

Page 1
ATV BEAD BREAKER
MODEL # 38620 ATV BEAD BREAKER
For use on tires 4” to 12”
CAUTION: Read Manual Completely and Carefully for Safe Operation
Before Using This Tool.
Form # 38620-99
Page 2

#38620
ATV BEAK BREAKER
Tabl e o f Contents
Safety Precautions Page 2
Warranty Information Page 3
Replacement Parts and Illustration Page 3
Instructions for Operation Page 4
IMPORTANT SAFETY PRECAUTIONS FOR
CHANGING TIRES
READ ENTIRE SAFETY PRECAUTIONS AND INSTRUCTION MANUAL BEFORE CHANGING ANY TIRES WITH THIS UNIT. IMPROPER USE MAY LEAD TO TIRE DAMAGE OR
COMPLETE DESTRUCTION OF THE BEAD BREAKER OR TIRE CHANGING MACHINE.
W ARNING:If you do not know how to use tire-changing tools -- STOP! Tire changing
should only be done by trained persons. Improper tire changing can result in injury or death.
Here are some safety rules to follow before using THE ATV BEAD BREAKER:
1.) Always wear approved safety eye protection when servicing tires and wheels and
whenever using hand tools.
2.) Follow all tire and rim manufacturers’ instructions when changing and inflating tires.
Ensure that tire and rim sizes match. Mismatched components can cause serious injury
during inflation.
3.) Never use this tool for anything except breaking a tire bead away from the rim. Don’t
use a tool for a purpose for which it was not intended.
4.) Always check for damaged or broken parts. Check for other conditions that may affect
its operation. Do not use damaged parts.
5.) Completely deflate tire before attempting to break the bead. This requires removing the
valve core and probing the valve with a wire to remove any obstructions which may
prevent air from escaping.
6.) Keep work area clean. Cluttered areas invite injuries.
7.) Don’t overreach. Keep proper footing and balance at all times.
8.) Always use tire bead lubrication when mounting or demounting any tire.
Page 3

Re placement Par ts / Illustr a tion
Also availab le is an instructional video on Ken-Tool’s complete Small Tire Changing
System, including the ATV Bead Breaker and other tools. To receive this instructional video,
send a check or money order for $9.95 to:
Ken-Tool Tire Changing Video
768 E. North Street
P.O. Box 9320
Akron, OH 44305
Phone: 330-535-7177
W arranty
Ken-Tool products are guaranteed for fitness and merchantability. Any tool, where adjustment
is asked for, should be returned to the place of purchase provided it has not been abused,
heated, ground, subjected to unreasonable leverage, or has worn out in normal usage. This
ATV Bead Breaker #38620, is warranted for one year from date of purchase. Sales receipt is
required as proof of purchase.
Page 4

Bead Bre aker Directions
1.) Mounting Collar
2.) All Thread
3.) Bottom Handle
4.) Black Grip Handle
Remove valve core and place ATV
tire and rim assembly on any sturdy,
center-post, tire-changing machine
(we recommend Ken-Tool 38600 or
38601 series). Center the tire and
secure the rim to the tire-changing
machine.
To adjust the breaker, remove the tool
from the center-post and rotate the
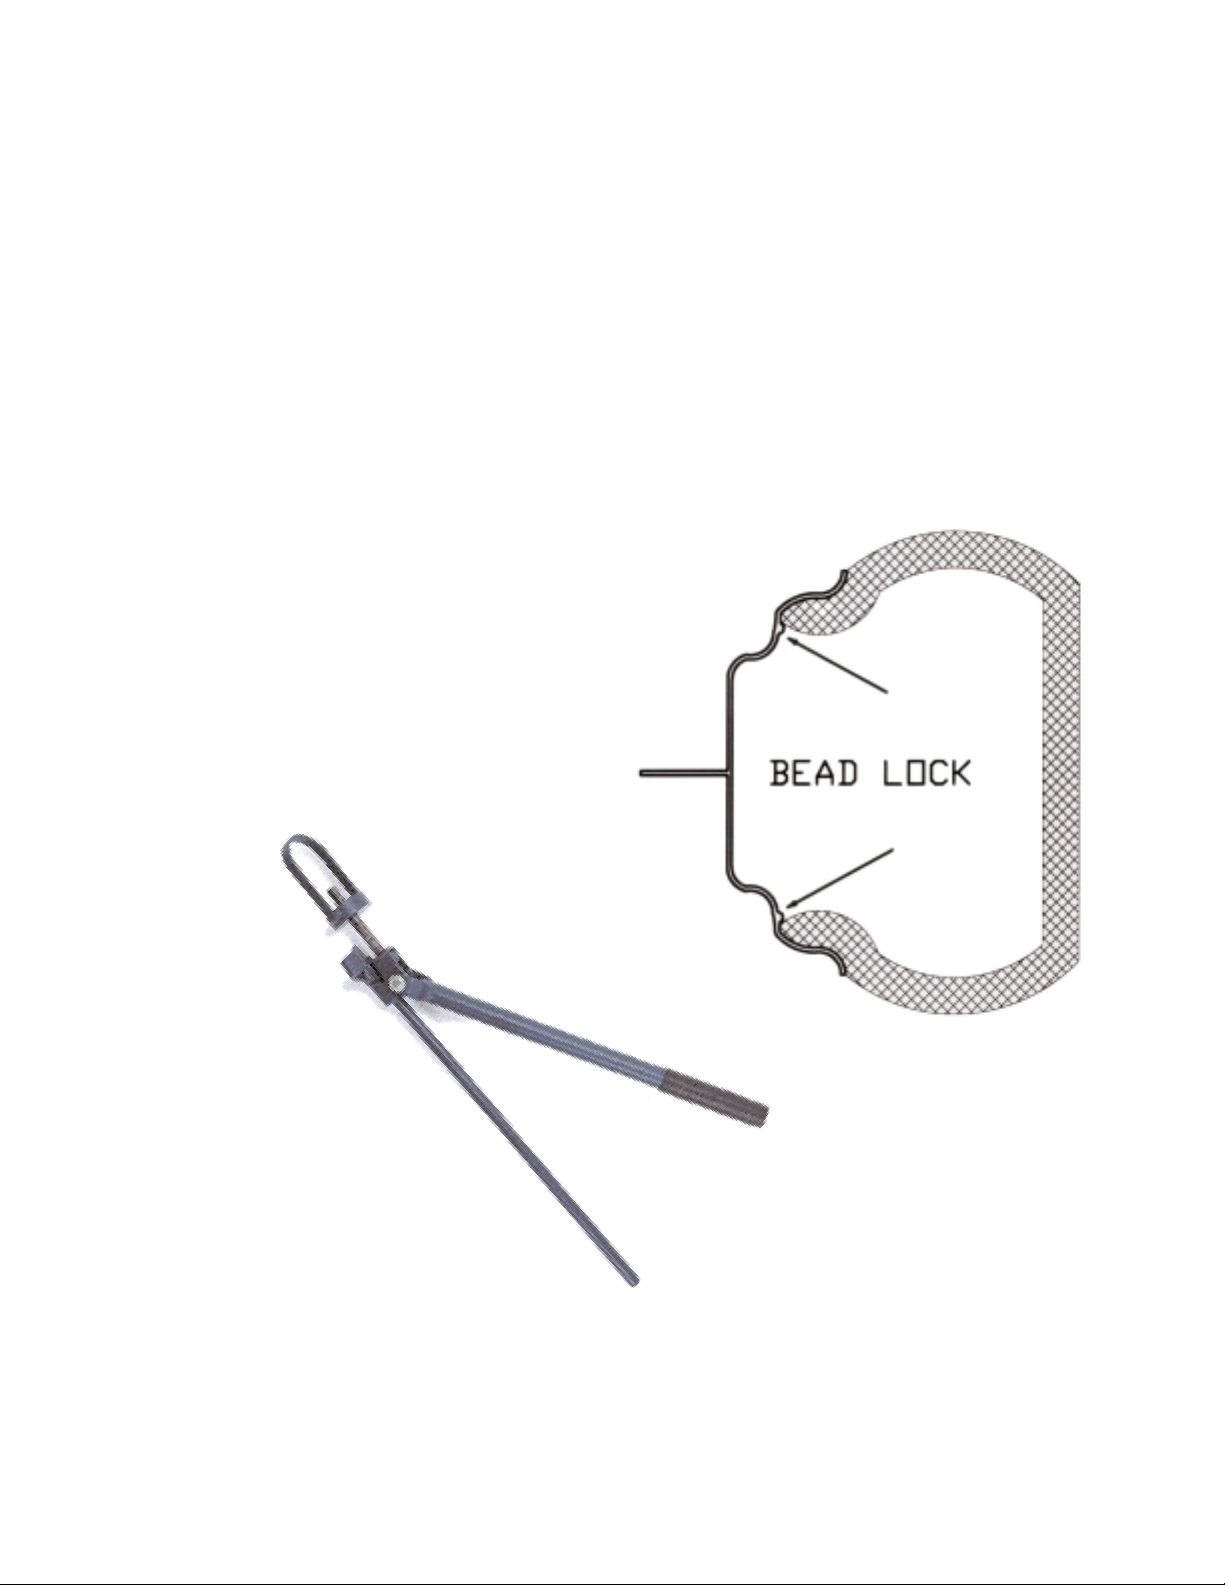
mounting collar. Replace the mounting collar over the center-post and reexamine the alignment. Repeat if necessary. It is important tha t the
edge of the guide rests next t o
the outer flange.
Hold both handles of the ATV Bead
Breaker in your left hand. With your
right hand, lower the adjustable,
mounting collar over the center-post
of the tire-changing machine. Hold
both handles horizontal and look
downward to check the tool alignment.
If the guide is not properly positioned
(see above diagram), the tool may slip
out from under the rim or cause damage to either the bead or sidewall of
the tire during use. Once properly
adjusted, LUBRICATE THE ENTIRE
BEAD AREA (Ken-Tool recommends
Bead-Eze). This is particularly important to provide a gliding effect as the
bead breaker is moved around the
tire, and to prevent damage to the tire.
Align the edge of guide (A) with
the edge of the outer-flange of
the wheel (see above diagram for
proper placement).
After the guide is properly positioned,
hold both handles in your left hand.
Push down on the sidewall with your
right hand. This provides a "starting
place" for insertion of the tool. Raise
both handles and slide the toe
between the rim and bead. keep
your right hand clear of t h e
insertion are a to avoid pinch ing.
Page 5

Once the toe is securely placed
between the rim and bead, lower
the handles to the horizontal position.
At this point, the toe should still
be between the rim and bead.
and the guide should rest against
the outer flange. With the handles and mounting collar in a horizontal position, lift the black handled grip as shown.
Your LEFT hand should be placed on
the bottom handle. DO NOT apply
much pressure to the bottom handle.
If too much force is applied to the bottom handle, bead breaking will be
more difficult and damage to the center-post may result.
After the top handle has been raised
to a vertical position and your left hand
has been placed on the bottom handle, pull the black handle grip toward
you in a clockwise fashion to about
45°. The left hand should remain on
bottom handle to provide stability
NOTpressure. (This tool can be used
in one direction only. You must have
the your left hand on the bottom handle and the atv bead braker on the left
side of you body during operation).
Once bead is completely broken from
the rim lock, lift both handles together
and disengage the breaker from
under the rim.
Take note that everything rotates
except the mounting collar. This
motion pushes the bead below the
bead lock on the rim assembly.
Relube in to the open gap between
the bead and rim.
Next, lift the mounting collar and bead
breaker off the center-post. Repeat
the entire process after the tire has
been lifted off the tire-changing
machine and opposite side is facing
upward.
Finally rotate the black handle
back to the vertical position. With
the bottom handle still horizontal
reposition the bead breaker at
another point clockwise along the
rim by moving to the left a few
inches from the last point.
Repeat the rotation step, as necessary until bead is broken.
Avoid disengaging the toe from
the underside of the rim during
this rotation.
If you are using the Ken-Tool Small
Tire Changing Machine, take the Tire
Snake and demount the tire.
Repair or replace tire and mount tire
on rim with the ATV Tire Snake.
 Loading...