

Page 1
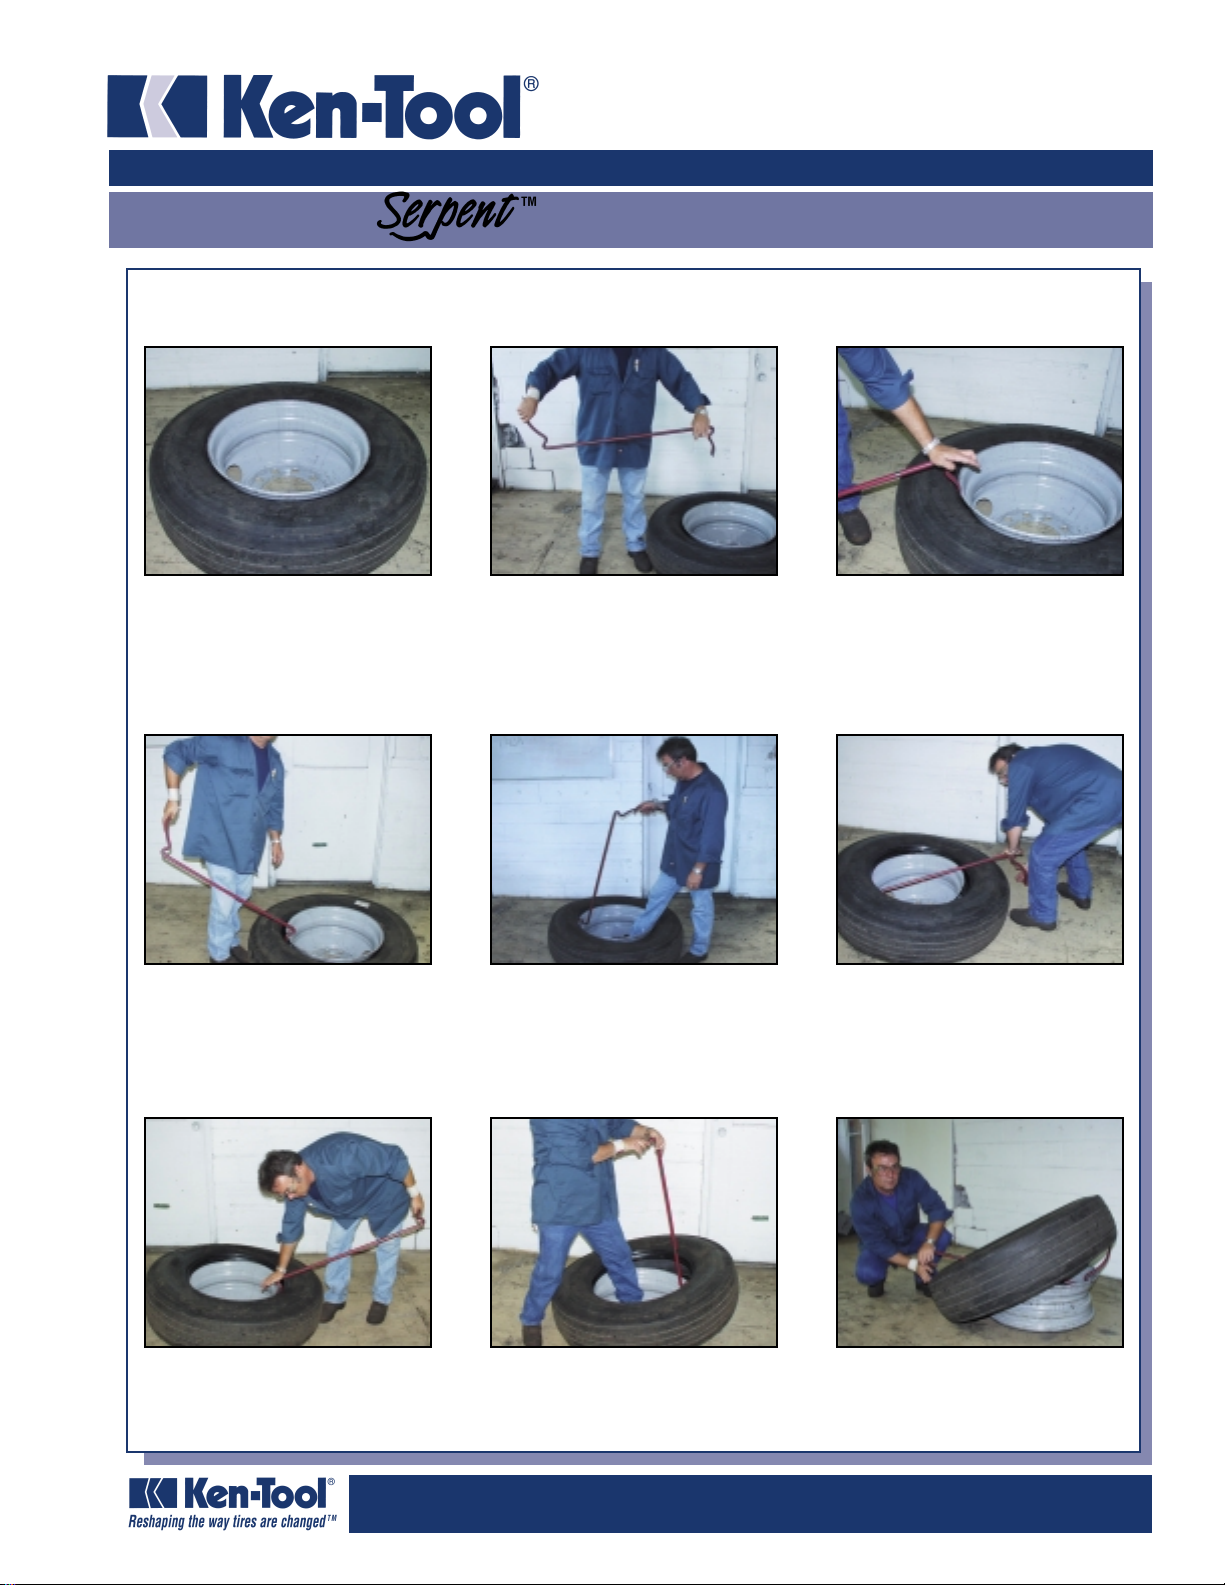
Demount First Bead
Instruction Manual
T2001 #35449 Demount Tool
Break and lube both beads.
Lay tire on floor with short side
of wheel up.
Lift large end. (Improper lifting
will cause the tool to roll)
Demount Second Bead
Hold curved part of large end,
with the tip facing up, behind
you.
Step through the wheel and
pull tool across center of wheel.
Keeping fingers out of the area
between tool and tire/wheel,
fully insert small end, between
rim and tire bead nearest you,
in top bead of tire.
Push tool down to opposite
side. First bead is now
demounted. Remove tool from
wheel. Do not pick up
tire/wheel.
Fully insert large end into gap
between wheel and tire until
you feel bottom bead.
768 E. North Street • P.O.Box 9320 • Akron, Ohio 44305 Phone: 330-535-7177
Website: www.kentool.com E-mail: sales@kentool.com Fax:330-535-1345
Lift small end, step through
the wheel and pull tool across
center of wheel.
Push tool down to opposite
side. Tire is now fully
demounted.
Copyright 6/00
Page 2
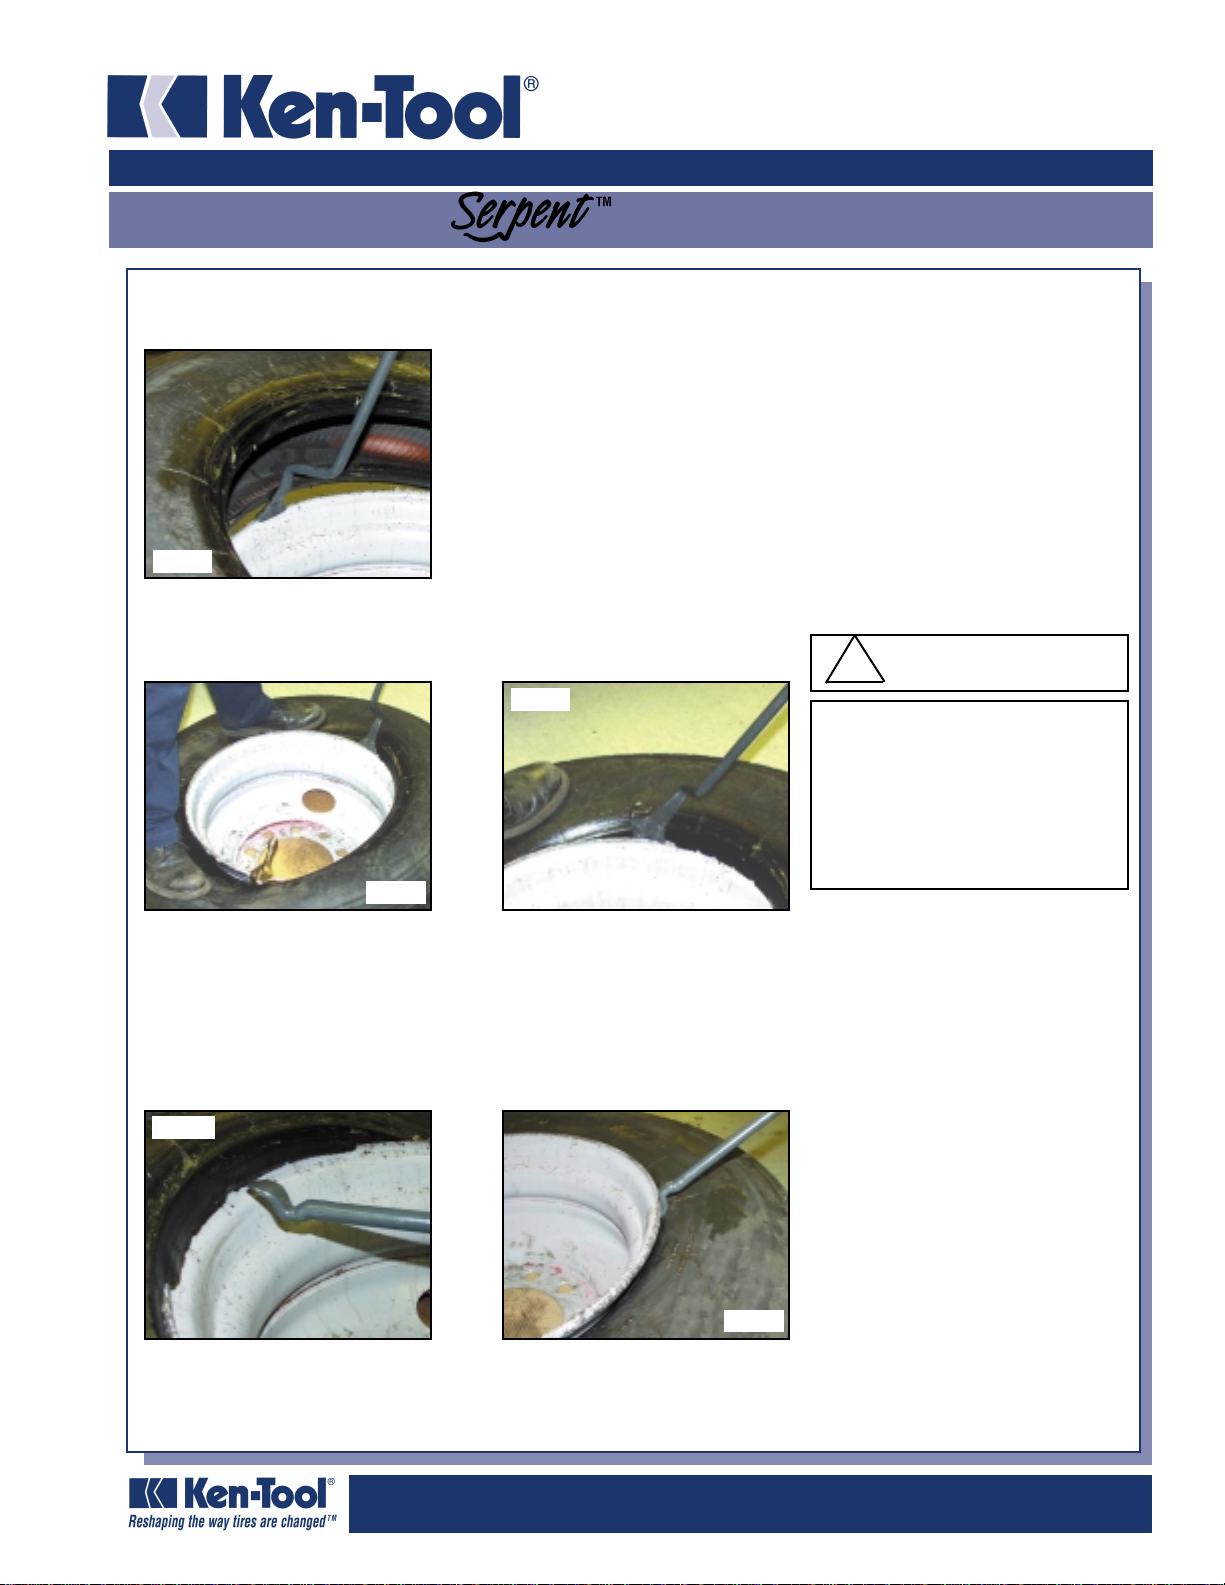
Mount First Bead
!
Fig. #1
Instruction Manual
T2002 #35450 Mount Tool
Mounting: Insert valve stem. Lubricate both bead seats of
the rim and both tire beads. Push lower bead over flange and
into rim well. Using the wing shaped end of tire iron with stop
resting on rim flange, pry tire over flange, starting where tire
bead crosses rim flange. Repeat progressively around tire
working with small sections until the tire is completely over
the rim. By rocking the tool sideways onto the wing, the tip
will release itself from the rim and bead. (See figure #3 below)
Mount Second Bead
WARNING
Fig. #3
Fig. #2
Stand on the tire to push a section of the bead over the flange and into the well. When
using this tool, a bead keeper (#31710) is recommended to hold the bead in place.(See
figure #2
)
While standing on the tire, insert the wing shaped end of the tire iron between
the tire bead and rim flange. Push the tire bead over the rim flange opposite where the tire
is already in the well. Repeat this step taking small sections of the bead until the last
section is pried over the rim flange until tire is mounted.
Fig. #4
Always wear eye protection when servicing tires
and wheels and whenever using hand tools.
Always use soft-faced hammers when driving tire
irons.
Never use one hammer to strike another hammer.
Never use a hammer with loose or cracked
handle.
Never use a dented, cracked, chipped,
mushroomed, or deformed tool.
Never use a tire tool for anything except
mounting/demounting tires.
The small end of the tool
easily gets under the
stretched bead for that last
pull.
Fig. #5
SAFETY WARNING: If you don’t know how to use tire changing tools - STOP! Tire changing should only be done by trained persons. If you do it
wrong, you could be hurt or killed. For complete tire servicing procedures, read the tire and rim makers’ service manuals. You can also get free
wall charts about tire servicing by calling OSHA at 1-202-523-9667.
768 E. North Street • P.O.Box 9320 • Akron, Ohio 44305 Phone: 330-535-7177
Website: www.kentool.com E-mail: sales@kentool.com Fax:330-535-1345
Copyright 2/01
 Loading...