

Page 1
Industrial Wheel Lock Ring Tool Set ™ #32129
These tools are designed to remove and
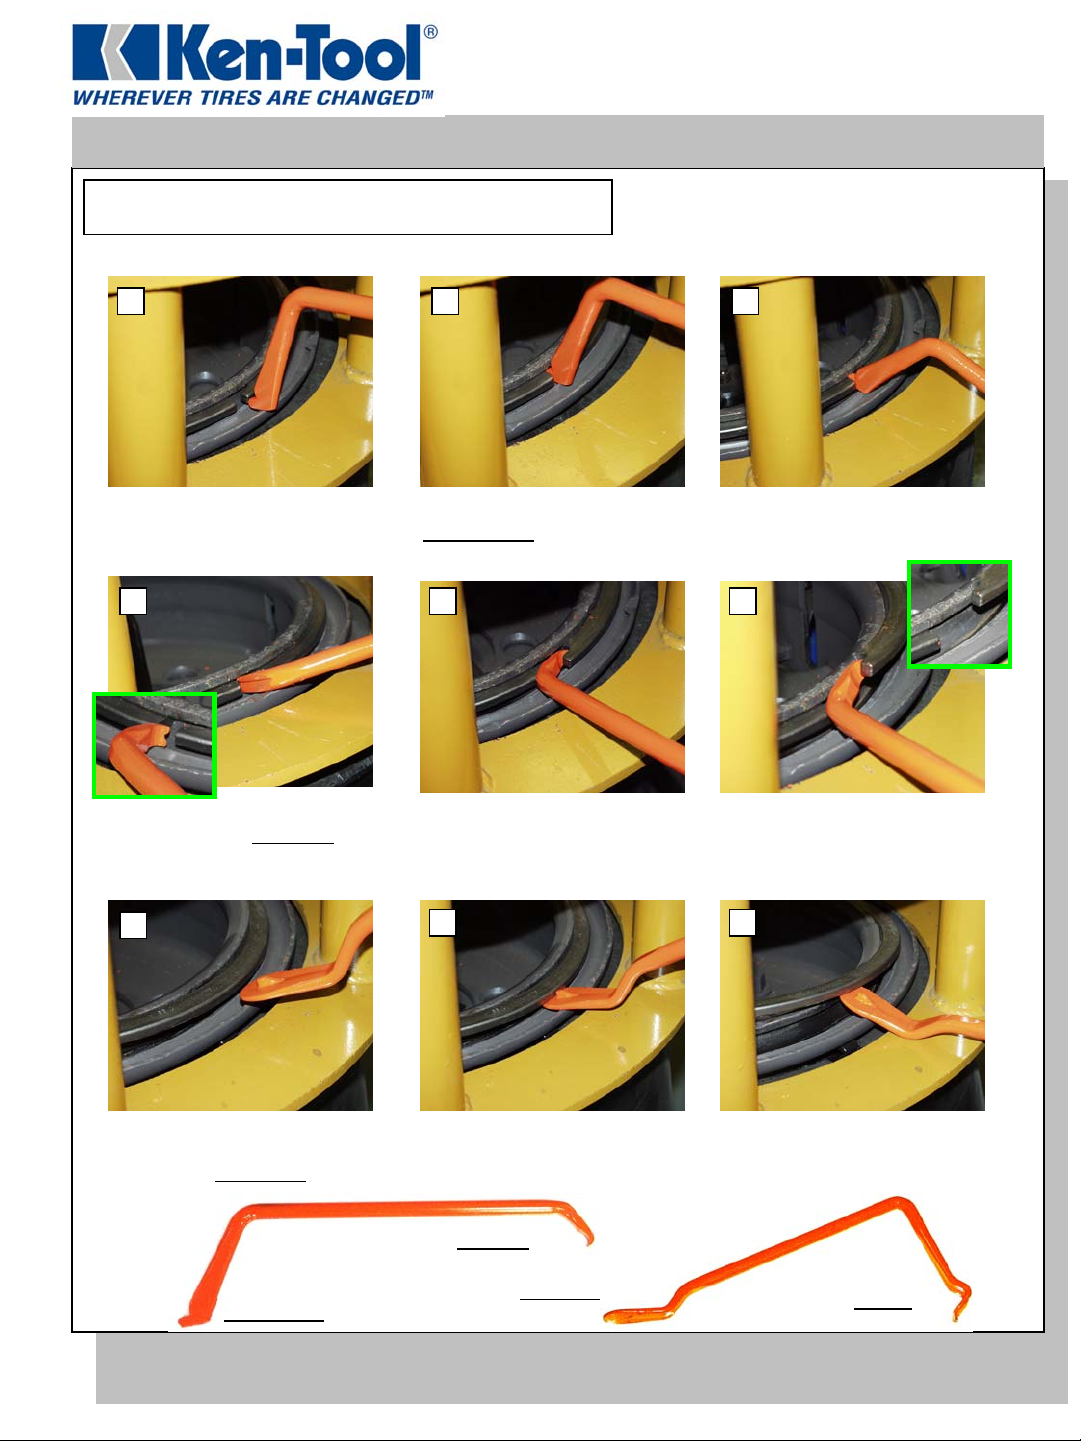
DEMOUNTING INSTRUCTIONS
If the rings are frozen together, follow steps 1-3.
1 2 3
replace lock rings on multi-piece industrial
Instruction Manual
©2007 Ken-Tool
Part No. 32129-98
wheels. Follow Tire and Wheel
Manufacturer’s Instructions
Locate the gap between the
ends of the split ring.
4
Once the rings are parted, insert
the “claws” of the PRY-OUT
behind the slotted end of the split
ring.
7
end
Insert the “toe” of the
SEPARATOR
ends of the split ring.
5
Pry the slotted end of the split
ring out and up until it is resting
against the wheel flange.
8 9
end between the
Push down to separate the
solid ring from the split ring.
6
Raise the ring until it stays in
place.
Start demounting the raised end of
the split ring by placing the end of
the tip of the DEMOUNT
the split ring.
SEPARATOR end
768 E. North Street, P. O. Box 9320, Akron, Ohio 44305; Phone: 330-535-7177, Fax: 330-535-1345
end under
Part No:
32131
www.kentool.com Contact Us: sales@kentool.com
Push down to pry up, working around the ring until it is demounted.
PRY-OUT
end
DEMOUNT end
Part No:
32130
MOUNT
end
(C)2007 Ken-Tool
1
Page 2
Industrial Wheel Lock Ring Tool Set ™ #32129
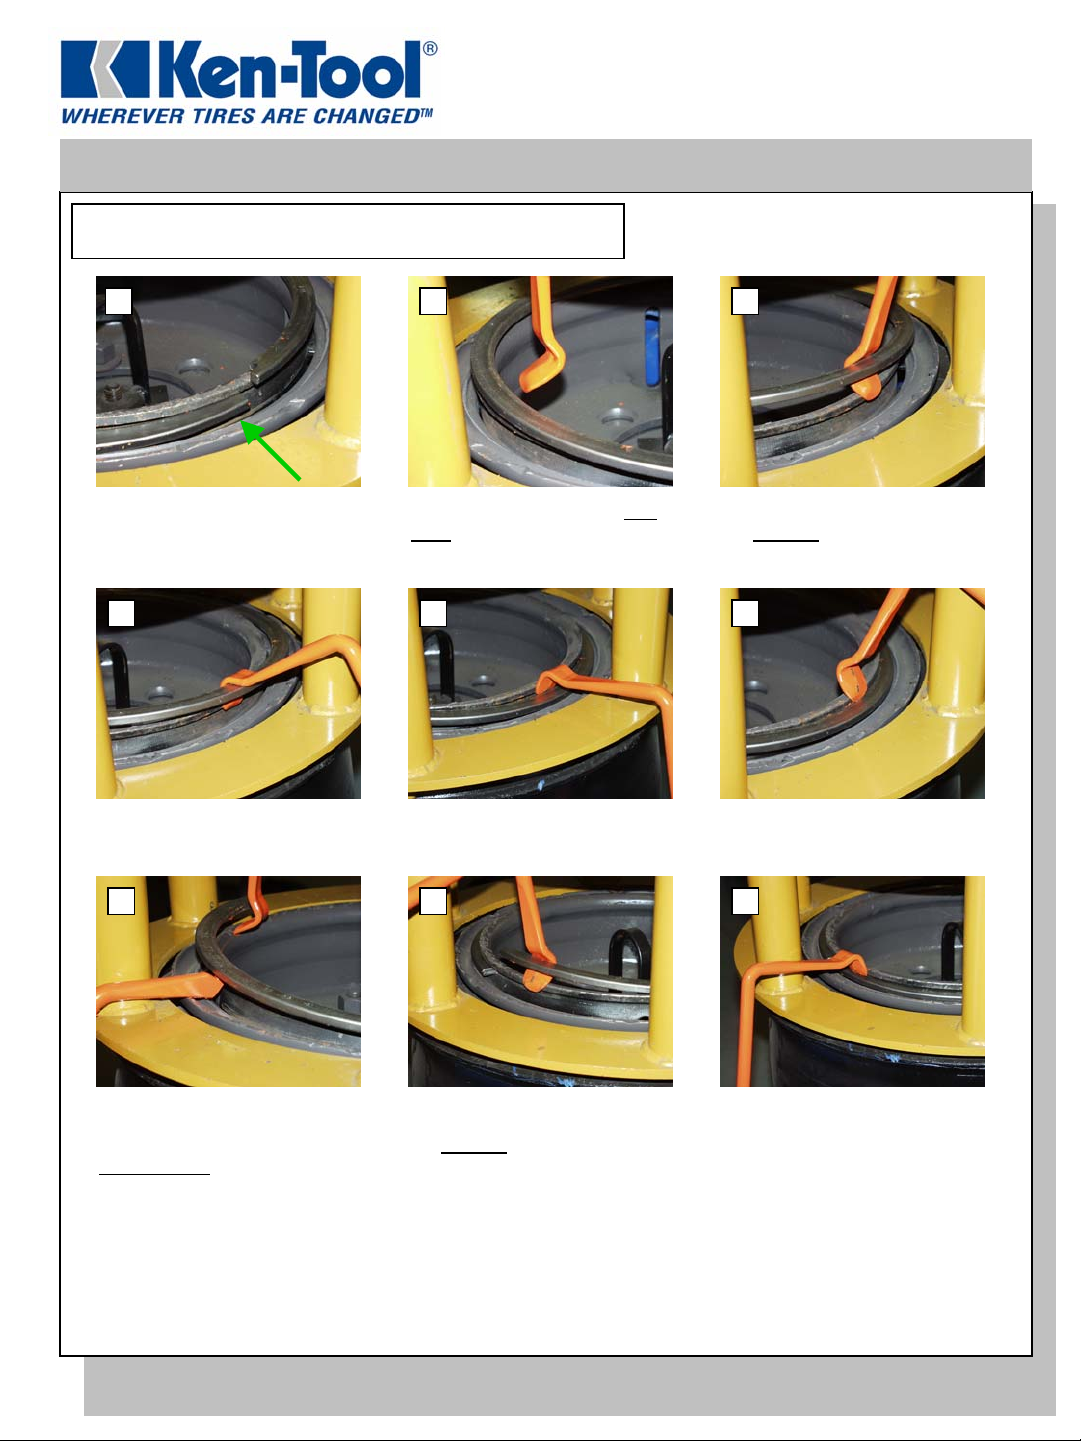
MOUNTING INSTRUCTIONS
Instruction Manual
©2007 Ken-Tool
Part No. 32129-98
1 3
Start one end of the split ring in
place under the wheel flange.
4
Push down… …until the ring snaps into place. Lift up to release the tool.
2
The first “bite” should be a little
more than half way around from
the started end of the split ring.
5
Pull the tool toward you to hook
the MOUNT
from the inside.
6
end under the ring
9
Push down.
Raise the unmounted portion of
the split ring using the
SEPARATOR
end.
87
Pull the tool toward you to hook
the MOUNT
end under the ring.
NOTE: These tools work equally well on pneumatic tires that do not require a press or cage.
768 E. North Street, P. O. Box 9320, Akron, Ohio 44305; Phone: 330-535-7177, Fax: 330-535-1345
www.kentool.com Contact Us: sales@kentool.com
2
Page 3

Instruction Manual
WARNING
If you don’t know how to use tire changing tools – STOP!
Tire changing should only be done by trained persons.
If you do it wrong, you could be hurt or killed.
Here are some Safety Rules.
For complete tire servicing procedures, read the tire
and rim makers’ service manuals. You can also get
free wall charts about tire servicing by calling
OSHA.
©2007 Ken-Tool
Part No. Safety Warning
USING TIRE TOOLS
ALWAYS wear eye protection when using hammers and tire irons.
ALWAYS use soft-faced hammers when driving tire irons.
NEVER use one hammer to strike another hammer.
NEVER use a hammer with a loose or cracked handle.
NEVER use a dented, cracked, chipped, or mushroomed tool.
NEVER use a tire tool for anything except mounting/demounting tires.
INFLATING TIRES
NEVER add air to a tire that has been run flat or under inflated.
NEVER hammer, strike, or pry on an inflated tire and rim.
ALWAYS use an inflation cage when inflating tires.
ALWAYS use a clip-on chuck.
ALWAYS use an extension hose with a removable valve and gauge.
NEVER inflate a tire over 40 psi if the tire beads are not seated.
NEVER use starting fluid, ether, gasoline or other flammable liquids to lubricate or seat the beads of a
tubeless tire. A gigantic explosion can result.
768 E. North Street, P. O. Box 9320, Akron, Ohio 44305; Phone: 330-535-7177, Fax: 330-535-1345
Website: www.kentool.com E-Mail: sales@kentool.com
3
 Loading...