

Page 1
AIR BLAST BEAD SEATER
OWNER’S MANUAL
MODEL # 31440 AIR BLAST BEAD SEATER
For use on small tubeless tires, size 4 to 12”.
CAUTION: Read Manual Completely and Carefully for Safe Operation Before
Using This Tool.
Form # 31440-98
Page 2

#31440
AIR BLAST BEAD SEATER
Tabl e of Contents
Safety Precautions Page 2
Warranty Information Page 3
Replacement Parts / Illustrations Page 3
Assembly Instructions Page 3
Instructions for Operation Page 4
IMPORTANT SAFETY PRECAUTIONS FOR
CHANGING TIRES
READ ENTIRE SAFETY PRECAUTIONS AND INSTRUCTION MANUAL BEFORE USING THIS
UNIT. IMPROPER USE MAY LEAD TO TIRE DAMAGE.
W ARNING:If you do not know how to use tire-changing tools -- STOP! Tire changing should
only be done by trained persons. Improper tire changing can result in injury or death.
Here are some safety rules to follow before using THE AIR BLAST BEAD SEATER:
1.) Always wear approved safety eye protection when servicing tires and wheels and
whenever using hand tools.
2.) Follow all tire and rim manufacturers’ instructions when changing and inflating tires.
Ensure that tire and rim sizes match. Mismatched components can cause serious injury
during inflation.
3.) DO NOT use flammable materials to inflate tire.
4.) Never use this tool for anything except seating the beads on small tires.
Don’t use a tool for a purpose for which it was not intended.
5.) Always check for damaged or broken parts. Check for other conditions that may affect
its operation. Do not use damaged parts.
6.) Use only compressed air systems with pressure ratings of 80 to 150 psi.
7.) Keep work area clean. Cluttered areas invite injuries.
8.) Don’t overreach. Keep proper footing and balance at all times.
9.) Always use tire bead lubrication when mounting/demounting any tire or during bead seating.
Page 3

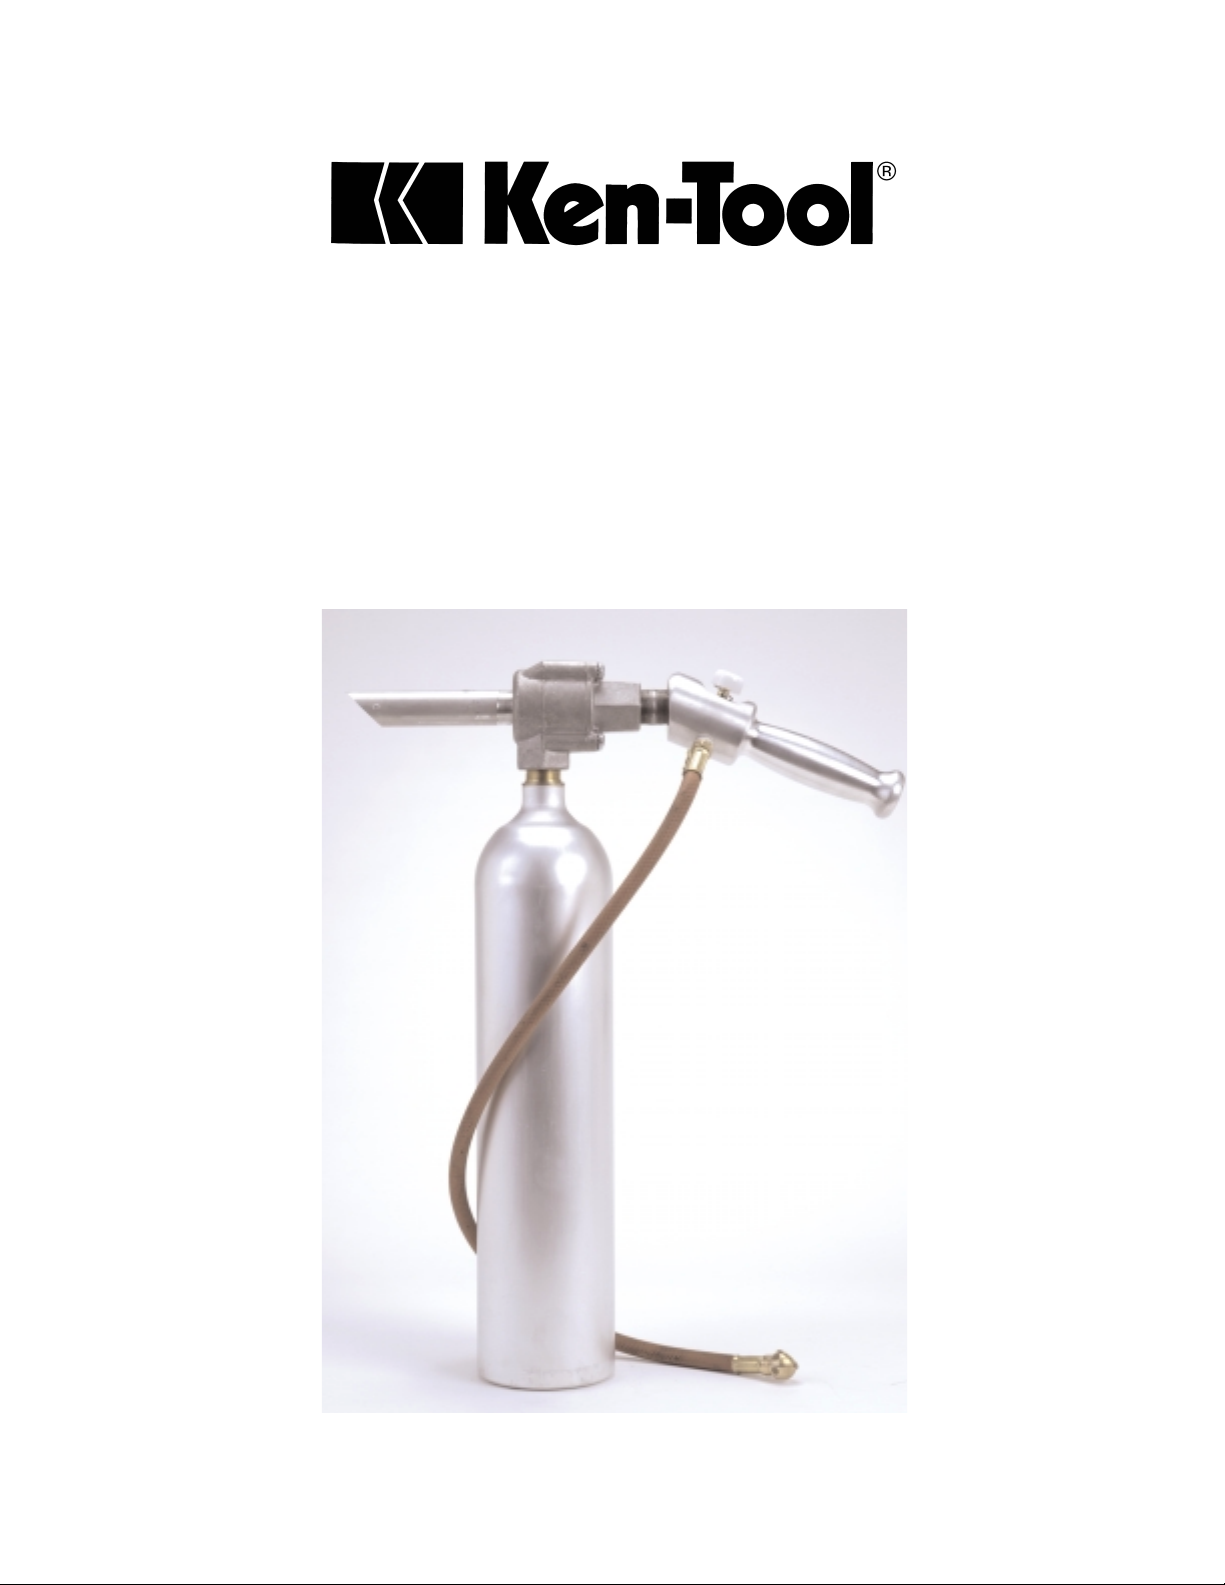
Re placement Parts / Illustr a tion
Also availab le is an instructional video on Ken-Tool’s complete Small Tire Changing
System, including the Air Blast Bead Seater and other tools. To receive this instructional
video, send a check or money order for $9.95 to:
Ken-Tool Bead Seating Video
768 E. North Street
P.O. Box 9320
Akron, OH 44305
Phone: 330-535-7177
W arr anty
Ken-Tool Products are guaranteed for fitness and merchantability. Any tool, where adjustment
is asked for, should be returned to the place of purchase provided it has not been abused,
modified, or has worn out in normal usage. This Air Blast Bead Seater #31440, is warranted
for one year from date of purchase. Sales receipt is required as proof of purchase.
ASSEMBLY INSTRUCTIONS
To assemble, screw the brass valve assembly adapter into the threaded opening of the storage tank. Screw both units together until snug. Next screw in a 1/4” male quick disconnect fitting into the handle of the valve assembly. Make sure the disconnect fitting is the correct size
to attach to your air hose equipment. The quick disconnect fitting is not included and can be
purchased from your local hardware store.
Page 4

Air Blast Bead Seating Instructions
After the tire has been mounted
onto the rim and the wheel has
been placed onto a tire machine,
straighten the bottom bead to lay
flat on the rim. Remove the valve
core.
Depress the white button located on
top of the bead seater and hold firmly
for a few seconds. This allows the
cylinder to fill completely. Continue to
depress button even after the cylinder
is completely filled.
Lubricate the entire bead area
before inflating the tire. (Ken-Tool
recommends Bead-Eze.) Lubing
the tire with a recommended
lubricant helps to seal the bead
to the rim flange.
Place the air chuck of the fill hose firmly onto the tire valve. When positioned
correctly air should be passing
through the valve stem. If air is not
passing through the valve stem, reposition the air chuck.
Attach the correct air hose with
coupling (80 - 150 psi) to the 1/4”
quick disconnect fitting. (The
1/4” male quick disconnect fitting
can be purchased from your
local hardware store.)
Aim the bead seater nozzle into the
opening between the rim and upper
bead. For best results, the bead
seater nozzle should be pointed into
the gap between the rim and the
upper bead where the gap is the
widest.
TO W ORK PRO P E R LY,THE NOZZLE SHOULD NOT TOUCH T HE
RIM OR TIRE. D O N OT PLAC E
NOZZLE BETWEEN THE BEAD
AND RIM. KEEP FINGERS A N D
HANDS AW AY FROM BEAD A N D
RIM.
Release the white button to expel the
blast of air into the tire. Once the bead
is seated, the tire will IMMEDIATELY
begin to inflate. STOP inflating when
tire is seated to rim. Should a second
attempt be necessary, remove the
chuck from the tire valve stem and
depress white button until cylinder is
fully pressurized and repeat steps.
C A UTION:NEVER OVER INFLA TE !
Replace valve core and check pressure again. Continue inflating and
checking with an air pressure gauge
until correct operating pressure is
reached.
 Loading...