

Kenmore Pro 25344833600 Owner’s Manual
Quick Start Guide
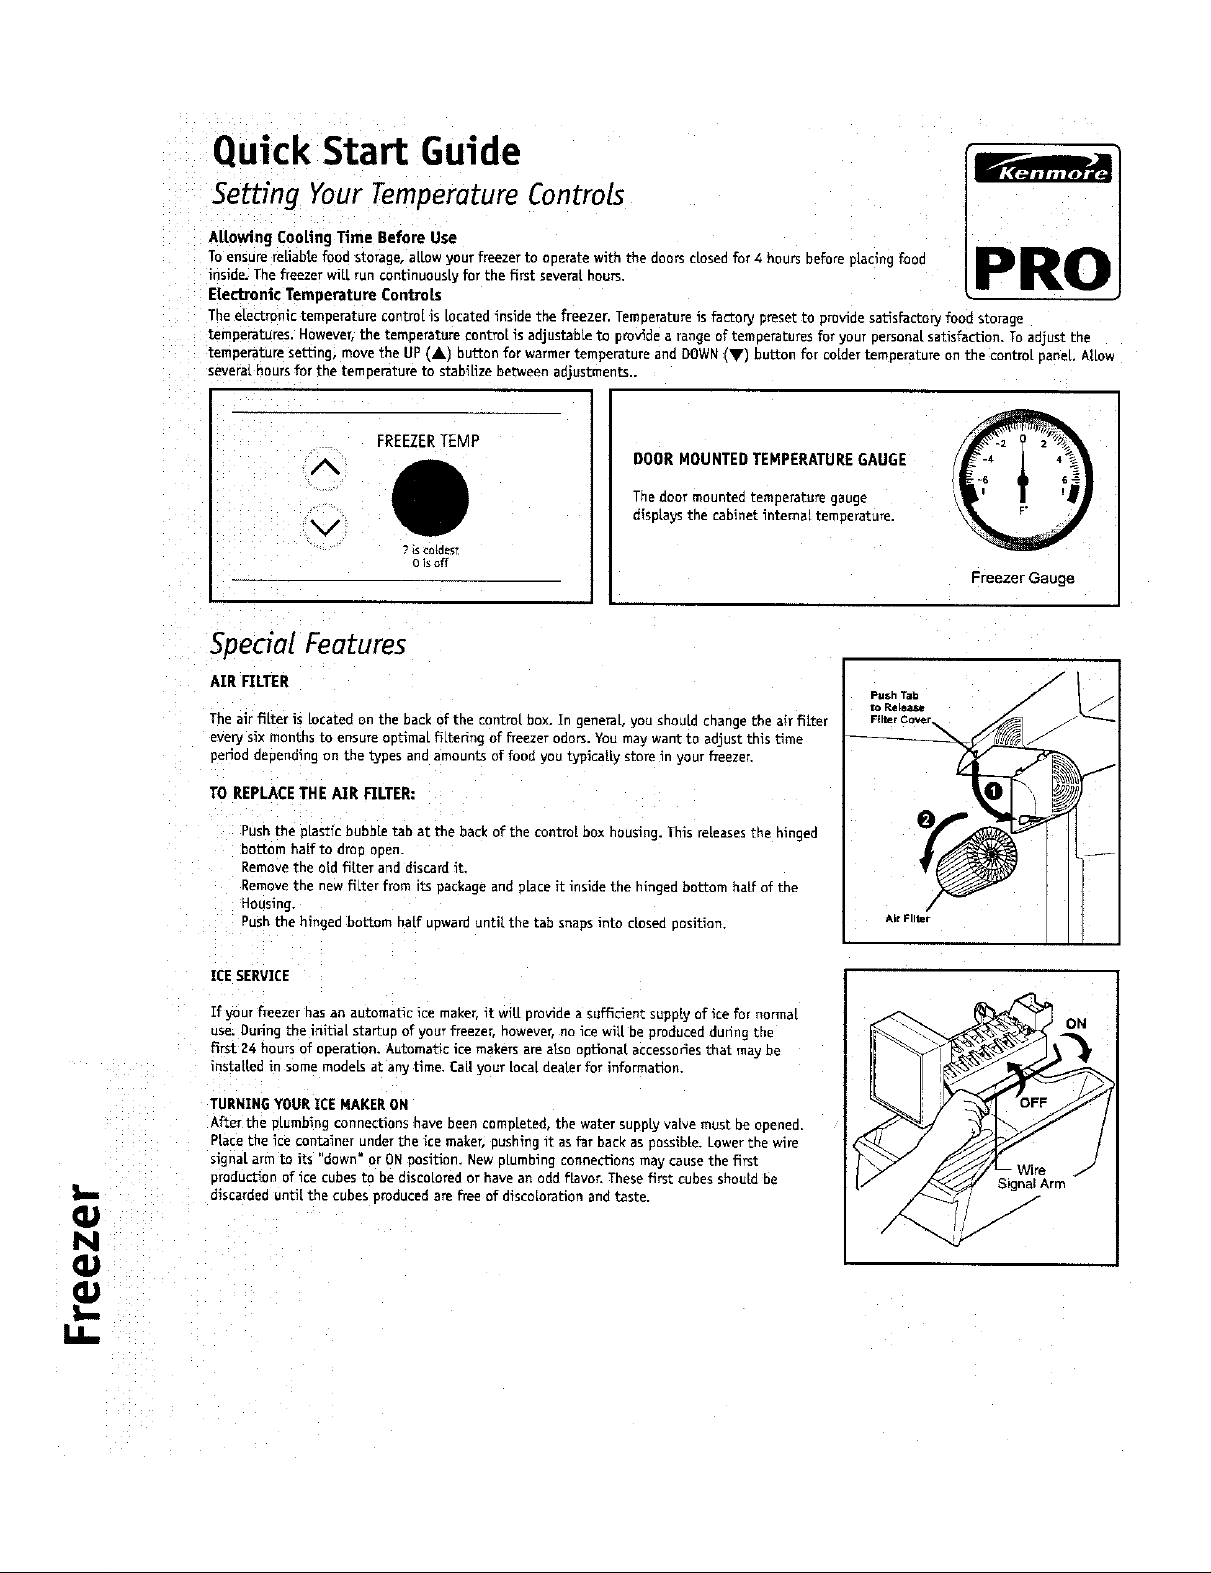
Setting Your Temperature Controls
Allowing CooLing Time Before Use
To ensure reLiabLefood storage,atLowyour freezer to oDeratewith the doorsdosed for 4 hoursbefore placing food
inside, The freezerwiLLrun continuousLyfor the first several nours
Electronic Temperature ControLs
Theelectronic temoerature controLis Locatedinside the freezer. Temoeratureis factory preset to provide satisfactory food storage
temperatures. However.the temoerature controlis adjustable to providea rangeof temperatures for your personal satisfaction. Toadjust the
temperature setting, movethe UP (A) button for warmertemperature and DOWNiV) button for colder temperature on the control paneL.ALLow
several hoursfor the temDeratureto stabilize between aojustments..
PRO
}..
N
FREEZERTEMP
DOOR MOUNTED TEMPERATURE GAUGE
The door mounted temperaturegauge
v
J• off
displaysthe cabinetinternaltemperature.
Special Features
AIR FILTER
The air fi[ter is Locatetl on the back of the control box. In generab you snouLo enange the air filter
even] six months to ensure oofima[ fiLtering of freezer odors. You may want to adjust this time
period depending on the types and amounts of food you typicaLLy store in your freezer.
TO REPLACETHE AIR FILTER:
BUSh the D[asticbubble tab at the back ofthe controlbox housing.Thisretease!the hinged
bottom halfto droo open.
Remove the old fi[terand discardit.
Remove the new fiLterfrom itspackage an(_placeitinsidethe hlngeo DoEom halfofthe
Housing.
Push the hingeo Do_orn ha[fupward untilthe Lab snapsintoclosed _osition.
ICESERVICE
If your freezer has an automatic ice maker it will provide a sufficient supp[y of ice for normal
use. Ounng the [nit[a[ startup of your freezer, noweve, no ice wiLL be oroduced dudng the
first24 hours of ooeration.Automaticicemakers are alsoootiona[accessoriesthat may be
installed in some mooeLs at any time, CaLl your Loca[dealer for information.
TURNING YOUR ICE MAKER ON
Afterthe o(umbing connecbons have been comoLe[eo,the water suppt_valve must De opened.
Pfacethe icecontainerunderthe icemaker, pushing itasfarback as oossibLe.Lower the wire
slgna[arm to its"down" or ON position.New p[umblng connectionsmay cause the first
productionoficecubes to be discoLoreoor have an odd flavor.These firstcubes should be
discardeduntilthe CUbeS produced are freeof discolorationand taste.
Freezer Gauge
-- Wire
Arm
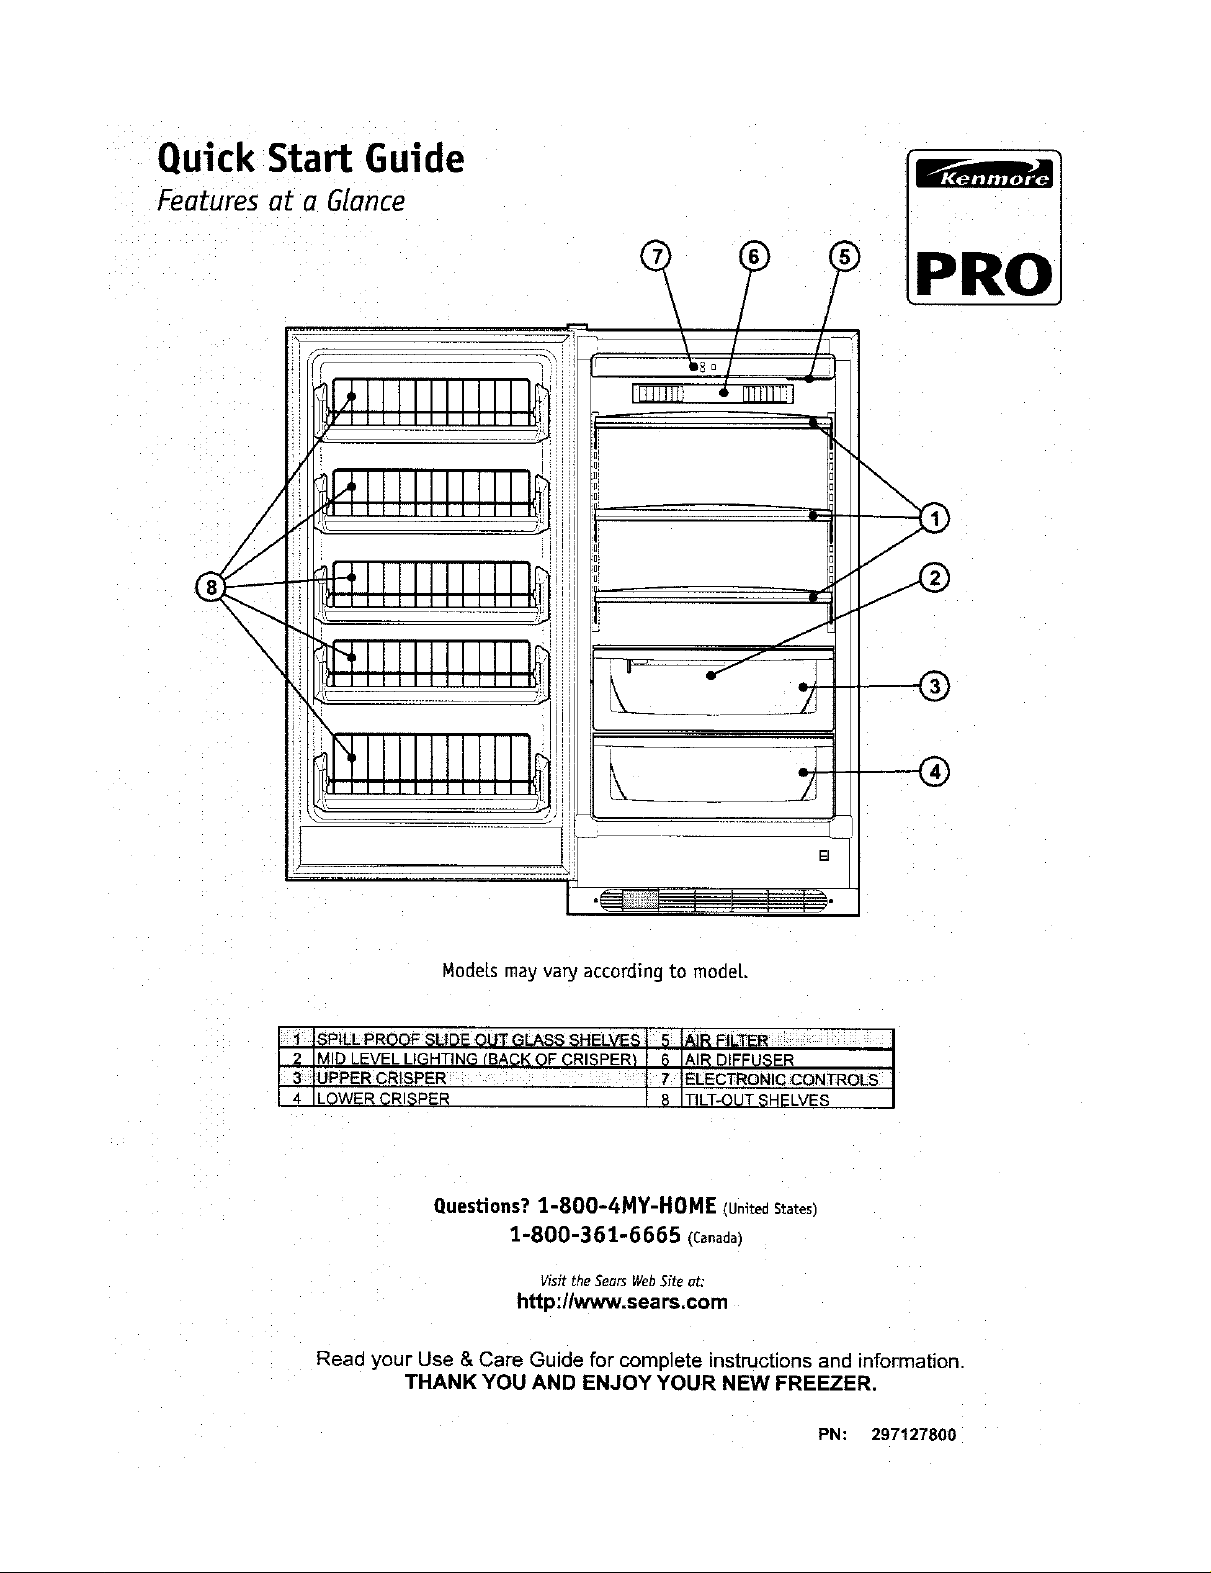
Quick Start Guide
Features at a Glance
PRO
®
ModeLsmay vary according to mode[.
I _ ISPILLPROOF SUDE OUT GLASS SHELVES | 5 _A]I_ FII.T!_R
I 2 IMID LEVEL LIGHTING (BACK OF CRISPER_ I 6 lAIR DIFFUSER
3 UPPERCRISPER 7 ELECTRONICCONTROLS I
4 LOWER CR 8PER 8 T LT-OUT SHELVES
Questions? 1-800-4MY-HOME (United States)
1-800-361-6665 (Canada)
V_sitthe SearsWebSite at:
http:llwww.sears.com
®
Read your Use & Care Guide for complete instructions and information
THANK YOU AND ENJOY YOUR NEW FREEZER.
PN: 297127800
 Loading...