

Page 1
Speedcook Oven
Homo de Speedcook
Models, Modelos 363.63695
$ = color number, nt_mero de color
120 TECHNOLOGY_
®
m
Z
F
m
t_
.T-
m
ZI
O
F
(SR40518) 143 ,JR
Printedin Korea Sears, Roebuck and Co., Hoffrnan Estates, |L 60179 UoSoA. www.searsooorn
MFL30147801
Page 2
Safety instructions
Precautions to Avoid Possible Exposure
to Excessive Microwave Energy .................. 4
Important Safety instructions .................. 4-7
Grounding instructions ......................... 7
Care and Maintenance
Cleaning the Appliance ..................... 36, 37
Light Bulb Replacement ....................... 37
The Vent Fan and Vent Filters .................. 38
Charcoal Filter .............................. 39
Operation
What is Speedcook? .......................... 8
Important Parts of Your Speedcook Oven ....... 9, 10
Quick Start .............................. 11, 12
Speedcooking ........................... 13-20
Convection Baking ........................... 21
Warming .................................. 22
Microwaving ............................. 23-32
Other Features ........................... 33-35
Troubleshooting Tips
Problems and Solutions .................... 40, 41
Consumer Services
Model/Serial Number Location ................... 2
Warranty ................................... 3
Master Protection Agreements ................... 3
Consumer Services .......................... 84
Repair Services ............................. 84
En Espa_ol
Instrucciones en espaSol ...................... 42
For your convenience and future reference, please write down
your model and serial numbers in the space provided. The
model number and serial number of your Speedcook Oven
can be found on a label on the front face of the oven label,
behind the door.
MODEL NUMBER:
363.
SERIAL NUMBER:
Page 3

KENMORE ELITE
APPLIANCE WARRANTY
ONE YEAR LIMITED WARRANTY
When installed, operated and maintained according to all
instructions supplied with the product, if this appliance fails due
to a defect in material or workmanship within one year from the
date of purchase, call 1-800-4-MY-HOME ®to arrange for free
repair.
FIVE-YEAR LIMITED WARRANTY ON THE MAGNETRON
For five years from the date of purchase, when this speed cook
oven is installed, operated and maintained according to all
instructions supplied with the product, Sears will replace the
magnetron free of charge due to defective materials or
workmanship.
If this appliance is used for other than private family purposes,
this warranty applies for only 90 days from the date of purchase.
THIS WARRANTY COVERS ONLY DEFECTS IN MATERIAL
AND WORKMANSHIP. SEARS WILL NOT PAY FOR:
1. Expendable items that can wear out from normal use,
including but not limited to filters, belts, light bulbs, and bags.
2. A service technician to instruct the user in correct product
installation, operation or maintenance.
3. A service technician to clean or maintain this product.
4. Damage to or failure of this product if it is not installed,
operated or maintained according to all instructions supplied
with the product.
5. Damage to or failure of this product resulting from accident,
abuse, misuse or use for other than its intended purpose.
6. Damage to or failure of this product caused by the use of
detergents, cleaners, chemicals or utensils other than those
recommended in all instructions supplied with the product.
7. Damage to or failure of parts or systems resulting from
unauthorized modifications made to this product.
DISCLAIMER OF IMPLIED WARRANTIES; LIMITATION OF
REMEDIES
Customer's sole and exclusive remedy under this limited
warranty shall be product repair as provided herein. Implied
warranties, including warranties of merchantability or fitness for a
particular purpose, are limited to one year or the shortest period
allowed by law. Sears shall not be liable for incidental or
consequential damages. Some states and provinces do not allow
the exclusion or limitation of incidental or consequential
damages, or limitations on the duration of implied warranties of
merchantability or fitness, so these exclusions or limitations may
not apply to you.
This warranty applies only while this appliance is used in the
United States and Canada.
This warranty gives you specific legal rights, and you may also
have other rights which vary from state to state.
Sears, Roebuck and Co.
Dept. 817WA, Hoffman Estates, IL 60179
Sears Canada Inc.
Toronto, Ontario, Canada M5B 2B8
PRODUCT RECORD
In the space below, record your complete model number, serial
number, and purchase date. You can find this information on the
model and serial number label located on the product.
Have this information available to help you obtain assistance or
service more quickly whenever you contact Sears concerning
your appliance.
Model number
Serial number
Purchase date
Save these instructions and your sales receipt for future
reference.
Page 4
iMPORTANT SAFETY iNSTRUCTiONS.
[]
A PRECAUTIONS
TOAVOID POSSIBLE
EXPOSURE TO
EXCESSIVE
MICROWAVEENERGY
= Read all instructions before using this appliance.
When using electrical appliances, basic safety
precautions should be followed, including the
following:
• Read and follow the specific precautions in the
PRECAUTIONS TO AVOID POSSIBLE EXPOSURE
TO EXCESSIVE MICROWAVE ENERGY section.
= Be sure your appliance is properly installed and
grounded by a qualified technician in accordance
with the provided installation instructions.
• Install or locate this appliance only in accordance with
the provided installation instructions.
• Some products such as whole eggs and sealed
containers--for example, closed jars--are able to
explode and should not be heated in this oven.
Such use of the oven could result in injury.
Do not mount this appliance over a sink.
This oven is not approved or tested for marine use.
This oven is UL listed for installation over electric and
gas ranges.
This oven was designed for use over ranges no wider
than 36 inches. It may be installed over both gas and
electric cooking equipment.
Do not operate this appliance if it has a damaged
power cord or plug, if it is not working properly, or
if it has been damaged or dropped.
• As with any appliance, close supervision is necessary
when used by children.
• Use this appliance only for its intended use as
described in this guide.
• Do not use corrosive chemicals or vapors in this
appliance.
This oven is specifically designed to heat, dry or cook
food, and is not intended for laboratory or industrial use.
READ ALL iNSTRUCTiONS BEFORE USING.
WARNING!
For your safety, the information in this manual must be followed to minimize
the risk of fire, explosion, electric shock, exposure to excessive microwave
energy, or to prevent property damage, personal injury or loss of life.
Do Not Attempt to operate this
oven with the door open since
open-door operation can result in
harmful exposure to microwave
energy, it is important not to defeat
or tamper with the safety interlocks.
Do Not Place any object between
the oven front face and the door or
allow soil or cleaner residue to
accumulate on sealing surfaces.
Do Not Operate the oven if it is
damaged. It is particularly important
that the oven door close properly
and that there is no damage to the:
1 door (bent),
2 hinges and latches (broken or
loosened),
3 door seals and sealing surfaces.
The Oven Should Not be adjusted
or repaired by anyone except
properly qualified service personnel.
This appliance should be serviced only
by qualified service personnel. Contact nearest
authorized service facility for examination, repair or
adjustment.
• Do not cover or block any openings on the appliance.
Do not store this appliance outdoors. Do not use this
product near water--for example, in a wet basement,
near a swimming pool, near a sink or in similar locations.
Keep power cord away from heated surfaces.
Do not immerse power cord or plug in water.
See door surface cleaning instructions in the Care and
Cleaning of the Oven section of this guide.
To reduce the risk of fire in the oven cavity:
-- Do not overcook food. Carefully attend appliance
when paper, plastic or other combustible materials
are placed inside the oven while cooking.
-- Remove wire twist-ties and metal handles from
paper or plastic containers before placing them
in the oven.
-- Do not use the oven for storage purposes. Do not
leave paper products, cooking utensils or food in
the oven when not in use.
-- If materials inside the oven ignite, keep the oven
door closed, turn the oven off and disconnect
the power cord, or shut off power at the fuse or
circuit breaker panel. If the door is opened, the
fire may spread.
-- Do not use the Sensor Features twice in succession
on the same food portion. If food is undercoooked
after the first countdown, use COOK TIME for
additional cooking time.
Do not store anything directly on top of the microwave
oven surface when the microwave oven is in operation.
Page 5
• Donotoperatetheovenwithouttheturntablesupport
inplace.Theturntablesupportmustbeunrestricted
soitcanturn.
• Duringandafteruse,donottouch,orletclothingor
otherflammablematerialscontactanyinteriorareaof
theoven;allowsufficienttimeforcoolingfirst.
• Potentiallyhotsurfacesincludetheovendoor,floor,
wallsandturntablesupport.
• Cookmeatandpoultrythoroughly--meattoatleastan
INTERNALtemperatureof 160°F,andpoultrytoatleast
anINTERNALtemperatureof180°RCookingtothese
temperaturesusuallyprotectsagainstfoodborneillness.
Keeptheovenfreefromgreasebuildup.
Don'tdefrostfrozenbeveragesinnarrow-neckedbottles
(especiallycarbonatedbeverages).Evenifthecontainer
isopen,pressurecanbuildup.Thiscancausethe
containertoburst,possiblyresultingininjury.
,WARNING!
ARCING
If you see arcing, press the STOP/CLEAR button
and correct the problem.
Arcing is the microwave term for sparks in the oven.
Arcing is caused by:
Metal or foil touching the side of the oven.
Turntable support not installed correctly.
Metal cookware used during either speedcook or
microwave cooking (except for the pans provided
with the oven).
Foodscookedinliquids(suchaspasta)maytendto
boilmorerapidlythanfoodscontaininglessmoisture.
Shouldthisoccur,refertotheCareandCleaningofthe
ovensectionforinstructionsonhowtocleantheinside
oftheoven.
• Hotfoodsandsteamcancauseburns.Becarefulwhen
openinganycontainersofhotfood,includingpopcorn
bags,cookingpouchesandboxes.Topreventpossible
injury,directsteamawayfromhandsandface.
Donotovercookpotatoes.Theycoulddehydrateand
catchfire,causingdamagetoyouroven.
• Avoidheatingbabyfoodinglassjars,evenwiththelid
off.Makesureall infantfoodisthoroughlycooked.Stir
foodtodistributetheheatevenly.Becarefulto prevent
scaldingwhenwarmingformula.Thecontainermay
feelcoolerthantheformulareallyis.Alwaystestthe
formulabeforefeedingthebaby.
• Donotattempttodeepfryintheoven.
Foil not molded to food (upturned edges act like
antennas). Use foil only as recommeded in this guide.
Metal, such as twist-ties, poultry pins or gold-rimmed
dishes, in the microwave.
Recycled paper towels containing small metal pieces
being used in the microwave.
,WARNING!
FOODS
• When microwaving, place all foods and containers
on the glass microwave turntable.
• Do not pop popcorn in your oven unless in a special
microwave popcorn accessory or unless you use
popcorn labeled for use in microwave ovens.
Do not boil eggs in this oven. Pressure will build up
inside egg yolk and will cause it to burst, possibly
resulting in injury.
Do not operate the oven without food inside.
This may cause damage to the oven. It increases
the heat around the magnetron and can shorten
the life of the oven.
• Foods with unbroken outer "skin" such as potatoes,
hot dogs, sausages, tomatoes, apples, chicken livers
and other giblets, and egg yolks should be pierced
to allow steam to escape during cooking.
SUPERHEATED WATER
Liquids, such as water, coffee or tea are able to be
overheated beyond the boiling point without appearing
to be boiling. Visible bubbling or boiling when the
container is removed from the microwave oven is not
always present. THIS COULD RESULT IN VERY HOT
LIQUIDS SUDDENLY BOILING OVER WHEN THE
CONTAINER IS DISTURBED ORA SPOON OR
OTHER UTENSIL IS INSERTED INTO THE LIQUID.
To reduce the risk of injury to persons:
-- Do not overheat the liquid.
-- Stir the liquid both before and halfway through
heating it.
-- Do not use straight-sided containers with narrow
necks.
-- After heating, allow the container to stand in the
microwave oven for a short time before removing
the container.
-- Use extreme care when inserting a spoon or other
5 utensil into the container.
Page 6
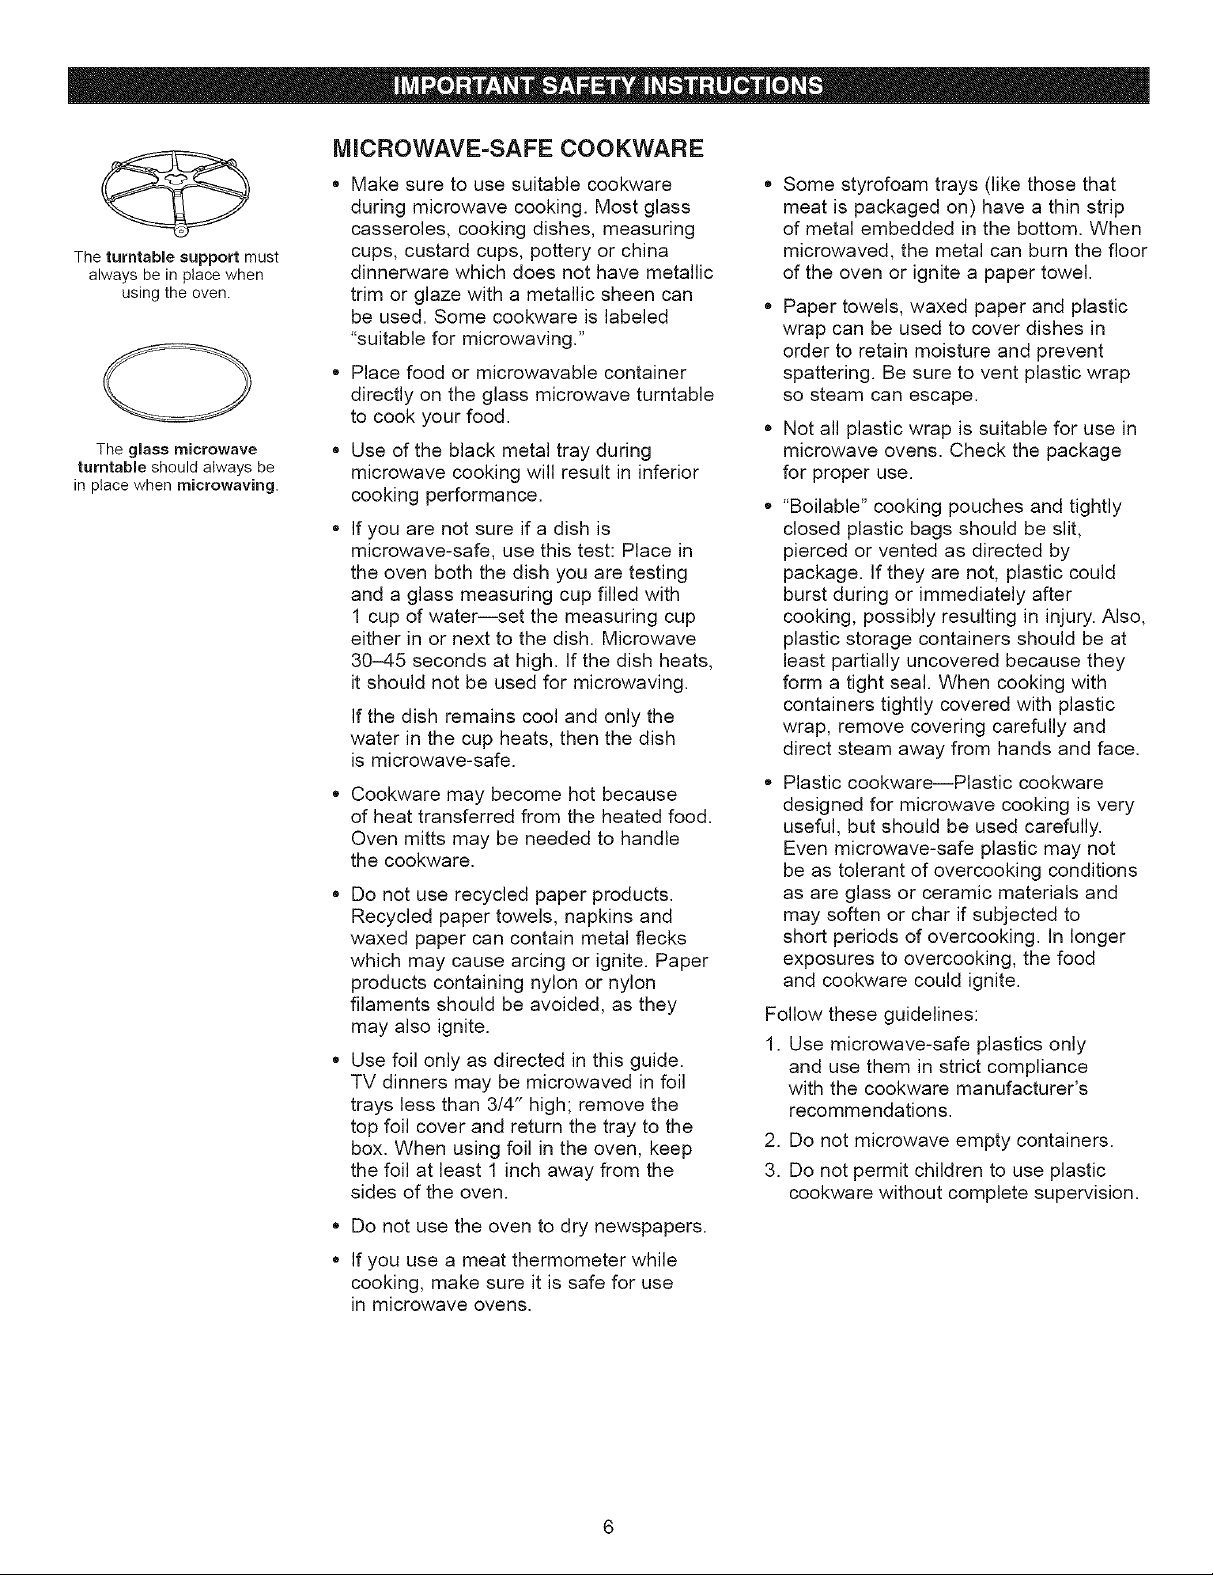
The turntable support must
always be in place when
using the oven.
The glass microwave
turntable should always be
in place when microwaving.
MICROWAVE-SAFE COOKWARE
Make sure to use suitable cookware
during microwave cooking. Most glass
casseroles, cooking dishes, measuring
cups, custard cups, pottery or china
dinnerware which does not have metallic
trim or glaze with a metallic sheen can
be used. Some cookware is labeled
"suitable for microwaving."
Place food or microwavable container
directly on the glass microwave turntable
to cook your food.
Use of the black metal tray during
microwave cooking will result in inferior
cooking performance.
If you are not sure if a dish is
microwave-safe, use this test: Place in
the oven both the dish you are testing
and a glass measuring cup filled with
1 cup of water--set the measuring cup
either in or next to the dish. Microwave
30-45 seconds at high. If the dish heats,
it should not be used for microwaving.
If the dish remains cool and only the
water in the cup heats, then the dish
is microwave-safe.
Cookware may become hot because
of heat transferred from the heated food.
Oven mitts may be needed to handle
the cookware.
Do not use recycled paper products.
Recycled paper towels, napkins and
waxed paper can contain metal flecks
which may cause arcing or ignite. Paper
products containing nylon or nylon
filaments should be avoided, as they
may also ignite.
Use foil only as directed in this guide.
TV dinners may be microwaved in foil
trays less than 314" high; remove the
top foil cover and return the tray to the
box. When using foil in the oven, keep
the foil at least 1 inch away from the
sides of the oven.
®
Do not use the oven to dry newspapers.
®
If you use a meat thermometer while
cooking, make sure it is safe for use
in microwave ovens.
Some styrofoam trays (like those that
meat is packaged on) have a thin strip
of metal embedded in the bottom. When
microwaved, the metal can burn the floor
of the oven or ignite a paper towel.
®
Paper towels, waxed paper and plastic
wrap can be used to cover dishes in
order to retain moisture and prevent
spattering. Be sure to vent plastic wrap
so steam can escape.
• Not all plastic wrap is suitable for use in
microwave ovens. Check the package
for proper use.
"Boilable" cooking pouches and tightly
closed plastic bags should be slit,
pierced or vented as directed by
package. If they are not, plastic could
burst during or immediately after
cooking, possibly resulting in injury. Also,
plastic storage containers should be at
least partially uncovered because they
form a tight seal. When cooking with
containers tightly covered with plastic
wrap, remove covering carefully and
direct steam away from hands and face.
Plastic cookware--Plastic cookware
designed for microwave cooking is very
useful, but should be used carefully.
Even microwave-safe plastic may not
be as tolerant of overcooking conditions
as are glass or ceramic materials and
may soften or char if subjected to
short periods of overcooking. In longer
exposures to overcooking, the food
and cookware could ignite.
Follow these guidelines:
1. Use microwave-safe plastics only
and use them in strict compliance
with the cookware manufacturer's
recommendations.
2. Do not microwave empty containers.
3. Do not permit children to use plastic
cookware without complete supervision.
Page 7
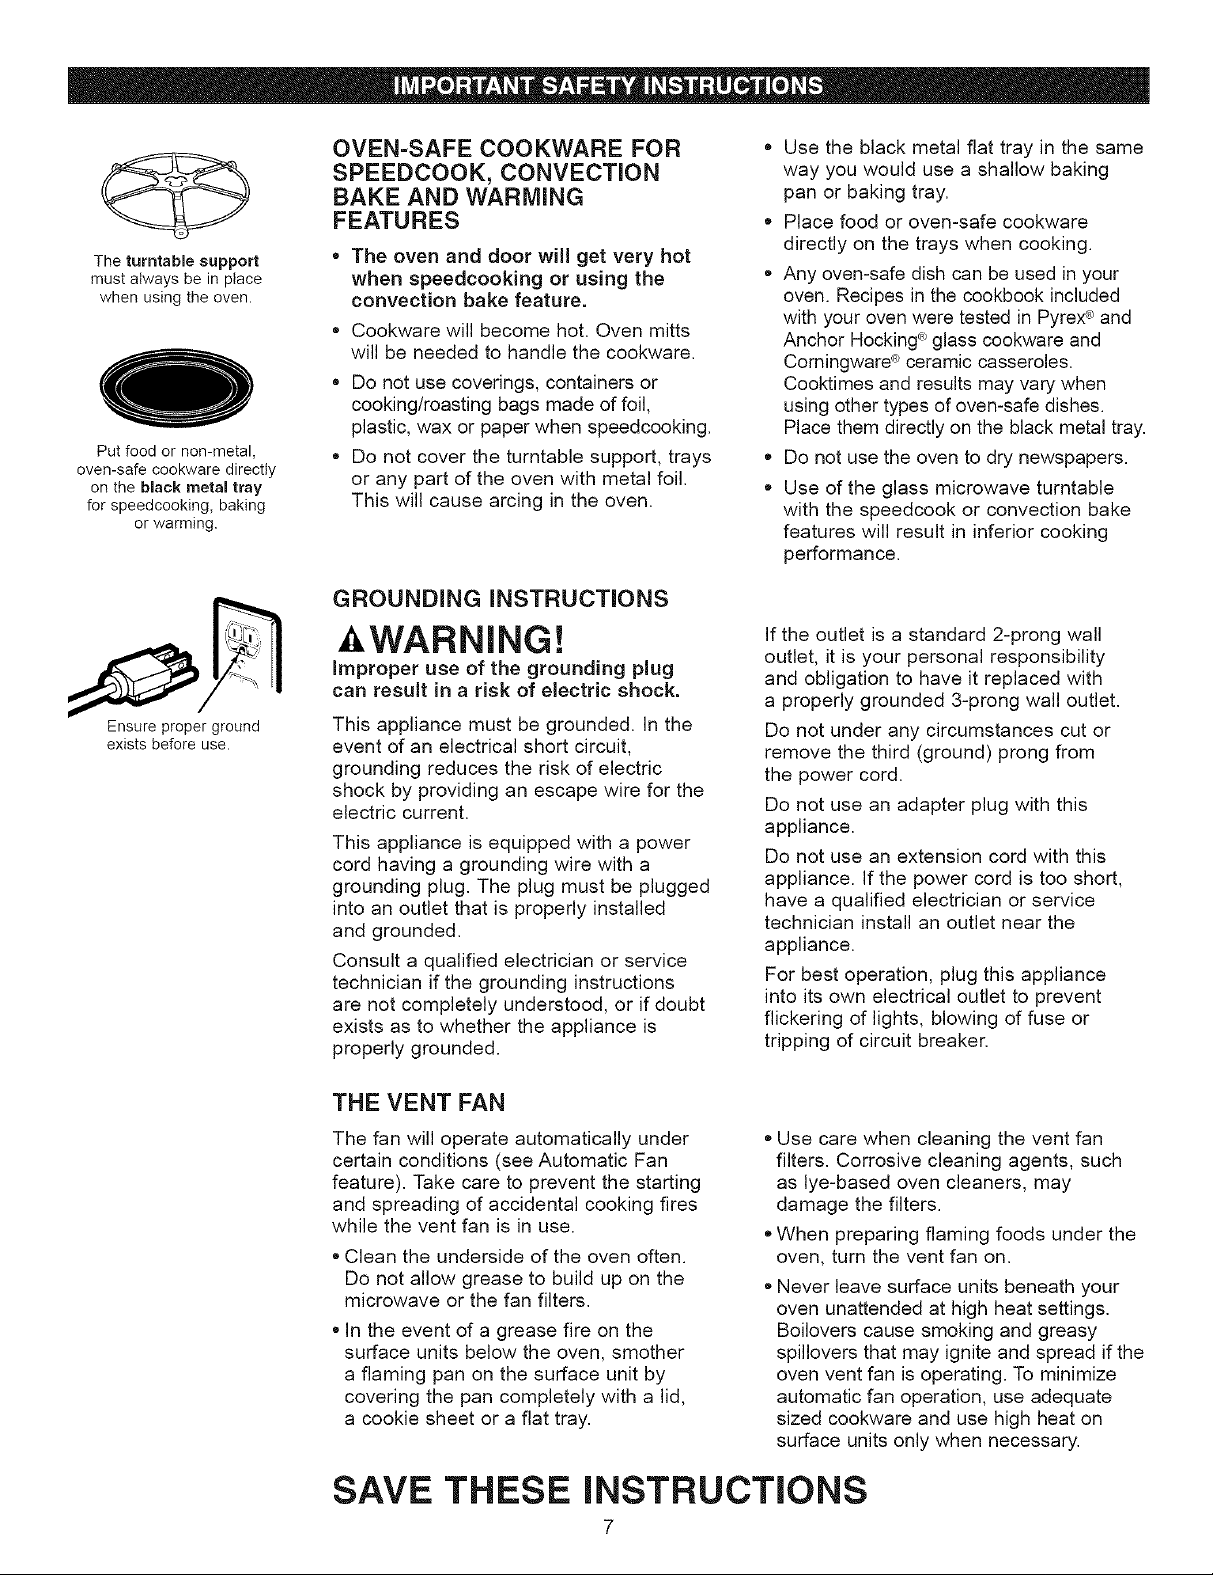
The turntable support
must always be in place
when using the oven.
Put food or non-metal,
oven-safe cookware directly
on the black metal tray
for speedcooking, baking
or warming.
OVEN-SAFE COOKWARE FOR
SPEEDCOOK, CONVECTION
BAKE AND WARMING
FEATURES
The oven and door will get very hot
when speedcooking or using the
convection bake feature.
®
Cookware will become hot. Oven mitts
will be needed to handle the cookware.
®
Do not use coverings, containers or
cooking/roasting bags made of foil,
plastic, wax or paper when speedcooking.
Do not cover the turntable support, trays
or any part of the oven with metal foil.
This will cause arcing in the oven.
GROUNDING iNSTRUCTiONS
• Use the black metal flat tray in the same
way you would use a shallow baking
pan or baking tray.
• Place food or oven-safe cookware
directly on the trays when cooking.
Any oven-safe dish can be used in your
oven. Recipes in the cookbook included
with your oven were tested in Pyrexc>and
Anchor Hocking_ glass cookware and
Corningware <_ceramic casseroles,
Cooktimes and results may vary when
using other types of oven-safe dishes.
Place them directly on the black metal tray,
• Do not use the oven to dry newspapers,
Use of the glass microwave turntable
with the speedcook or convection bake
features will result in inferior cooking
performance.
Ensure proper ground
exists before use.
WARNING!
improper use of the grounding plug
can result in a risk of electric shock.
This appliance must be grounded. In the
event of an electrical short circuit,
grounding reduces the risk of electric
shock by providing an escape wire for the
electric current.
This appliance is equipped with a power
cord having a grounding wire with a
grounding plug. The plug must be plugged
into an outlet that is properly installed
and grounded.
Consult a qualified electrician or service
technician if the grounding instructions
are not completely understood, or if doubt
exists as to whether the appliance is
properly grounded.
THE VENT FAN
The fan will operate automatically under
certain conditions (see Automatic Fan
feature). Take care to prevent the starting
and spreading of accidental cooking fires
while the vent fan is in use.
• Clean the underside of the oven often.
Do not allow grease to build up on the
microwave or the fan filters.
• In the event of a grease fire on the
surface units below the oven, smother
a flaming pan on the surface unit by
covering the pan completely with a lid,
a cookie sheet or a flat tray.
If the outlet is a standard 2-prong wall
outlet, it is your personal responsibility
and obligation to have it replaced with
a properly grounded 3-prong wall outlet.
Do not under any circumstances cut or
remove the third (ground) prong from
the power cord.
Do not use an adapter plug with this
appliance.
Do not use an extension cord with this
appliance. If the power cord is too short,
have a qualified electrician or service
technician install an outlet near the
appliance.
For best operation, plug this appliance
into its own electrical outlet to prevent
flickering of lights, blowing of fuse or
tripping of circuit breaker.
• Use care when cleaning the vent fan
filters. Corrosive cleaning agents, such
as lye-based oven cleaners, may
damage the filters.
• When preparing flaming foods under the
oven, turn the vent fan on.
Never leave surface units beneath your
oven unattended at high heat settings.
Boilovers cause smoking and greasy
spillovers that may ignite and spread if the
oven vent fan is operating. To minimize
automatic fan operation, use adequate
sized cookware and use high heat on
surface units only when necessary.
SAVE THESE INSTRUCTIONS
Page 8
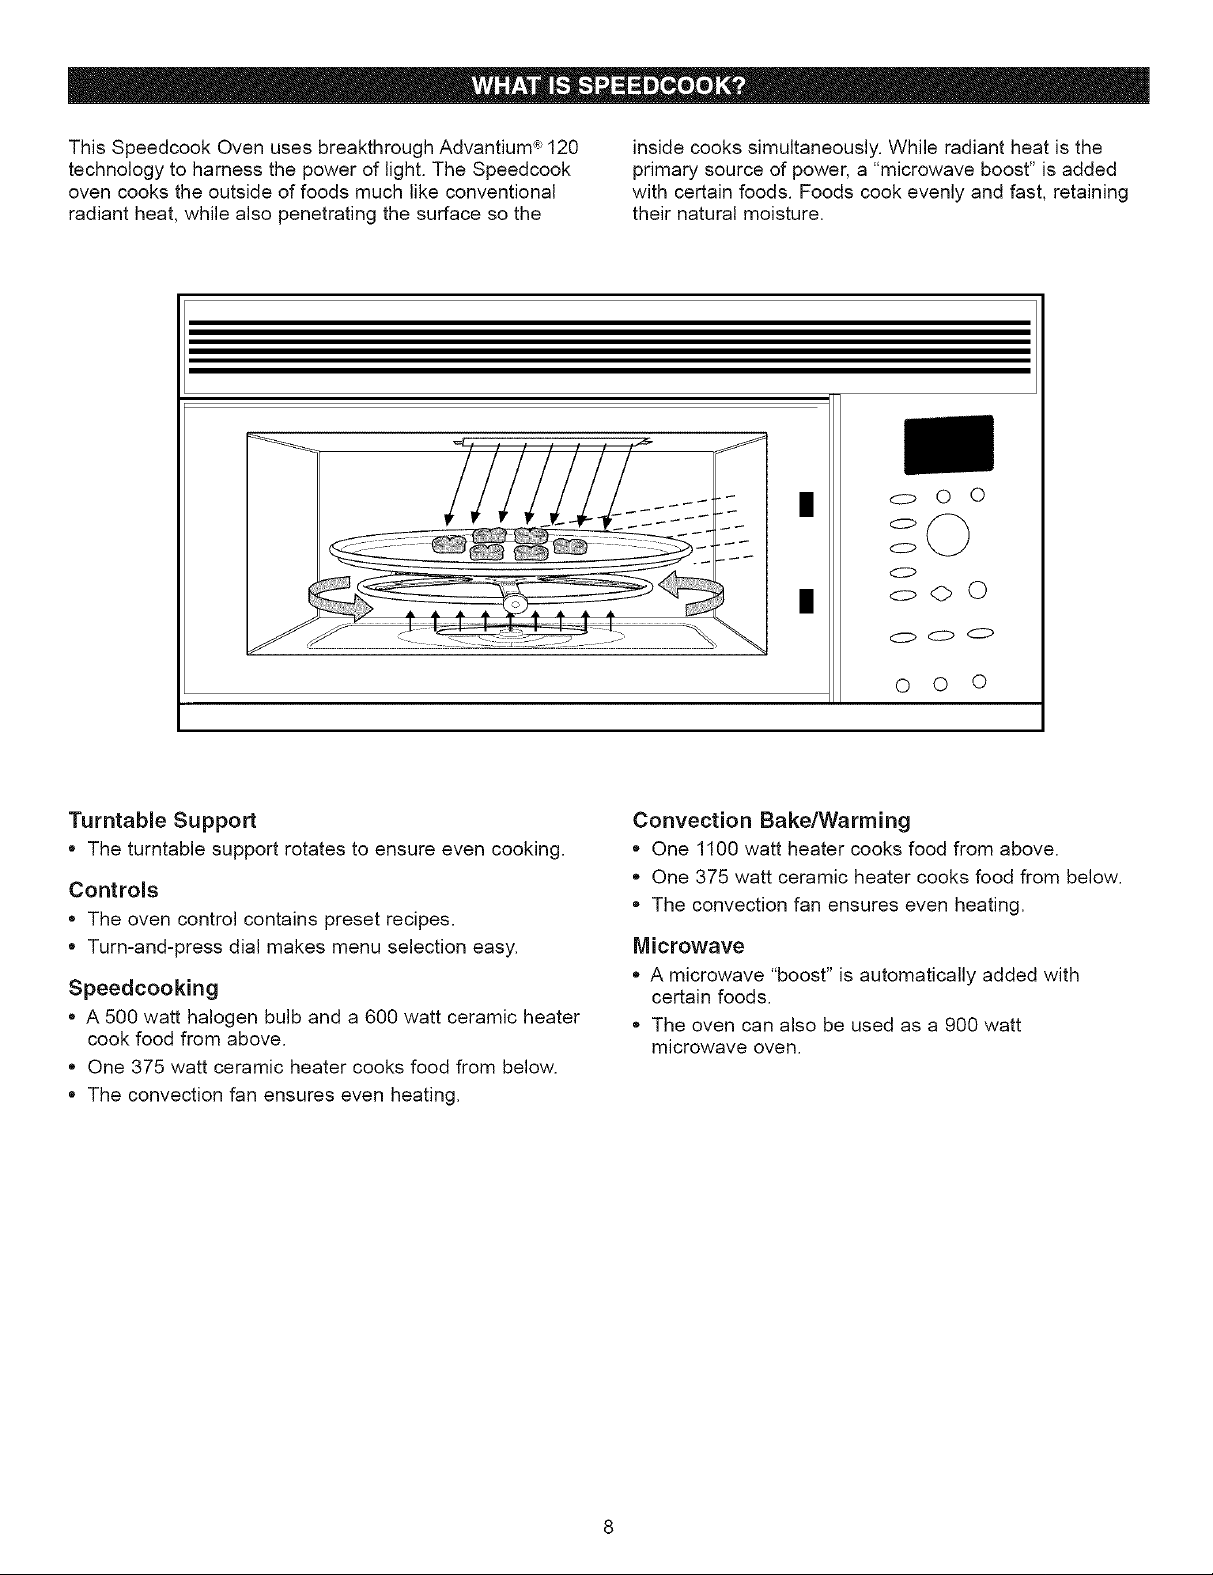
This Speedcook Oven uses breakthrough Advantium <R_120
technology to harness the power of light. The Speedcook
oven cooks the outside of foods much like conventional
radiant heat, while also penetrating the surface so the
inside cooks simultaneously. While radiant heat is the
primary source of power, a "microwave boost" is added
with certain foods. Foods cook evenly and fast, retaining
their natural moisture.
m o O O
o©
o
O
I ooo
oo o
0 0 0
Turntable Support
= The turntable support rotates to ensure even cooking.
Controls
= The oven control contains preset recipes.
= Turn-and-press dial makes menu selection easy.
Speedcooking
= A 500 watt halogen bulb and a 600 watt ceramic heater
cook food from above.
• One 375 watt ceramic heater cooks food from below.
• The convection fan ensures even heating.
Convection Bake/Warming
= One 1100 watt heater cooks food from above.
• One 375 watt ceramic heater cooks food from below.
• The convection fan ensures even heating.
Microwave
• A microwave "boost" is automatically added with
certain foods.
= The oven can also be used as a 900 watt
microwave oven.
Page 9
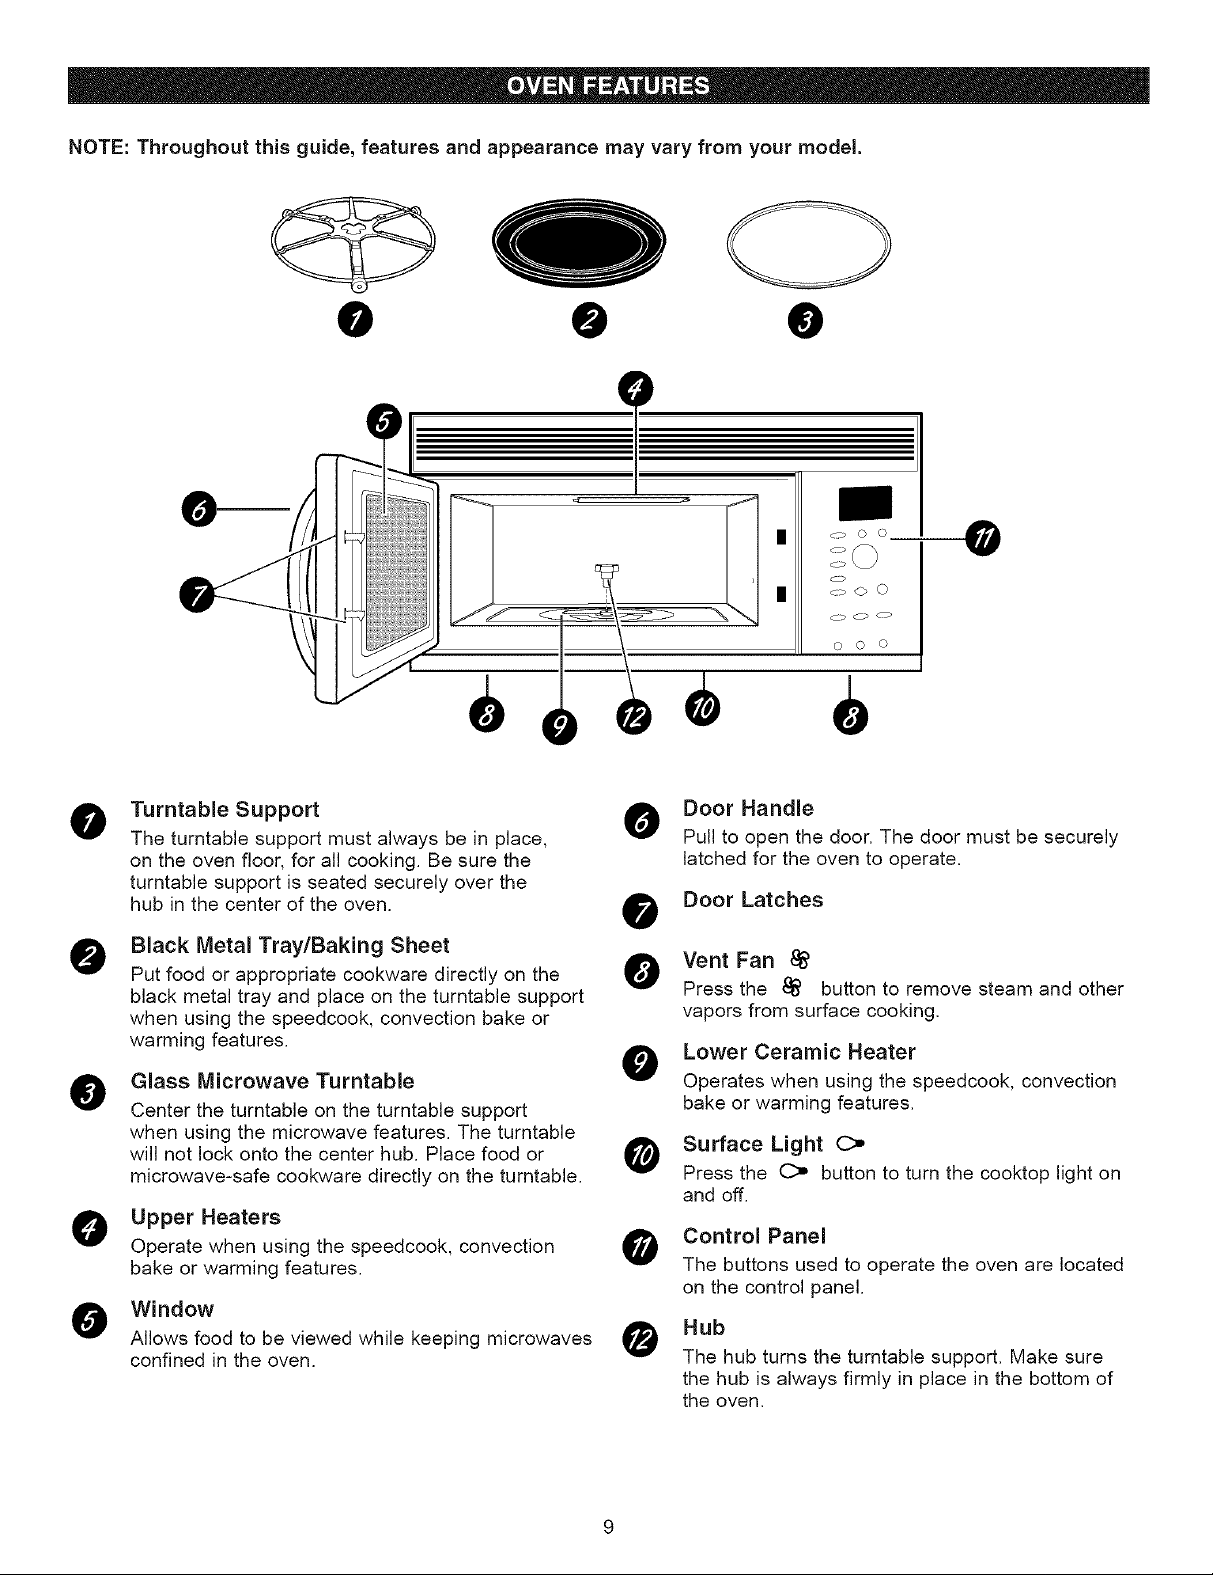
NOTE:Throughout this guide, features and appearance may vary from your model.
0 0 @
0
0
@
0
Turntable Support
The turntable support must always be in place,
on the oven floor, for all cooking. Be sure the
turntable support is seated securely over the
hub in the center of the oven.
Black Metal Tray/Baking Sheet
Put food or appropriate cookware directly on the
black metal tray and place on the turntable support
when using the speedcook, convection bake or
warming features.
Glass Microwave Turntable
Center the turntable on the turntable support
when using the microwave features. The turntable
will not lock onto the center hub. Place food or
microwave-safe cookware directly on the turntable.
J
¢o O Q
|
o
c_> 0 0
0 0 0
O Door Handle
Pull to open the door. The door must be securely
latched for the oven to operate.
O Door Latches
O Vent Fan
Press the _ button to remove steam and other
vapors from surface cooking.
O ower Ceramic Heater
Operates when using the speedcook, convection
bake or warming features.
O urface Light C_
Press the C_ button to turn the cooktop light on
and off.
0
O pper Heaters
Operate when using the speedcook, convection
bake or warming features.
Window
Allows food to be viewed while keeping microwaves
confined in the oven.
Control Panel
The buttons used to operate the oven are located
on the control panel.
Hub
The hub turns the turntable support. Make sure
the hub is always firmly in place in the bottom of
the oven.
Page 10
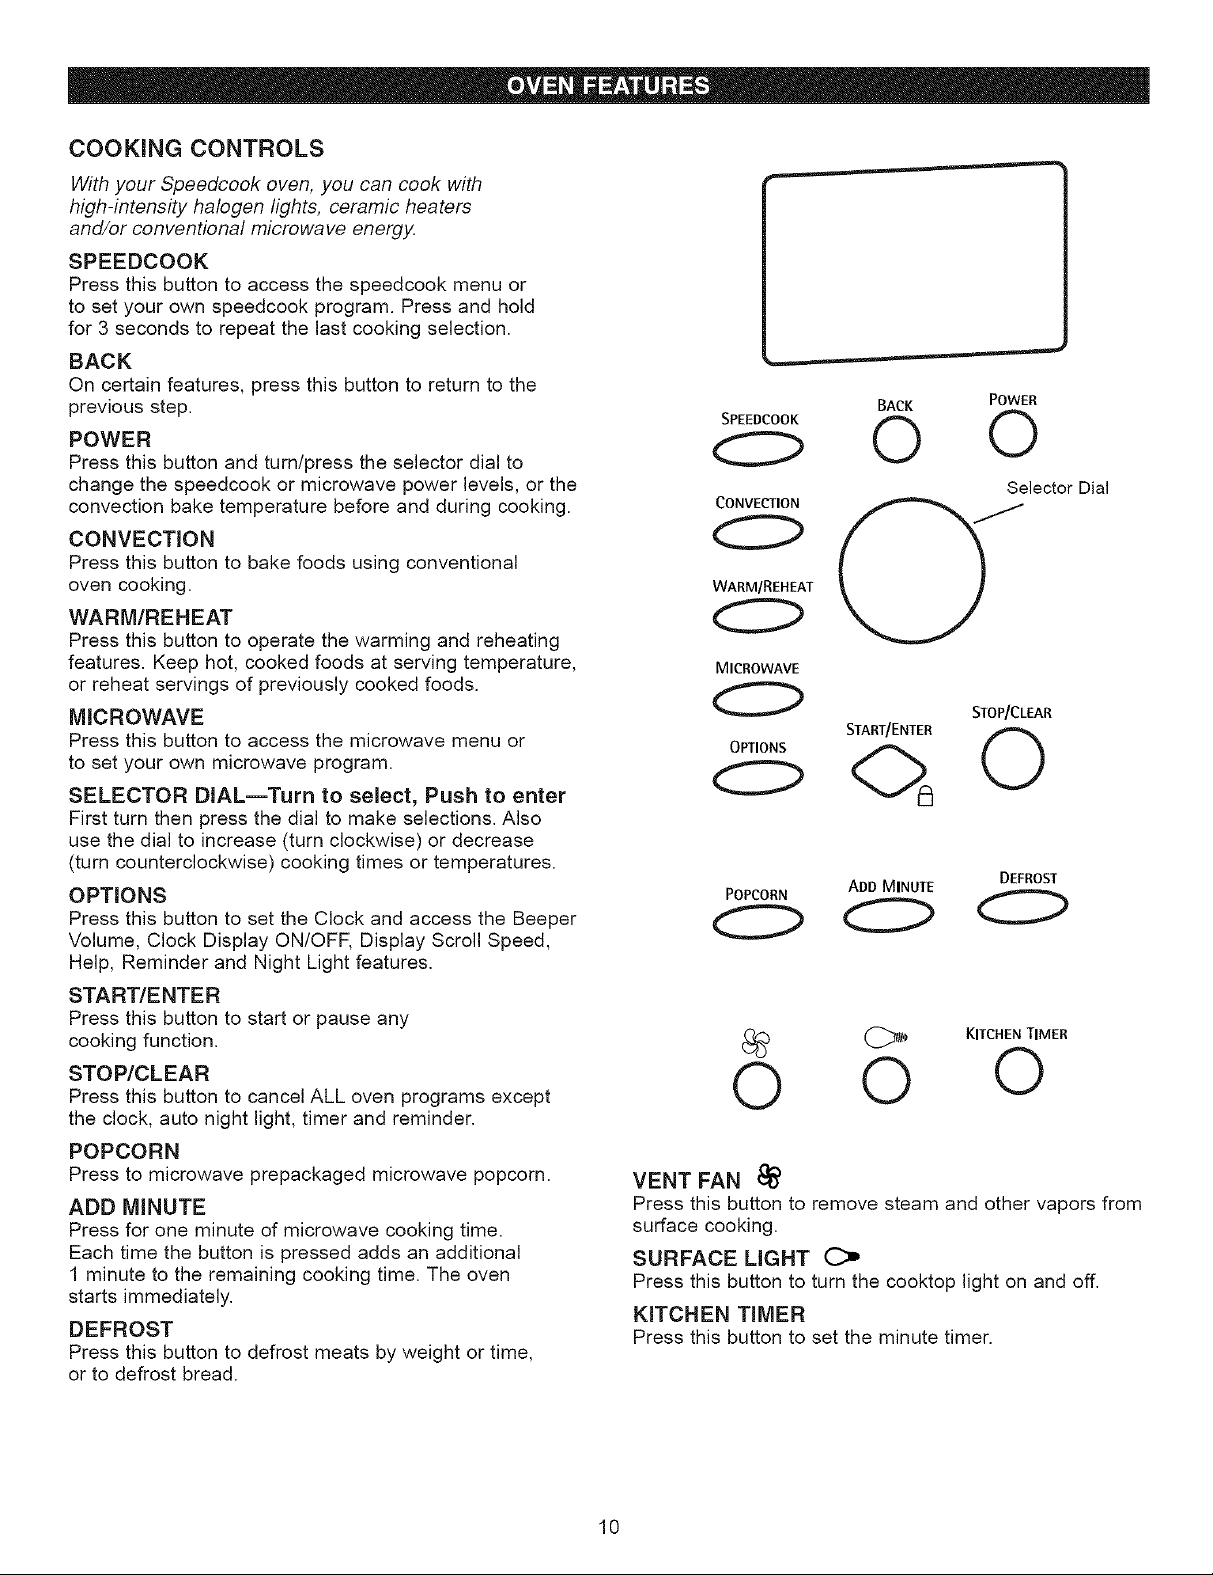
COOKING CONTROLS
With your Speedcook oven, you can cook with
high-intensity halogen lights, ceramic heaters
and/or conventional microwave energy.
SPEEDCOOK
Press this button to access the speedcook menu or
to set your own speedcook program. Press and hold
for 3 seconds to repeat the last cooking selection.
BACK
On certain features, press this button to return to the
previous step.
POWER
Press this button and turn/press the selector dial to
change the speedcook or microwave power levels, or the
convection bake temperature before and during cooking.
CONVECTION
Press this button to bake foods using conventional
oven cooking.
WARM/REHEAT
Press this button to operate the warming and reheating
features. Keep hot, cooked foods at serving temperature,
or reheat servings of previously cooked foods.
MICROWAVE
Press this button to access the microwave menu or
to set your own microwave program.
SELECTOR DIAL--Turn to select, Push to enter
First turn then press the dial to make selections. Also
use the dial to increase (turn clockwise) or decrease
(turn counterclockwise) cooking times or temperatures.
OPTIONS
Press this button to set the Clock and access the Beeper
Volume, Clock Display ON/OFF, Display Scroll Speed,
Help, Reminder and Night Light features.
START/ENTER
Press this button to start or pause any
cooking function.
STOP/CLEAR
Press this button to cancel ALL oven programs except
the clock, auto night light, timer and reminder.
POPCORN
Press to microwave prepackaged microwave popcorn.
ADD MINUTE
Press for one minute of microwave cooking time.
Each time the button is pressed adds an additional
1 minute to the remaining cooking time. The oven
starts immediately.
DEFROST
Press this button to defrost meats by weight or time,
or to defrost bread.
BACK POWER
© 0
Selector Dial
CONVECTION
WARM/REHEAT
MICROWAVE
STOP/CLEAR
START/ENTER
POPCORN ADD MINUTE DEFROST
_ KITCHEN TIMER
0 0 0
VENT FAN _'
Press this button to remove steam and other vapors from
surface cooking.
SURFACE LIGHT C:_
Press this button to turn the cooktop light on and off.
KITCHEN TIMER
Press this button to set the minute timer.
10
Page 11
OPTIONS
0
0
SET THE CLOCK
When you first plug in the oven or
after a power outage:
1. Turn the selector dial to set the hour.
Press the dial to enter.
2. Turn the dial to set the minute.
Press the dial to enter.
3. Turn the dial to select AM or PM.
Press the dial to enter.
To change the time:
1. Press the OPTIONS button.
2. Turn the dial to CLOCK. Press the
dial to enter and follow the display
directions to set.
SPEEOCOOK
0
0
START/ENTER
ADD MINU1L
0
0
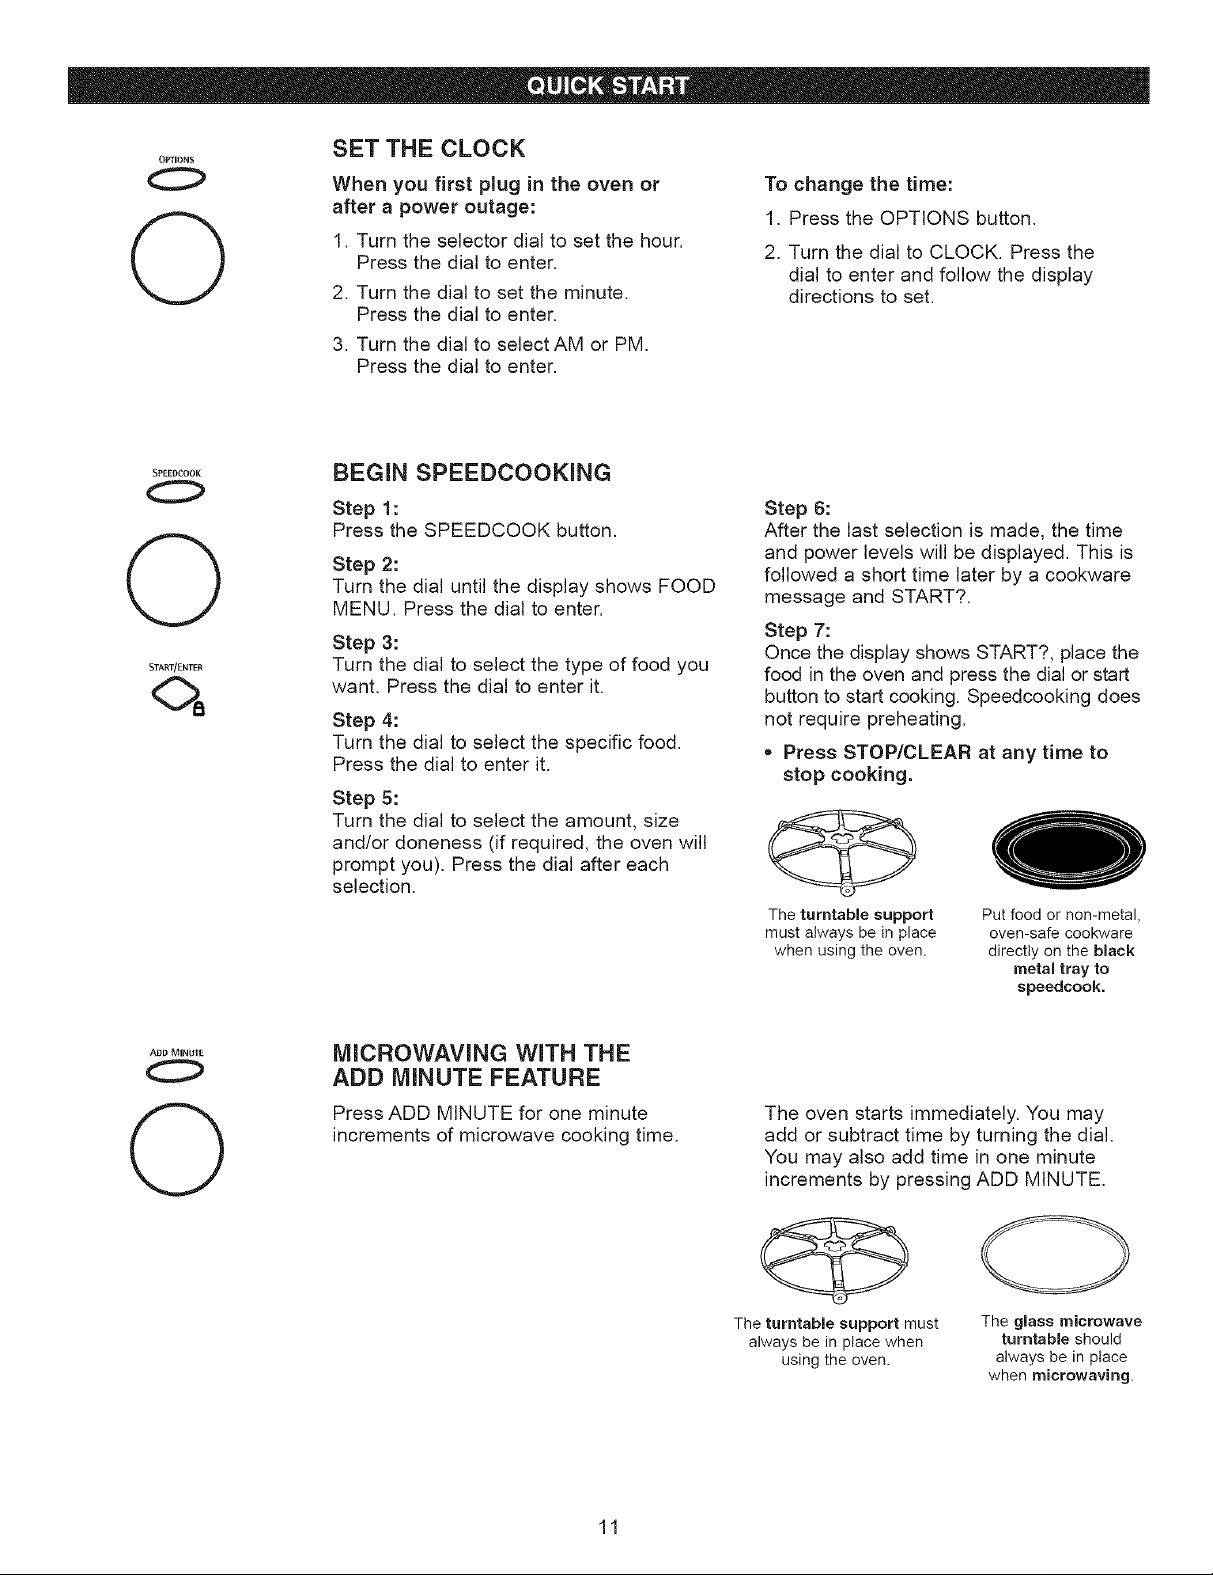
BEGIN SPEEDCOOKING
Step 1:
Press the SPEEDCOOK button.
Step 2:
Turn the dial until the display shows FOOD
MENU. Press the dial to enter.
Step 3:
Turn the dial to select the type of food you
want. Press the dial to enter it.
Step 4:
Turn the dial to select the specific food.
Press the dial to enter it.
Step 5:
Turn the dial to select the amount, size
and/or doneness (if required, the oven will
prompt you). Press the dial after each
selection.
MICROWAVING WITH THE
ADD MINUTE FEATURE
Press ADD MINUTE for one minute
increments of microwave cooking time.
Step 6:
After the last selection is made, the time
and power levels will be displayed. This is
followed a short time later by a cookware
message and START?.
Step 7:
Once the display shows START?, place the
food in the oven and press the dial or start
button to start cooking. Speedcooking does
not require preheating.
• Press STOP/CLEAR at any time to
stop cooking.
The turntable support
must always be in place
when using the oven.
The oven starts immediately. You may
add or subtract time by turning the dial.
You may also add time in one minute
increments by pressing ADD MINUTE.
Put food or non-metal,
oven-safe cookware
directly on the black
metal tray to
speedcook.
11
The turntable support must
always be in place when
using the oven.
The glass microwave
turntable should
always be in place
when microwaving.
Page 12
WARM/REH_^T
0
0
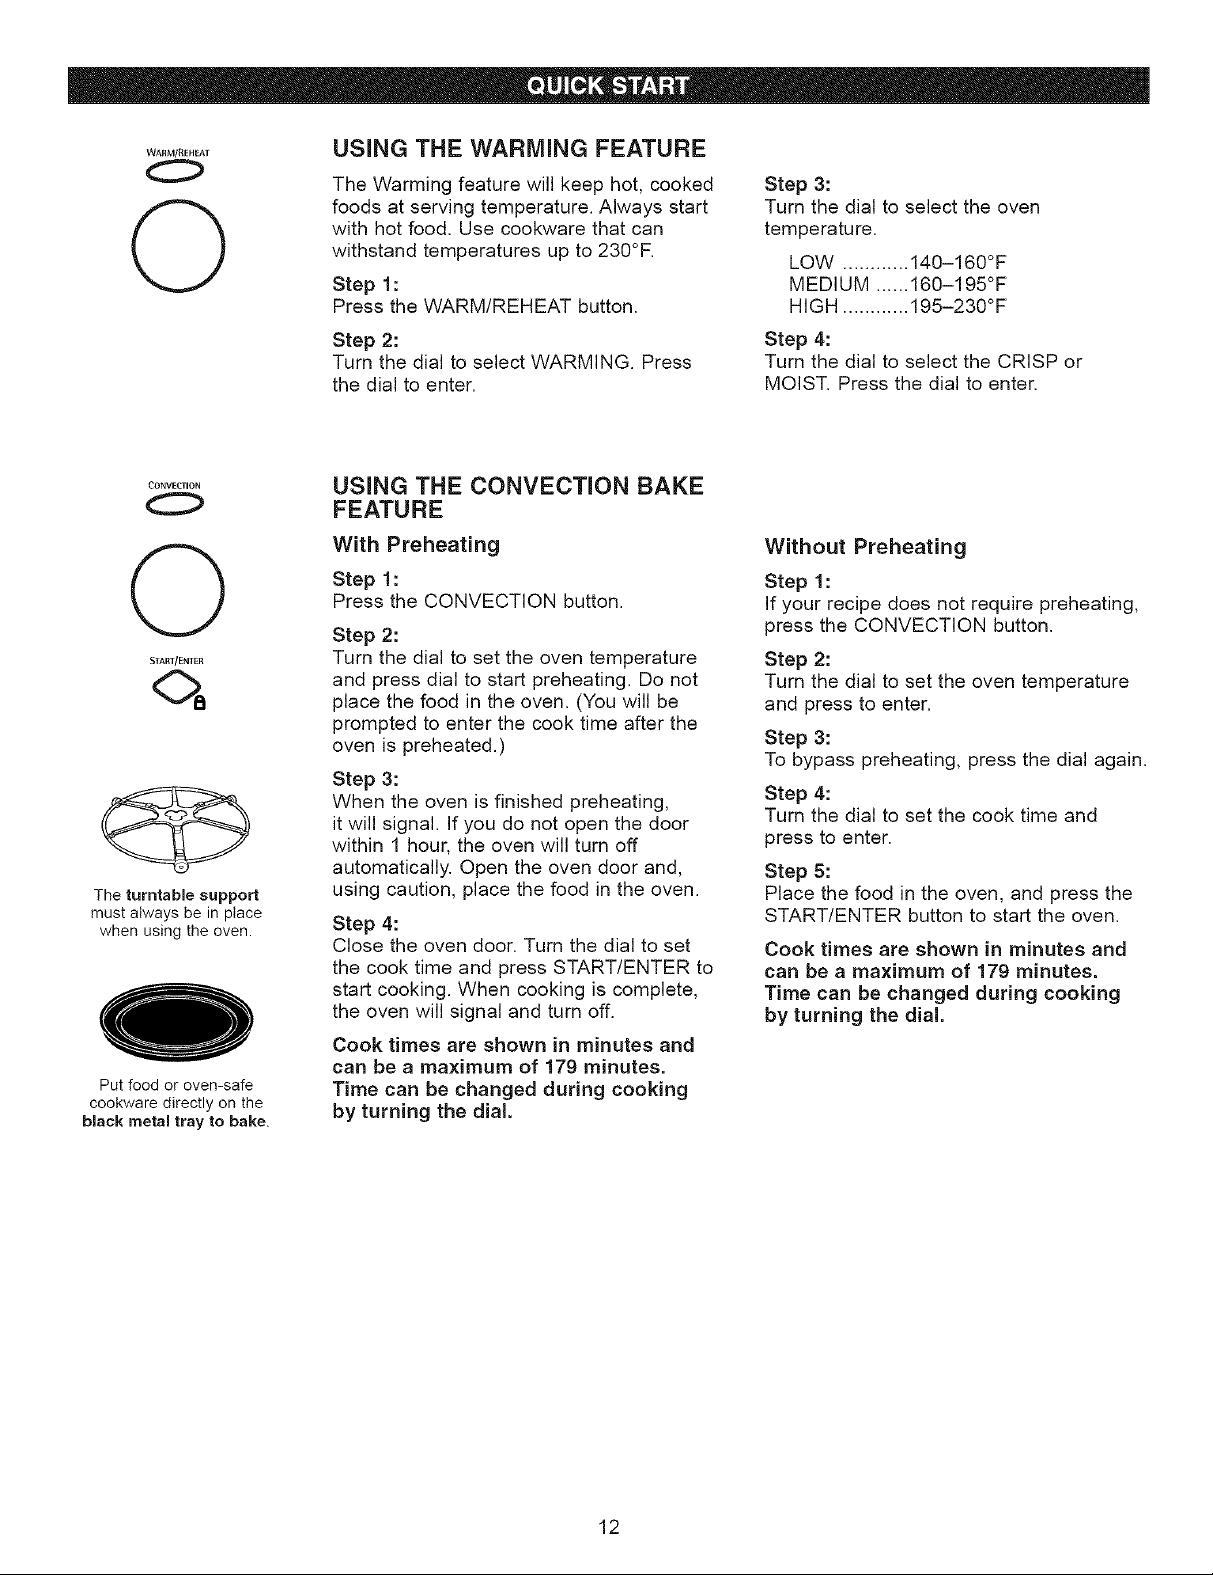
USING THE WARMING FEATURE
The Warming feature will keep hot, cooked
foods at serving temperature. Always start
with hot food. Use cookware that can
withstand temperatures up to 230°F.
Step 1:
Press the WARM/REHEAT button.
Step 3:
Turn the dial to select the oven
temperature.
LOW ............ 140-160 °F
MEDIUM ...... 160-195°F
HIGH ............ 195-230°F
CONVEL'TION
0
0
START/ENTER
The turntable support
must always be in place
when using the oven.
Put food or oven-safe
cookware directly on the
black metal tray to bake.
Step 2:
Turn the dial to select WARMING. Press
the dial to enter.
USING THE CONVECTION BAKE
FEATURE
With Preheating
Step 1:
Press the CONVECTION button,
Step 2:
Turn the dial to set the oven temperature
and press dial to start preheating. Do not
place the food in the oven. (You will be
prompted to enter the cook time after the
oven is preheated.)
Step 3:
When the oven is finished preheating,
it will signal. If you do not open the door
within 1 hour, the oven will turn off
automatically. Open the oven door and,
using caution, place the food in the oven.
Step 4:
Close the oven door. Turn the dial to set
the cook time and press START/ENTER to
start cooking. When cooking is complete,
the oven will signal and turn off.
Cook times are shown in minutes and
can be a maximum of 179 minutes.
Time can be changed during cooking
by turning the dial.
Step 4"
Turn the dial to select the CRISP or
MOIST. Press the dial to enter.
Without Preheating
Step 1:
If your recipe does not require preheating,
press the CONVECTION button.
Step 2:
Turn the dial to set the oven temperature
and press to enter.
Step 3:
To bypass preheating, press the dial again.
Step 4:
Turn the dial to set the cook time and
press to enter.
Step 5:
Place the food in the oven, and press the
START/ENTER button to start the oven.
Cook times are shown in minutes and
can be a maximum of 179 minutes.
Time can be changed during cooking
by turning the dial.
12
Page 13
SP_ED(!()OK
0
0
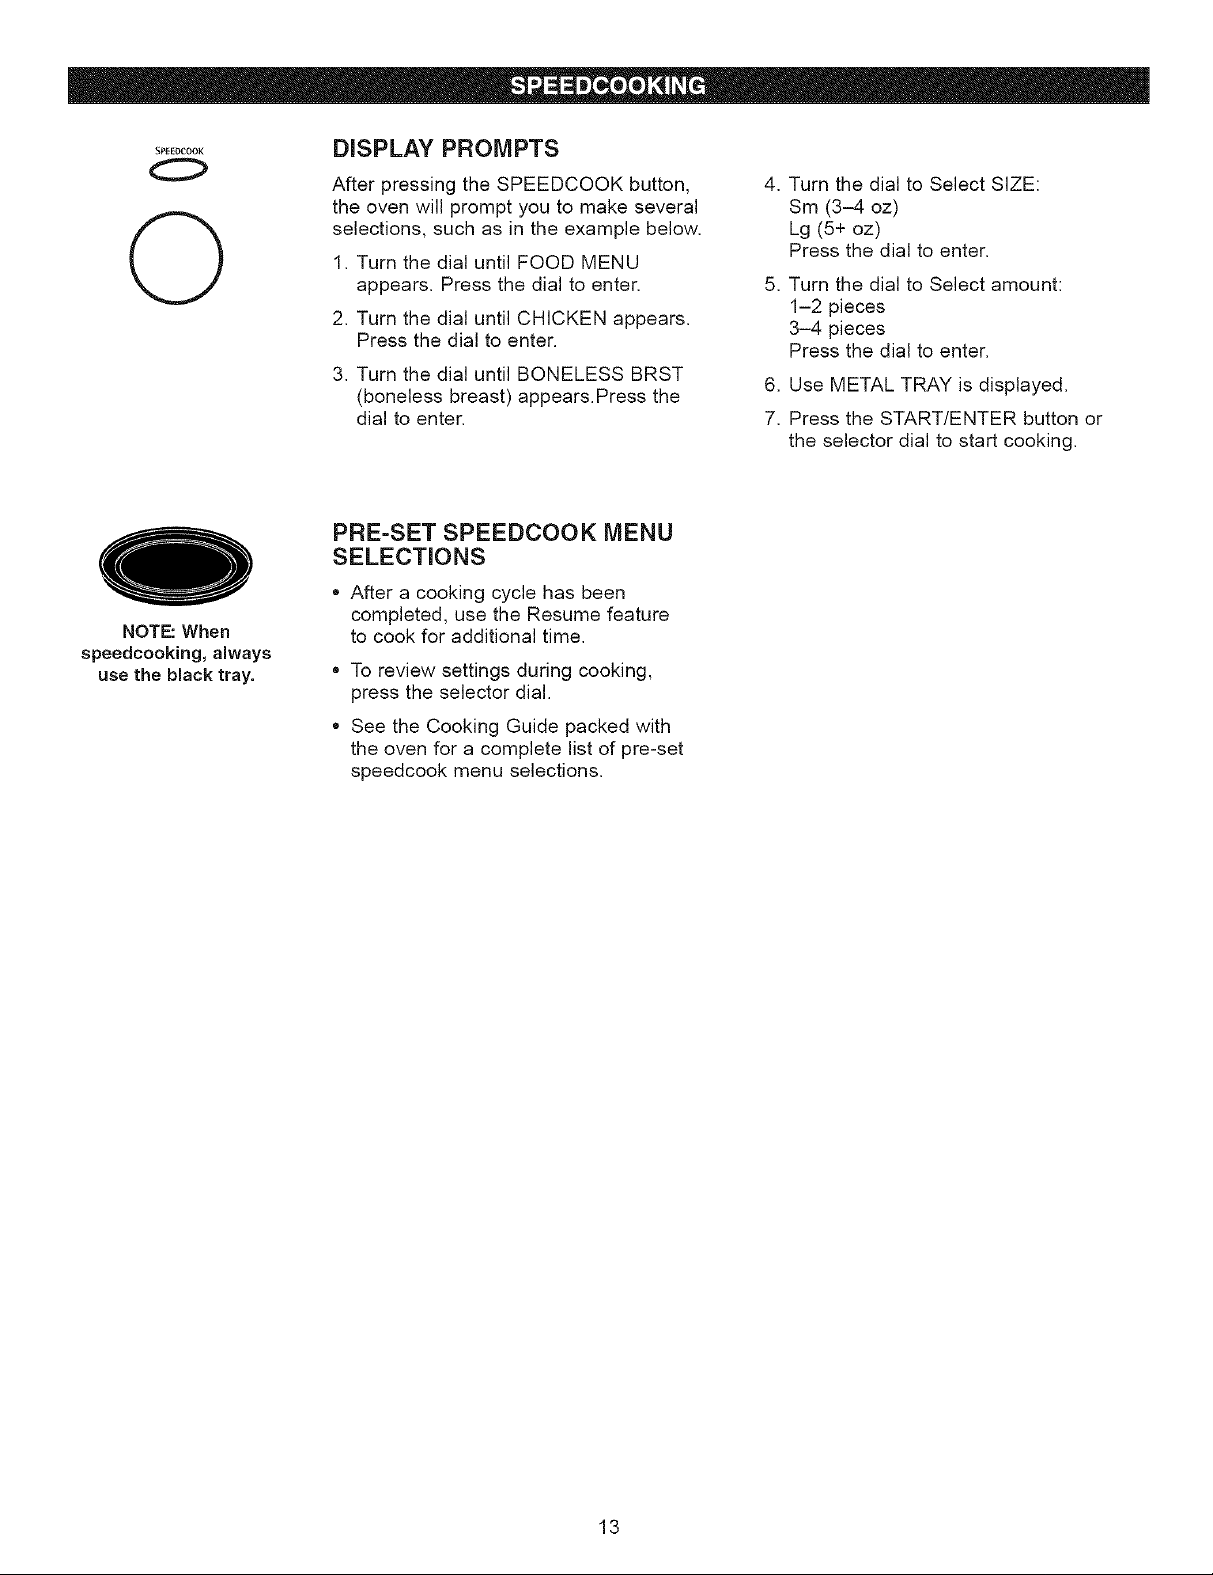
NOTE When
speedcooking, always
use the black tray.
DISPLAY PROMPTS
After pressing the SPEEDCOOK button, 4.
the oven will prompt you to make several
selections, such as in the example below.
1. Turn the dial until FOOD MENU
appears. Press the dial to enter. 5.
2. Turn the dial until CHICKEN appears.
Press the dial to enter.
3. Turn the dial until BONELESS BRST
(boneless breast) appears.Press the
dial to enter.
PRE-SET SPEEDCOOK MENU
SELECTIONS
• After a cooking cycle has been
completed, use the Resume feature
to cook for additional time.
®
To review settings during cooking,
press the selector dial.
®
See the Cooking Guide packed with
the oven for a complete list of pre-set
speedcook menu selections.
Turn the dial to Select SIZE:
Sm (3-4 oz)
Lg (5+ oz)
Press the dial to enter.
Turn the dial to Select amount:
1-2 pieces
3-4 pieces
Press the dial to enter.
6. Use METAL TRAY is displayed.
7. Press the START/ENTER button or
the selector dial to start cooking.
13
Page 14
USING SPEEDCOOK FEATURES
CAUTION: When using speedcook programs,
remember that the oven, door and dishes will
be very hott
Prior to the first use of your oven, the clock must be set.
See the Quick Start section.
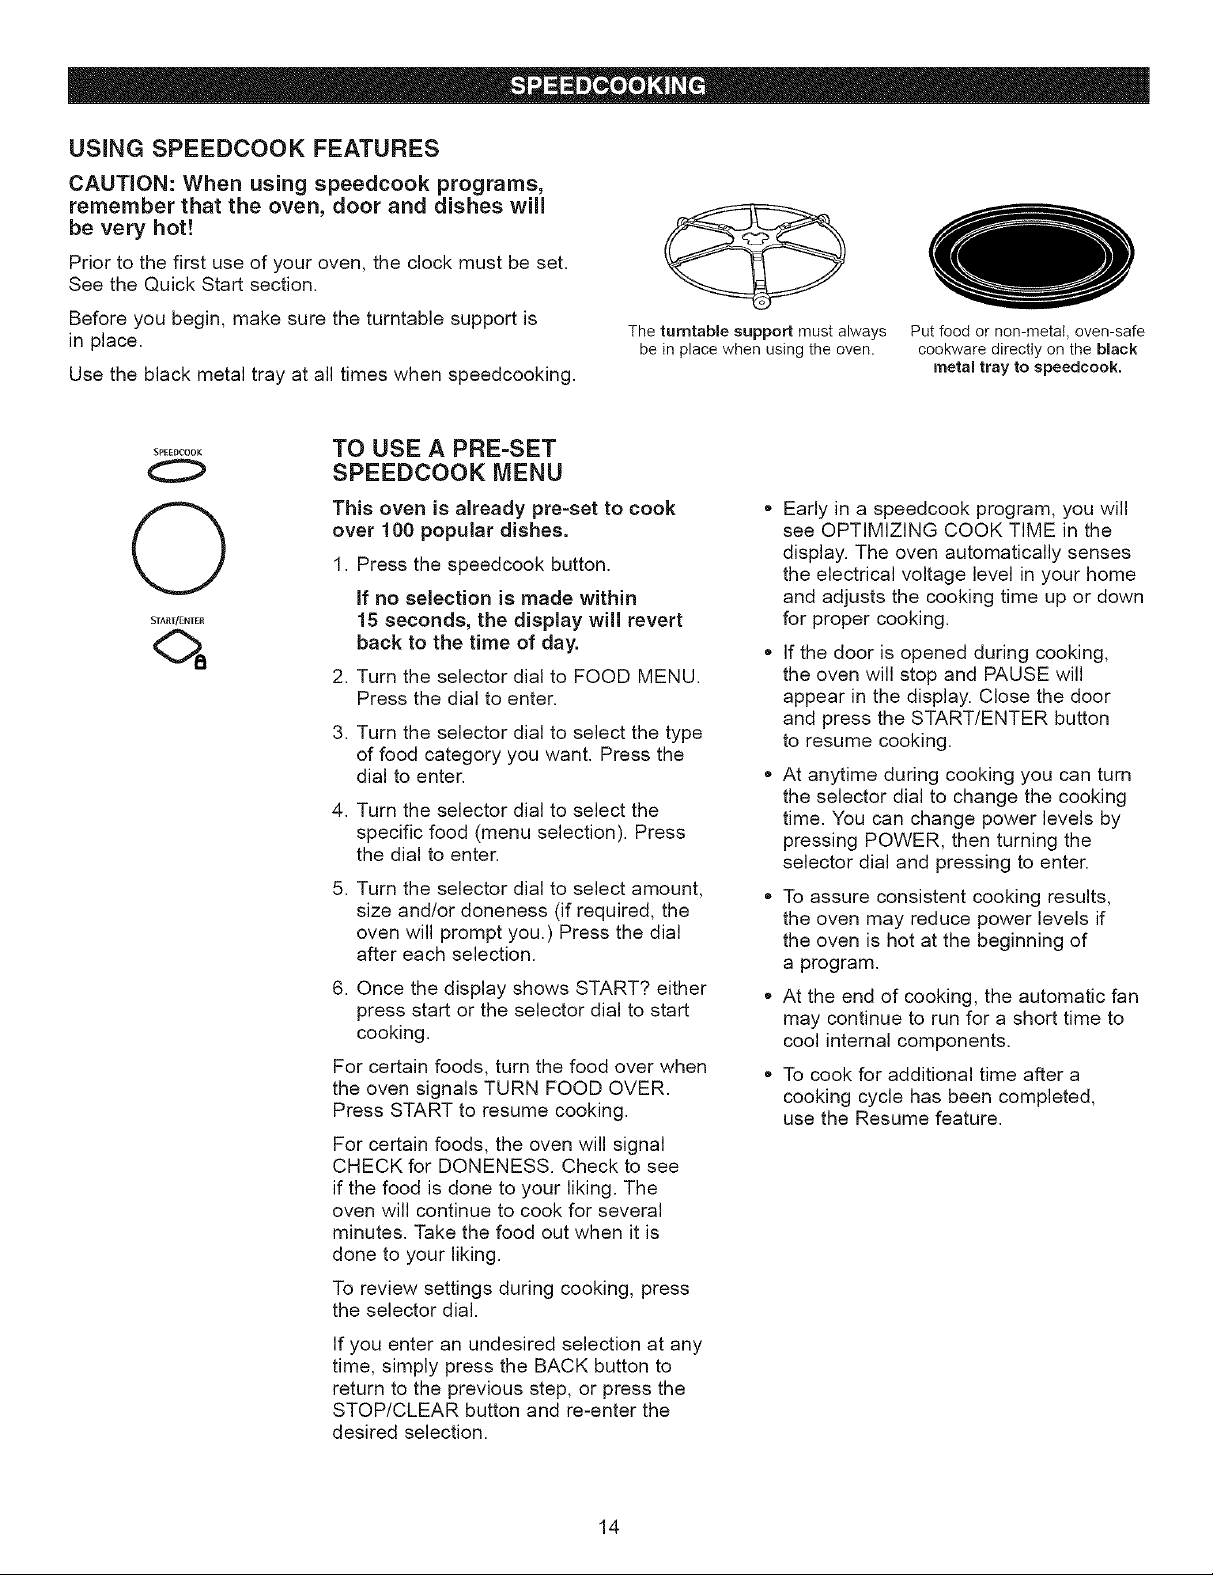
Before you begin, make sure the turntable support is
in place.
Use the black metal tray at all times when speedcooking.
SP£EDCOOK
TO USE A PRE-SET
SPEEDCOOK MENU
This oven is already pre-set to cook
over 100 popular dishes.
Q
START/INTER
1. Press the speedcook button.
if no selection is made within
15 seconds, the display will revert
back to the time of day.
2. Turn the selector dial to FOOD MENU.
Press the dial to enter.
3. Turn the selector dial to select the type
of food category you want. Press the
dial to enter.
4. Turn the selector dial to select the
specific food (menu selection). Press
the dial to enter.
.
Turn the selector dial to select amount,
size and/or doneness (if required, the
oven will prompt you.) Press the dial
after each selection.
6. Once the display shows START? either
press start or the selector dial to start
cooking.
For certain foods, turn the food over when
the oven signals TURN FOOD OVER.
Press START to resume cooking.
For certain foods, the oven will signal
CHECK for DONENESS. Check to see
if the food is done to your liking. The
oven will continue to cook for several
minutes. Take the food out when it is
done to your liking.
To review settings during cooking, press
the selector dial.
The turntable support must always
be in place when using the oven.
Early in a speedcook program, you will
see OPTIMIZING COOK TIME in the
display. The oven automatically senses
the electrical voltage level in your home
and adjusts the cooking time up or down
for proper cooking.
If the door is opened during cooking,
the oven will stop and PAUSE will
appear in the display. Close the door
and press the START/ENTER button
to resume cooking.
At anytime during cooking you can turn
the selector dial to change the cooking
time. You can change power levels by
pressing POWER, then turning the
selector dial and pressing to enter.
To assure consistent cooking results,
the oven may reduce power levels if
the oven is hot at the beginning of
a program.
At the end of cooking, the automatic fan
may continue to run for a short time to
cool internal components.
To cook for additional time after a
cooking cycle has been completed,
use the Resume feature.
Put food or non-metal, oven-safe
cookware directly on the black
metal tray to speedcook.
If you enter an undesired selection at any
time, simply press the BACK button to
return to the previous step, or press the
STOP/CLEAR button and re-enter the
desired selection.
14
Page 15
COOKING TIPS FOR GREAT
TASTING RESULTS
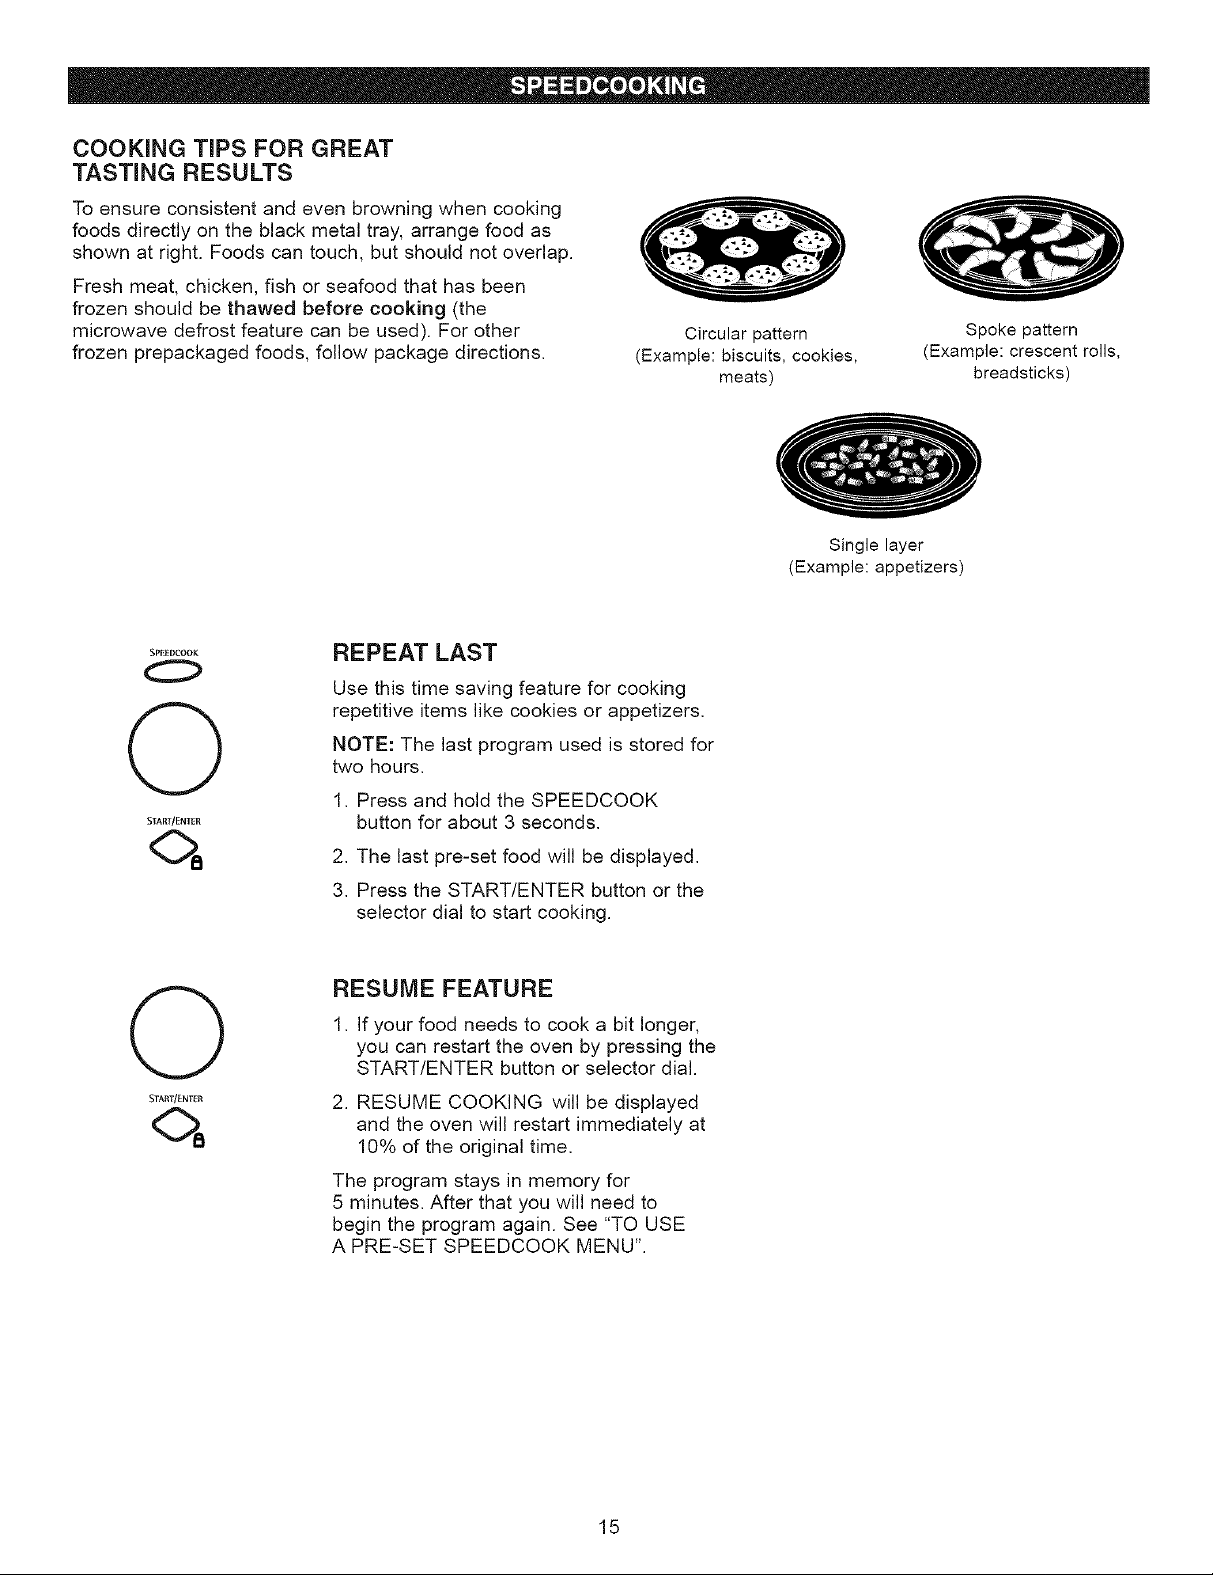
To ensure consistent and even browning when cooking
foods directly on the black metal tray, arrange food as
shown at right. Foods can touch, but should not overlap.
Fresh meat, chicken, fish or seafood that has been
frozen should be thawed before cooking (the
microwave defrost feature can be used). For other
frozen prepackaged foods, follow package directions.
Circular pattern
(Example: biscuits, cookies,
meats)
(Example: appetizers)
Spoke pattern
(Example: crescent rolls,
breadsticks)
Single layer
SPE£DCOOK
O
C)
START/ENI_R
O
START/ENTER
REPEAT LAST
Use this time saving feature for cooking
repetitive items like cookies or appetizers.
NOTE: The last program used is stored for
two hours.
1. Press and hold the SPEEDCOOK
button for about 3 seconds.
2. The last pre-set food will be displayed.
3. Press the START/ENTER button or the
selector dial to start cooking.
RESUME FEATURE
1. If your food needs to cook a bit longer,
you can restart the oven by pressing the
START/ENTER button or selector dial.
2. RESUME COOKING will be displayed
and the oven will restart immediately at
10% of the original time.
The program stays in memory for
5 minutes. After that you will need to
begin the program again. See "TO USE
A PRE-SET SPEEDCOOK MENU".
15
Page 16
SPEEDCOOK
0
0
START/ENTER
SPEEDCOOK POWER LEVEL
This oven uses power from a high intensity
halogen light, ceramic heaters and
microwaves simultaneously to cook food
from the top, bottom and interior to seal
in moisture and flavor.
When using the pre-set speedcook recipes
on the food menu, the power levels are
already selected for you. However, these
power levels can be adjusted before or
during cooking. Also, the manual cook
feature allows you to speedcook items not
on the pre-set food menu by selecting your
own cook time and power level settings.
Each power level gives you heater power
and microwave energy for a certain
percentage of the time.
UPPER POWER (U) controls both the
upper heater and microwave power. A
higher UPPER POWER setting will use
more upper heater power, browning food
faster on top. A lower UPPER POWER
setting uses more microwave power,
causing food to cook more evenly
throughout. Select a higher setting for
foods such as pizza and baked goods.
Select a lower setting for foods such as
casseroles, meat and fish.
LOWER POWER (L) controls the lower
heater. Select a higher setting to brown
foods more on the bottom. Select a lower
setting for less browning on the bottom.
1. Press the SPEEDCOOK button and
turn the dial to select FOOD MENU or
MANUAL COOK. Press the dial to enter.
2. Follow instructions from "TO USE A
PRE-SET SPEEDCOOK MENU" or
"MANUAL COOK".
.
To change the power level when
prompted by the display, turn the
dial clockwise to increase or
counterclockwise to decrease the
upper power level. Press the dial
to enter.
4. Turn the dial to change the lower power
level. Press the dial to enter.
5. Press the START/ENTER button or
the selector dial to start cooking.
If you do not want to change one of the
settings, just press the dial to move to
the next selection.
NOTE: Be careful when adjusting power
levels so that you do not over- or
undercook food,
16
Page 17
SPEEDCOOK COOKWARE
• Follow cookware suggestions on the
oven display or in the Cookbook or
Cooking Guide.
• Cookware will become hot. Oven mitts
will be needed to handle the cookware.
®
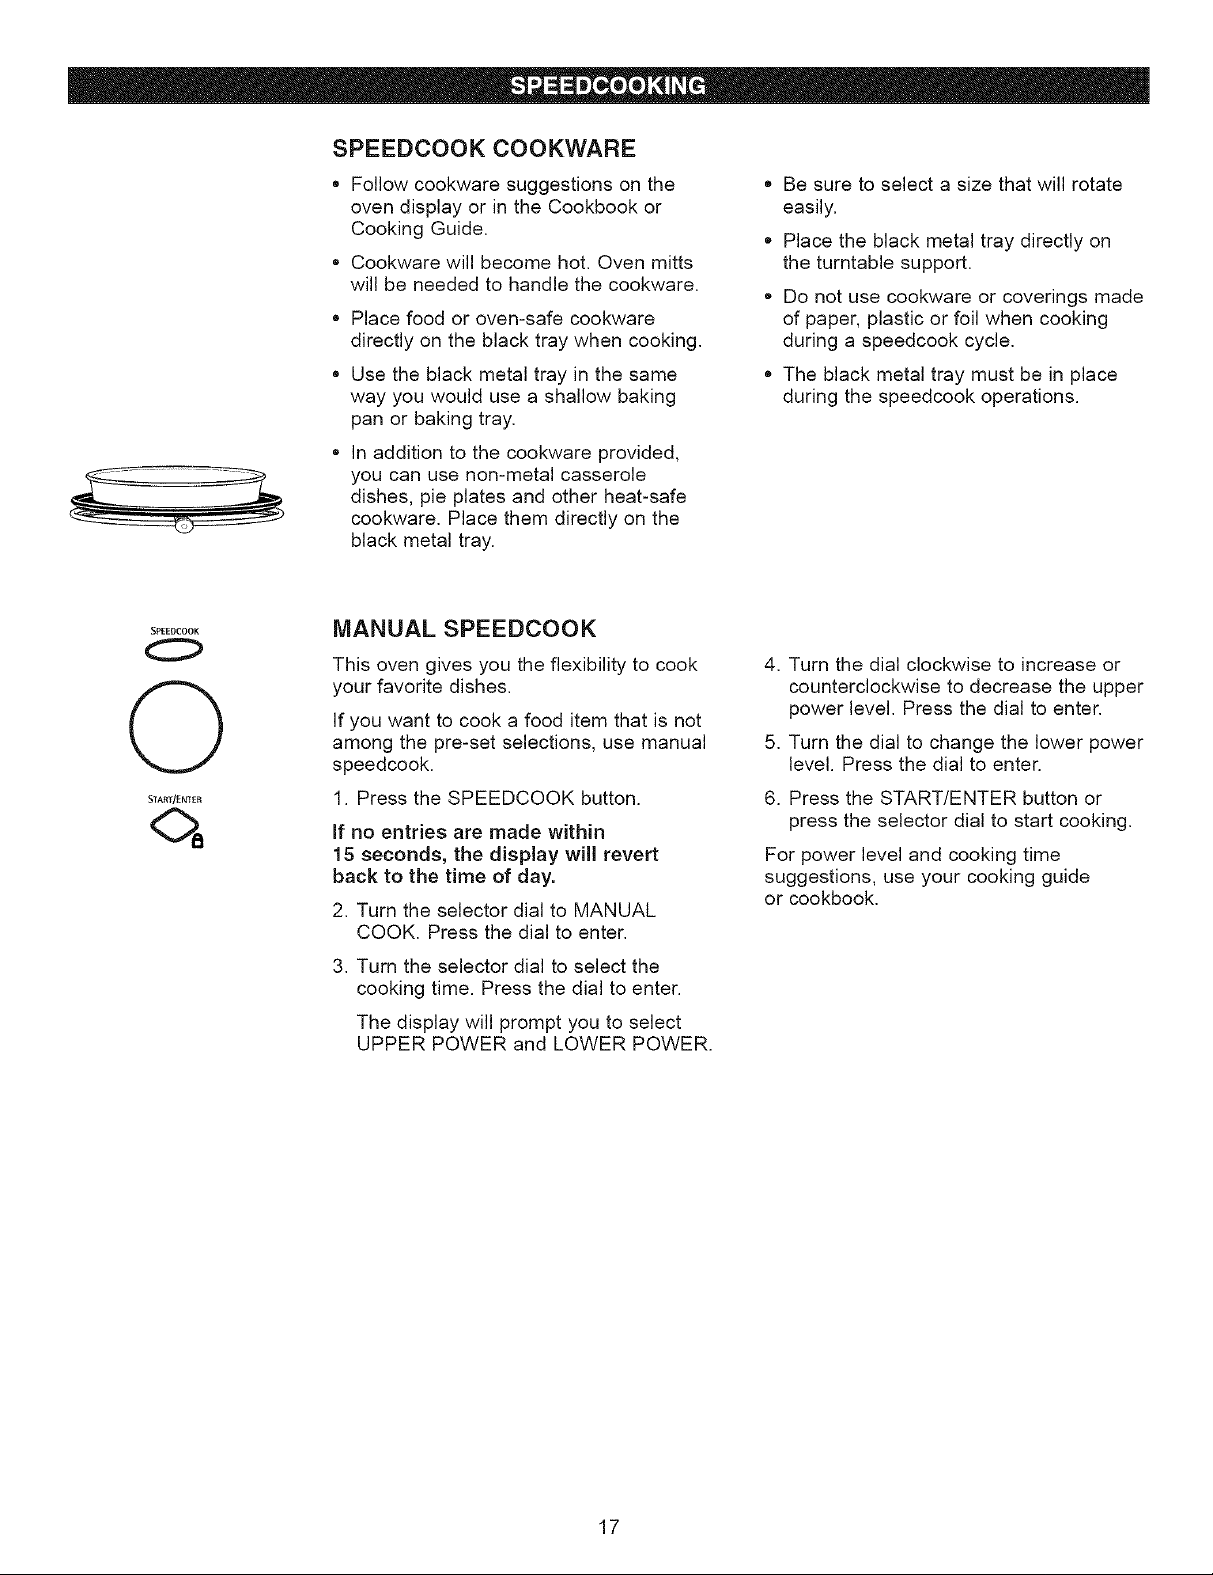
Place food or oven-safe cookware
directly on the black tray when cooking.
®
Use the black metal tray in the same
way you would use a shallow baking
pan or baking tray.
In addition to the cookware provided,
you can use non-metal casserole
dishes, pie plates and other heat-safe
cookware. Place them directly on the
black metal tray.
• Be sure to select a size that will rotate
easily.
• Place the black metal tray directly on
the turntable support.
• Do not use cookware or coverings made
of paper, plastic or foil when cooking
during a speedcook cycle.
• The black metal tray must be in place
during the speedcook operations.
SPEEDCOOK
0
0
STARI/ENtER
MANUAL SPEEDCOOK
This oven gives you the flexibility to cook
your favorite dishes.
If you want to cook a food item that is not
among the pre-set selections, use manual
speedcook.
1. Press the SPEEDCOOK button.
If no entries are made within
15 seconds, the display will revert
back to the time of day.
2. Turn the selector dial to MANUAL
COOK. Press the dial to enter.
3. Turn the selector dial to select the
cooking time. Press the dial to enter.
The display will prompt you to select
UPPER POWER and LOWER POWER.
4. Turn the dial clockwise to increase or
counterclockwise to decrease the upper
power level. Press the dial to enter.
5. Turn the dial to change the lower power
level. Press the dial to enter.
6. Press the START/ENTER button or
press the selector dial to start cooking.
For power level and cooking time
suggestions, use your cooking guide
or cookbook.
17
Page 18
SPEEDCOOK
0
SPEEDCOOK RECIPE--
TO ENTER AND SAVE
0
START/ENTFR
STOP/CLEAR
©
SPEEDCOOR
Q
Create up to 30 of your own Speedcook
recipes, or customize an existing
custom recipe to suit your tastes.
Once it's done, your food cooks just
the way you want it every time!
1. Press the SPEEDCOOK button.
2. Turn the dial until MY RECIPES
appears. Press the dial to enter.
3. Turn the dial until <empty> appears.
Press the dial to enter.
4. SELECT COOK TIME appears.
Turn the dial to select the cooking
time. Press the dial to enter.
The display will prompt you to select
UPPER POWER and LOWER POWER.
5. Turn the dial clockwise to increase or
counterclockwise to decrease the upper
power level. Press the dial to enter.
SPEEDCOOK RECIPE--
TO FiND AND USE
To find and use stored custom
speedcook recipes:
1. Press the SPEEDCOOK button.
6. Turn the dial to change the lower power
level. Press the dial to enter.
Spell out the food name by turning the
selector dial to advance through the
available characters. Press the dial
to enter a character. When you have
entered the entire name, press
START/ENTER. You may change
previously entered characters by
pressing the BACK button.
RECIPE ADDED appears. To begin
cooking, press the START/ENTER
button. To store the recipe without
cooking, press the STOP/CLEAR
button.
For power level and cooking time
suggestions, use your cooking guide
or cookbook.
START/ENTER
2. Turn dial to MY RECIPES and press
to enter.
3. Turn dial until the recipe you want is
displayed and press the dial to enter.
4. Press the START/ENTER button or
press the selector dial to start cooking.
18
Page 19
SPEED{_OOK
0
SPEEDCOOK RECIPE--
TO ADJUST OR CHANGE
0
OPTIONS
0
START/_NT_R
STOP/CLEAR
0
SPEEDCOOK
0
0
OPTIONS
0
To adjust or change stored custom
speedcook recipes:
1. Press the SPEEDCOOK button.
2. Turn the dial until MY RECIPES
appears. Press the dial to enter.
3. Turn the dial to the recipe you want
to change. Press the dial to enter.
4. Press the OPTIONS button.
5. Turn the dial to select CHANGE
RECIPE. Press the dial to enter.
SPEEDCOOK REClPEm
TO DELETE
To delete stored custom speedcook
recipes:
1. Press the SPEEDCOOK button.
2. Turn the dial until MY RECIPES
appears and press the dial to enter.
3. Turn dial to the recipe you want to
delete and press the dial to enter.
6. The display will prompt you to SELECT
COOK TIME, then select UPPER
POWER, LOWER POWER and FOOD
NAME. Turn the dial and press to enter
the appropriate settings.
(For more detailed instructions, follow
steps 4 through 7 in the section
"SPEEDCOOK RECIPE-TO ENTER
AN D SAVE". )
7. RECIPE ADDED appears. To begin
cooking, press the START/PAUSE
button. To store the recipe without
cooking, press the CLEAR/OFF button.
For power level and cooking time
suggestions, use your cooking guide
or cookbook.
4. Press the OPTIONS button.
5. Turn the dial to select DELETE RECIPE,
and press the dial to enter. This deletes
the recipe. You may now enter and save
a new recipe or press STOP/CLEAR to
return to the clock display.
19
Page 20
THINGS THAT ARE NORMAL
DURING SPEEDCOOKING
Cooking Times
• When speedcooking preprogrammed
foods, you may see OPTIMIZING COOK
TIME in the display several seconds
after you press START. The oven
automatically senses the electrical
voltage level in your home and
adjusts the cooking time up or down
for proper cooking.
Fan/Vent
The fan will come on during cooking.
At the end of cooking, the automatic
fan will continue to run for a short time,
and the display will read Oven is
Cooling. The fan will automatically
shut off when the internal parts of
the oven have cooled.
®
The exhaust fan may come on
automatically if the cooktop is in use.
®
The oven vent will emit warm air while
the oven is on.
Lights
= When the oven is on, light may be
visible around the door or outer case.
Heaters
• No preheating is required. The oven
begins cooking immediately.
= The door and inside of the oven will be
very hot. Use caution when opening the
door and removing food.
= Do not use cookware or coverings made
of paper, plastic or foil when cooking
during a speedcook cycle.
When cooking for an extended period
of time, the oven may automatically
reduce the power levels to maintain the
appropriate level of oven heat.
Sounds
• Clicks and a fan blowing are normal
sounds during cooking. The relay board
is turning components on and off.
• The heaters will dim and cycle on
and off during a speedcook cycle,
sometimes even at full power levels.
This is normal. The oven senses the
heat level and adjusts automatically.
2O
Page 21
CONVECTION BAKING
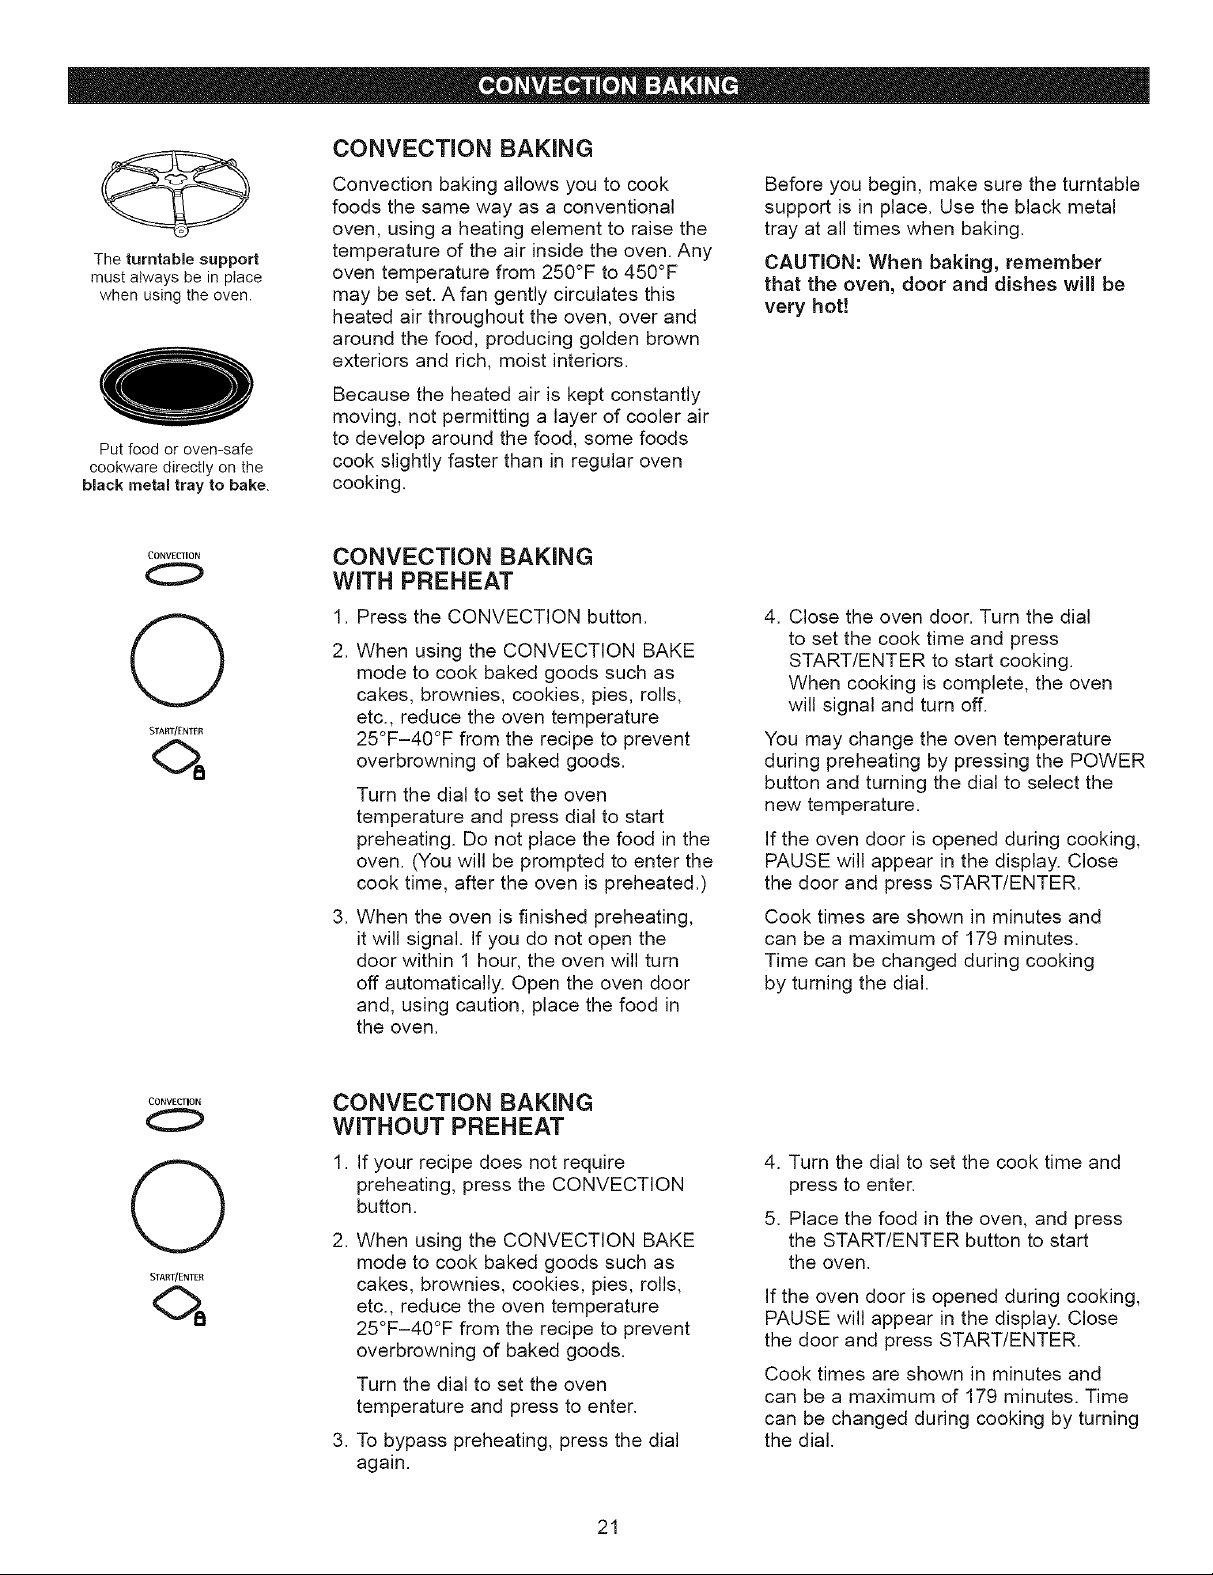
The turntable support
must always be in place
when using the oven.
Put food or oven-safe
cookware directly on the
black metal tray to bake.
CONVE_ION
0
0
STaRT/ENTFR
Convection baking allows you to cook
foods the same way as a conventional
oven, using a heating element to raise the
temperature of the air inside the oven. Any
oven temperature from 250°F to 450°F
may be set. A fan gently circulates this
heated air throughout the oven, over and
around the food, producing golden brown
exteriors and rich, moist interiors.
Because the heated air is kept constantly
moving, not permitting a layer of cooler air
to develop around the food, some foods
cook slightly faster than in regular oven
cooking.
CONVECTION BAKING
WITH PREHEAT
1. Press the CONVECTION button.
.
When using the CONVECTION BAKE
mode to cook baked goods such as
cakes, brownies, cookies, pies, rolls,
etc., reduce the oven temperature
25°F-40°F from the recipe to prevent
overbrowning of baked goods.
Turn the dial to set the oven
temperature and press dial to start
preheating. Do not place the food in the
oven. (You will be prompted to enter the
cook time, after the oven is preheated.)
.
When the oven is finished preheating,
it will signal. If you do not open the
door within 1 hour, the oven will turn
off automatically. Open the oven door
and, using caution, place the food in
the oven.
Before you begin, make sure the turntable
support is in place. Use the black metal
tray at all times when baking.
CAUTION: When baking, remember
that the oven, door and dishes will be
very hot!
4. Close the oven door. Turn the dial
to set the cook time and press
START/ENTER to start cooking.
When cooking is complete, the oven
will signal and turn off.
You may change the oven temperature
during preheating by pressing the POWER
button and turning the dial to select the
new temperature.
If the oven door is opened during cooking,
PAUSE will appear in the display. Close
the door and press START/ENTER.
Cook times are shown in minutes and
can be a maximum of 179 minutes.
Time can be changed during cooking
by turning the dial.
CONVECTION
0
0
START/ENTER
CONVECTION BAKING
WITHOUT PREHEAT
1. If your recipe does not require
preheating, press the CONVECTION
button.
.
When using the CONVECTION BAKE
mode to cook baked goods such as
cakes, brownies, cookies, pies, rolls,
etc., reduce the oven temperature
25°F-40°F from the recipe to prevent
overbrowning of baked goods.
Turn the dial to set the oven
temperature and press to enter.
.
To bypass preheating, press the dial
again.
21
4. Turn the dial to set the cook time and
press to enter.
5. Place the food in the oven, and press
the START/ENTER button to start
the oven.
If the oven door is opened during cooking,
PAUSE will appear in the display. Close
the door and press START/ENTER.
Cook times are shown in minutes and
can be a maximum of 179 minutes. Time
can be changed during cooking by turning
the dial.
Page 22
WARM/REHEAT
0
WARMING
The warming feature will keep hot,
cooked foods at serving temperature.
Always start with hot food. Use cookware
and utensils that can withstand
temperatures up to 230°R
1. Press the WARM/REHEAT button.
2. Turn the dial to select WARMING.
Press the dial to enter.
3. Turn the dial to select the oven
temperature.
LOW .................... 140-160°F
MEDIUM .............. 160-195°F
HIGH .................... 195-230°F
4. Turn the dial to CRISP or MOIST.
Press the dial to enter.
If the oven door is opened during warming,
PAUSE will appear in the display. Close
the door and press START/ENTER
Tips for Crisp Foods:
• Leave food uncovered,
,,Do not use plastic containers or
plastic wrap.
= Preheat prior to use according to
recommended times.
Tips for Moist Foods:
• Cover food with lid or aluminum foil,
= Do not put water in the warming pan.
• Do not use plastic containers or
plastic wrap.
• Preheat prior to use according to
recommended times.
To Crisp Stale items:
• Place food or dishes directly on the
black metal tray.
• Preheat on LOW setting and select
CRISR
= Check crispness after 45 minutes.
Add time as needed.
Temperature and Moisture Selection Chart
Food Type Control Setting Moisture Setting
Bread, hard rolls MEDIUM CRISP
Bread, soft rolls MEDIUM MOIST
Casseroles MEDIUM MOIST
Fried foods HIGH CRISP
Meats* and fish MEDIUM CRISP
Pancakes, waffles HIGH CRISP
Pizza HIGH CRISP
Potatoes, baked HIGH CRISP
Potatoes, mashed MEDIUM MOIST
Poultry HIGH MOIST
Tortilla Chips LOW CRISP
Vegetables MEDIUM MOIST
USDA/FSIS recommends an internal temperature of 145°F as the
minimum deneness for beef Use a portable meat thermometer to
check internal temperatures.
22
Page 23
USING THE MICROWAVE
FEATURES
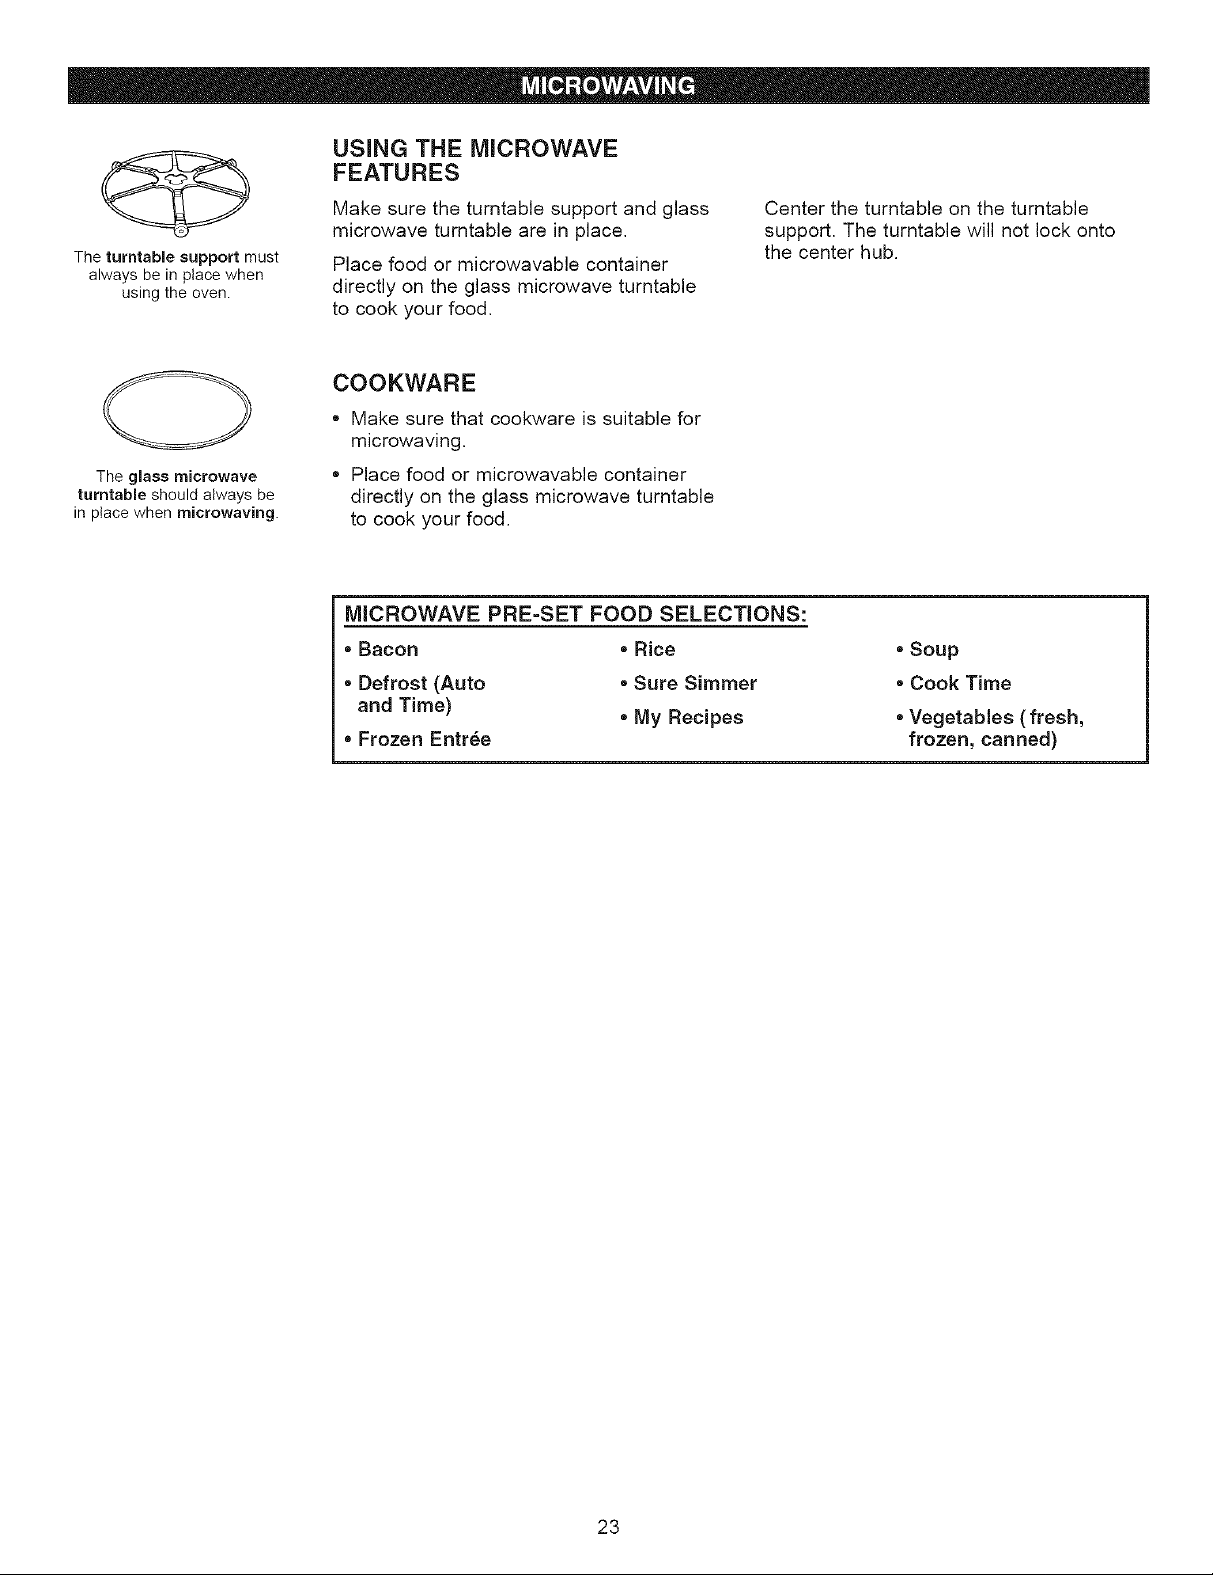
The turntable support must
always be in place when
using the oven.
The glass microwave
turntable should always be
in place when microwaving.
Make sure the turntable support and glass
microwave turntable are in place.
Place food or microwavable container
directly on the glass microwave turntable
to cook your food.
COOKWARE
= Make sure that cookware is suitable for
microwaving.
• Place food or microwavable container
directly on the glass microwave turntable
to cook your food.
MICROWAVE PRE=SET FOOD SELECTIONS:
• Bacon • Rice
=Defrost (Auto =Sure Simmer
and Time) • My Recipes
• Frozen Entree
Center the turntable on the turntable
support. The turntable will not lock onto
the center hub.
• Soup
• Cook Time
• Vegetables (fresh,
frozen, canned)
23
Page 24
MI£ROWAVE
HOW TO USE PRE-SET
MICROWAVE SELECTIONS
O
START/ENTER
_ACK
0
SIOI_C[EAR
0
1. Press the MICROWAVE button.
if no selection is made within
15 seconds, the display will revert
back to the time of day.
2. Turn the dial to find the pre-set selection
you want. Press the dial to enter.
,
If required, the oven will prompt you
to select amount, weight, size or time.
Turn the dial and press after each
selection.
4. Press the dial or the START/ENTER
button to start cooking.
COOKING TIPS
• When cooking bacon, layer strips on
a plate. Cover each layer with a paper
towel.
• When cooking vegetables, use a
microwave-safe casserole or bowl.
Cover with a lid or vented plastic wrap.
To review settings during cooking, press
the selector dial.
If you enter an undesired selection at any
time, simply press the BACK button to
return to the previous step, or press the
STOP/CLEAR button and re-enter the
desired selections.
= For frozen vegetables, follow the
package instructions for adding water.
= For fresh vegetables, add two
tablespoons of water for each serving.
MICROWAVE
0
POW£R
COOK TIME
= The power level is automatically set at
high, but you can change it for more
flexibility.
1. Press the MICROWAVE button.
2. Turn the dial to COOK TIME and press
the dial to enter.
0
START/ENTER
ADD MINUTE ADD MINUTE
3. Turn the dial to set the time and press
the dial to enter.
Press ADD MINUTE for one minute
increments of microwave cooking time.
Oven starts immediately.
4. To change the power level if you don't
want full power, press the POWER
button. Turn the dial to select. Press
the dial to enter.
5. Press the dial or the START/ENTER
button to start cooking.
You may open the door during COOK
TIME to check the food. Close the door
and press START/ENTER to resume
cooking.
You may add or subtract time by turning
the dial. You may also add time in one
minute increments by pressing ADD
MINUTE again.
24
Page 25
MICROWAVE
0
MICROWAVE SENSOR
FEATURES
Q
START/ENTEa
Some microwave features are sensor
functions that detect the increasing
humidity released during cooking. The
oven automatically adjusts the cooking
time to various types and amounts of food.
When using sensor features, do not
open the oven door until time is counting
down in the display. If the door is opened,
close it and press START/ENTER
immediately.
Do not use the Sensor Features twice
in succession on the same food portion
--it may result in severely overcooked
or burnt food. If food is undercooked
after the countdown, use COOK TIME
in the microwave selector for additional
cooking time.
To subtract time from a sensor program:
Within the first 30 seconds after the oven
starts, turn the dial counterclockwise to
subtract 10% (-) from the automatic time.
Additional turning will subtract 20% (- -)
from the automatic time.
To add time to a sensor program:
Within the first 30 seconds after the oven
starts, turn the dial clockwise to add 10%
(+) to the automatic time. Additional turning
will add 20% (+ +) to the automatic time.
If you have been speedcooking or
baking and the oven is already hot, it
may indicate that it is too hot for sensor
cooking. Of course, you can always
continue with the non-sensor functions.
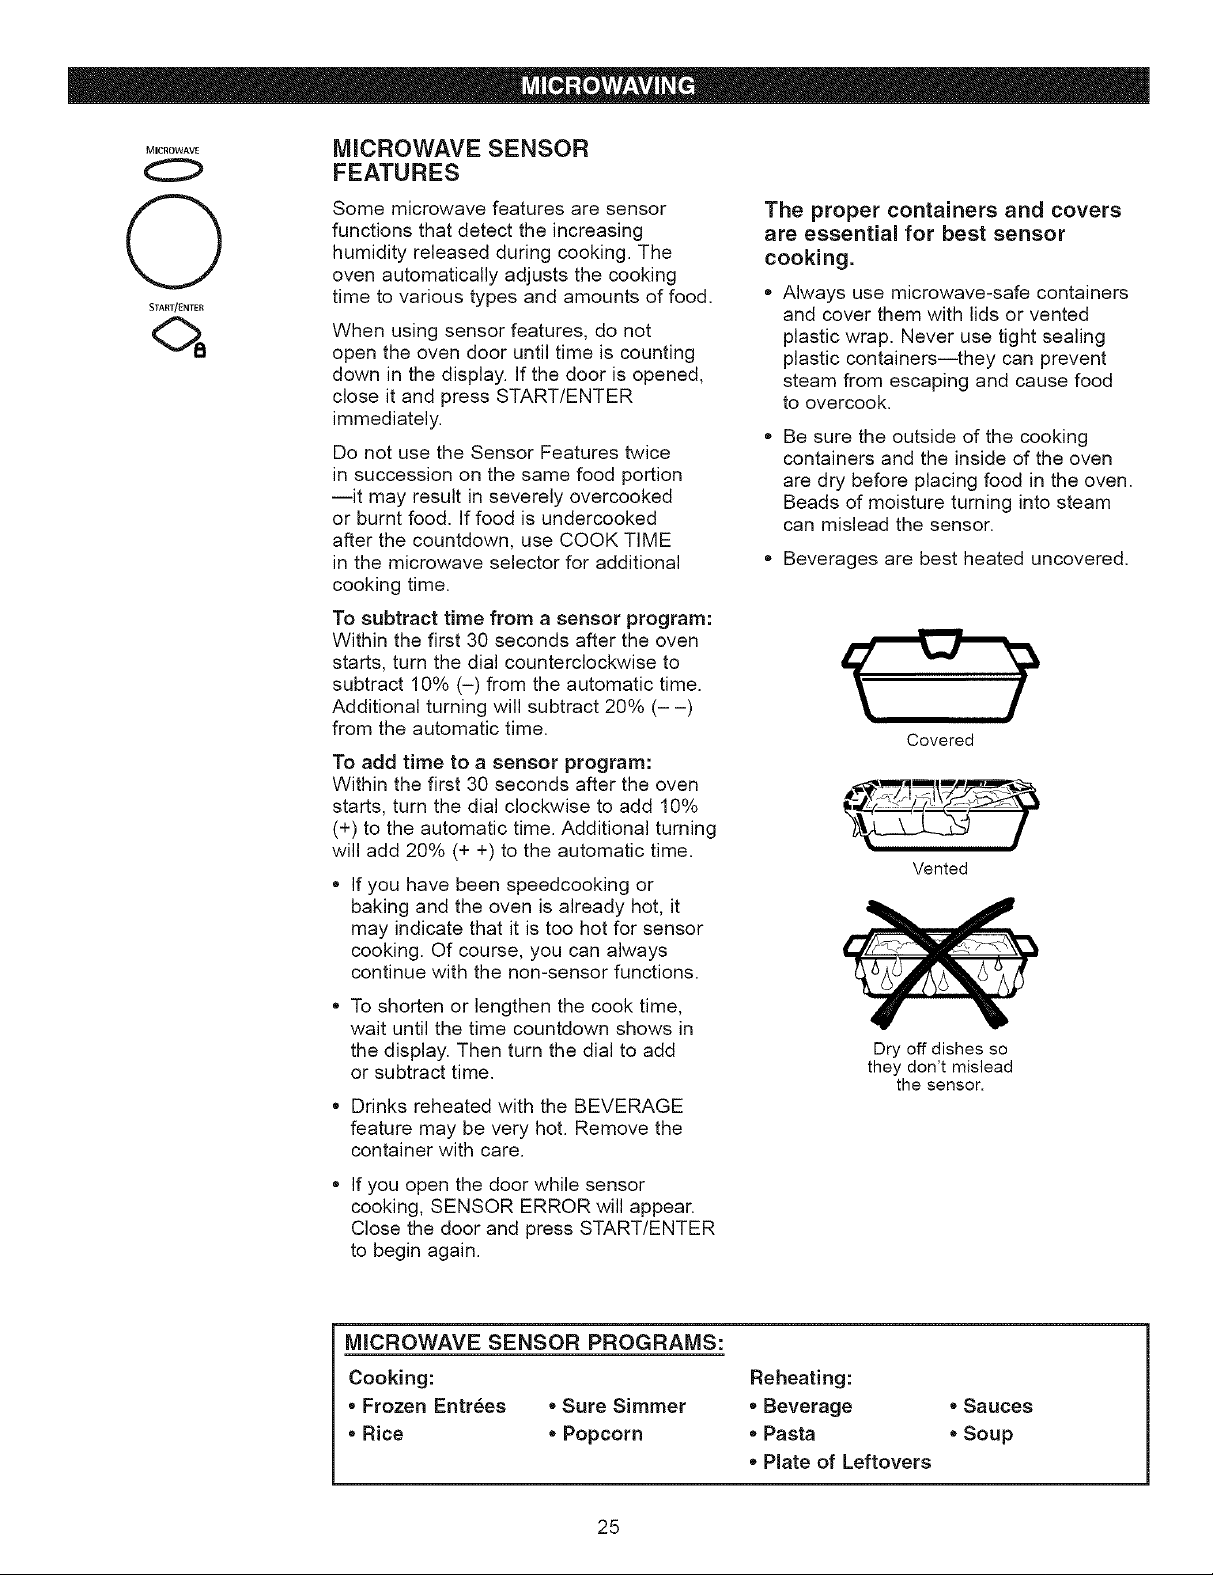
The proper containers and covers
are essential for best sensor
cooking.
• Always use microwave-safe containers
and cover them with lids or vented
plastic wrap. Never use tight sealing
plastic containers--they can prevent
steam from escaping and cause food
to overcook.
• Be sure the outside of the cooking
containers and the inside of the oven
are dry before placing food in the oven.
Beads of moisture turning into steam
can mislead the sensor.
• Beverages are best heated uncovered.
Covered
Vented
To shorten or lengthen the cook time,
wait until the time countdown shows in
the display. Then turn the dial to add
or subtract time.
• Drinks reheated with the BEVERAGE
feature may be very hot. Remove the
container with care.
If you open the door while sensor
cooking, SENSOR ERROR will appear.
Close the door and press START/ENTER
to begin again.
MICROWAVE SENSOR PROGRAMS:
Cooking:
=Frozen Entr_es =Sure Simmer
=Rice =Popcorn
25
Dry off dishes so
they don't mislead
the sensor.
Reheating:
=Beverage
• Pasta
• Plate of Leftovers
• Sauces
,Soup
Page 26

Polo.. POPCORN
0
start/Enter
Use only with
prepackaged popcorn
weighing
1.75 to 3.5 ounces.
To use the Popcorn feature:
.
Follow package instruction, using
COOK TIME if the package is less than
1.75 ounces or larger than 3.5 ounces.
Place the package of popcorn in the
center of the oven.
2. Press POPCORN.
3. Press the dial or press the
START/ENTER button to start cooking.
NOTE: Do not use this feature twice
in succession on the same food portion
-- it may result in severely overcooked
or burnt food. If food is undercooked
after the countdown, use COOK TIME
in the microwave selector for additional
cooking time.
If you open the door while POPCORN is
displayed, a SENSOR ERROR message
will appear. Close the door and press
START/ENTER immediately.
MICROWAVE
0
StaRT/ENTER
SURE SIMMER
The Sure Simmer feature will bring 1-4
quarts of foods such as soups and stews
to a boil, then allow them to simmer for
up to 2 hours. Cover the dish with a lid.
1. Place covered food in the oven.
2. Press the MICROWAVE button.
3. Turn the dial to SURE SIMMER.
Press the dial to enter.
4. Turn the dial to set the amount of
time you want the food to simmer
after boiling.
5. Press the dial or the START/ENTER
button to start cooking.
The oven signals when the food begins to
boil and the simmer time begins counting
down. Stir the food if necessary.
Do not open the door until time is counting
down in the display. If the door is opened,
close it and press START/ENTER
immediately.
NOTE: Do not use this feature twice
in succession on the same food portion
-- it may result in severely overcooked
or burnt food. If food is undercooked
after the countdown, use COOK TIME
in the microwave selector for additional
cooking time.
26
Page 27

MICROWAVE
0
0
START/ENTER
RICE
The Rice feature will cook 1/2-2 cups of
long-cooking rice. Follow the package
instructions for the amount of water to add.
Use an oversized microwaveable dish and
cover the dish with a lid.
1. Place covered food in the oven.
2. Press the MICROWAVE button.
3. Turn the dial to RICE. Press the dial
to enter.
4. Press the dial or the START/ENTER
button to start cooking.
The oven signals when steam is sensed
and the time remaining begins counting
down. Stir the food if necessary.
Do not open the door until time is counting
down. If the door is opened, close it and
press START/ENTER immediately.
NOTE: Do not use this feature twice
in succession on the same food portion
-- it may result in severely overcooked
or burnt food. If food is undercooked
after the countdown, use COOK TIME
in the microwave selector for additional
cooking time.
MICROWAV£
O
Q
S_'ART/ENTER
FROZEN ENTREE
The Frozen Entree feature will cook
an 8-22 ounce frozen entree.
1. Loosen one corner of the plastic cover
on the entree and place in the oven
2. Press the MICROWAVE button.
3. Turn the dial to FROZEN ENTREE.
Press the dial to enter.
4. Press the dial or the START/ENTER
button to start cooking.
The oven signals when steam is sensed
and the time remaining begins counting
down. Stir the food if necessary.
Do not open the door until time is counting
down. If the door is opened, close it and
press START/ENTER immediately.
NOTE: Do not use this feature twice
in succession on the same food portion
-- it may result in severely overcooked
or burnt food. If food is undercooked
after the countdown, use COOK TIME
in the microwave selector for additional
cooking time.
27
Page 28
Wa"M_"E"_A' REHEATING
The REHEAT feature reheats servings
of previously cooked foods or a plate
of leftovers.
O
START/ENTER
1. Press the WARM/REHEAT button.
2. Turn dial to select REHEATING.
Press the dial to enter.
3. Turn dial to find the food you want
to reheat. Press the dial to enter.
.
If required, the oven will prompt you
to select the amount. Turn the dial to
select and press to enter.
.
Press the dial or the START/ENTER
button to start reheating.
To review settings during cooking,
press the selector dial.
Reheated foods may have wide
variations in temperature. Some
areas may be extremely hot.
REHEAT GUIDE
NOTE: Do not use this feature twice
in succession on the same food portion
-- it may result in severely overcooked
or burnt food. If food is not hot enough
after the countdown, use COOK TIME
in the microwave selector for additional
reheating time.
It is best to use COOK TIME and not
REHEAT for these foods:
• Bread products
• Foods that must be reheated uncovered
• Foods that need to be stirred of turned
• Foods calling for a dry look or crisp
surface after reheating
POWER
O
O
STaRT/EnTER
Food Type
Beverage (8-10 oz.)
Pasta (8-12 oz.)
Pizza Slices (1-4 slices)
Plate of Leftovers
(2-3 foods, 4 oz. each)
Sauces (4-8 oz.)
Soup (8-20 oz.)
MICROWAVE POWER LEVEL
1. First, follow directions for COOK TIME,
TIME DEFROST orADD MINUTE.
2. Press the POWER button.
3. Turn the dial clockwise to increase and
counterclockwise to decrease the power
level. Press the dial to enter.
4. Press the dial or the START/ENtER
button to start cooking.
• You can change the power level before
or during a cooking program.
Comments
Do not cover.
Cover with wax paper, lid or vented plastic wrap.
Do not cover.
Cover with wax paper or vented plastic wrap.
Cover with lid or vented plastic wrap.
Cover with lid or vented plastic wrap.
Here are some examples of uses for
various power levels:
High 10: Fish, bacon, vegetables, boiling
liquids.
Med-High 7: Gentle cooking of meat and
poultry; baking casseroles and reheating.
Medium 5: Slow cooking and tenderizing
for stews and less tender cuts of meat.
Low 2 or 3: Defrosting; simmering;
delicate sauces.
Warm 1: Keeping food warm; softening
butter.
28
Page 29
MICROWAVE
MICROWAVE RECIPE--
TO ENTER AND SAVE
Q
START_ENTER
BACK
0
STOP/CLEAR
©
MICROWAVE
0
Q
START/INTER
Create and store up to 10 of your own 6.
microwave recipes.
1. Press the MICROWAVE button.
2. Turn dial until MY RECIPES appears.
Press the dial to enter.
3. Turn dial until <empty> appears.
Press the dial to enter.
4. SELECT COOK TIME appears. Turn
the dial to select the cooking time you
want. Press the dial to enter.
5. Turn the dial to change the power level
and press to enter.
MICROWAVE RECIPE--
TO FIND AND USE
To find and use stored custom
microwave recipes:
1. Press the MICROWAVE button.
2. Turn dial to MY RECIPES and press
the dial to enter.
Spell out the food name by turning the
selector dial to advance through the
available characters. Press the dial
to enter a character. When you have
entered the entire name, press
START/ENTER. You may change
previously entered characters by
pressing the BACK button.
7.
RECIPE ADDED appears. To begin
cooking, press the START/ENTER
button or press the STOP/CLEAR
button to store the recipe without
cooking.
4. Turn dial to your recipe and press the
dial to enter.
5. Press the START/ENTER button or
the selector dial to start cooking.
3. FOOD NAME and the recipe names
you entered will appear.
29
Page 30

MICROWAVE MICROWAVE RECIPE--
TO ADJUST OR CHANGE
microwave recipes:
O To adjust or change stored custom 6.
o_,o,s 2. Turn dial to MY RECIPES and press
5TAST/ENTER
STOP/CLEAR
0
1. Press the MICROWAVE button. 7.
the dial to enter. 8.
3. Turn the dial to the recipe you want
to change. Press the dial to enter.
4. Press the OPTIONS button.
5. Turn the dial to select CHANGE
RECIPE. Press the dial to enter.
Turn the dial to select the cook time
and press the dial to enter.
Turn the dial to select the power level
and press the dial to enter.
RECIPE ADDED appears. To begin
cooking, press the START/ENTER
button or press the STOP/CLEAR
button to store the recipe without
cooking.
MICROWAVE
O
OPTIONS
O
STOP/CLEAR
0
MICROWAVE RECIPE--
TO DELETE
To delete stored custom microwave
recipes:
1. Press the MICROWAVE button.
2. Turn dial to MY RECIPES and press
the dial to enter.
3. Turn the dial to the recipe you want
to delete. Press the dial to enter.
4. Press the OPTIONS button.
5. Turn the dial to select DELETE
RECIPE, and press the dial to enter.
This deletes the recipe. You may now
enter and save a new recipe or press
STOP/CLEAR to return to the clock
display.
3O
Page 31

DEFROST
AUTO DEFROST
0
SIART/ENTER
DEFROST
0
0
START/ENTER
Auto Defrost automatically sets the
defrosting times and power levels to give
even defrosting results for meats, poultry
and fish weighing up to six pounds.
1. Remove food from the package and
place it on a microwave-safe dish.
2. Press the DEFROST button.
3. Turn the dial to DEFROST-AUTO.
Press the dial to enter.
4. Turn the dial to the food weight,
using the Conversion Guide at right.
For example, dial 1.2 for 1.2 pounds
(1 pound, 3 oz.) Press the dial to enter.
6. Turn the food over when the oven
signals TURN FOOD OVER.
• Remove defrosted meat or shield warm
areas with small pieces of foil for even
defrosting.
TIME DEFROST
Use Time Defrost to defrost for a selected
length of time.
1. Press the DEFROST button.
2. Turn the selector dial to DEFROST-TIME
Press the dial to enter.
3. Turn the dial to select the time you
want. Press the dial to enter.
4. Press the dial or START/ENTER button
to start defrosting.
5. Turn the food over when the oven
signals TURN FOOD OVER.
,,After defrosting, most meats need to
stand 5 minutes to complete defrosting.
Large roasts should stand for about
30 minutes.
Conversion Guide
If the weight of food is stated in pounds
and ounces, the ounces must be
converted to tenths (.1) of a pound.
Weight of Food Enter Food Weight
in Ounces (tenths of a pound)
1-2 .1
3 .2
4-5 .3
6-7 .4
8 .5
9-10 .6
11 .7
12-13 .8
14-15 .9
Power level is automatically set at 3, but
can be changed. To change the power
levels, see the Microwave Power Level
section. You can defrost small items
quickly by raising the power level after
entering the time. Power level 7 cuts the
total defrosting time in about half; power
level 10 cuts the total time to about 1/3.
When defrosting at high power levels,
food will need more frequent attention
than usual.
DEFROST
0
S1ARt/ENTER
BREAD DEFROST
Bread Defrost automatically sets the
defrosting times and power levels for
defrosting breads.
Remove any wire twist-ties from package
and place bread on a microwave-safe
dish. Small servings of bread should be
removed from the packaging.
1. Press the DEFROST button.
2. Turn dial to DEFROST-BREAD.
Press the dial to enter.
3. Turn the dial to enter the food weight.
Press the dial to enter.
4. Press the dial or the START/ENTER
button to start defrosting.
31
5. Turn the food over when the oven
signals TURN FOOD OVER.
After defrosting, let bread stand
5 minutes to complete defrosting.
Bread Defrost Chart
Bread Type Approximate Weight
1 Small Bagel 0.2 Ib
1 Large Bagel 0.3 Ib
4 Slices of Bread 0.2 Ib
1 Loaf of Bread 1.0 Ib
1 Dinner Roll 0.2 Ib
1 Hamburger/Hot Dog Bun 0.2 Ib
1 Small Muffin 0.2 Ib
1 Large Muffin 0.3 Ib
Page 32

DEFROSTING TIPS
Use Auto Defrost for meat, poultry and
fish. Use Time Defrost for most other
frozen foods. Use Bread Defrost for
bread products.
• Foods frozen in paper or plastic can be
time defrosted in the package, but foods
should be taken out of the package when
using Auto Defrost. Small servings of
bread should be removed from the
package when using Bread Defrost.
Closed packages should be slit, pierced
or vented after food has partially
defrosted. Plastic storage containers
should be partially uncovered.
• Family-size, prepackaged frozen dinners
can be defrosted and microwaved. If the
food is in a foil container, transfer it to
a microwave-safe dish.
THINGS THAT ARE NORMAL
Interference
• TV/radio interference might be noticed
while using the microwave. Similar to
the interference caused by other small
appliances, it does not indicate a
problem with the microwave. Move
the radio or TV as far away from the
microwave as possible, or check the
position of the TV/radio antenna.
• Foods that spoil easily should not be
allowed to sit out for more than one hour
after defrosting. Room temperature
promotes the growth of harmful bacteria.
For more even defrosting of larger
foods, such as roasts, use Auto Defrost.
Be sure large meats are completely
defrosted before cooking.
When defrosted, food should be cool
but softened in all areas. If still slightly
icy, return to the microwave very briefly,
or let it stand a few minutes.
Oven Heat
• Cookware may become hot because of
heat transferred from the heated food.
Oven mitts may be needed to handle
the cookware.
• Steam or vapor may escape from
around the door.
Sounds
• You may hear a dull thumping sound
while the oven is operating.
32
Page 33

"FOOD IS READY"
To remind you that you have food in the
oven, the oven will display FOOD IS
READY and beep once a minute until
you either open the oven door or press
the STOP/CLEAR button.
REVIEW
Use this feature to review the current
cooking selections you have set.
Press the selector dial at any time during
cooking.
O_flONS
OPIIONS
OPTIONS
BEEPER VOLUME
Use this feature to adjust the volume of
the beeper or to turn the beeper off.
1. Press the OPTIONS button.
2. Turn the dial to BEEPER VOLUME and
press the dial to enter.
CLOCK
The clock must be set before you can
use your oven for the first time (see the
"Quick Start" section for instructions).
1. To change the clock time, press the
OPTIONS button and turn the dial to
CLOCK. Press the dial to enter.
2. Turn the dial to set hours. Press the
dial to enter.
CLOCK DISPLAY ON/OFF
Use this feature to turn your clock
display on or off.
1. Press the OPTIONS button.
3. Turn the dial to select the beeper volume.
Press the dial to enter.
3. Turn the dial to set minutes. Press the
dial to enter.
4. Turn the dial to select AM or PM. Press
the dial to enter.
2. Turn the dial to CLOCK DISPLAY. Press
the dial to enter.
3. Turn the dial to select ON or OFF. Press
the dial to enter.
OPTIONS
DISPLAY SPEED
You can change the display scroll
speed if the message scroll is too
slow or too fast.
1. Press the OPTIONS button.
33
2. Turn the dial to DISPLAY SPEED. Press
the dial to enter.
3. Turn the dial to select the scroll speed.
Press the dial to enter.
Page 34

OPTIONS
0
0
AUTO NIGHT LIGHT
Use this feature to program the on/off
time for an automatic night light.
To set the Night Light:
1. Press the OPTIONS button.
2. Turn the dial to NIGHT LIGHT. Press
the dial to enter.
3. Turn the dial to SET NITE LIGHT. Press
the dial to enter.
4. Set hours, minutes, and AM/PM for the
on and off times. Press the dial after
each selection.
To check the Night Light setting:
1. Press the OPTIONS button.
2. Turn the dial to NIGHT LIGHT. Press
the dial to enter.
3. Turn the dial to CHECK SETTING.
Press the dial to enter.
To cancel the Night Light setting:
1. Press the OPTIONS button.
2. Turn the dial to NIGHT LIGHT. Press
the dial to enter.
3. Turn the dial to CLEAR SETTING.
Press the dial to enter.
OPTIONS
0
OPTIONS
0
REMINDER
Use this feature like an alarm clock to
help you keep up with things to do.
To set the Reminder:
1. Press the OPTIONS button.
2. Turn the dial to REMINDER and press
the dial to enter.
3. Turn the dial to SET. Press the dial
to enter.
4. Set the hours, minutes and AM/PM
for the on and off times. Press the dial
after each selection.
HELP
Use this feature to find out more about
your oven and its features. The display
will show a description for the program
you have chosen.
To review the Reminder setting:
1. Press the OPTIONS button.
2. Turn the dial to REMINDER and press
the dial to enter.
3. Turn the dial to REVIEW. Press the dial
to enter.
To clear the Reminder setting:
1. Press the OPTIONS button.
2. Turn the dial to REMINDER and press
the dial to enter.
3. Turn the dial to CLEAR. Press the dial
to enter.
1. Press the OPTIONS button.
2. Turn the dial to HELR Press the dial
to enter.
3. Turn the dial to select the feature name.
Press the dial to enter.
Features found in the HELP function.
Add Minute Defrost (Auto)
Adjust Defrost (Bread)
Back Defrost (Time)
Bacon Display Speed
Beeper Volume Food Menu
Beverage Frozen Entree
Child Lockout Help
Clear/Off Kitchen Timer
Clock Manual Cook
Clock Display Microwave
Convection My Recipes
Cook Time Night Light
34
Options Soup
Pasta Speedcook
Pizza Start/Enter
Plate Stop/Clear
Popcorn Sure Simmer
Power Surface Light
Reminder Vegetables (Canned)
Repeat Last Vegetables (Fresh)
Resume Vegetables (Frozen)
Review Vent Fan
Rice Warm/Reheat
Sauce
Page 35

START/ENTER
CHILD LOCKOUT
You may lock the control panel
to prevent the oven from being
accidentally started or used by
children.
SURFACE LIGHT
Press and hold START/ENTER for about
3 seconds to lock and unlock.
When the control panel is locked, Control
Panel LOCKED will be displayed briefly
any time a button or the dial is pressed,
0
0
O
O
KITCHEN TIMER
O
O
Use to light your cooktop.
Press the C_ button, then turn the dial
if you want to change the brightness.
Press the C_ button again to turn the
light off.
VENT FAN
The vent fan removes steam and other
surface vapors from cooking.
Press the _ button, then turn the dial
if you want to change the fan speed.
Press the _1_button again to turn the
fan off.
KITCHEN TIMER
Use this feature anytime you need
a general purpose timer. It can even
be used while cooking in the oven.
1. Press the KITCHEN TIMER button.
2. Turn the dial to select the minutes.
Press the dial to enter.
3. Turn the dial to select the seconds.
Press the dial to enter.
To turn the Night Light on, press and hold
the C_ button for about 3 seconds.
To turn the Night Light off, press the
C_ button.
To pause, press KITCHEN TIMER. To
restart, press KITCHEN TIMER again.
To cancel, press and hold the KITCHEN
TIMER button down for about 3 seconds.
AUTOMATIC FAN
An automatic fan feature protects the
oven from too much heat rising from
the cooktop below it and from too much
heat inside the oven cavity.
It automatically turns on if it senses
too much heat.
35
If you have turned the fan on, you may
find that you cannot turn it off. The fan will
automatically turn off when the internal
parts are cool. It may stay on for 30
minutes or more after the cooktop and
oven controls are turned off.
Page 36

HELPFUL HINTS
An occasional thorough wiping with
a solution of baking soda and water
keeps the inside fresh.
Be sure the power is off before
cleaning any part of this oven.
HOW TO CLEAN THE iNSiDE
Walls, floor, inside window,
metal and plastic parts
on the door
Turntable support
Do not use the oven without
the turntable support in ptace.
Some spatters can be removed with a
paper towel, others may require a damp
soapy cloth. Remove greasy spatters with
a damp sudsy cloth, then rinse with a
damp cloth.
Do not spray or splash liquids directly
into the heater areas.
Do not use abrasive cleaners or sharp
utensils on oven walls.
Never use a commercial oven cleaner
on any part of your oven.
REMOVABLE TURNTABLE
SUPPORT
The area underneath the turntable support
should be cleaned frequently to avoid
odors and smoking during a cooking cycle.
The turntable support can be broken
if dropped. Wash carefully in warm, sudsy
water. Dry completely and replace.
Do not clean the inside of the oven with
metal scouring pads. Pieces can break off
the pad, causing electrical shock.
Some food or liquids may fall into the
heater areas. The heaters will cook most
of the food away. Any remaining residue
will not affect cooking.
To replace the turntable support, place its
center over the hub in the center of the
oven and turn it until it seats into place.
Black metal tray
Glass microwave
turntable
TRAY AND TURNTABLE
To prevent breakage, allow the black metal
tray and glass microwave turntable to cool
completely before cleaning. Wash carefully
in warm, sudsy water or in the dishwasher.
36
A soap-filled scouring pad can also be
used to clean the black metal tray.
Do not use abrasives, as they may
damage the finish.
Page 37

HOW TO CLEAN THE OUTSIDE
We recommend against using cleaners
with ammonia or alcohol, as they can
damage the appearance of the oven.
If you choose to use a common
household cleaner, first apply the
cleaner directly to a clean cloth,
then wipe the soiled area.
Case
Clean the outside with a sudsy cloth.
Rinse and then dry. Wipe the window
clean with a damp cloth.
Glass Door (on some models)
Wipe with a clean damp sponge. Dry
thoroughly. Do not use cleaning sprays,
large amounts of soap and water, abrasives
or sharp objects on the panel--they can
damage it.
Stainless Steel Control Panel and
Door (on some models)
Do not use a steel wool pad; it will scratch
the surface.
To clean the stainless steel surface, use
a hot, damp cloth with a mild detergent
suitable for stainless steel surfaces. Use
a clean, hot, damp cloth to remove soap.
Dry with a dry, clean cloth.
If food soil remains, try a general kitchen
cleaner, such as Fantastik_; Simple Green s`
or Formula 4096!
For hard-to-clean soil, use a standard
stainless steel cleaner, such as Bon-AmP
or CameoS!
Apply cleaner with a damp sponge. Use a
clean, hot, damp cloth to remove cleaner.
Dry with a dry, clean cloth. Always scrub
lightly in the direction of the grain.
After cleaning, use a stainless steel
polish, such as Stainless Steel Magic _"_',
Revere Copper and Stainless Steel
Cleaner _R_'or Wenol All Purpose Metal
PolisheR!Follow the product instructions
for cleaning the stainless steel surface.
Bottom
Clean off the grease and dust on the
bottom often. Use a solution of warm
water and detergent.
Vent Grill
Use warm soapy water and a dishcloth to
wipe off the grill, tf desired, use cotton
swabs to get in between the grill louvers.
Door Frame
It's important to keep the area clean
where the door seals against the oven.
Use only mild, non-abrasive detergents
applied with a clean sponge or soft cloth.
Rinse well.
Remove screw
5J
COOKTOP LIGHT/NIGHT LIGHT
1. To replace the cooktop light/night light,
first disconnect the power at the main
fuse or circuit breaker panel, or pull
the plug.
2. Remove the screw from the side of the
light compartment cover and lower the
cover until it stops.
3. Be sure the bulb is cool before removing.
Gently pull the bulb from the receptacle.
37
Replace the burned-out bulb with a
12 volt, 20watt halogen bulb available
from your nearest Sears Part &
Repair Center.
Call 1-800-4-MY-HOME. _"_
4. Push the new bulb straight into the
receptacle all the way, then raise the
light cover and replace the screw.
Connect electrical power to the oven.
important - when replacing the bulb in
the receptacle, be sure to hold the bulb
with a clean cloth or tissue.
Oils from the skin can be deposited on
the glass surface of the bulb and shorten
it's life.
Page 38

Charcoal filter (on some models)
L
Reusable vent filters
(on all models)
VENT FAN
The vent fan has two metal reusable
vent filters.
Models that recirculate air back into
the room aJsouse a charcoaJ filter.
REUSABLE VENTFILTERS
The metal filters trap grease released by
foods on the cooktop. They also prevent
flames from foods on the cooktop from
damaging the inside of the oven.
REMOVING AND CLEANING
THE FILTERS
To remove, slide them to the rear using
the tabs. Pull down and out.
To clean the vent filters, soak them and
then swish around in hot water and
detergent. Don't use ammonia or ammonia
products because they will darken the
metal. Light brushing can be used to
remove embedded dirt.
For this reason, the filters must always be
in place when the hood is used. The vent
filters should be cleaned once a month,
or as needed.
Rinse, shake and let dry before replacing.
To replace, slide the filters into the frame
slots on the back of each opening. Press
up and to the front to lock into place.
38
Page 39

CHARCOAL FILTER
The charcoal filter cannot be cleaned.
it must be replaced. Order Part No.
WB2X9883 available from your
nearest Sears Parts & Repair Center.
Call 1-800-4-MY-HOME2
If the model is not vented to the outside,
the air will be recirculated through a
disposable charcoal filter that helps
remove smoke and odors.
The charcoal filter should be replaced
when it is noticeably dirty or discolored
(usually after 6 to 12 months, depending
on usage).
/t
Remove 2 grille screws
to remove the grille
J
F
TO REMOVE THE
CHARCOAL FILTER
To remove the charcoal filter, first
disconnect power at the main fuse or
circuit breaker, or pull the plug. Remove
the top grille by removing the two screws
that hold it in place.
You may need to open the cabinet
doors to remove the screws.
TO iNSTALL THE
CHARCOAL FILTER
To install a new charcoal filter, remove
plastic and other outer wrapping from the
new filter.
Insert the filter into the top opening of the
oven as shown, maneuvering it behind the
plastic grille until it fits squarely into place.
It will rest at an angle behind the plastic
grille on two side support tabs and in front
of the right rear tab. Replace the grille and
two screws. Reconnect power.
Slide the filter toward the front of the oven
and remove it.
39
Page 40

PROBLEM POSSIBLE CAUSE SOLUTION
LIGHTS
Light during a This is normal. • This is normal. The oven senses heat level and
the speedcook cycle Power level has been adjusts automatically.
dims and cycles on automatically reduced
and off, even at full because the oven is hot.
power JeveJs
Light visible around This is normal. • When the oven is on, light may be visible around
the door and the door and outer case.
outer case while
speedcooking
FAN
Fan continues to run The oven is cooling. • The fan will automatically shut off when the internal parts
after cooking stops of the oven have cooled.
Oven vent emits warm This is normal.
air whiJe oven is on
Fan comes on This is normal. = If the cooktop gets too hot, the vent fan
automatically when comes on.
oven not in use
Fan comes on This is normal. = If the microwave is used after speedcook and the oven senses
automatically when that it is too hot, the vent fan comes on to cool the oven.
using the microwave
COOKING
The oven makes Clicks and fans blowing • These sounds are normal.
unusual sounds are normal. The relay
while cooking board is turning the
i components on and off.
Smoke comes out Food is high in fat • Smoke is normal when cooking high-fat foods.
of the oven when content. Aerosol spray Use vegetable oil or olive oil on the meat itself
the door is open used on the pans. instead of coating the entire pan.
Food is not fully Programmed times • Increase or decrease time for doneness or adjust
cooked or browned may not match the size the upper or lower lamps for browning.
at the end of a or amount of food you
cooking program are cooking.
40
Page 41

PROBLEM POSSIBLE CAUSE SOLUTION
DISPLAY
The display is blank The clock display has = Check the OPTIONS menu for clock display settings.
been turned off. Turn the display on.
"Control Panel The control has • Press and hold START/ENTER for about
LOCKED" appears been locked. 3 seconds to unlock the control.
in display
Control display is Clock is not set. • Set the clock.
lighted yet oven
will not start Door not securely closed. • Open the door and close securely.
START/ENTER button = Press START/ENTER.
not pressed after entering
cooking selection.
Another selection already = Press STOP/CLEAR.
entered in oven and
STOP/CLEAR button not
pressed to cancel it.
Size, quantity or cooking
time not entered after
selecting VEGETABLES
(FRESH, FROZEN,
CANNED), BACON,
DEFROST-TIME,
COOK TIME or PIZZA.
STOP/CLEAR was = Reset cooking program and press
pressed accidentally. START/ENTER.
Food weight not entered • Make sure you have entered food weight after
after selecting selecting DEFROST-AUTO or DEFROST-BREAD.
DEFROST-AUTO
or DEFROST-BREAD.
OTHER PROBLEMS
The door and inside The heat lamps • This is normal.
of the oven feels hot produce intense heat = Use oven mitts to remove food when ready.
in a small space.
Floor of the oven is
warm, even when
the oven has not
been used
The cooktop light is
located below the oven
floor. When the light
is on, the heat it produces
may make the oven floor
get warm.
= Make sure you have entered cooking
time after selecting.
• This is normal.
Oven will not start A fuse in your home = Replace fuse or reset circuit breaker.
may be blown or the
circuit breaker tripped.
Power surge. = Unplug the oven, then plug it back in.
Plug not fully inserted • Make sure the plug on the oven is fully inserted into
into wall outlet, wall outlet.
Glass microwave • This is normal. Center the tray on the
turntable does not turntable support.
lock into center hub
41
Page 42
Instrucciones de seguridad
Precauciones para evitar posibles exposiciones
a exceso de energia del microondas ........... 44
Instrucciones importantes de seguridad ...... 44-47
Instrucciones para la conexion a tierra .......... 47
Cuidado y mantenimiento
Limpieza del aparato .................... 77, 78
Reposicion de bombillas .................... 78
El ventilador y los filtros del ventilador .......... 79
Filtro de carbon ........................... 80
Operacion
&Qu6 es Speedcook o coccion rapida? ......... 48
Partes importantes de su Homo Speedcook...49, 50
Inicio rapido ........................... 51, 52
Speedcooking o Coccion r&pida ............ 53-60
Horneado a conveccion ..................... 61
Funcion "Warming" (calentar) ................. 62
Microondas ........................... 63-72
Otras funciones ........................ 73-76
Consejos para la soluci6n de problemas
Problemas y soluciones .................. 81-83
Servicios al consumidor
Ubicacion del modelo/nQmero de serie ......... 42
Garantia ................................ 43
Contrato de proteccion maestra ............... 43
Servicios al consumidor ..................... 84
Servicios de reparacion ..................... 84
Para su conveniencia y referencia futura, sirvase escribir
los nQmeros de modelo y de serie en el espacio provisto.
El nQmero de modelo y el nemero de serie de su Homo
Speedcook se encuentra en una etiqueta al frente de la
etiqueta del homo, detras de la puerta.
NUMERO DE MODELO:
363.
NUMERO DE SERIE:
m
Z_
O
t"
42
Page 43

GARANT[A PARA
ELECTRODOIVlESTICOS
KENIVIORE ELITE®
GARANT[A LIMITADA DURANTE UN AK!O
Si, tras ser instalado, operado y mantenido segQn todas las
instrucciones incluidas con el producto, este electrodomestico
sufriera averias debidas a defectos de material o mano de obra,
dentro del periodo de un afro desde la fecha de compra, Ilame al
1-888-SU-HOGAR su para su reparaci6n gratuita.
GARANT[A LIMITADA DE CINCO AKIOS EN EL MAGNETRON
Dentro de un periodo de cinco afros desde la fecha de compra,
cuando este homo microondas este instalado, operado y
mantenido conforme alas instrucciones incluidas con el producto,
Sears sustituirb, gratuitamente el magnetr6n por averias debidas
a defectos de material o mano de obra.
Si este electrodomestico se utiliza con propositos distintos a los
fines privados de una familia, esta garantia s61o serb, aplicable
durante 90 dias desde la fecha de compra.
ESTA GARANT[A CUBRE 0NICAMENTE LOS DEFECTOS DE
MATERIAL Y MANO DE OBRA. SEARS NO CUBRIR._:
1. Elementos consumibles que pueden gastarse debido al uso
normal, incluyendo de forma enunciativa pero no limitativa, los
filtros, correas, bombillas y bolsas de la unidad.
2. Un tecnico de servicio para mostrar al usuario la instalaci6n,
funcionamiento o mantenimiento correctos del producto.
3. Un tecnico de servicio para realizar labores de limpieza o
mantenimiento del producto.
4. DaSos o averias en caso de no acatar las instrucciones de
instalaci6n, funcionamiento o mantenimiento incluidas con el
producto.
5. Dahos o averias en caso de accidente, abuso, uso inadecuado
o uso con prop6sitos distintos a los fines para los que fue
disehado.
6. Dahos o averias en caso de utilizar detergentes, limpiadores,
sustancias quimicas o utensilios distintos a los recomendados
en las instrucciones incluidas con el producto.
7. DaSos o averias en las piezas o sistemas provocadas por
modificaciones de] producto no autorizadas.
DESCARGO DE RESPONSABIL[DAD EN GARANT[AS
IIVIPL[ClTAS; LIMITACION DE SOLUCIONES
El unico y exclusive recurso del cliente bajo esta garantia limitada
ser& la reparaci6n del producto como se ha mencionado. Las
garantias implicitas, incluyendo garantias de comerciabilidad o
idoneidad para un fin concreto, estAs limitadas a un ado o el
periodo de tiempo m&s reducido permitido por la ley. Sears no
ser& responsable de los dahos incidentales o derivados. Ciertos
estados y provincias no permiten exclusiones o limitaciones de
dahos incidentales o derivados, o limitaciones en relaci6n a la
duraci6n de las garantias implicitas de comerciabilidad o
idoneidad, de tal forma que estas limitaciones o excepciones
pueden no ser pertinentes para usted.
Esta garantia seth, aplicable Onicamente mientras este
electrodomestico sea utilizado dentro de los Estados Unidos y
Canadb,.
Esta garantia le otorga unos derechos legales especificos, e
incluso puede conferirle otros derechos, distintos dependiendo
de] estado en que se encuentre.
Sears, Roebuck and Co.
Dept. 817WA, Hoffman Estates, IL 60179
Sears Canada Inc.
Toronto, Ontario, Canada M5B 2B8
REGISTRO DEL PRODUCTO
En el espacio a continuaci6n, registre el n° de modelo completo, n°
de serie y fecha de compra. Puede encontrar esta informaci6n en la
etiqueta de mode]o y numero de serie sobre el producto.
Tenga disponible esta informaci6n cuando solicite asistencia
tecnica a fin de obtener servicio mAs rApidamente siempre que
contacte con Sears en relaci6n con su electrodomestico.
N_mero de modelo
Nt)mero de serie
Fecha de compra
Guarde estas instrucciones, y su ticket de cornpra, para
futuras consultas.
Page 44

INSTRUCCIONES IMPORTANTES DE SEGURIDAD
[]
A PRECAUCIONES
PARA EVITAR
POSIBLES
EXPOSICiONES
A EXCESO DE
ENERG[A DEL
MICROONDAS
• Lea todas las instrucciones antes de usar este aparato.
Cuando use aparatos electricos, se deben seguir
precauciones b&sicas de seguridad, incluyendo las
siguientes:
• Lea y siga las precauciones especificas en la seccion
PRECAUCIONES PARA EVITAR POSIBLES EXPOSICIONES A
EXCESO DE ENERGiA DEL MICROONDAS.
,, Cerci6rese de que el aparato este correctamente instalado y
conectado a tierra por un tecnico calificado de acuerdo con las
instrucciones de instalaci6n suministradas.
Instale o coloque este aparato unicamente de acuerdo con las
instrucciones de instalaci6n suministradas.
AIgunos productos tales come huevos enteros y envases
sellados--por ejemplo, tarros o botes cerrados--podr[an
explotar y no deben calentarse en este horno. Tal uso del homo
podr[a resultar en lesiones.
No instale este aparato encima de un lavaplatos.
- Este homo no esta aprobado para uso o pruebas en el agua.
,, Este homo cumple con la lista UL para instalaci6n encima de
estufas electricas y de gas.
Este homo esta diseSado para uso encima de hornos no
mayores de 36 pulgadas. Se puede instalar tanto encima de
equipos de cocina de gas como electricos.
No opere este aparato si tiene un cable o enchufe da5ado,
si no esta funcionando correctamente y si est& estropeado
y se ha caido.
,, AI igual que con cualquier otro aparato, se necesita de
supervisi6n cercana si es usado por niSos.
- Use este aparato L_nicamente con el proposito para el cual fue
dise_ado seg_n se describe en esta guia.
No use quimicos o vapores corrosivos en este aparato.
- Este aparato esta especificamente disefiado para calentar, secar
o cocinar alimentos. No est& disefiado para uso de laboratorio o
industrial.
LEA TODAS LAS INSTRUCCIONES ANTES DE USAR.
AADVERTENCIA!
Por su seguridad, se debe seguir la informacion de este manual para reducir el riesgo
de incendios, explosiones, choques electricos, exposiciones a exceso de energia del
microondas o para evitar daSos a la propiedad, daSos personales o la perdida de la vida.
No intente operar este homo con la
puerta abierta ya que esto podria resultar
en una exposicion daSina a la energia
del microondas. Es importante no destruir
o alterar los bloqueos de seguridad.
No eoloque ning_n objeto entre el frente
del homo y la puerta ni permita que la
suciedad o residuos de limpiadores se
acumulen en las superficies de cierre.
No opere el homo siesta daSado. Es
particularmente importante que la puerta
del homo cierre correctamente y que no
haya daSos en la:
1 puerta (torcedura),
2 bisagras y cierres (rotos o sueltos),
3 empaques de la puerta y superficies
de cierre hermetico.
El homo Io debe ajustar o reparar el
personal correctamente calificado para
realizar servicios.
Este aparato s61o debe ser reparado por personal de servicio
calificado. Contacte el centro de servicio autorizado mas
cercano para revisiones, reparaciones o ajustes.
,, No cubra ni bloquee ninguna abertura en este aparato.
- No almacene este electrodomestico al aire libre. No use este
producto cerca de agua--por ejemplo, en un sotano humedo,
proximo a piscinas o albercas, cerca de un lavamanos o lugares
similares.
®
Mantenga el cable electrico alejado de las superficies calientes.
®
No sumerja el cable o el enchufe en agua.
®
Consulte las instrucciones para la limpieza de la superficie de la
puerta en la secci6n de Cuidado y limpieza de esta guia.
Para reducir el riesgo de incendio en la cavidad del homo:
-- NO cocine excesivamente los alimentos. Atienda el
electrodomestico cuando materiales de papel, pl&stico
o cualquier otro material combustible es colocado en
el interior del homo mientras cocina.
-- Retire los amarres de alambre o manijas de metal de los
contenedores de papel o plastico antes de colocados en
el homo.
-- No use el homo como espacio de almacenamiento.
No deje productos de papel, utensilios de cocina o alimentos
en el homo cuando no este en uso.
-- Si los materiales en el interior del homo se incendian,
mantenga la puerta del homo cerrada, apague el homo
y desconecte el suministro electrico, o desconecte el
suministro electrico hacia la casa interrumpa el suministro
electrico en el panel de interrupcion de circuito. Si la puerta
se abre, el incendio se podr[a esparcir.
-- No utilice las funciones de los sensores dos veces seguidas
en la misma porcion de comida. Si la comida no esta
completamente cocinada despues del primer conteo
regresivo, use COOK TIME para tiempo de cocci6n adicional.
No almacene nada directamente encima de la superficie
del homo de microondas cuando el microondas esta en
operacion.
44
Page 45
Noopereelhomosinelsoportegiratorio.Elsoportegiratorio
nodebeestarrestringidoparaquepuedagirar.
Duranteydespuesdeluso,notoqueopermitaquelaropau
otrosmaterialesinflamablesentrenencontactoconcualquier
&reainteriordelhorno.Permitatiemposuficienteparaquese
enfrieprimero.
Lassuperficiespotencialmentecalientesincluyenlapuerta
delhomo,elpiso,lasparedesyelsoportegiratorio.
Cocinelascamesylasayescompletamente;lacameauna
temperaturaINTERNAminimade160°Fylasayesauna
temperaturaINTERNAminimade180°F.Cocinaraestas
temperaturaspotIogeneralprotegecontralasenfermedades
causadaspotlosalimentos.
,, Mantenga el homo libre de acumulaci6n de grasa.
No descongele bebidas congeladas en botellas con cuello
angosto (especialmente bebidas carbonadas). Incluso si el
contenedor esta abierto, se puede acumular presion. Esto
puede causar que el contenedor explote, Io que podria
resultar en lesiones.
iADVERTENCIA!
ARQUEO
Si observa arqueo, presione el boron STOP/CLEAR y
corrija el problema.
Arqueo es el termino de microondas para las chispas en el
homo. El arqueo se causa cuando:
El metal o papel de aluminio toca las paredes del homo.
El soporte giratorio no est& instalado correctamente.
El recipiente metalico usado durante la cocci6n con
Speedcook o con microondas (excepto las bandejas
provistas con el homo).
Los alimentos cocinados en liquido (como la pasta) tienden
a cocerse m&s r&pidamente que los alimentos que contienen
menos humedad. Si esto ocurriera, consulte la seccion de
Cuidado y Limpieza de la seccion del homo para
instrucciones sobre como limpiar el interior del horno.
,, Los alimentos calientes y el vapor pueden causar quemaduras.
Tenga cuidado al abrir cualquier contenedor de alimentos
calientes, incluyendo las bolsas de palomitas de maiz, bolsas y
cajas para cocinar. Para evitar posibles lesiones, dirija el vapor
lejos de las manos y el rostro.
No cocine las papas en exceso, se podrian deshidratar y
prenderse, causando daSos a su horno.
Evite calentar alimentos para bebes en frascos de vidrio,
incluso sin la tapa. Cerciorese de que todos los alimentos
para bebes esten completamente cocinados. Revuelva los
alimentos para distribuir el calor uniformemente. Tenga
cuidado de evitar quemarse al calentar leche de formula
para bebes. El contenedor puede estar m&s frio que la leche.
Siempre pruebe la leche antes de dar al bebe.
No intente freir en aceite en el homo.
El aluminio no se doblo sobre el alimento (los bordes hacia
arriba actOan como antenas). Use papel de aluminio
Qnicamente de la forma como se recomienda en esta guia.
,, Los metales como los alambres para amarrar, las patas para
aves o los platos con bordes dorados, en el microondas.
,, Las toallas de papel reciclado que contengan piezas
pequeSas de metal que se usen en el microondas.
iADVERTENCIA!
ALIMENTOS
,, AI cocinar en el microondas, coloque todos los alimentos y
contenedores en el plato giratorio de cristal del microondas.
No coloque palomitas de maiz en el homo a menos que
esten en un accesorio de palomitas para microondas o que
use palomitas marcadas para uso en hornos microondas.
,, No hierva huevos en el horno. Se acumulara presion al
interior de la yema del huevo y causara que explote, Io que
pedria resultar en lesiones.
,, No opere el homo sin alimentos al interior. Esto podria
causar dar_os al homo, aumenta el calor alrededer del
magnetron y puede reducir la vida del homo.
Los alimentos con la piel exterior sin abrir, como las papas,
perros calientes, salchichas, tomates, manzanas, yemas de
huevo, higados de polio y otras menudencias se deben
perforar para permitir que el vapor escape durante la coccion.
AGUA SOBRECALENTADA
Los liquidos tales como agua, cafe o te se pueden
sobrecalentar m&s alia del punto de ebullicion sin aparentar
que estan calientes. La evidencia de que los liquidos est&n
calientes no siempre se presenta a traves de las burbujas
visibles o evidencias de que estan hirviendo cuando los
envases son removidos del homo de microondas. ESTO
PODRiA RESULTAR EN LiQUIDOS MUY CALIENTES QUE
COMIENZAN A HERVIR REPENTINAMENTE CUANDO
EL ENVASE ES MOVIDO O SI UNA CUCHARA U OTRO
UTENSlLIO ES INSERTADO EN EL LiQUIDO.
Para reducir el riesgo de lesiones personales:
-- No caliente los liquidos excesivamente.
-- Mueva el liquido a antes y la mitad del proceso de
calentamiento.
-- No use envases de lados rectos con cuellos estrechos.
-- Despues de calentar, permita que el envase permanezca
en el homo de microondas por un corto periodo antes
de removerlo.
-- Use cuidado extremo cuando inserte una cuchara u otro
45
utensilio en el envase.
Page 46
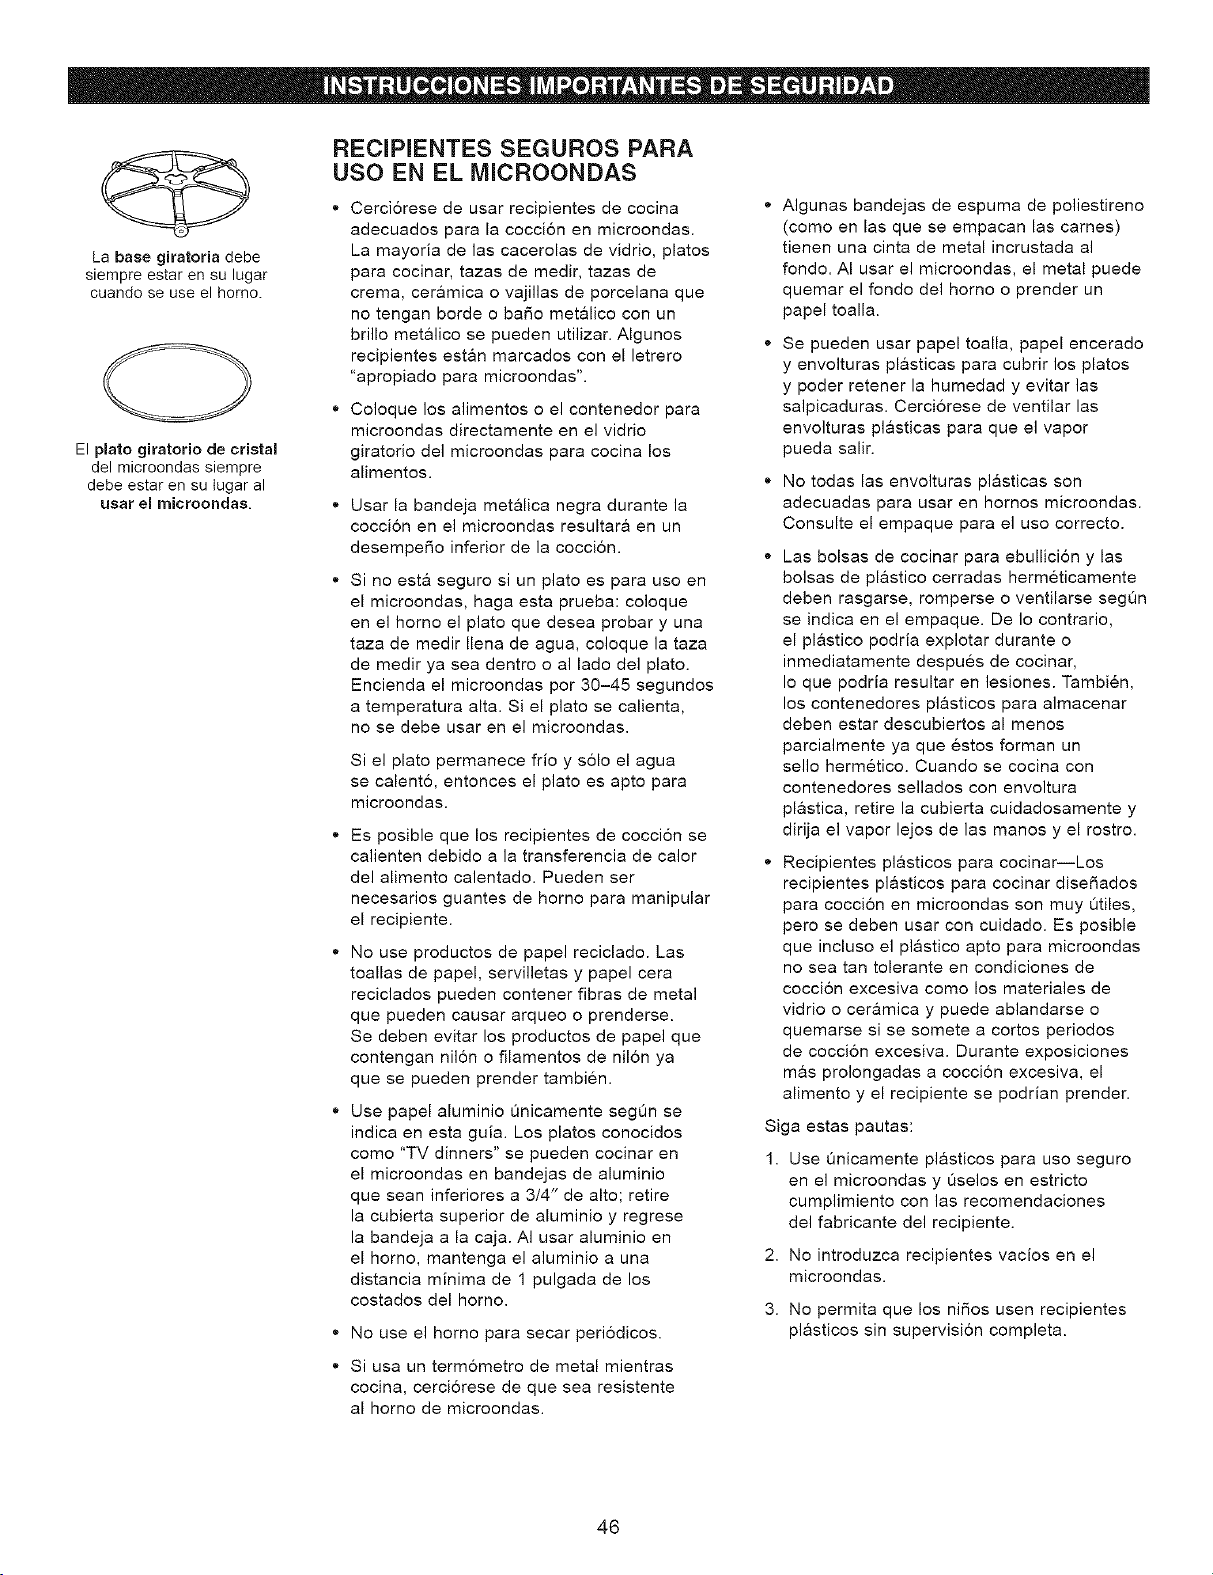
Labasegiratoria debe
siempre estar en su lugar
ouando se use el horno.
El plato giratorio de cristal
del microondas siempre
debe estar en su tugar al
ILisar el microondas.
RECiPIENTES SEGUROS PARA
USO EN EL IVllCROONDAS
" Cerci6rese de usar recipientes de cocina
adecuados para la cocci6n en microondas.
La mayoria de las cacerolas de vidrio, platos
para cocinar, tazas de medir, tazas de
crema, ceramica o vajillas de porcelana que
no tengan borde o ba_o metalico con un
brillo metalico se pueden utilizar. Algunos
recipientes estan marcados con el letrero
"apropiado para microondas".
Coloque los alimentos o el contenedor para
microondas directamente en el vidrio
giratorio del microondas para cocina los
alimentos.
Usar la bandeja metalica negra durante la
cocci6n en el microondas resultara en un
desempe_o inferior de la cocci6n.
Si no esta seguro si un plato es para uso en
el microondas, haga esta prueba: coloque
en el homo el plato que desea probar y una
taza de medir Ilena de agua, coloque la taza
de medir ya sea dentro o al lado del plato.
Encienda el microondas por 30-45 segundos
a temperatura alta. Si el plato se calienta,
no se debe usar en el microondas.
Si el plato permanece frio y s61o el agua
se calento, entonces el plato es apto para
microondas.
,, Es posible que los recipientes de coccion se
calienten debido a la transferencia de calor
del alimento calentado. Pueden set
necesarios guantes de homo para manipular
el recipiente.
No use productos de papel reciclado. Las
toallas de papel, servilletas y papel cera
reciclados pueden contener fibras de metal
que pueden causar arqueo o prenderse.
Se deben evitar los productos de papel que
contengan nilon o filamentos de nil6n ya
que se pueden prender tambien.
Use papel aluminio Onicamente segQn se
indica en esta guia. Los platos conocidos
como "TV dinners" se pueden cocinar en
el microondas en bandejas de aluminio
que sean inferiores a 3/4" de alto; retire
la cubierta superior de aluminio y regrese
la bandeja a la caja. AI usar aluminio en
el homo, mantenga el aluminio a una
distancia minima de 1 pulgada de los
costados del homo.
®
No use el homo para secar periodicos.
®
Si usa un termometro de metal mientras
cocina, cerciorese de que sea resistente
al homo de microondas.
Algunas bandejas de espuma de poliestireno
(como en las que se empacan las cames)
tienen una cinta de metal incrustada al
rondo. AI usar el microondas, el metal puede
quemar el fondo del homo o prender un
papel toalla.
Se pueden usar papel toalla, papel encerado
y envolturas plasticas para cubrir los platos
y poder retener la humedad y evitar las
salpicaduras. Cerci6rese de ventilar las
envolturas plasticas para que el vapor
pueda salir.
,, No todas las envolturas plasticas son
adecuadas para usar en hornos microondas.
Consulte el empaque para el uso correcto.
Las bolsas de cocinar para ebullici6n y las
bolsas de plastico cerradas hermeticamente
deben rasgarse, romperse o ventilarse segQn
se indica en el empaque. De Io contrario,
el plastico podria explotar durante o
inmediatamente despues de cocinar,
Io que podria resultar en lesiones. Tambien,
los contenedores plasticos para almacenar
deben estar descubiertos al menos
parcialmente ya que estos forman un
sello hermetico. Cuando se cocina con
contenedores sellados con envoltura
plastica, retire la cubierta cuidadosamente y
dirija el vapor lejos de las manos y el rostro.
Recipientes plasticos para cocinar--Los
recipientes plasticos para cocinar dise_ados
para cocci6n en microondas son muy Otiles,
pero se deben usar con cuidado. Es posible
que incluso el plastico apto para microondas
no sea tan tolerante en condiciones de
coccion excesiva como los materiales de
vidrio o ceramica y puede ablandarse o
quemarse si se somete a cortos periodos
de coccion excesiva. Durante exposiciones
mas prolongadas a cocci6n excesiva, el
alimento y el recipiente se podrian prender.
Siga estas pautas:
1. Use Qnicamente plasticos para uso seguro
en el microondas y t3selos en estricto
cumplimiento con las recomendaciones
del fabricante del recipiente.
2. No introduzca recipientes vacios en el
microondas.
3. No permita que los nifios usen recipientes
plasticos sin supervision completa.
46
Page 47
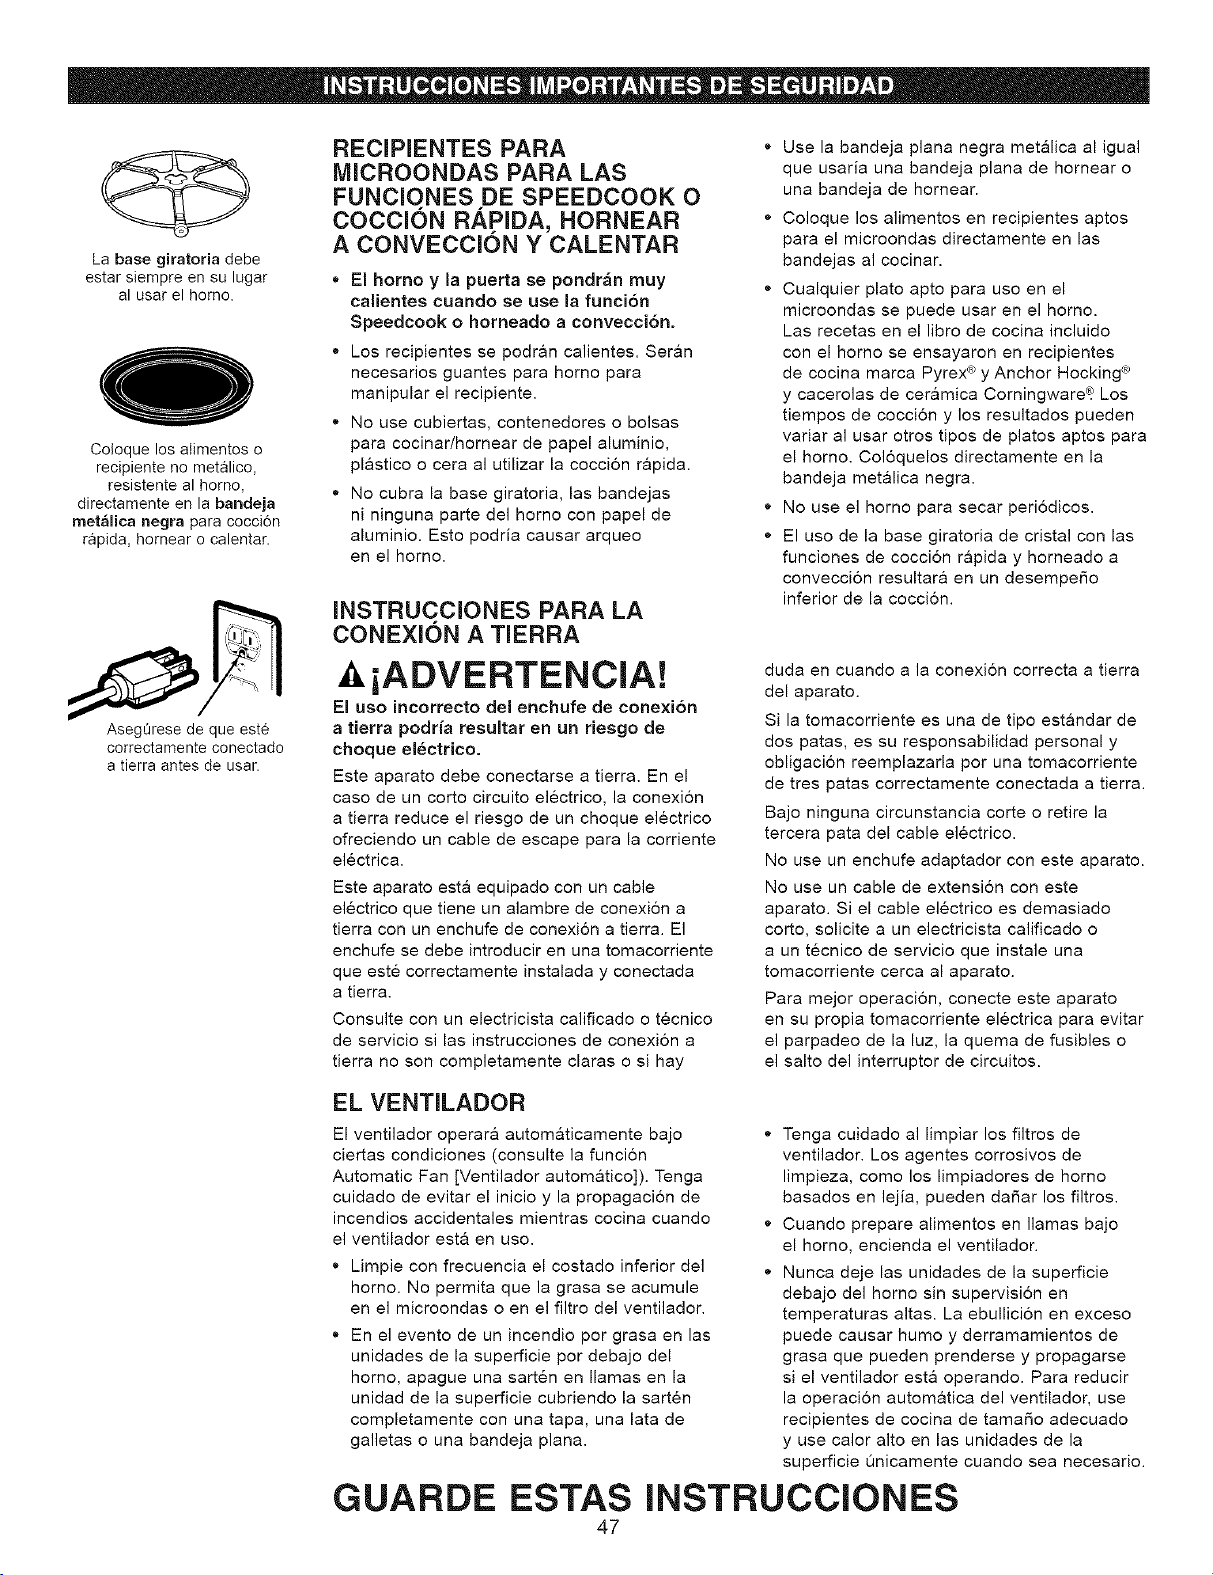
La base giratoria debe
estar siempre en su lugar
al usar el horno.
Coloque los alimentos o
recipiente no metalico,
resistente al homo,
directamente en la bandeja
met_lica negra para cocci6n
rapida, hornear o calentar.
AsegOrese de que este
correctamente conectado
a tierra antes de usar.
RECIPIENTES PARA
MICROONDAS PARA LAS
FUNCIONES DE SPEEDCOOK O
COCCION RAPIDA, HORNEAR
A CONVECCION Y CALENTAR
* El homo y la puerta se pondr_n muy
calientes cuando se use la funci6n
Speedcook o horneado a convecci6n.
* Los recipientes se podran calientes. Ser&n
necesarios guantes para homo para
manipular el recipiente.
,, No use cubiertas, contenedores o bolsas
para cocinar/hornear de papel aluminio,
plastico o cera al utilizar la coccion rapida.
No cubra la base giratoria, las bandejas
ni ninguna parte del homo con papel de
aluminio. Esto podria causar arqueo
en el homo.
INSTRUCCIONES PARA LA
CONEXiON A TIERRA
iADVERTENCIA!
El uso incorrecto del enchufe de conexion
a tierra podria resultar en un riesgo de
choque electrico.
Este aparato debe conectarse a tierra. En el
caso de un corto circuito electrico, la conexion
a tierra reduce el riesgo de un choque electrico
ofreciendo un cable de escape para la corriente
electrica.
Este aparato esta equipado con un cable
electrico que tiene un alambre de conexion a
tierra con un enchufe de conexion a tierra. El
enchufe se debe introducir en una tomacorriente
que este correctamente instalada y conectada
a tierra.
Consulte con un electricista calificado o tecnico
de servicio si las instrucciones de conexion a
tierra no son completamente claras o si hay
,, Use la bandeja plana negra metalica al igual
que usaria una bandeja plana de hornear o
una bandeja de hornear.
Coloque los alimentos en recipientes aptos
para el microondas directamente en las
bandejas al cocinar.
,, Cualquier plato apto para uso en el
microondas se puede usar en el homo.
Las recetas en el libro de cocina incluido
con el homo se ensayaron en recipientes
de cocina marca Pyrex ® y Anchor Hocking _
y cacerolas de cer&mica Corningware_? Los
tiempos de coccion y los resultados pueden
variar al usar otros tipos de plates aptos para
el homo. Coloquelos directamente en la
bandeja met&lica negra.
No use el homo para secar periodicos.
El uso de la base giratoria de cristal con las
funciones de coccion rapida y horneado a
conveccion resultar& en un desempefio
inferior de la coccion.
duda en cuando a la conexion correcta a tierra
del aparato.
Si la tomacorriente es una de tipo estandar de
dos patas, es su responsabilidad personal y
obligacion reemplazarla por una tomacorriente
de tres patas correctamente conectada a tierra.
Bajo ninguna circunstancia corte o retire la
tercera pata del cable electrico.
No use un enchufe adaptador con este aparato.
No use un cable de extension con este
aparato. Si el cable electrico es demasiado
corto, solicite a un electricista calificado o
a un tecnico de servicio que instale una
tomacorriente cerca al aparato.
Para mejor operacion, conecte este aparato
en su propia tomacorriente electrica para evitar
el parpadeo de la luz, la quema de fusibles o
el salto del interruptor de circuitos.
EL VENTILADOR
El ventilader operara autom&ticamente bajo
ciertas condiciones (consulte la funci6n
Automatic Fan [Ventilador automatico]). Tenga
cuidado de evitar el inicio y la propagaci6n de
incendios accidentales mientras cocina cuando
el ventilador esta en uso.
,_ Limpie con frecuencia el costado inferior de]
horno. No permita que la grasa se acumule
en el microondas o en el filtro del ventilador.
,, En el evento de un incendio per grasa en las
unidades de la superficie por debajo del
homo, apague una sarten en llamas en la
unidad de la superficie cubriendo la sarten
completamente con una tapa, una lata de
galletas o una bandeja plana.
GUARDE ESTAS
INSTRUCCIONES
47
Tenga cuidado al limpiar los filtros de
ventilador. Los agentes corrosives de
limpieza, como los limpiadores de homo
basados en lejia, pueden dafiar los filtros.
Cuando prepare alimentos en llamas bajo
el homo, encienda el ventilador.
Nunca deje las unidades de la superficie
debajo del homo sin supervision en
temperaturas altas. La ebullicion en exceso
puede causar humo y derramamientos de
grasa que pueden prenderse y propagarse
si el ventilador esta operando. Para reducir
la operacion automatica del ventilador, use
recipientes de cocina de tamaSo adecuado
y use calor alto en las unidades de la
superficie Qnicamente cuando sea necesario.
Page 48

Este horno Speedcook o de cocci6n rapida utiliza
tecnologia de avanzada Advantium _"_120 para aprovechar
la potencia de la luz. El homo Speedcook cocina el
exterior de los alimentos de manera muy similar al calor
radiante convencional, penetrando la superficie de
manera que el interior se cocine de manera simultanea.
Mientras el calor radiante es la principal fuente de
energia, se agrega un "refuerzo per microondas" con
ciertos alimentos. Los alimentos se cocinan de manera
uniforme y rapida, reteniendo su humedad natural.
m o 0 0
o©
o
o
II oo0
oo o
0 0 0
Base giratoria
• La base giratoria rota para garantizar una cocci6n
uniforme.
Controles
• El control del homo contiene recetas preestablecidas.
• El bot6n de girar y presionar hace que la selecci6n
del menQ sea facil.
Coccion rapida
= Una bombilla hal6gena de 500 vatios y un calefactor
de ceramica de 600 vatios cocinan los alimentos
desde arriba.
• Un calefactor de ceramica de 375 vatios cocina los
alimentos desde abajo.
• El ventilador de convecci6n garantiza un calentamiento
uniforme.
Hornear/calentar a conveccion
= Un calefactor de 1100 vatios calienta los alimentos
desde arriba.
Un calefactor de ceramica de 375 vatios calienta los
alimentos desde abajo.
= El ventilador de convecci6n garantiza un calentamiento
uniforme.
IVlicroondas
• Se agrega un "refuerzo" de microondas con ciertos
alimentos.
El homo tambien se puede utilizar como un homo
de microondas de 900 vatios.
48
Page 49

NOTA: En esta guia, las caracteristicas y el aspecto pueden variar de su modelo.
0 0 @
0
0
0
J_
Base giratoria
La base giratoria siempre debe estar en su lugar,
en el piso del homo, para todas las cocciones.
Cerci6rese de que la base giratoria este firmemente
colocada en el centro del horno.
Lata/bandeja metalica negra de hornear
Coloque los alimentos o el recipiente correcto en
la bandeja metalica y coloque en la guia giratoria
cuando use las funciones de cocci6n rapida,
hornear a convecci6n o calentar.
o o o
c-pO0
o O 0
IVlanija de la puerta
0
Hale para abrir la puerta. La puerta se debe cerrar
firmemente para que el homo opere.
Cerrojos de la puerta
0
O entiiador
Presione el bot6n _ para retirar el vapor al
cocinar en la estufa de la superficie.
0
@
0
Plato giratorio de cristal del microondas
Coloque el plato giratorio en la base giratoria
cuando utilice las funciones del microondas.
El plato giratorio no encajara en el centro.
Coloque alimentos o recipientes adecuados para
microondas directamente en el plato giratorio.
Caiefactores superiores
Operan cuando se usan las caracteristicas de
cocci6n rapida, hornear a convecci6n y calentar.
Ventana
Permite que los alimentos se vean mientras que
las ondas del microondas se mantienen al interior
del homo.
49
Calefactor de ceramica inferior
Opera cuando se usan las caracteristicas de
cocci6n rapida, hornear a convecci6n y calentar.
Luz de superficie C_
Presione el bot6n C_ para encender y apagar
la luz para iluminar la estufa de la superficie.
Panel de control
Los botones para operar el homo se encuentran
en el panel de control.
Centro
El centro gira la base giratoria. Cerci6rese de que
el centro este siempre firme en su lugar en el rondo
del horno.
Page 50

CONTROLES DE COCClON
Con su homo Speedcook o de coccidn rbpida, puede cocinar
con luces haldgenas de alta intensidad, calefactores de
cerbmica y/o energfa convencional de microondas.
SPEEDCOOK 0 COCCl()N RAPIDA
Presione este bot6n para tener acceso al ment3 de cocci6n
r&pida o para establecer su propio programa de cocci6n r&pida.
Presione y sostenga por 3 segundos para repetir la Oltima
selecci6n de cocci6n.
BACK (regresar)
En ciertas funciones, presione este bot6n para regresar
al paso anterior.
POWER (potencia)
Presione este bot6n y gire/presione el dial de selecci6n
para cambiar los niveles de cocci6n r&pida o potencia del
microondas, o la temperatura del homo a convecci6n antes
y durante la cocci6n.
CONVECTION (convecci6n)
Presione este bot6n para homear alimentos usando la cocci6n
en el homo a convecci6n.
WARM/REHEAT (calentadrecalentar)
Presione este boton para operar las funciones de calentar y
recalentar. Mantenga los alimentos calientes, cocinados a la
temperatura de servir, o recaliente las porciones de alimentos
anteriormente cocinados.
MICROWAVE (microondas)
Presione este bot6n para tener acceso al ment3 del microondas
o para configurar su propio programa de microondas.
DiAL DE SELECCION--Gire para vet las opciones,
presione para seleccionar.
Primero gire, luego presione el dial para hacer selecciones.
Tambien, use el dial para aumentar (en el sentido de las
manecillas del reloj) o disminuir (en el sentido contrario de las
mancillas del reloj) los tiempos de cocci6n o las temperaturas.
OPTIONS (opciones)
Presione este boton para configurar el reloj y tenet acceso a
las funciones de volumen de la seEal, encendido y apagado de
la pantalla del reloj, velocidad de desplazamiento de la pantalla,
ayuda, recordatorio y luz nocturna.
START/ENTER (iniciar/selecciona0
Presione este boton para iniciar o hacer una pausa en
cualquier funcion de coccion.
STOP/CLEAR (paradborrar)
Presione este boton para cancelar TODOS los programas
del homo, excepto el reloj, luz nocturna automatica, reloj
de cocina y recordatorio.
POPCORN (palomitas de maiz)
Presione para preparar palomitas de maiz preempacadas
para microondas.
ADD MINUTE (agregar minuto)
Presione para un minute de tiempo de coccion de microondas.
Cada vez que el bot6n se presione, se agrega un minuto
adicional al tiempo restante de coccion. El homo inicia de
inmediato.
BACK POWER
© ©
CONVECTION
0
WARM/REHEAT
0
MICROWAVE
STOP/CLEAR
START/ENTER
POPCORN ADD MINUTE DEFROST
O0 0
_ KITCHEN TIMER
0 © ©
DEFROST (descongelar)
Presione este boton para descongelar carnes pot peso
o tiempo, o para descongelar pan.
VENT FAN (ventilador) (_
Presione este bot6n para retirar los vapores producidos al
cocinar en la superficie.
SURFACE LIGHT (luz de la supetficie) C_
Presione este boton para encender y apagar la luz de la estufa.
KITCHEN TIMER (reloj de cocina)
Presione este boton para configurar el reloj de minutos.
de selecci6n
5O
Page 51

OPTIONS
0
0
CONFIGURE EL RELOJ
Ai conectar iniciaimente el homo, o
despues de una interrupcion en el fluido
electrico:
1. Gire el dial selector para configurar la hera.
Presione el dial para seleccionar.
2. Gire el dial para configurar los minutos.
Presione el dial para seleccionar.
3. Gire el dial para buscar AM o PM. Presione
el dial para seleccionar.
Para cambiar la hora:
1. Presione el boton OPTIONS (opciones).
2. Gire el dial hacia CLOCK (reloj). Presione el
dial para seleccionar y siga las instrucciones
de la pantalla para configurar.
SPEEOCOOK
0
0
START/ENTER
ADD MINIJI]:
O
O
INICIE LA COCCION RAPIDA
Paso 1 :
Presione el boton SPEEDCOOK.
Paso 2:
Gire el dial hasta que la pantalla muestre
FOOD MENU (menu de alimentos). Presione
el dial para ingresar.
Paso 3:
Gire el dial para buscar el tipo de alimento que
desea. Presione el dial para seleccionar.
Paso 4:
Gire el dial para buscar el alimento especifico.
Presione el dial para seleccionar.
Paso 5:
Gire el dial para seleccionar la cantidad,
tamaSo y/o nivel de coccion (si se necesario,
el homo le indicar&). Presione el dial despues
de cada seleccion.
COMO USAR EL MICROONDAS
CON LA FUNCION ADD MINUTE
(agregar minuto)
Presione ADD MINUTE para incrementos
de un minuto de tiempo de coccion de
microondas.
Paso 6:
Despues de realizar la _ltima selecci6n,
aparecen la hora y los niveles de potencia.
Esto es seguido un instante despues pot un
mensaje sobre el recipiente de coccion y
START? (inicio).
Paso 7:
Una vez que la pantalla muestre START?,
coleque los alimentos en el homo y presione el
dial o el boton START para empezar la coccion.
La coccion r&pida no requiere precalentar.
* Presione STOP/CLEAR en cualquier
momento para interrumpir la coccion.
Et soporte giratorio debe
siempre estar en su lugar
cuando use el homo.
El homo inicia de inmediato. Puede agregar o
restar tiempo al girar el dial. Puede tambien
agregar tiempo en incrementos de un minuto
al presionar ADD MINUTE.
Coloque los alimentos en
recipientes no metalicos,
resistentes al homo en la
bandeja metalica negra
para cocci6n r_pida.
51
El soporte giratorio debe
siempre estar en su lugar
ouando use el homo.
El plato giratorio de
cristal debe estar
siempre en su tugar
cuando utitice ta funci6n
del microondas.
Page 52

WARM/REHeAT
0
0
COIVIO USAR LA FUNCION
WARMING (calentar)
La funcion Warming mantendrf los alimentoa
cocinados calientes a temperatura de servir.
Siempre empiece con los alimentos calientes.
Use recipientes que puedan soportar
temperaturas hasta 230 ° F.
Paso 1 :
Presione el boton WARM/REHEAT.
Paso 2:
Gire el dial para buscar WARMING. Presione
el dial para seleccionar.
Paso 3:
Gire el dial para seleccionar la temperatura
del homo.
BAJO .............. 140-160°F
MEDIO ............ 160-195°F
ALTO .............. 195-230°F
Paso 4:
Gire el dial para buscar la funcion CRIPSP o
MOIST. Presione el dial para seleccionar.
CONVECTION
0
START/ENTER
El soporte giratorio debe
siempre estar en su lugar
ouando use el homo.
Coloque los alimentos en
recipientes no metalicos,
resistentes al homo en ta
bandeja met_lica negra
para hornear
COIVIO USAR LA FUNCION
CONVECTION BAKE (homo
a convecci6n)
Con Precalentamiento
Paso 1 :
Presione el boton CONVECTION.
Paso 2:
Gire el dial para seleccionar la temperatura
del homo y presione el dial para empezar a
precalentar. No coloque los alimentos en el
horno. (Se le pedira que ingrese el tiempo
de coccion despues de que el homo este
precalentado.)
Paso 3:
Cuando el homo termine de precalentar,
se le indicara. Si no abre la puerta dentro de
un lapso de una hora, el homo se apagar&
automaticamente. Abra la puerta del homo
y con precaucion, coloque los alimentos
en el homo.
Paso 4:
Cierre la puerta del horno. Gire el dial para
configurar el tiempo de coccion y presione
START/ENTER para empezar la coccion.
Cuando la coccion este completa, el homo
avisar& y se apagar&.
Los tiempos de coccion se muestran
en minutos y pueden ser un m_ximo de
179 minutos. El tiempo se puede cambiar
durante la cocci6n al girar el dial.
Sin precalentar
Paso 1 :
Si la receta no requiere precalentamiento,
presione el boton CONVECTION.
Paso 2:
Gire el dial para configurar la temperatura del
homo y presione para seleccionar.
Paso 3:
Para ignorar el precalentado, presione el dial
nuevamente.
Paso 4:
Gire el dial para configurar el tiempo de coccion
y presione para seleccionar.
Paso 5:
Coloque el alimento en el homo y presione el
boton START/ENTER para encender el horno.
Los tiempos de cocci6n se muestran en
minutos y pueden ser un m_ximo de
179 minutos. El tiempo se puede cambiar
durante la coccion al girar el dial.
52
Page 53

SP_ED(!()OK
0
0
MENSAJES DE LA PANTALLA
Despues de presionar el bot6n SPEEDCOOK
(cocci6n r&pida), el homo le pedir& que realice
varias selecciones, como el siguiente ejemplo:
1. Gire el dial hasta que FOOD MENU (menu
de alimentos) aparezca. Presione el dial
para seleccionar.
2. Gire el dial hasta que CHICKEN (polio)
aparezca. Presione el dial para seleccionar.
3. Gire el dial hasta que BONELESS BRST
(pechuga sin hueso) aparezca. Presione
el dial para seleccionar.
SELECCIONES DE COCCl0N
RAPIDA PRESELECClONADAS
EN EL MENU
4. Gire el dial para seleccionar el tamafio
(Select SIZE):
Sm (pequefio) (3-4 oz)
Lg (grande) (5+ oz)
Presione el dial para seleccionar.
5. Gire el dial para seleccionar la cantidad
(Select amount):
1-2 piezas
3-4 piezas
Presione el dial para seleccionar.
6. Aparece Use METAL TRAY (use bandeja
metalica).
7. Presione el boton START/ENTER o el dial
de seleccion para empezar la coccion.
NOTA: Cuando se
encuentre usando la
cocci6n rapida, siempre
use la bandeja negra.
* Despues de que un ciclo de cocci6n se haya
completado, use la funci6n Resume para
cocinar pot tiempo adicional.
* Para revisar los ajustes durante la cocci6n,
presione el dial selector.
Ver la Guia de Cocci6n empacada con
el homo para una lista completa de
las selecciones de cocci6n rapida
preseleccionadas en el menU.
53
Page 54

COMO USAR LAS FUNCiONES DE
SPEEDCOOK 0 COCCION RAPIDA
PRECAUCION: Cuando use los programas de coccion
rapida, recuerde que el homo, la puerta y los platos
estaran muy calientes.
Antes de usar el homo per primera vez, debe configurar el reloj.
Consulte la secci6n de Inicio r&pido.
Antes de empezar, cerci6rese de que la base giratoria este
en su lugar.
Use la bandeja metalica negra en todo momenta cuando utilice
la funcion Speedcook.
La base giratoria debe estar en
su lugar en todo momento cuando
utilice el homo.
Coloque los alimentos o el
recipiente no metatico para uso
en microondas directamente en
ta bandeja metalica negra.
SF'£EDCOOK
0
0
Sra_l/Ente_
PARA USAR UN MEN0
SPEEDCOOK PREESTABLECIDO
Este homo ya esta configurado para
cocinar m&s de 100 recetas populates.
1. Presione el boton Speedcook.
Si no hace una seleccion dentro de
un plazo de 15 segundos, la pantalla
regresar& a la hora del alia.
2. Gire el dial de seleccion hasta FOOD
MENU. Presione el dial para seleccionar.
3. Gire el dial de seleccion para seleccionar el
tipo de categoria de alimento que desea.
Presione el dial para seleccionar.
4. Gire el dial de seleccion para seleccionar el
alimento especifico (seleccion de men0).
Presione el dial para seleccionar.
5. Gire el dial de seleccion para seleccionar la
cantidad, tamaSo y nivel de coccion (si se
requiere, el homo le indicara.) Presione el
dial despues de cada seleccion.
6. Una vez que la pantalla muestre START?
Presione START o el dial de seleccion para
iniciar la coccion.
Para ciertos alimentos, voltee el alimento
cuando el homo indique TURN FOOD OVER
(voltee el alimento). Presione START para
continuar la coccion.
Para ciertos alimentos, el homo le indicara
CHECK for DONENESS (revise el nivel de
coccion). Revise para ver si el alimento esta
listo en el nivel deseado. El homo continuara
cocinando por varios minutos. Saque el
alimento cuando este al nivel deseado.
Para revisar los valores durante la coccion,
presione el dial de seleccion.
Si ingresa una selecci6n no deseada en
cualquier memento, simplemente presione el
bot6n BACK (regresar) para regresar al paso
anterior, o presione el boton STOP/CLEAR y
vuelva a ingresar la selecci6n deseada.
AI inicio de un programa de cocci6n rapida,
vera OPTIMIZING COOK TIME (optimizar
tiempo de cocci6n) en la pantalla. El homo
automaticamente percibe el nivel de voltaje
electrico en su casa y ajusta el tiempo de
cocci6n hacia arriba o abajo para una
cocci6n correcta.
Si la puerta est& abierta durante la cocci6n,
el homo parara y el mensaje PAUSE (pausa)
aparecera en la pantalla. Cierre la puerta y
presione el bot6n START/ENTER para
continuar la cocci6n.
En cualquier memento durante la coccion
puede girar el dial de seleccion para cambiar
el tiempo de coccion. Puede cambiar los
niveles de potencia al presionar POWER,
luego gire el dial y presione para seleccionar.
,, Para garantizar resultados consistentes en la
coccion, el homo puede reducir los niveles
de potencia si el homo est& caliente al inicio
de un programa.
AI final de la coccion, el ventilador automatico
puede continuar funcionando pot un tiempo
corto para enfriar los componentes intemos.
Para cocinar por tiempo adicional despues de
que un ciclo de coccion se ha completado,
use la funcion Resume (continuar).
54
Page 55

CONSEJOS DE COClNA PARA FABULOSOS
RESULTADOS EN EL SABOR
Para garantizar una coccion consistente y un dorado uniforme
cuando cocina los alimentos directamente en la bandeja
met&lica negra, organice los alimentos como se muestra a la
derecha. Los aNmentos se pueden tocar entre si, aunque no
se deben traslapar.
La came, el polio, el pescado o la comida de mar que han
estado congelados se deben descongelar antes de cocinar
(se puede usar la funcion de descongelacion del homo
microondas). Para otros alimentos congelados preempacados,
siga las instrucciones del empaque.
Patron circular (ejemplo:
biscuits, galletas, carnes)
Una sola capa (ejemplo:
Patron de radio (ejemplo,
panecillos crecientes, paNtos
de pan)
aperitivos)
SPE£DCOOK
0
0
START/ENTeR
O
STA_t/ENt£R
FUNCION "REPEAT LAST"
(repetir el Ultimo)
Use esta funcion para ahorrar tiempo al cocinar
alimentos repetidos como galletas o aperitivos.
NOTA: El 01timo programa utilizado se
almacena pot dos horas.
FUNCI6N "RESUME" (continuar)
1. Si el alimento necesita coccion por un poco
mas de tiempo, puede volver a iniciar el
homo al presionar el boton START/ENTER
o el dial de seleccion.
2. Aparece RESUME COOKING (continuar
coccion) y el homo reiniciara de inmediato
al 10% del tiempo original.
El programa permanece en la memoria por
5 minutos. Despues de eso, debera iniciar
el programa nuevamente. Consulte "PARA
USAR UN MEN0 PRECONFIGURADO DE
SPEEDCOOK".
1. Presione y sostenga el boton SPEEDCOOK
por alrededor de 3 segundos.
2. Aparece el 01timo aNmento preseleccionado.
3. Presione el boton START/ENTER o el dial
de seleccion para empezar la coccion.
55
Page 56

SPEEDCOOK
0
NIVEL DE POTENCIA PARA
SPEEDCOOK O COCCION
RAPIDA
0
START/ENTER
Este homo utiliza potencia de una luz halogena
de alta intensidad, calefactores de ceramica y
microondas de forma simultanea para cocinar
alimentos desde la parte superior, inferior e
interior para encerrar la humedad y el sabor.
AI usar las recetas de coccion rapida
preseleccionadas en el menQ de alimentos,
los niveles de potencia ya estan seleccionados
para usted. Sin embargo, estos niveles de
potencia se pueden ajustar antes o durante
la coccion. Igualmente, la funcion de coccion
manual le permite cocinar rapido alimentos
que no estan en el menQ preseleccionado de
alimentos al seleccionar su propio tiempo de
coccion y niveles de potencia.
Cada nivel le da la potencia del calefactor
y la energia de microondas para cierto
porcentaje del tiempo.
UPPER POWER (potencia superior) (U)
controla el calefactor superior y la potencia
del microondas. Un nivel m&s alto de UPPER
POWER usa mas potencia del calefactor
superior, Io que dora los alimentos mas rapido
en la parte alta. Un nivel mas bajo de UPPER
POWER usa mas potencia de microondas,
Io que cause que los alimentos se cocinen
m&s uniformemente. Seleccione un nivel mas
alto para alimentos como pizza y alimentos
horneados. Seleccione un nivel m&s bajo para
alimentos como cacerolas, cames y pescado.
LOWER POWER (potencia inferior) (L) controla
el calefactor inferior. Seleccione un nivel m&s
alto para dorar los alimentos m&s en la parte
de abajo. Seleccione un nivel mas bajo para
menos dorado en la parte de abajo.
Presione el boton SPEEDCOOK y gire el
dial para seleccionar FOOD MENU o
MANUAL COOK. Presione el dial para
seleccionar.
2. Siga las instrucciones de la seccion "PARA
USAR UN MEN0 PRECONFIGURADO DE
SPEEDCOOK" o "COCClON MANUAL".
Para cambiar el nivel de potencia cuando
se Io indique la pantalla, gire el dial en el
sentido de las manecillas del reloj para
aumentar o en el sentido contrario alas
manecillas del reloj para disminuir el nivel
de potencia superior. Presione el dial para
seleccionar.
4. Gire el dial para cambiar el nivel de potencia
inferior. Presione el dial para seleccionar.
5. Presione el boton START/ENTER o el dial
selector para empezar a cocinar.
Si no desea cambiar uno de los niveles,
simplemente presione el dial para pasar
a la siguiente seleccion.
NOTA: Tenga cuidado al ajustar los niveles
de potencia de manera que no cocine los
alimentos en exceso ni que queden crudos.
56
Page 57

RECIPIENTE$ PARA
SPEEDCOOK O COCCION
RAPIDA
SPEEDCOOK
0
0
SrARq£N_ER
* Siga las sugerencias para recipientes de *
cocina en la pantalla del homo o en el libro
de cocina o guia de coccion.
* El recipiente se pondr& caliente. Se necesitan
guantes para el homo para manipular el
recipiente.
* Coloque los alimentos o el recipiente
resistente al homo directamente en la
bandeja negra al cocinar.
Use la bandeja met&lica negra de la misma
manera que usaria una bandeja o lata de
homear.
SPEEDCOOK O COCCl6N
RAPIDA MANUAL
Este homo le brinda la flexibilidad de cocinar
sus platos favoritos.
Si desea cocinar un alimento que no esta entre
las selecciones preestablecidas, use la funcion
de coccion rapida manual.
1. Presione el boton SPEEDCOOK.
Si no ingresa un valor dentro de 15 segundos,
la pantalla regresa a la hora del dia.
2. Gire el dial de seleccion hasta MANUAL
COOK. Presione el dial para seleccionar.
3. Gire el dial de seleccion para seleccionar el
tiempo de coccion. Presione el dial para
seleccionar.
Ademas del recipiente provisto, puede usar
platos de cacerola no metalicos, platos para
pasteles y otros recipientes resistentes al
homo. Coloquelos directamente en la
bandeja met&lica negra.
Cerciorese de seleccionar un tamaSo que
rote f&cilmente.
Coloque la bandeja metalica negra
directamente en la base giratoria.
No use recipientes o tapas de papel, plastico
o aluminio cuando cocine durante un ciclo de
coccion rapida.
La bandeja metalica negra debe colocarse
en su lugar durante las operaciones de
coccion rapida.
4. Gire el dial en el sentido de las manecillas
del reloj para aumentar o en el sentido
contrario para disminuir el nivel de potencia
superior. Presione el dial para seleccionar.
5. Gire el dial para cambiar el nivel de potencia
inferior. Presione el dial para seleccionar.
6. Presione el boton START/ENTER o presione
el dial de seleccion para empezar la
coccion.
Para sugerencias sobre el nivel de potencia y
el tiempo de coccion, utilice su guia de coccion
o libro de cocina.
La pantalla le indicara que seleccione
UPPER POWER y LOWER POWER.
57
Page 58

SPEEDCOOK
0
COMO INGRESAR Y GUARDAR
UNA RECETA DE SPEEDCOOK O
COCCION RAPIDA
0
START/ENTFR
SmP/CLEAR
©
SPEEDCOOR
Cree hasta 30 recetas propias de coccibn
rapida o personalice una receta existente
segun su gusto.Una vez io haga, sus
alimentos se cocinar_n de la forma que
usted quiera todas las veces.
1. Presione el boton SPEEDCOOK.
2. Gire el dial hasta que MY RECIPES
(mis recetas) aparezca.
3. Gire el dial hasta que <empty> (vacio)
aparezca. Presione el dial para seleccionar.
4. SELECT COOK TIME (seleccione tiempo
de coccion) aparece. Gire el dial para
seleccionar el tiempo de coccion. Presione
el dial para seleccionar.
La pantalla le indica que seleccione UPPER
POWER (potencia superior) y LOWER POWER
(potencia inferior).
5. Gire el dial en el sentido de las manecillas
del reloj para aumentar o en el sentido
contrario para disminuir el nivel de potencia
superior. Presione el dial para seleccionar.
PARA ENCONTRAR Y USAR
RECETAS EN LA COCCION
RAPIDA
6. Gire el dial para cambiar el nivel de potencia
inferior. Presione el dial para seleccionar.
7. Marque el hombre del alimento girando el
dial de seleccion para avanzar a traves de
los caracteres disponibles. Presione el dial
para marcar un car&cter. Cuando haya
ingresado el hombre completo, presione
START/ENTER. Puede cambiar caracteres
marcados anteriormente presionando el
boton BACK (regresar).
8. RECIPE ADDED (receta ingresada)
aparece. Para empezar a cocinar, presione
el boton START/ENTER. Para almacenar
la receta sin cocinar, presione el boton
STOP/CLEAR.
Para sugerencias sobre el nivel de potencia y
el tiempo de coccion, use la guia de coccion o
el libro de cocina.
Q
START/ENTER
Para ericontrar y usar recetas almacenadas
erl el homo de cocci6n rapida:
1. Presione el boton de SPEEDCOOK.
2. Gire el dial a MY RECIPES (mis recetas) y
presione para seleccionar.
3. Gire el dial hasta que la receta que usted
desea sea mostrada y presione el dial para
aceptar.
4. Presione el boton de START/ENTER o
presione el dial de seleccion para comenzar
la coccion.
58
Page 59

SPEED_'OOK
0
COMO AJUSTAR O CAMBIAR
UNA RECETA DE SPEEDCOOK
o COCCiON RAPiDA
0
OFIIONS
0
START/_NT_R
STOP/CLEAR
0
SPEEDCOOK
0
0
OPTIONS
0
STOP/CLEAR
©
Para ajustar o cambiar las recetas
almacenadas personalizadas
de Speedcook:
1. Presione el bot6n SPEEDCOOK.
2. Gire el dial hasta que MY RECIPES
aparezca. Presione el dial para seleccionar.
3. Gire el dial hacia la receta que desea
cambiar. Presione el dial para seleccionar.
4. Presione el bot6n OPTIONS.
5. Gire el dial para seleccionar CHANGE
RECIPE (cambiar receta). Presione el dial
para seleccionar.
COIVIO ELIMINAR UNA RECETA
DE SPEEDCOOK O COCCION
RAPIDA
Para elirninar recetas personalizadas
de Speedcook o coccion r&pida:
1. Presione el boton SPEEDCOOK.
2. Gire el dial hasta que MY RECIPES
aparezca y presione el dial para seleccionar.
3. Gire el dial hasta la receta que desee
eliminar y presione el dial para seleccionar.
6. La pantalla le indicara SELECT COOK TIME
(seleccione tiempo de cocci6n), luego
seleccione UPPER POWER, LOWER
POWER y FOOD NAME. Gire el dial y
presione para seleccionar el nivel apropiado.
(Para instrucciones mas detalladas, siga
los pasos 4 a 7 en la secci6n "COMO
INGRESAR Y GUARDAR UNA RECETA
DE SPEEDCOOK O COCCION R,&PIDA").
7. RECIPE ADDED (receta ingresada)
aparece. Para empezar a cocinar, presione
el bot6n START/PAUSE. Para almacenar
la receta sin cocinar, presione el bot6n
CLEAR/OFF.
Para sugerencias sobre el nivel de potencia y
el tiempo de coccion, use su guia de coccion
o libro de cocina.
4. Presione el bot6n OPTIONS.
5. Gire el dial para seleccionar DELETE
(eliminar). Esto elimina la receta.
Ahora puede ingresar y guardar una
nueva receta o presione STOP/CLEAR
para regresar la pantalla al reloj.
59
Page 60
EFECTOS NORMALES DURANTE
SPEEDCOOKING O COCCION
RAPIDA
Tiempos de cocci6n
AI usar Speedcooking o coccion r&pida
de alimentos preprogramados, es posible
que observe OPTIMIZING COOK TIME
(optimizacion del tiempo de coccion) en la
pantalla pot varios segundos despues de
presionar START. El horno autom&ticamente
percibe el nivel de voltaje electrico en su
casa y ajusta el tiempo de coccion hacia
arriba o hacia abajo para una coccion
adecuada.
Ventilador
,, El ventilador se encender& durante la
coccion. AI final de la coccion, el ventilador
autom&tico continuar& funcionando per un
tiempo corto, y la pantalla indicar& Oven is
Cooking (homo cocinando). El ventilador se
apagara autom&ticamente cuando las partes
internas del homo se hayan enfriado.
,, Es posible que el ventilador del escape se
encienda automaticamente si la estufa est&
en uso.
,, El ventilador del homo emitira aire caliente
mientras el homo esta encendido.
Calefactores
No se requiere precalentamiento. El homo
empieza a cocinar de inmediato.
La puerta y el interior del homo estaran muy
calientes. Tenga precaucion al abrir la puerta
y retirar los alimentos.
No use recipientes de cocina o tapas de
papel, plastico o aluminio al cocinar durante
un ciclo de coccion rapida.
Cuande cocine por un periodo de tiempo
prolongado, es posible que el homo reduzca
autom&ticamente los niveles de potencia
para mantener el nivel correcto de calor en
el horno.
Sonido
Los sonidos y el soplido del ventilador son
normales durante la cocci6n. El tablero de
reles apaga y enciende los componentes.
Luces
" Cuando el homo est& encendido, es posible
que se vean las luces alrededor de la puerta
o caja exterior.
,, Los calefactores se encenderan e iniciaran
el ciclo durante un ciclo de cocci6n rapida,
algunas veces incluso a los niveles de
potencia total. Esto es normal. El homo
percibe el nivel de calory se ajusta
automaticamente.
6O
Page 61
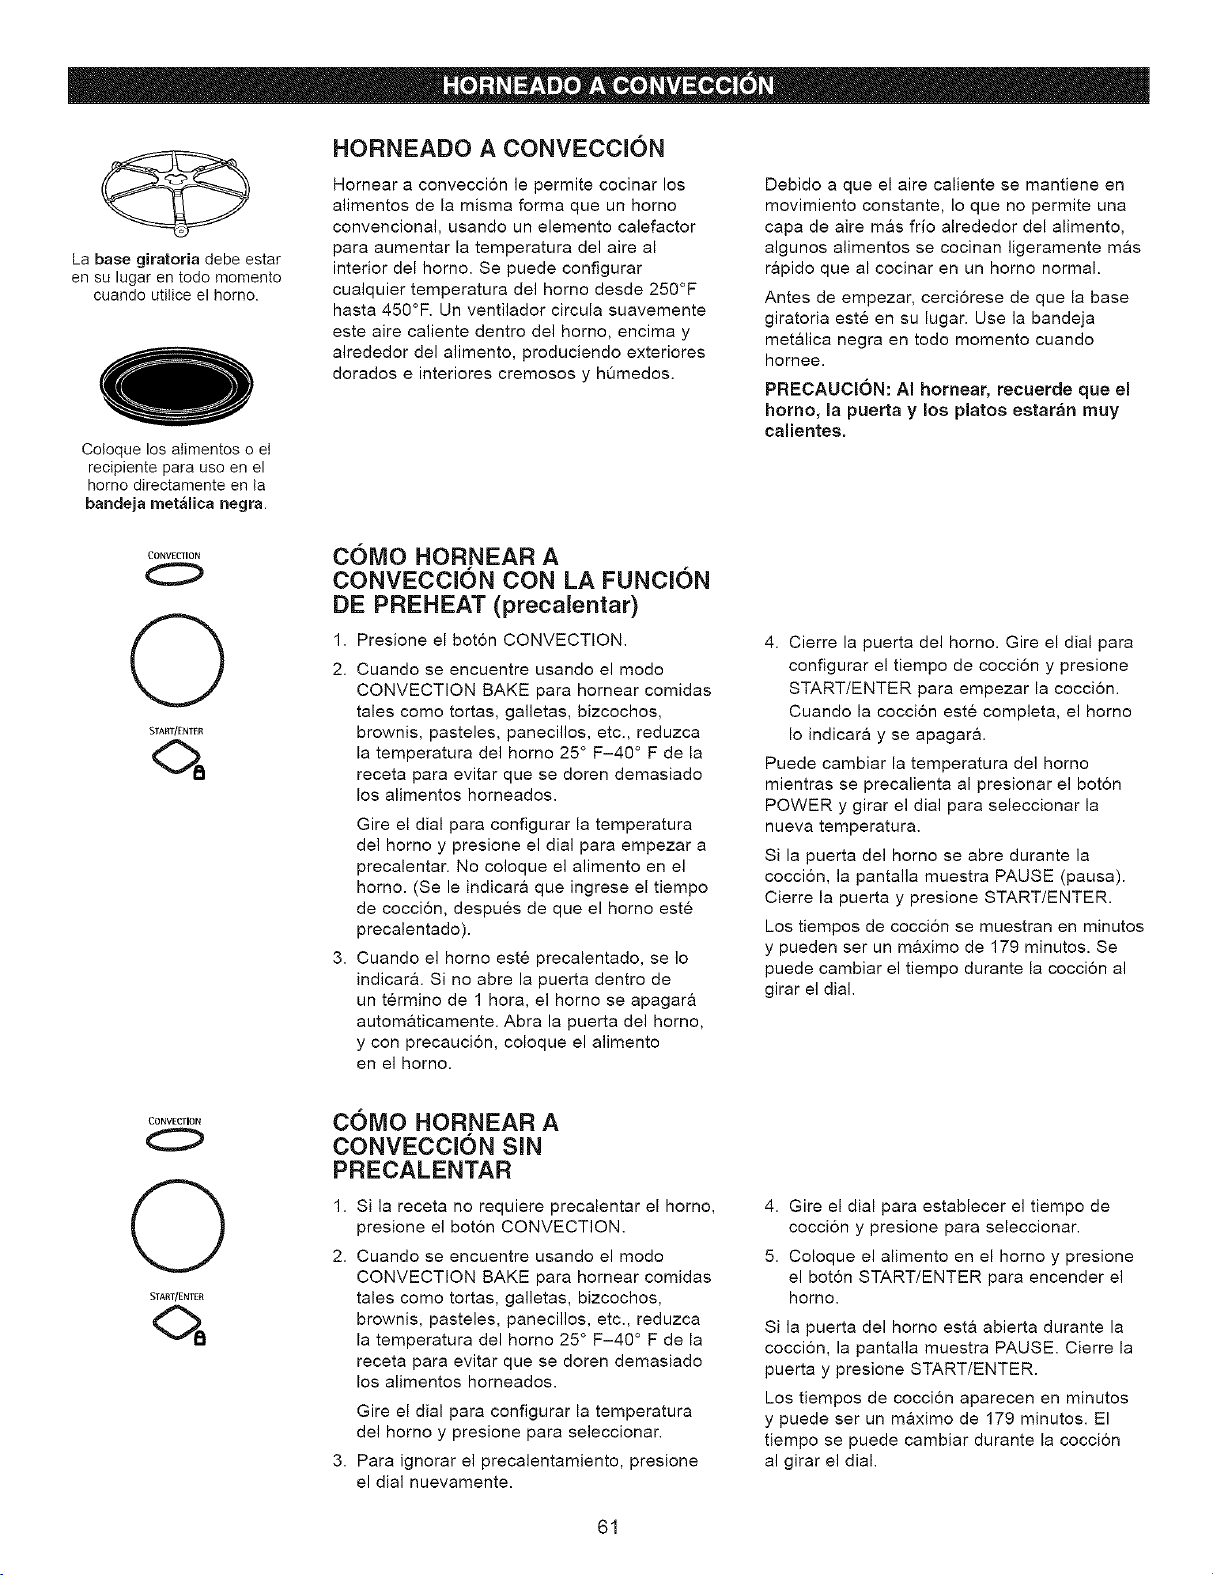
HORNEADO A COHVECCIOH
La base giratoria debe estar
en su lugar en todo momento
cuando utitice el horno.
Coloque los atimentos o el
recipiente para uso en el
homo directamente en ta
bandeja metalica negra.
CONVECTION
0
0
START/ENTER
Hornear a convecci6n le permite cocinar los
alimentos de la misma forma que un homo
convencional, usando un elemento calefactor
para aumentar la temperatura del aire al
interior del homo. Se puede configurar
cualquier temperatura del homo desde 250°F
hasta 450°F. Un ventilador circula suavemente
este aire caliente dentro del homo, encima y
alrededor del alimento, produciendo exteriores
dorados e interiores cremosos y hOmedos.
COIVIO HORNEAR A
CONVECCION CON LA FUNCION
DE PREHEAT (precalentar)
1. Presione el bot6n CONVECTION.
2. Cuando se encuentre usando el modo
CONVECTION BAKE para hornear comidas
tales como tortas, galletas, bizcochos,
brownis, pasteles, panecillos, etc., reduzca
la temperatura del homo 25 ° F-40 ° F de la
receta para evitar que se doren demasiado
los alimentos horneados.
Gire el deal para configurar la temperatura
del homo y presione el dial para empezar a
precalentar. No coloque el alimento en el
horno. (Se le indicara que ingrese el tiempo
de coccion, despues de que el homo este
precalentado).
3. Cuando el homo este precalentado, se Io
indicar& Si no abre la puerta dentro de
un termino de 1 hera, el homo se apagara
automaticamente. Abra la puerta del homo,
y con precaucion, coloque el alimento
en el horno.
Debido a que el aire caliente se mantiene en
movimiento constante, Io que no permite una
capa de aire m&s frio alrededor del alimento,
algunos alimentos se cocinan ligeramente mas
rapido que al cocinar en un homo normal.
Antes de empezar, cerci6rese de que la base
giratoria este en su lugar. Use la bandeja
metalica negra en todo momento cuando
hornee.
PRECAUCION: AI hornear, recuerde que el
homo, la puerta y los platos estaran muy
calientes.
4. Cierre la puerta del horno. Gire el dial para
configurar el tiempo de coccion y presione
START/ENTER para empezar la cocci6n.
Cuando la cocci6n este completa, el homo
Io indicara y se apagar&
Puede cambiar la temperatura del homo
mientras se precalienta al presionar el bot6n
POWER y girar el dial para seleccionar la
nueva temperatura.
Si la puerta del homo se abre durante la
cocci6n, la pantalla muestra PAUSE (pausa).
Cierre la puerta y presione START/ENTER.
Los tiempos de cocci6n se muestran en minutos
y pueden set un maximo de 179 minutos. Se
puede cambiar el tiempo durante la coccion al
girar el dial.
CONVECTION
0
0
START/ENTER
COMO HORNEAR A
CONVECCION SIN
PRECALENTAR
1. Si la receta no requiere precalentar el homo,
presione el boton CONVECTION.
2. Cuando se encuentre usando el modo
CONVECTION BAKE para homear comidas
tales como tortas, galletas, bizcochos,
brownis, pasteles, panecillos, etc., reduzca
la temperatura del homo 25 ° F-40 ° F de la
receta para evitar que se doren demasiado
los alimentos horneados.
Gire el dial para configurar la temperatura
del homo y presione para seleccionar.
3. Para ignorar el precalentamiento, presione
el dial nuevamente.
61
4. Gire el dial para establecer el tiempo de
cocci6n y presione para seleccionar.
5. Coloque el alimento en el homo y presione
el bot6n START/ENTER para encender el
homo.
Si la puerta del homo esta abierta durante la
cocci6n, la pantalla muestra PAUSE. Cierre la
puerta y presione START/ENTER.
Los tiempos de cocci6n aparecen en minutes
y puede ser un maximo de 179 minutos. El
tiempo se puede cambiar durante la coccion
al girar el dial.
Page 62

WARM/REHEAT
O
FUNCION "WARMING" (calentar)
La funci6n Warming mantiene los alimentos
cocinados calientes a temperatura de servir.
Siempre empiece con alimentos calientes. Use
recipientes y utensilios que puedan soportar
temperaturas hasta de 230°F.
1. Presione el boton WARM/REHEAT.
2. Gire el dial para seleccionar WARMING
(calentar). Presione el dial para seleccionar.
3. Gire el dial para seleccionar la temperatura
del homo.
BAJO ........................ 140-160°F
MEDIO ...................... 160-195°F
ALTO .......................... 195-230°F
4. Gire el dial hacia CRISP (crujiente) o MOIST
(ligeramente mojado). Presione el dial para
seleccionar.
Si la puerta del homo esta abierta mientras
calienta, la pantalla muestra PAUSE. Cierre
la puerta y presione START/ENTER.
Consejos para alimentos crujientes:
• Deje los alimentos destapades.
• No use contenedores plasticos o envolturas
plasticas.
• Precaliente antes de usar segOn los tiempos
recomendados.
Consejos para aiimentos ligeramente
mojados:
• Cubra el alimento con una tapa o papel de
aluminio.
* No ponga agua en la bandeja de calentar.
No use contenedores plasticos o envolturas
plasticas.
Precaliente antes de usar de acuerdo con los
tiempos recomendados.
Para tostar alimentos duros:
* Coloque los alimentos o los platos
directamente en la bandeja metalica negra.
* Precaliente en nivel BAJO y seleccione
CRISP (crujiente).
* Revise el nivel de tostado despues de
45 minutos. Adicione mas tiempo segen
sea necesario.
Tabla para la selecci6n de temperatura y humedad
Tipo de alimento Nivel de control Nivel de humedad
Pan, panecillos duros MEDIUM CRISP
Pan, panecillos blandos MEDIUM MOIST
Cacerolas MEDIUM MOIST
Alimentos fritos HIGH CRISP
Carnes* y pescado MEDIUM CRISP
Pancakes, waffles HIGH CRISP
Pizza HIGH CRISP
Papas horneadas HIGH CRISP
Papas, pure MEDIUM MOIST
Aves HIGH MOIST
Hojuelas de tortilla LOW CRISP
Vegetales MEDIUM MOIST
La USDA/FSIS recomienda una temperatura interna de 145°F como el nivel
mfnimo de coccidn para la came de res. Use un termdmetro port4til para
revisar las temperaturas intemas.
62
Page 63

COIVlO USAR LAS FUNCIONES
DEL MICROONDAS
La base giratoria debe estar
siempre en su lugar cuando
se usa el horno.
El plato giratorio de cristal
del microondas debe estar
siempre en su lugar al
usar el rnicroondas.
Cerciorese de que la base giratoria y el plato
giratorio de cristal del microondas esten en
su lugar.
Coloque los alimentos o el contenedor de
microondas directamente en el plato giratorio
de cristal del microondas para cocinar sus
alimentos.
Centre el plato giratorio en la base giratoria.
El plato giratorio no se ajustara en el centro.
REClPIENTES DE COClNA
* Cerciorese de que el recipiente de cocina
sea apropiado para el microondas.
SELECClONES PREESTABLEClDAS PARA ALllVlENTOS EN EL IVlICROONDAS:
Bacon (tocineta)
Defrost (descongelar)
(automatico y tiempo)
Frozen Entree
(plato congelado)
• Rice (arroz)
Sure Simmer
(hervidor)
• My Recipes
(mis recetas)
Coloque el alimento o el recipiente apto para
microondas directamente en el plato giratorio
de cristal del microondas para cocinar sus
alimentos.
• Soup (sopa)
Cook Time
(tiempo de coccion)
Vegetables (vegetales)
(frescos, congelados,
enlatados)
63
Page 64

MI£ROWAVE
O
START/ENTER
_ACK
0
SIOI_C[EAR
0
C0MO UTILIZAR SELECCIONES
PREESTABLECIDAS PARA EL
MICROONDAS
1. Presione el boton MICROWAVE.
Si no hace una seleccibn dentro de un
periodo de 15 segundos, la pantalla regresa
a la hora del dia.
2. Gire el dial para encontrar la seleccion
preestablecida que desea. Presione el dial
para seleccionar.
3. Si es necesario, el homo le pedira que
seleccione la cantidad, el peso, el tamaSo
o el tiempo. Gire el dial y presione despues
de cada seleccion.
4. Presione el dial o el boton START/ENTER
para empezar a cocinar.
SUGERENCIAS PARA COClNAR
Para revisar los niveles durante la cocci6n,
presione el dial de seleccion.
Si ingresa una seleccion no deseada en
cualquier momento, simplemente presione el
boton BACK para regresar al paso anterior,
o presione STOP/CLEAR y vuelva a ingresar
las selecciones deseadas.
MICROWAVE
0
POWER
0
START/ENER
AI cocinar tocineta o bacon, coloque las tiras
en un plato y cubra cada capa con papel
toalla.
AI cocinar vegetales, use una cacerola para
uso en microondas o un tazon. Cubra con
una tapa o una envoltura pl&stica con
ventilacion.
TEMPO DE COCCl6N
,, El nivel de potencia se configura
autom&ticamente en alto, pero puede
cambiarse para mayor flexibilidad.
1. Presione el boton MICROWAVE.
2. Gire el dial hacia COOK TIME y presione
el dial para ingresar.
3. Gire el dial para configurar el tiempo y
presione el dial para seleccionar.
Para vegetales congelados, siga las
instrucciones del paquete para agregar agua.
Para vegetales frescos, agregue dos
cucharadas de agua por cada porcion.
4. Para cambiar el nivel de potencia, si no
desea toda la potencia, presione el boton
POWER. Gire el dial para seleccionar.
Presione el dial para seleccionar.
5. Presione el dial o el boton START/ENTER
para empezar a cocinar.
Puede abrir la puerta durante el tiempo de
coccion para revisar el alimento. Cierre la
puerta y presione START/ENTER para
continuar cocinando.
ADD MINL#E
FUNCI6N "ADD MINUTE"
(agregar minuto)
Presione ADD MINUTE para incrementos
de un minuto de tiempo de coccion en el
microondas. El homo inicia de inmediato.
64
Puede agregar o restar tiempo girando el dial.
Tambien puede agregar tiempo en incrementos
de un minuto presionando ADD MINUTE
nuevamente.
Page 65

MICROWAVE
0
0
STart/Enter
FUNClONES DE SENSOR DEL
MICROONDAS
Algunas funciones del microondas son funciones
de sensor que detectan el aumento de la
humedad liberada durante la cocci6n.
El homo automaticamente ajusta el tiempo
de coccion a los diferentes tipos y cantidades de
alimentos.
Cuando se usan las funciones de sensor, no abra
la puerta del homo hasta que el conteo regresivo
empiece en la pantalla. Si la puerta se abre,
cierrela y presione START/ENTER
de inmediato.
No utilice las funciones de los sensores dos
veces seguidas en la misma porci6n de comida
ya que puede resultar en que la comida se cocine
en exceso o se queme. Si la comida no esta
completamente cocinada despues del conteo
regresivo, use COOK TIME en el selector del
microondas para tiempo de cocci6n adicional.
Para restar tiempo de un programa con
sensor: Dentro de los primeros 30 segundos
despues de que el homo inicie, gire el dial en el
sentido contrario de las maneciflas del reloj para
restar 10% (-) de el tiempo autom&tico. Giros
adicionales restaran 20% (- -) del tiempo
autom&tico.
Para agregar tiempo a un programa con
sensor: Dentro de los primeros 30 segundos
despues de que el homo se encienda, gire el dial
en el sentido de las manecillas del reloj para
agregar 10% (+) al tiempo autom&tico. Giros
adicionales agregar&n 20% (+ +) al tiempo
autom&tico.
• Si ha usado el homo para cocci6n r&pida o
para hornear y el homo ya esta caliente, puede
indicar que est& demasiado caliente para
coccion con sensor, aunque podra continuar
con las funciones sin sensor.
• Para reducir o prolongar el tiempo de coccion,
espere hasta que la cuenta regresiva aparezca
en la pantalla. Luego, gire el dial para agregar
o restar tiempo.
- Las bebidas recalentadas con la funci6n
BEVERAGE (bebida) pueden estar muy
calientes. Retire el contenedor con cuidado.
• Si abre la puerta del homo mientras est&
cocinando con sensor, el mensaje SENSOR
ERROR (error del sensor) aparecera. Cierre la
puerta y presione START/ENTER para
empezar de nuevo.
Contar con los contenedores y tapas
correctas es esencial para mejor
cocci6n con los sensores.
• Utilice siempre contenedores aptos para
el microondas y c_bralos con tapas o
envolturas plasticas ventiladas. Nunca utilice
contenedores plasticos sellados, pueden evitar
que el vapor se escape y causar que el
alimento se cocine en exceso.
,, Cerci6rese de que el exterior de los
contenedores de cocina y el interior del homo
esten secos antes de colocar alimentos en el
homo. Las gotas de humedad que se
convierten en vapor
pueden confundir al sensor.
• Las bebidas se calientan meier sin cubrirse.
Cubierto
Ventilado
Seque los plates
de manera que no
confundan al sensor.
PROGRAIVIAS CON SENSOR PARA EL IVIICROONDAS:
Coccion: Recalentar:
• Frozen Entr6es • sure Simmer • Beverage (bebida)
(platos (hervidor) * Pasta
congelados) * Popcorn ,,Plate of Leftovers
• Rice (arroz) (palomitas de (plato con
maiz) sobrantes de
eomida)
65
'_sauces
(salsas)
* Soup (sopa)
Page 66

POPCORN
0
STart/enter
Use solamiente con tos
paquetos de popcorn entre
1,75 onzas
y 3,5 onzas.
FUNCION "POPCORN"
(palomitas de maiz)
Para usar la funcion POPCORN:
Siga las instrucciones del paquete, usando
COOK TIME si el paquete es menos de
1,75 onzas o mas de 3,5 onzas. Coloque el
paquete de palomitas de maiz en el centro
del homo.
2. Presione POPCORN.
3. Presione el dial o presione el boton
START/ENTER para empezar a cocinar.
NOTA: No utilice esta funcion dos veces
seguidas en la misma porcion de comida ya
que puede resultar en que la comida se cocine
en exceso o se queme. Si la comida no esta
completamente cocinada despues del conteo
regresivo, use COOK TIME en el selector del
microondas para tiempo de coccion adicional.
Si abre la puerta mientras POPCORN aparece
en la pantalla, aparecera un mensaje de
SENSOR ERROR (error de sensor). Cierre la
puerta y presione START/ENTER de inmediato.
MICROWAVE
0
0
START/ENTER
FUNClON "SURE SIMMER"
(hervidor)
La funcion Sure Simmer hara hervir de 1 a 4
cuartos de gal6n de comida como sepas y
cocidos, luego permita que hiervan hasta pot 2
horas. Cubra el plato con una tapa.
1. Coloque la comida cubierta en el homo.
2. Presione el boton MICROWAVE.
3. Gire el dial hacia SURE SIMMER. Presione
el dial para seleccionar.
4. Gire el dial para establecer la cantidad de
tiempo que desea que el alimento siga
hirviendo lentamente despues del hervor
inicial.
5. Presione el dial o el boton START/ENTER
para empezar a cocinar.
El homo le indica cuando el alimento empieza a
hervir y el hervidor empieza la cuenta regresiva.
Revuelva el alimento de set necesario.
No abra la puerta del homo hasta que el
conteo regresivo concluya en la pantalla.
Si se abre la puerta, cierrela y presione
START/ENTER de inmediato.
- NOTA: No utilice esta funcion dos veces
seguidas en la misma porcion de comida ya
que puede resultar en que la comida se cocine
en exceso o se queme. Si la comida no esta
completamente cocinada despues del conteo
regresivo, use COOK TIME en el selector del
microondas para tiempo de coccion adicional.
66
Page 67

MICROWAVE
0
0
START[INTER
ARROZ
La funci6n Rice (arroz) cocina 1/2-2 tazas de
arroz de cocci6n prolongada. Siga las
instrucciones del empaque para la cantidad de
agua que debe agregar. Use un plato para
microondas de tamaSo grande y cubra con una
tapa.
1. Coloque la comida cubierta en el horno.
2. Presione el boton MICROWAVE.
3. Gire el dial hasta RICE. Presione el dial
para aceptar.
4. Presione el dial o el boton START/ENTER
para empezar la coccion.
El homo indica cuando perciba el vapor y el
tiempo restante empieza una cuenta regresiva.
Revuelva la comida si es necesario.
No abra la puerta hasta tanto no inicie la
cuenta regresiva. Si se abre la puerta, cierrela
y presione START/ENTER de inmediato.
NOTA: No utilice esta funcion dos veces
seguidas en la misma porcion de comida ya
que puede resultar en que la comida se cocine
en exceso o se queme. Si la comida no esta
completamente cocinada despues del conteo
regresivo, use COOK TIME en el selector del
microondas para tiempo de coccion adicional.
MICROWAVE
0
0
START/ENTER
FROZEN ENTRF:E
(platos congelados)
La funci6n Frozen Entree cocina un plato
congelado de 8-22 onzas.
1. Afloje una esquina de la tapa plastica en el
plato y coloque en el horno.
2. Presione el bot6n MICROWAVE.
3. Gire el dial a FROZEN ENTREE. Presione
el dial para aceptar.
4. Presione el dial o el bot6n START/ENTER
para empezar a cocinar.
El homo indica cuando perciba el vapor y el
tiempo restante empieza una cuenta regresiva.
Revuelva la comida si es necesario.
No abra la puerta hasta tanto no inicie la cuenta
regresiva. Si se abre la puerta, cierrela y
presione START/ENTER de inmediato.
NOTA: No utilice esta funcion dos veces
seguidas en la misma porcion de comida ya que
puede resultar en que la comida se cocine en
exceso o se queme. Si la comida no est&
completamente cocinada despues del conteo
regresivo, use COOK TIME en el selector del
microondas para tiempo de coccion adicional.
67
Page 68

WARM/REHEAT
O
START/ENTER
FUNCION "REHEAT" (recalentar)
La funcion "REHEAT" recalienta las porciones
de alimentos cocinados con anterioridad o
un plato de sobrantes.
1. Presione el boton WARM/REHEAT
(calentar/recalentar).
2. Gire el dial para seleccionar REHEATING
(recalentar). Presione el dial para
seleccionar.
3. Gire el dial hasta encontrar el alimento que
desea recalentar. Presione el dial para
seleccionar.
4. Si es necesario, el homo le indicar& que
seleccione la cantidad. Gire el dial para
seleccionar y presione.
5. Presione el dial o el boton START/ENTER
para empezar a recalentar.
Para revisar los niveles durante la coccion,
presione el dial de seleccion.
Los alimentos recalentados pueden
tener amplias variaciones en la
temperatura. Algunas areas pueden
estar extremadamente calientes.
NOTA: No utilice esta funcion dos veces
seguidas en la misma porcion de comida ya
que puede resultar en que la comida se cocine
en exceso o se queme. Si la comida no esta
completamente cocinada despues del conteo
regresivo, use COOK TIME en el selector del
microondas para tiempo de calentamiento
adicional.
Es mejor usar la funcion COOK TIME y
no REHEAT para estos alimentos:
* Productos de pan
,, Alimentos que se deben recalentar
descubiertos
* Alimentos que se deben revolver o voltear
* Alimentos que requieren un aspecto seco o
una superficie tostada despues de recalentar.
POWER
O
O
START/ENTER
GUiA PARA RECALENTAR
Food Type
Beverage (8-10 oz.)
Pasta (8-12 oz.)
Pizza Slices (1-4 slices)
Plate of Leftovers
(2-3 foods, 4 oz. each)
Sauces (4-8 oz.)
Soup (8-20 oz.)
NIVELDE POTENClA DEL
MICROONDAS
1. Primero, siga las instrucciones para COOK
TIME, TIME DEFROST o ADD MINUTE.
2. Presione el boton POWER.
3. Gire el dial en el sentido de las manecillas
del reloj para incrementar y en el sentido
contrario para disminuir el nivel de potencia.
Presione el dial para seleccionar.
4. Presione el dial o el boton START/ENTER
para empezar a cocinar.
* Puede cambiar el nivel de potencia antes o
durante un programa de coccion.
Comments
Do not cover.
Cover with wax paper, lid or vented plastic wrap.
Do not cover.
Cover with wax paper or vented plastic wrap.
Cover with lid or vented plastic wrap.
Cover with lid or vented plastic wrap.
Los siguientes son ejemplos de los usos para
los diferentes niveles de potencia:
Alto 10: Pescado, bacon o tocineta, vegetales,
hervir liquidos.
Medio-alto 7: Coccion ligera de carnes y aves,
hornear cacerolas y recalentar.
Medio 5: Coccion lenta y para ablandar
estofados y cortes de came menos suave.
Bajo 2 6 3: Descongelar; hervir lentamente;
salsas delicadas.
Tibio 1: Mantener los alimentos tibios;
ablandar mantequilla.
68
Page 69

MICROWAVE
C0MO INGRESAR Y GUARDAR
UNA RECETA PARA
MICROONDAS
O
START/ENTER
BACK
0
STOP/CLEAR
0
MICROWAVE
0
0
START/INTER
Cree y almacene hasta 10 recetas propias
de microondas.
1. Presione el boron MICROWAVE.
2. Gire el dial hasta que MY RECIPES
aparezca. Presione el dial para seleccionar.
3. Gire el dial hasta que <empty> (vacio)
aparezca. Presione el dial para seleccionar.
4. SELECT COOK TIME aparece. Gire el dial
para seleccionar el tiempo de coccion que
desea. Presione el dial para seleccionar.
5. Gire el dial para cambiar el nivel de potencia
y presione para seleccionar.
C0MO ENCONTRAR Y
USAR UNA RECETA PARA
MICROONDAS
Para encontrar y usar recetas para
microondas personalizadas almaeenadas:
1. Presione el boron MICROWAVE.
2. Gire el dial hasta MY RECIPES y presione
el dial para seleccionar.
3. FOOD NAME y los nombres de la receta
que ingreso aparecen en la pantalla.
Deletree el nombre del alimento girando el
dial de seleccion para avanzar a traves de
los caracteres disponibles. Presione el dial
para marcar un car&cter. Cuando haya
ingresado el nombre complete, presione
START/ENTER. Puede cambiar caracteres
ingresados anteriormente presionando el
boron BACK.
RECIPE ADDED (receta ingresada) aparece.
Para empezar a cocinar, presione el boton
START/ENTER o presione el boron
STOP/CLEAR para almacenar la receta
sin cocinar.
4. Gire el dial hasta su receta y presione el dial
para seleccionar.
5. Presione el boton START/ENTER o el dial
de selecci6n para empezar a cocinar.
MICROWAVE
O
OPTIONS
O
START/ENTER
STOP/CLEAR
0
C0MO AJUSTAR O CAMBIAR
UNA RECETA PARA
MICROONDAS
Para ajustar o cambiar las recetas
personalizadas para microondas:
1. Presione el boron MICROWAVE.
2. Gire el dial hacia MY RECIPES y presione
el dial para seleccionar.
3. Gire el dial hacia la receta que desea
cambiar. Presione el dial para seleccionar.
4. Presione el boton OPTIONS.
5. Gire el dial para seleccionar CHANGE
RECIPE (cambiar receta). Presione el
dial para seleccionar.
6. Gire el dial para seleccionar el tiempo de
cocci6n y presione el dial para seleccionar.
7. Gire el dial para seleccionar el nivel de
potencia y presione el dial para seleccionar.
8. La pantalla muestra RECIPE ADDED
(receta ingresada). Para empezar a cocinar,
presione el bot6n START/ENTER o presione
el bot6n STOP/CLEAR para guardar la
receta sin cocinar.
69
Page 70

MICROWAVE
0
OPTIONS
STOP/CLEAR
0
COMO ELIMINAR UNA RECETA
PARA MICROONDAS
Para eliminar una receta para microondas
personalizada almacenada:
1. Presione el bot6n MICROWAVE.
2. Gire el dial hacia MY RECIPES y presione
el dial para seleccionar.
3. Gire el dial hacia la receta que desea
eliminar. Presione el dial para seleccionar.
4. Presione el boton OPTIONS.
5. Gire el dial para seleccionar DELETE
RECIPE (eliminar receta), y presione el dial
para seleccionar. Esto elimina la receta.
En este momento ser& posible seleccionar
y guardar una receta nueva o presione
STOP/CLEAR para regresar a la pantalla
del reloj.
DEFROST
O
START/ENTER
TIEMPO DE DESCONGELADO
Use el Time Defrost para descongelar por un
tiempo seleccionado.
1. Presione el bot6n DEFROST.
2. Gire el selector a DEFROST-TIME. Presione
el dial para aceptar.
3. Gire el dial para seleccionar el tiempo que
usted desea. Presione el dial para aceptar.
4. Presione el dial o el boton START/ENTER
para comenzar a descongelar.
5. Voltee la comida cuando el homo haga la
seSal de TURN FOOD OVER.
El nivel de potencia se establece
automaticamente en 3, pero se puede
cambiar. Para cambiar los niveles de potencia,
consulte la seccion Nivel de potencia del
microondas. Puede descongelar porciones
peque_as r&pidamente aumentando el nivel
de potencia despues de marcar el tiempo.
El nivel de potencia 7 reduce el tiempo total
de descongelacion en casi la mitad; el nivel
de potencia 10 reduce el tiempo total en 1/3.
AI descongelar a altos niveles de potencia,
los alimentos necesitaran mas atencion
frecuente que la normal.
7O
Page 71

DEFROST
0
SlAnt/ENTeR
FUNCION "AUTO DEFROST"
(descongelaci6n autom_tica)
La funci6n Auto Defrost establece
autom&ticamente los tiempos de descongelaci6n
y los niveles de potencia para ofrecer resultados
uniformes de descongelaci6n para cames, aves
y pescado que pesen hasta seis libras.
1. Retire el alimento del empaque y col6quelo
en un plato de uso seguro para microondas.
2. Presione el bot6n DEFROST.
3. Gire el dial hacia DEFROST-AUTO.
Presione el dial para seleccionar.
4. Gire el dial hacia el peso del alimento,
usando la guia de conversion a la derecha.
Por ejemplo, gire el dial hacia 1,2 para
1,2 libras (1 libra, 3 onzas). Presione el dial
para seleccionar.
6. Voltee el alimento cuando el homo indique
TURN FOOD OVER (voltear alimento).
Retire la came descongelada o proteja las
&reas tibias con pedazos pequeSos de papel
aluminio para una descongelacion uniforme.
• Despues de descongelar, la mayoria de los
alimentos deben reposar por 5 minutos para
completar la descongelacion. Las carnes
grandes para hornear se deben dejar por
30 minutos.
GuJa de conversi6n
si el peso del alimento se establece en libras y
onzas, las onzas se deben convertir a decimas
(.1) de una libra.
Peso del alimento Marque el peso
en onzas del alimento
(decimas de una libra)
1-2 0,1
3 0,2
4-5 0,3
6-7 0,4
8 0,5
9-10 0,6
11 0,7
12-13 0,8
14-15 0,9
DEFROST
0
SIARJ/ENI£R
FUNCION "BREAD DEFROST"
(descongelar pan)
La funcion Bread Defrost establece
autom&ticamente los tiempos de descongelacion
y los niveles de potencia para descongelar pan.
* Retire cualquier alambre de amarre del
paquete y coloque el pan en un plato apto
para microondas. Las porciones pequeSas
de pan deben retirarse del empaque.
1. Presione el boton DEFROST.
2. Gire el dial hacia DEFROST BREAD.
Presione el dial para seleccionar.
3. Gire el dial para marcar el peso del
alimento. Presione el dial para seleccionar.
4. Presione el dial o el boton START/ENTER
para empezar a descongelar.
5. Voltee el alimento cuando el homo indique
TURN FOOD OVER (voltear alimento).
* Despues de descongelar, deje que el pan
repose por 5 minutes para completar la
descongelacion.
Tabla para descongelar pan
Tipo de pan Peso aproximado
1 bagel pequefio 0,2 Ib
1 bagel grande 0,3 Ib
4 rodajas de pan 0,2 Ib
1 molde de pan 1,0 Ib
1 panecillo 0,2 Ib
1 pan de hamburguesa 0,2 Ib
o hot dog
1 muffin pequeSo 0,2 Ib
1 muffin grande 0,3 Ib
71
Page 72

SUGERENCIAS PARA
DESCONGELAR
Use la funcion Auto Defrost para carnes, aves
y pescado. Use Time Defrost (descongelacion
con tiempo) para la mayoria de los demas
alimentos congelados. Use Bread Defrost para
los productos de pan.
Los alimentos congelados envueltos en
papel o plastico se pueden descongelar en
el empaque, sin embargo, se deben sacar
del empaque cuando se usa Auto Defrost.
Las porciones peque_as de pan se deben
sacar del paquete al usar Bread Defrost.
Los paquetes cerrados se debe perforar
o ventilar despues de que el alimento se
haya descongelado parcialmente. Los
contenedores plasticos se deben abrir
parcialmente.
Los platos congelados preempacados
tama_o familiar se pueden descongelar
y calentar en microondas. Si el alimento esta
en un contenedor de papel de aluminio,
traslade a un plato apto para microondas.
EFECTOS NORMALES
Interfetencia
Es posible que observe que un radio/
televisor interfiere mientras se usa el
microondas. AI igual que la interferencia
causada por otros aparatos peque_os,
no indica que haya un problema con el
microondas. Mueva el radio o el televisor
tan lejos del homo microondas como sea
posible, o revise la posicion de la antena
del radio/televisor.
,, Los alimentos que se echan a perder
f&cilmente no se deben dejar reposar m&s
de una hora despues de descongelarse.
La temperatura del cuarto promueve la
propagaci6n de bacterias dafiinas.
Para descongelaci6n adicional en el homo
o alimentos mas grandes, como las carnes
para hornear, utilice Auto Defrost. Cerci6rese
de que las carnes grandes se descongelen
completamente antes de cocinar.
Cuando esten descongelados, los alimentos
deben estar frios y suaves en todas las
&reas. Si todavia tienen un poco de hielo,
regrese el alimento al microondas por un
corto tiempo, o permita reposar pot unos
pocos minutos.
Calor del homo
• Los recipientes se pueden calentar debido
al calor trasladado del alimento calentado.
Es posible que necesite guantes para homo
para manipular los recipientes.
• Es posible que el vapor se escape alrededor
de la puerta.
Sonidos
• Es posible escuchar un sonido sordo de
golpes mientras el homo opera.
72
Page 73

FUNCION "FOOD IS READY"
(la comida est_ lista)
Para recordarle que tiene comida en el homo,
el homo muestra FOOD IS READY en la
pantalla y producir& un sonido una vez por
minuto hasta que se abra la puerta del homo
o se presione el boton STOP/CLEAR.
FUNCl6N "REVIEW" (revisar)
O
OPTIONS
0
0
OFTIONS
0
Utilice esta funcion para revisar las
selecciones actuales de coccion que
ha establecido.
FUNCION "BEEPER VOLUME"
(volumen del beeper)
Utilice esta funcion para ajustar el volumen
del beeper o para apagar el beeper.
1. Presione el boton OPTIONS.
2. Gire el dial hacia BEEPER VOLUME y
presione el dial para seleccionar.
FUNCl6N "CLOCK" (reioj)
El reloj debe configurarse antes de poder
usar el homo por primera vez (consulte la
seccion Inicio rapido para instrucciones).
1. Para cambiar la hora del reloj, presione el
boton OPTIONS y gire el dial hasta CLOCK.
Presione el dial para seleccionar.
2. Gire el dial para configurar la hora. Presione
el dial para seleccionar.
Presione el dial de seleccion en cualquier
momento durante la coccion.
3. Gire el dial para seleccionar el volumen del
beeper. Presione el dial para seleccionar.
3. Gire el dial para configurar los minutes.
Presione el dial para seleccionar.
4. Gire el dial para seleccionar AM o PM.
Presione el dial para seleccionar.
OPTIONS
0
OP[IONS
0
FUNCI6N "CLOCK DISPLAY
ON/OFF" (encenderlapagar
el reloj)
Utiliee esta funcion para apagar o encender
el reloj.
1. Presione el boton OPTIONS.
FUNCI6N "DISPLAY SPEED"
(velocidad de la pantaila)
Puede cambiar la velocidad del
desplazamiento de la pantalla si el
desplazamiento del mensaje es
demasiado lento o demasiado r&pido.
73
2. Gire el dial hasta CLOCK DISPLAY.
Presione el dial para seleccionar.
3. Gire el dial para seleccionar ON o OFF.
Presione el dial para seleccionar.
1. Presione el boton OPTIONS.
2. Gire el dial hasta DISPLAY SPEED.
Presione el dial para seleccionar.
3. Gire el dial para seleccionar la velocidad
del desplazamiento. Presione el dial para
seleccionar.
Page 74
OPTIONS
O
O
FUNCION "AUTO NIGHT LIGHT"
(luz nocturna autom_tica)
Use esta funcibn para programar el
encendido y apagado de la luz nocturna
automatica.
Para configurar la luz nocturna:
1. Presione el boton OPTIONS.
2. Gire el dial hasta NIGHT LIGHT. Presione
el dial para seleccionar.
3. Gire el dial hasta SET NIGHT LIGHT
(configurar luz nocturna). Presione el dial
para seleccionar.
4. Configure la hora, los minutos, y AM o PM
para la hora de encendido y apagado.
Presione el dial despues de cada seleccion.
Para revisar la configuracion de la luz
nocturna:
1. Presione el boton OPTIONS.
2. Gire el dial hasta NIGHT LIGHT. Presione
el dial para seleccionar.
3. Gire el dial hasta CHECK SETTING
(revisar configuracion). Presione el dial
para seleccionar.
Para cancelar la configuracion de la luz
nocturna:
1. Presione el boton OPTIONS.
2. Gire el dial hasta NIGHT LIGHT. Presione
el dial para seleccionar.
3. Gire el dial hasta CLEAR SETTING
(borrar configuracion). Presione el dial
para seleccionar.
OPTIONS
O
FUNCI6N "REMINDER"
(recordatorio)
Utilice esta funci6n como una alarma para
ayudarle a recordar Io que debe hacen
Para configurar el recordatorio:
1. Presione el boton OPTIONS.
2. Gire el dial hasta REMINDER y presione el
dial para seleccionar.
3. Gire el dial hasta SET (configurar). Presione
el dial para seleccionar.
4. Configure la hora, los minutos y AM/PM
para las horas de encendido y apagado.
Presione el dial despues de cada seleccion.
Para revisar la configuracion del
recordatorio:
1. Presione el boton OPTIONS.
2. Gire el dial hasta REMINDER y presione
el dial para seleccionar.
3. Gire el dial hasta REVIEW (revisar).
Presione el dial para seleccionar.
Para borrar la configuracion del
recordatorio:
1. Presione el boton OPTIONS.
2. Gire el dial hasta REMINDER y presione
el dial para seleccionar.
3. Gire el dial hasta CLEAR (borrar). Presione
el dial para seleccionar.
74
Page 75

OP_ONS
0
FUNCION "HELP" (ayuda)
Utilice esta funci6n para averiguar mas
sobre el homo y sus funciones. La pantalla
muestra una descripcion del programa
seleccionado.
Funciones que se encuentran en la funcion HELP.
1. Presione el boton OPTIONS.
2. Gire el dial hasta HELP. Presione el dial
para seleccionar.
3. Gire el dial para seleccionar el nombre de la
funcion. Presione el dial para seleccionar.
Add Minute (agregar minuto)
Adjust (ajustar)
Back (regresar)
Bacon (tocineta)
Beeper Volume
(volumen del beeper)
Beverage (bebida)
Child Lockout
(bloqueo para nidos)
Clear/Off (borrariapagar)
Clock (reloj)
Clock Display
(pantalla de reloj)
Convection (convecci6n)
Cook Time
(tiempo de cocci6n)
Defrost (Auto)
(descongelar-a utomatico)
Defrost (Bread)
(descongelar-pan)
Defrost (Time)
(descongelar-tiempo)
Display Speed
(velocidad de la pantalla)
Food Menu
(menQ de alimentos)
Frozen Entree
(plato congelado)
Help (ayuda)
Kitchen Timer
(reloj de cocina)
Manual Cook
(cocci6n manual)
Microwave (microondas)
My Recipes (mis recetas)
Night Light (luz nocturna)
Options (opciones)
Pasta
Pizza
Plate (plato)
Popcorn (palomitas de maiz)
Power (potencia)
Reminder (recordatorio)
Repeat Last (repetir QItimo)
Resume (continuar)
Review (revisar)
Rice (arroz)
Sauce (salsa)
Soup (sopa)
Speedcook (cocci6n rapida)
Start/Enter
(iniciariselecciona r)
Stop/Clear (parar/borrar)
Sure Simmer (hervidor)
Surface Light
(luz de superficie)
Vegetables (Canned)
(vegetales-enlatados)
Vegetables (Fresh)
(vegetales-frescos)
Vegetables (Frozen)
(vegetales-congelados)
Vent Fan (ventilador)
Warm/Reheat
(calentarirecalentar)
75
Page 76
FUNCION "CHILD LOCKOUT"
(bloqueo para ni5os)
Puede bloquear el panel de control
para evitar que los ni5os operen o
usen accidentalmente el homo.
Presione y mantenga presionado
START/ENTER per unos 3 segundos
para cerrar o para cancelar.
Cuando el panel de control est& cerrado,
se mostrara en la pantalla Control Panel
LOCKED por unos segundos cada vez que
un boton o un dial sea presionado.
C>
O
O
O
O
KITCHEN TIMER
O
O
FUNCION "SURFACE LIGHT"
(luz de superficie)
Use para iluminar la estufa.
Presione el boton C_, luego gire el dial
si desea cambiar el brillo.
Presione el boton (_ nuevamente para
apagar la luz.
FUNCION "VENT FAN"
(ventilador)
El ventilador retira los vapores de la
superficie que se producen al cocinar.
Presione el boton _. luego gire el dial si
desea cambiar la velocidad del ventilador.
Presione el boton _ nuevamente para
apagar el ventilador.
FUNCION "KITCHEN TIMER"
(reloj de cocina)
Use esta funcion en cualquier momento que
necesite un reloj para propositos generales.
Puede utilizarlo incluso mientras cocina
en el homo.
1. Presione el boton KITCHEN TIMER.
2. Gire el dial para seleccionar los minutos.
Presione el dial para seleccionar.
3. Gire el dial para seleccionar los segundos.
Presione el dial para seleccionar.
Para encender la luz nocturna, presione y
sostenga el boton C_ por aproximadamente
3 segundos.
Para apagar la luz nocturna, presione el
boton C_.
Para hacer una pausa, presione KITCHEN
TIMER. Para volver a iniciar, presione
KITCHEN TIMER de nuevo.
Para cancelar, presione y sostenga el bot6n
KITCHEN TIMER por aproximadamente
3 segundos.
FUNCION "AUTOMATIC FAN"
(ventilador autom_tico)
La funcion ventilador autom&tico protege al
homo del calor excesivo que se produzca en
la estufa abajo y del calor excesivo al interior
de la cavidad del horno.
Se enciende automaticamente cuando percibe
demasiado calor.
76
Si ha encendido el ventilador, quiz&s le ocurra
que no puede apagarlo. El ventilador se apagar&
autom&ticamente cuando las partes internas se
enfrien. Es posible que permanezcan encendido
por 30 minutos o mas despues de que la estufa
y los controles del homo esten apagados.
Page 77

CONSEJOS 0TILES
Las paredes, piso, ventana
interior, partes metalicas y
plSsticas en la puerta
Base giratoria
No utilioe el homo sin la base
giratoria en su tugar.
Una limpieza ocasional profunda con una
soluci6n de bicarbonato de soda y agua
mantiene fresco el interior.
COMO LIMPIAR EL iNTERiOR
Ciertas salpicaduras se pueden limpiar con un
papel toalla, otras pueden necesitar un patio
hQmedo con jabon. Retire las salpicaduras
grasosas con un patio hQmedo con jabon,
luego enjuague con un patio hOmedo.
No rocie o vierta liquidos directamente
en las areas del calefactor.
No utilice limpiadores abrasivos o utensilios
filosos en las paredes del homo.
Nunca utiliee un limpiador comercial de
hornos en ninguna parte del homo.
BASE GIRATORIA REMOVIBLE
El &rea debajo de la base giratoria se debe
limpiar con frecuencia para evitar olores y que
se produzca humo durante un ciclo de coccion.
La base giratoria se puede quebrar si se
cayera. Se debe lavar cuidadosamente en
agua tibia jabonosa. Seque por completo y
vuelva a instalar.
Cerci6rese de que el homo este apagado
antes de limpiar cualquier parte del mismo.
No limpie el interior del homo con esponjillas
met&licas. Se pueden soltar porciones de la
esponjilla y causar un choque electrico.
Es posible que ciertos alimentos caigan en las
&reas del calefactor. Los calefactores cocinaran
la mayor parte del alimento. Cualquier residuo
restante no afectara la coccion.
Para reemplazar la base giratoria, coloque el
centro de la misma en el centro del horno y
girela hasta que se acomode en su lugar.
Bandeja metalica negra
Plato giratorio de cristal
para microondas
BANDEJA Y PLATO GIRATORIO
Para evitar la rotura, permita que la bandeja
met&lica negra y el plato giratorio de vidrio para
microondas se enfrien por completo antes de
limpiarse. Lave cuidadosamente en agua tibia
jabonosa o en el lavaplatos.
77
Tambien puede usar una esponjilla para limpiar
la bandeja metalica negra.
No use abrasivos, podrian datiar el acabado.
Page 78

C(DMO LIMPIAR EL EXTERIOR
No recomendamos el uso de limpiadores
con amoniaco o alcohol, ya que pueden
da_ar el aspecto del homo. Si selecciona un
limpiador casero comQn, primero aplique el
limpiador directamente en un paso limpio,
luego limpie el area sucia.
Caja
Limpie el exterior con un patio jabonoso.
Enjuague y luego seque. Limpie la ventana
con un patio hOmedo.
Puerta de vidrio (en algunos modelos)
Limpie con una esponja h_meda limpia.
Seque completamente. No use atomizadores
de limpieza, grandes cantidades de jab6n y
agua, objetivos abrasivos o filosos en el panel,
ya que podr[an datiarlo.
Panel de control y puerta de acero
ino×idable (en algunos modelos)
No use una almohadilla de lana de acero,
ya que rayar& la superficie.
Para limpiar la superficie de acerco inoxidable,
utilice un patio caliente, hOmedo con un
detergente suave apropiado para superficies
de acedo inoxidable. Utilice un patio limpio,
caliente, hOmedo para retirar el jabon. Seque
con un patio seco y limpio.
Si permanecen restos de comida, intente
con un limpiador general de cocina, como
Fantastik _:,Simple Green® o Formula 409_°L
Para manchas dificiles, utilice un limpiador de
acero inoxidable estandar como Bon AmP>o
Cameo ®.
Aplique el limpiador con una esponja hOmeda.
Utilice un patio limpio, caliente, hOmedo para
retirar el limpiador. Seque con un patio seco y
limpio. Siempre restriegue suavemente en la
direcci6n de la veta.
Despues de limpiar, utilice un acabado de
acero inoxidable, come Stainless Steel Magic_
Revere Copper and Stainless Steel Cleaner '_
o Wenol All Purpose Metal Polish_: Sigas las
instrucciones del producto para la limpieza
de la superficie de acero inoxidable.
Parte inferior
Limpie a menudo la grasa y el polvo de la parte
inferior. Utilice una soluci6n de agua tibia y
detergente.
Rejilla del ventilador
Utilice agua jabonosa y un patio para plates
para limpiar la rejilla, si Io desea, utilice copitos
de algodon para limpiar entre los listones de
la rejilla.
Marco de la puerta
Es importante mantener el &rea limpia donde
la puerta se sella contra el horno. Utilice
0nicamente detergentes suaves, no abrasivos,
aplicados con una esponja limpia o patio
suave. Enjuague bien.
Quite el tornillo
LUZ DE ENCIMERAJ
LUZ NOCTURNA
1. Para cambiar la luz de encimera/luz
nocturna, primero desconecte la corriente
del fusible principal o del panel de
diferencial, o estire del enchufe.
2. Quite el tornillo del lateral de la cubierta
del compartimiento de la bombilla y baje
la cubierta hasta que pare.
3. AsegOrese que la bombilla esta fr[a antes
de retirarla. Rompa el sello adhesivo
desenroscando con cuidado la bombilla.
78
Reemplace la bombilla fundida con una
bombilla halbgena de 12 voltios, 20=varies
disponible en su centro de repuestos
y reparacionss Sears mas cercano.
Llame al l=888-SU=HOGAR sM
(1=888=784=6427).
4. Enrosque la nueva bombilla, luego levante
la cubierta y vuelva a poner el tornillo.
Conecte el homo a la corriente electrica.
Importante - al sustituir la bombilla del
compartimento, asegt3rese de sujetarla con
un paho o papel limpio.
Los aceites de la piel de sus manos podrian
depositarse sobre la superficie de la
bombilla y acortar su vida t3til.
Page 79
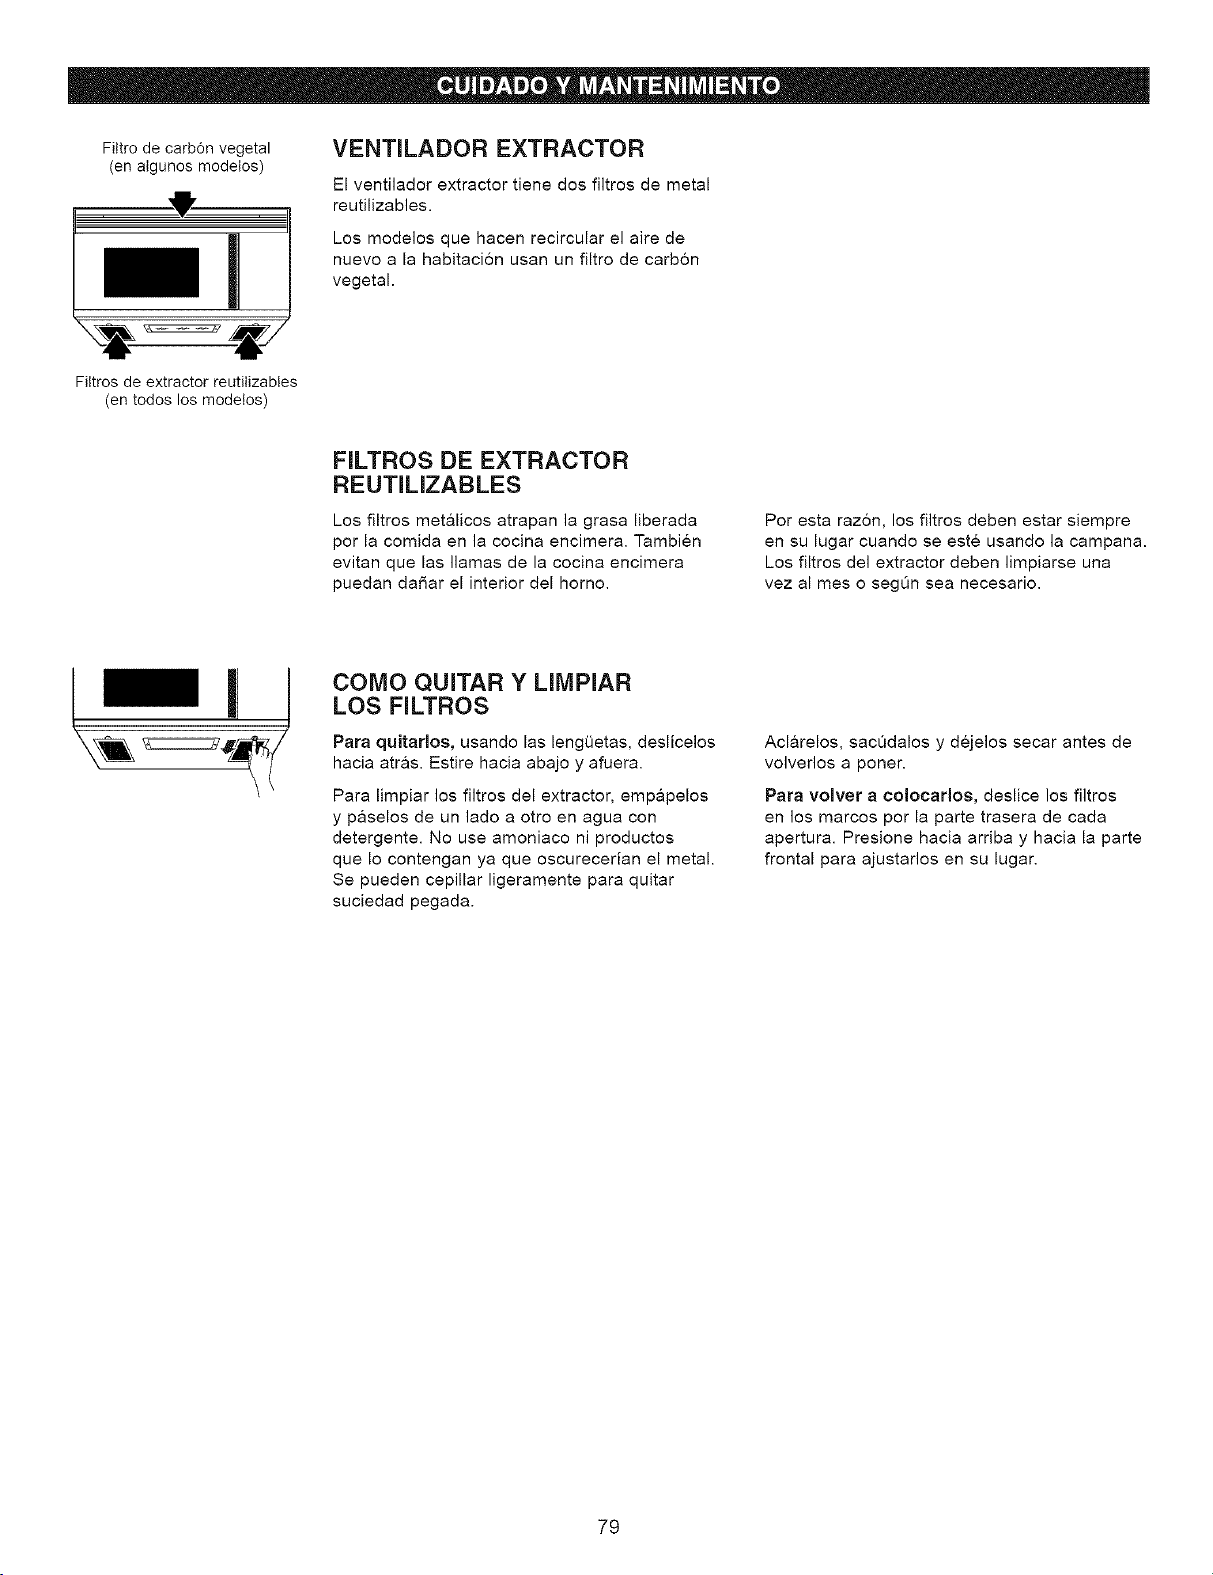
Fittro de carb6n vegetal
(en atgunos modelos)
!
Fittros de extractor reutitizables
(en todos los modelos)
VENTILADOR EXTRACTOR
El ventilador extractor tiene dos filtros de metal
reutilizables.
Los modelos que hacen recircular el aire de
nuevo a la habitacion usan un filtro de carbon
vegetal.
FILTROS DE EXTRACTOR
REUTILIZABLES
Los filtros met&licos atrapan la grasa liberada
por la comida en la cocina encimera. Tambien
evitan que las llamas de la cocina encimera
puedan da_ar el interior del homo.
COMO QUITAR Y LIMPIAR
LOS FILTROS
Para quitarlos, usando las lengQetas, deslicelos
hacia atras. Estire hacia abajo y afuera.
Para limpiar los filtros del extractor, empapelos
y paselos de un lado a otro en agua con
detergente. No use amoniaco ni productos
que Io contengan ya que oscurecerian el metal.
Se pueden cepillar ligeramente para quitar
suciedad pegada.
Por esta razon, los filtros deben estar siempre
en su lugar cuando se este usando la campana.
Los filtros del extractor deben limpiarse una
vez al mes o segOn sea necesario.
Acl&relos, sacQdalos y dejelos secar antes de
volverlos a poner.
Para volver a colocarlos, deslice los filtros
en los marcos por la parte trasera de cada
apertura. Presione hacia arriba y hacia la parte
frontal para ajustarlos en su lugar.
79
Page 80

FILTROS DE CARBON VEGETAL
F
Retire la parrilta superior
quitando los dos tornillos
que Io sujetan
El filtre de carbon vegetal no puede
limpiarse. Debe cambiarse per otto. Ordene
la parte No. WB2X9883 dispenible en su
centre de repuestos y reparaciones Sears
m&s cercano. Llame al 1-888-SU=HOGAR sM
(1-888=784-6427).
Si el modelo no realiza la extracci6n al exterior,
el aire recircular& a traves de un filtro de
carb6n vegetal no reutilizable que ayuda a
quitar olores y humos.
come QUITAR EL FILTRO
DE CARBON VEGETAL
Para quitar el filtro de carb6n vegetal,
primero desconecte la corriente del fusible
principal o del panel de diferencial o estire del
enchufe. Retire la parrilla superior quitando los
dos tornillos que Io sujetan.
Puede ser que necesite abrir las puertas
del armario para quitar los tornillos.
El filtro de carb6n vegetal deberia cambiarse
cuando est& visiblemente sucio o descolorido
(normalmente tras 6 o 12 meses, segQn el use).
Deslice el filtro hacia la parte frontal del homo
y saquelo.
J
lUlUlU
IIHIII
come INSTALAR EL FILTRO
DE CARBON VEGETAL
Para instalar un nuevo filtro de carb6n
vegetal, retire el plastico y cualquier otro
envoltorio del nuevo filtro.
Inserte el filtro en la apertura superior del
homo come se muestra, maniobrandolo
detras de la rejilla pl&stica hasta que se
ajuste correctamente en su lugar. Descansar&
en un angulo detras de la rejilla pl&stica en
dos lengL_etas laterales de soporte yen frente
de la lengQeta trasera derecha. Vuelva a
colocar la rejilla y los dos tornillos en su lugar.
Conecte la corriente de nuevo.
80
Page 81

PROBLEMA POSIBLE CAUSA SOLUCION
LUCES
La luz se opaca
durante el ciclo de
cocci6n r&pida y
se enciende y se
apaga, incluso con
el nivel m_ximo de
potencia
La luz es visible
alrededor de la
puerta y caja
exterior mientras se
utiliza la cocci6n
r_pida
VENTILADOR
El ventilador continua
operando despu_s de
terminar la cocci6n
El ventilador del
homo emite aire
caliente cuando el
homo est_ encendido
El ventilador se
enciende
autom_iticamente
cuando el homo
no est_ en uso
Esto es normal.
El nivel de potencia
se ha reducido
automaticamente
debido a que el
homo esta caliente.
Esto es normal.
El homo se esta
enfriando.
Esto es normal.
Esto es normal.
• Esto es normal. El horno percibe el nivel de calor
y se ajusta automaticamente.
= Cuando el homo esta encendido, es posible que la luz
sea visible alrededor de la puerta yen la caja exterior.
= El ventilador se apaga automaticamente cuando las partes
internas del homo se han enfriado.
• Si la estufa se calienta mucho, el ventilador se enciende.
El ventilador se
enciende
autom_ticamente
cuando utiliza el
microondas
COCClON
El homo produce
ruidos extrahos
mientras opera
Sale humo del homo
cuando se abre
la puerta
El alimento no est_
completamente
cocinado o dorado
al final del programa
de cocci6n
Esto es normal.
Los sonidos del ventilador
funcionando son normales.
El tablero de reles esta
encendiendo y apagando
los componentes.
Los alimentos tienen
alto contenido de grasa.
Se us5 aerosol en
los recipientes.
Es posible que los
tiempos programados no
concuerden con el tamado
o la cantidad de alimentos
que este cocinando.
• Si el microondas se utiliza despues de utilizar la cocci6n rapida
y el horno percibe que esta demasiado caliente, el ventilador
se enciende para enfriar el horno.
= Estos sonidos son normales.
= El humo es normal mientras se cocinan alimentos altos
en grasa. Utilice aceite vegetal o de olivas en la carne en vez
de cubrir el sarten completo.
= Aumente o disminuya el tiempo para el nivel de cocci6n
correcto o ajuste las lamparas superior e inferior para dorar
los alimentos.
81
Page 82

PROBLEIVIA POSIBLE CAUSA SOLUCION
PANTALLA
La pantalla est_ La pantalla del reloj ,, Revise el menO OPTIONS para la configuraci6n de la pantalla
en blanco se ha apagado, del reloj. Encienda la pantalla.
La pantalla muestra Se ha bloqueado el • Presione y sostenga el bot6n START/ENTER por
"Control Panel control, aproximadamente 3 segundos para desbloquear el control.
LOCKED" (panel de
control bloqueado)
La pantalla de control El reloj no esta • Configure el reloj.
est_ iluminada cuando conflguracto.
el homo ann no ha
iniciado La puerta no esta cerrada • Abra la puerta y cierrela firmemente.
firmemente.
El bot6n START/ENTER • Presione el bot6n START/ENTER.
no se presion6 despues
de ingresar la selecci6n
de cocci6n.
Ya se ingres6 otra • Presione STOP/CLEAR.
selecci6n en el homo y el
bot6n STOP/CLEAR no
se ha presionacto para
cancelar.
El tamafio, la cantidad o
el tiempo de cocci6n no
se seleccion6 despues
de seleccionar
VEGETABLES (FRESH,
FROZEN, CANNED),
BACON, DEFROST-TIME.
COOK TIME o PIZZA
Se presion6 STOP/CLEAR
accidentalmente.
No se ingres6 el peso del
alimento despues de
seleccionar DEFROST-
AUTO o DEFROST-
BREAD.
• Cerci6rese de que ingres6 el tiempo de cocci6n despues
de hacer la selecci6n.
• Vuelva a establecer el programa de cocci6n y presione
START/ENTER.
• Cerci6rese de que ingres6 el peso ctel alimento despues
de seleccionar DEFROST-AUTO o DEFROST-BREAD.
82
Page 83

PROBLEMA POSIBLE CAUSA SOLUCION
OTROS
PROBLEIVlAS
La puerta y el interior Las lamparas calefactoras = Esto es normal.
del horno est_n producen calor intenso = Utilice guantes para el horno para retirar los alimentos
calientes en un espacio peque_o, cuando esten listos.
El piso del homo
est& caliente, incluso
cuando el homo
no se ha usado
El homo no enciende Es posible que se haya = Reemplace el fusible o vuelva a iniciar el interruptor de circuitos.
El plato giratorio • Esto es normal. Centre la bandeja en la base giratoria.
de cristal para
microondas no
encaja en el centro
La luz de la estufa esta
Iocalizada debajo del piso
del horno. Cuando la luz
esta encendida, el calor
que produce puede hacer
que el horno se caliente.
quemado un fusible o
que el interruptor de
circuitos se haya saltado.
Subida de tensi6n. = Desconecte el homo, luego conecte nuevamente.
El enchufe no esta • Cerci6rese de que el enchufe del homo esta completamente
completamente insertado insertado en el tomacorriente.
en el tomacorriente.
• Esto es normal.
83
Page 84

Your Home
For repair-in your home-of all major brand appliances,
lawn and garden equipment, or heating and cooling systems,
no matter who made it, no matter who sold it!
For the replacement parts, accessories and
owner's manuals that you need to do-it-yourself.
For Sears professional installation of home appliances
and items like garage door openers and water heaters.
1-800-4-MY-HOME ® (1-800-469-4663)
Call anytime, day or night (U.S.A. and Canada)
www.sears.com www.sears.ca
Our Home
For repair of carry-in items like vacuums, lawn equipment,
and electronics, call or go on-line for the location of your nearest
Sears Parts & Repair Center.
1-800-488-1222
Call anytime, day or night (U.S.A. only)
www.sears.com
To purchase a protection agreement (U.S.A.)
or maintenance agreement (Canada) on a product serviced by Sears:
1-800-827-6655 (U.S.A.) 1-800-361-6665 (Canada)
Para pedir servicio de reparaci6n
a domicilio, y para ordenar piezas:
1-888-SU-HOGAR ®
(1-888-784-6427)
Au Canada pour service en frangais:
1-800-LE-FOYER Mc
(1-800-533-6937)
www.sears.ca
Sea.its
® Registered Trademark / TMTrademark / Service Mark of Sears Brands, LLC
® Marca Registrada / Mama de F_brica / Marca de Servicio de Sears Brands, LLC
MC MD
Marque de commerce / Marque d6pos6e de Sears Brands, LLC ® Sears Brands, LLC
TM SM
SM
 Loading...