

Kenmore ULTRA WASH, ULTRA WASH 665.1340 Series, ULTRA WASH 665.1344 Series, ULTRA WASH 665.1773 Series Use & Care Manual
Page 1

ULTRA WASH® Dishwasher
Use & Care Guide
Lavavajillas ULTRA WASH
Manual de uso y cuidado
Lave-vaisselle ULTRA WASH
Guide d’utilisation et d’entretien
Models/Modelos/Modèles 665.1340✼, 665.1344✼, 665.1773✼
✼ = color number, número de color, numéro de couleur
®
®
W10250186A Sears Canada Inc., Toronto, Ontario, Canada M5B 2B8 www.sears.ca
Sears Roebuck and Co., Hoffman Estates, IL 60179 U.S.A. www.sears.com
Page 2

TABLE OF CONTENTS
PROTECTION AGREEMENTS
PROTECTION AGREEMENTS.......................................................2
WARRANTY ....................................................................................3
DISHWASHER SAFETY .................................................................4
Before Using Your Dishwasher....................................................5
PARTS AND FEATURES................................................................6
ULTRA WASH
START-UP GUIDE .......................................................................... 7
Using Your New Dishwasher .......................................................7
CONNECTING THE DISHWASHER
(ON PORTABLE MODELS ONLY).................................................7
Connecting the Faucet Adapter...................................................7
Connecting to Water and Electrical Supply.................................8
Using the Faucet ..........................................................................8
Disconnecting the Dishwasher ....................................................8
DISHWASHER LOADING...............................................................9
Loading Suggestions ...................................................................9
Loading Top Rack........................................................................9
Loading Bottom Rack ................................................................10
Loading Silverware Basket ........................................................10
DISHWASHER USE......................................................................11
Detergent Dispenser ..................................................................11
Rinse Aid Dispenser...................................................................12
Dishwasher Efficiency Tips ........................................................12
Cycle Selection Charts...............................................................13
Canceling a Cycle ......................................................................13
Changing a Cycle or Setting ......................................................14
Adding Items During a Cycle .....................................................14
Option Selections.......................................................................14
Cycle Status Indicators..............................................................15
Drying System............................................................................15
Overfill Protection Float..............................................................15
WASHING SPECIAL ITEMS.........................................................16
DISHWASHER CARE ...................................................................17
Cleaning......................................................................................17
Drain Air Gap..............................................................................17
Storing ........................................................................................17
TROUBLESHOOTING ..................................................................18
SERVICE NUMBERS............................................... BACK COVER
®
Soil Removal System..........................................7
Master Protection Agreements
Congratulations on making a smart purchase. Your new
Kenmore
dependable operation. But like all products, it may require
preventive maintenance or repair from time to time. That’s when
having a Master Protection Agreement can save you money and
aggravation.
The Master Protection Agreement also helps extend the life of
your new product. Here’s what the Agreement* includes:
®
product is designed and manufactured for years of
✔ Parts and labor needed to help keep products
operating properly under normal use, not just defects.
Our coverage goes well beyond the product warranty.
No deductibles, no functional failure excluded from
coverage— real protection.
✔ Expert service by a force of more than 10,000
authorized Sears service technicians, which means
someone you can trust will be working on your product.
✔ Unlimited service calls and nationwide service, as
often as you want us, whenever you want us.
✔ “No-lemon” guarantee – replacement of your covered
product if four or more product failures occur within
twelve months.
✔ Product replacement if your covered product can’t be
fixed.
✔ Annual Preventive Maintenance Check at your
request – no extra charge.
✔ Fast help by phone – we call it Rapid Resolution –
phone support from a Sears representative on all
products. Think of us as a “talking owner’s manual.”
✔ Power surge protection against electrical damage due
to power fluctuations.
✔ $250 Food Loss Protection annually for any food
spoilage that is the result of mechanical failure of any
covered refrigerator or freezer.
✔ Rental reimbursement if repair of your covered product
takes longer than promised.
✔ 10% discount off the regular price of any non-covered
repair service and related installed parts.
Once you purchase the Agreement, a simple phone call is all that
it takes for you to schedule service. You can call anytime day or
night, or schedule a service appointment online.
The Master Protection Agreement is a risk free purchase. If you
cancel for any reason during the product warranty period, we will
provide a full refund. Or, a prorated refund anytime after the
product warranty period expires. Purchase your Master
Protection Agreement today!
Some limitations and exclusions apply. For prices and
additional information in the U.S.A. call 1-800-827-6655.
*Coverage in Canada varies on some items. For full details
call Sears Canada at 1-800-361-6665.
2
Sears Installation Service
For Sears professional installation of home appliances, garage
door openers, water heaters, and other major home items, in the
U.S.A. or Canada call 1-800-4-MY-HOME
®
.
Page 3

KENMORE APPLIANCE WARRANTY
ONE YEAR LIMITED WARRANTY
When installed, operated and maintained according to all
instructions supplied with the product, if this appliance fails due
to a defect in material or workmanship within one year from the
date of purchase, call 1-800-4-MY-HOME
repair.
If this appliance is used for other than private family purposes,
this warranty applies for only 90 days from the date of purchase.
THIS WARRANTY COVERS ONLY DEFECTS IN MATERIAL
AND WORKMANSHIP. SEARS WILL NOT PAY FOR:
1. Expendable items that can wear out from normal use,
including but not limited to filters, belts, light bulbs, and bags.
2. A service technician to instruct the user in correct product
installation, operation or maintenance.
3. A service technician to clean or maintain this product.
4. Damage to or failure of this product if it is not installed,
operated or maintained according to all instructions supplied
with the product.
5. Damage to or failure of this product resulting from accident,
abuse, misuse or use for other than its intended purpose.
6. Damage to or failure of this product caused by the use of
detergents, cleaners, chemicals or utensils other than those
recommended in all instructions supplied with the product.
7. Damage to or failure of parts or systems resulting from
unauthorized modifications made to this product.
®
to arrange for free
DISCLAIMER OF IMPLIED WARRANTIES; LIMITATION OF
REMEDIES
Customer’s sole and exclusive remedy under this limited
warranty shall be product repair as provided herein. Implied
warranties, including warranties of merchantability or fitness for a
particular purpose, are limited to one year or the shortest period
allowed by law. Sears shall not be liable for incidental or
consequential damages. Some states and provinces do not allow
the exclusion or limitation of incidental or consequential
damages, or limitations on the duration of implied warranties of
merchantability or fitness, so these exclusions or limitations may
not apply to you.
This warranty applies only while this appliance is used in the
United States and Canada.
This warranty gives you specific legal rights, and you may also
have other rights which vary from state to state.
Sears, Roebuck and Co.
Hoffman Estates, IL 60179
Sears Canada Inc.
Toronto, Ontario, Canada M5B 2B8
PRODUCT RECORD
Record your complete model number, serial number, and
purchase date. You can find this information on the model and
serial number label located on the product.
Have this information available to help you obtain assistance or
service more quickly whenever you contact Sears concerning
your appliance.
Model number __ __ __. __________________________________________
Serial number___________________________________________________
Purchase date __________________________________________________
Save these instructions and your sales receipt for future
reference.
3
Page 4

DISHWASHER SAFETY
Your safety and the safety of others are very important.
We have provided many important safety messages in this manual and on your appliance. Always read and obey all safety
messages.
This is the safety alert symbol.
This symbol alerts you to potential hazards that can kill or hurt you and others.
All safety messages will follow the safety alert symbol and either the word “DANGER” or “WARNING.”
These words mean:
You can be killed or seriously injured if you don't immediately
DANGER
WARNING
All safety messages will tell you what the potential hazard is, tell you how to reduce the chance of injury, and tell you what can
happen if the instructions are not followed.
IMPORTANT SAFETY INSTRUCTIONS
WARNING: When using the dishwasher, follow basic precautions, including the following:
follow instructions.
can be killed or seriously injured if you don't
You
instructions.
follow
■ Read all instructions before using the dishwasher.
■ Use the dishwasher only for its intended function.
■ Use only detergents or rinse agents recommended for use
in a dishwasher, and keep them out of the reach of children.
■ When loading items to be washed:
1) Locate sharp items so that they are not likely to damage
the door seal; and
2) Load sharp knives with the handles up to reduce the risk
of cut-type injuries.
■ Do not wash plastic items unless they are marked
“dishwasher safe” or the equivalent. For plastic items not so
marked, check the manufacturer's recommendations.
■ Do not touch the heating element during or immediately
after use.
■ Do not operate the dishwasher unless all enclosure panels
are properly in place.
SAVE THESE INSTRUCTIONS
■ Do not tamper with controls.
■ Do not abuse, sit on, or stand on the door, lid, or dish racks
of the dishwasher.
■ To reduce the risk of injury, do not allow children to play in
or on the dishwasher.
■ Under certain conditions, hydrogen gas may be produced in
a hot water system that has not been used for two weeks or
more. HYDROGEN GAS IS EXPLOSIVE. If the hot water
system has not been used for such a period, before using
the dishwasher turn on all hot water faucets and let the
water flow from each for several minutes. This will release
any accumulated hydrogen gas. As the gas is flammable,
do not smoke or use an open flame during this time.
■ Remove the door or lid to the washing compartment
when removing an old dishwasher from service or
discarding it.
4
Page 5
Before Using Your Dishwasher
WARNING
Tip Over Hazard
Do not use dishwasher until completely installed.
Do not push down on open door.
Doing so can result in serious injury or cuts.
GROUNDING INSTRUCTIONS
■
For a grounded, cord-connected dishwasher:
The dishwasher must be grounded. In the event of a
malfunction or breakdown, grounding will reduce the
risk of electric shock by providing a path of least
resistance for electric current. The dishwasher is
equipped with a cord having an equipment-grounding
conductor and a grounding plug. The plug must be
plugged into an appropriate outlet that is installed and
grounded in accordance with all local codes and
ordinances.
WARNING: Improper connection of the
equipment-grounding conductor can result in a risk of
electric shock. Check with a qualified electrician or
service representative if you are in doubt whether the
dishwasher is properly grounded. Do not modify the
plug provided with the dishwasher; if it will not fit the
outlet, have a proper outlet installed by a qualified
electrician.
■
For a permanently connected dishwasher:
The dishwasher must be connected to a grounded
metal, permanent wiring system, or an equipmentgrounding conductor must be run with the circuit
conductors and connected to the equipmentgrounding terminal or lead on the dishwasher.
SAVE THESE INSTRUCTIONS
5
Page 6

PARTS AND FEATURES
A
J
K
B
L
C
M
D
N
E
F
G
H
O
P
Q
I
A. Upper level wash
B. Top rack
C. Bottom rack
D. Fold-down tines (on some models)
E. Lower spray arm
Control Panel
F. Water inlet opening (in tub wall)
G. Rack bumper
H. Heating element
I. Vent
J. Top spray arm
K. ULTRA FLOW™ water feed tube
L. Silverware basket
M. Model and serial number label
N. ULTRA WASH
O. Overfill protection float
P. Detergent dispenser
Q. Rinse aid dispenser
®
module
Delay Hours: 2-4-6 or 4 Hour Delay (depending on model) Sani Rinse (on some models)
6
Page 7

ULTRA WASH® Soil Removal System
The ULTRA WASH soil removal system gives you sparkling clean
dishes, while using less energy and time. The ULTRA WASH soil
removal system includes:
A multilevel wash sytem with a self-cleaning filter.
START-UP GUIDE
Before using your dishwasher, remove all packaging materials.
Read this entire Use and Care Guide. You will find important
safety information and useful operating tips.
IMPORTANT: The Start/Resume light will flash if the door is
opened during a cycle. Power interruptions during a cycle
may also cause the Start/Resume light to flash. Press START/
RESUME to continue a cycle.
Using Your New Dishwasher
1. Rinse aid is essential for good drying. Be sure to fill the
dispenser before you use your new dishwasher. Each filling
will last about 1 to 3 months depending on your usage.
2. Scrape large food soil and hard items (toothpicks or bones)
from dishes.
3. Properly load the dishwasher. (See “Dishwasher Loading.”)
Load dishes with space in between so water will reach the
soiled surfaces. Make sure nothing keeps the spray arm(s)
from spinning freely.
4. Add detergent. Always use a high-quality brand detergent.
(See “Dishwasher Use.”)
5. Push door firmly closed. The door latches automatically.
6. Run hot water at the sink nearest your dishwasher until the
water is hot. (See “Dishwasher Efficiency Tips.”) Turn off
water.
CONNECTING THE
DISHWASHER
(On portable models only)
Connecting the Faucet Adapter
NOTE: A special adapter must be installed on the faucet before
the dishwasher can be connected. Complete Installation
Instructions and the adapter are packed with your dishwasher.
(See the Installation Instructions.)
When moving your dishwasher, make sure the door is latched.
Hold the dishwasher at the top front corners.
Preparing the faucet
1. Remove the screen holder or aerator, screen, and washer
from the end of the faucet.
2. Use the faucet adapter kit that came with your portable
dishwasher to modify the faucet where the dishwasher will be
used.
NOTE: Remove and save the washer, screen, and screen holder
or aerator for future use.
A
B
C
A. Washer
B. Screen
C. Screen holder or aerator
7. Press the desired cycle and option selections. (See
“Dishwasher Use.”)
8. Press START/RESUME, or press START/RESUME to repeat
the same cycle and options as the previous cycle.
Connecting the faucet adapter to faucets with
external threads
Insert the 2 screens and then the thin washer from the faucet
adapter kit into the faucet adapter. Attach the adapter onto the
end of the faucet.
7
Page 8

NOTE: Do not use the thick washer.
A
B
C
A. Thin washer
B. Screens
C. Faucet adapter
Connecting the faucet adapter to faucets with
internal threads
Insert the 2 screens, the thin washer, and then the thick washer
from the faucet adapter kit into the faucet adapter. Attach the
adapter onto the end of the faucet.
NOTE: Use both washers.
A
B
C
D
A. Thick washer
B. Thin washer
C. Screens
D. Faucet adapter
WARNING
Electrical Shock Hazard
Plug into a grounded 3 prong outlet.
Do not remove ground prong.
Do not use an adapter.
Do not use an extension cord.
Failure to follow these instructions can result in death,
fire, or electrical shock.
6. Plug into a grounded 3 prong outlet.
Using the Faucet
You can draw water from the faucet while the dishwasher is
connected.
NOTE: Do not draw water while the dishwasher is filling or while
water is being pumped out. (This helps avoid a low fill when
dishwasher is filling or mixing drain water with fresh water when
dishwasher is draining.)
Press the red button on the hose connector to draw water from
the faucet. (The faucet is set on hot. Adjust the faucet for the
water temperature you want.)
NOTE: Turn the hot water back on after you draw water from the
faucet. Turn off the cold water.
Connecting to Water and Electrical Supply
1. Run water at the faucet until it is hot. Turn off the water.
2. Pull the hoses out of their storage compartment on the back
of the dishwasher.
NOTE: Make sure the hoses are not kinked or twisted. Kinked
hoses reduce washing performance.
3. Pull down on the locking collar while lifting the hose
connector onto the faucet adapter.
A
B
C
A. Faucet adapter
B. Locking collar
C. Hose connector
4. When the connector snaps into place, release the locking
collar.
5. Turn the hot water on slowly until it is all the way on.
Disconnecting the Dishwasher
1. Turn off the hot water. (This can be done after the last rinse.)
2. Press the red button on the connector to release the water
pressure.
A
B
C
D
A. Faucet adapter
B. Locking collar
C. Red button
D. Hose connector
3. Lift slightly on the hose connector while pulling down the
locking collar. Pull down on the connector.
4. Empty any remaining water from the connector by turning the
connector upside down.
5. Unplug the power supply cord and return it to the storage
compartment.
6. Return the hoses to the storage compartment.
8
Page 9
DISHWASHER LOADING
Loading Suggestions
■ Remove leftover food, bones, toothpicks and other hard
items from the dishes. To conserve water and energy and
save time, it is not necessary to rinse dishes before putting
them into the dishwasher.
NOTE: Prerinsing dishes soiled with tomato-based products
is recommended to avoid staining the dishware.
The wash module removes food particles from the water. The
module contains a multilevel wash system with a
self-cleaning filter.
NOTE: If hard items such as fruit seeds, nuts, and eggshells
enter the wash module, you might hear grinding, crunching,
or buzzing sounds. These sounds are normal when hard
items enter the module. To avoid damage to the dishwsher,
do not let metallic items (such as pot handle screws) get into
the wash module.
■ For best drying, water must be able to drain from all surfaces.
■ It is important for the water spray to reach all soiled surfaces.
■ Load dishes so they are not stacked or overlapping if
possible.
■ Load heavy pots and pans gently. Heavy items can damage
the interior of the door if they are dropped or bumped.
■ Make sure pot lids and handles, pizza pans, cookie sheets,
etc., do not interfere with the spray arm rotation.
■ Conserve water and energy and save time over hand rinsing
by running a rinse cycle to keep dishes moist if you do not
plan to wash them soon. Foods such as eggs, rice, pasta,
spinach, and cooked cereals may be hard to remove if they
are left to dry over a period of time.
■ Place items so open ends face down for best cleaning and
draining.
Quiet operating tips
To avoid thumping/clattering noises during operation:
■ Make sure lightweight load items are secured in the racks.
■ Make sure pot lids and handles, pizza pans, cookie sheets,
etc., do not touch interior walls or interfere with the rotation of
the spray arm(s).
■ Load dishes so they do not touch one another.
NOTE: For built-in models, keep sink drain plugs closed during
dishwasher operation to avoid noise transfer through drains.
Loading Top Rack
The top rack is designed for cups, glasses, and smaller items.
(See recommended loading patterns shown.)
NOTE: The features on your dishwasher rack may vary from the
drawings shown.
10 place setting
12 place setting
■ Place items so open ends face down for cleaning and
draining.
■ Load glasses in top rack only. The bottom rack is not
designed for glasses. Damage can occur.
■ Place cups and glasses in the rows between tines. Placing
them over the tines can lead to breakage and water spots.
■ China, crystal, and other delicate items must not touch each
other during dishwasher operation. Damage may occur.
■ Load plastic items in the top rack only. Only plastic items
marked “dishwasher safe” are recommended.
■ Load plastic items so the force of the spray does not move
them during the cycle.
■ To avoid chipping, do not let stemware touch other items.
■ Small bowls, pans, and other utensils can be placed in the
top rack. Load bowls in the center section for best stability.
9
Page 10
Loading Bottom Rack
The bottom rack is designed for plates, pans, casseroles, and
utensils. (See recommended loading patterns shown.)
NOTE: The features on your dishwasher rack may vary from the
drawings shown.
10 place setting
■ Do not load glasses, cups, or plastic items in the bottom
rack. Load small items in the bottom rack only if they are
secured in place.
■ Load plates, soup bowls, etc., between tines.
■ Overlap the edges of plates for large loads.
■ Load soup, cereal, and serving bowls in the rack in a variety
of ways depending upon their size and shape. Load bowls
securely between the rows of tines. Do not nest bowls
because the spray will not reach all surfaces.
Fold-down tines (on some models)
You can fold down one row of tines at the back of the bottom
rack.
1. Grasp the tip of the tine that is in the tine holder.
2. Gently pull the tine out of the tine holder.
3. Lay the row of tines down in the rack to make room for larger
dishes, bowls, pots, pans or roasters.
Loading Silverware Basket
Load the silverware basket while it is in the bottom rack or take
the basket out for loading on a counter or table.
IMPORTANT: Always load items (knives, skewers, etc.) pointing
down.
■ Place small items such as baby bottle caps, jar lids, corncob
holders, etc., in a covered section. Close the cover to hold
small items in place.
Covers on some models.
12 place setting
■ Load cookie sheets, cake pans, and other large items at the
sides and back. Loading such items in front can keep the
water spray from reaching the detergent dispenser.
■ Secure heavily soiled cookware face down in the rack.
■ Make sure pot handles and other items do not stop rotation
of the spray arm(s). The spray arm(s) must move freely.
■ Do not load items between the bottom rack and the side of
the dishwasher tub because they might block the water inlet
opening.
NOTE: If you have removed the bottom rack for unloading or
cleaning, replace it with the bumpers in front.
10
■ Use suggested loading patterns, as shown, to increase
washability of your silverware. Load items using the slots with
the covers down to avoid silverware nesting.
■ If your silverware basket does not have covers or when
covers are up, mix items in each section of the basket with
some pointing up and some down to avoid nesting. Spray
cannot reach nested items. Covers on some models.
Page 11
DISHWASHER USE
Detergent Dispenser
The detergent dispenser has 2 sections. The Pre-Wash section
empties detergent into the dishwasher when you close the door.
A
BCD
■ Water hardness can change over a period of time. Find out
your water’s hardness by asking your Sears Sales Associate,
local water department, water softener company, or county
extension agent.
Where to fill
Top of 3rd step (9 tsp or 45 mL)
A. Cover
B. Main Wash section
C. Cover latch
D. Pre-Wash section
The larger Main Wash section automatically empties detergent
into the dishwasher during the main wash. (See the “Cycle
Selection Charts.”)
■ Use automatic dishwashing detergent only. Other detergents
can produce excessive suds that can overflow out of the
dishwasher and reduce washing performance.
■ Add detergent just before starting a cycle.
■ Store tightly closed detergent in a cool, dry place. Fresh
automatic dishwasher detergent results in better cleaning.
NOTE: Do not use detergent if you have selected a rinse cycle.
Filling the dispenser
1. If the dispenser cover is closed, open the cover by pushing
the cover latch.
2. Fill the Main Wash section with detergent. See “How much
detergent to use.”
3. Fill the Pre-Wash section if needed. (See “Cycle Selection
Charts.”)
4. Close the dispenser cover.
The cover will open during the cycle to dispense the detergent.
How much detergent to use
■ The amount of detergent to use depends on the hardness of
your water and the type of detergent. If you use too little,
dishes will not be clean. If you use too much in soft water,
glassware will etch.
Top of 2nd step (6 tsp or 30 mL)
Top of 1st step (3 tsp or 15 mL)
Soft to Medium Water (0-6 grains per gallon)
[typical water softener water and some city water]
Soil Level Main Wash Pre-Wash
Lightly soiled/Prerinsed dish loads
Normally soiled
dish loads
Heavily soiled
dish loads
Medium to Hard Water (7-12 grains per gallon)
3 tsp (15 mL)
[top of 1st step]
6 tsp (30 mL)
[top of 2nd step]
9 tsp (45 mL)
[top of 3rd step]
3 tsp (15 mL)
[top of 1st step]
6 tsp (30 mL)
[top of 2nd step]
6 tsp (30 mL)
[top of 2nd step]
†
[well water and some city water]
Soil Level Main Wash Pre-Wash
All soil types 9 tsp (45 mL)
[top of 3rd step]
†
It might be necessary to use the Hi Temp wash option for best
6 tsp (30 mL)
[top of 2nd step]
wash performance in very hard water.
NOTE: Fill amounts shown are for standard powdered detergent.
Amounts may vary if you use liquid or concentrated powdered
detergent. Tablet detergents should be placed in the main wash
section of the detergent dispenser with the cover closed. Follow
instructions on the package when using liquid dishwasher
detergent, concentrated powdered detergent or tablet detergent.
IMPORTANT: See “Cycle Selection Charts” for which detergent
dispenser sections to use with each cycle.
11
Page 12

Rinse Aid Dispenser
IMPORTANT: Your dishwasher is designed to use a liquid rinse
aid. The use of rinse aids greatly improves drying by allowing
water to drain from the dishes during the final rinse. They also
keep water from forming droplets that can dry as spots or
streaks. Do not use a solid or bar-type rinse aid.
Checking the dispenser
Check the center of the fill indicator cap. Clear means it needs
filling.
Or you can remove the fill indicator cap. If an “E” is visible, the
dispenser is empty.
Filling the dispenser
The rinse aid dispenser holds 6 oz (175 mL) of rinse aid. Under
normal conditions, this will last for about 3 months. You do not
have to wait until the dispenser is empty to refill it. Try to keep it
full, but be sure not to overfill it.
1. Make sure the dishwasher door is completely open.
2. Remove the fill indicator cap.
3. Add rinse aid. Fill to the smallest opening in the lower part of
the dispenser. Overfilling can cause the rinse aid to leak out,
and could cause oversudsing.
4. Clean up any spilled rinse aid with a damp cloth.
5. Replace the fill indicator cap. Close tightly.
Dishwasher Efficiency Tips
Hot water dissolves and activates the dishwashing detergent.
Hot water also dissolves grease on dishes and helps glasses dry
spot-free. For best dishwashing results, water should be 120°F
(49°C) as it enters the dishwasher. Loads may not wash as well if
the water temperature is too low. Water that is too hot can make
some soils harder to remove and cause certain detergent
ingredients not to function. If your water heater is located far from
the dishwasher, it may be necessary to run the hot water at the
faucet closest to the dishwasher to minimize the amount of cold
water in the water line.
To check water temperature
1. Run hot water at the faucet closest to your dishwasher for at
least 1 minute.
2. Place a candy or meat thermometer in a glass measuring
cup.
3. Check the temperature on the thermometer as the water is
running into the cup.
Additional efficiency tips
■ To save water, energy and time, do not rinse dishes before
putting them into the dishwasher.
■ Use a delay feature to run your dishwasher during off-peak
hours. Local utilities recommend avoiding heavy usage of
energy at certain times of day.
■ During the summer, run your dishwasher at night. This
reduces daytime heat buildup in the kitchen.
■ Use a rinse aid to improve drying.
■ Use cycles or options that add extra heat to the wash or rinse
portion of the cycle only when needed.
■ If your home is equipped with a water softener, you may want
to avoid starting the dishwasher during the regeneration of
the softener, since this may contribute to poor wash
performance.
12
Page 13
Cycle Selection Charts
Select the wash cycle and options desired. Or press START/
RESUME to use the same cycle and options as the previous
cycle.
NOTE: If the last cycle you completed was a rinse cycle, the
dishwasher will run the last full wash cycle and options that you
selected when you press Start/Resume.
Light Wash
Use this cycle for china and crystal. This cycle uses a light
wash and gentle dry. During the heated dry, the heating
element cycles on and off.
Use covered detergent dispenser section.
A “●” shows what steps are in each cycle.
Water usage is shown in U.S. gallons/liters.
IMPORTANT: Typical cycles may take several hours depending
on cycle selected and water temperature.
Pots Pans
Use this cycle for hard-to-clean, heavily soiled pots, pans,
casseroles, and regular tableware.
Use both detergent dispenser sections.
Wash Main
Wash
●●●
Rinse or
Purge
Rinse
Final
Rinse
Dry Approximate
●●
Time
2.5 hrs* 8.6/32.6
Water
Usage
(gal/L)
Heavy Wash
Use this cycle for loads with heavy food soil.
Use both detergent dispenser sections.
Wash Main
Wash
●●●
Rinse or
Purge
Purge
Final
Rinse
Dry Approximate
●●
Time
2 hrs* 6.9/26.1
Water
Usage
(gal/L)
Wash Main
Wash
Rinse or
Purge
●●
Purge
Final
Rinse
Dry Approximate
●●
cycled
Time
1.5 hrs* 4.8/18.2
Water
Usage
(gal/L)
Quick Rinse
Use this rinse cycle for rinsing dishes, glasses, and silverware
that will not be washed right away.
Do not use detergent with this cycle.
Wash Main
Wash
Rinse or
Purge
●
Rinse
Final
Rinse
Dry Time
(min)
10 2.2/8.3
Water
Usage
(gal/L)
*If the incoming water temperature is less than the recommended
temperature, the cycle will automatically compensate by adding
time and heat as needed.
Canceling a Cycle
1. Press CANCEL/DRAIN. The Cancel/Drain light glows.
2. The dishwasher starts a 2-minute drain (if needed). Let the
dishwasher drain completely. The light turns off after
2 minutes. The door must be closed for the dishwasher to
drain.
To stop the drain
Normal Wash
Use this cycle for loads with normal amounts of food soil. (The
energy-usage label is based on this cycle.)
Use covered detergent dispenser section.
Wash Main
Wash
Rinse or
Purge
●●
Purge
Final
Rinse
Dry Approximate
●●
1.5 hrs* 4.6/17.4
Time
Water
Usage
(gal/L)
You can press CANCEL/DRAIN again to stop the drain. Be sure
to drain the dishwasher before starting a new cycle.
To clear the indicators
Press CANCEL/DRAIN before starting the dishwasher to clear all
options and cycles.
13
Page 14

Changing a Cycle or Setting
During the first minute of a cycle
1. Select a new cycle and/or options.
2. Check the detergent dispensers. They must be filled properly
for the new cycle.
3. The Start/Resume light will flash when the door is opened.
Make sure the door is closed.
4. Press START/RESUME.
Hi Temp Wash
Select this option to heat the water to 140ºF (60ºC) during parts
of the cycle. Heating the water helps improve washing results.
This option adds heat, water and wash time to parts of the cycle.
Hi Temp Wash is useful when loads contain tough food soil items.
NOTES:
■ Pots Pans automatically uses this option. Hi Temp Wash is an
option with the Heavy Wash and Normal Wash cycles.
■ Use this option for heavier than normal-soiled loads.
After the first minute of a cycle
1. Press CANCEL/DRAIN. The Cancel/Drain light glows. Your
dishwasher starts a 2-minute drain (if needed). Let the
dishwasher drain completely.
2. Check the detergent dispensers. They must be filled properly
for the new cycle.
3. Make sure the door is closed. The Start/Resume light will
flash.
4. Select a new cycle and/or options.
5. Press START/RESUME.
Adding Items During a Cycle
You can add an item anytime before the main wash starts. Open
the door and check the detergent dispenser. If the cover is still
closed, you can add items.
To add items
1. Open the door slightly to stop the cycle. Wait for the spraying
action to stop before opening the door. The Start/Resume
light will flash.
2. Open the door. If the detergent dispenser cover is still closed,
add the item.
3. Close the door firmly until it latches. The Start/Resume light
will flash.
4. Press START/RESUME.
IMPORTANT: If Lock On is selected, turn off the lock (see Lock
On section in “Option Selections”), or the Start/Resume light will
continue to flash.
Option Selections
You can customize your cycles by pressing an option. If you
change your mind, press the option again to turn the option off.
Select a different option if desired.
You can change an option anytime before the selected option
begins. For example, you can press an unheated drying option
anytime before drying begins.
Press START/RESUME to use the same cycle and option(s) as
the previous wash cycle.
NOTE: If the last cycle you completed was a rinse cycle, when
you press START/RESUME, the dishwasher runs the last full
wash cycle and options.
Sani Rinse (on some models)
Select this option to raise the water temperature in the final rinse
to approximately 155°F (68°C). Sani Rinse adds heat and time to
the cycle. This high-temperature rinse sanitizes your dishes and
glassware in accordance with the NSF/ANSI Standard 184 for
Residential Dishwashers. Certified residential dishwashers are
not intended for licensed food establishments.
NOTE: Sani Rinse is an option with Pots Pans, Heavy Wash and
Normal Wash. Only these sanitization cycles have been designed
to meet the NSF/ANSI requirements.
Heated Dry
The Heated Dry option in combination with rinse aid will give you
excellent drying results. The energy to use Heated Dry costs
pennies per cycle. Heated Dry is on when the light is lit on the
Heated Dry button. Be sure to load plastic items in the upper rack
to avoid damage.
You may turn off the Heated Dry option by pressing HEATED DRY
so that the light goes off. However, you will have items in your
dish load that will not be dry at the end of the cycle.
NOTE: The Heated Dry option is used in all cycles except Quick
Rinse.
Lock On
Use the Lock On to avoid unintended use of the dishwasher. You
can also use the lock feature to avoid unintended cycle or option
changes during a cycle.
When LOCK ON is lit, all buttons are disabled.
NOTE: The dishwasher door can be opened while the controls
are locked. However, the lock must be turned off and the Start/
Resume button pressed to resume the cycle.
To turn on the Lock
Press and hold HEATED DRY for 4 seconds. LOCK ON glows.
If you press any pad while your dishwasher is locked, the light
flashes 3 times.
NOTE: If the Heated Dry option is selected, the light will
temporarily turn off until Lock On glows.
To turn off the Lock
Press and hold HEATED DRY for 4 seconds. The light turns off.
14
Page 15

Delay Hours
Clean Light
Select this option to run your dishwasher at a later time or during
off-peak hours. You can add items to the load anytime during the
delay. After adding items, firmly close the door until it latches and
press START/RESUME, or the delay will not continue.
To delay the start
1. Press the delay button to choose the number of hours
delayed.
2. Select a wash cycle and options.
3. Press START/RESUME.
The dishwasher starts the cycle in the selected number of hours.
NOTES:
■ To cancel the delay and cycle, press CANCEL/DRAIN.
■ To cancel the delay and start the cycle, press START/
RESUME.
Cycle Status Indicators
(on some models)
Follow the progress of your dishwasher with the Cycle Status
indicators.
NOTE: The features on your dishwasher may vary from those
shown here.
The Clean light glows when a cycle is finished. The light turns off
when you press any button or close the door.
Sanitized Ligt (on some models)
If you select the Sani Rinse option, sanitized light glows when the
Sani Rinse cycle is finished. If your dishwasher did not properly
sanitize your dishes, the light flashes at the end of the cycle. This
can happen if the cycle is interrupted or the incoming water
temperature is too low. The light turns off when you press any
button or close the door.
Drying System
During drying, you can see steam escaping through the vent at
the upper left corner of the door. This is normal as the heat dries
your dishes.
IMPORTANT: The vapor is hot. Do not touch the vent
during drying.
Overfill Protection Float
The overfill protection float (in the front right corner of the
dishwasher tub) keeps the dishwasher from overfilling. It must be
in place for the dishwasher to operate.
Check under the float for objects that may keep the protector
from moving up or down.
15
Page 16

WASHING SPECIAL ITEMS
If you have doubts about washing a particular item, check with the manufacturer to see if it is dishwasher safe.
Material Dishwasher Safe? Comments
Aluminum Yes High water temperature and detergents can affect finish of anodized aluminum.
Disposable Aluminum No Do not wash throwaway aluminum pans in the dishwasher. These might shift
Bottles and Cans No Wash bottles and cans by hand. Labels attached with glue can loosen and clog the
Cast Iron No Seasoning will be removed, and iron will rust.
China/Stoneware Yes Always check manufacturer’s recommendations before washing. Antique, hand-
Crystal Yes Always check manufacturer’s recommendations before washing. Some types of
Gold No Gold-colored flatware will discolor.
Glass Yes Milk glass yellows with repeated dishwasher washing.
Hollow-Handle Knives No Handles of some knives are attached to the blade with adhesives which can
Pewter, Brass, Bronze No High water temperatures and detergent can discolor or pit the finish.
Disposable Plastics No Cannot withstand high water temperatures and detergents.
Plastics Yes Always check manufacturer’s recommendations before washing. Plastic items may
during washing and transfer black marks to dishes and other items.
spray arms or pump and reduce washing performance.
painted, or over-the-glaze patterns may fade. Gold leaf can discolor or fade.
leaded crystal can etch with repeated washing.
loosen if washed in the dishwasher.
vary in their ability to withstand high temperatures and detergents. It is
recommended that light items such as lids and butter dishes be placed in the
upper rack only. Sturdy items such as coolers and high-chair trays may be placed
in the lower rack. When washing plastic items in the lower rack, it is recommended
that an air dry be used.
Stainless Steel Ye s Run a rinse cycle if not washing immediately. Prolonged contact with food
containing salt, vinegar, milk products, or fruit juice can damage finish.
Sterling Silver or Silver
Plate
Tin No Can rust.
Wooden Ware No Wash by hand. Always check manufacturer’s instructions before washing.
Yes Run a rinse cycle if not washing immediately. Prolonged contact with food
containing salt, acid, or sulfide (eggs, mayonnaise, and seafood) can damage
finish.
Untreated wood can warp, crack, or lose its finish.
16
Page 17
DISHWASHER CARE
Cleaning
Cleaning the exterior
In most cases, regular use of a soft, damp cloth or sponge and a
mild detergent is all that is necessary to keep the outside of your
dishwasher looking nice and clean. If your dishwasher has a
stainless steel exterior, a stainless steel cleaner is recommended.
Cleaning the interior
Hard water minerals can cause a white film to build up on the
inside surfaces, especially just beneath the door area.
Do not clean the dishwasher interior until it has cooled. You may
want to wear rubber gloves. Do not use any type of cleanser
other than dishwasher detergent because it may cause foaming
or sudsing.
To clean interior
Make a paste with powdered dishwasher detergent on a damp
sponge and clean.
OR
Use liquid automatic dishwasher detergent and clean with a
damp sponge.
OR
See the vinegar rinse procedure in “Spotting and filming on
dishes” in “Troubleshooting.”
NOTE: Run a normal cycle with detergent after cleaning the
interior.
Drain Air Gap
(on undercounter models only)
Check the drain air gap anytime your dishwasher isn’t draining
well.
Some state or local plumbing codes require the addition of a
drain air gap between a built-in dishwasher and the home drain
system. If a house drain is clogged, the drain air gap keeps water
from backing up into the dishwasher.
The drain air gap is usually located on top of the sink or
countertop near the dishwasher. To order a drain air gap, please
call 1-800-4-MY-HOME
NOTE: The drain air gap is an external plumbing device that is
not part of your dishwasher. The warranty provided with your
dishwasher does not cover service costs directly associated with
the cleaning or repair of the external drain air gap.
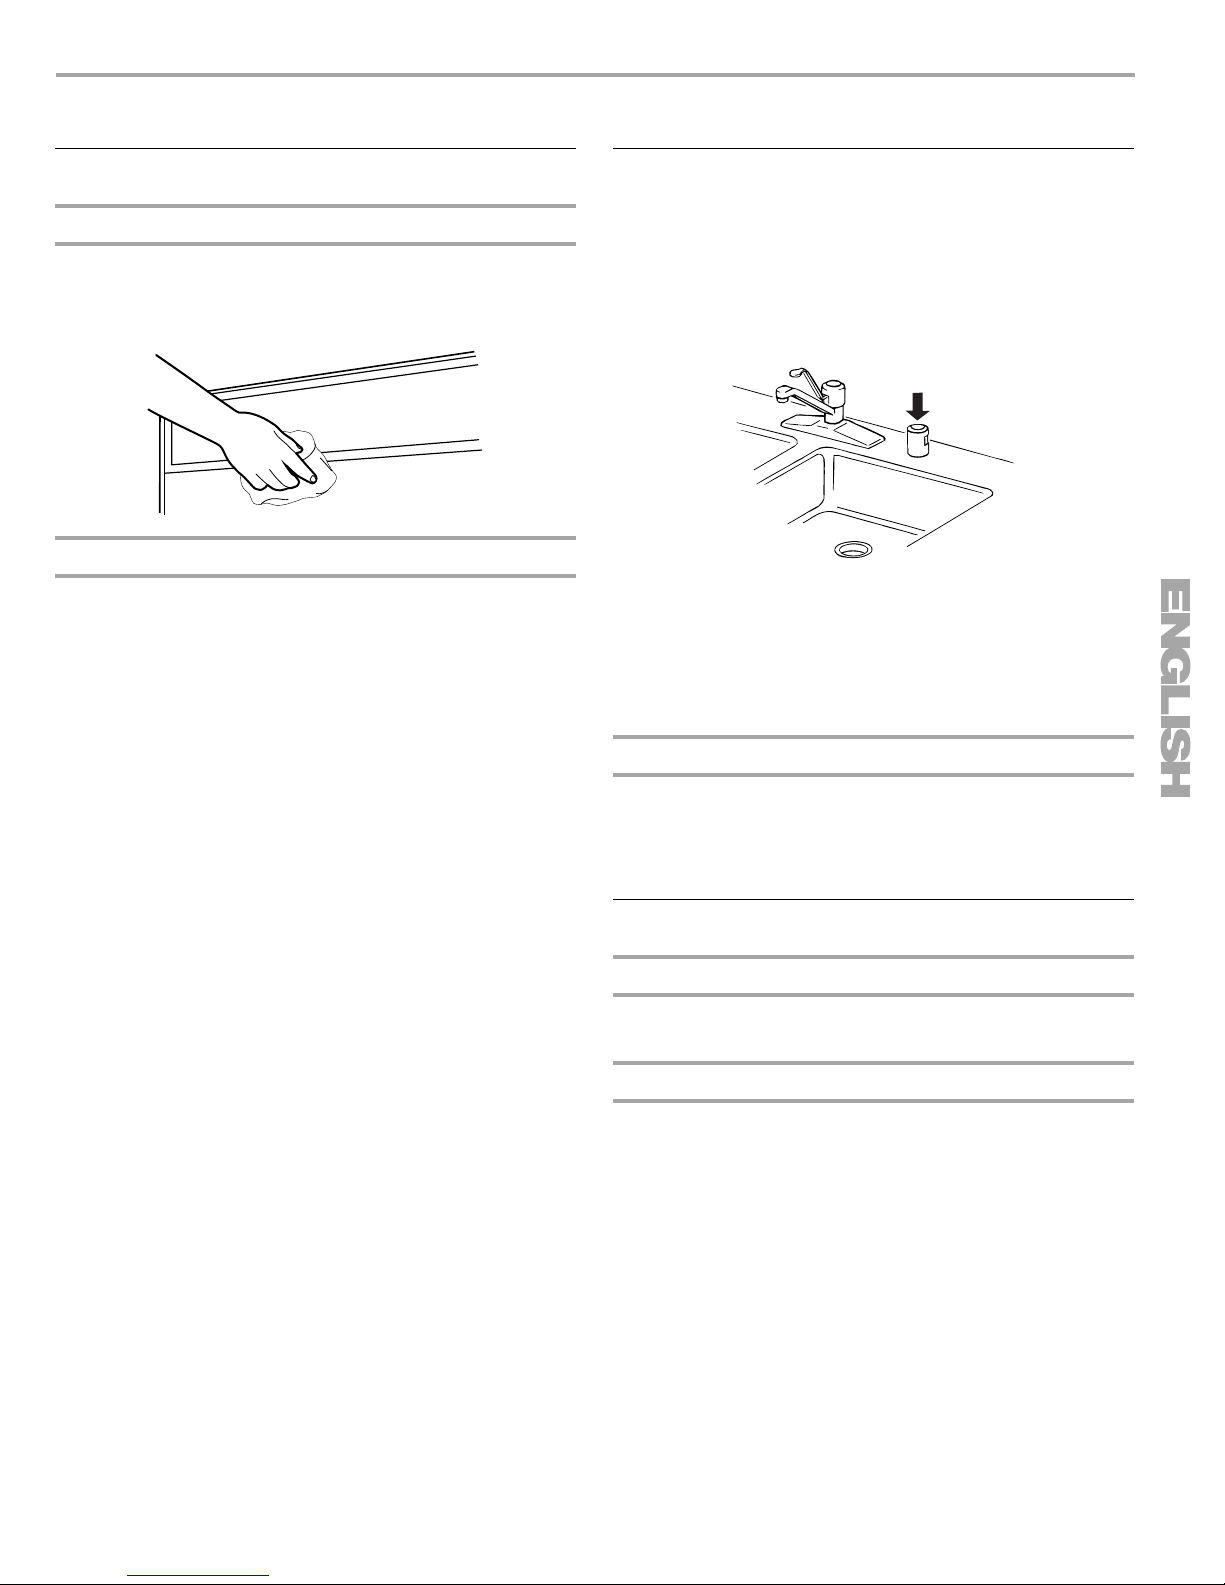
To clean the drain air gap
Clean the drain air gap periodically to ensure proper drainage of
your dishwasher. Follow the cleaning instructions provided by the
manufacturer. With most types, you lift off the chrome cover.
Unscrew the plastic cap. Then check for any soil buildup. Clean
if necessary.
®
. Ask for Part Number 300096.
Storing
Storing for the summer
Turn off the water supply and power supply to the dishwasher
during the summer to avoid damage to your dishwasher.
Winterizing your dishwasher
Avoid water damage to your dishwasher and home due to
freezing water lines. If your dishwasher is left in a seasonal
dwelling or could be exposed to near freezing temperatures, have
your dishwasher winterized by authorized service personnel.
17
Page 18

TROUBLESHOOTING
First try the solutions suggested here and possibly avoid the cost of a service call...
Dishwasher is not operating properly
■ Dishwasher does not run or stops during a cycle
Is the door closed tightly and latched?
Is the right cycle selected? Refer to the “Cycle Selection
Charts.”
Is there power to the dishwasher? Has a household fuse
blown, or has a circuit breaker tripped? Replace the fuse or
reset the circuit breaker. If the problem continues, call an
electrician.
Has the motor stopped due to an overload? The motor
automatically resets itself within a few minutes. If it does not
restart, call for service.
Is the water shutoff valve (if installed) turned on?
It is normal for certain cycles to repeatedly pause for several
seconds during the wash cycle.
■ START/RESUME light is flashing
Was the door opened during the cycle, or was the power
interrupted? The Start/Resume light will flash when the door
is opened during a cycle, or may flash if the power is
interrupted. Press START/RESUME to resume the cycle.
Make sure the door is fully closed and latched.
■ The Clean light is flashing
The dishwasher has malfunctioned. Call for service.
■ Dishwasher will not fill
Is the overfill protection float able to move up and down
freely? Press down to release.
■ Dishwasher seems to run too long
Is the water supplied to the dishwasher hot enough? The
dishwasher runs longer while heating water. Refer to the
“Dishwasher Efficiency Tips” section.
A delay automatically occurs in some wash and rinse cycles
until the water reaches the proper temperature.
■ Water remains in the dishwasher
Is the cycle complete?
Was the disposer knockout plug removed during installation?
(See “Install the drain hose” in the Installation Instructions.)
■ Detergent remains in the covered section of the
dispenser
Is the cycle complete?
Is the detergent lump-free? Replace detergent if necessary.
Is the bottom rack installed properly with the bumpers (on
some models) in the front? Refer to the “Parts and Features”
section. Reinstall the rack if necessary.
■ White residue on the front of the access panel
Was too much detergent used? Refer to the “Detergent
Dispenser” section.
Is the brand of detergent making excess foam? Try a different
brand to reduce foaming and eliminate buildup.
■ Odor in the dishwasher
Are dishes washed only every 2 or 3 days? Run a rinse cycle
once or twice a day until you have a full load.
Does the dishwasher have a new plastic smell? Run a vinegar
rinse as described in “Spotting and filming on dishes” later in
this Troubleshooting guide.
■ Condensation on the kitchen counter (built-in models)
Is the dishwasher aligned with the countertop? Moisture from
the vent in the dishwasher console can form on the counter.
Refer to the Installation Instructions for more information.
Dishes are not completely clean
■ Food soil left on the dishes
Is the dishwasher loaded correctly? Refer to the “Dishwasher
Loading” section.
Is the water temperature too low? For best dishwashing
results, water should be 120°F (49°C) as it enters the
dishwasher. Refer to the “Dishwasher Efficiency Tips”
section.
Did you use the correct amount of fresh detergent? Use
recommended dishwasher detergents only. Refer to the
“Detergent Dispenser” section. Detergent must be fresh to be
effective. Store detergent in a cool, dry area. Heavy soil and/
or hard water generally require extra detergent.
Do you have hard water? You may need to increase the
amount of detergent you are using. Refer to the “Detergent
Dispenser” section. Also, you may need to switch to a
detergent with a phosphorus content of 8.7%.
Is detergent caked in dispenser? Use fresh detergent only. Do
not allow detergent to sit for several hours in a wet dispenser.
Clean dispenser when caked detergent is present.
Is the pump or spray arm clogged by labels from bottles and
cans?
Is the home water pressure high enough for proper
dishwasher filling? Home water pressure should be 20 to
120 psi (138 to 828 kPa) for proper dishwasher fill. If you have
questions about your water pressure, call a licensed, qualified
plumber.
Are high suds slowing the wash arm? Do not use soap or
laundry detergents. Use recommended dishwasher
detergents only.
Spots and stains on dishes
■ Spotting and filming on dishes
Is your water hard or is there a high mineral content in your
water? Conditioning the final rinse water with a liquid rinse
aid helps eliminate spotting and filming. Keep the rinse aid
dispenser filled.
Is the water temperature too low? For best dishwashing
results, water should be 120°F (49°C) as it enters the
dishwasher. Refer to the “Dishwasher Efficiency Tips”
section.
18
Page 19

Did you use the correct amount of effective detergent? Use
recommended dishwasher detergents only. Refer to the
“Detergent Dispenser” section. Detergent must be fresh to be
effective. Store detergent in a cool, dry area. Heavy soil and/
or hard water generally require extra detergent.
Is the home water pressure high enough for proper
dishwasher filling? Home water pressure should be 20 to
120 psi (138 to 828 kPa) for proper dishwasher fill. If you have
questions about your water pressure, call a licensed, qualified
plumber.
NOTE: To remove spots and film from dishes, try a white
vinegar rinse. This procedure is intended for occasional use
only. Vinegar is an acid, and using it too often could damage
your dishwasher.
1. Wash and rinse dishes. Use an air-dry or an energy saving
dry option. Remove all silverware or metal items.
2. Put 2 cups (500 mL) white vinegar in a glass or
dishwasher-safe measuring cup on the bottom rack.
3. Run the dishwasher through a complete washing cycle
using an air-dry option. Do not use detergent. Vinegar will
mix with the wash water.
■ Silica film or etching (silica film is a milky, rainbow-
colored deposit; etching is a cloudy film)
Sometimes there is a water/chemical reaction with certain
types of glassware. This is usually caused by some
combination of soft or softened water, alkaline washing
solutions, insufficient rinsing, overloading the dishwasher,
and the heat of drying. It might not be possible to avoid the
problem, except by hand washing.
To slow this process use a minimum amount of detergent per
load. Use a liquid rinse aid and underload the dishwasher to
allow thorough rinsing. Silica film and etching are permanent
and cannot be removed. Do not use heated drying.
■ White spots on cookware with nonstick finish
Has the dishwasher detergent removed cookware
seasoning? Reseason cookware after washing in the
dishwasher.
■ Brown stains on dishes and dishwasher interior
Does your water have high iron content? Rewash dishes
using 1-3 tsp (5-15 mL) of citric acid crystals added to the
covered section of the detergent dispenser. Do not use
detergent. Follow with a normal wash cycle with detergent. If
treatment is needed more often than every other month, the
installation of an iron removal unit is recommended.
■ Black or gray marks on dishes
Are aluminum items rubbing dishes during washing?
Disposable aluminum items can break down in the
dishwasher and cause marking. Hand wash these items.
Remove aluminum markings by using a mild abrasive cleaner.
■ Orange stains on plastic dishes or dishwasher interior
Are large amounts of tomato-based foods on dishes placed
in the dishwasher? Stains gradually fade over time. Regular
use of heated drying will slow fading. Stains will not affect
dishwasher performance. Regular use of a rinse cycle and an
air-dry or energy-saving dry option will reduce the likelihood
of staining.
Dishes/silverware do not dry completely
■ Dishes are not dry
Did you load your dishwasher to allow proper water
drainage? Do not overload. Refer to the “Dishwasher
Loading” section. Use a liquid rinse aid to speed drying.
Are the plastics wet? Plastics often need towel drying.
Is the rinse aid dispenser empty? Refer to the “Rinse Aid
Dispenser” section.
Did you use an air-dry or energy-saving dry option? Use a
heated drying option for drier dishes.
■ Try adding the “Hi-Temp Wash” or “Sani Rinse” option for
further improved drying performance.
■ Use a more aggressive cycle, such as Pots and Pans or
Heavy cycle for improved drying performance.
■ Silverware is not dry
Did you load your silverware to allow proper water drainage?
Refer to the “Dishwasher Loading” section.
Are the silverware basket lids being used? For best drying
use the slots in the lids to separate and space the silverware.
Are utensils and/or silverware touching? Avoid items from
touching or nesting onto each other by mixing silverware
types. Do not overload the basket.
Dishes are damaged during a cycle
■ Chipping of dishes
Did you load the dishwasher properly? Load the dishes and
glasses so they are stable and do not strike together from
washing action. Minimize chipping by moving the rack in and
out slowly.
NOTE: Antiques, feather-edged crystal, and similar types of
china and glassware might be too delicate for automatic
dishwashing. Wash by hand.
Noises
■ Grinding, grating, crunching or buzzing sounds
A hard object has entered the wash module (on some
models). When the object is ground up, the sound should
stop. If the noise persists after a complete cycle, call for
service.
Dishwasher exterior is dirty or marked
■ Marks, smudges or residue on dishwasher exterior
Did you clean the dishwasher with a mild detergent and cloth
or use a stainless steel cleaner on models with a stainless
steel exterior? In most cases, regular use of a soft, damp
cloth or sponge and a mild detergent is all that is necessary
to keep the outside of your dishwasher looking fresh and
clean. If your dishwasher has a stainless steel exterior, a
stainless steel cleaner is recommended.
19
Page 20

ÍNDICE
CONTRATOS DE PROTECCIÓN.................................................20
GARANTÍA DE LOS ELECTRODOMÉSTICOS KENMORE.......21
SEGURIDAD DE LA LAVAVAJILLAS..........................................22
Antes de usar su lavavajillas ......................................................23
PIEZAS Y CARACTERÍSTICAS ...................................................24
El sistema de remoción de suciedad ULTRA WASH
GUÍA DE PUESTA EN MARCHA.................................................25
El uso de su nueva lavavajillas...................................................25
CONEXIÓN DE LA LAVAVAJILLAS
(EN MODELOS PORTATILES SOLAMENTE).............................25
Conexión del adaptador de la llave del agua ............................25
Conexión al suministro de agua y de electricidad.....................26
Uso de la llave del agua.............................................................27
Desconexión de la lavavajillas ...................................................27
CÓMO CARGAR LA LAVAVAJILLAS..........................................27
Sugerencias para cargar la lavavajillas......................................27
Cómo cargar la canasta superior ..............................................28
Cómo cargar la canasta inferior.................................................28
Cómo llenar la canastilla de los cubiertos.................................29
®
...............25
CONTRATOS DE PROTECCIÓN
CÓMO USAR LA LAVAVAJILLAS ...............................................30
Depósito del detergente.............................................................30
Depósito del agente de enjuague ..............................................31
Consejos para la eficiencia de la lavavajillas.............................31
Tablas de selección de ciclos....................................................32
Cómo cancelar un ciclo .............................................................33
Para cambiar un ciclo o una selección ......................................33
Para agregar artículos durante un ciclo.....................................33
Selecciones de opciones ...........................................................33
Indicadores de estado del ciclo.................................................34
Sistema de secado.....................................................................34
Flotador de protección de sobrellenado....................................34
CÓMO LAVAR ARTÍCULOS ESPECIALES.................................35
CUIDADO DE LA LAVAVAJILLAS...............................................36
Limpieza .....................................................................................36
Purga de aire del desagüe .........................................................36
Almacenamiento.........................................................................36
SOLUCIÓN DE PROBLEMAS......................................................37
NÚMEROS DE SERVICIO ..............................CONTRAPORTADA
Contratos maestros de protección
¡Felicitaciones por su inteligente adquisición! Su nuevo producto
Kenmore
funcionamiento confiable. Pero al igual que todos los productos,
puede necesitar mantenimiento preventivo o reparación de vez
en cuando. Es allí donde el Contrato maestro de protección
puede ahorrarle dinero e inconvenientes.
El Contrato maestro de protección también ayuda a prolongar la
vida de su nuevo producto. He aquí lo que se incluye en el
Contrato*:
®
está diseñado y fabricado para proporcionarle años de
✔ Piezas y mano de obra necesarias para ayudar a
mantener los productos funcionando correctamente
bajo uso normal, no sólo en caso de defectos. Nuestra
cobertura va mucho más allá de la garantía del
producto. No existen deducibles ni fallas de
funcionamiento que estén excluidas de la cobertura —
protección verdadera.
✔ Servicio experto a cargo de un personal de más de
10.000 técnicos de servicio autorizados por Sears, lo
que significa que su producto será reparado por alguien
en quien usted puede confiar.
✔ Llamadas de servicio ilimitado y servicio en todo el
país, con la frecuencia que usted desee, cuando usted
desee.
✔ Garantía “sin disgustos” – reemplazo de su producto
protegido si ocurren cuatro fallas o más del producto en
el transcurso de doce meses.
✔ Reemplazo del producto si su producto protegido no
puede ser reparado.
✔ Revisión anual de mantenimiento preventivo a
solicitud suya – sin costo adicional.
✔ Ayuda rápida por teléfono – lo que nosotros llamamos
Solución rápida – apoyo por teléfono a cargo de un
representante de Sears para todos los productos.
Piense en nosotros como si fuéramos un “manual
parlante para el propietario”.
✔ Protección de sobrevoltaje contra daños eléctricos
debido a fluctuaciones de electricidad.
✔ Protección por pérdida de comida, por un valor
anual de $250, por cualquier pérdida de comida que
sea como resultado de fallas mecánicas de cualquier
refrigerador o congelador cubierto bajo la garantía.
✔ Reembolso de la renta si la reparación de su producto
protegido tarda más de lo prometido.
✔ 10% de descuento sobre el precio común por el
servicio de reparación que no esté bajo protección, así
como también las piezas relacionadas con el mismo que
se hayan instalado.
Una vez adquirido el Contrato, tan sólo tiene que llamar para fijar
la visita de servicio técnico. Usted puede llamar a cualquier hora,
de día o de noche, o fijar una visita técnica en Internet.
El Contrato maestro de protección es una compra sin riesgo. Si
por algún motivo usted lo cancela durante el período de la
garantía del producto, le proveeremos un reembolso total. O un
reembolso proporcional en cualquier momento posterior a la
expiración del período de la garantía. ¡Adquiera hoy su Contrato
maestro de protección!
Se aplican algunas limitaciones y exclusiones. Para obtener
precios e información adicional en EE.UU., llame al
1-800-827-6655.
*La cobertura en Canadá varía en algunos artículos. Para
obtener los detalles completos, llame a Sears Canada al
1-800-361-6665.
Servicio de instalación de Sears
Para la instalación profesional de Sears de aparatos
electrodomésticos, abridores de puertas de garaje, calentadores
de agua y otros artículos principales del hogar, en los EE.UU. o
en Canadá llame al 1-800-4-MY-HOME
®
.
20
Page 21

GARANTÍA DE LOS ELECTRODOMÉSTICOS KENMORE
GARANTÍA LIMITADA DE UN AÑO
Cuando este electrodoméstico haya sido instalado, operado y
mantenido según las instrucciones provistas con el producto, si
este electrodoméstico falla por defectos de material o de mano
de obra dentro de un año a partir de la fecha de compra, llame al
1-800-4-MY-HOME
Si este electrodoméstico es empleado para algún otro uso que
no sea el doméstico familiar, esta garantía sólo tiene vigencia por
90 días a partir de la fecha de compra.
ESTA GARANTÍA CUBRE SOLAMENTE LOS DEFECTOS DE
MATERIAL Y MANO DE OBRA. SEARS NO PAGARÁ POR LO
SIGUIENTE:
1. Los artículos no reutilizables que pueden gastarse por el uso
normal, incluyendo, pero sin limitación, filtros, correas, focos
y bolsas.
2. Un técnico de servicio para enseñarle al usuario cómo
instalar, operar o mantener el producto adecuadamente.
3. Un técnico de servicio para limpiar o mantener este
producto.
4. Daños a este producto o fallas del mismo en caso de no ser
instalado, operado o mantenido conforme a todas las
instrucciones provistas con el producto.
5. Daños a este producto o fallas del mismo como resultado de
accidente, abuso, uso indebido o un uso diferente de aquel
para el cual fue creado.
6. Daños a este producto o fallas del mismo causados por el
uso de detergentes, limpiadores, productos químicos o
utensilios diferentes de los recomendados en todas las
instrucciones provistas con el producto.
7. Daños a piezas o sistemas o fallas de los mismos como
resultado de modificaciones no autorizadas que se hayan
efectuado en este producto.
®
para gestionar la reparación libre de cargo.
EXCLUSIÓN DE GARANTÍAS IMPLÍCITAS; LIMITACIÓN DE
RECURSOS
El único y exclusivo recurso del cliente según los términos de
esta garantía limitada será el de reparar el producto según se
estipula en la presente. Las garantías implícitas, incluyendo las
garantías de comerciabilidad o de capacidad para un propósito
particular, serán limitadas a un año o al período más corto
permitido por ley. Sears no se hará responsable por daños
incidentales o consecuentes. Algunos estados y provincias no
permiten la exclusión o limitación de daños incidentales o
consecuentes, o limitaciones acerca de cuánto debe durar una
garantía implícita de comerciabilidad o capacidad, de modo que
las limitaciones o exclusiones arriba mencionadas pueden no
aplicarse en su caso.
Esta garantía se aplica sólo mientras este electrodoméstico se
usa en los Estados Unidos y Canadá.
Esta garantía le otorga derechos legales específicos, y es posible
que usted tenga también otros derechos, los cuales varían de un
estado a otro.
Sears, Roebuck and Co.
Hoffman Estates, IL 60179
Sears Canada Inc.
Toronto, Ontario, Canada M5B 2B8
REGISTRO DEL PRODUCTO
Anote el número completo de modelo y serie así como la fecha
de compra. Usted puede encontrar esta información en la
etiqueta con el número de modelo y de serie ubicada en el
producto.
Tenga esta información disponible para facilitarle la obtención de
asistencia o servicio con prontitud siempre que llame a Sears
con respecto a su electrodoméstico.
Número de modelo __ __ __. _____________________________________
Número de serie ________________________________________________
Fecha de compra _______________________________________________
Guarde estas instrucciones y su comprobante de compra
para referencia futura.
21
Page 22

SEGURIDAD DE LA LAVAVAJILLAS
Su seguridad y la seguridad de los demás es muy importante.
Hemos incluido muchos mensajes importantes de seguridad en este manual y en su electrodoméstico. Lea y obedezca siempre
todos los mensajes de seguridad.
Este es el símbolo de advertencia de seguridad.
Este símbolo le llama la atención sobre peligros potenciales que pueden ocasionar la muerte o una lesión a
usted y a los demás.
Todos los mensajes de seguridad irán a continuación del símbolo de advertencia de seguridad y de la palabra
“PELIGRO” o “ADVERTENCIA”. Estas palabras significan:
PELIGRO
ADVERTENCIA
Todos los mensajes de seguridad le dirán el peligro potencial, le dirán cómo reducir las posibilidades de sufrir una lesión y lo que
puede suceder si no se siguen las instrucciones.
Si no sigue las instrucciones de inmediato, usted puede
morir o sufrir una lesión grave.
Si no sigue las instrucciones, usted puede morir o sufrir
una lesión grave.
INSTRUCCIONES IMPORTANTES DE SEGURIDAD
ADVERTENCIA: Cuando use la lavavajillas siga precauciones básicas, incluyendo las siguientes:
■ Lea todas las instrucciones antes de usar la lavavajillas.
■ Use la lavavajillas únicamente para las funciones que fue
diseñada.
■ Use únicamente detergentes o agentes de enjuague
recomendados para ser usados en las lavavajillas y
manténgalos fuera del alcance de los niños.
■ Al introducir los artículos para lavar:
1) Coloque los artículos puntiagudos de manera que no
dañen el sello de la puerta
2) Introduzca los cuchillos filosos con los mangos hacia
arriba para reducir el riesgo de cortaduras.
■ No lave artículos de plástico que no lleven la indicación
“lavables en la lavavajillas” u otra similar. Lea las
recomendaciones del fabricante para los artículos de
plástico que no lleven tal indicación.
■ No toque el elemento de calefacción durante o
inmediatamente después de usar la lavavajillas.
■ No haga funcionar la lavavajillas a menos que todos los
paneles estén colocados debidamente en su lugar.
■ No juegue con los controles.
■ No abuse, ni se siente ni se pare sobre la puerta, la tapa o
sobre las canastas de la lavavajillas.
■ Para reducir el riesgo de lesión, no permita que los niños
jueguen dentro ni sobre la lavavajillas.
■ Bajo ciertas condiciones, un sistema de agua caliente que
no ha sido usado por dos semanas o más puede producir
gas hidrógeno. EL GAS HIDRÓGENO ES EXPLOSIVO. Si
el sistema de agua caliente no ha sido usado por ese
período, abra todas las llaves de agua caliente y deje que
corra el agua por varios minutos antes de usar la
lavavajillas. Esto permitirá que los gases acumulados
escapen. Debido a que el gas es inflamable, no fume ni
encienda ninguna llama abierta durante este tiempo.
■ Quite la puerta o la tapa del compartimiento de lavado
cuando remueva o deje de usar para siempre una vieja
lavavajillas.
22
GUARDE ESTAS INSTRUCCIONES
Page 23

Antes de usar su lavavajillas
ADVERTENCIA
Peligro de Vuelco
No use la lavavajillas antes de estar completamente
instalada.
No se apoye en la puerta abierta.
No seguir estas instrucciones puede ocasionar heridas
serias o cortaduras.
INSTRUCCIONES DE
CONEXIÓN A TIERRA
■
Para una lavavajillas con cable eléctrico y conexión a
tierra:
La lavavajillas debe estar conectada a tierra. En caso de
funcionamiento defectuoso o avería, la conexión a tierra
reduce el riesgo de choque eléctrico al establecer una
ruta de menor resistencia para la corriente eléctrica. La
lavavajillas viene equipada con un cable eléctrico que
tiene un conductor para conexión a tierra y un enchufe
con conexión a tierra. El enchufe debe ser conectado a
un contacto apropiado que esté instalado y conectado a
tierra de acuerdo con todos los códigos y ordenanzas
locales.
ADVERTENCIA: La conexión inadecuada del
conductor de conexión a tierra puede resultar en riesgo
de choque eléctrico. Pregunte a un electricista calificado
o a un agente de servicio si no está seguro si la
lavavajillas está adecuadamente conectada a tierra. No
modifique el enchufe que viene con la lavavajillas. Si no
cabe en el contacto, pida que un electricista calificado
instale un contacto apropiado.
■
Para lavavajillas con conexión permanente:
Esta lavavajillas debe estar conectada a un sistema de
cableado de metal permanente, conectado a tierra, o se
debe tender un conducto para la conexión a tierra del
equipo con los conductores de circuito y conectado a la
terminal de tierra del equipo o al conductor de suministro
de la lavavajillas.
GUARDE ESTAS INSTRUCCIONES
23
Page 24

PIEZAS Y CARACTERÍSTICAS
A
J
K
B
L
C
M
D
N
E
F
G
H
O
P
Q
A. Lavado del nivel superior
B. Canasta superior
C. Canasta inferior
D. Puntas plegables (en algunos
modelos
E. Brazo rociador inferior
Panel de control
I
F. Orificio de entrada de agua
(en la pared de la tina)
G. Parachoques de la canasta
H. Elemento de calefacción
I. Orificio de ventilación
J. Brazo rociador superior
K. Tubo de alimentación de
agua ULTRA FLOW™
L. Canastilla para cubiertos
M. Etiqueta de número de
modelo y serie
N. Módulo ULTRA WASH
O. Flotador de protección de
sobrellenado
P. Depósito del detergente
Q Depósito del agente de enjuague
®
Delay Hours (Horas de retraso): 2-4-6 o 4 horas, (dependiendo
del modelo)
24
Sani Rinse Rinse (Enjuague sanitario) (en algunos modelos)
Page 25

El sistema de remoción de
suciedad ULTRA WASH
El sistema de remoción de suciedad ULTRA WASH le brinda
platos limpios y relucientes, empleando menos tiempo y menos
energía. El sistema de remoción de suciedad ULTRA WASH
incluye:
Un sistema de lavado multinivel con un filtro de autolimpieza.
®
6. Deje correr agua caliente en el fregadero que esté más cerca
de su lavavajillas hasta que el agua salga caliente. (Consulte
“Consejos para la eficiencia de la lavavajillas”.) Cierre la llave
del agua.
GUÍA DE PUESTA
EN MARCHA
Antes de usar su lavavajillas, quite todos los materiales de
embalaje. Lea todo este Manual de Uso y Cuidado. Usted
encontrará información de seguridad importante así como
consejos útiles para la operación.
El uso de su nueva lavavajillas
1. El agente de enjuague es esencial para un buen secado.
Asegúrese de llenar el depósito antes de usar su nueva
lavavajillas. Cada llenado durará de 1 a 3 meses según el
uso.
2. Quite los pedazos grandes de restos de alimentos y otros
objetos duros (palillos o huesos) de los platos.
3. Cargue adecuadamente la lavavajillas. (Consulte “Cómo
cargar la lavavajillas”.) Cargue los platos con espacio entre
ellos para que el agua alcance las superficies con suciedad.
Asegúrese de que nada impida que el (los) brazo(s)
rociador(es) gire(n) libremente.
7. Oprima las selecciones de ciclo y opciones que desee. (Vea
“Cómo usar la lavavajillas”.)
8. Presione START/RESUME (Inicio/reanudar), o presione
START/RESUME (inicio/reanudar) para repetir el mismo ciclo
y opciones que en el ciclo previo.
IMPORTANTE: La luz de Start/Resume (inicio/reanudar)
comenzará a destellar si se abre la puerta durante un ciclo.
Los cortes de corriente durante un ciclo también pueden
hacer que la luz de Start/Resume destelle. Presione START/
RESUME (inicio/reanudar) para continuar un ciclo.
CONEXIÓN DE
LA LAVAVAJILLAS
4. Agregue detergente. Siempre use un detergente de marca de
alta calidad. (Consulte “Cómo usar la lavavajillas”.)
5. Empuje la puerta cerrándola con firmeza. La puerta queda
asegurada automáticamente.
(En modelos portatiles solamente)
Conexión del adaptador
de la llave del agua
NOTA: Debe instalarse un adaptador especial en la llave del agua
antes de que la lavavajillas pueda ser conectada. Las
instrucciones completas de instalación y el adaptador vienen con
su lavavajillas. (Consulte las instrucciones de instalación.)
Cuando mueva su lavavajillas, asegúrese de que la puerta esté
asegurada. Sostenga la lavavajillas por las esquinas superiores
delanteras.
25
Page 26

Preparación de la llave del agua
1. Quite el portafiltro o aereador, la pantalla y la arandela del
extremo de la llave del agua.
2. Use el juego del adaptador de la llave del agua que viene con
su lavavajillas portátil para modificar la llave del agua donde
usará la lavavajillas.
NOTA: Quite y guarde la arandela, la pantalla y el portafiltro o
aereador para uso en el futuro.
A
B
C
A. Arandela
B. Pantalla
C. Portafiltro o aereador
Conexión al suministro
de agua y de electricidad
1. Haga salir agua de la llave hasta que esté caliente. Cierre la
llave del agua.
2. Saque las mangueras del compartimiento donde se guardan,
en la parte trasera de la lavavajillas.
NOTA: Asegúrese de que las mangueras no estén dobladas o
torcidas. Las mangueras dobladas reducen el desempeño
del lavado.
3. Presione hacia abajo el collar de bloqueo mientras levanta el
conector de la manguera para unirlo al adaptador de la llave
del agua.
Conexión del adaptador a llaves del agua con
roscas externas
Inserte las 2 pantallas y luego la arandela delgada, que viene en
el juego del adaptador, en el adaptador de la llave de agua. Fije el
adaptador en el extremo de la llave del agua.
NOTA: No use la arandela gruesa.
A
B
C
A. Arandela delgada
B. Pantallas
C. Adaptador de la llave del agua
Conexión del adaptador a llaves del agua con
roscas internas
Inserte las 2 pantallas, la arandela delgada y luego la arandela
gruesa, que vienen en el juego del adaptador, en el adaptador de
la llave del agua. Fije el adaptador en el extremo de la llave del
agua.
NOTA: Use ambas arandelas.
A
B
C
D
A. Arandela gruesa
B. Arandela delgada
C. Pantallas
D. Adaptador de la llave del agua
A
B
C
A. Adaptador de la llave del agua
B. Collar de bloqueo
C. Conector de la manguera
4. Cuando el conector encaje en su lugar con un chasquido,
suelte el collar de bloqueo.
5. Abra la llave del agua caliente lentamente, hasta que esté
totalmente abierta.
ADVERTENCIA
Peligro de Choque Eléctrico
Conecte a un contacto de pared de conexión a tierra de
3 terminales.
No quite la terminal de conexión a tierra.
No use un adaptador.
No use un cable eléctrico de extensión.
No seguir estas instrucciones puede ocasionar
la muerte, incendio o choque eléctrico.
6. Conecte a un contacto de pared de conexión a tierra de 3
terminales.
26
Page 27

Uso de la llave del agua
Usted puede hacer salir agua de la llave mientras la lavavajillas
está conectada.
NOTA: No haga salir agua mientras la lavavajillas se está
llenando o mientras el agua está siendo expelida. (Esto ayuda a
evitar que la lavavajillas no se llene de agua lo suficiente o que se
mezcle agua de desagüe con agua fresca durante el desagüe.)
Oprima el botón rojo en el conector de la manguera para que
salga agua de la llave del agua. (La llave del agua está
programada en caliente. Ajuste la llave del agua a la temperatura
del agua que usted desee.)
NOTA: Vuelva a abrir la llave del agua caliente después de que
haya hecho salir agua de la llave. Cierre el agua fría.
Desconexión de la lavavajillas
1. Cierre el agua caliente. (Esto puede hacerse después del
último enjuague.)
2. Presione el botón rojo en el conector para aliviar la presión
del agua.
A
B
C
D
A. Adaptador de la llave del agua
B. Collar de bloqueo
C. Botón rojo
D. Conector de la manguera
3. Levante ligeramente el conector de la manguera mientras
presiona hacia abajo el collar de bloqueo. Tire hacia abajo el
conector.
4. Elimine toda el agua que quede en el conector, invirtiendo
éste.
5. Desconecte el cordón eléctrico y colóquelo en el
compartimiento donde se guarda.
6. Vuelva a colocar las mangueras en el compartimiento donde
se guardan.
CÓMO CARGAR LA
LAVAVAJILLAS
Sugerencias para
cargar la lavavajillas
■ Quite los restos de alimentos, huesos, palillos y otros
artículos duros de los platos. Para conservar agua, energía y
ahorrar tiempo, no es necesario enjuagar los platos antes de
ponerlos en la lavavajillas.
NOTA: Se recomienda preenjuagar la vajilla sucia con
productos a base de tomate para evitar que se manche la
vajilla.
El módulo de lavado quita las partículas de alimentos del
agua. El módulo incluye un sistema de lavado multinivel con
un filtro de autolimpieza.
NOTA: Si objetos duros tales como semillas de frutas,
nueces y cáscara de huevo entran en el módulo de lavado,
usted podrá oír cuando el material está siendo molido,
triturado o podrá escuchar zumbidos. Estos sonidos son
normales cuando entran objetos duros en el módulo. Para
evitar daños a la lavavajillas, no permita que objetos
metálicos (tales como los tornillos de los mangos de ollas) se
introduzcan en el módulo de lavado.
■ Para lograr un mejor secado, el agua debe escurrirse de
todas las superficies.
■ Es importante que el rociado de agua alcance todas las
superficies sucias.
■ Coloque los platos de manera que no estén amontonados o
superpuestos de ser posible.
■ Preste especial cuidado cuando cargue ollas y cazuelas
pesadas. Los artículos pesados pueden dañar el interior de la
puerta si se dejan caer o se golpean.
■ Asegúrese que las tapas de ollas y los mangos, moldes para
pizza, moldes para galletas, etc., no interfieran con la
rotación del brazo rociador.
■ Conserve agua, energía y ahorre tiempo de enjuague a mano
haciendo correr un ciclo de enjuague para mantener los
platos húmedos, si usted no planea lavarlos pronto. Los
alimentos tales como los huevos, arroz, pasta, espinaca y
cereales cocidos pueden ser difíciles de eliminar si llegan a
secarse después de un tiempo.
■ Coloque los objetos de manera que su parte cóncava mire
hacia abajo para una mejor limpieza y para que el agua se
escurra.
27
Page 28

Consejos para el funcionamiento silencioso
Para evitar ruidos descomunales o estrepitosos durante el
funcionamiento:
■ Asegúrese de que los objetos livianos estén firmes en las
canastas.
■ Asegúrese de que las tapas y los mangos de las ollas, los
moldes para pizza, los moldes para galletas, etc. no toquen el
interior de las paredes ni interfieran con la rotación del (de
los) brazo(s) rociador(es).
■ Coloque los platos de manera que no se toquen entre sí.
NOTA: Para modelos empotrados, mantenga los tapones de
desagüe del fregadero cerrados mientras la lavavajillas esté
funcionando para evitar que el ruido se pase por el conducto de
desagüe.
Cómo cargar la canasta superior
La canasta superior está diseñada para tazas, vasos y objetos
más pequeños. (Vea los siguientes modelos recomendados de
carga.)
NOTA: Las características de la canasta de su lavavajillas
pueden ser diferentes de las ilustraciones que siguen.
■ Los artículos de porcelana, de cristal y otros objetos
delicados no deben rozarse entre sí durante el lavado.
Pueden dañarse.
■ Coloque los artículos de plástico únicamente en la canasta
superior. Se recomienda sólo artículos de plástico marcados
como “lavable en la lavavajillas”.
■ Coloque los artículos de plástico de manera tal que la fuerza
del rociado no los mueva durante el ciclo de lavado.
■ Para evitar que se desportillen, no deje que los artículos de
cristal toquen otros artículos.
■ Los tazones pequeños, las cazuelas y otros utensilios
pueden ser colocados en la canasta superior. Coloque los
tazones en la sección central para lograr una mejor
estabilidad.
Cómo cargar la canasta inferior
La canasta inferior está diseñada para platos, ollas, cacerolas y
utensilios. (Vea los siguientes modelos recomendados de carga.)
NOTA: Las características de la canasta de su lavavajillas
pueden ser diferentes de las ilustraciones que siguen.
10 puestos
12 puestos
■ Coloque los objetos de manera que su parte cóncava mire
hacia abajo para la limpieza y para que el agua se escurra.
■ Coloque los vasos únicamente en la canasta superior. La
canasta inferior no está diseñada para vasos. Pueden
dañarse.
■ Coloque las tazas y vasos en las hileras entre las puntas. Si
los coloca sobre las puntas pueden romperse o terminar con
manchas de agua.
10 puestos
■ No ponga vasos, tazas o artículos de plástico en la canasta
inferior. Coloque los artículos pequeños en la canasta inferior
únicamente si están seguros en su lugar.
■ Coloque los platos, tazones de sopa, etc. entre las puntas.
■ Traslape los bordes de los platos cuando tenga cargas
voluminosas.
■ Coloque los tazones de sopa, de cereal y fuentes para servir
en la canasta de diferentes maneras, dependiendo de sus
tamaños y formas. Coloque los tazones firmemente entre las
hileras de puntas. No amontone los tazones porque el
rociador no alcanzará todas las superficies.
12 puestos
28
Page 29

■ Coloque los moldes para galletas, moldes para pasteles y
otros objetos grandes en los costados y en la parte posterior.
El colocar tales objetos en la parte del frente puede impedir
que el rociado de agua alcance el depósito de detergente.
■ Asegure los utensilios de cocina con suciedad profunda boca
abajo en la canasta.
■ Asegúrese de que los mangos de las ollas y otros objetos no
impidan la rotación del(de los) brazo(s) rociador(es). El(los)
brazo(s) rociador(es) debe(n) moverse libremente.
■ No coloque objetos entre la canasta inferior y el costado de la
tina de la lavavajillas. Pueden bloquear el orificio de admisión
del agua.
NOTA: Si ha quitado la canasta inferior para descargar o para
limpiar, vuelva a colocarla con los parachoques al frente.
Puntas plegables (en algunos modelos)
Usted puede plegar una hilera de puntas en la parte posterior de
la canasta inferior.
Cómo llenar la canastilla
de los cubiertos
Llene la canastilla de cubiertos mientras ésta se encuentre en la
canasta inferior o sáquela para llenarla sobre un mostrador o una
mesa.
IMPORTANTE: Coloque siempre los objetos (cuchillos, pinchos,
etc.) con las puntas hacia abajo.
■ Coloque artículos pequeños como tapas de biberones, tapas
de frascos, pinchos para sostener mazorcas de maíz, etc. en
una sección cubierta. Cierre la cubierta para mantener los
artículos pequeños en su lugar. Cubiertas en algunos
modelos
.
1. Sujete el cabo superior de la punta que está en el recipiente
de puntas.
2. Jale con cuidado la punta hacia afuera del recipiente.
3. Doble la hilera de puntas de la canasta hacia abajo para
acomodar platos más grandes, tazones, ollas, cacerolas o
fuentes para hornear.
■ Siga los modelos de carga sugeridos, según se muestra, para
mejorar los resultados del lavado de sus cubiertos. Cargue
los artículos utilizando las ranuras con las tapas hacia abajo
para evitar que los cubiertos se apilen.
■ Si la canastilla de los cubiertos no tiene tapas o cuando las
tapas están hacia arriba, mezcle los artículos en cada
sección de la canastilla, algunos con la punta hacia arriba y
otros hacia abajo para evitar apilamientos. El rociador no
puede alcanzar los objetos apilados. Cubiertas en algunos
modelos.
29
Page 30

CÓMO USAR LA
LAVAVAJILLAS
■ La dureza del agua puede cambiar durante un período de
tiempo. Infórmese sobre el nivel de dureza del agua de su
localidad, preguntando al representante de ventas de Sears,
a la tienda comercial de agua, a la compañía de
ablandadores de agua o al departamento de suministro de
agua de su localidad.
Depósito del detergente
El depósito del detergente tiene 2 secciones. La sección de
Prelavado vierte el detergente en la lavavajillas cuando usted
cierra la puerta.
A
A. Tapa
B. Sección de lavado principal
C. Seguro de la tapa
D. Sección de prelavado
La sección más grande de Lavado Principal automáticamente
vierte el detergente en la lavavajillas durante el ciclo de lavado
principal. (Vea las “Tablas de selección de ciclos”.)
■ Use únicamente detergentes para lavavajillas automáticas.
Otros detergentes pueden producir espuma en exceso, que
puede derramarse fuera de la lavavajillas y reducir el
rendimiento del lavado.
■ Agregue el detergente justo antes de comenzar el ciclo.
■ Guarde el detergente bien cerrado en un lugar fresco y seco.
El detergente para lavavajillas automáticas produce mejores
resultados cuando está fresco.
NOTA: No use detergente si ha seleccionado un ciclo de
enjuague.
Llenado del depósito
1. Si la tapa del depósito está cerrada, abra la tapa empujando
el seguro de la tapa.
2. Llene la sección de Lavado Principal con detergente.
Consulte “Cuánto detergente debe usar”.
3. Llene la sección de Prelavado si es necesario. (Vea “Tablas
de selección de ciclos”.)
4. Cierre la tapa del depósito.
La tapa se abrirá durante el ciclo para distribuir el detergente.
Cuánto detergente debe usar
■ La cantidad de detergente que debe usar depende de la
dureza del agua y del tipo de detergente. Si usa muy poco,
los platos no quedarán limpios. Si usa demasiado en agua
blanda, las piezas de cristal quedarán manchadas.
BCD
Dónde llenar
Parte superior del 3er. nivel
(9 cdtas ó 45 mL)
Parte superior del 2do. nivel
(6 cdtas ó 30 mL)
Parte superior del 1er. nivel
(3 cdtas ó 15 mL)
Agua blanda a medio dura (0 a 6 granos por galón)
[agua típica tratada con ablandador de agua y cierto tipo de
Nivel de suciedad Lavado
Cargas con suciedad
liviana/previamente
enjuagadas
Cargas con suciedad
normal
Cargas con suciedad
profunda
Agua medio dura a dura (7 a 12 granos por galón)
[agua de pozo y cierto tipo de agua urbana]
Nivel de suciedad Lavado
Todos los tipos de
suciedad
†
Podría ser necesario usar la opción Hi Temp (Lavado a
Temperatura Alta) para obtener el óptimo rendimiento en el
lavado con agua muy dura.
NOTA: Los niveles de llenado que se indican corresponden a los
detergentes en polvo estándares. Los niveles pueden variar si
usted usa el detergente líquido o en polvo concentrado. Los
detergentes en pastilla deberán colocarse en la sección de
lavado principal del depósito de detergente con la tapa cerrada.
Siga las instrucciones del paquete cuando use un detergente
líquido para lavavajillas, un detergente en polvo concentrado o
un detergente en pastilla.
IMPORTANTE: Vea “Tablas de selección de ciclos” para ver qué
secciones del depósito de detergente debe usar para cada ciclo.
agua urbana]
principal
3 cdtas (15 mL)
[parte superior
del 1er. nivel]
6 cdtas (30 mL)
[parte superior
del 2do. nivel]
9 cdtas (45 mL)
[parte superior
del 3er. nivel]
principal
9 cdtas (45 mL)
[parte superior
del 3er. nivel]
Prelavado
3 cdtas (15 mL)
[parte superior
del 1er. nivel]
6 cdtas (30 mL)
[parte superior
del 2do. nivel]
6 cdtas (30 mL)
[parte superior
del 2do. nivel]
†
Prelavado
6 cdtas (30 mL)
[parte superior
del 2do. nivel]
30
Page 31

Depósito del agente de enjuague
IMPORTANTE: Su lavavajillas está diseñada para usar un agente
de enjuague líquido. El uso de un agente de enjuague mejora el
secado pues permite que el agua se escurra de los platos
durante el enjuague final. También impide que el agua forme
gotitas que pueden secarse como manchas o rayas. No use
agentes de enjuague sólidos o en barra.
Revisión del depósito
Revise el centro de la tapa del indicador de llenado. Si está vacía
significa que necesita llenarse.
O
Consejos para la eficiencia
de la lavavajillas
El agua caliente disuelve y activa el detergente para lavavajillas.
El agua caliente también disuelve la grasa que se encuentra en
los platos y ayuda a secar los vasos sin manchas. Para lograr
óptimos resultados en el lavado de la vajilla, el agua deberá tener
una temperatura de 120°F (49°C) al entrar en la lavavajillas. Si la
temperatura del agua está demasiado baja, es posible que la
vajilla no se lave bien. El agua demasiado caliente puede
dificultar la eliminación de algunos tipos de suciedad e impedir la
acción de ciertos ingredientes en el detergente. Si el calentador
de agua está ubicado lejos de la lavavajillas, quizás sea
necesario dejar correr el agua caliente en el grifo que esté más
cercano a la lavavajillas para minimizar la cantidad de agua fría
en la tubería de agua.
Para revisar la temperatura del agua
O usted puede quitar la tapa del indicador de llenado. Si ve una
“E” significa que el depósito está vacío.
Llenado del depósito
El depósito del agente de enjuague tiene capacidad para
6 oz (175 mL) de agente de enjuague. En condiciones normales,
éste durará alrededor de 3 meses. Usted no tiene que esperar
hasta que el depósito esté vacío para volver a llenarlo. Trate de
mantenerlo lleno, pero asegúrese de no exceder su capacidad.
1. Asegúrese de que la puerta de la lavavajillas esté
completamente abierta.
2. Quite la tapa del indicador de llenado.
3. Agregue el agente de enjuague. Llénelo hasta la abertura más
pequeña que se encuentra en la parte inferior del depósito. El
llenado en exceso puede dar lugar a que el agente de
enjuague se filtre y podría resultar en exceso de espuma.
4. Limpie todo el agente de enjuague derramado con un paño
húmedo.
5. Vuelva a colocar la tapa del indicador de llenado. Ciérrela
bien.
1. Deje correr el agua caliente del grifo que está más cerca de
su lavavajillas, por lo menos un minuto.
2. Coloque un termómetro de caramelo o de carne en una taza
medidora de vidrio.
3. Verifique la temperatura en el termómetro mientras el agua
está vertiéndose en la taza.
Consejos de eficiencia adicionales
■ Para ahorrar agua, energía y tiempo, no enjuague los platos
antes de ponerlos en la lavavajillas.
■ Use la función de retraso para poner a funcionar su
lavavajillas durante las horas de menos consumo de energía.
Las empresas locales de servicios públicos recomiendan que
se evite un alto consumo de energía en determinadas horas
del día.
■ Durante el verano, ponga a funcionar su lavavajillas por la
noche. Esto reduce la acumulación de calor en la cocina
durante el día.
■ Use un agente de enjuague para mejorar el secado.
■ Use ciclos u opciones que añadan calor extra a la porción de
lavado o enjuague del ciclo únicamente cuando sea
necesario.
■ Si su casa está equipada con un ablandador de agua, tal vez
quiera evitar comenzar a usar la lavavajillas durante la
regeneración del ablandador, ya que esto puede contribuir a
un rendimiento de lavado insuficiente.
31
Page 32

Tablas de selección de ciclos
Seleccione el ciclo de lavado y opciones que desee. U oprima
START/RESUME (Inicio/Reanudar) para usar el mismo ciclo y
opciones del ciclo previo.
NOTA: Si el último ciclo que usted terminó fue un ciclo de
enjuague, cuando oprima Start/Resume (Inicio/Reanudar) la
lavavajillas hará funcionar el último ciclo completo de lavado y
opciones que usted seleccionó.
Un “●” muestra las etapas que tiene cada ciclo.
El uso de agua se muestra en galones de EE. UU./litros.
IMPORTANTE: Los ciclos comunes pueden demorar algunas
horas, dependiendo del ciclo seleccionado y de la temperatura
del agua.
Pots Pans/Ollas, Cazuelas
Use este ciclo para ollas, cacerolas, cazuelas y vajilla regular
que estén muy sucias y sean difíciles de limpiar.
Normal Wash/Lavado Normal
Use este ciclo para cargas que tengan cantidades normales de
suciedad. (La etiqueta de consumo de energía está basada en
este ciclo.)
Use la sección con tapa del depósito
de detergente.
Lavado Lavado
Enjuague
Principal
o Purga
●●
Purga
Enjuague
final
Secado Tiempo
●●
aproxi-
mado
1,5 hrs* 4,6/17,4
Uso de
agua
(gal/L)
Light Wash/Lavado Ligero
Use este ciclo para vajilla de porcelana y cristalería. Este ciclo
usa un lavado ligero y un secado delicado. Durante el secado
caliente, el elemento de calefacción se enciende y se apaga.
Use ambas secciones del depósito de detergente.
Lavado Lavado
●
Enjuague
Principal
o Purga
●●
Enjuague
Enjuague
final
Secado Tiempo
●●
aproxi-
mado
2,5 hrs* 8,6/32,6
Uso de
agua
(gal/L)
Heavy Wash/Lavado intenso
Use este ciclo para cargas con suciedad intensa de comida.
Use ambas secciones del depósito de detergente.
Lavado Lavado
●●●
Principal
Enjuague
o Purga
Purga
Enjuague
final
Secado Tiempo
●●
aproxi-
mado
2 hrs* 6,9/26,1
Uso de
agua
(gal/L)
Use la sección con tapa del depósito
de detergente.
Lavado Lavado
Enjuague
Principal
o Purga
●●
Purga
Enjuague
final
Secado Tiempo
●●
en ciclo
aproxi-
mado
1,5 hrs* 4,8/18,2
Uso de
agua
(gal/L)
Quick Rinse/Enjuague Rápido
Use este ciclo para enjuagar platos, vasos y cubiertos que no
van a lavarse de inmediato.
No use detergente con este ciclo de enjuague.
Lavado Lavado
Principal
Enjuague
o Purga
●
Enjuague
Enjua-
gue
final
Secado Tiempo
(min)
10 2,2/8,3
Uso de
agua
(gal/L)
32
*Si la temperatura del agua de entrada es más baja que la
temperatura recomendada, el ciclo lo compensará
automáticamente agregando tiempo y calor según sea
necesario.
Page 33

Cómo cancelar un ciclo
1. Oprima CANCEL/DRAIN (Cancelar/Desaguar). La luz de
cancelar/desaguar se enciende.
2. La lavavajillas comienza un desagüe de 2 minutos (de ser
necesario). Deje que la lavavajillas complete el desagüe. La
luz se apaga al cabo de los 2 minutos. La puerta deberá estar
cerrada para que la lavavajillas desagüe.
Para detener el desagüe
Usted puede oprimir CANCEL/DRAIN (Cancelar/Desaguar)
nuevamente para detener el desagüe. Acuérdese de desaguar la
lavavajillas antes de comenzar un nuevo ciclo.
Para despejar los indicadores
Antes de poner la lavavajillas en marcha, oprima CANCEL/DRAIN
(Cancelar/Desaguar) para despejar todas las opciones y ciclos.
Para cambiar un ciclo o una selección
Durante el primer minuto de un ciclo
1. Seleccione un nuevo ciclo y/u opciones.
2. Revise los depósitos de detergente. Deben ser llenados
correctamente para el nuevo ciclo.
3. La luz de Start/Resume destellará cuando se abra la puerta.
Cerciórese de que la puerta esté cerrada.
4. Presione START/RESUME (Inicio/Reanudar).
Para agregar artículos
1. Abra la puerta ligeramente para detener el ciclo. Espere a que
la acción de rociado se detenga antes de abrir la puerta. La
luz de Start/Resume (Inicio/Reanudar) destellará.
2. Abra la puerta. Si la tapa del depósito del detergente está aún
cerrada, agregue el artículo.
3. Cierre la puerta con firmeza hasta que quede asegurada. La
luz de Start/Resume (Inicio/Reanudar) destellará.
4. Presione START/RESUME (Inicio/Reanudar).
IMPORTANTE: Si la opción Lock On (Seguro de los Controles)
ha sido seleccionada, saque el seguro (vea la sección Seguro de
los Controles en “Selecciones de opciones”) o la luz de Start/
Resume (Inicio/Reanudar) continuará destellando.
Selecciones de opciones
Usted puede personalizar sus ciclos oprimiendo una opción. Si
cambia de idea, oprima la opción nuevamente para cancelarla.
Seleccione una opción diferente si lo desea.
Usted puede cambiar una opción en cualquier momento antes
de que dicha opción seleccionada comience. Por ejemplo, usted
puede oprimir una opción de secado sin calor en cualquier
momento antes de que comience el secado.
Oprima START/RESUME (Inicio/Reanudar) para usar el mismo
ciclo y opción (opciones) del ciclo de lavado previo.
NOTA: Si el último ciclo que usted terminó fue uno de enjuague,
cuando usted oprime START/RESUME (Inicio/Reanudar), la
lavavajillas pone en funcionamiento el último ciclo completo de
lavado y opciones.
Después del primer minuto de un ciclo
1. Oprima CANCEL/DRAIN (Cancelar/Desaguar). La luz de
Cancel/Drain (Cancelar/Desaguar) se enciende. Su
lavavajillas inicia un desagüe de 2 minutos (de ser necesario).
Deje que la lavavajillas complete todo el desagüe.
2. Revise los depósitos de detergente. Deben ser llenados
correctamente para el nuevo ciclo.
3. Cerciórese de que la puerta esté cerrada. La luz de Start/
Resume (Inicio/Reanudar) destellará.
4. Seleccione un nuevo ciclo y/u opciones.
5. Presione START/RESUME (Inicio/Reanudar).
Para agregar artículos durante un ciclo
Usted puede agregar un artículo en cualquier momento antes de
que comience el lavado principal. Abra la puerta y revise el
depósito del detergente. Si la tapa está aún cerrada, usted puede
agregar artículos.
Hi Temp Wash/Lavado a Temperatura Alta
Seleccione esta opción para calentar el agua a 140ºF (60ºC)
durante las partes del ciclo. El calentar el agua ayuda a mejorar
los resultados del lavado. Esta opción agrega tiempo de calor, de
agua y de lavado a las partes del ciclo. La función Hi Temp Wash
(Lavado a Temperatura Alta) es útil cuando las cargas contienen
suciedad rebelde de alimentos.
NOTAS:
■ El ciclo Pots Pans (Ollas, Cazuelas) usa automáticamente
esta opción. Hi Temp Wash (Lavado a Temperatura Alta) es
una opción que funciona con los ciclos Heavy Wash (Lavado
Intenso) y Normal Wash (Lavado Normal).
■ Use esta opción para las cargas con suciedad más profunda
que la normal.
Sani Rinse/Enjuague sanitario (en algunos modelos)
Seleccione esta opción para aumentar la temperatura del agua
en el enjuague final a aproximadamente 155ºF (68ºC). Sani Rinse
hace que aumente la temperatura y el tiempo de duración del
ciclo. Este enjuague con alta temperatura higieniza sus platos y
su cristalería según el Estándar NSF/ANSI 184 para lavavajillas
domésticas. Las lavavajillas domésticas certificadas no han sido
diseñadas para los establecimientos con licencia para alimentos.
NOTA: El ciclo Sani Rinse (Enjuague Sanitario) es una opción que
funciona con los ciclos de Pots Pans (Ollas, Cazuelas), Heavy
Wash (Lavado Intenso) y Normal Wash (Lavado Normal).
Solamente estos ciclos de higienizado han sido designados para
cumplir con los requisitos de NSF/ANSI.
33
Page 34

Heated Dry/Secado con calor
La opción de secado caliente, combinada con un agente de
enjuague, le dará excelentes resultados de secado. La energía
que usa el secado caliente cuesta unos pocos centavos por
ciclo. La opción de secado caliente está encendida cuando la luz
del botón de secado caliente está encendida. Para evitar daños,
asegúrese de cargar los artículos de plástico en la canasta
superior.
Puede apagar la opción de secado caliente presionando HEATED
DRY (Secado con calor) para que se apague la luz. De todos
modos, habrá artículos en la carga que no se secarán al final del
ciclo.
NOTA: La opción de secado caliente se usa en todos los ciclos
excepto el de QUICK RINSE (Enjuague rápido).
Lock On/Seguro de los Controles
Indicadores de estado del ciclo
(en algunos modelos)
Siga de cerca el progreso de lavado de su lavavajillas con los
Indicadores de Estado del Ciclo.
NOTA: Las características de su lavavajillas pueden ser
diferentes de las que se muestran a continuación.
Luz de Clean/Limpio
La luz de Clean (Limpio) se ilumina cuando se ha terminado un
ciclo. La luz se apaga cuando usted presiona cualquier botón o
cierra la puerta.
Use este seguro para evitar el uso no intencional de la
lavavajillas. También puede usar la opción de seguro del control
para evitar cambios no intencionales de ciclos u opciones
durante un ciclo.
Cuando la luz del LOCK ON (Seguro de los Controles) está
encendida, todos los botones están desactivados.
NOTA: La puerta de la lavavajillas puede abrirse mientras los
controles están con seguro. Aún así, el seguro debe estar
desactivado y el botón de Start/Resume presionado para
reanudar el ciclo.
Para activar el seguro
Oprima y sostenga HEATED DRY (Secado con calor) durante
4 segundos. LOCK ON (Seguro de los Controles) se ilumina.
Si usted oprime cualquier botón mientras su lavavajillas está con
seguro, la luz se enciende y apaga 3 veces.
NOTA: Si se selecciona la opción de Secado con calor, la luz se
apagará temporariamente hasta que se ilumine Lock On.
Para desactivar el seguro
Oprima y sostenga HEATED DRY (Secado con calor) durante
4 segundos. La luz se apaga.
Delay Hours/Horas de retraso
Seleccione esta opción para poner a funcionar su lavavajillas
más tarde o durante las horas de menos consumo de energía. Se
pueden agregar artículos a la carga en cualquier momento
durante el retraso. Después de agregar los artículos, cierre la
puerta firmemente hasta asegurarla y oprima START/RESUME o
el retraso no se reanudará.
Para retrasar el inicio
1. Presione el botón de retraso para elegir el número de horas
de retraso.
2. Seleccione un ciclo de lavado y opciones.
3. Oprima START/RESUME (Inicio/Reanudar).
La lavavajillas inicia el ciclo dentro del número seleccionado de
horas.
NOTAS:
■ Para cancelar el retraso y el ciclo, oprima CANCEL/DRAIN
(Cancelar/Desaguar).
■ Para cancelar el retraso y comenzar el ciclo, presione START/
RESUME (Inicio/Reanudar).
Luz de Sanitized/Higienizado (en algunos modelos)
Si usted selecciona la opción de Sani Rinse (Enjuague Sanitario),
la luz de Sanitized (Higienizado) se ilumina cuando el ciclo de
Enjuague Sanitario se ha terminado. Si su lavavajillas no higienizó
sus platos adecuadamente, la luz se enciende y apaga al término
del ciclo. Esto puede ocurrir si se interrumpe el ciclo o si la
temperatura del agua de entrada es muy baja. La luz se apaga
cuando usted presiona cualquier botón o cierra la puerta.
Sistema de secado
Durante el secado, usted puede ver el vapor que se escapa a
través del orificio de ventilación que se encuentra en la esquina
superior izquierda de la puerta. Esto es normal mientras el calor
seca sus platos.
IMPORTANTE: El vapor es caliente. No toque el orificio de
ventilación durante el secado.
Flotador de protección de sobrellenado
El flotador de protección de sobrellenado (ubicado en la esquina
frontal derecha de la tina de la lavavajillas) evita que la lavavajillas
se llene en exceso. Este dispositivo tiene que estar en su lugar
para que la lavavajillas pueda funcionar.
Revise debajo del flotador si hay objetos que pudieran impedir
que el protector suba o baje.
34
Page 35

CÓMO LAVAR ARTÍCULOS ESPECIALES
Si tiene dudas acerca del lavado de un artículo determinado, consulte con el fabricante para ver si se trata de un artículo lavable en la
lavavajillas.
Material ¿Lavable en
Aluminio Sí La temperatura alta del agua y los detergentes pueden afectar el acabado del
Aluminio desechable No No lave bandejas de aluminio desechables en la lavavajillas. Éstas podrían
Botellas y latas No Lave las botellas y latas a mano. Las etiquetas engomadas pueden soltarse y
Hierro fundido No Se perderá el curado y el hierro se oxidará.
Porcelana/Cerámica de
gres
Cristal Sí Siempre consulte las recomendaciones del fabricante antes de lavar. Algunos
Oro No Los cubiertos dorados perderán su color.
Vidrio Sí Los vasos de leche se pondrán amarillentos luego de varias lavadas en la
Cuchillos con mango
hueco
Peltre, latón, bronce No Las temperaturas altas del agua y el detergente pueden decolorar o picar el
la lavavajillas?
Sí Siempre consulte las recomendaciones del fabricante antes de lavar. Los diseños
No Los mangos de algunos cuchillos están fijados a la hoja con adhesivos que
Comentarios
aluminio anodizado.
moverse durante el lavado y dejar marcas negras en los platos y otros objetos.
obstruir los brazos rociadores o la bomba y reducir el rendimiento de lavado.
antiguos, pintados a mano o sobre glaseado se desteñirán. Los acabados
dorados pueden perder su color o intensidad.
tipos de cristal de sosa pueden corroerse después de varias lavadas.
lavavajillas.
pueden aflojarse al ser lavados en la lavavajillas.
acabado.
Plásticos desechables No No pueden resistir las temperaturas altas del agua y los detergentes.
Plásticos Sí Siempre consulte las recomendaciones del fabricante antes de lavar. La capacidad
de los objetos de plástico para resistir las temperaturas altas y los detergentes
varía. Es recomendable colocar los objetos livianos, tales como tapas y
mantequeras, sólo en la canasta superior. Objetos duros tales como refrigerantes
y bandejas de sillas para bebés pueden colocarse en la canasta inferior. Cuando
lave objetos de plástico en la canasta inferior, es recomendable usar un secado al
aire.
Acero inoxidable Sí Haga correr un ciclo de enjuague si no va a lavar de inmediato. El contacto
Plata Sterling o con
baño de plata
Hojalata No Puede oxidarse.
Artículos de madera No Lávelos a mano. Consulte siempre las recomendaciones del fabricante antes de
Sí Haga correr un ciclo de enjuague si no va a lavar de inmediato. El contacto
prolongado con los alimentos que contienen sal, vinagre, productos lácteos o
jugos de fruta puede dañar el acabado.
prolongado con los alimentos que contienen sal, ácido o sulfuro (huevos,
mayonesa y mariscos) puede dañar el acabado.
lavar. La madera no tratada puede deformarse, agrietarse o perder el acabado.
35
Page 36

CUIDADO DE LA LAVAVAJILLAS
Limpieza
Limpieza externa
En la mayoría de los casos, todo lo que se debe hacer es usar
periódicamente un paño suave y húmedo o una esponja con un
detergente suave para que el exterior de su lavavajillas se vea
limpio y reluciente. Si el exterior de la lavavajillas es de acero
inoxidable, se recomienda un limpiador de acero inoxidable.
Limpieza interna
Los residuos minerales del agua dura pueden causar la
acumulación de una película blanca en las superficies interiores,
sobre todo inmediatamente debajo del área de la puerta.
No limpie el interior de la lavavajillas hasta que se haya enfriado.
Quizás sea necesario usar guantes de hule. No utilice ningún tipo
de limpiador que no sea el detergente para lavavajillas debido a
que puede producir espuma o jabón en exceso.
Para limpiar el interior
Haga una pasta con el detergente en polvo de lavavajillas en una
esponja húmeda y limpie.
O
Use detergente líquido de lavavajillas y limpie con una esponja
húmeda.
O
Consulte el procedimiento de enjuague con vinagre en la sección
“Manchas y formación de películas en los platos” bajo “Solución
de problemas”.
NOTA: Ponga a funcionar un ciclo normal con detergente
después de la limpieza interna.
Purga de aire del desagüe
(en modelos con montaje debajo
del mostrador solamente)
Revise la purga de aire del desagüe siempre que su lavavajillas
no esté desaguando bien.
Algunas normas de plomería locales o estatales exigen que se
instale una purga de aire del desagüe entre una lavavajillas
empotrada y el sistema de desagüe de la casa. Si el desagüe de
la casa está obstruido, la purga de aire del desagüe evita que el
agua retroceda y se estanque en su lavavajillas.
La purga de aire del desagüe está por lo general ubicada encima
del fregadero o en el mostrador cerca de la lavavajillas. Para
adquirir una purga de aire del desagüe, llame al 1-800-4-MY-
®
HOME
NOTA: La purga de aire del desagüe es un dispositivo de
plomería externo que no forma parte de su lavavajillas. La
garantía proporcionada con su lavavajillas no cubre los costos de
servicio técnico directamente asociados con la limpieza o
reparación de una purga de aire del desagüe externa.
Limpie la purga de aire del desagüe cada cierto tiempo para
asegurar un desagüe apropiado de su lavavajillas. Siga las
instrucciones de limpieza proporcionadas por el fabricante. Para
la mayoría de tipos de purgas, usted tiene que levantar la tapa de
cromo. Destornille la tapa de plástico. Luego revise si hay alguna
acumulación de suciedad. Limpie si es necesario.
. Pida la Pieza Número 300096.
Para limpiar la purga de aire del desagüe
Almacenamiento
36
Cómo guardar la lavavajillas para el verano
Cierre el suministro de agua y la fuente de alimentación a al
lavavajillas durante el verano para evitar daño a su lavavajillas.
Cómo acondicionar su lavavajillas para el invierno
Evite daños de agua en la lavavajillas y en su casa debido al
congelamiento de las líneas de agua. Si deja su lavavajillas en
una vivienda de temporada o si pudiera estar expuesta a
temperaturas casi congelantes, haga acondicionar su lavavajillas
para el invierno por un técnico autorizado.
Page 37

SOLUCIÓN DE PROBLEMAS
En primer lugar, pruebe las soluciones sugeridas aquí y posiblemente se
evite el gasto de una visita de servicio técnico…
La lavavajillas no está funcionando correctamente
■ La lavavajillas no funciona o se detiene durante
un ciclo
¿Se ha cerrado bien la puerta y el pestillo ha enganchado?
¿Se ha seleccionado el ciclo correcto? Consulte “Tablas de
selección de ciclos”.
¿Hay suministro eléctrico para la lavavajillas? ¿Hay un fusible
de la casa fundido o se disparó el cortacircuitos? Reemplace
el fusible o reposicione el cortacircuitos. Si el problema
continúa, llame a un electricista.
¿Se ha detenido el motor debido a una sobrecarga? El motor
se reactiva automáticamente en unos minutos. Si no lo hace,
llame al servicio técnico.
¿Está abierta la válvula de cierre del agua (si ha sido
instalada)?
Es normal que en ciertos ciclos se produzcan pausas
repetidamente por unos cuantos segundos durante el ciclo
de lavado.
■ La luz de START/RESUME (inicio/reanudar) está titilando
¿Se ha abierto la puerta durante el ciclo o se interrumpió el
suministro de energía? La luz de Start/Resume (Inicio/
Reanudar) destellará cuando se abra la puerta durante un
ciclo o puede destellar si se interrumpe la energía. Oprima
START/RESUME (inicio/reanudar) para reanudar el ciclo.
Cerciórese de que la puerta esté bien cerrada y asegurada.
■ Está destellando la luz de Clean (limpio)
La lavavajillas no está funcionando bien. Llame al servicio.
■ La lavavajillas no se llena de agua
¿Puede el flotador de protección de sobrellenado moverse
hacia arriba o hacia abajo libremente? Oprima hacia abajo
para liberarlo.
■ La lavavajillas pasa mucho tiempo en marcha
¿El agua que ingresa a la lavavajillas está lo suficientemente
caliente? La lavavajillas toma más tiempo cuando calienta el
agua. Consulte la sección “Consejos para la eficiencia de la
lavavajillas”.
En algunos ciclos de lavado y enjuague hay un retraso
automático hasta que el agua alcanza la temperatura
apropiada.
■ Queda agua en la lavavajillas
¿Se ha terminado el ciclo?
¿Se quitó el tapón del disco removible durante la instalación?
(Vea “Instalación de la manguera de desagüe” en las
Instrucciones de instalación.)
■ Queda detergente en la sección con tapa del depósito
¿Se ha terminado el ciclo?
¿Está el detergente sin grumos? Cambie el detergente si
fuera necesario.
¿Está la canasta inferior instalada correctamente con los
parachoques al frente (en algunos modelos)? Consulte la
sección “Piezas y características”. Si es necesario, instale
nuevamente la canasta.
■ Residuos blancos aparecen en la parte frontal del panel
de acceso
¿Se usó demasiado detergente? Consulte la sección
“Depósito del detergente”.
¿Es la marca de detergente lo que causa espuma en exceso?
Pruebe una marca diferente para reducir la espuma y eliminar
la acumulación.
■ Olor en la lavavajillas
¿Se lavan los platos sólo cada 2 ó 3 días? Páselos por un
ciclo de enjuague una vez o dos veces por día hasta que
usted acumule una carga completa.
¿Tiene la lavavajillas un olor a plástico nuevo? Haga un
enjuague con vinagre como se describe en “Manchas y
formación de películas en los platos” más adelante en esta
guía de Solución de problemas.
■ Condensación en la cubierta de la cocina
(en modelos empotrados)
¿Está la lavavajillas alineada con la cubierta? La humedad
proveniente del orificio de ventilación en la consola de la
lavavajillas puede formarse en la cubierta. Consulte las
Instrucciones de Instalación para obtener más información.
Los platos no están completamente limpios
■ Residuos de alimentos en los platos
¿Se ha cargado la lavavajillas correctamente? Consulte la
sección “Cómo cargar su lavavajillas”.
¿Está la temperatura del agua demasiado baja? Para lograr
óptimos resultados en el lavado de la vajilla, el agua deberá
tener una temperatura de 120°F (49°C) al entrar en la
lavavajillas. Consulte la sección “Consejos para la eficiencia
de la lavavajillas”.
37
Page 38

¿Usó usted la cantidad correcta de detergente fresco? Use
únicamente detergentes recomendados para lavavajillas.
Consulte la sección “Depósito del detergente”. El detergente
debe estar fresco para ser eficaz. Guarde el detergente en un
área fresca y seca. La suciedad profunda y/o el agua dura
por lo general requieren detergente adicional.
¿Tiene agua dura? Es posible que tenga que aumentar la
cantidad de detergente que está usando. Consulte la sección
“Depósito del detergente”. Además puede necesitar cambiar
el detergente por uno cuyo contenido de fósforo sea
de 8,7 %.
¿Está el detergente endurecido en el depósito? Use sólo
detergente fresco. No permita que el detergente permanezca
por varias horas en un depósito húmedo. Limpie el depósito
cuando haya detergente endurecido.
¿Está la bomba o el brazo rociador obstruido por las
etiquetas de botellas y latas?
¿Está la presión del agua de la casa lo suficientemente alta
para lograr un llenado adecuado de la lavavajillas? La presión
del agua de la casa debe ser de 20 a 120 libras por pulgada
cuadrada (138-828 kPa) para obtener un llenado apropiado
de la lavavajillas. Si tiene preguntas acerca de la presión del
agua, llame a un plomero competente autorizado.
¿Está el exceso de espuma reduciendo la velocidad del
brazo rociador? No use jabón o detergentes para lavar ropa.
Use únicamente detergentes recomendados para lavavajillas.
Manchas en los platos
■ Manchas y formación de películas en los platos
¿Es el agua dura o tiene un alto contenido de minerales? El
acondicionar el agua del enjuague final con un agente de
enjuague ayuda a eliminar las manchas y la formación de
películas. Mantenga el depósito del agente de enjuague lleno.
¿Está la temperatura del agua demasiado baja? Para lograr
óptimos resultados en el lavado de la vajilla, el agua deberá
tener una temperatura de 120°F (49°C) al entrar en la
lavavajillas. Consulte la sección “Consejos para la eficiencia
de la lavavajillas”.
¿Usó usted la cantidad correcta de detergente eficaz? Use
sólo detergentes recomendados para lavavajillas. Consulte la
sección “Depósito del detergente”. El detergente debe estar
fresco para ser eficaz. Guarde el detergente en un área fresca
y seca. La suciedad profunda y/o el agua dura por lo general
requieren detergente adicional.
¿Está la presión del agua de la casa lo suficientemente alta
para lograr un llenado adecuado de la lavavajillas? La presión
del agua de la casa debe ser de 20 a 120 libras por pulgada
cuadrada (138-828 kPa) para obtener un llenado apropiado
de la lavavajillas. Si tiene preguntas acerca de la presión del
agua, llame a un plomero competente autorizado.
NOTA: Para quitar manchas y las películas de los platos,
pruebe un enjuague con vinagre blanco. Este procedimiento
está destinado únicamente para uso ocasional. El vinagre es
un ácido y su uso frecuente podría dañar la lavavajillas.
1. Lave y enjuague los platos. Use una opción de secado al
aire o un secado que ahorra energía. Quite todos los
objetos metálicos o cubiertos.
2. Ponga 2 tazas (500 mL) de vinagre blanco en una taza
medidora de vidrio o de otro material seguro para
lavavajillas en la canasta inferior.
3. Haga funcionar la lavavajillas por un ciclo completo con
una opción de secado al aire. No use detergente. El
vinagre se mezclará con el agua del lavado.
■ Película de sílice o corrosión (la película de sílice es un
depósito blanco e iridiscente; la corrosión es una película
turbia)
A veces se produce una reacción química al agua con ciertos
tipos de objetos de cristal. Por lo general se debe a una
combinación de agua suave o agua ablandada, soluciones
alcalinas para lavar, enjuague insuficiente, sobrecarga de la
lavavajillas y el calor del secado. Evitar este problema no
sería posible, excepto lavando a mano.
Para retardar el proceso, use una mínima cantidad de
detergente por carga. Use un agente de enjuague líquido y
reduzca la carga de la lavavajillas para permitir un enjuague a
fondo. Las películas de sílice y la corrosión son permanentes
y no se pueden eliminar. No use el secado caliente.
■ Manchas blancas en las cacerolas con acabado
antiadherente
¿Ha quitado el detergente de la lavavajillas el curado de las
cacerolas? Vuelva a curarlas luego de lavarlas en la
lavavajillas.
■ Manchas de color castaño en los platos y en el interior de
la lavavajillas
¿Tiene el agua un alto contenido de hierro? Vuelva a lavar los
platos usando 1-3 cucharaditas (5-15 mL) de cristales de
ácido cítrico agregados en la sección con tapa del depósito
del detergente. No use detergente. A continuación use el
ciclo de Lavado Normal con detergente. Si el tratamiento
llega a ser necesario más de una vez cada dos meses, se
recomienda la instalación de una unidad de eliminación de
hierro.
■ Marcas negras o grises en los platos
¿Hay objetos de aluminio que rozan los platos durante el
lavado? Los objetos de aluminio desechables pueden
romperse en la lavavajillas y rayar los demás artículos. Lave
estos objetos a mano. Quite las marcas de aluminio usando
un producto de limpieza abrasivo suave.
■ Manchas anaranjadas en los platos de plástico o en el
interior de la lavavajillas
¿Se han colocado platos con grandes cantidades de restos
de comida a base de tomate en la lavavajillas? Las manchas
desaparecen gradualmente con el tiempo. El uso continuo
del secado caliente retardará la desaparición de las manchas.
Las manchas no afectarán el rendimiento de la lavavajillas. El
uso continuo de un ciclo de enjuague y una opción de
secado al aire o un secado que ahorra energía reducirá la
posibilidad de manchas.
38
Page 39

Los platos/los cubiertos no quedan bien secos
Los platos se dañan durante el ciclo
■ Los platos no están secos
¿Se cargó la lavavajillas de manera que permita el escurrido
apropiado del agua? No sobrecargue. Consulte la sección
“Cómo cargar su lavavajillas”. Use un agente de enjuague
líquido para acelerar el secado.
¿Están mojados los objetos de plástico? Los objetos de
plástico a menudo necesitan un secado con toalla.
¿Está vacío el depósito del agente de enjuague? Consulte la
sección “Depósito del agente de enjuague”.
¿Se usó una opción de secado al aire o un secado que
ahorra energía? Use una opción de secado caliente para
obtener platos más secos.
■ Intente agregar la opción “Hi-Temp Wash” (Lavado a
temperatura alta) o “Sani Rinse” (Enjuague sanitario) para
un rendimiento mejor en el secado.
■ Use un ciclo más poderoso, como puede ser el de ollas y
cacerolas o el ciclo intenso, para mejorar el rendimiento
del secado.
■ Los cubiertos no están secos
¿Cargó los cubiertos de manera que se pueda escurrir bien el
agua? Consulte la sección “Cómo cargar su lavavajillas”.
¿Se están usando las tapas de la canasta para los cubiertos?
Para un mejor secado, use las ranuras en las tapas para
separar los cubiertos y dejar espacio entre éstos.
¿Están tocándose los utensilios y/o los cubiertos? Evite que
los artículos se toquen o se apilen uno sobre otro, mezclando
tipos diferentes de cubiertos. No sobrecargue la canasta.
■ Platos despostillados
¿Se cargó la lavavajillas adecuadamente? Coloque los platos
y vasos de manera que estén estables y no choquen entre sí
por la acción del lavado. El sacar y meter las canastas
despacio reduce la posibilidad de despostilladuras.
NOTA: Algunos objetos de cristal antiguo, con cantos
biselados y objetos similares de porcelana y cristal serían
demasiado delicados para lavarse en la lavavajillas
automática. Lávelos a mano.
Ruidos
■ Se escuchan chirridos, trituraciones, crujidos o zumbidos
Un objeto duro se ha introducido en el módulo de lavado (en
algunos modelos). El sonido deberá cesar una vez que el
objeto haya sido pulverizado. Si el ruido persiste después de
un ciclo completo, llame al servicio técnico.
El exterior de la lavavajillas está sucio o marcado
■ Marcas, manchas o residuos en el exterior de la
lavavajillas
¿Ha limpiado la lavavajillas con un detergente suave y un
paño o ha usado un limpiador de acero inoxidable en los
modelos con exterior de acero inoxidable? En la mayoría de
los casos, todo lo que se debe hacer es usar periódicamente
un paño o esponja suave húmedo con un detergente suave
para que el exterior de su lavavajillas se vea limpio y
reluciente. Si el exterior de la lavavajillas es de acero
inoxidable, se recomienda el uso de un limpiador para acero
inoxidable.
39
Page 40

TABLE DES MATIÈRES
CONTRATS DE PROTECTION ................................................... 40
GARANTIE.................................................................................... 41
SÉCURITÉ DU LAVE-VAISSELLE.............................................. 42
Avant d’utiliser le lave-vaisselle................................................. 43
PIÈCES ET CARACTÉRISTIQUES ............................................. 44
Système d’élimination des solides ULTRA WASH
GUIDE DE MISE EN MARCHE ................................................... 45
Utilisation de votre nouveau lave-vaisselle............................... 45
CONNEXION DU LAVE-VAISSELLE
(POUR LES MODÈLES MOBILES UNIQUEMENT)................... 46
Connexion de l’adaptateur pour robinet.................................. 46
Connexion à la source d’eau et d’alimentation électrique ....... 46
Utilisation du robinet ................................................................. 47
Déconnexion du lave-vaisselle.................................................. 47
CHARGEMENT DU LAVE-VAISSELLE ...................................... 47
Suggestions de chargement ..................................................... 47
Chargement du panier supérieur .............................................. 48
Chargement du panier inférieur ................................................ 48
Chargement du panier à couverts ............................................ 49
®
.................. 45
CONTRATS DE PROTECTION
UTILISATION DU LAVE-VAISSELLE.......................................... 49
Distributeur de détergent........................................................... 49
Distributeur d’agent de rinçage................................................. 50
Conseils d’efficacité pour le lave-vaisselle ............................... 51
Tableaux de sélection de programmes..................................... 51
Annulation d’un programme...................................................... 52
Changement d’un programme ou réglage................................ 52
Addition de vaisselle durant un programme............................. 53
Sélection d’options.................................................................... 53
Indicateurs d’état d’avancement du programme ..................... 54
Système de séchage................................................................. 54
Dispositif de protection contre le débordement ....................... 54
LAVAGE D’ARTICLES SPÉCIAUX.............................................. 55
ENTRETIEN DU LAVE-VAISSELLE............................................ 56
Nettoyage .................................................................................. 56
Dispositif anti-refoulement ........................................................ 56
Remisage................................................................................... 56
DÉPANNAGE................................................................................ 57
NUMÉROS DE SERVICE...................... COUVERTURE ARRIÈRE
Contrats principaux de protection
Nous vous félicitons d'avoir fait un achat judicieux. Votre nouvel
appareil Kenmore
années de fonctionnement fiable. Mais comme pour tous les
produits, il pourra à l'occasion nécessiter un entretien préventif
ou une réparation. Le cas échéant, un Contrat principal de
protection peut vous épargner de l'argent et des soucis.
Le Contrat principal de protection contribue aussi à prolonger la
vie utile de votre nouvel appareil ménager. Le Contrat* inclut :
®
est conçu et fabriqué pour vous procurer des
✔ Pièces et main-d'œuvre nécessaires pour conserver
les appareils en état de fonctionnement correct pendant
une utilisation normale, pas uniquement les
défaillances. Notre couverture va bien au-delà de la
garantie du produit. Aucune franchise, aucune
anomalie de fonctionnement ne sont exclues de ce
contrat - protection réelle.
✔ Un service d'expert proposé par plus de 10 000
techniciens d'entretien Sears autorisés, ce qui signifie
que quelqu'un de confiance prendra soin de votre
produit.
✔ Appels de service illimités et service national, aussi
souvent que vous en avez besoin et quand vous en avez
besoin.
✔ Garantie “Anti-citron” - remplacement de votre produit
couvert si plus de quatre pannes se produisent en deçà
de douze mois.
✔ Remplacement du produit si votre produit couvert ne
peut être réparé.
✔ Vérification annuelle d'entretien préventif sur
demande - sans frais supplémentaires.
✔ Aide rapide par téléphone - nous appelons cela
Résolution rapide - support téléphonique d'un agent
de Sears sur tous les produits. Considérez-nous comme
un “manuel d'utilisateur parlant”.
✔ Protection contre les sautes de puissance pour
prévenir les dommages électriques attribuables aux
fluctuations de courant.
✔ Couverture pour la perte de nourriture de 250 $ par
an sur tout aliment altéré en raison d'une défaillance
mécanique sur tout réfrigérateur ou congélateur couvert.
✔ Remboursement de location si la réparation du produit
couvert prend plus de temps que promis.
✔ 10 % de réduction sur le prix courant de toute
intervention de réparation non couverte et pièces de
rechange.
Dès que vous achetez le Contrat, il suffit d'un appel téléphonique
pour obtenir un rendez-vous de service. Vous pouvez appeler en
tout temps jour et nuit ou prendre un rendez-vous de service en
direct.
Le Contrat principal de protection constitue un investissement
sans risque. Si vous annulez pour une quelconque raison
pendant la période de garantie du produit, nous vous
rembourserons intégralement ou nous vous verserons un
remboursement au prorata après l'expiration de la période de
garantie. Achetez votre Contrat principal de protection
aujourd'hui même!
Certaines limitations et exclusions s'appliquent. Pour des
prix et renseignements supplémentaires aux États-Unis,
composez le 1-800-827-6655.
*Le contrat de couverture au Canada varie pour certains
articles. Pour des informations détaillées, appelez Sears
Canada au 1-800-361-6665.
Service d'installation Sears
Pour l'installation professionnelle garantie par Sears d'appareils
ménagers et d'articles tels que les ouvre-portes de garage,
chauffe-eau, et autres gros appareils ménagers, aux É.-U. ou au
Canada, composez le 1-800-4-MY-HOME
®
.
40
Page 41

GARANTIE DES APPAREILS MÉNAGERS KENMORE
GARANTIE LIMITÉE DE UN AN
Lorsqu'il est installé, utilisé et entretenu conformément à toutes
les instructions fournies avec le produit, si cet appareil ménager
fait défaut par suite d'un vice de matériau ou de fabrication au
cours de l'année qui suit la date d'achat, composer le 1-800-4MY-HOME
Si cet appareil ménager fonctionne à toute autre fin que
l'utilisation familiale privée, la présente garantie ne s'appliquera
que pendant 90 jours à partir de la date d'achat.
LA PRÉSENTE GARANTIE COUVRE UNIQUEMENT LES
VICES DE MATÉRIAUX ET DE FABRICATION. SEARS NE
PAIER A PA S POUR :
1. Les pièces courantes qui peuvent s'user suite à une
2. L'intervention d'un technicien pour montrer à l'utilisateur
3. L'intervention d'un technicien pour nettoyer ou entretenir ce
4. L'endommagement ou les défauts du produit si celui-ci n'est
5. L'endommagement ou les défauts du produit résultant
6. L'endommagement ou les défauts du produit causés par
7. L'endommagement ou les défauts des pièces ou systèmes
®
pour obtenir une réparation gratuite.
utilisation normale, notamment les filtres, courroies,
ampoules et sacs.
comment installer, utiliser et entretenir correctement le
produit.
produit.
pas installé, utilisé ou entretenu conformément à toutes les
instructions fournies avec le produit.
d'accident, usage impropre ou abusif ou utilisation autre que
celle pour laquelle il est destiné.
l'utilisation de détergents, agents de nettoyage, produits
chimiques ou ustensiles autres que ceux recommandés dans
toutes les instructions fournies avec le produit.
résultant d'une modification non autorisée faite au produit.
CLAUSE D'EXONÉRATION DE RESPONSABILITÉ AU TITRE
DES GARANTIES IMPLICITES; LIMITATION DES RECOURS
Le seul et exclusif recours du client dans le cadre de la présente
garantie limitée consiste en la réparation prévue ci-dessus. Les
garanties implicites, y compris les garanties applicables de
qualité marchande et d'aptitude à un usage particulier, sont
limitées à un an ou à la plus courte période autorisée par la loi.
Sears n'assume aucune responsabilité pour les dommages
fortuits ou indirects. Certains États ou certaines provinces ne
permettent pas l'exclusion ou la limitation des dommages fortuits
ou indirects, ou la limitation de la durée des garanties implicites
de qualité marchande ou d'aptitude à un usage particulier, de
sorte que cette exclusion ou limitation peut ne pas être
applicable dans votre cas.
Cette garantie s'applique seulement lorsque cet appareil
ménager est utilisé aux États-Unis et au Canada.
Cette garantie vous confère des droits juridiques spécifiques et
vous pouvez également jouir d'autres droits qui peuvent varier
d'un État à l'autre.
Sears, Roebuck and Co.
Hoffman Estates, IL 60179
Sears Canada Inc.
Toronto, Ontario, Canada M5B 2B8
ENREGISTREMENT DU PRODUIT
Inscrivez les numéros de modèle et de série complets et la date
d'achat. Vous trouverez ces renseignements sur l'étiquette des
numéros de modèle et de série située sur le produit.
Gardez ces renseignements à disposition pour obtenir plus
rapidement assistance ou service lorsque vous communiquez
avec Sears au sujet de votre appareil ménager.
Numéro de modèle __ __ __. _____________________________________
Numéro de série ________________________________________________
Date d'achat ____________________________________________________
Conservez ces instructions et votre reçu de vente pour
référence ultérieure.
41
Page 42

SÉCURITÉ DU LAVE-VAISSELLE
Votre sécurité et celle des autres est très importante.
Nous donnons de nombreux messages de sécurité importants dans ce manuel et sur votre appareil ménager. Assurez-vous de
toujours lire tous les messages de sécurité et de vous y conformer.
Voici le symbole d’alerte de sécurité.
Ce symbole d’alerte de sécurité vous signale les dangers potentiels de décès et de blessures graves à vous
et à d’autres.
Tous les messages de sécurité suivront le symbole d’alerte de sécurité et le mot “DANGER” ou
“AVERTISSEMENT”. Ces mots signifient :
Risque possible de décès ou de blessure grave si vous ne
DANGER
AVERTISSEMENT
Tous les messages de sécurité vous diront quel est le danger potentiel et vous disent comment réduire le risque de blessure et
ce qui peut se produire en cas de non-respect des instructions.
IMPORTANTES INSTRUCTIONS DE SÉCURITÉ
AVERTISSEMENT :
Lors de l’utilisation du lave-vaisselle, suivre les précautions élémentaires dont les suivantes :
suivez pas immédiatement les instructions.
Risque possible de décès ou de blessure grave si vous
ne suivez pas les instructions.
■ Lire la totalité des instructions avant d’utiliser le
lave-vaisselle.
■ N’utiliser le lave-vaisselle que pour laver la vaisselle.
■ Utiliser les détersifs ou agents de rinçage recommandés
pour lave-vaisselle et les garder hors de la portée des
enfants.
■ Lorsque vous chargez le lave-vaisselle :
1) Placer les objets coupants de façon qu’ils ne puissent
endommager le joint de la porte; et
2) Placer les couteaux le manche vers le haut de façon à ne
pas vous couper.
■ Ne pas laver d’articles en plastique à moins qu’ils ne soient
marqués “Peut aller au lave-vaisselle” ou l’équivalent. Si
l’article ne porte aucune indication, vérifier auprès du
fabricant.
■ Ne pas toucher l’élément chauffant pendant le
fonctionnement ou immédiatement après.
CONSERVEZ CES INSTRUCTIONS
■ Ne pas faire fonctionner le lave-vaisselle si tous les
panneaux de l’enceinte ne sont pas en place.
■ Ne pas jouer avec les commandes.
■ Ne pas abuser, vous asseoir ni monter sur la porte,
le couvercle ou les paniers du lave-vaisselle.
■ Pour éviter tout risque d’accident, ne pas laisser les
enfants jouer dans ou sur le lave-vaisselle.
■ Sous certaines conditions, de l’hydrogène peut se former
dans un réseau d’eau chaude inutilisé depuis deux
semaines ou plus. L’HYDROGÈNE EST UN GAZ
EXPLOSIBLE. Si le système d’eau chaude n’a pas été
utilisé depuis un certain temps, laisser couler l’eau chaude
des robinets pendant quelques minutes avant de faire
fonctionner le lave-vaisselle. Cette mesure permettra à
l’hydrogène de s’évaporer. Ce gaz étant inflammable, ne
pas fumer ni utiliser de flamme nue pendant cette période.
■ Enlever la porte ou le couvercle du compartiment de lavage
lorsque vous remplacez ou mettez au rebut un vieux
lave-vaisselle.
42
Page 43

Avant d’utiliser le lave-vaisselle
AVERTISSEMENT
Risque de basculement
Ne pas utiliser le lave-vaisselle jusqu’à ce qu’il soit
complètement installé.
Ne pas appuyer sur la porte ouverte.
Le non-respect de ces instructions peut causer des
blessures graves ou des coupures.
INSTRUCTIONS DE MISE À LA TERRE
■
Pour un lave-vaisselle relié à la terre, branché avec
un cordon :
Le lave-vaisselle doit être relié à la terre. En cas d'un
mauvais fonctionnement ou d'une panne, la mise à terre
réduira le risque d'un choc électrique en fournissant le
moins de résistance pour le courant électrique. Le lavevaisselle est équipé d'un cordon avec un conducteur
pour relier les appareils à la terre. La fiche doit être
branchée sur une prise appropriée, installée et reliée à la
terre conformément aux codes et règlements locaux.
AVERTISSEMENT :
du conducteur pour relier les appareils à la terre peut
causer le risque de choc électrique. Vérifier avec un
électricien compétent ou un représentant de service si
vous avez des doutes si le lave-vaisselle est
correctement relié à la terre. Ne pas modifier la fiche
fournie avec le lave-vaisselle; si elle n'entre pas dans la
prise, faire installer une prise appropriée par un
électricien compétent.
■
Pour un lave-vaisselle branché en permanence :
Le lave-vaisselle doit être branché à un système
d'installation électrique permanent en métal relié à la
terre, ou un conducteur pour relier les appareils à la terre
doit être relié avec les conducteurs du circuit et branché
à une borne pour relier les appareils à la terre ou au
cordon d'alimentation électrique avec le lave-vaisselle.
La connexion incorrecte
CONSERVEZ CES INSTRUCTIONS
43
Page 44

PIÈCES ET CARACTÉRISTIQUES
A
J
K
B
L
C
M
D
N
E
F
G
H
O
P
Q
A. Lavage au niveau supérieur
B. Régleurs du panier supérieur
C. Panier inférieur
D. Tiges rabattables (sur certains
modèles
E. Bras d’aspersion inférieur
F. Ouverture d’arrivée d’eau
(dans la paroi de la cuve)
Tableau de commande
I
G. Butoir de panier
H. Élément chauffant
I. Évent
J. Bras d’aspersion supérieur
K. Tube d’arrivée d’eau ULTRA FLOW™
L. Panier à couverts
M. Plaque signalétique des numéros
de modèle et de série
N. Module ULTRA WASH
O. Dispositif de protection contre
le débordement
P. Distributeur de détergent
Q. Distributeur d’agent de rinçage
®
Delay Hours (nombre d'heures différées): 2-4-6 ou 4 heures, (sur
certains modèles)
44
Sani Rinse (rinçage sanitaire) (sur certains modèles)
Page 45

Système d’élimination des solides
ULTRA WASH
Le système d’élimination des solides ULTRA WASH vous donne
une vaisselle étincelante tout en utilisant moins d’énergie et de
temps. Le système ULTRA WASH comprend :
Un système de lavage à multiniveau avec un filtre autonettoyant.
®
GUIDE DE MISE
5. Bien fermer la porte. Le verrou de la porte s'engage
automatiquement.
6. Laisser l’eau couler du robinet le plus près du lave-vaisselle
jusqu’à ce qu’elle soit chaude. (Voir “Conseils d’efficacité
pour le lave-vaisselle”.) Fermer le robinet.
EN MARCHE
Avant d’utiliser le lave-vaisselle, enlever tous les matériaux
d’emballage. Lire ce guide d’utilisation et d’entretien au complet.
Vous y trouverez des renseignements de sécurité importants
ainsi que des conseils d’utilisation utiles.
Utilisation de votre nouveau
lave-vaisselle
1. L’utilisation d’un agent de rinçage est essentielle pour un bon
séchage. S’assurer de remplir le distributeur avant d’utiliser le
nouveau lave-vaisselle. Chaque remplissage durera 1 à
3 mois, selon l’utilisation.
2. Ôter les particules alimentaires et articles durs (cure-dents ou
os) de la vaisselle.
3. Bien charger le lave-vaisselle. (Voir “Chargement du lave-
vaisselle”.) Espacer la vaisselle pour que l’eau puisse
atteindre les surfaces sales. S’assurer que rien n’empêche le
ou les bras d’aspersion de tourner librement.
7. Appuyer sur les boutons de programmes et d’options
désirés. (Voir “Utilisation du lave-vaisselle”.)
8. Appuyer sur START/RESUME (mise en marche/
réinitialisation), ou appuyer sur START/RESUME (mise en
marche/réinitialisation) pour répéter le même programme et
les mêmes options que précédemment.
IMPORTANT : Le témoin lumineux Start/Resume (mise en
marche/réinitialisation) clignote si la porte est ouverte durant
un programme. Les coupures de courant pendant un
programme peuvent également amener le témoin Start/
Resume à clignoter. Appuyer sur START/RESUME (mise en
marche/réinitialisation) pour poursuivre un programme.
4. Ajouter le détergent. Toujours utiliser un détergent d’une
marque de haute qualité. (Voir “Utilisation du lave-vaisselle”.)
45
Page 46

CONNEXION DU LAVE-VAISSELLE
(Pour les modeles mobiles uniquement)
Connexion de l’adaptateur
pour robinet
REMARQUE : Un adaptateur spécial doit être installé sur le
robinet avant que le lave-vaisselle puisse être raccordé. Les
instructions d’installation complètes ainsi que l’adaptateur sont
livrés avec le lave-vaisselle. (Voir les instructions d’installation.)
Lors du déplacement du lave-vaisselle, s’assurer que la porte est
enclenchée. Saisir le lave-vaisselle par les coins avant
supérieurs.
Préparation du robinet
1. Enlever le porte-filtre ou l’aérateur, le filtre et la rondelle de
l’extrémité du robinet.
2. Utiliser l’ensemble d’adaptateur pour robinet fourni avec le
lave-vaisselle mobile pour modifier le robinet qui servira au
lave-vaisselle.
REMARQUE : Ôter et mettre de côté la rondelle, le filtre et portefiltre ou aérateur pour utilisation ultérieure.
A
B
C
A. Rondelle
B. Filtre
C. Porte-filtre ou aérateur
Connexion de l’adaptateur pour robinet aux robinets à
filetage interne
Insérer les 2 filtres, la rondelle mince puis la rondelle épaisse de
l’ensemble de l’adaptateur pour robinet dans l’adaptateur pour
robinet. Visser l’adaptateur sur l’extrémité du robinet.
REMARQUE : Utiliser les deux rondelles.
A
B
C
D
A. Rondelle épaisse
B. Rondelle mince
C. Filtres
D. Adaptateur pour robinet
Connexion à la source d’eau et
d’alimentation électrique
1. Ouvrir le robinet d’eau chaude et attendre que l’eau soit
chaude. Fermer le robinet.
2. Tirer les tuyaux hors du compartiment de rangement à
l’arrière du lave-vaisselle.
REMARQUE : S’assurer que les tuyaux ne sont pas
déformés ou tordus. Les tuyaux déformés réduisent le
rendement du lave-vaisselle.
Connexion de l’adaptateur pour robinet aux robinets à
filetage externe
Insérer les 2 filtres, puis la rondelle mince de l’ensemble de
l’adaptateur pour robinet dans l’adaptateur pour robinet. Visser
l’adaptateur sur l’extrémité du robinet.
REMARQUE : Ne pas utiliser la rondelle épaisse.
A
B
C
A. Rondelle mince
B. Filtres
C. Adaptateur pour robinet
3. Tirer vers le bas sur le collet de blocage tout en poussant le
raccord de tuyau sur l’adaptateur pour robinet.
A
B
C
A. Adaptateur pour robinet
B. Collet de blocage
C. Raccord de tuyau
4. Lorsque le raccord s’enclenche, relâcher le collet de blocage.
5. Ouvrir complètement, mais lentement, le robinet d’eau
chaude.
46
Page 47

AVERTISSEMENT
Risque de choc électrique
Brancher sur une prise à 3 alvéoles reliée à la terre.
Ne pas enlever la broche de liaison à la terre.
Ne pas utiliser un adaptateur.
Ne pas utiliser un câble de rallonge.
Le non-respect de ces instructions peut causer
un décès, un incendie ou un choc électrique.
6. Brancher sur une prise à 3 alvéoles reliée à la terre.
Utilisation du robinet
On peut prendre de l’eau du robinet pendant que le lave-vaisselle
est connecté.
REMARQUE : Ne pas prendre de l’eau pendant que le lavevaisselle se remplit ou pendant l’évacuation de l’eau. (Ceci
empêche un faible remplissage lorsque le lave-vaisselle se
remplit ou le mélange de l’eau d’évacuation avec l’eau fraîche
lorsque le lave-vaisselle se vide.)
Appuyer sur le bouton rouge du raccord de tuyau pour prendre
de l’eau du robinet. (Le robinet est réglé à chaud. Régler le
robinet pour la température d’eau désirée.)
REMARQUE : Ouvrir l’eau chaude après avoir puisé de l’eau du
robinet. Fermer l’eau froide.
Déconnexion du lave-vaisselle
1. Fermer l’eau chaude. (On peut le faire après le dernier
rinçage.)
2. Appuyer sur le bouton rouge du raccord pour dégager la
pression de l’eau.
A
B
C
D
A. Adaptateur pour robinet
B. Collet de blocage
C. Bouton rouge
D. Raccord de tuyau
3. Soulever légèrement le raccord de tuyau tout en abaissant le
collet de blocage. Tirer le raccord vers le bas.
4. Retourner le raccord pour bien vider l’excès d’eau.
5. Déconnecter le cordon de courant électrique et le ranger
dans le compartiment de rangement.
6. Replacer les tuyaux dans le compartiment de rangement.
CHARGEMENT DU
LAVE-VAISSELLE
Suggestions de chargement
■ Enlever de la vaisselle les restes alimentaires, os, cure-dents
et autres articles durs. Pour conserver l’eau, l’énergie et
économiser du temps, il n’est pas nécessaire de rincer la
vaisselle avant de la placer dans le lave-vaisselle.
REMARQUE : Pour éviter de tacher la vaisselle, on
recommande de prérincer les articles sur lesquels se trouvent
des produits à base de tomate.
Le module de lavage sépare les particules alimentaires de
l’eau. Le module comporte un système de lavage à
multiniveau avec un filtre autonettoyant.
REMARQUE : Si des articles durs tels que graines de fruits,
noix et coquilles d’oeufs pénètrent dans le module de lavage,
il est possible que l’on entende des sons de hachage,
broyage ou bourdonnement. Ces bruits sont normaux
lorsque des articles durs pénètrent dans le module. Pour
éviter d’endommager le lave-vaisselle, ne pas laisser
d’articles métalliques (tels que des vis de poignées de
casserole) pénétrer dans le module de lavage.
■ Pour le meilleur résultat de séchage, l’eau doit pouvoir
s’écouler de toutes les surfaces.
■ Il est important que le jet d'eau atteigne toutes les surfaces
sales.
■ Si possible, charger la vaisselle de telle sorte qu’elle ne soit
pas empilée ou en chevauchement.
■ Faire très attention lors de la manipulation d'ustensiles de
cuisson lourds. Les articles lourds peuvent endommager
l’intérieur de la porte si on les fait tomber ou on les heurte.
■ S’assurer que les couvercles et poignées de casseroles,
plaques à pizza ou à biscuits, etc. n’entravent pas la rotation
des bras d’aspersion.
■ Conserver l’eau, l’énergie et économiser du temps sur le
rinçage manuel en utilisant un programme de rinçage pour
garder la vaisselle légèrement mouillée si vous n’avez pas
l’intention de la laver bientôt. Les aliments tels que les oeufs,
riz, pâtes alimentaires, épinards et céréales cuites peuvent
être difficiles à enlever si on les laisse sécher pendant
quelque temps.
■ Placer les articles avec la partie ouverte vers le bas pour un
meilleur nettoyage et égouttement.
Conseils de fonctionnement silencieux
Pour éviter les bruits de choc et d’entrechoc durant le
fonctionnement :
■ S’assurer que les articles légers sont bien retenus dans les
paniers.
■ S’assurer que les couvercles et poignées de casserole,
plaques à pizza et à biscuits, etc. ne touchent pas les parois
intérieures ou n’entravent pas la rotation du bras d’aspersion.
■ Charger la vaisselle pour que les articles ne se touchent pas
les uns les autres.
REMARQUE : Pour les modèles encastrés, boucher les orifices
d’évacuation des éviers avec leurs bondes pendant les
opérations de lavage pour éviter le transfert des bruits par les
canalisations.
47
Page 48

Chargement du panier supérieur
Le panier supérieur est conçu pour le chargement des tasses,
verres et petits articles. (Voir les modèles de chargement
recommandés ci-dessous.)
REMARQUE : Les caractéristiques du panier de votre lavevaisselle peuvent différer des illustrations.
Chargement du panier inférieur
Le panier inférieur est conçu pour les assiettes, casseroles et
ustensiles. (Voir les modèles de chargement recommandés cidessous.)
REMARQUE : Les caractéristiques du panier de votre lavevaisselle peuvent différer des illustrations.
Charge de 10 couverts
Charge de 12 couverts
■ Pour faciliter le nettoyage et le drainage, orienter la cavité des
articles vers le bas.
■ Charger les verres dans le panier supérieur seulement. Le
panier inférieur n’est pas conçu pour les verres. Ils pourraient
y subir des dommages.
■ Placer les tasses et verres dans les rangées entre les tiges.
Ces articles placés sur les tiges peuvent se casser et
comporter des taches d’eau.
■ Veiller à ce qu’il n’y ait aucun contact entre les articles de
porcelaine, de cristal et autres articles délicats durant le
lavage. Ils pourraient subir des dommages.
■ Placer les articles de plastique dans le panier supérieur
seulement. Ne laver des articles de plastique au lavevaisselle que s’ils sont identifiés comme “lavable au lavevaisselle”.
■ Placer les articles de plastique pour que la force du jet d’eau
ne les déplace pas durant le lavage.
■ Pour éviter l’écaillage, veiller à ce que les verres à pied ne
touchent pas les autres articles.
■ On peut placer dans le panier supérieur de petits bols ou
moules et autres petits ustensiles. Placer les bols dans la
section centrale pour la meilleure stabilité.
Charge de 10 couverts
■ Ne pas charger dans le panier inférieur des articles comme
les verres, tasses ou articles de plastique. Ne charger de
petits articles dans le panier inférieur que s’ils sont bien fixés
en place.
■ Charger les assiettes, bols à soupe, etc. entre les tiges de
séparation.
■ Pour une charge importante, placer les bords des assiettes
en chevauchement.
■ Charger les bols à soupe, à céréales et de service dans le
panier de diverses façons selon leur taille et forme. Charger
les bols solidement entre les rangées de tiges. Ne pas
imbriquer les bols car le jet d’eau n’atteindra pas toutes les
surfaces.
Charge de 12 couverts
■ Charger les plaques à biscuits, moules à gâteaux et autres
gros articles sur les côtés et à l’arrière. Le chargement de tels
articles à l’avant peut empêcher le jet d’eau d’atteindre le
distributeur de détergent.
■ Immobiliser les ustensiles de cuisson très souillés dans le
panier, cavité vers le bas.
■ Veiller à ce que les poignées des ustensiles et autres articles
n’entravent pas la rotation du ou des bras d’aspersion. Le ou
les bras d’aspersion doivent pouvoir tourner librement.
■ Ne pas charger d’articles entre le panier inférieur et la paroi
latérale de la cuve du lave-vaisselle. Cela risque de bloquer
l’arrivée d’eau.
REMARQUE : Si vous avez retiré le panier inférieur pour le
décharger ou le nettoyer, le replacer avec les butoirs à l’avant.
48
Page 49

Tiges rabattables (sur certains modèles)
On peut abaisser une rangée de tiges à l'arrière du panier
inférieur.
UTILISATION DU
LAVE-VAISSELLE
Distributeur de détergent
Le distributeur de détergent comporte 2 sections. La section de
prélavage vide le détergent dans le lave-vaisselle lors de la
fermeture de la porte.
1. Saisir la pointe de la tige qui se trouve dans le support de la
tige.
2. Tirer doucement la tige hors du support de la tige.
3. Coucher la rangée de tiges dans le panier pour faire de la
place pour des plats plus gros, des bols, casseroles ou
rôtissoires.
Chargement du panier à couverts
Charger le panier à couverts alors qu’il est dans le panier inférieur
ou le retirer pour le charger sur un comptoir ou sur une table.
IMPORTANT : Toujours charger les articles (couteaux,
brochettes, etc.) pointés vers le bas.
■ Placer les petits articles tels que les capuchons de biberons,
couvercles de bocaux, porte-épi de maïs, etc. dans une
section couverte. Fermer le couvercle pour maintenir les
petits articles en place. Couvercles sur certains modèles.
A
A. Couvercle
B. Section du lavage principal
C. Loquet du couvercle
D. Section du prélavage
La section plus grande pour le lavage principal vide
automatiquement le détergent dans le lave-vaisselle au cours du
programme de lavage principal. (Voir les “Tableaux de sélection
de programmes”.)
■ N’utiliser que du détergent pour lave-vaisselle automatique.
Les autres détergents peuvent produire une mousse
excessive qui risque de déborder du lave-vaisselle et réduire
la performance de lavage.
■ Verser le détergent juste avant de démarrer un programme.
■ Conserver le détergent bien fermé dans un lieu sec et frais.
Pour l’obtention de meilleurs résultats, un détergent à lavevaisselle frais est meilleur.
REMARQUE : Ne pas utiliser de détergent si vous avez
sélectionné un programme de rinçage.
BCD
Remplissage du distributeur
■ Utiliser les modèles de chargement illustrés pour améliorer le
lavage des couverts. Charger les articles en utilisant les
fentes avec couvercle rabattu afin d'éviter l'imbrication des
articles.
■ Si votre panier à couverts ne dispose pas de couvercles ou
lorsque les couvercles sont relevés, mélanger les articles
dans chaque section du panier, certains vers le haut et
d’autres vers le bas afin que les articles ne s’imbriquent pas.
Le jet d’eau ne peut atteindre les articles imbriqués.
Couvercles sur certains modèles.
1. Si le couvercle du distributeur est fermé, l’ouvrir en poussant
le loquet du couvercle.
2. Verser le détergent dans la section pour le lavage principal.
Voir “Quantité de détergent à utiliser”.
3. Remplir la section pour le prélavage au besoin. (Voir les
“Tableaux de sélection de programmes”.)
4. Fermer le couvercle du distributeur.
Le couvercle s'ouvrira lors du programme pour distribuer le
détergent.
Quantité de détergent à utiliser
■ La quantité de détergent à utiliser dépend de la dureté de
l’eau et du type de détergent. Si on n’utilise pas assez de
détergent, la vaisselle ne sera pas parfaitement lavée. Si on
utilise trop de détergent dans une eau douce, la solution
attaquera les articles de verre.
49
Page 50

■ La dureté de l'eau peut changer au cours d'une période de
temps. Pour déterminer la dureté de l'eau, interroger un
concessionnaire Sears, le service local de distribution d'eau
potable, une entreprise d'adoucissement de l'eau ou un
agent local préposé à la distribution de l’eau.
Où remplir
Jusqu’au sommet du 3e repère
(9 c. à thé ou 45 mL)
REMARQUE : Les quantités indiquées correspondent à l'emploi
d'un détergent en poudre standard. La quantité peut varier si on
utilise un détergent en poudre concentré ou un détergent liquide.
Les détergents en pastilles doivent être ajoutés à la section de
lavage principal du distributeur de détergent avec le couvercle
fermé. Lors de l'utilisation d'un détergent en poudre concentré,
d'un détergent liquide ou d'un détergent en pastille, procéder
conformément aux instructions indiquées sur l'emballage.
IMPORTANT : Voir “Tableaux de sélection de programmes” pour
savoir quelles sections du distributeur de détergent utiliser avec
chaque programme.
e
Jusqu’au sommet du 2
repère
(6 c. à thé ou 30 mL)
Jusqu’au sommet du 1er repère
(3 c. à thé ou 15 mL)
Eau douce à moyenne (0 à 6 grains par gallon)
[eau ordinaire traitée à l’adoucisseur et du service municipal]
Niveau de saleté Lavage principal Prélavage
Charges de
vaisselle
légèrement sale/
3 c. à thé (15 mL)
[jusqu’au sommet
er
repère]
du 1
3 c. à thé (15 mL)
[jusqu’au sommet
er
repère]
du 1
pré-rincée
Charges de
vaisselle
normalement sale
Charges de
vaisselle très sale
6 c. à thé (30 mL)
[jusqu’au sommet
e
repère]
du 2
9 c. à thé (45 mL)
[jusqu’au sommet
e
repère]
du 3
Eau moyenne à dure (7 à 12 grains par gallon)
6 c. à thé (30 mL)
[jusqu’au sommet
e
repère]
du 2
6 c. à thé (30 mL)
[jusqu’au sommet
du 2e repère]
†
[eau de puits et du service municipal]
Niveau de saleté Lavage principal Prélavage
Tou s g e nr e s d e
saletés
†
Il peut être nécessaire d'utiliser l'option Hi Temp (lavage à haute
9 c. à thé (45 mL)
[jusqu’au sommet
e
repère]
du 3
6 c. à thé (30 mL)
[jusqu’au sommet
du 2e repère]
temp.) pour la meilleure performance de lavage avec une eau
très dure.
Distributeur d’agent de rinçage
IMPORTANT : Votre lave-vaisselle est conçu pour l’utilisation
d’un agent de rinçage liquide. L’utilisation des agents de rinçage
améliore nettement le séchage en permettant à l’eau de s’écouler
de la vaisselle au cours du rinçage final. Ils empêchent également
l’eau de former des gouttelettes qui peuvent sécher en laissant
des taches ou coulées. Ne pas utiliser un agent de rinçage solide
ou en forme de barre.
Vérification du distributeur
Examiner la zone centrale du bouchon du distributeur d’agent de
rinçage. La transparence indique un besoin de remplissage.
OU
Ou retirer le bouchon du distributeur d’agent de rinçage. Si la
lettre “E” est visible, le distributeur est vide.
Remplissage du distributeur
La capacité du distributeur d’agent de rinçage est de
6 oz (175 mL). Dans des conditions normales, cette quantité
devrait durer environ 3 mois. Il n’est pas nécessaire d’attendre
que le distributeur soit vide avant de le remplir. Essayer de le
garder plein, mais s’assurer de ne pas trop le remplir.
1. S’assurer que la porte du lave-vaisselle est complètement
ouverte.
2. Ôter le bouchon du distributeur d’agent de rinçage.
3. Verser l’agent de rinçage. Remplir jusqu’à l’ouverture la plus
petite dans la partie inférieure du distributeur. Un remplissage
excessif suscitera une fuite de l’agent de rinçage et un
moussage excessif.
50
4. Essuyer tout agent de rinçage renversé avec un chiffon
humide.
5. Replacer le bouchon du distributeur d’agent de rinçage et
bien le serrer.
Page 51

Conseils d’efficacité pour
le lave-vaisselle
L’eau chaude dissout et active le détergent de lavage de la
vaisselle. L’eau chaude dissout également la graisse sur la
vaisselle et contribue au séchage sans taches des verres. Pour
les meilleurs résultats de lavage, l’eau devrait être à 120°F (49°C)
à son entrée dans le lave-vaisselle. Les charges peuvent ne pas
être lavées aussi bien si la température de l’eau est trop basse.
L’eau trop chaude peut rendre certaines saletés plus difficiles à
enlever et empêcher certains ingrédients du détergent de faire
effet. Si le chauffe-eau se trouve loin du lave-vaisselle, il peut être
nécessaire de faire couler l’eau chaude au robinet le plus près du
lave-vaisselle pour minimiser la quantité d’eau froide dans la
canalisation d’eau.
Contrôle de la température de l’eau
1. Laisser couler l’eau chaude par le robinet le plus proche du
lave-vaisselle pendant au moins 1 minute.
2. Placer un thermomètre à viande ou à confiserie dans une
tasse à mesurer en verre.
Tableaux de sélection de programmes
Choisir le programme et les options de lavage désirés. Ou
appuyer sur START/RESUME (mise en marche/réinitialisation)
pour utiliser le même programme et les mêmes options que dans
le programme précédent.
REMARQUE : Si le dernier programme achevé était un rinçage,
le lave-vaisselle exécutera le dernier programme de lavage
complet et les options que vous avez choisies quand vous
appuyez sur Start/Resume (mise en marche/réinitialisation).
Le “●” indique les étapes de chaque programme.
La consommation d’eau est indiquée en gallons américains/litres.
IMPORTANT : Les programmes habituels peuvent prendre
plusieurs heures, selon le programme choisi et la température de
l’eau.
Pots Pans/casseroles
Utiliser ce programme pour les casseroles et la vaisselle
ordinaire difficiles à nettoyer et très sales.
Utiliser les deux sections du distributeur de
détergent.
3. Vérifier la température sur le thermomètre pendant que l’eau
coule dans la tasse.
Conseils d’efficacité supplémentaires
■ Pour économiser de l’eau, de l’énergie et du temps, ne pas
rincer la vaisselle avant de la placer dans le lave-vaisselle.
■ Utiliser la caractéristique de mise en marche différée pour
faire fonctionner votre lave-vaisselle en dehors des heures de
pointe. Les services publics locaux recommandent d’éviter
l’emploi intense d’énergie à certaines heures du jour.
■ Durant l’été, faire fonctionner le lave-vaisselle la nuit pour
réduire l’accumulation de chaleur dans la cuisine durant la
journée.
■ Utiliser un agent de rinçage pour améliorer le séchage.
■ Utiliser les programmes ou les options qui ajoutent un
supplément de chaleur au lavage ou à la section de rinçage
du programme seulement lorsque cela s’impose.
■ Si votre domicile est équipé d’un adoucisseur d’eau, vous
voudrez peut-être éviter de mettre le lave-vaisselle en marche
durant la régénération de l’adoucisseur, laquelle pourrait
entraîner une mauvaise performance de lavage.
Lavage Lavage
principal
●●●
Rinçage
ou vidange
rinçage
Rinçage
final
Séchage Durée
●●
ap-
proxima-
tive
2,5 h* 8,6/32,6
Heavy Wash/lavage intense
Utiliser ce programme pour des charges comportant des
quantités élevées de débris alimentaires.
Utiliser les deux sections du distributeur de
détergent.
Lavage Lavage
principal
●●●
Rinçage
ou vidange
vidange
Rinçage
final
Séchage Durée
●●
ap-
proxima-
tive
2 h* 6,9/26,1
Consom-
mation
d’eau
(gal/L)
Consom-
mation
d’eau
(gal/L)
51
Page 52

Normal Wash/lavage normal
Utiliser ce programme pour des charges comportant des
quantités normales de débris alimentaires. (L’étiquette de
consommation d’énergie est basée sur ce programme.)
Utiliser la section couverte du distributeur.
Annulation d’un programme
1. Appuyer sur CANCEL/DRAIN (annulation/vidange). Le témoin
lumineux Cancel/Drain (annulation/vidange) s’allume.
2. Le lave-vaisselle commence une vidange de 2 minutes (si
nécessaire). Laisser le lave-vaisselle se vidanger
complètement. Le témoin s’éteint après 2 minutes. La porte
doit être fermée pour que le lave-vaisselle se vidange.
Lavage Lavage
principal
Rinçage
ou vi-
dange
Rinçage
●●
vidange
Séchage Durée
final
●●
Consom-
ap-
proxima-
tive
1,5 h* 4,6/17,4
mation
d’eau
(gal/L)
Light Wash/lavage léger
Utiliser ce programme pour les articles en porcelaine et en
cristal. Ce programme comprend un lavage léger et un rinçage
délicat. Pendant le séchage à chaud, l’élément de chauffage
fonctionne par intermittence.
Utiliser la section couverte du distributeur.
Lavage Lavage
principal
Rinçage
ou vi-
dange
Rinçage
●●
vidange
Séchage Durée
final
●●
par
intermit-
tence
Consom-
ap-
proxima-
tive
1,5 h* 4,8/18,2
mation
d’eau
(gal/L)
Pour arrêter la vidange
On peut appuyer de nouveau sur CANCEL/DRAIN (annulation/
vidange) pour arrêter la vidange. Veiller à vidanger le lavevaisselle avant de commencer un nouveau programme.
Pour annuler les indicateurs
Appuyer sur CANCEL/DRAIN (annulation/vidange) avant de
mettre le lave-vaisselle en marche pour annuler l’ensemble des
options et programmes.
Changement d’un programme ou réglage
Au cours de la première minute d’un programme
1. Sélectionner un nouveau programme et/ou de nouvelles
options.
2. Vérifier les distributeurs de détergent. Ils doivent être bien
remplis pour le nouveau programme.
3. Le témoin lumineux Start/Resume (mise en marche/
réinitialisation) clignote lorsque la porte est ouverte. S’assurer
que la porte est fermée.
4. Appuyer sur START/RESUME (mise en marche/
réinitialisation).
Après la première minute d’un programme
Quick Rinse/rinçage rapide
Utiliser ce programme de rinçage pour rincer la vaisselle, les
verres et l’argenterie qui ne seront pas lavés immédiatement.
Ne pas utiliser de détergent avec ce programme.
Lavage Lavage
principal
*Si la température de l’eau à l’entrée est inférieure à la
température recommandée, le programme compensera
automatiquement en ajoutant du temps et de la chaleur si
nécessaire.
Rinçage
ou vi-
dange
●
rinçage
Rinçage
final
Séchage Durée
(min)
10 2,2/8,3
Consom-
mation
d’eau
(gal/L)
1. Appuyer sur CANCEL/DRAIN (annulation/vidange). Le témoin
lumineux Cancel/Drain (annulation/vidange) s’allume. Le lavevaisselle commence une vidange de 2 minutes (si
nécessaire). Laisser le lave-vaisselle se vidanger
complètement.
2. Vérifier les distributeurs de détergent. Ils doivent être bien
remplis pour le nouveau programme.
3. S’assurer que la porte est fermée. Le témoin lumineux Start/
Resume (mise en marche/réinitialisation) clignotera.
4. Sélectionner un nouveau programme et/ou de nouvelles
options.
5. Appuyer sur START/RESUME (mise en marche/
réinitialisation).
52
Page 53

Addition de vaisselle
durant un programme
On peut ajouter un article n’importe quand avant le début du
lavage principal. Ouvrir la porte et vérifier le distributeur de
détergent. Si le distributeur de détergent est encore fermé, on
peut ajouter des articles.
Pour ajouter des articles
1. Ouvrir légèrement la porte pour arrêter le programme.
Attendre l’arrêt des bras d’aspersion avant d’ouvrir la porte.
Le témoin lumineux Start/Resume (mise en marche/
réinitialisation) clignotera.
2. Ouvrir la porte. Si le couvercle du distributeur de détergent
est encore fermé, ajouter l’article.
3. Pousser fermement sur la porte jusqu’à ce qu’elle
s’enclenche. Le témoin lumineux Start/Resume (mise en
marche/réinitialisation) clignotera.
4. Appuyer sur START/RESUME (mise en marche/
réinitialisation).
IMPORTANT : Si l'option Lock On (verrouillage) est choisie,
désactiver le verrouillage (voir Lock On/Verrouillage dans la
section “Sélection d'options”) ou le témoin lumineux Start/
Resume (mise en marche/réinitialisation) continuera à clignoter.
Sélection d’options
Vous pouvez personnaliser vos programmes en appuyant sur une
option. Si vous changez d’idée, appuyer de nouveau sur l’option
pour l’annuler. Choisir une option différente si désiré.
Vous pouvez changer une option en tout temps avant que
l’option choisie ne commence. Par exemple, vous pouvez
appuyer sur une option de séchage sans chaleur en tout temps
avant que le séchage commence.
Appuyer sur START/RESUME (mise en marche/réinitialisation)
pour utiliser le même programme et les mêmes options que dans
le programme de lavage précédent.
REMARQUE : Si le dernier programme terminé était un
programme de rinçage, quand vous appuyez sur START/
RESUME (mise en marche/réinitialisation), le lave-vaisselle
exécute le dernier programme complet de lavage et les options.
Hi Temp Wash/lavage à temp. élevée
Sélectionner cette option pour chauffer l’eau à 140o F (60oC) à
des moments précis pendant le programme. Une eau plus
chaude donne de meilleurs résultats pendant le lavage. Cette
option ajoute de la chaleur, de l'eau et du temps de lavage à
certaines parties du programme. La fonction Hi Temp Wash
(lavage à temp. élevée) est utile lorsque des aliments cuits
adhèrent à la vaisselle.
REMARQUES :
■ Le programme Pots Pans (casseroles) a automatiquement
recours à cette option. Hi Temp Wash (lavage à temp. élevée)
est une option avec les programmes Heavy Wash (lavage
intense) et Normal Wash (lavage normal).
■ Utiliser cette option pour les charges plus sales que la
normale.
Sani Rinse/option de rinçage sanitaire (sur certains
modèles)
Choisir cette option pour augmenter la température de l’eau du
rinçage final à environ 155°F (68°C). L’option Sani Rinse
augmente la chaleur et la durée du programme. Ce rinçage à
haute température assainit la vaisselle et la verrerie
conformément à la norme 184 NSF/ANSI pour les lave-vaisselle
résidentiels. Les lave-vaisselle résidentiels certifiés ne sont pas
destinés aux établissements alimentaires autorisés.
REMARQUE : L’option Sani Rinse est une option avec les
programmes Pots Pans (casseroles), Heavy Wash (lavage
intense) et Normal Wash (lavage normal). Seuls ces programmes
d’assainissement ont été conçus pour répondre aux exigences
NSF/ANSI.
Heated Dry/séchage avec chaleur
L’option Heated Dry (séchage avec chaleur) combinée à
l’utilisation d’un agent de rinçage vous donnera d’excellents
résultats de séchage. L’énergie requise pour utiliser Heated Dry
(séchage avec chaleur) ne coûte que quelques cents par
programme. Heated Dry (séchage avec chaleur) est activé quand
le témoin sur le bouton Heated Dry (séchage avec chaleur) est
allumé. S’assurer de bien charger les articles en plastique dans le
panier supérieur pour éviter de les endommager.
L’option Heated Dry peut être annulée en appuyant sur HEATED
DRY (séchage avec chaleur); le témoin lumineux s’éteint alors.
Cependant, certains articles dans le lave-vaisselle ne seront pas
secs à la fin du programme.
REMARQUE : L’option Heated Dry (séchage avec chaleur) est
utilisée dans tous les programmes à l’exception de Quick Rinse
(rinçage rapide).
53
Page 54

Lock On/verrouillage
Utiliser le verrouillage des commandes pour éviter l’utilisation
non intentionnelle du lave-vaisselle. Le verrouillage des
commandes peut aussi être utilisé pour éviter les changements
non intentionnels de programme ou d’option durant un
programme.
Lorsque LOCK ON (verrouillage)
sont désactivés.
REMARQUE : On peut ouvrir la porte du lave-vaisselle lorsque
les commandes sont verrouillées. Toutefois, la porte doit être
déverrouillée et on doit appuyer sur Start/Resume (mise en
marche/réinitialisation) pour que le programme continue.
est allumé, tous les boutons
Pour enclencher le dispositif de verrouillage
Appuyer sur la touche HEATED DRY (séchage avec chaleur)
pendant 4 secondes. L’indicateur LOCK ON (verrouillage)
s’allume.
Lorsqu’on appuie sur une touche alors que les commandes du
lave-vaisselle sont verrouillées, l’indicateur clignote 3 fois.
REMARQUE : Si l'option Heated Dry (séchage à chaud) est
sélectionnée, le témoin s'éteint temporairement jusqu'à ce que
Lock On (verrouillage) s'allume.
Pour désenclencher le dispositif de verrouillage
Appuyer sur la touche HEATED DRY (séchage avec chaleur)
pendant 4 secondes. L’indicateur lumineux s’éteint.
Delay Hours/mise en marche différée
Indicateurs d’état d’avancement
du programme
(sur certains modèles)
On peut suivre la progression du programme du lave-vaisselle en
vérifiant les indicateurs d’état d’avancement du programme.
REMARQUE : Les caractéristiques de votre lave-vaisselle
peuvent différer de celles qui sont illustrées ici.
Clean/propre
L’indicateur Clean (propre) s’allume lorsque le programme
sélectionné est terminé. Le témoin lumineux s’éteint lorsqu’on
appuie sur un bouton ou qu’on ferme la porte.
Sanitized/assainissement (sur certains modèles)
Lorsqu’on sélectionne l’option Sani Rinse, l’indicateur Sanitized
(assainissement)
le lave-vaisselle n’a pas bien assaini la vaisselle, le témoin
clignote à la fin du programme. Ceci peut se produire si le
programme est interrompu ou si la température de l’eau à l’entrée
est trop basse. Le témoin lumineux s’éteint lorsqu’on appuie sur
un bouton ou qu’on ferme la porte.
s’allume dès que ce programme est terminé. Si
Choisir cette option pour mettre en marche le lave-vaisselle plus
tard ou en dehors des heures de pointe. Vous pouvez ajouter des
articles à la charge à tout moment pendant le délai. Après avoir
ajouté des articles, bien fermer la porte jusqu’à ce qu’elle
s’enclenche et appuyer sur Start/Resume (mise en marche/
réinitialisation) pour que la mise en marche différée soit activée.
Pour différer la mise en marche
1. Appuyer sur le bouton de délai pour choisir le nombre
d’heures différées.
2. Choisir un programme de lavage et des options.
3. Appuyer sur START/RESUME (mise en marche/
réinitialisation).
Le lave-vaisselle commence le programme après le nombre
d’heures sélectionné.
REMARQUES :
■ Pour annuler la mise en marche différée et le programme,
appuyer sur CANCEL/DRAIN (annulation/vidange).
■ Pour annuler la mise en marche différée et mettre le
programme en marche, appuyer sur START/RESUME (mise
en marche/réinitialisation).
Système de séchage
Durant le séchage, vous pouvez voir de la vapeur s’échapper par
l’évent du coin supérieur gauche de la porte. Ceci est normal car
la chaleur sèche la vaisselle.
IMPORTANT : La vapeur est chaude. Ne pas toucher l’évent
durant le séchage.
Dispositif de protection
contre le débordement
Le dispositif de protection contre le débordement (au coin avant
droit de la cuve du lave-vaisselle) empêche le lave-vaisselle de
déborder. Il faut qu’il soit en place pour que le lave-vaisselle
fonctionne.
54
S’assurer qu’il n’y a pas en dessous des objets qui puissent
empêcher le dispositif de monter ou de descendre.
Page 55

LAVAGE D’ARTICLES SPÉCIAUX
En cas de doute au sujet du lavage d’un article particulier, consulter le fabricant pour déterminer s’il est lavable au lave-vaisselle.
Matériau Lavable au lave-
vaisselle?
Aluminium Oui Une température de l'eau élevée et les détergents peuvent affecter la finition de
Aluminium jetable Non Ne pas laver les plats d’aluminium jetables au lave-vaisselle. Ils risquent de se
Bouteilles et cannettes Non Laver manuellement les bouteilles et cannettes. Les étiquettes peuvent se
Fonte Non La patine sera éliminée et la fonte rouillera.
Porcelaine/grès Oui Consulter toujours les recommandations du fabricant avant le lavage. La
Cristal Oui Consulter toujours les recommandations du fabricant avant le lavage. Après
Or Non Les couverts dorés subiront un changement de couleur.
Verre Oui Le verre opaque jaunit après de nombreux lavages au lave-vaisselle.
Coutellerie à manche
creux
Non Les manches de certains couteaux sont fixés à la lame au moyen d’un adhésif qui
Commentaires
l’aluminium anodisé.
déplacer durant le lavage et de transférer des marques noires à la vaisselle et à
d’autres articles.
détacher dans le lave-vaisselle et obstruer les orifices des bras d’aspersion ou la
pompe, et réduire la performance de lavage.
décoration des articles antiques, peints à la main ou l’émaillage peut se détériorer.
Les dorures peuvent se dissiper ou changer de couleur.
plusieurs lavages, la solution de détergent peut attaquer certains types de cristal
au plomb.
peut se dégager lors du lavage au lave-vaisselle.
Étain, laiton, bronze Non L’eau chaude et les détergents peuvent modifier la couleur et la finition.
Plastiques jetables Non Ce matériau ne peut résister aux effets d'une température de l'eau élevée et des
Plastiques Oui Consulter toujours les recommandations du fabricant avant le lavage. La capacité
Acier inoxydable Oui Si le lavage n’est pas effectué immédiatement, exécuter un programme de
Argent sterling ou
plaqué
Fer blanc Non Possibilité de rouille.
Ustensiles de bois Non Laver manuellement. Consulter toujours les recommandations du fabricant avant
Oui Si le lavage n’est pas effectué immédiatement, exécuter un programme de
détergents.
de résister aux températures élevées et aux détergents varie parmi les articles en
plastique. Il est recommandé que les articles légers tels que les couvercles et les
plats à beurre soient placés dans le panier supérieur seulement. Des articles
robustes tels que les accessoires de glacière et plateaux de chaise haute peuvent
être placés dans le panier inférieur. Lors du lavage d’articles en plastique dans le
panier inférieur, il est recommandé que le séchage à l’air soit utilisé.
rinçage. Le contact prolongé avec des résidus alimentaires contenant sel, vinaigre,
produits laitiers ou jus de fruit peut endommager la finition.
rinçage. Le contact prolongé avec des résidus alimentaires contenant sel, acide ou
sulfide (œufs, mayonnaise et fruits de mer) peut endommager la finition.
le lavage. Le bois non traité peut se déformer, se fissurer ou perdre sa finition.
55
Page 56

ENTRETIEN DU LAVE-VAISSELLE
Nettoyage
Nettoyage de l’extérieur
Dans la plupart des cas, il suffit d’utiliser un linge doux, humide
ou une éponge et un détergent doux pour nettoyer les surfaces
extérieures du lave-vaisselle et préserver son aspect de produit
neuf. Si l’extérieur du lave-vaisselle est en acier inoxydable, un
nettoyant pour acier inoxydable est recommandé.
Nettoyage de l’intérieur
Les composés minéraux présents dans l’eau dure peuvent
provoquer l’accumulation d’un film blanchâtre sur les surfaces
intérieures, particulièrement juste au-dessous de la porte.
Ne pas nettoyer les surfaces internes du lave-vaisselle avant
qu’elles aient refroidi. Vous voudrez peut-être porter des gants en
caoutchouc. Ne pas utiliser un produit de nettoyage autre que le
détergent pour lave-vaisselle car cela pourrait provoquer un
moussage excessif.
Nettoyage des surfaces internes
Faire une pâte avec un détergent pour lave-vaisselle en poudre
sur une éponge humide et nettoyer.
OU
Utiliser un détergent liquide pour lave-vaisselle automatique, et
nettoyer avec une éponge humide.
OU
Voir la méthode de rinçage au vinaigre à la section “Taches et
films sur la vaisselle” à “Dépannage”.
REMARQUE : Effectuer un programme de lavage normal avec
détergent après avoir nettoyé l’intérieur.
Certains codes de plomberie provinciaux ou locaux exigent
l’installation d’un dispositif anti-refoulement entre un lavevaisselle encastré et le système de canalisation du domicile. Si
un tuyau d’évacuation du domicile est bouché, le dispositif antirefoulement protège votre lave-vaisselle contre un refoulement
de l’eau.
Le dispositif anti-refoulement se trouve habituellement sur le
dessus de l’évier ou du comptoir près du lave-vaisselle. Pour
commander un dispositif anti-refoulement, composer le 1-800-4-
MY-HOME
REMARQUE : Le dispositif anti-refoulement est un article de
plomberie externe qui ne fait pas partie de votre lave-vaisselle. La
garantie fournie avec votre lave-vaisselle ne couvre pas les coûts
de service directement associés au nettoyage ou à la réparation
d’un dispositif anti-refoulement externe.
®
. Demander le numéro de pièce 300096.
Nettoyage du dispositif anti-refoulement
Nettoyer le dispositif anti-refoulement périodiquement pour
assurer la vidange adéquate de votre lave-vaisselle. Suivre les
instructions de nettoyage fournies par le fabricant. Pour la
plupart des types de lave-vaisselle, il suffit de soulever le
couvercle chromé, de dévisser le capuchon de plastique, puis de
vérifier s’il y a une accumulation de saleté. Nettoyer au besoin.
Remisage
Remisage pour l’été
Arrêtez l'approvisionnement en eau et l'alimentation d'énergie au
lave-vaisselle pendant l'été pour éviter d'endommager votre lavevaisselle.
Dispositif anti-refoulement
(sur des modèles encastrés seulement)
Vérifier le dispositif anti-refoulement lorsque votre lave-vaisselle
ne se vidange pas bien.
56
Hivérisation du lave-vaisselle
Évitez que votre lave-vaisselle et votre domicile ne subissent tout
dommage lié à l'eau susceptible de geler dans les canalisations.
Si le lave-vaisselle est laissé dans une résidence saisonnière ou
risque d’être exposé à des températures près du degré de
congélation, faites hivériser le lave-vaisselle par un technicien de
service agréé.
Page 57

DÉPANNAGE
Essayer d’abord les solutions suggérées ici; elles pourraient vous éviter le coût d’une visite de service...
Le lave-vaisselle ne fonctionne pas correctement
■ Le lave-vaisselle ne fonctionne pas ou s’arrête au cours
d’un programme
La porte est-elle bien fermée et enclenchée?
A-t-on sélectionné le bon programme? Consulter “Tableaux
de sélection de programmes”.
Le lave-vaisselle est-il alimenté par le courant électrique? Un
fusible est-il grillé ou un disjoncteur s’est-il déclenché?
Remplacer le fusible ou réenclencher le disjoncteur. Si le
problème persiste, appeler un électricien.
Le moteur s’est-il arrêté par suite d’une surcharge? Le
moteur se réactive automatiquement après quelques
minutes. S’il ne se remet pas en marche, contacter le service
de dépannage.
Le robinet d’arrêt (le cas échéant) est-il ouvert?
Il est normal pour certains programmes de faire des pauses
répétées pendant quelques secondes lors du programme de
lavage.
■ Le témoin lumineux START/RESUME (mise en marche/
réinitialisation) clignote
La porte a-t-elle été ouverte durant le programme ou le
courant électrique a-t-il été interrompu? Le témoin Start/
Resume clignote lors de l'ouverture de la porte durant un
programme ou est susceptible de clignoter en cas de
coupure de courant. Appuyer sur START/RESUME (mise en
marche/réinitialisation) pour remettre le programme en
marche. S'assurer que la porte est bien fermée et verrouillée.
■ Le témoin lumineux Clean (propre) clignote
Il y a eu un dysfonctionnement du lave-vaisselle. Appeler le
service technique.
■ Le lave-vaisselle ne se remplit pas
Le dispositif de protection contre le débordement peut-il
monter et descendre librement? Appuyer pour le libérer.
■ La durée d’exécution du programme semble être
trop longue
L’eau fournie au lave-vaisselle est-elle suffisamment chaude?
Le lave-vaisselle fonctionne plus longtemps durant le
chauffage de l’eau. Voir la section “Conseils d’efficacité pour
le lave-vaisselle”.
Une période d’attente s’ajoute automatiquement dans
certains programmes de lavage et de rinçage jusqu’à ce que
l’eau atteigne la température correcte.
■ Résidus d’eau dans le lave-vaisselle
Le programme est-il achevé?
A-t-on retiré le bouchon d'éjection du broyeur de déchets au
cours de l'installation? (Voir “Installation du tuyau
d'évacuation” dans les Instructions d'installation.)
■ Résidus de détergent dans la section avec couvercle du
distributeur
Le programme est-il terminé?
Le détergent est-il libre de grumeaux? Remplacer le
détergent au besoin.
Le panier inférieur est-il installé correctement avec les butées
(sur certains modèles) à l’avant? Voir la section “Pièces et
caractéristiques”. Réinstaller le panier au besoin.
■ Apparition d’un résidu blanc à l’avant du panneau d’accès
A-t-on utilisé une quantité excessive de détergent? Voir la
section “Distributeur de détergent”.
La marque de détergent utilisée produit-elle trop de mousse?
Essayer une marque de détergent différente pour réduire le
moussage et éliminer l’accumulation.
■ Odeur dans le lave-vaisselle
La vaisselle est-elle lavée tous les 2 ou 3 jours? Exécuter un
programme de rinçage une ou deux fois par jour jusqu’à ce
qu’une charge complète soit accumulée.
Le lave-vaisselle a-t-il une odeur de plastique neuf? Effectuer
un rinçage au vinaigre décrit à “Taches et films sur la
vaisselle” plus loin dans ce guide de dépannage.
■ Condensation sur le comptoir de la cuisine
(modèles encastrés)
Le lave-vaisselle est-il aligné avec le dessus du comptoir?
L’humidité sortant de l’évent de la console du lave-vaisselle
peut se former sur le comptoir. Voir les instructions
d’installation pour plus de renseignements.
Vaisselle pas complètement nettoyée
■ Résidus de produits alimentaires sur la vaisselle
La vaisselle est-elle chargée correctement? Voir la section
“Chargement du lave-vaisselle”.
La température de l’eau est-elle trop basse? Pour les
meilleurs résultats de lavage, l’eau devrait être à 120°F (49°C)
à son entrée dans le lave-vaisselle. Voir la section “Conseils
d’efficacité pour le lave-vaisselle”.
57
Page 58

A-t-on utilisé la bonne quantité de détergent frais? Utiliser
seulement les détergents recommandés pour lave-vaisselle.
Voir la section “Distributeur de détergent”. Pour qu’il soit
efficace, il faut que le détergent soit frais. Remiser le
détergent dans un endroit frais et sec. Une vaisselle très sale
et/ou une eau dure nécessitent généralement un supplément
de détergent.
L’eau que vous utilisez est-elle dure? Il se peut que vous ayez
besoin d’augmenter la quantité de détergent que vous
utilisez. Consulter la section “Distributeur de détergent”. Il se
peut également que vous ayez besoin de changer et de
choisir un détergent avec un contenu de phosphore
de 8,7 %.
Y a-t-il des grumeaux de détergent dans le distributeur?
Utiliser uniquement un détergent frais. Ne pas laisser le
détergent pendant plusieurs heures dans un distributeur
humide. Nettoyer le distributeur lorsqu’il s’y trouve des
grumeaux de détergent.
La pompe ou le bras d’aspersion est-elle/il obstrué(e) par des
étiquettes de bouteilles et de cannettes?
La pression d’eau du domicile est-elle suffisamment élevée
pour un remplissage convenable du lave-vaisselle? La
pression d’eau du domicile devrait être de 20 à 120 lb/po
(138 à 828 kPa). Si vous avez des questions au sujet de la
pression de votre eau, appeler un plombier qualifié agréé.
Une accumulation de mousse ralentit-elle le bras
d’aspersion? Ne pas utiliser de savon ou de détergent à
lessive. Utiliser uniquement les détergents recommandés
pour lave-vaisselle.
Présence de taches sur la vaisselle
■ Taches et films sur la vaisselle
L’eau est-elle dure ou contient-elle une concentration élevée
de minéraux? Le conditionnement de l’eau de rinçage final
avec un agent de rinçage liquide favorise l’élimination des
taches et films. Veiller à ce que le distributeur soit toujours
rempli d’un agent de rinçage.
La température de l’eau est-elle trop basse? Pour les
meilleurs résultats de lavage, l’eau devrait être à 120°F (49°C)
à son entrée dans le lave-vaisselle. Voir la section “Conseils
d’efficacité pour le lave-vaisselle”.
A-t-on utilisé la bonne quantité de détergent efficace? Utiliser
seulement les détergents recommandés pour lave-vaisselle.
Voir la section “Distributeur de détergent”. Pour qu’il soit
efficace, il faut que le détergent soit frais. Remiser le
détergent dans un endroit frais et sec. Une vaisselle très sale
et/ou une eau dure nécessitent généralement un supplément
de détergent.
La pression d’eau du domicile est-elle suffisamment élevée
pour un remplissage convenable du lave-vaisselle? La
pression d’eau du domicile devrait être de 20 à 120 lb/po
2
(138 à 828 kPa). Si vous avez des questions au sujet de la
pression de votre eau, appeler un plombier qualifié agréé.
REMARQUE : Pour éliminer les taches et films sur la
vaisselle, essayer un rinçage au vinaigre blanc. Cette
méthode ne devrait être utilisée qu’occasionnellement. Le
vinaigre est un acide et son utilisation trop fréquente pourrait
endommager le lave-vaisselle.
1. Laver et rincer la vaisselle. Utiliser le séchage à l’air ou
une option de séchage économique. Enlever tous les
couverts ou articles métalliques.
2. Ajouter 2 tasses (500 mL) de vinaigre blanc dans une
tasse à mesurer lavable au lave-vaisselle et la placer dans
le panier inférieur.
3. Faire exécuter au lave-vaisselle un programme de lavage
complet et un séchage à l’air. Ne pas utiliser de détergent.
Le vinaigre se mélangera à l’eau de lavage.
■ Film de silice ou attaque (le film de silice est un dépôt
blanc irisé; l’attaque produit l’apparence d’un film
translucide)
2
Il y a parfois une réaction chimique de l’eau avec certains
types de verres. Ceci est habituellement imputable à
certaines combinaisons d’eau douce ou adoucie, solutions
de lavage alcalines, rinçage insuffisant, chargement excessif
du lave-vaisselle, et la chaleur de séchage. Il peut être
nécessaire de laver manuellement ces articles pour éliminer
complètement le problème.
Pour ralentir ce processus, utiliser la quantité minimale de
détergent par charge. Utiliser un agent de rinçage liquide, et
ne pas trop charger le lave-vaisselle pour permettre un
rinçage à fond. Il n’est pas possible d’éliminer le film de silice
ou l’effet de l’attaque chimique qui demeurent en
permanence. Ne pas utiliser un séchage avec chaleur.
■ Taches blanches sur les ustensiles de cuisson à
revêtement antiadhésif
Le détergent du lave-vaisselle a-t-il éliminé la patine? Générer
une nouvelle patine après le lavage au lave-vaisselle.
■ Taches marron sur la vaisselle et les surfaces internes du
lave-vaisselle
L’eau comporte-t-elle une concentration de fer élevée? Laver
de nouveau la vaisselle après avoir versé 1 à 3 c. à thé (515 mL) de cristaux d’acide citrique dans la section fermée du
distributeur de détergent. Ne pas utiliser de détergent.
Exécuter ensuite un programme de lavage Normal avec
détergent. Si ce traitement est nécessaire plus fréquemment
qu’à intervalles de deux mois, on recommande l’installation
d’un dispositif d’élimination du fer.
■ Marques noires ou grises sur la vaisselle
Des articles d’aluminium frottent-ils contre la vaisselle durant
le lavage? Les articles d’aluminium jetables peuvent se
détériorer dans le lave-vaisselle et causer des marques. Laver
ces articles à la main. Pour éliminer les marques d’aluminium,
employer un produit de nettoyage moyennement abrasif.
58
Page 59

■ Taches orange sur les articles de plastique ou les
surfaces internes du lave-vaisselle
Place-t-on dans le lave-vaisselle de la vaisselle sur laquelle il
y a une quantité considérable de résidus alimentaires à base
de tomates? Les taches peuvent se dissiper graduellement à
la longue. L’utilisation fréquente du séchage avec chauffage
peut ralentir le processus de dissipation des taches. Les
taches n’affectent pas la performance du lave-vaisselle. Pour
réduire le risque de formation de taches, utiliser
régulièrement un programme de rinçage et un séchage à l’air
ou une option de séchage économique.
La vaisselle et les couverts ne sont pas complètement
secs
■ La vaisselle n’est pas sèche
Le lave-vaisselle a-t-il été chargé de manière à permettre un
drainage adéquat de l’eau? Ne pas charger excessivement.
Voir la section “Chargement du lave-vaisselle”. Utiliser un
agent de rinçage liquide pour accélérer le séchage.
Les articles de plastique sont-ils humides? Il est
souvent nécessaire de sécher les articles de plastique
avec une serviette.
Le distributeur d’agent de rinçage est-il vide? Voir la section
“Distributeur d’agent de rinçage”.
A-t-on utilisé un séchage à l’air? Utiliser une option de
séchage avec chauffage pour une vaisselle plus sèche.
Essayer d’ajouter l’option “Hi-Temp Wash” (lavage à haute
température) ou “Sani Rinse” (rinçage sanitaire) pour
améliorer davantage le séchage.
■ Utiliser un programme plus agressif tel que le programme
pots and pans (casseroles) ou heavy (service intense)
pour améliorer le séchage.
■ Avez-vous chargé vos couverts pour permettre un
drainage adéquat de l’eau? Voir la section “Chargement
du lave-vaisselle”.
■ Les couvercles du panier à couverts sont-ils utilisés?
Pour le meilleur séchage, utiliser les fentes dans les
couvercles pour séparer et espacer les ustensiles.
Les ustensiles et/ou les couverts se touchent-ils?
Éviter que les articles se touchent ou s’imbriquent les uns sur
les autres en mélangeant les types d'ustensiles. Ne pas trop
charger le panier.
Vaisselle endommagée au cours d’un programme
■ Écaillage de la vaisselle
A-t-on chargé le lave-vaisselle correctement? Charger la
vaisselle et les verres de telle manière qu’ils soient stables et
qu’ils ne s’entrechoquent pas lors du lavage. Minimiser
l’écaillage en déplaçant lentement les paniers.
REMARQUE : Les antiquités, le cristal très mince et certains
types de porcelaine et de verre peuvent être trop délicats
pour le lavage automatique. Laver à la main.
Bruits
■ Émission de bruits de broyage , crissement, craquement
et bourdonnement
Un objet dur a pénétré dans le module de lavage (sur certains
modèles). Le bruit devrait cesser après le broyage de l’objet.
Si le bruit persiste après un programme complet, faire un
appel de service.
L’extérieur du lave-vaisselle est sale ou marqué
■ Marques, taches ou résidus sur l’extérieur du lave-
vaisselle
Avez-vous nettoyé le lave-vaisselle avec un détergent doux et
un chiffon ou avez-vous utilisé un nettoyant pour acier
inoxydable sur les modèles à extérieur en acier inoxydable?
Dans la plupart des cas, il suffit d’utiliser un linge doux
humide ou une éponge et un détergent doux pour nettoyer
les surfaces extérieures du lave-vaisselle et préserver son
aspect de produit neuf. Si l’extérieur de votre lave-vaisselle
est en acier inoxydable, un nettoyant pour acier inoxydable
est recommandé.
59
Page 60

Notes
60
Page 61

Notes
61
Page 62

Notes
62
Page 63

63
Page 64

©
® Registered Trademark /
W10250186A
2009 Sears Brands, LLC
® Marca registrada /
® Marque déposée /
TM
TM
TM
Marque de commerce / SMMarque de service de Sears Brands, LLC
Trademark / SMService Mark of Sears Brands, LLC
Marca de comercio / SMMarca de servicio de Sears Brands, LLC
Printed in U.S.A.
6/09
Impreso en EE.UU.
Imprimé aux É.-U.
 Loading...