

Page 1
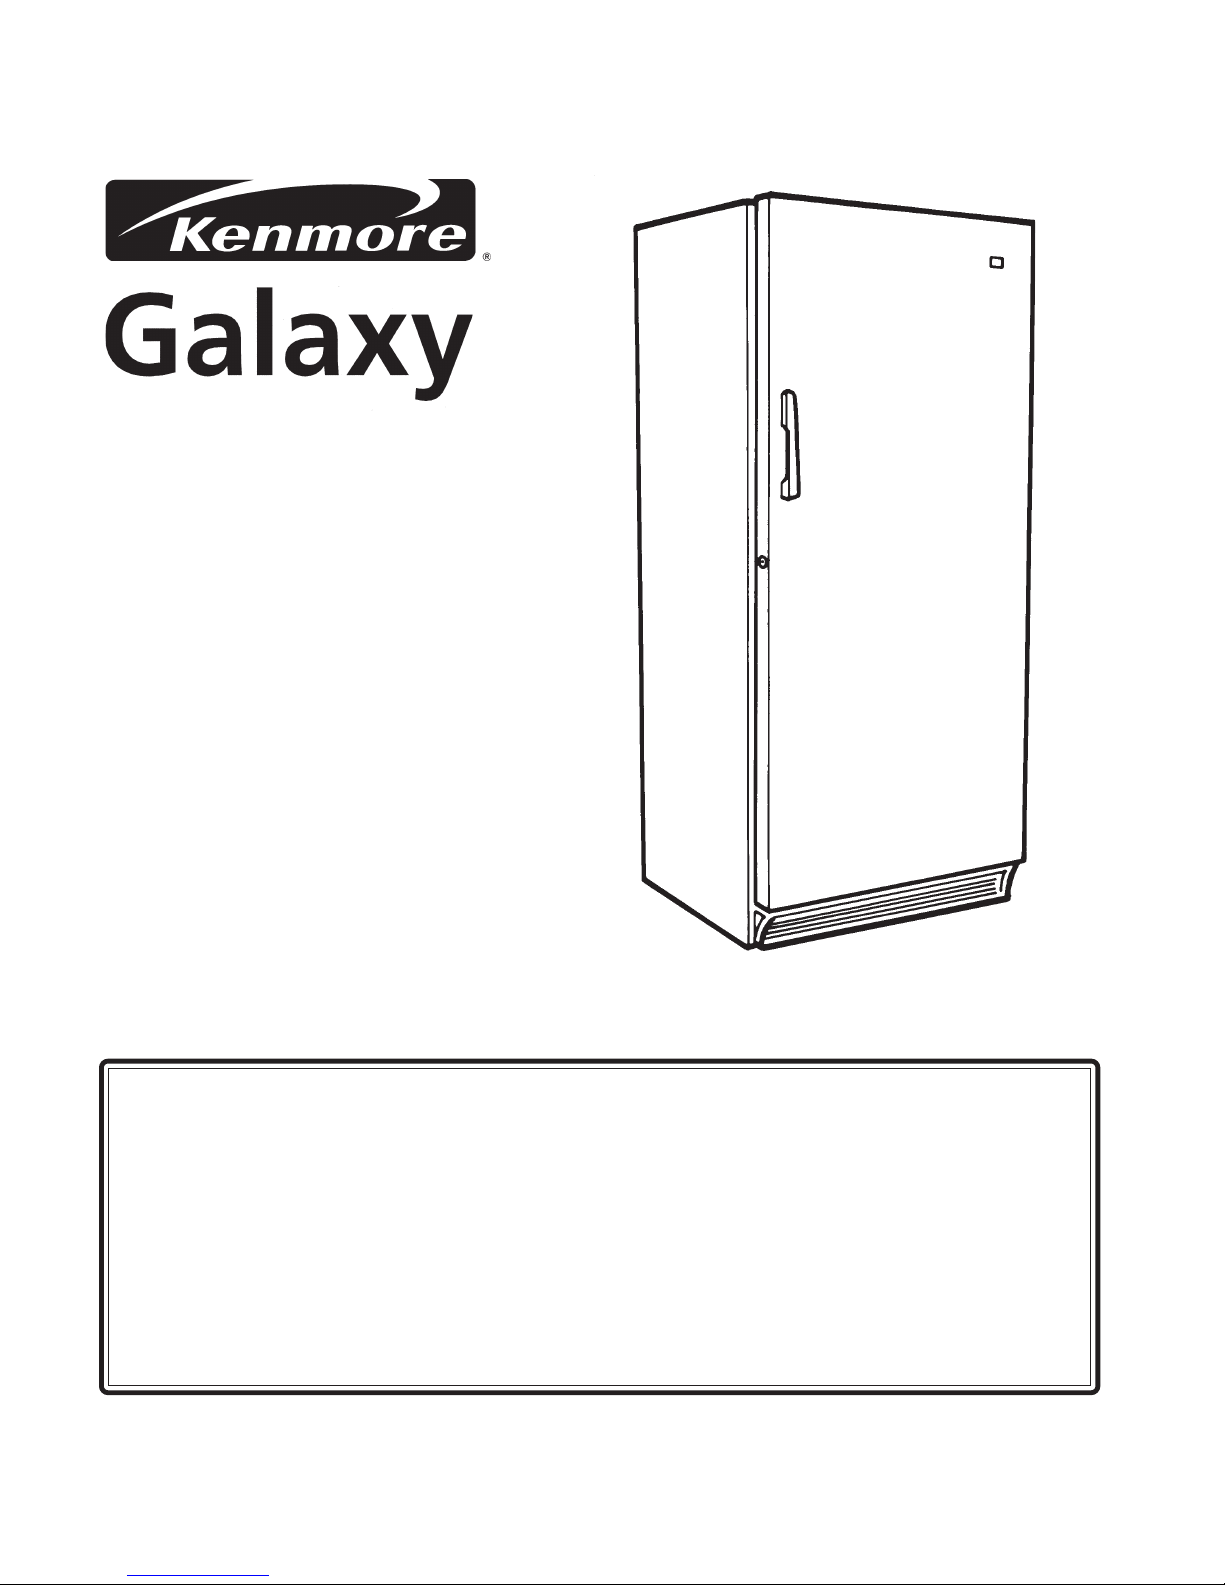
Sears
Upright Freezer
Use and Care Guide
Table of Contents ..... 3
CAUTION: Read and Save All Instructions
COPY YOUR MODEL AND SERIAL NUMBER HERE:
If you need service or call with a question, have this information ready:
Model: ____________________________________________________________________
Serial Number: ______________________________________________________________
Purchase Date: ______________________________________________________________
Printed in Canada
1-60037-001 Rev. 05
Page 2

SEARS LIMITED WARRANTY
FREEZERS
Every new Sears Freezer is warranted to be free from defects in material or workmanship.
What Sears will do, free of charge,
in case of Defect.
PARTS LABOUR
At SEARS option,
What is covered
The Seal System
(consists of evaporator,
condenser, compressor
and refrigerant).
How long Warranted
(From date of sale)
Five (5) Years Parts & Labour
either repair part or
supply replacement
part for:
Five (5) Years Five (5) Years
Install repaired or
replacement part for:
All Other Parts/
Adjustments
One (1) Year
Parts and Labour
NORMAL RESPONSIBILITY OF THE CUSTOMER
If any service is required under this warranty simply
contact your nearest Sears outlet.
This warranty is in addition to any statutory
warranty.
This above warranty covers Sears Freezers sold
and operated in Canada only and shall not apply if
the Freezer is used for other than domestic
purposes.
One (1) Year One (1) Year
The following items since they are not manufacturing defects, are not included in the Warranty, but are
the responsibilty of the Customer:
1) Damage to finish after delivery.
2) Improper power supply, low voltage, or any
defect in the house wiring system or appliance not
connected to electric outlet.
3) Replacement of light bulbs.
4) Damage caused by moving the product from its
original installation.
5) Service required as a result of alteration, abuse,
fire, floods or acts of God.
SEARS CANADA INC.
TORONTO, ONTARIO, CANADA
M5B 2B8
6) Providing adequate air circulation to the
refrigeration system.
7) Proper use and care of product as listed in the
customer's manual; proper setting of control.
- 2 -
Page 3

INTRODUCTION
Read this book carefully. It is intended to help you operate and maintain your new Sears
Freezer properly. The features described in this manual are not incorporated on all
models. It is important that you familiarize yourself with the features present on your model.
TABLE OF CONTENTS
WARRANTY 2
INTRODUCTION 3
TABLE OF CONTENTS 3
MAINTENANCE AGREEMENT 4
IMPORTANT SAFETY INSTRUCTIONS 5
PROTECT CHILDREN 5
THE KEY EJECT LOCK 5
INSTALLATION INSTRUCTIONS 6
CHOOSE A LOCATION 6
REMOVE PACKAGING MATERIAL 6
ELECTRICAL SUPPLY 6
OPERATING INSTRUCTIONS 7
COOLING THE FREEZER FIRST 7
FEATURES 7
COLD CONTROL KNOB 7
FAST FREEZE 7
LIGHTS - INTERIOR 7
- POWER WARNING LIGHT 7
KEY EJECT LOCK 8
REFRIGERATED SHELVES 8
REMOVABLE SHELF 8
STORAGE BASKETS 8
ICE MAKER OPERATION 8
DEFROST INSTRUCTIONS 9
CLEANING INSTRUCTIONS 10
ELECTRICAL AND MECHANICAL FAILURE 10
TROUBLESHOOTING INSTRUCTIONS 10
SERVICE DEPOT LISTING 10
CHILD ENTRAPMENT INFORMATION 12
- 3 -
Page 4

MAINTENANCE AGREEMENT
We Service What We Sell
"We Service What We Sell" is our assurance to you that you can depend on Sears for service because Sears
service is nationwide.
Your Sears freezer has added value when you consider that Sears has a service unit near you, staffed by
Trained Technicians - professional technicians specifically trained on Sears freezers, having the parts, tools
and equipment to ensure that we meet our pledge to you - " We Service What We Sell".
TO FURTHER ADD TO THE VALUE OF YOUR FREEZERS, BUY A SEARS MAINTENANCE AGREEMENT
Sears freezers are designed, manufactured, and tested for years of dependable operation. Yet any modern
appliance may require service from time to time. A Sears Maintenance Agreement is more than an extension of
the Warranty.
It provides complete protection from unexpected repair bills and undue inconvenience. It assures you of
maximum efficency from your freezer. Here is a comparative Warranty and Maintenance Agreement chart
showing you the benefits of a Sears freezer Maintenance Agreement.
YEARS OF OWNERSHIP
COVERAGE
Parts and Service required due to
defects in materials or workmanship
Mechanical adjustment and required
service
All parts and service required for
proper operation not covered by
warranty
Even if problem turns out to be
non-technical, such as customer
instructions, there will be no charge for
service
Annual preventive maintenance
check“at your request.
1st
Year
WMAMA
WMAMA
MA MA MA
MA MA MA
MA MA MA
2nd
Year
3rd
Year
4th
Year
MA
MA
MA
MA
MA
5th
Year
MA
MA
MA
MA
MA
MA - Maintenance Agreement
W - Warranty
CONTACT YOUR SEARS SALESPERSON OR LOCAL SEARS SERVICE CENTRE
TODAY AND PURCHASE A SEARS MAINTENANCE AGREEMENT
- 4 -
Page 5

IMPORTANT SAFETY INSTRUCTIONS
Protect Children
Read all instructions before using this appliance.
WARNING: When using this appliance, always
exercise basic safety precautions, including the following:
1.
This freezer must be properly installed in accordance
with the installation instructions before it is used. See
grounding instructions on page 6.
Never unplug your freezer by pulling on the power
2.
cord. Always grip the plug firmly and pull it straight
out from the outlet. Never use an extension cord.
Unplug your freezer before cleaning, changing a
3.
lightbulb or making any repairs.
NOTE: We recommend that all repairs be performed
by a qualified technician.
Turning the temperature control knob to the off
4.
position does not remove power to the electrical
circuit.
Immediately replace all electrical service cords that
5.
have become frayed or otherwise damaged. Do not
use a cord that shows cracks or abrasion damage
along its length or at either the plug or connector end.
6.
After your freezer is in operation, do not touch the
cold surfaces, particularly when hands are damp or
wet. Skin may adhere to these extremely cold
surfaces.
Children may suffocate if they crawl into a freezer to hide
or play.
Remove the door of a freezer not in use, even if you plan
to discard the freezer. Many communities have laws
requiring you to take this safety precaution.
Destroy the carton and any plastic bags after the freezer
is unpacked. Children might use them for play. Cartons
covered with bedspreads or plastic sheets can become
airtight chambers.
Remove all staples from the carton. Staples can cause
severe cuts to people or destroy finishes.
The Key Eject Lock (Some Models)
If your freezer is equipped with a lock, it can help reduce
the hazard of child entrapment.
NOTE: Be sure to keep your key in a safe location out of
the reach of children.
To lock or unlock the freezer, you must hold the key in the
lock while turning. The lock is spring loaded so the key
cannot be left in the lock.
If the key is lost, contact your nearest Sears outlet for a
replacement. Always give the complete model and serial
number of your freezer when requesting a replacement
key.
7.
Do not operate your freezer in the presence of
explosive fumes.
8.
Use this appliance only for its intended purposes as
described in this Use and Care Book.
- 5 -
Page 6
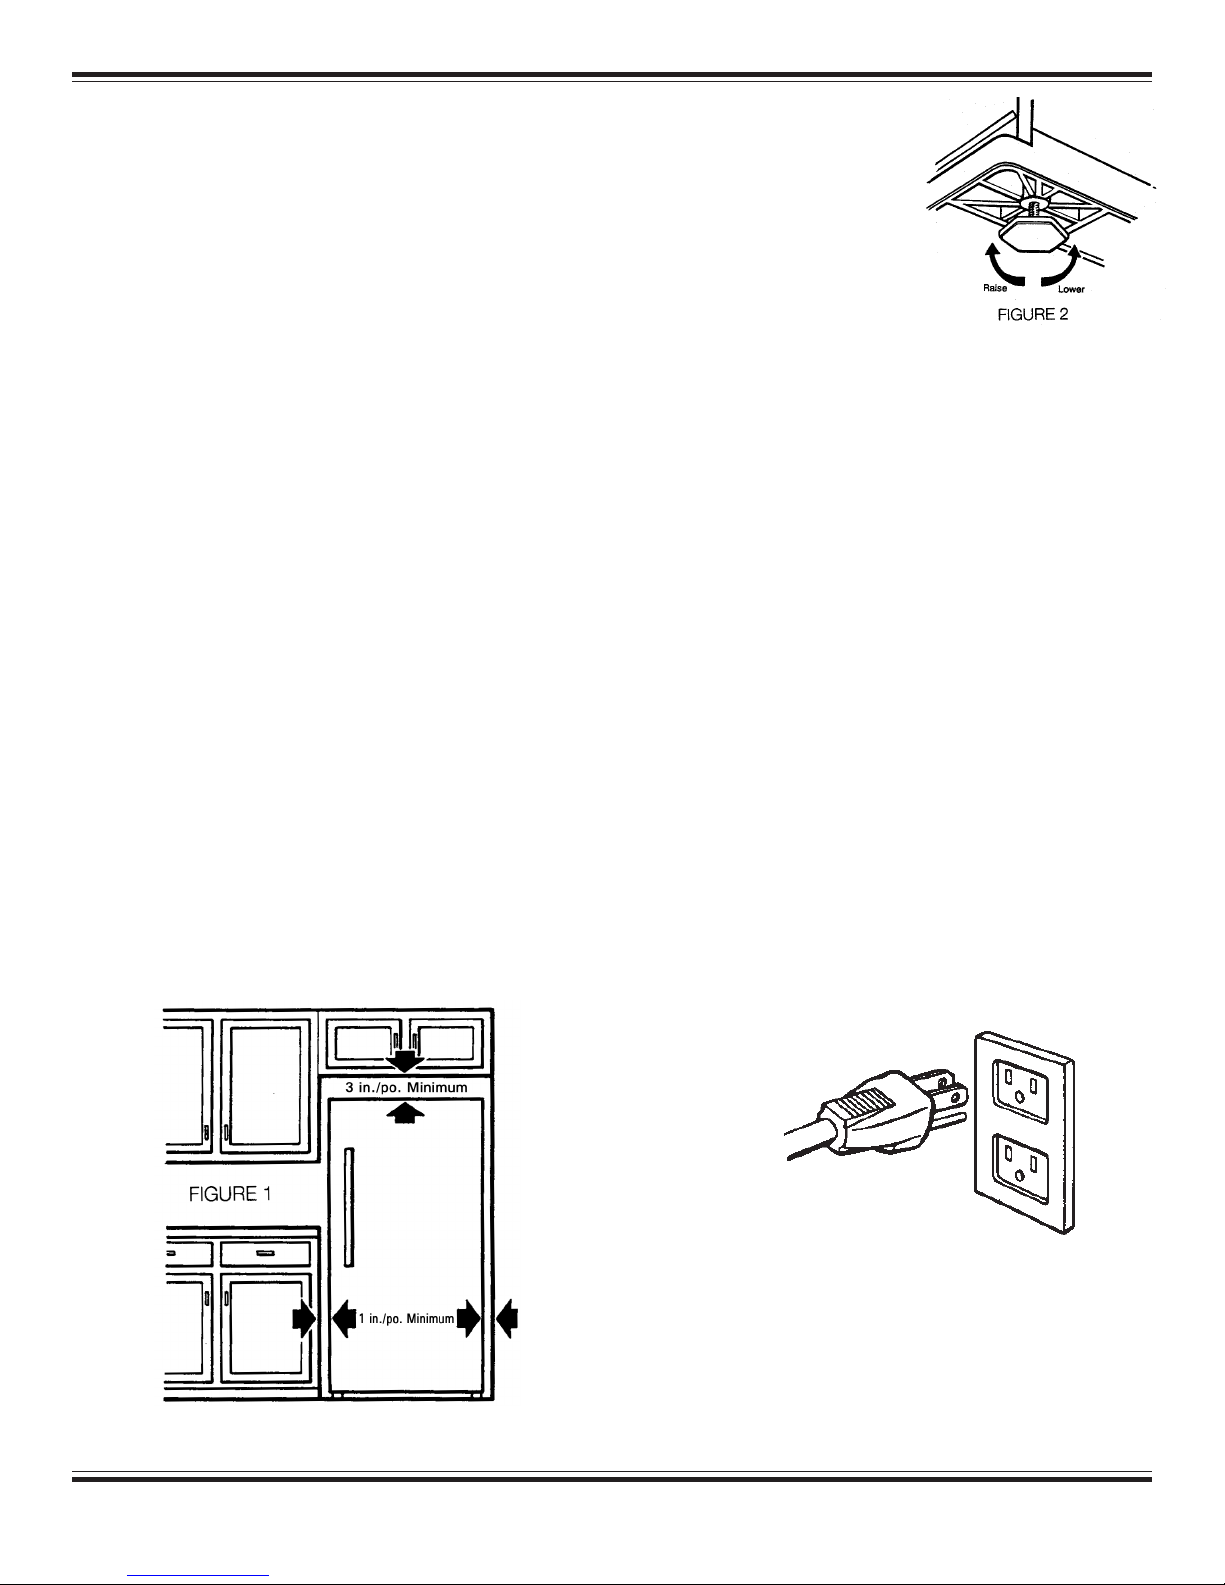
INSTALLATION INSTRUCTIONS
Choose a Location
•
Locate the freezer so that extension cords are not
necessary.
•
Your freezer operates most efficiently when located in an
area where the temperature is normally between 4°C
(40°F) and 32°C (90°F).
•
Allow 3 inches (7.5 cm) between overhead cabinets
and the upright freezer top. Allow at least an inch (2.5
cm) between the back of the freezer and the wall.
•
Allow 1 inch (2.5 cm) on each side of the freezer for
ease of installation.
If the side of the freezer is to be against a wall, you will
•
need to leave enough space so the door can be
opened.
Be sure to install your freezer on a floor strong enough
•
to support it when it is fully loaded. The freezer must
be solidly positioned on the floor if it is to function at its
best. The front levelling legs may be used to accomplish this wherever the floor is too uneven.
Level Your Freezer
You can level your freezer with
the screw-type adjustable
leveling legs located at the front
corners or the base.
Remove Packaging Material
Remove all shipping tape and cardboard inside and
outside the freezer. If there is adhesive residue left on the
freezer, it may be removed with warm water and mild
detergent. Do not use a solvent such as lighter or
cleaning fluid, or an abrasive cleaner which may harm
the finish.
As you remove the tape and cardboard, check for
accessory items.
Clean the freezer interior and parts to remove dust from
shipping and packaging. Clean the inside of the freezer
with a mild detergent.
Electrical Supply
•
If the location selected for your freezer is damp or
moist, as in some basements, the use of 2x4's is
recommended to ensure adequate support. Make sure
the 2x4's are placed directly under the feet of the
freezer.
Install Properly
The freezer should always be plugged into its own
individual 120V, 60 HZ electrical grounded outlet, which is
protected by its own 15 ampere fuse or circuit breaker.
This is recommended for best performance to prevent
overload of house wiring circuits, which could cause a
possible fire hazard by overheating wires.
Do not plug the freezer into an outlet controlled by a
wall switch or a pull cord which may be turned off
accidentally.
Properly Polarized and
Grounded Outlet
Three-Pronged (Grounding) Plug
If the electrical outlet you intend to use will not
accept the three-prong plug, you must have a
properly grounded three-prong outlet installed by a
qualified electrician. Do not, under any
circumstances, cut or remove the round grounding
prong from the plug.
- 6 -
Page 7
If you are not sure the outlet is adequately grounded, you
should have a qualified electrician check the outlet.
No food should be stored in the freezer until the freezer has
obtained the set operation temperature. Refer to Cooling
the Freezer First below.
OPERATING INSTRUCTIONS
Cooling the Freezer First
After plugging the freezer in, it must run for 3 hours in
order to cool before placing any food inside. Make sure
the cold control knob is set at "4" (Factory Settings).
When the freezer is first started, the compressor will run
constantly until the cabinet is cold. After the cabinet is
cooled the compressor will cycle on and off as needed to
keep the freezer at the set temperature.
The outside of your freezer may feel warm. This is
normal. The freezer's design and main function is to
remove heat from packages and air space inside the
freezer. This heat is transferred to the room air through
the outside walls of the freezer so they usually feel warm
to the touch.
The freezer temperature may be adjusted by setting the
cold control knob from number 1 (warmest) to number 7
(coldest).
Setting the cold control knob at the number "0" where it
clicks will switch off power to the compressor.
NOTE: When the cold control knob is set at position "0"
the temperature in the freezer will rise to room
temperature and the freezer contents will defrost.
Setting the cold control knob to number "0"
position (Off) does not remove power to the freezer.
Do not attempt to do any cleaning, repairs or
defrost the freezer without first unplugging the
freezer first.
Fast Freeze (some models)
This setting causes the freezer to run
continuously, driving the freezer temperature to the coldest
possible temperature. To activate, turn control knob to which
is the coldest setting. Use this feature just before adding
large amounts of unfrozen foods. For best food quality, do not
exceed 3 pounds per cubic foot. Return to you normal setting
after 24 to 48 hours.
FEATURES
The features described below are not incorporated on all
FREEZERS. It is important that you familiarize yourself
with the features present on your freezer.
Cold Control Knob
The cold control knob is located inside the freezer.
The cold control knob has been preset at the factory at
the standard operating temperature (position 4).
0
2
3
6
5
4
Figure 3
LIGHTS
Interior Light (Some Models)
The interior light is located on the inside of the freezer at
the top of the food liner. The light turns on when the door
is opened and turns off when the door is closed.
Replacement bulbs may be obtained through your nearest
Sears parts department.
Power Light (Some Models)
The power light is amber in color and is located in the
toeplate of the freezer. The purpose of the power warning
light is to warn you when there is an interruption in power
to the freezer. When the power light is on, the freezer is
receiving electrical power. If the light is off, there is an
absence of power to the freezer (due to blown fuse,
tripped circuit breaker, loose power cord, etc.) This light
does not guarantee a sufficiently cold temperature inside.
IMPORTANT: The power light indicates electrical power
only. It does not indicate that there is a sufficiently cold
temperature inside the freezer.
- 7 -
Page 8
Key Eject Lock (Some Models)
The key eject lock is located below the handle. The key
is packaged in the plastic bag with the use and care
guide.
The purpose of the lock is to keep your frozen food supply
secure and to help reduce the hazard of child entrapment.
To lock or unlock the freezer you must hold the key in the
lock while turning. The lock is spring loaded so the key
cannot be left in the lock.
NOTE: Be sure to keep your key in a safe location out of
the reach of children.
Refrigerated Shelves: Manual Defrost
Your freezer is equipped with refrigerated shelves.
Packages in direct contact with the shelves will have the
best refrigeration. Fresh, unfrozen food packages should
be stored directly on the shelves and not on top of already
frozen food packages.
When placing the food packages in your freezer it should
be remembered:
a) The shelves of the foodliner have the best freezing
capability. The doorshelf temperatures, and the bottom
temperatures are somewhat higher. Therefore packages
sensitive to temperature (meat, poultry, etc.) should not
be placed on the doorshelf or the freezer bottom.
b) Give the cold air a chance to completely surround the
packages.
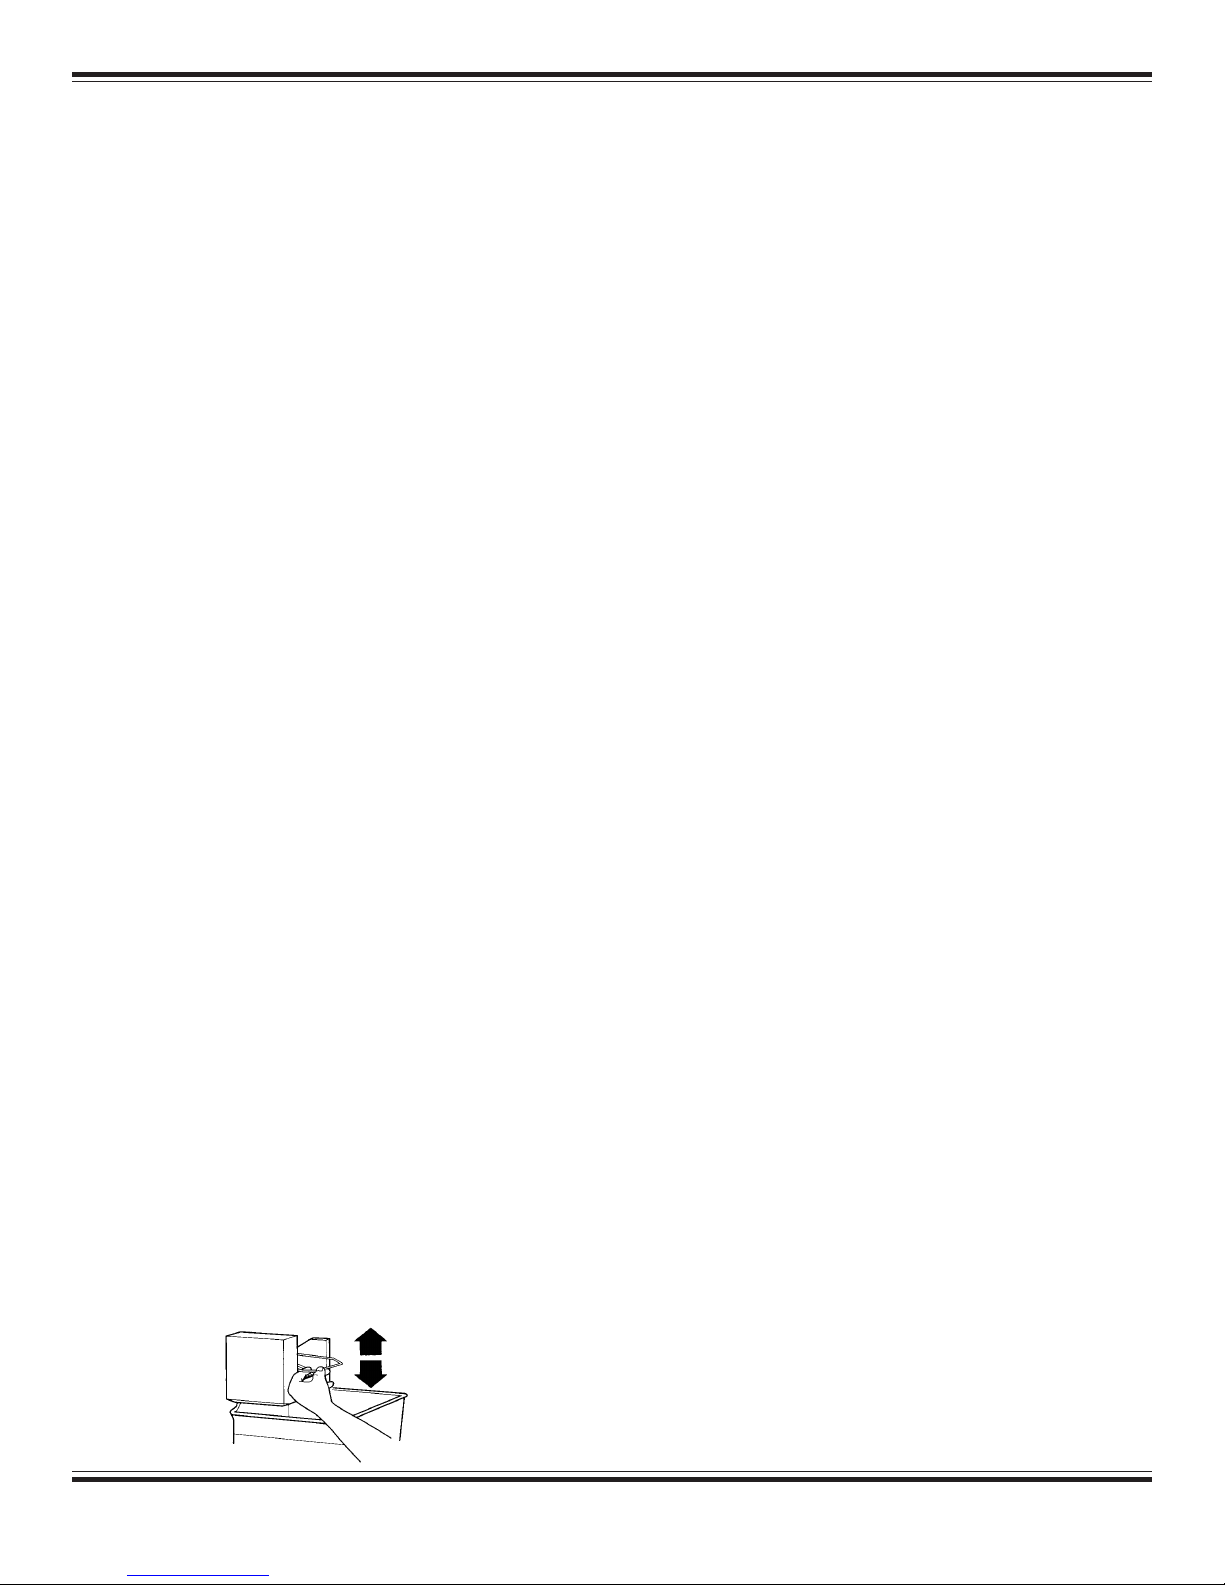
Removable Shelf (some models)
If there is a removable shelf in your freezer, it can be
removed in order to facilitate storage space for large food
items. To remove the shelf, lift up and pull forward.
To increase ice production rate:
The ice maker should produce approximately 7 to 9 batches
of ice in a 24 hour period. If ice is not being made fast enough,
turn the temperature control toward a higher (colder) number
in half number steps.
For example, if the control is set to 3, move it to between 3
and 4. Wait 24 hours and if necessary gradually turn the
temperature control to the highest setting, waiting 24 hours
between each increase.
REMEMBER:
• Allow 24 hours to produce the first batch of ice. Discard the
first three batches of ice produced.
• The quality of your ice will be only as good as the quality
of water supplied to your ice maker. Avoid connecting the ice
maker to a softened water supply. Water softener chemicals (such as salt) can damage parts of the ice maker and
lead to poor quality ice. If a softened water supply can not be
avoided, make sure the water softener is operating properly
and well maintained.
• Do not store anything on top of the ice maker or in the ice
storage bin.
Ice Maker Water Supply Connection (Some Models)
Read all directions carefully before you begin installation.
IMPORTANT:
• If you turn the freezer on before the water line is connected,
be sure to turn the ice maker OFF.
• All installations must meet local plumbing code requirements.
• Use plastic tubing and check for leaks. Install plastic tubing
in areas where temperatures will remain above freezing.
Note:Your freezer dealer can obtain a kit with a 1/4"
(6.35mm) saddle-type shutoff valve, a union and plastic
tubing. Before purchasing, make sure a saddle-type valve
complies with your local plumbing codes. Do not use a
piercing-type or 3/16" (4.76mm) saddle valve that reduces
water flow and clogs more easily.
Storage Baskets
To remove, lift up and take basket out.
Ice Maker Operation (some models)
To turn the ice maker on/off:
NOTE: Do not force the wire shut-off arm up or down.
• To turn the ice maker on, simply lower the wire shut-off arm.
NOTE: Your ice maker has an automatic shut-off. As ice is
made, the ice cubes fill the ice storgae bin and the ice
cubes will raise the wire shut-off arm to the OFF (arm up)
position.
• To manually turn the ice maker off, lift the wire shut-off arm
to the OFF (arm up) position and listen for the click to
make sure the ice maker will not continue to operate.
Tools Required: Standard screwdriver, 7/16" and 1/2"
open end wrenches or two adjustable wrenches, 1/4"
nutdriver and drill bit, hand drill or electric drill (properly
grounded).
Cold water supply
Connect the ice maker to a cold water line with water
pressure between 30 and 120 psi. If you have questions
regarding your water pressure, call your utility company.
Connecting to water line:
1.Unplug freezer or disconnect power.
2.Turn OFF main water supply. Turn on nearest faucet long
enough to clear water lines.
3.Locate a 1/2" to 1 1/4" (12.7 mm to 3.18 cm) vertical cold
water pipe near the freezer. NOTE: A horizontal pipe will
work but drill on the top side of the pipe, not the bottom. This
will help keep water away from the drill and normal sediment
from collecting in the valve.
- 8 -
Page 9

4. Determine the length of plastic tubing you need. Measure
from the connection on the lower left rear of freezer to the
water pipe. Add 7 feet (2.1 m) to allow for cleaning. Use 1/
4" (6.35 mm) outside diameter plastic tubing. Be sure both
ends of plastic tubing are cut square.
5. Using a grounded drill, drill a 1/4" hole in the cold water
pipe you have selected.
DEFROSTING INSTRUCTIONS
Do not use any electrical device in defrosting your
freezer.
Depending on the climate you live in, humidity and usage,
your freezer may need defrosting only once or twice a
year. If possible, choose a time to defrost when your food
supply is at its lowest.
DO NOT use an ice pick or sharp edged instrument as it
may damage or scratch the freezer.
For Periodic Complete Cleaning and Frost Removal
If the frost is too thick or too hard to be scraped, we
suggest you do the following:
6. Fasten the shut-off valve to the cold water pipe with the
pipe clamp. Be sure the outlet end is solidly in the 1/4"
drilled hole in the water pipe and that the washer is under
the pipe clamp. Tighten the packing nut. Tighten the pipe
clamp screws carefully and evenly so washer makes a
watertight seal. Do not overtighten or you may crush the
plastic tubing.
7. Slip the compression sleeve and compression nut on the
plastic tubing as shown. Insert the end of the tubing into the
outlet end squarely as far as it will go. Screw compression
nut onto outlet end with adjustable wrench. Do not overtighten.
8.Place the free end of the tubing in a container or sink and
turn ON the main water supply. Flush the tubing until water
is clear. Turn OFF the shut-off valve on the water pipe. Coil
the plastic tubing.
Connecting to the freezer:
1.Attach the plastic tube to the valve inlet using a compres-
sion nut and sleeve as shown. Tighten the compression
nut. Do not overtighten. Use the tube clamp on the back of
the freezer to secure the tubing to the freezer as shown.
This will help prevent damage to the tubing when the freezer
is pushed against the wall.
2.Turn shut-off valve ON. Check for leaks. Tighten any
connections (including those at valve) or nuts that
leak.
1.
Remove the power cord plug from the outlet and open
your freezer door.
2.
Remove all the food from the freezer. Your food may
be temporarily stored in large corrugated paper boxes,
insulated bags, towels or wrapped in newspapers to
preserve coldness.
You may speed defrosting by removing large, loose
3.
pieces of frost before they melt.
NOTE: Water may drip from the bottom of the door
during defrosting. This is normal. Ice builds up in the
door insulation when the door is open for adding or
removing food and melts during the defrosting operation.
After the frost is completely removed, rinse the inside
4.
of the freezer with a solution of warm water and baking
soda (about one tablespoon of soda to each quart of
water). You may use mild soap and warm water, but
follow with a baking soda solution. Rinse with clean
water and wipe dry. DO NOT use harsh or gritty
cleaners in the interior.
WARNING: When cleaning in the vicinity of electrical
parts, (lamps, switches, controls, etc.) squeeze
excess moisture out of your sponge or cloth so that it
is barely damp. This will prevent water or liquid from
getting into any electrical part and causing a possible
shock hazard when the freezer is plugged in again.
3.The ice maker is eqipped with a built-in water strainer. If
your water conditions require a second water strainer,
install it in the 1/4" (6.35 mm) water line at either tube
connection. Obtain a water strainer from your nearest
appliance dealer.
4.Plug in freezer or reconnect power.
- 9 -
5
Dry the gasket on the door.
6.
Plug in the freezer at the electrical outlet. Turn the
temperature control knob to its regular setting and wait
for the freezer to cool down, then return the food to the
freezer.
Page 10

Cleaning Instructions
In order to retain the finish of the freezer cabinet, inside
and outside, wash the enamelled and plastic parts with
warm water and mild soap only, then rinse and dry. Do
not use, under any circumstances, a grit soap or a
kitchen scouring cleanser as they tend to scratch the
finish.
Electrical and Mechanical Failure
In case of a failure, it is recommended to keep the freezer
well covered with blankets. This will help to preserve the
"cold" on the inside of the foodliner. If no help is available
within 12 hours then the freezer contents should be
transferred into a neighbor's freezer or commercial freezerlockers.
In the event of mechanical or electrical failure of the
freezer, contact your nearest Sears' Service Depot
immediately. Provide the complete information for your
freezer; model number and serial number. These are
shown on the serial plate located inside the freezer.
Before calling for service please consult the
troubleshooting instructions.
TROUBLESHOOTING INSTRUCTIONS
The freezer does not operate.
• Check to make sure the freezer is plugged in at the wall
outlet.
• If the plug is secure and the freezer still fails to operate,
plug a lamp or a small appliance into the same outlet to
determine if there is a tripped circuit breaker or burned out fuse.
• Check to ensure the cold control knob is not set to
Position "0" (off).
The freezer runs too frequently or too long.
• Excessive frost or a package may be holding the door
open.
• The temperature control knob has been reset to a
colder temperature setting.
• The door was opened too frequently or too long.
• A large quantity of unfrozen food has recently been
added to the freezer.
• The room temperature is unusually warm (extended
period of warm weather).
• There is inadequate air circulation space behind the
cabinet. The freezer needs proper clearance at the
back and sides.
• New high efficiency systems can run longer.
The freezer clicks and does not run.
• The power to the freezer has recently been disrupted
and then restored. Unplug the freezer for 30 minutes to
allow the refrigeration system to equalize.
Noisy operation or vibration.
• The floor may be weak causing the freezer to vibrate
when the compressor is on. Placing 2"x4" boards
under the length of the freezer will help support it and
reduce the noise vibration.
• The cabinet is not positioned solidly on the floor.
• Adjust the front levelling legs to correct for an uneven
floor. (see page 6)
• There is uneven food distribution in the freezer.
Redistribute the food in a uniform manner.
The freezer temperature is too warm.
• The freezer may not be plugged in at the wall outlet.
• The door was opened too frequently or too long.
• There is excessive frost built-up around the door or a
package may be holding the door open.
• The cold control knob is set too low or is set in the off
position.
• The unit may need to be defrosted.
The freezer temperature is too cold.
• The cold control knob is set on too high a number.
Foods are drying out.
• Packages are not properly wrapped or sealed.
Moisture is collecting on the outside of the cabinet or door.
• Extended hot and/or humid weather will cause this
collection of moisture to occur.
The freezer door won't fully close.
• A package may be holding the door open.
• There is excessive frost built-up.
Excessive frost build-up.
• The door was opened too frequently or too long.
• A package may be holding the door open.
• Extended hot and/or humid weather.
For service and parts
information for your
Sears freezer, please
contact 1-800-665-4455.
- 10 -
Page 11

Dear Customer:
In manufacturing this Sears product, many steps have been taken to provide you with the highest quality.
Unfortunately, errors or omisssions occasionally occur. In the event that you find a missing or defective
part, please contact your nearest Sears' store.
If you have any suggestions that would help us to improve our assembly/operation instructions, or this
product, please write them down and mail to:
____________________________________________________________
Sears Canada Inc.
222 Jarvis Street
Toronto, Ontario
M5B 2B8
Attention: Buyer Dept. 646
From: _______________________________________________________
Name: _______________________________________________________
Address: _______________________________________________________
City: __________________ Province: __________________________
Postal Code: _______________ Phone #: __________________________
Model # _______________________________________________________
Serial Plate # ___________________________________________________
Date Purchased: __________________________________________________
Location Purchased: _______________________________________________
Comments: ___________________________________________________________________
________________________________________________________________________________
________________________________________________________________________________
________________________________________________________________________________
- 11 -
Page 12

Help Save A
Child's Life
WARNING! To reduce risk of entrapment, fire, electrical shock or injury,
follow basic safety precautions including the following:
Never allow children to operate, play with, or crawl inside a freezer or refrigerator. Always
leave the shelves in so children cannot easily crawl inside.
If you are storing a refrigerator or freezer:
1. Block the door open: Glue thick wooden blocks to the door so it can't close.
Be sure to use strong glue and place the blocks high, out of children's reach. Leave only
enough room to allow ventilation to keep appliance from collecting mildew.
2. Band, tape or secure the door shut: Use strong tape and wrap it
all the way around the appliance several times or pass a heavy duty chain
around the appliance and through the handle(s) and then padlock it
ensuring it cannot slide loose.
If you are disposing of a refrigerator or freezer:
1. Take off the lid or door: The hinge of chest type freezers are
under spring tension. Instructions for removal of the hinges are found on
the back of the freezer.
2. Cut off any electrical wires: Ordinary household tools
are all you need.
Talk to your children about the dangers of playing around or inside any container that might shut
them in.
WHY all these precautions?
Each year children die because they climb inside an old refrigerator or freezer, the door closes
and they are trapped inside and suffocate . . . usually in less than 10 minutes!
Please take a few minutes and prevent such a needless tragedy.
If you are selling your old appliance or giving it away, put this manual inside so the new
owners will know what to do when they discard or store the unit.
Other Safety Suggestions:
· Do not use an extension cord.
· Never unplug your refrigerator by tugging on the cord. Always grab the plug firmly and pull straight out from the
receptacle.
- 12 -
Page 13

Utilisation et
entretien des
congélateurs
verticaux Sears
Table des matières .... 3
ATTENTION: Lisez et conservez ces instructions
NOTEZ CI-DESSOUS LE NUMÉRO DE SÉRIE ET DE MODÈLE DE VOTRE APPAREIL:
Vous devez avoir cette information à portée de la main, si vous téléphonez pour obtenir de l’aide
ou poser une question.
Modèle: ____________________________________________________________________
Numéro de série: ____________________________________________________________
Date d’achat: ________________________________________________________________
Imprimé au Canada
Page 14

GARANTIE LIMITÉE DES
CONGÉLATEURS SEARS
Tous les congélateurs neufs Sears sont garantis exempts de vice de matière et de fabrication.
NOMBRE D'ANNÉES DE GARANTIE
Pièces et service requis sutieà un vice
de matière ou de fabrication
Ajustements mècaniques et services
requis
Toutes les pièces et tous les services
requis po ur un bon fonctionnement et
non couverts par la garantie
Même si un probléme se révèle être de
nature non technique, tel que les
instructions, pour le consommateur,
nour ne facturerons absolument rien
pour le service
Contrat d'entretien préventif annuel.
Contrôle sur demande.
RESPONSABILITÉS NORMALES DU CLIENT
Pour tout service en vertu de cette garantie,
adressez-vous à vitre magasin Sears le plus
proche.
1re
année
G CECECECE
G CECECECE
CE CE CE CE CE
CE CE CE CE CE
CE CE CE CE CE
2e
année
3e
année
4e
année
5e
année
Étant donné que les énoncés suivants ne peuvent
pas être considérés cinne des defectuosités de
fabrication, ils ne sont pas inclus dans le garantie,
mais font partie des responsabilités:
Cette garantie s'ajoute à toute autre garantie
légale.
La garantie ci-dessus ne s'applique qu'aux
congélateurs Sears vendus et utilisés au
Canada seulement; de plus elle est nulle et non
avenue si le congélateur est utilisé à d'autres fins
qu' à des fins domestiques.
SEARS CANADA INC.
TORONTO, ONTARIO, CANADA
M5B 2B8
1) Les dommages causés au fini après la livraison.
2) Courant électrique de mauvaise intensité,
tension faible ou toute autre défectuosité du circuit
électrique de l'habitation ou si l'appareil n'est pas
branché dans une prise électrique.
3) Le remplacement des ampoules.
4) Les dommages causés lors du déplacement
d'un endroit à un autre du congélateur.
5) Les services requis suite à une transformation à
des abus et à un incendie, à une inondation ou à un
cas de force majeure..
6) Ne pas assurer une circulation d'air adéquate
autour du circuit de réfrigération.
7) La bonne utilisation et le bon entretien du
congélateur, comme il est indiqué dans la Norice
d'utilisation; le bon réglage du bouton de contrôle de
la température.
- 2 -
Page 15

INTRODUCTION
Lisez ce manuel attentivement. Il vous aidera pour l’entretien et le fonctionnement de votre congélateur
Sears. Toutes les caractéristiques décrites dans ce manuel ne sont pas comprises dans tous les modèles
de congélateurs. Il est important que vous vous familiarisiez avec les caractéristiques du modèle que vous
avez acheté.
TABLE DES MATIÈRES
GARANTIE 2
INTRODUCTION 3
TABLE DES MATIÈRES 3
CONTRACT D’ENTRETIEN 4
MISES EN GARDE IMPORTANTES POUR LA SÉCURITÉ 5
PROTÉGEONS NOS ENFANTS 5
SERRURE DE SÉCURITÉ 5
INSTRUCTIONS POUR L’INSTALLATION 6
CHOIX DE L’EMPLACEMENT 6
ENLEVER L’EMBALLAGE 6
ALIMENTATION ÉLECTRIQUE 7
NOTICE D’UTILISATION 7
MISE EN MARCHE DE L’APPAREIL AVANT L’UTILISATION 7
CARACTÉRISTIQUES 7
BOUTON DE RÉGLAGE DE LA TEMPÉRATURE 7
ÉCLAIRAGE - À L’INTÉRIEUR 7
- LAMPE-TÉMOIN DE FONCTIONNEMENT 7
SERRURES DE SÉCURITÉ 7
MACHINE À GLAÇONS
7
CLAYETTES RÉFRIGÉRÉES 9
CLAYETTE AMOVIBLE 9
PANIER DE RANGEMENT 9
INSTRUCTIONS POUR LE DÉGIVRAGE 9
INSTRUCTIONS POUR LE NETTOYAGE 10
PANNES MÉCANIQUES ET ÉLECTRIQUES 10
GUIDE DE DÉPANNAGE 10
NUMÉROS SANS FRAI 10
INFORMATION SUR ENFANT PIÉGE 12
- 3 -
Page 16

CONTRACT D'ENTRETIEN
NOUS ASSURONS LE SERVICE APRÉS-VENTE
"Nous assurons le service aprés-vente" ... une devise que Sears se fait fort de répéter en s'appuyant sur son
service aprés-ventre national.
Lorsque vous achetez un congélateur Sears vous obtenez quelque chose que vous ne trouvez nulle part
ailleurs: le service aprés-vente national Sears. La garantie Sears a'appuie sur des techniciens ayant reçu une
formation spéciale et disposant d'equipement, d'outillage et de stock nécessaries de pièces de rechange.
PROTÉGEZ VOTRE CONGÉLATEUR D'AVANTGE ACHETEZ UN CONTRAT D'ENTRETIEN.
Les congélateurs Sears ont été conçus, fabriqués et mis à l'essai pendant des années et leur fonctionnement
s'est révélé être des plus fiables. Malgré cela, tout appareil électroménager moderne nécessite de temps à
autre un entretien. Un contrat d'entretien Sears plus qu'une prolongation de la garantie.
Il vous assure une protection totale contre toutes les factures de réparation, ce que vous perment de profiter au
maximum de 'efficaté de votre congélateur.
Voici un tableau comparatif de la garantie et du contrat d'entretien indiquant les advantages d'un contrat
d'entretien des congélateurs Sears.
NOMBRE D'ANNÉES DE GARANTIE
Pièces et service requis sutieà un vice
de matière ou de fabrication
Ajustements mècaniques et services
requis
Toutes les pièces et tous les services
requis pour un bon fonctionnement et
non couverts par la garantie
Même si un probléme se révèle être de
nature non technique, tel que les
instructions, pour le consommateur,
nour ne facturerons absolument rien
pour le service
Contrat d'entretien préventif annuel.
Contrôle sur demande.
CE - Contrat d'entretien
G - Garantie
1re
année
G CECECECE
G CECECECE
CE CE CE CE CE
CE CE CE CE CE
CE CE CE CE CE
2e
année
3e
année
4e
année
5e
année
METTEZ-VOUS DÉS AUJOURD'HUI EN RAPPORT AVEC UN VENDEUR
SEARS OU AVEC NOTRE CENTRE D'ENTRETIEN SEARS ET ACHETEZ
UN CONTRAT D'ENTRETIEN
- 4 -
Page 17

IMPORTANTES CONSIGNES DE SÉCURITÉ
Lisez toutes les consignes de sécurité avant d'utiliser votre
congélateur:
ATTENTION: Lorsque vous utilisez cet appareil, prenez
toujours des précautions élémentaires de sécurité, y compris
les suivantes:
1. Le congélateur doit être installé conformément aux
instructions d’installation avant son utilisation. Voir les
instructions de mise à terre.
2. Ne débranchez jamais votre congélateur en tirant sur le
cordon électrique. Prenez la fiche électrique fermement en
main et tirez droit. N’utilisez jamais de rallonge électrique.
3. Débranchez toujours le congélateur avant de procéder à
des réparations, changer une ampoule ou avant de le nettoyer.
Note: Nous vous recommandons de toujours faire appel à
un technicien qualifié pour toutes réparations.
4. Même si le bouton de contrôle de la température est à la
position “Off”, il y a toujours du courant dans le circuit
électrique.
Protegeons Nos Enfants
Un enfant peut rester enfermé et suffoquer s’il grimpe à
l’intérieur d’un congélateur pour s’y cacher ou y jouer.
Enlevez la porte e votre congélateur si vous ne l’employez
pas et même si vous avez l’intention de vous en départir.
Plusieurs localités ont adopté des lois exigeant cette mesure
de sécurité.
Détruisez la boîte ainsi que tous les sacs de plastiques
après avoir déballé votre congélateur. Les enfants pourraient
s’en servir comme jouet. Les boîtes recouvertes de feuilles
de plastique ou de couvre-lits peuvent devenir hermétiques
et être dangereuses pour la sécurité des enfants.
Enlevez toutes les agrafes de la boîte. Ces agrafes peuvent
occasionner des blessures graves ou encore égratigner les
meubles.
Serrure de sécurité. (Sur certains modèles)
Si votre congélateur est équipé d'une serrure, elle peut
diminuer les risques qu'un enfant reste emprisonné dedans.
5. Remplacez immédiatement tout cordon électrique
endommagé. N’utilisez jamais de cordon électrique ayant
des fissures, ni de cordon, de fiche ou de prise électrique
montrant des signes de détérioration.
6. Lorsque votre congélateur est en marche, ne touchez
pas aux surfaces froides, spécialement lorsque vos mains
sont humides ou mouillées. Votre peau pourrait rester collée
à ces surfaces extrêmement froides.
7. Ne faites jamais fonctionner votre congélateur en présence
de vapeurs explosives.
8. N’utilisez cet appareil qu’aux fins décrites dans le présent
manuel.
Nota: Gardez la clé de votre congélateur dans un endroit
súr, hors de la portée des enfants.
Pour verrouiller ou déverrouiller votre congélateur, poussez
sur la clé et tournez-la. La clé est sous la force d'un ressort
et elle ne restera pas dans la serrure.
Si vous perdez votre clé, adressez-vous à votre magasin
Sears le plus proche pour en obtenir une de rechange.
Indiquez toujours le numéro de série et le modèle au complet
de votre congélateur pour obtenir une clé de rechange.
- 5 -
Page 18

INSTRUCTIONS POUR L’INSTALLATION
Dépose du matérial d'emballage
Choix de l’emplacement
• Placez votre congélateur dans un endroit oú un cordon
prolongateur ne sera pas nécessaire. Reportez-vous à la
page 7 pour l'alimentation en courant électrique.
• Pour un meilleur fonctionnement, it est préférable de mettre
votre congélateur dans une pièce ou la température se tient
entre 4°C (40°F) et 32°C (90°F).
• Laissez tujours un espace d'au moins 3 po (7.5 cm)
entre les élements de cuisine et les dessus du congélateur.
Laissez au moins 1 po (2.5 cm entre le dos du congélateur
et le mur.
• Laissez 1 po (2.5 cm) de chaque côte du congélateur
pour faciliter l'installation.
• Laissez assez d'espace sur les côtes pour que la porte
s'ouvre.
• Posez votre congélateur sur un plancher suffisamment
solide pour le supporter lorsqu'il sera plein. Le congélateur
doit reposer solidament sur le plancher pour qu'il fonctionne
bien. Si le plancher n'est pas de niveau,utiliisez les pieds
niveleurs du devant pour mettre le congélateur de niveau.
Enlevez tous les rubans d'expédition et tous les cartons
qui se trouvent à l'intérieur et à l'extérieur du congélateur,
vous pourrez l'enlever avec une solution faite d'eau tiéde et
de détergent doux. N'utilisez pas de solvant, tel que de
'l'essence de briquet ou du fluide de nettoyage, ni un
nettoyant abrasif qui risque d'endommager le fini.
Au fur et à mesure que vous enlevez le ruban et les
cartons, vérifiez les accessories.
Nettoyez l'intérieur du congélateur et les piéces en
enlevant toute la poussiére de l'expédition et du carton
d'emballage. Nettoyez la cuve du congélateur avec un
détergent doux.
Alimentation en courant électrique
• Votre congélateur doit toujours être branché dans une
prise individuelle de 120V, 60 Hz, mise à ka terre et protégée
par son propre fusible de 15 ampéres iy d'un disjoncteur.
Ainsi, vous obtiendrez un meilleur rendement de votre
congélateur et vous ne surchargerez pas les circuits
électriques de la maison, évitant ainsi le risque d'un incendie
en cas de surchauffe des fils.
• Si la pièce dans laquelle vous voulez installer vortre
congélateur est humide, comme c'est souvent le cas dans
les sous-sols, mettez des 2 x4 pour assurer un support
adéquat. Mettez-les directement sous les pieds du
congélateur.
N’UTILISEZ PAS DE RALLONGE ÉLECTRIQUE.
INSTALL A CORRECTEMENT
Mettez le congélateur au niveau
Vous pouvez mettre le congélateur
au niveau grâce aux pieds niveleurs
situés aux coins devant le
congélateur.
• Ne branchez pas votre congélateur dans une prise contrôlée
par un interrupteur mural ou par un cordon à tirer, car vous
risquez de l'éteindre par inadvertance.
• SI VOUS NE POUVEZ PAS BRANCHER LA FICHE A
TROIS BROCHES DU CORDON D'ALIMENTATION DE
VOTRE CONGÉLATEUR DANS LA PRISE DE COURANT
QUE VOUS PRÉVOYEZ UTILISER, FAITES INSTALLER
UNE PRISE DE COURNAT A TROIS DOUILLES
CORRECTEMENT MISE A LA TERRE PAR UN
ÉLECTRICIEN QUALIFIÉ. VOUS NE DEVEZ JAMIAS
COUPER NI ENLEVER LA BROCHE DE MISE A LA TERRE
DE LA FICHE.
• Si vous n'êtres pas sur si la prise de courant est
correctement mise à la terre, demandez à un électricien de
la contrôler.
Prise de courant polarisée
et mise à la terre.
Figure 4
Fiche à 3 broches
(mise à la terre)
- 6 -
Page 19

Ne mettez pas les denrées dans votre congélateur tant
qu'il n'a pas atteint la température à laquelle vous l'avez
réglé. Reportez-vous à "Pour refroidir votre congélateur
pour la premiére fois", à la page 7.
INSTRUCTIONS DE FONCTIONNEMENT
Congélation rapide (Sur certains modèles) :
Ce réglage a pour effet de mettre le congélateur en marche
continue, lui permettant ainsi d’atteindre un froid maximal.
Pour l’activer, il suffit de tourner le bouton de réglage au
réglage
Pour refroidir votre congélateur pour la premiére fois
Après avoir branché votre congélateur, et avant d'y mettre
vos denrées laissez-le fonctionner pendant environ 3
heures pour qu'il refroidisse. Assurez-vous que la bouton
de contrôle du froid est régle sur "4". (Réglage de l'usine au centre entre 3 et 5.)
• Lorsque vous mettrez votre congélateur en marche pour
la premiére fois, le compresseur fonctionnerea constamment
jusqu'à ce que l'intérieur du congélateur ait refroidi. Aprés
cela, le compresseur démarrera et s'arrêtera pour garder le
congélateur à la température à lacquelle vous l'aurez réglé.
• Il se peut la paroi extérieure de votre congélateur soit
chaude. Ceci est tout à fait normal. Votre congélateur est
prévu pour éliminer la chaleur des denrées et de l'air qu'il
contient. Cette chaleur est transférée à l'air ambiant par la
paroi extérieure qui semble habituellement être chaude au
toucher.
CARACTÉRISTIQUES
Tous les CONGÉLATEURS ne sont pas dotés de toutes
caractéristiques décrites ci-dessous. Vous devez
apprendre à connaître les caractéristiques de votre
congélateur.
Bouton de contrôle du froid
• Il se trouve à l'intérieur du congélateur.
qui est le plus froid. Se servir de cette option chaque fois que
l’on ajoute des quantités importantes de produits alimentaires
non congelés. Pour de meilleurs résultats, ne pas dépasser
3 lb par pi
congélateur à la température normale.
LORSQUE LE BOUTON DE CONTROLE DU FROID EST
RÉGLÉ SUR "0" (ARRÉT), LE COURANT PARVIENT
TOUJOURS AU CONGÉLATEUR. N'ESSAYEZ PS DE
NETTOYER, E RÉPARER NI DE FAIRE DÉGIVRER LE
CONGÉLATEUR SANS 'LAVOIR DÉBRANCHÉ
AUPARAVANT.
ÉCLAIRAGE
Éclairage à l’intérieur (Sur certains modèles)
L’éclairage intérieur est logé dans la paroi supérieure à
l'intérieur du congélateur. L'ampoule s'allume lorsque vous
ouvrez le parte et s'éteint s'allume lorsque vous la refermez.
Vous pouvez vous procurer des ampoules de recange auprés
du service aprés-vente Sears le plus proche.
Lampe-témoin (sur certains modèles)
La lampe-témoin sera généralement “allumée”. Elle vous
laisse savoir lorsque l’appareil ne fonctionne pas. Si pour
quelque raison que ce soit, l’électricité est interrompue
(fusible brûlé, appareil mal branché, etc.) la lampe-témoin
sera “éteinte". ATTENTION: La lampe témoin n’indique pas
que le système de réfrigération de l’appareil fonctionne bien
ou que la température est bien réglée. Une lumière qui
clignote indique une lampe brûlée ou défectueuse.
3
. Attendre de 24 à 48 heures avant de régler le
• Le bouton de contrôle du froid a été réglé an usine à la
température de fonctionnement normale (position 4). La
température du congélateur peut être modifiée en tournant
le bouton de contrôle du froid de 1 (le plus chaud) à 7 (le
plus froid). La position 4 se trouve entre 3 en 5.
• Si vous tourniz le bouton de contrôle du froid sur ")" (le
bouton émettra un déclit), le courant ne parviendra plus au
compresseur.
NOTA: Lorsque le bouton de contrôle du froid est réglé sur
"0", la température à l'intérieur du congélateur s'élèvera jusqu'
à la température ambiante et les denrées contenues dons
le congélateur dégèleront.
0
6
5
Figure 3
2
3
4
Serrrue à éjection de clé: (Sur certains modèles)
Cette serrure est logée sous la poignée. La clé est emballée
dans un sachet en plastique avec la Notice d'utilisation et
d'entretien.
Le but de cette serrure est de permettre de fermer le couvercle
de votre congélateur à clé et de diminuer les risques qu'un
enfant reste emprisonné dedans.
Machine à glaçons (sur certains modèles)
Mise en marche/arrêt de la machine à glaçons:
REMARQUE: Ne pas forcer le commutateur du bras en
broche vers le haut ou vers le bas.
• Pour mettre la machine à glaçons en marche, il suffit
d'abaisser le bras de commande en broche.
REMARQUE: Votre machine à glaçons a un arrêt automatique.
Au fur et à mesure de la fabrication de la glace, les glaçons
remplissent le bac d'entreposage de glaçons. Les glaçons
soulèvent le bras de commande en broche à la position OFF
(élevée).
• Pour un arrêt manuel, soulever le bras de commande en
broche à la position OFF (élevée) et écouter pour le déclic
pour s'assurer que la machine à glaçons ne continuera pas
de fonctionner.
- 7 -
Page 20

Augmentation du taux de production de glaçons:
La machine à glaçons devrait produire environ de 7 à 9 lots
de glaçons par période de 24 heures. Si les glaçons ne sont
pas fabriqués assez rapidement, tourner la commande du
température vers un chiffre plus élevé (plus froid) en étapes
de un demi numéro. Par example, si la commande est à 3,
la déplacer entre 3 et 4. Attendre 24 heures et, si nécessaire,
tourner graduellement la commande du congélateur au
réglage le plus élevé, en attendant 24 heures entre chaque
augmentation.
À NOTER:
• Accorder 24 heures pour produire la première quantité de
glaçons. Jeter les trois premières quantités de glaçons
produites.
• La qualitéde vos glaçons sera seulement aussi bonne
que la qualité de l'eau fournie à votre machine glaçons. Éviter
de brancher la machine à glaçons à un approvisionnement
d'eau adoucie. Les produits chimiques adoucisseurs d'eau
(tels que le sel) peuvent endommager des pièces de la
machine à glaçons et causer une piètre qualité des glaçons.
Si une alimentation d'eau adoucir ne peut pas être évitée,
s'assurer que l'adoucisseur d'eau fonctionne bienet qu'il est
bien entretenu.
• Ne pas gerder quoi que ce soit sur le dessus de la machine
à glaçons ou dans le bac à glaçons.
Arrivée d'eau froide
Connecter la machine à glaçons à une canalisation d'eau
froide avec limitations de pression d'eau de 30 à 120 lb-po².
Si vous avez des questions au sujet de la pression d'eau,
contacter la compagnie de distribution d'eau.
Raccordement à une canalisation d'eau:
1.Débrancher le congélateur ou déconnecter la source de
courant électrique.
2.FERMER le robinet principal d'arrivée d'eau. OUVRIR le
robinet de puisage le plus proche pendant une période
suffisant pour que la canalisation d'eau se vide.
3.Trouver une canalisation d'eau FROIDE verticale de 1/2 po
à 1 1/4 po (12,7 mm à 3,18 cm) près du congélateur.
REMARQUE: Un conduit horizontal fonctionnera, mais percer
par le dessus se la canalisation et non pas par les dessous.
Ainsi, l'eau ne risquera pas d'arroser la perceuse. Ceci
empêche également les sédiments qu'on trouve
normalement dans l'eau de s'accumuler dans le robinet
d'arrêt.
4.Pour déterminer la longueur du tube en plastique il faut
mesurer las distance entre le point de connexion inférieur
gauche à l'arrière du congélateur et le tuyau d'arrivée d'eau.
Ajouter une longueur de 7 pi (2,1 m) pour permettre le
déplacement du congélateur pour le nettoyage. Utiliser un en
plastique de 1/4 po (6,35 mm) de diamètre extérieur. Veiller
à ce que le tube soit coupé d'équerre aux deux extrémites.
5. À l'aide d'une perceuse électrique reliée à la terre, percer un
trou de 1/4 po dans le tuyau de canalisation d'eau froide
choisi.
Raccordement de la canalisation d'eau (sur certains
modèles)
Lire attentivement toutes les instructions avant de
commencer.
IMPORTANT:
• Si on doit utiliser le congélateur avant qu'il soit raccordé à
la canalisation d'eau, placer la commande de la machine à glaçons ä la position d'ârret (OFF).
• Toutes les installations doivent être conformes aux exigences des codes locaux de plomberie.
• Utiliser un tube en plastique et vérifier s'il y a des fuites.
Installer les tubes en plastique seulement à des endroits où
la température se maintient au-dessus du point de
congélation.
Outils requis: Tournevis standard, clés plates de 7/16 po et
1/2 po ou deux clés à molette réglables, tourne-écrou et foret
de 1/4 po, perceuse manuelle ou électrique (convenablement
reliée à la terre).
REMARQUE: Votr marchand de congélateurs présente une
trousse disponible avec un robinet d'arrêt à étrier de 1/4 po
(6,35 mm), un raccord et un tube en plastique. Avant l'achat,
s'assurer que le robinet d'arrêt étrier est conforme à vos codes
locaux de plomberie. Ne pas employer de robinet d'arrêt à
étrier de 3/16 po (4,76 mm) ou de type à percer, ce qui réduit
le débit d'eau et cause une obstruction plus facilement.
6.Fixer le robinet d'arrêt sur la canalisation d'eau f r o i d e
avec la bride de tuyau. Vérfier que la raccord du robinet est
bien engagé dans le trou de 1/4 po percé dans la canalisation
et que la rondelle d'étanchéité est placée sous la bride de
tuyau. Serrer l'écrou de serrage sur la tige du robinet. Serrer
soigneusement et uniformément les vis fixant la bride de
tuyau sur la tuyauterie afin que la rondelle forme jonction
étanche. Ne pas serrer excessivement car ceci pourrait
provoquer l'écrasement du tube en plastique.
7.Enfiler l'ecrou et la bague de compression du raccord sur
le tube en plastique comme on le voit sur l'illustration. Insérer
l'extrémité du tube aussi loin que possible dans l'ouverture de
sortie du robinet. Visser l'ecrou du raccord de compression
sur le raccord de sortie avec une clé à molette. Ne pas serre
excessivement.
8.Placer le bout libre du tube dans un contenant ou évier et
OUVRIR le robinet principal d'arrivée d'eau et laisser l'eau
s'écouler par le tube jusqu'à ce que l'eau soit limpide.
FERMER le robinet principal d'arrivée d'eau. Enrouler le tube
em plastique.
Raccordement au congélateur:
1.Connecter le tube en plastique au robinet d'eau en utilisant
un écrou et une bague de compression tel qu'illustré. Serrer
l'écrou de compression. Ne pas serrer excessivement.
- 8 -
Page 21

Utiliser la bride du tube à l'arrière du congélateur pour fixer le
tube au congélateur tel qu'illustré. Ceci aidera à empêche les
dommages au tube lorsque le congélateur est poussé contre
le mur.
2.OUVRIR le robinet d'arrêt. Inspecter pour rechercher
les fuites. Serrer tous les raccords (y compris les
raccordements de la valve d'entrée d'eau) ou les
écrous qui coulent.
INSTRUCTIONS POUR LE DÉGIVRAGE
N’UTILISEZ JAMAIS D’APPAREILS ÉLECTRIQUES POUR
DÉGIVRER VOTRE CONGÉLATEUR
En fonction du climat dans lequel vous vivez, du degré
d'humidité et de l'utilisation que vous faites d'votre
congélateur, vous devrez peut-être le dégivre une ou deux
fois par année. Dans la mesure du possible, essayez de la
mesure du possible, essayez de la dégivrer losqu'il contient
le moins possible de denrées.
N'UTILISEZ PAS un pic à glace ou un instrument
extrêmement tranchant pour enlever le givre des parois, sin
on vous risquez de les endommager ou de les rayer
Pour un nettoyage complet et pour enlever
périoquement le givre
3.La machine à glaçons est équipée d'un filtre à eau
incorporé. Si la qualité de l'eau distribée localement
nécessite un deuxième filtre à eau, il serait utile de
l'installer dans le tube de raccordement de 1/4 po (6,35
mm). On peut obtenir un tel filtre à eau chez le marchand
d'appareils électroménagers le plus proche.
4.Brancher le congélateur ou reconnecter la source de
courant électrique.
Pour verrouiller ou déverrouiller votre congélateur, vous
devez pousser sur la clé et la turner. Un ressort empêche
la clé de rester dans la serrure.
NOTA: Gardez la clé de votre congélateur dans un endroit
súr, hors de la portée des enfants.
Clayettes réfrigérées. (Sur certains modèles)
Votre congélateur est doté de clayettes réfrigérées. Les
denrées en contact direct avec les clayettes seront mieux
réfrigérées. Les aliments frais, non congelées doivent être
posées directement sur les clayettes et non sur des
paquets déjà congelés.
Lorsque vous mettez des denrées dans le congélateur,
n'oubliez pas de:
a) ne pas mettre des denrées sensibles aux
changements de température (viandes, volailles, etc.)
dans la contre-porte ou au bas du congélateur. Les
clayettes à l'intérieur du congélateur sont celles qui
congelent le plus facilement. La température dans la
contre-porte et au bas du congélateur est un peu plus
élevée.
b) mettre les surfaces des aliments en contact avec l'air
froid autant que possible.
Si le givre est trop épais ou trop difficile à enlever, nous vous
conseillons de procéder comme suit:
1. Débranchez votre congélateur de la prise de courant et
ouvrez la porte.
2. Sortez toutes les denrées. Vous pourrez les entreposer
temporairement dans de grandes boîtes de carton, des sacs
isolants, des serviettes ou les envelopper dans des papiers
journaux pour préserver le froid.
3. Vous pourrez accélérer le processus de dégivrage en
enlevant les gros morceaux de givre avant u'ils dégèlent.
NOTA: Pendent l'opération de dégivrage, de l'eau peut couler
du bas de la porte. Ceci est tout à fait normal étant donné
que de la glace se forme dans l'isolation de la porte lorsque
vous l'ouvrez pour ajouter ou sortir des denrées et qu'elle
fond pendant le dégivrage.
4. Lorsqu'il il n'y a plus de givre à l'intérieur du congélateur,
rincez-le avec une solution faite d'eau tiéde et de bicarbonate de soude pour chaque pinte d'eau). Vous pouvez
également utiler du savon doux et de 'eau tiéde, à conditon
d'utiliser ensuite une solution de bicarbonate de soude.
Rincez à l'eau claire et essuyez. N'UTILISEZ PAS de
nettoyants abrasifs sur les parois intérieures.
AVERTISSEMENT: Lorsque vous nettoyez prés des pièces
électriques, (lampes, contacteurs, commandes, etc.)
essorez au maximum votre éponge ou votre chiffon de façon
qu'il soit à peine humide pour que l'eau ou le liquide ne
pénètre pas dans les pièces électriques et cause un risque
potentiel de chox électriques lorsque vous rebrancherez
votre congélateur.
5. Essuyez le joint de la porte.
Clayette amovible (Sur certains modèles)
Vous pouvez enlever la tablette amovible pour congeler de
grosses piéces. Il vous suffit de tirer la tablette.
Panier de rangement (Sur certains modèles)
Pour enlever, tirez et levez le panier.
6. Branchez votre congélateur dans la prise de courant,
puis tournez le bouton de contrôle de la température au
réglage normal; attendez que le congélateur au réglage
normal; attendez que le congélateur refroidisse avant de
remettre vos denrées dedans. Reportez-vous à "Pour refroidir
votre congélateur pour la première fois" à la page 7.
- 9 -
Page 22

Instructions pour le nettoyage
De façon à garderle fini des parois intérieures et extérieures
de votre congélateur, lavez l'émail et les pièces en plastique
avec de l'eau tiéde et un savon doux seulement, puis rincezles et essuyez-les. N'utilisez jamais de savon abrasif ni de
nettoyant à récurer de cuisine, sinon vous rayerez le fini.
Pannes mécaniques et électriques
En cas de panne, nous vous coseillons de couvrir votre
congélateur avec des couvertures afin de garder le froid à
l'intérieur. Si votre congélateur ne peut pas être dépanné
dans les12 heures, transférez son contenu dans le
congélateur d'un voisin ou dans ou congélateur commercial. N'oubliez pas d'enlever les couvertures lorsue le courant
sera rétabli.
En cas de panne mécanique ou électrique de votre
congélateur, adressez-vous immédiatement à votre
congélateur, adresez-vous immédiatement à votre Center
de réparation Sears le plus proche en indiquant tous les
renseignements sure la plaque de série fixée sur 'intérieur
du congélateur.
AVANT D’APPELER LE CENTRE D'ENTRETIEN VEUILLEZ
CONSULTER LES INSTRUCTIONS SUIVANTES DE
DÉPANNAGE.
• La température de la pièce est inhabituellement élevée
(période prolongée de chaleur).
• L'air ne circule pas suffisamment derriére le
congélateur. Le congélateur a besoin de plus d'espace à
l'arrière, sur le dessus et sur les côtes (voir page 6).
Vous entendez un déclic mais le congélateur ne
fonctionne pas
• L'alimentation électrique a été interrompue
momentanément. Débranchez le congélateur pendant 30
meinues pour permettre au systéme de réfrigeration de
s'uniformiser.
Fonctionnement bruyant ou vibrations
• La plancher n'est peut-être pas assez solide et le
congélateur vibre lorsque le compresseur fonctionne.
Placez des 2x4 sous le congélateur pour mieux le supporter et dinimuer les vibrations.
• Le congélateur ne repose pas solidement sur le
plancher. Utilisez les pieds niveleurs du devant pour le
mettre de niveau. (voir page 6)
• Les denrées ne sont pas uniformément réparties dans
le congélateur. Répartissez-les uniformément.
La température du congélateur est trop élevée
• Le congélatuer n'est peut-être pas branché.
• La porte a été ouverte trop souvent ou trop longtemps.
• Accumulation excessive de givre autour de la porte ou
un paquet empêche la porte de fermer.
• Le bouton de contrôle de la tempéature est réglé trop
bas ou sur "off" (arrêt).
• Le congélateur doit être dégivré.
GUIDE DE DÉPANNAGE
Le congélateur ne fonctionne pas
• Vérifiez si le congélateur est bien branché.
• Si la fich est bien dans la prise et si le congélateur ne
fonctionne toujours pas, branchez une lampe ou un petit
appareil électroménager dans la même prise pour
déterminer si un disjoncteur s'est déclenché ou si un
fusible a brûle.
• Le bouton de contrôle de la température est peut-être à
zéro (off).
Le congélateur fonctionne trop souvent ou trop
longtemps
• Il y a peut-être trop de givre ou la porte reste ouverte à
cause d'un paquet.
• Le bouton de contrôle de la température a été réglé à
une température plus froide.
• La porte a été ouverte trip souvent ou trop longtemps.
• Les nouveaux systèmes de rendement élevé peuvent
fonctionner plus longtemps.
Pour le département de pièces et service pour
La température du congélateur est trop basse
• Le bouton de contrôle de la température est réglé sur
un numéro trop élevé.
La denrées séchent
• Elles sont mal enveloppées ou les emballages sont mal
fermés. (Reportez-vous à votre live de guide de
congélation.)
L'humidité s'accumule à l'extérieur de congélateur
ou de la porte
• Des température extrêmement chaudes et/ou humides
en sont la cause.
La porte congélateur ne se ferme pas complétment
• Un paquet l'empêche de se fermer
• Accumulation excessive de givre
Accumulation excessive de givre
• La porte a été ouverte trop souvent ou trop longtemps
• Un paquet empêche la porte de se fermer.
• Temps extrêmement chaud de/ou humide pendant une
période prolongée.
congélateur Sears, faites le 1-800-665-4455.
- 10 -
Page 23

Cher client:
Lors de la fabrication de cet appareil Sears, nous avons pris toutes les mesures nécessaires pour vous fournir
un produit de toute première qualité. Mailheureusement des erreurs ou des omissins se produisent parfois. Au
cas où une pièce serait manquante ou défectueuse, veuillez vous adresser à votre magasin Sears le plus
proche.
Si vous avez des suggestions qui pourraient nous aider à améliorer nos instructions de montage/de
fonctionnement, ou ce produit, veuillez les indiquer ci-dessous et les faire parvenir à:
Sears Canada Inc.
222 Jarvis Street
Toronto, Ontario
M5B 2B8
A l'attention du: Service des achats 646
De: _____________________________________________________________________________________
Nom: _____________________________________________________________________________________
Adresse: ________________________________________________________________________________
Ville: ________________________________ Province: _________________________________
Code postal: ______________________________ No. de télé #: ____________________________
Modèle # ________________________________________________________________________________
No de série # ___________________________________________________________________________
Date d'achat: _____________________________________________________________________________
Adresse du magasin: ______________________________________________________________________
Commentaires: ___________________________________________________________________________
_________________________________________________________________________________________
_________________________________________________________________________________________
- 11 -
Page 24

AIDEZ AIDEZ
AIDEZ
AIDEZ AIDEZ
A LA SAA LA SA
A LA SA
A LA SAA LA SA
UVERUVER
UVER
UVERUVER
VIE D’UN ENFVIE D’UN ENF
VIE D’UN ENF
VIE D’UN ENFVIE D’UN ENF
AVERTISSEMENT: Il y a risque qu'un enfant se prenne au piège
Ne jamais permettre aux enfants de faire fonctionner ou jouer autour, ou de se glisser à
l’intérieur d’un réfrigérateur ou congélateur.
Si vous entreposez un congélateur ou réfrigérateur :
1. Bloquer la porte / le couvercle: coller avec une colle forte des morceaux de
bois épais sur la porte ou le couvercle pour l’empêcher de fermer.
Placer les carrés de bois hors de la portée des enfants. Laisser
une ouverture pour permettre une ventilation afin d’empêcher
la moisissure.
2. Barricader la porte / le couvercle: Entourer l’appareil
de nombreuses cordes ou bandes adhésives résistantes ou
d’une grosse chaîne, que vous glisserez sous la/les poignée(s),
fermée(s) au cadenas.
ANTANT
ANT
ANTANT
Si vous vous débarassez d’un réfrigérateur ou
congélateur:
1. Détacher la porte ou couvercle: les charnières d'un congélateur-coffre sont à ressort.
Les instructions pour enlever les charnières se trouvent sur la partie arrière de
congélateur.
2. Couper les fils électriques à l’aide de simples outils domestiques.
3. Laisser les étagères à l’intérieur pour rendre l’accès plus difficile.
Discuter avec vos enfants des dangers de jouer autour ou à l’intérieur d’appareils dans
lesquels ils risquent d’être emprisonnés.
POURQUOI toutes ces précautions?
Chaque année des enfants meurent emprisonnés dans un réfrigérateur ou congélateur.
Ils suffoquent en moins de 10 minutes. Prenez quelques minutes de votre temps pour éviter
de telles tragédies.
Si vous vendez ou donnez votre appareil usagé, placez ces instructions à l’intérieur de
l’appareil pour le nouveau propriétaire.
- 12 -
 Loading...