

Kenmore 911.92485 User Manual

OWNER'S MANUAL
30" ELECTBIC
SELP-CLE^^iUCS
FREE-SmUDIi^G
R AM Q E
MODEL NO.
911. 92391
311. 92485
911.92486
911. 94391
911. 94398
911. 93471
O AU T iO M s
Before usirag this range,
read this manuai and
follow all Its Safety R«les
and Operating
¡nstriictioins»
Sears, Boebyck and Co., Hoffman Estates, IL 60179 U.S.A.
Safety instryctions
Operation
Care and Cleaning
Problem Solving
229C4020P118 ($R~10323)
Kènmàre
Table of Contents
ELECTRIC FREE-STAMDIMG
mf!EmimrRücmoNs:
Range Safety
Stability Device
Features of Your Range ,
Removal of Packaging Tape . 7
Cooking Elements
Control Settings . ,
Home Canning Hour/Minute Arrow Pad
Display ..............-.................... 9
Indicator Lights
Black Out The Display
F-Codes..
Power On
Automatic Oven Shut-off
To Set the Clock
To Set the Timer
To Reset The Timer
To Gance! The Timer................ 10
Oven Cooking Tips.............11-14
Strong Smell or Odor
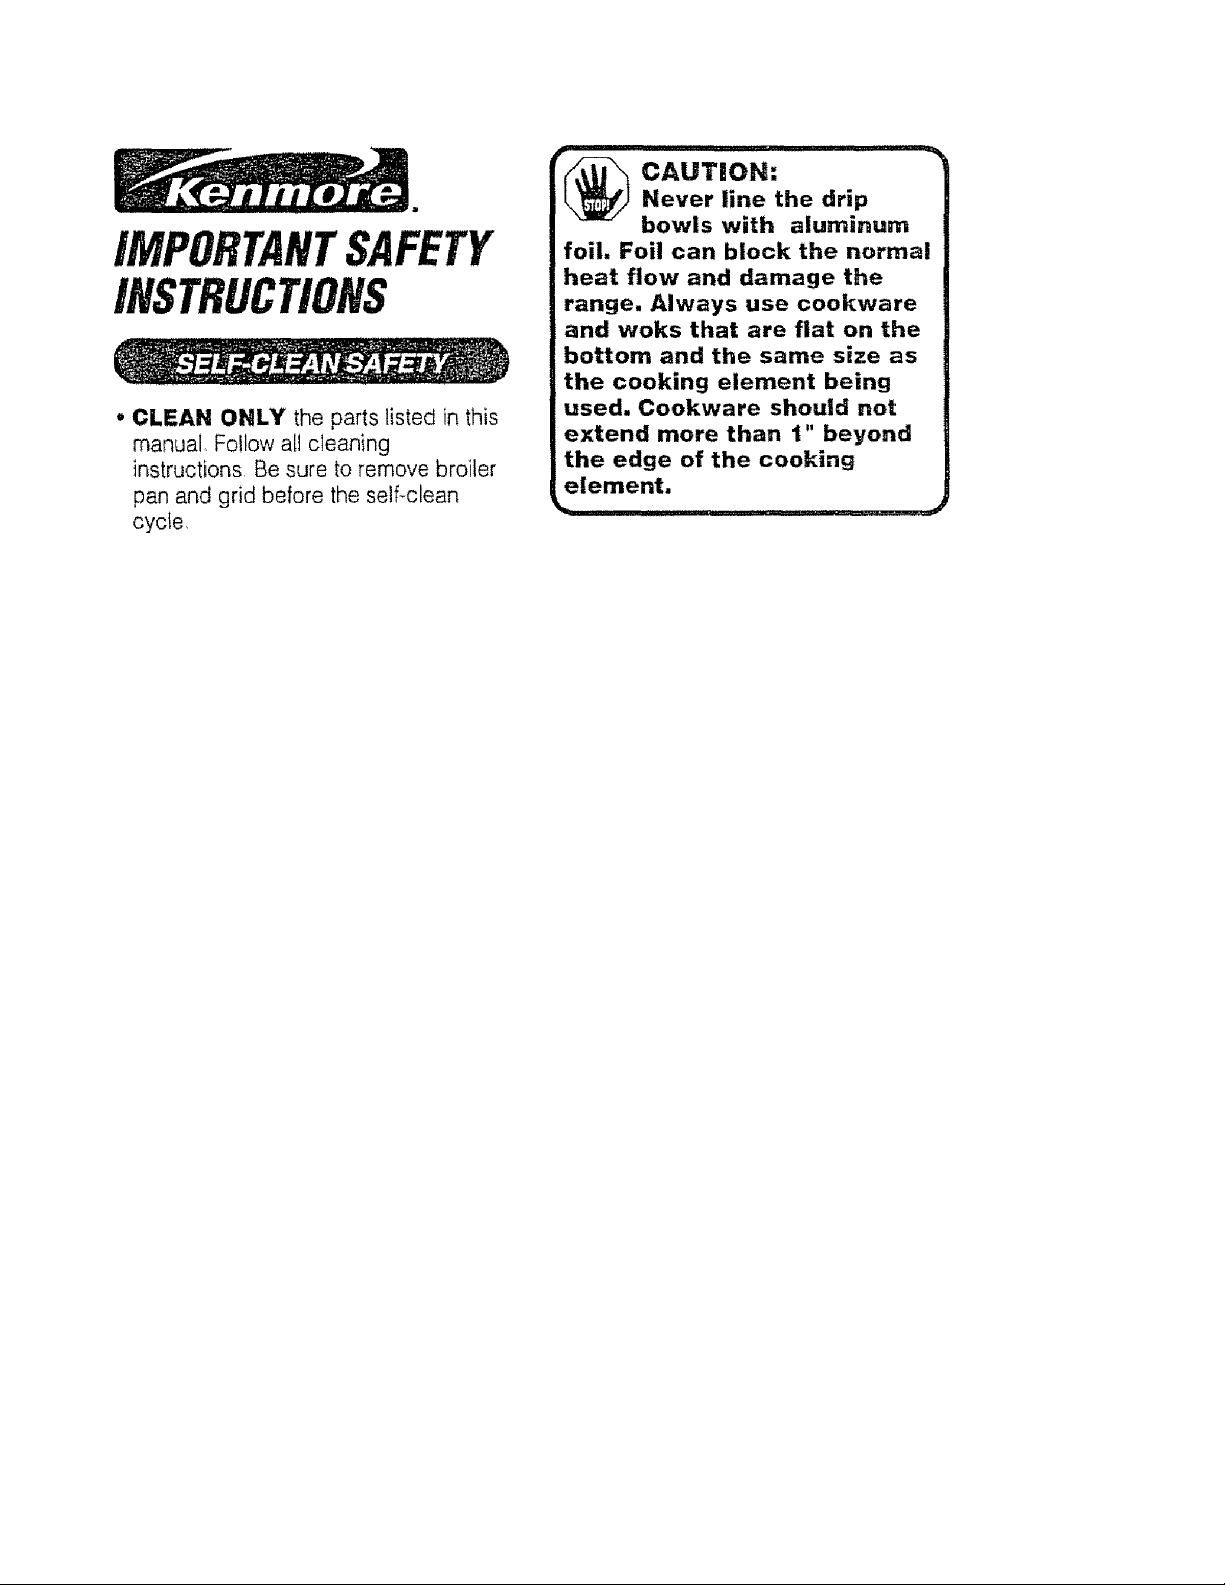
Aluminum Foil
Oven Vent,...
Preheating
Temperature Sensor..
No Peeking
Bakeware,,.....................
Bakeware Placement.
Oven Racks
Oven Control
Hide-A-Way Handle
...............
........................... 3
..... .
.......
........................
.................-..................
............
....
......................
............
..........
...................
.... .
................ 8
....
...................
..............
...............
................
.............
.......................
....................
................. 10
....
.........
..............
............
.....
3*6
8
.. 9
9
10
10
11
... 11
....
....................
...
................
...
.............
..................
.... 11
.... 12
....
8
11
11
11
13
13
7
9
9
9
9
12
12
To Set Bake ............... ..
Element Cycling.........................14
Oven Temperature
Adjustment
Broiling ......................................15
Self-Cleaning
Control Panel
Broiler Pan and Grid
Walls of The Oven
Cooktop and Burner Box
Bottom
Painted Surface
Control Knobs. ..
Replacing Oven Light Bulb . 19
Storage Drawer . . ......
Lift Up Cooktop
Cooktop Units,
Oven Racks
Oven Door
Before Calling for
Service
Temperature Adjustment
Warranty
Consumer Service
Numbers............ -
..........................
........
.........................
.....
........... .
................— 18
................ . 19
......................
......................
...............
...
22
.......................
.....................................
..........
13, 25
.............
..............
_____ ___ 18
.....................
16-17
18
.............
.............
.........23, 24
.........
..........
18
.....
,.20
21
21
14
18
22
25
27
23
For your convenieince and future reference, please write down
your model and serial number in the space provided. They are
located behind the storage drawer»
fyiODEL MUMBEB:
SEBIAL nUMBBnt
IMPORTANT SAFETY
Кептогё:
INSTRUCTIONS
SAVE THESE mSTBUCTIONS
Bead ail instructions before using this appliance. When using
gas or electrica! appliances, basic safety precautions should
be followed, including the followings
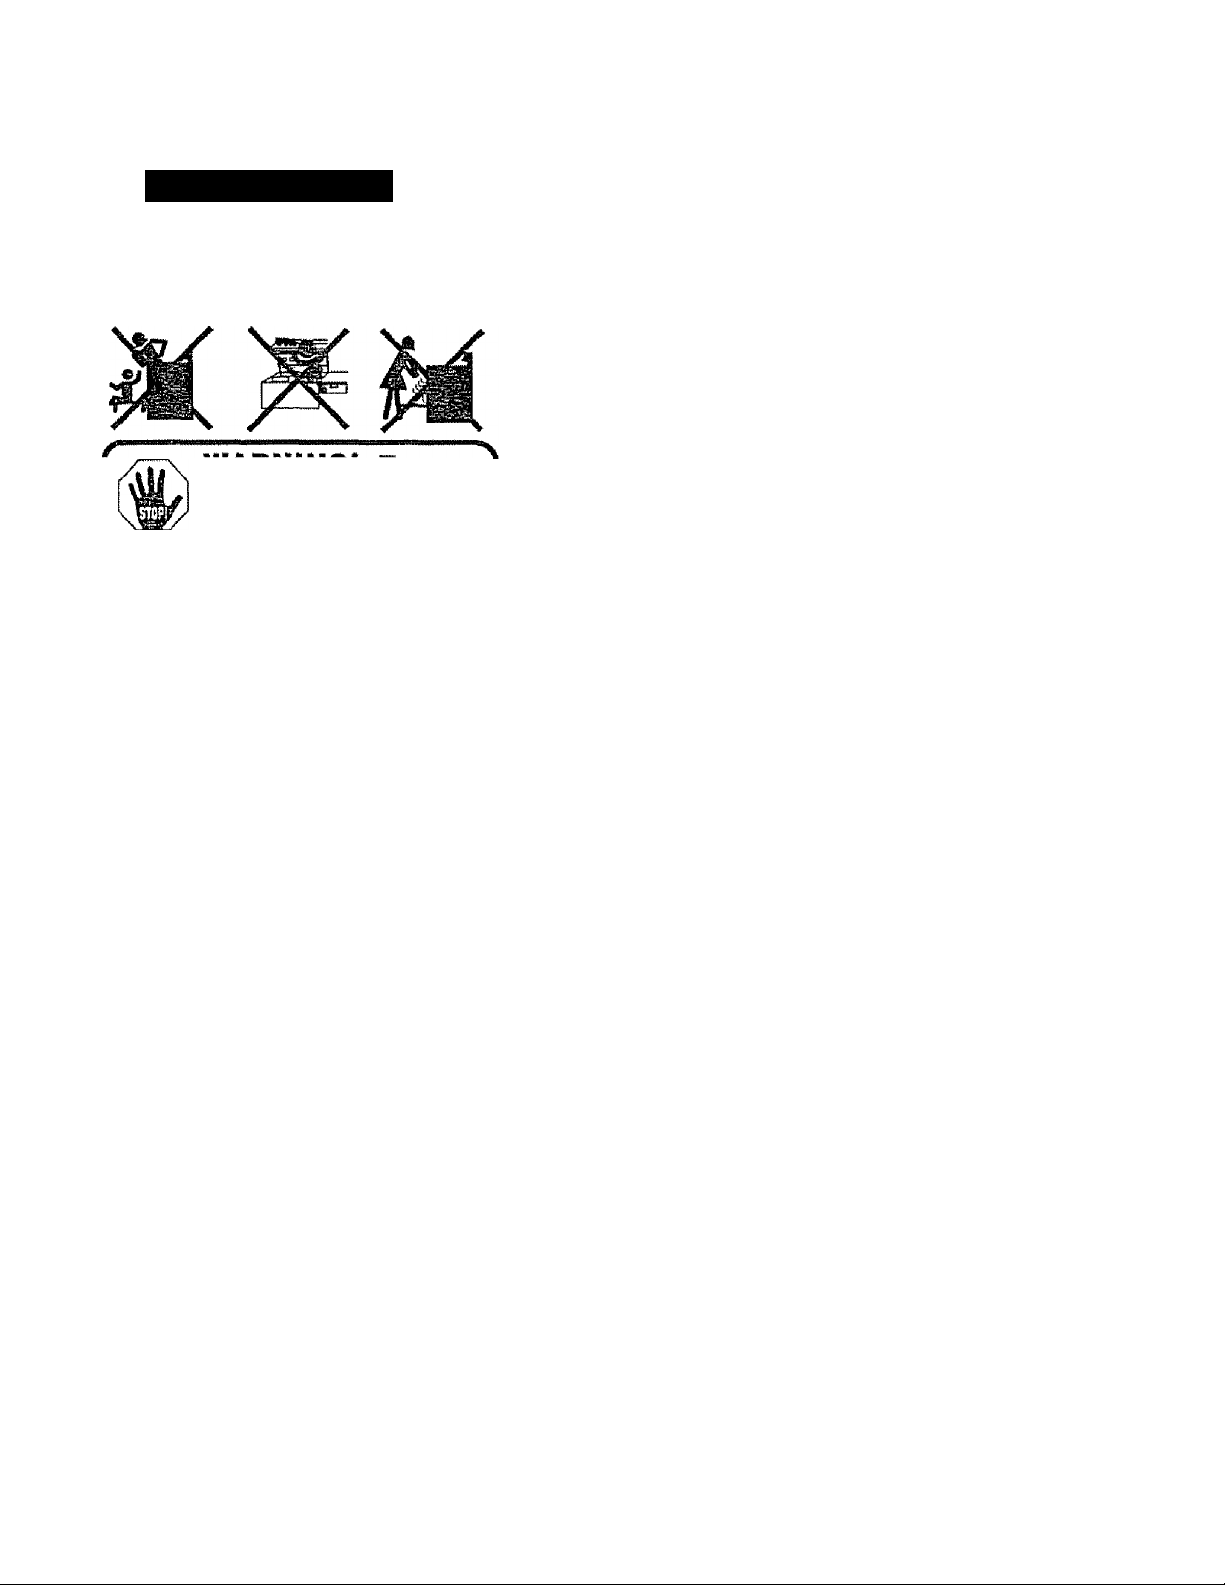
StmiOTY device
A WARNING
All Ranges Can Tip
Injury To Persons
Could Result
install Anti-tip
Device Packed With
Range
See installation
instructions
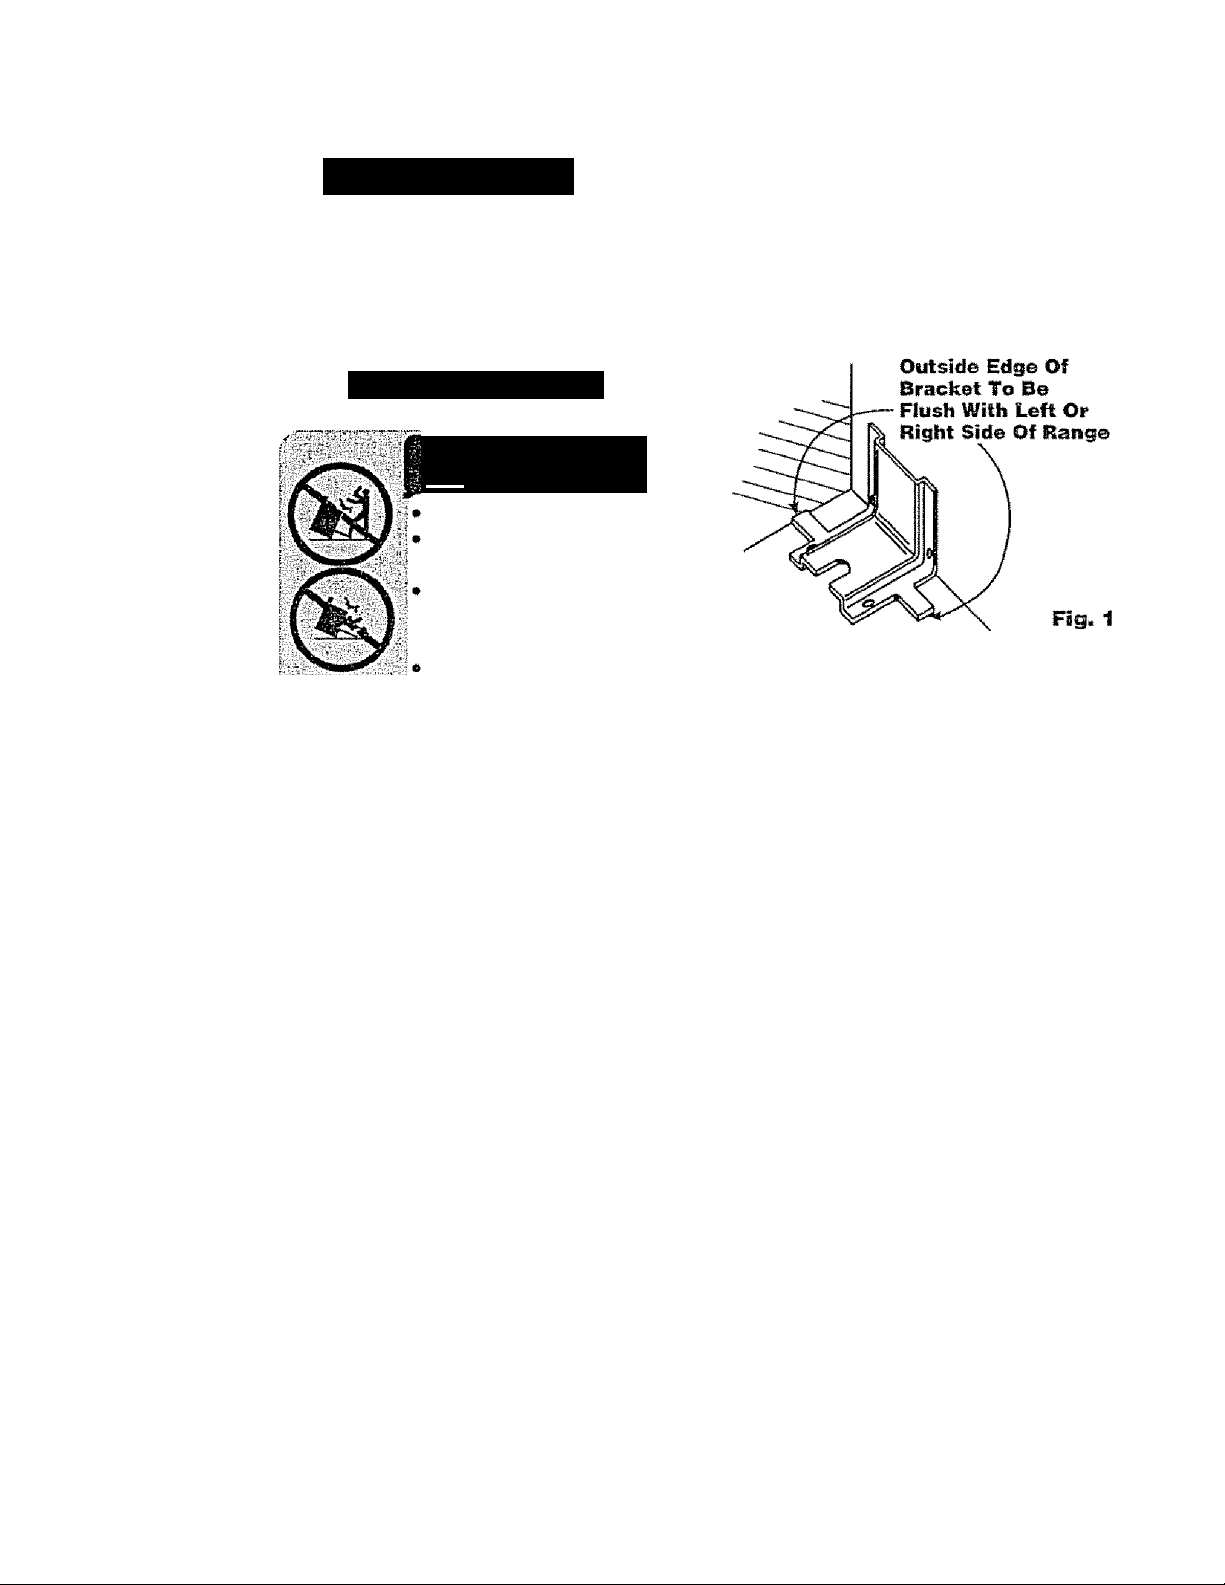
Tools you will need:
* Phillips head screwdriver
e 13/8" open end or adjustable wrench
1. Remove the bracket from the
prepack located inside the oven,
2. Decide whether the bracket will be
installed on the right or left side of
range location ,
3. If the bracket side of the range is
adjacent to a cabinet, place the
bracket against back wall and
cabinet as shown in Figure 1,
If there is no adjacent cabinet,
determine where the location of
the range side (painted outside
panel) will be. Place the bracket
with its outside edge at this
location and against back wall.
See Figure
4. Determine whether you wiii anchor
the bracket to the floor or wall,
Make sure this location is clear of
eiectrical wiring or plumbing
5. Fasten the bracket securely with
the screws provided. Screws are
self-drilling in wood, plywood,
particle and chip board, and most
metal framing, if attaching to
masonry, you can buy suitable
screws and anchors at hardware
stores Use a masonry drill to drill
the required holes
Fig, 2
6, Using the wrench, back out the
four ieg leveiers at least two turns.
See your instaliation guide for
гроге leveling information before
positioning range-
7. Slide the range into place. Be sure
rear leg ieveler fuliy engages the
slot in the bracket. If range cannot
be moved back far enough for
rear leg Ieveler to enter bracket,
move bracket forward as required
and attach to floor in new location.
Bracket
Screw Must Enter \
Wood Or Metal ^
Attachment To Wall
Wall
Plate
/
tn ^j^ipi ^
IMPORTANT SAFETY INSTRUCTIONS
WARNING! To pre
vent accidental tipping
of the range from ab
normal usage, including ex
cessive loading of the oven
door, attach the range to the
wall or floor by Installing the
Anti-Tip device supplied, lithe
range is moved for cleaning,
servicing or any reason, be
sure the Anti-Tip device is re
engaged properly when the
range is slid back in the open
ing. Failure to do so could
result in the range tipping or
personal Injury. To inspect the
anti-tip device, remove the
storage drawer and look to
see II the rear leg leveler fully
engages the slot in the
bracket.
important: To insure safety for
yourself, famiiy and home, please read
your Owner's Manual carefully Keep it
handy for reference Pay close attention
to Safety Sections. BE SURE your
appliance is installed and grounded by a
qualified technician.
• DO fiOT leave children alone or
unattended near an appliance in use.
• TEACH CHILDREI'I not to play with
controls or any part of the appliance,
and not to sit, climb or stand on the
door, or any other part of the appliance.
CAUTION: NEVER STORE items
of interest to children on the
backguard or in cabinets above the
appliance. Children climbing on the
appliance could be seriously injured
• KEEP THIS book for later use.
• NEVER USE your appliance for
warming or heating the room
• NEVER TRY to repair or replace any
part of the appliance unless instruc
tions are given in this manual. All other
work should be done by a qualified
technician.
• ALWAYS KEEP combustible wall
coverings, curtains, dish cloths,
towels, potholders, and other linens a
safe distance from the appliance,
• NEVER HEAT unopened food
containers. Pressure buildup can
cause the container to burst and cause
injury,
• NEVER LEAVE jars or cans of fat or
drippings in your oven.
« ALWAYS KEEP the oven and
surface unit areas free from things that
will burn. Food, wooden utensils, and
grease buildup could catch fire.
Plastic ulensiis could melt and canned
foods could explode. Your appliance
should never be used as a storage
area.
• ALWAYS KEEP your appliance clear
of things that will burn {gasoline and
other flammable vapors or liquids),
• NEVER TRY to clean a hot surface.
Some cleaners produce noxious
fumes, and wet cloths or sponges
could cause steam burns.
• never wear loose fitting clothing
when using your appliance.
• never use a towel or other bulky
cloth as a potholder, and make sure
the potholder is dry. Moist potholders
and wet cloths or sponges could
cause steam burns. DO NOT let
potholders touch hot heating elements,.
Kenmore
IMPORTANT SAFETY INSTRUCTIONS
• DO NOT touch heating elements,
surfaces near them, or interior oven
surfaces. These may be hot enough to
cause burns even though they are
dark in color During and after use, do
not touch or let clothing or flammable
material contact the elements or hot
surfaces until they have had time to
cool. Other surfaces near the oven
vent openings, oven door and
window, and cooktop surfaces may
also be hot enough to cause burns.
' NEVER LEAVE surface units
unattended at high settings. Boiiovers
result in smoking or greasy spilis
which could catch fire,
• ALWAYS TURN utensil handles
inward and away from other surface
units to reduce the risk of burns,
ignition, unintended contact, and
spillage,
NEVER put heating elements in
water.
• PLACE OVEN RACKS in the
desired position while the oven is
cool. If racks must be moved while
oven is hot, do not let potholder
contact the hot oven element.
coommsAF^m
' ONLY SOME kinds of glass or
ceramic cookware can be used for
cooktop cooking Make sure the
cookware you choose to use is
designed for cooktop cooking without
breaking due to the sudden tempera
ture change
USE care when touching
cooktop elements They will retain
heat after the range has been turned
off
NEVER BLOCK the oven air vent
under the right rear element
COOKWARE USED for cooktop
cooking should be fiat on the bottom
and large enough to cover the heating
area being used Undersized utensils
expose the heating element and may
result in direct contact or ignition of
clothing.
• AFTER BROILING, always take
the broiler pan and grid out of the
oven and clean them. Leftover
grease in the broiler pan could catch
fire the next time you use your oven.
» ALWAYS USE care when opening
the oven door Let hot air and steam
escape before moving foods.
• NEVER USE aluminum foil to line the
oven bottom Improper use of foil could
result in the risk of electrical shock and
fire.
ALWAYS USE drip bowls to prevent
wiring and component damage. Do
not use aluminum liners or foil in drip
bowls Improper use may result in risk
of electrical shock or fire
, RUB, move or damage the
door gasket on self-cleaning ranges
• NEVER TRY to clean utensils,
cookware, removable parts, or broiler
pan and grid in the self-clean cycle
• DO NOT USE oven cleaners - No
commercial oven cleaner, or protective
coating of any kind, should be used in
or around any par! of the oven
• NEVER FORCE the latch handle
open while oven is hot.
IMPORTANT SAFETY
NOTICE!
The California Safe Drinking
Water and Toxic Enforcement
Act requires the governor of
California to publish a fist of
substances known to the state
to cause birth defects or other
reproductive harm and requires
businesses to warn their eus*
lomers of potential exposure to
such substances. The fiberglass
insulation in a self-cleaning oven
win give off a very small amount
of carbon monoxide during the
cleaning cycle. Exposure can be
minimized by venting with an
open door or window or using a
ventilation fan or hood.
BEAD AND UNDERSTAND
THIS INFORMATION NOW!
Be sure everyone in your home
knows what to do in case of fire.
Never use water on a grease
fire; it will only spread the
flames.
COOKTOP GREASE FIRE:
Never pick up a flaming pan...
1. Turn off the surface elements.
2. Smother the flame with a tightly
fitting lid - Use baking soda or a dry
chemical, foam, or halón type
extinguisher.
OVEN FIRE:
Do not try to move the pan!
1. Close the oven door and turn
controls off
2. If fire continues, carefully open the
door, throw baking soda on the fire,
or use a dry chemical, foam, or
halón type extinguisher
KGnmGrS
OPERATION
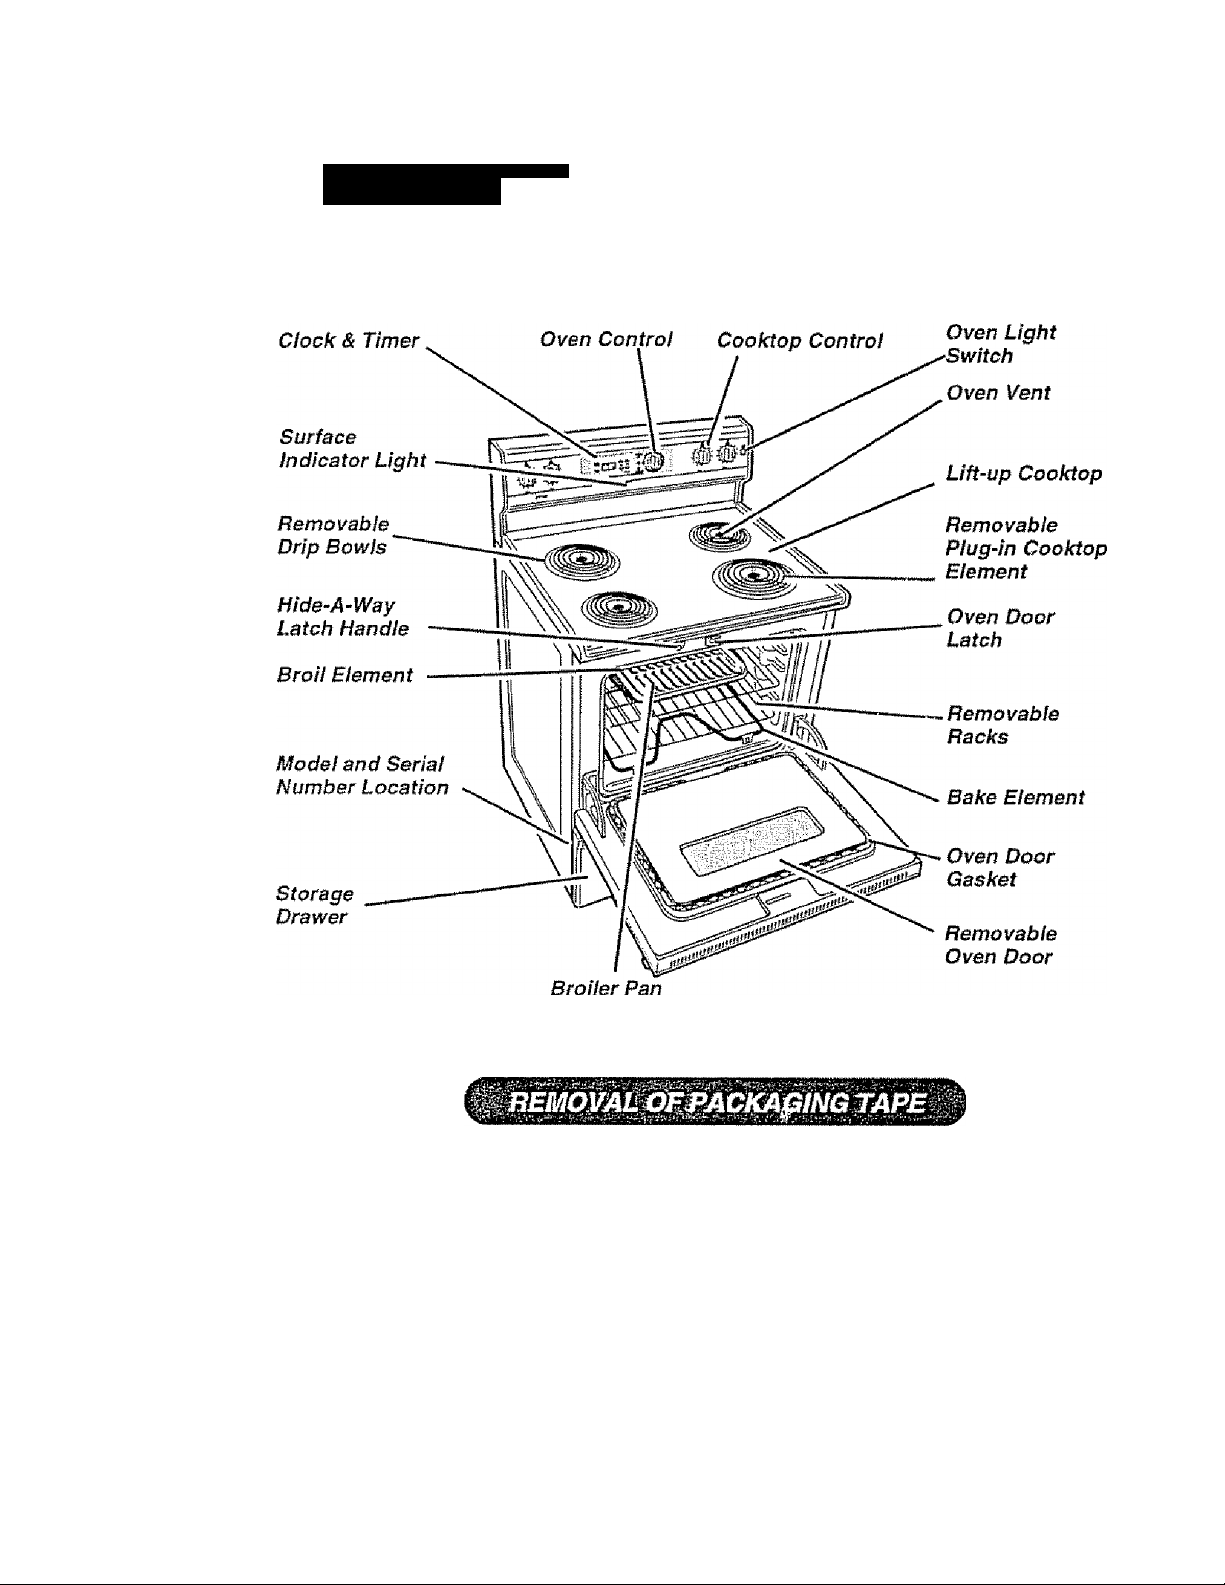
FEATURES OF YOUR RANGE
SfiCJ Grid
To remove the adhesive left from packaging tape, use household dishwashing
liquid, mineral oil or cooking oil. With a soft cloth rub into the area and allow to
soak- Rinse and dry well. Repeat procedure using an appliance polish to
insure no damage is done to the appliance. This shouid he done before
the range Is turned on for the first time. The tape cannot be
removed once the range has heated. Packaging tape can be found In
the following areas; Cooktop Surface, Door Handle, Oven Area, Control Panel
Area and Door Trim Area,
OPERATION
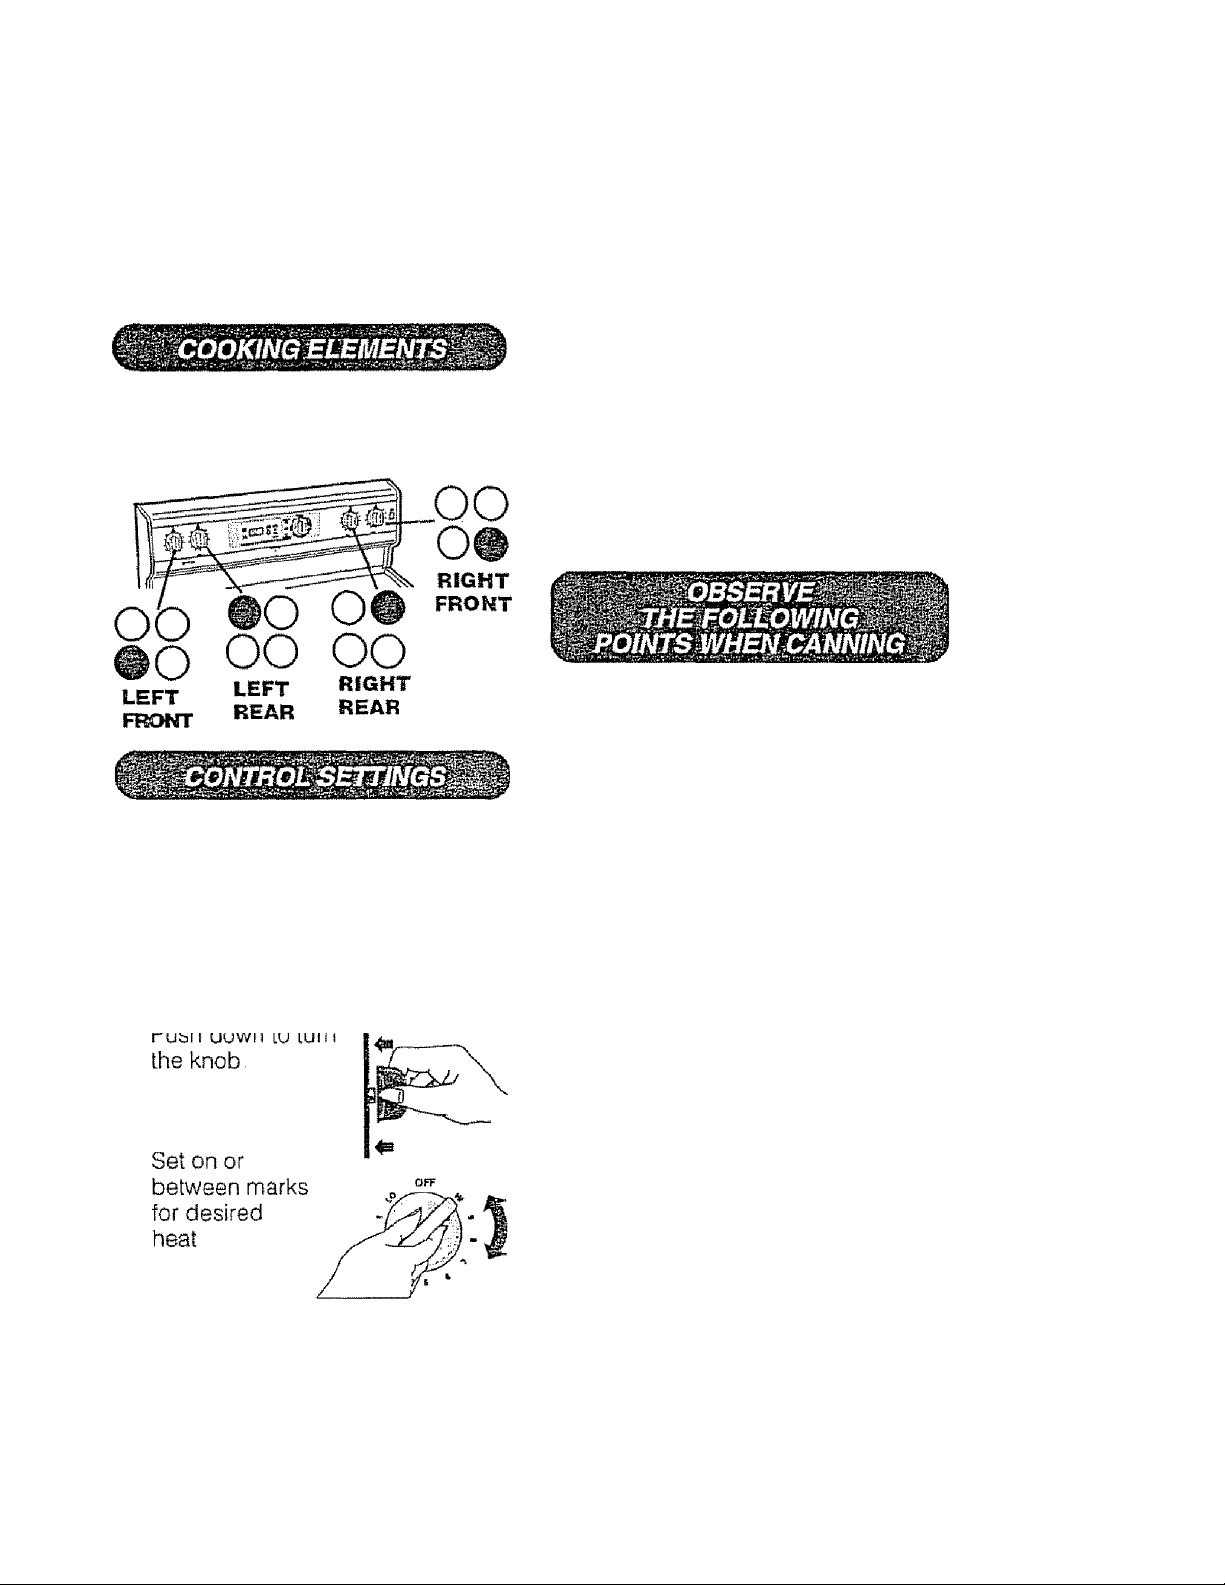
Cooktop Cooking
The sign near each control knob
shows you which element is turned
on by that knob.
Water-bath or pressure canners and
large diameter pots extending more
than r beyond the edge of the
cooktop element may be used tor
canning. However, do not use large
diameter canners, pots or pans for
anything other than boiling water
Most syrup or sauce mixtures, and ail
types of frying, cook at temperatures
much higher than boiling water. Such
temperatures could eventualiy harm
the cooktop surfaces surrounding the
surface units.
1. Be sure the canner is centered
over the element,
2. Make sure the canner is fiat on the
bottom,
HI
MED
LO
1.
When any surface unit is on, the
surface unit indicator light wili be on.
Used for quick starts, such as
bringing water to a boil
Used for slow boiling and
sautéing,
Used for steaming foods or
keeping cooked foods at
serving temperature.
3. Use recipes and procedures from
reputable sources These are
available from manufacturers such
as Ball® and Kerr®, and the
Department of Agriculture Exten
sion Service.
4. Use caution while canning, to
prevent burns from steam or heat.
8

OPERATION
KenmaiM
|ndUl
mm
; V inj.M—1> : uttaifinMta'" « tmì iwm mm bum»
Your new range CLOCK, TIMER and OVEN operations are simple and easy to
understand-
Clock, Timer & Oven Control
The HOUR/MIN arrow pads allow you
to set the exact time you need
The display in the center of your control
will show:
1. The time of day CLOCK,
2. The amount of time you choose
when using the TIMER,
3. The temperature selection as you
turn the oven control knob
Your control has individual indicator
lights that will show you the operations
you have chosen
As you read through your manual, you
will find what each of these indicators is
used for and how they will help you in
understanding your new control.
If the display flashes an “F” followed by
a number and beeps continuously, you
have a function error code. Note the
number after the “F” Turn the oven
control knob to the OFF position, Allow
the oven to cool for about 1 hour and
retry the oven operation, if the problem
repeats call for service. Advise the
technician what the flashing code was.
When the power to your range is turned
on for the first time, the display will flash
the time when the power was turned off.
You can set the clock a! this point, or
press the Clock pad to stop the
flashing.
As a safety feature, this oven will
automatically shut off if it has been left
on for more than 12 hours. This feature
can be disabled See page 14.
Your new control has the special feature
of blacking out the display (have
nothing showing in the display) To
activate this feature:
if the time of day is showing in the
display, press the CLOCK pad once,
To bring back the display from the time
of day black-out, press the CLOCK
pad twice
 Loading...