

Kenmore 911.62471, 911.62478, 911.62175, 911.91171, 911.91178 Owner's Manual
...
OWNER'S MANUAL
30" ELECTRIC
FREE-STANDING
RANGE
MODEL NO.
911.62471
911.62478
911.62175
911.91171
911.91178
911.91181
911.91188
CAUTION:
Before using this range,
read this manual and
follow all its Safety Rules
and Operating
Instructions.
• Safety Instructions
• Operation
• Care and Cleaning
• Problem Solving
Sears, Roebuck and Co., Hoffman Estates, IL 60179 U.S.A.
(_ 229C4020P 104-2 SR 10332
Tableof Contents
FREE-STANDINGRANGE
To Set Roast ........................... 11
Broiling ................................... 12
Range Safety ......................... 3-6
Stability Device ......................... 3
Removal of Packaging Tape .... 7
Features of Your Range ........... 7
Cooking Elements .................... 8
Control Settings ........................ 8
Home Canning ......................... 8
Oven Cooking Tips .............. 9-11
Strong Smell or Odor ................ 9
Aluminum Foil ........................... 9
Oven Vent ................................. 9
Preheating ................................ 9
Oven Temperature Sensor ....... 9
No Peeking ............................... 9
Bakeware ................................ 10
Bakeware Placement .............. 10
Element Cycling ..................... 10
Oven Racks ............................ 10
Oven Temperature
Adjustment ....................... 11, 20
To Set Bake ............................ 11
Care and Cleaning ............ 13-17
Control Panel .......................... 13
Broiler Pan and Grid ............... 13
Cooktop And Burner
Box Bottom ............................. 13
Painted Surfaces .................... 13
Glass ...................................... 13
Oven Interior ........................... 13
Control Knobs ......................... 14
Oven Light .............................. 14
Storage Drawer ...................... 15
Lift-Up Cooktop ...................... 16
Cooktop Units ......................... 16
Oven Racks ............................ 17
Oven Door .............................. 17
Before Calling for Service ...........
.......................................... 18, 19
Temperature Adjustment ....... 20
Warranty ................................. 21
Consumer Service Numbers .. 22
For your convenience and future reference, please write down
your model and serial numbers in the space provided. They are
located behind the Storage drawer.
MODEL NUMBER:
SERIAL NUMBER:
2
IMPORTANTSAFETY
INSTRUCTIONS
SAVE THESE INSTRUCTIONS
Read all instructions before using this appliance. When using
gas or electrical appliances, basic safety precautions should
be followed, including the following:
Injury To Persons
Could Result
Device Packed With
See Installation
!
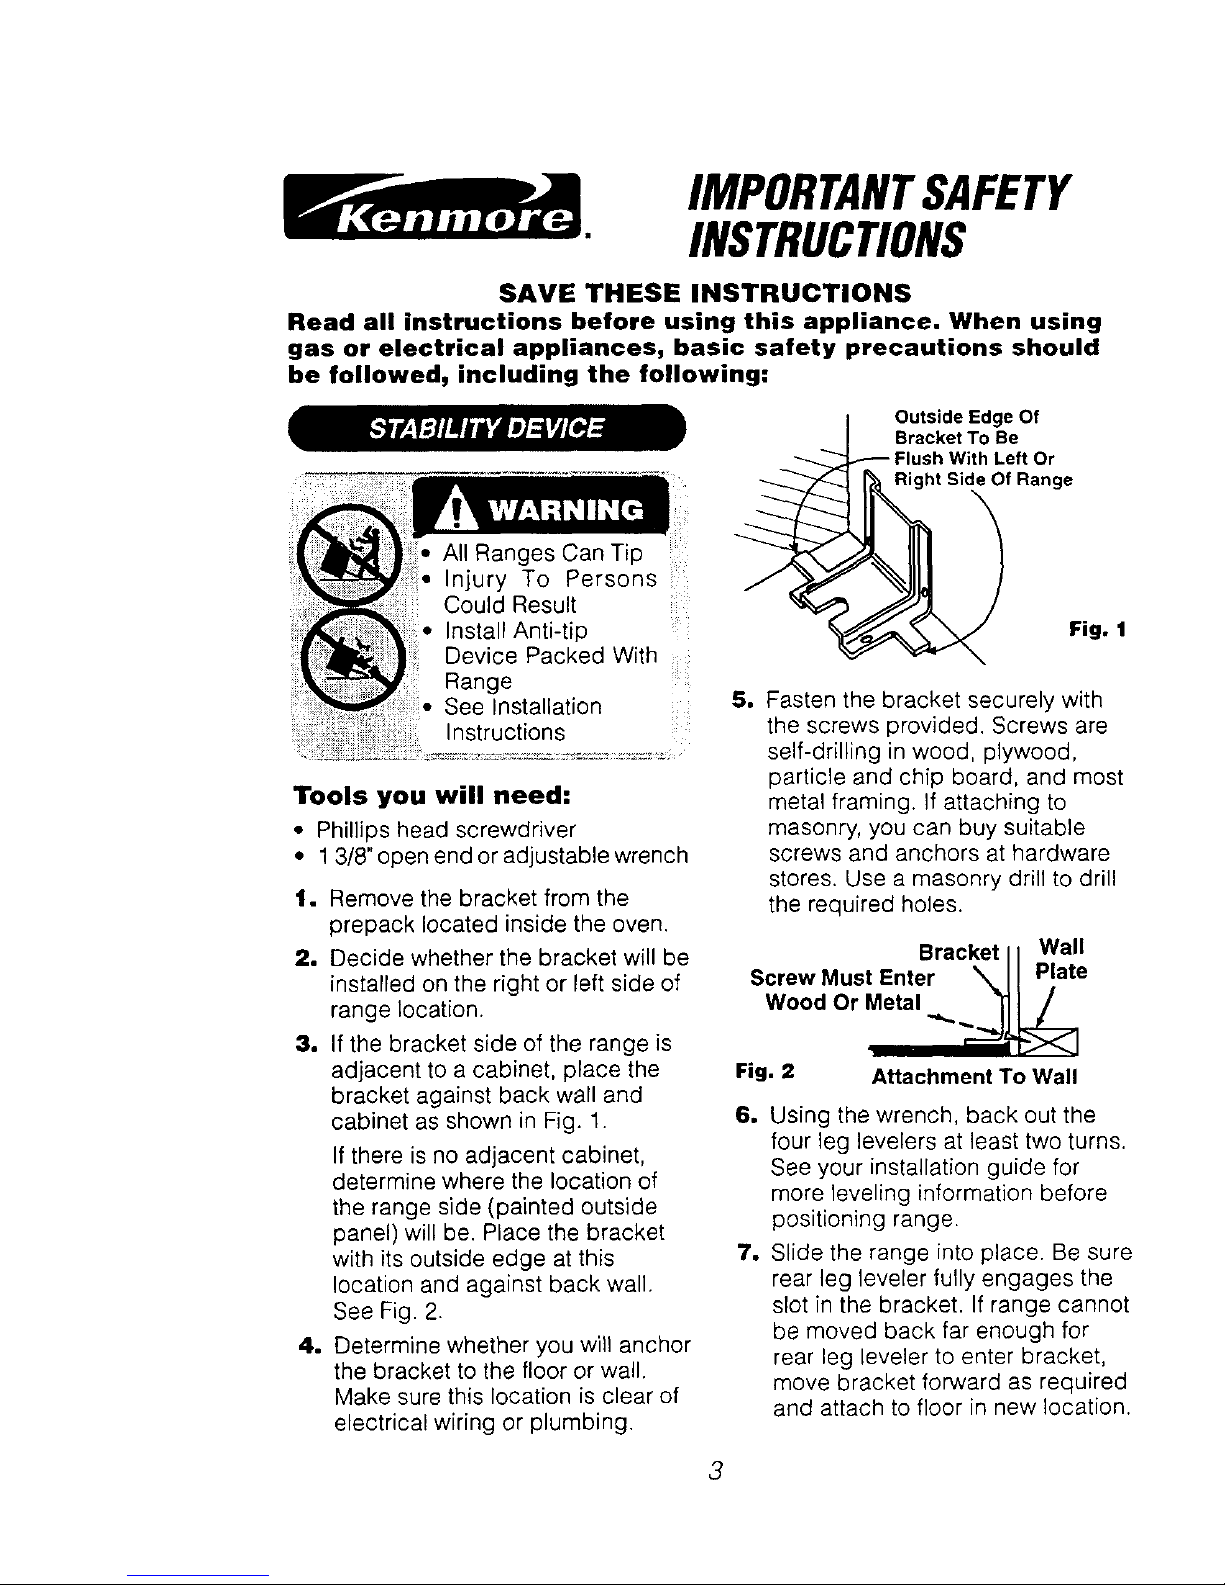
Tools you will need:
• Phillips head screwdriver
• 13/8" open end or adjustable wrench
1. Remove the bracket from the
prepack located inside the oven.
2. Decide whether the bracket will be
installed on the right or left side of
range Location.
3, If the bracket side of the range is
adjacent to a cabinet, place the
bracket against back wall and
cabinet as shown in Fig. 1.
If there is no adjacent cabinet,
determine where the location of
the range side (painted outside
panel) will be. Place the bracket
with its outside edge at this
location and against back wall.
See Fig. 2.
4. Determine whether you will anchor
the bracket to the floor or wall.
Make sure this location is clear of
electrical wiring or plumbing.
Outside Edge Of
Bracket To Be
Flush With Left Or
ide Of Range
Fig. I
So
Fasten the bracket securely with
the screws provided. Screws are
self-drilling in wood, plywood,
particle and chip board, and most
metal framing. If attaching to
masonry, you can buy suitable
screws and anchors at hardware
stores. Use a masonry drill to drill
the required holes.
Bracket II Wall
Screw Must Enter \ II Plate
Wood Or Metal -,_,._
I I_1
Fig. 2 Attachment To Wall
o
1
Using the wrench, back out the
four leg levelers at least two turns.
See your installation guide for
more leveling information before
positioning range.
Slide the range into place. Be sure
rear leg leveler fully engages the
slot in the bracket. If range cannot
be moved back far enough for
rear leg leveler to enter bracket,
move bracket forward as required
and attach to floor in new location.
3
IMPORTANTSAFETY
INSTRUCTIONS
WARNING! To pre-
vent accidental tipping
of the range from ab-
normal usage, including ex-
cessive loading of the oven
door, attach the range to the
wall or floor by installing the
Anti-Tip device supplied. If the
range is moved for cleaning,
servicing or any reason, be
sure the Anti-Tip device is re-
engaged properly when the
range is slid back in the open-
ing. Failure to do so could
result in the range tipping or
personal injury. To inspect the
anti ;.ttip device, remove the
storage drawer and look to
see if the rear leg leveler fully
engages the slot in the
bracket.
Important: To insure safety for
yourself, family and home, please read
your Owner's Manual carefully. Keep it
handy for reference. Pay close attention
to Safety Sections. BE SURE your
appliance is installed and grounded by a
qualified technician.
• DO NOT leave children alone or
unattended near an appliance in use.
• TEACH CHILDREN not to play with
controls or any part of the appliance,
and not to sit, climb or stand on the
door, or any other part of the appliance.
CAUTION: NEVER STORE items
of interest to children on the
backguard or in cabinets above the
appliance Children climbing on the
appliance could be seriously injured
• KEEP THIS book for later use.
• NEVER USE your appliance for
warming or heating the room.
• NEVER TRY to repair or replace any
part of the appliance unless instruc-
tions are given in this manual All other
work should be done by a qualified
technician.
• ALWAYS KEEP combustible wall
coverings, curtains, dish cloths,
towels, potholders, and other linens a
safe distance from the appliance.
• NEVER HEAT unopened food
containers. Pressure buildup can
cause the container to burst and cause
injury.
• NEVER LEAVE jars or cans of fat or
drippings in your oven.
• ALWAYS KEEP the oven and
surface unit areas free from things that
will burn. Food, wooden utensils, and
grease buildup could catch fire
Plastic utensils could melt and canned
foods could explode Your appliance
should never be used as a storage
area.
• ALWAYS KEEP your appliance clear
of things that will burn (gasoline and
other flammable vapors or liquids).
• NEVER TRY to clean a hot surface.
Some cleaners produce noxious
fumes, and wet cloths or sponges
could cause steam burns.
• NEVER WEAR loose fitting clothing
when using your appliance.
• NEVER USE a towel or other bulky
cloth as a potholder, and make sure
the potholder is dry. Moist potholders
and wet cloths or sponges could
cause steam burns DO NOT let
potholders touch hot heating elements.
4

IMPORTANTSAFETY
INSTRUCTIONS
• DO NOT touch heating elements,
surfaces near them, or interior oven
surfaces. These may be hot enough to
cause burns even though they are
dark in color. During and after use. do
not touch or let clothing or flammable
material contact the etements or hot
surfaces until they have had time to
cool. Other surfaces near the oven
vent openings, oven door and
window, and cooktop surfaces may
also be hot enough to cause burns.
• ONLY SOME kinds of glass or
ceramic cookware can be used for
cooktop cooking. Make sure the
cookware you choose to use is
designed for cooktop cooking without
breaking due to the sudden tempera-
ture change.
• ALWAYS USE care when touching
cooktop elements. They will retain
heat after the range has been turned
off.
• NEVER BLOCK the oven air vent
under the right rear element.
• COOKWARE USED for coektop
cooking should be flat on the bottom
and large enough to cover the heating
area being used. Undersized utensils
expose the heating element and may
result in direct contact or ignition of
clothing.
• ALWAYS USE drip bowls to prevent
wiring and component damage. Do
not use aluminum liners or foil in drip
bowls. Improper use may result in risk
of electrical shock or fire.
• NEVER LEAVE surface units
unattended at high settings. Believers
result in smoking or greasy spills
which could catch fire.
• ALWAYS TURN utensil handles
inward and away from other surface
units to reduce the risk of burns.
ignition, unintended contact, and
spillage.
• NEVER put heating elements in
water.
• WHEN PREPARING flaming foods
under the hood. turn the fan on.
• PLACE OVEN RACKS in the
desired position while the oven is
coot. If racks must be moved while
oven is hot. do not !et potholder
contact the hot oven element.
• AFTER BROILING, always take
the broiler pan and grid out of the
oven and clean them Leftover
grease in the broiler pan could catch
fire the next time you use your oven.
• ALWAYS USE care when opening
the oven door. Let hot air and steam
escape before mowng foods.
• NEVER USE aluminum foi! to line the
oven bottom. Improper use of foil could
result in the risk of electrica! shock and
fire.
5
IMPORTANTSAFETY
INSTRUCTIONS
ill
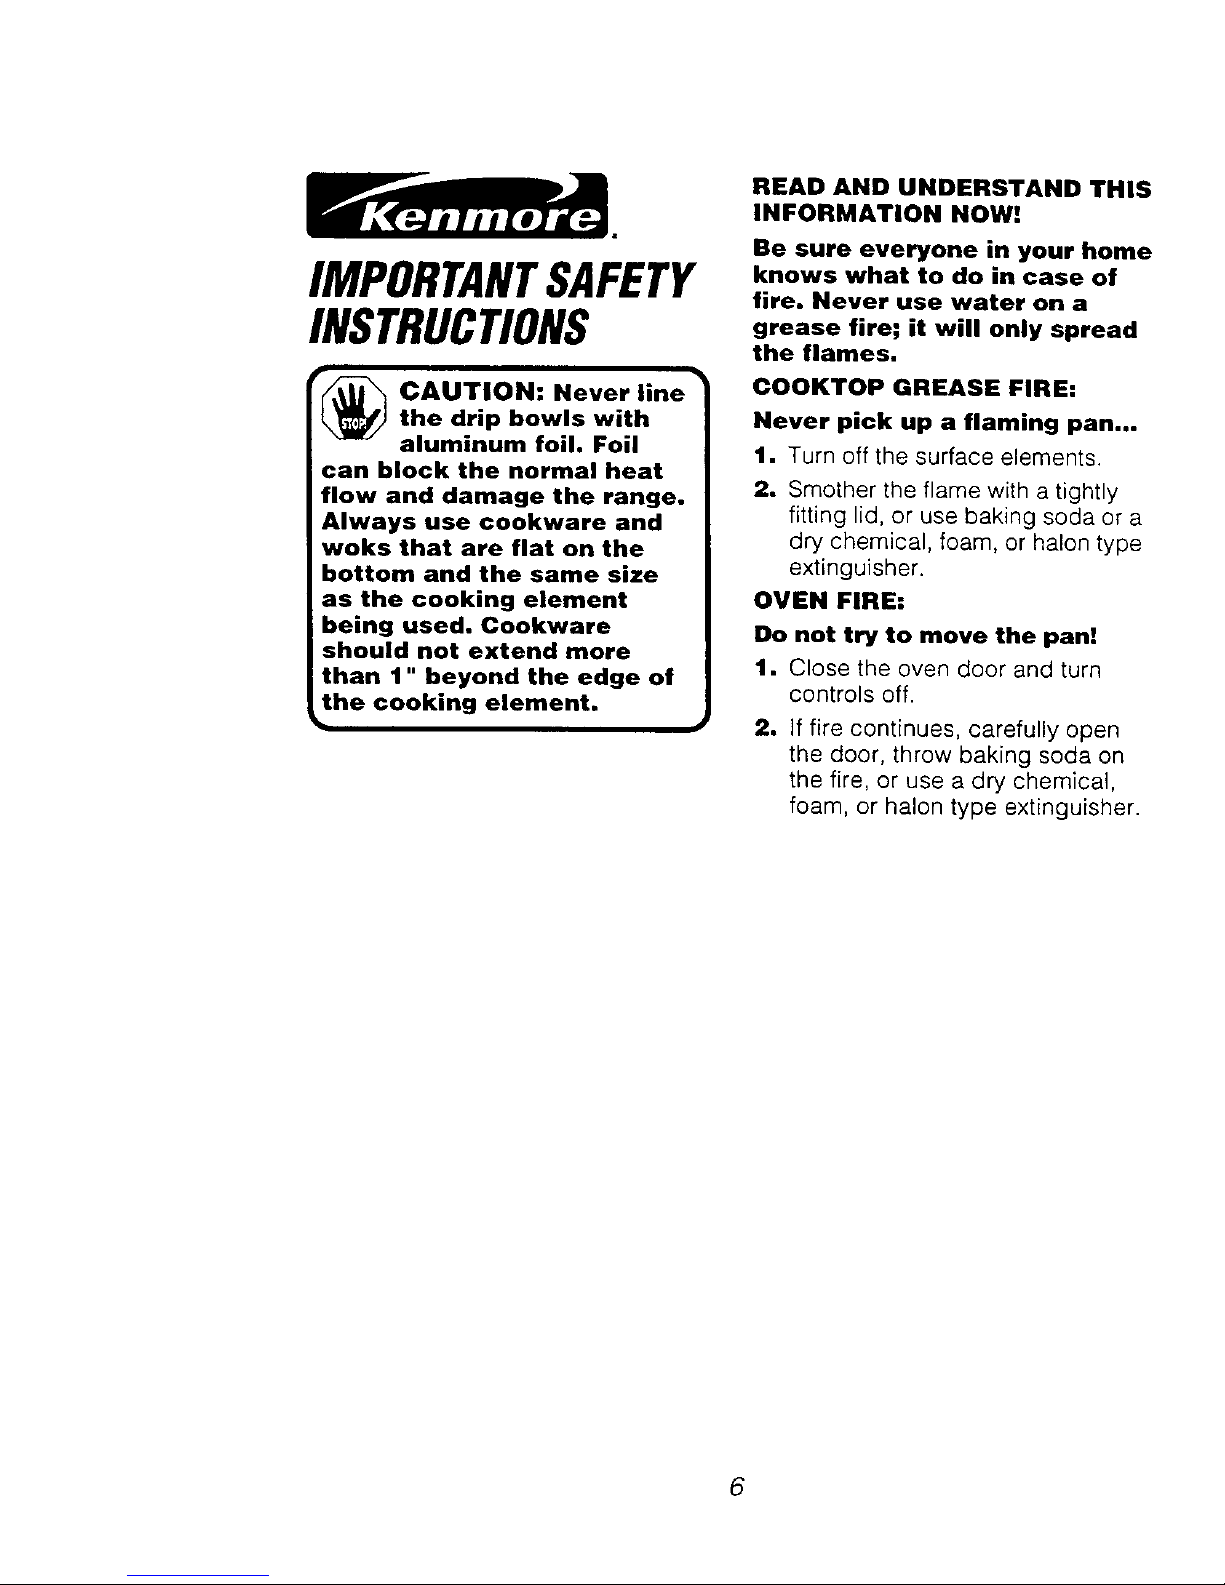
r_ CAUTION: Never line
the drip bowls with
aluminum foil. Foil
can block the normal heat
flow and damage the range,
Always use cookware and
woks that are flat on the
bottom and the same size
as the cooking element
being used. Cookware
should not extend more
than 1" beyond the edge of
the cooking element.
READ AND UNDERSTAND THIS
INFORMATION NOW!
Be sure everyone in your home
knows what to do in case of
fire. Never use water on a
grease fire; it will only spread
the flames.
COOKTOP GREASE FIRE:
Never pick up a flaming pan...
1. Turn off the surface elements.
2. Smother the flame with a tightly
fitting lid, or use baking soda or a
dry chemical, foam, or halon type
extinguisher.
OVEN FIRE:
Do not try to move the pan!
1. Close the oven door and turn
controls off.
2. If fire continues, carefully open
the door, throw baking soda on
the fire, or use a dry chemical,
foam, or halon type extinguisher.
6
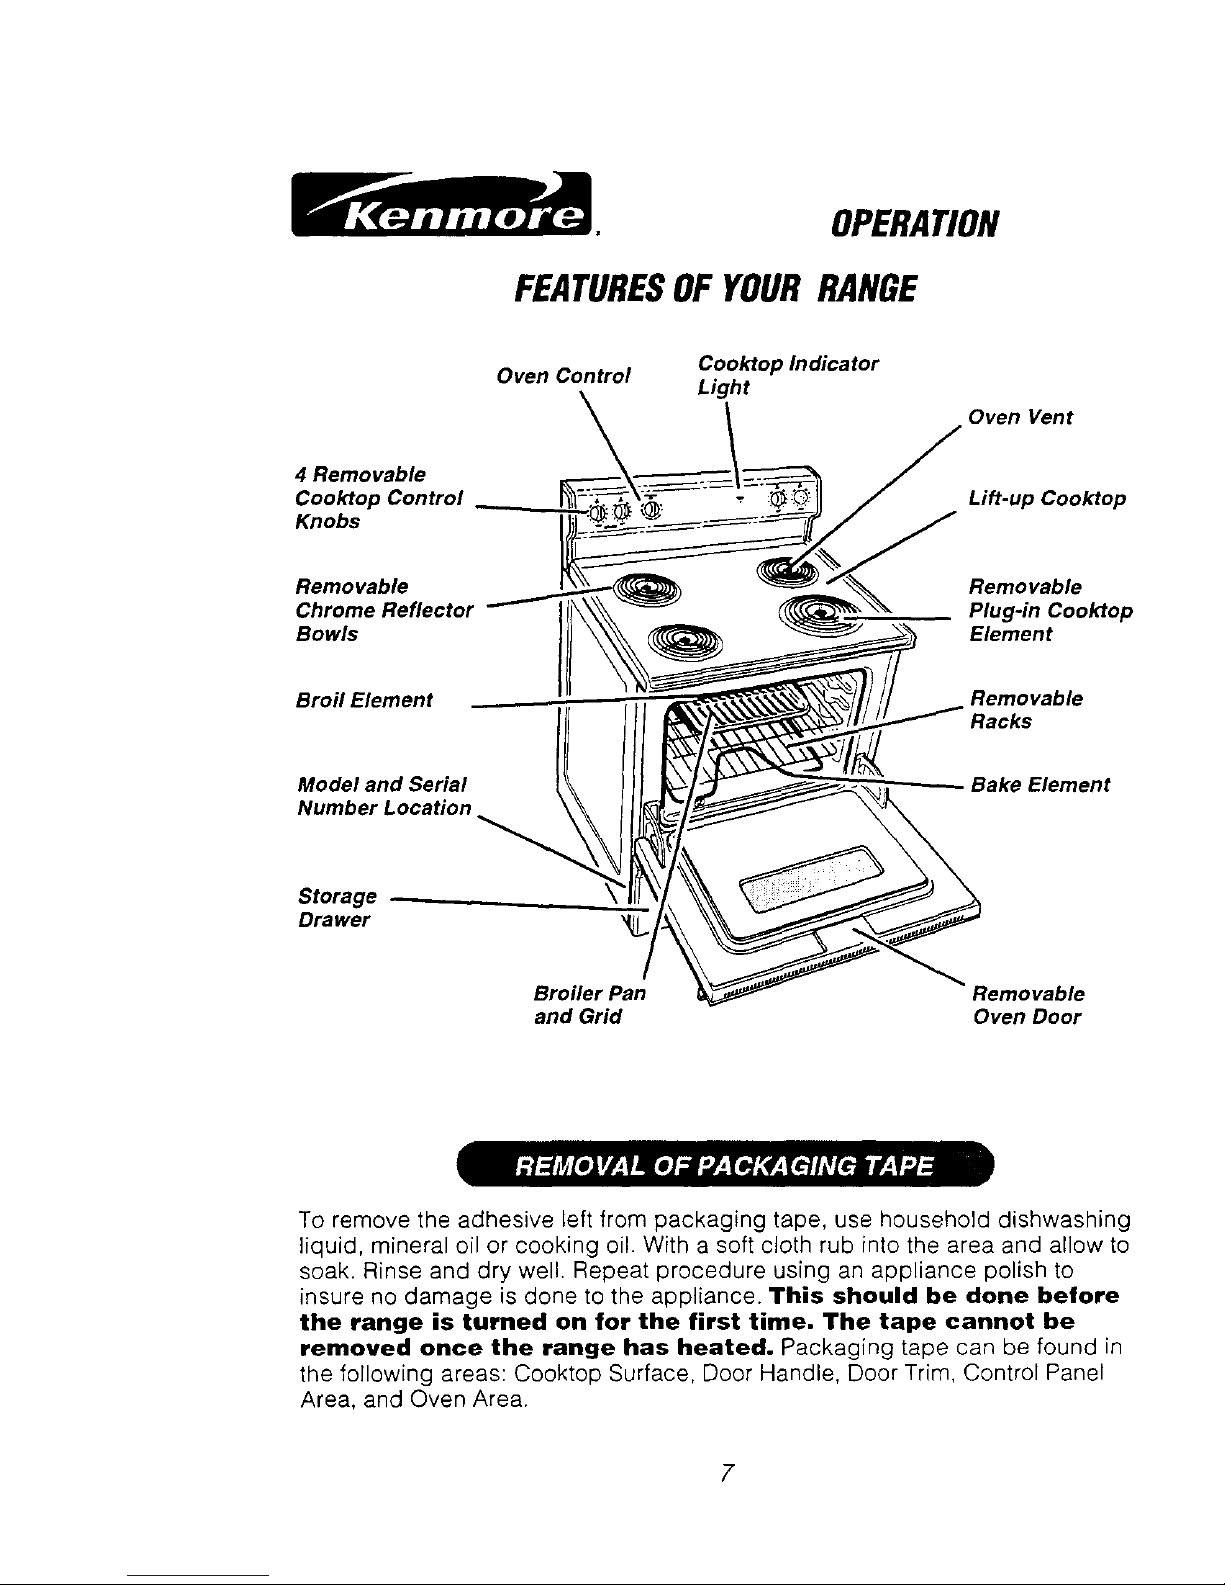
OPERATION
FEATURESOF YOURRANGE
Oven Control
Cooktop Indicator
Light
Oven Vent
4 Removable
Cooktop Control
Knobs
Lift-up Cooktop
Removable
Chrome Reflector
Bowls
Removable
Plug-in Cooktop
Element
Broil Element Removable
Racks
Model and Serial
Number Location
Bake Element
Storage --
Drawer
Broiler Pan Removable
and Grid Oven Door
To remove the adhesive left from packaging tape, use household dishwashing
liquid, mineral oil or cooking oil. With a soft cloth rub into the area and allow to
soak. Rinse and dry well. Repeat procedure using an appliance polish to
insure no damage is done to the appliance. This should be done before
the range is turned on for the first time. The tape cannot be
removed once the range has heated. Packaging tape can be found in
the following areas: Cooktop Surface, Door Handle, Door Trim, Control Panel
Area, and Oven Area.
7
 Loading...