

Page 1
BEms
USE & CARE
AAANUAL
STOCK NO.
88963
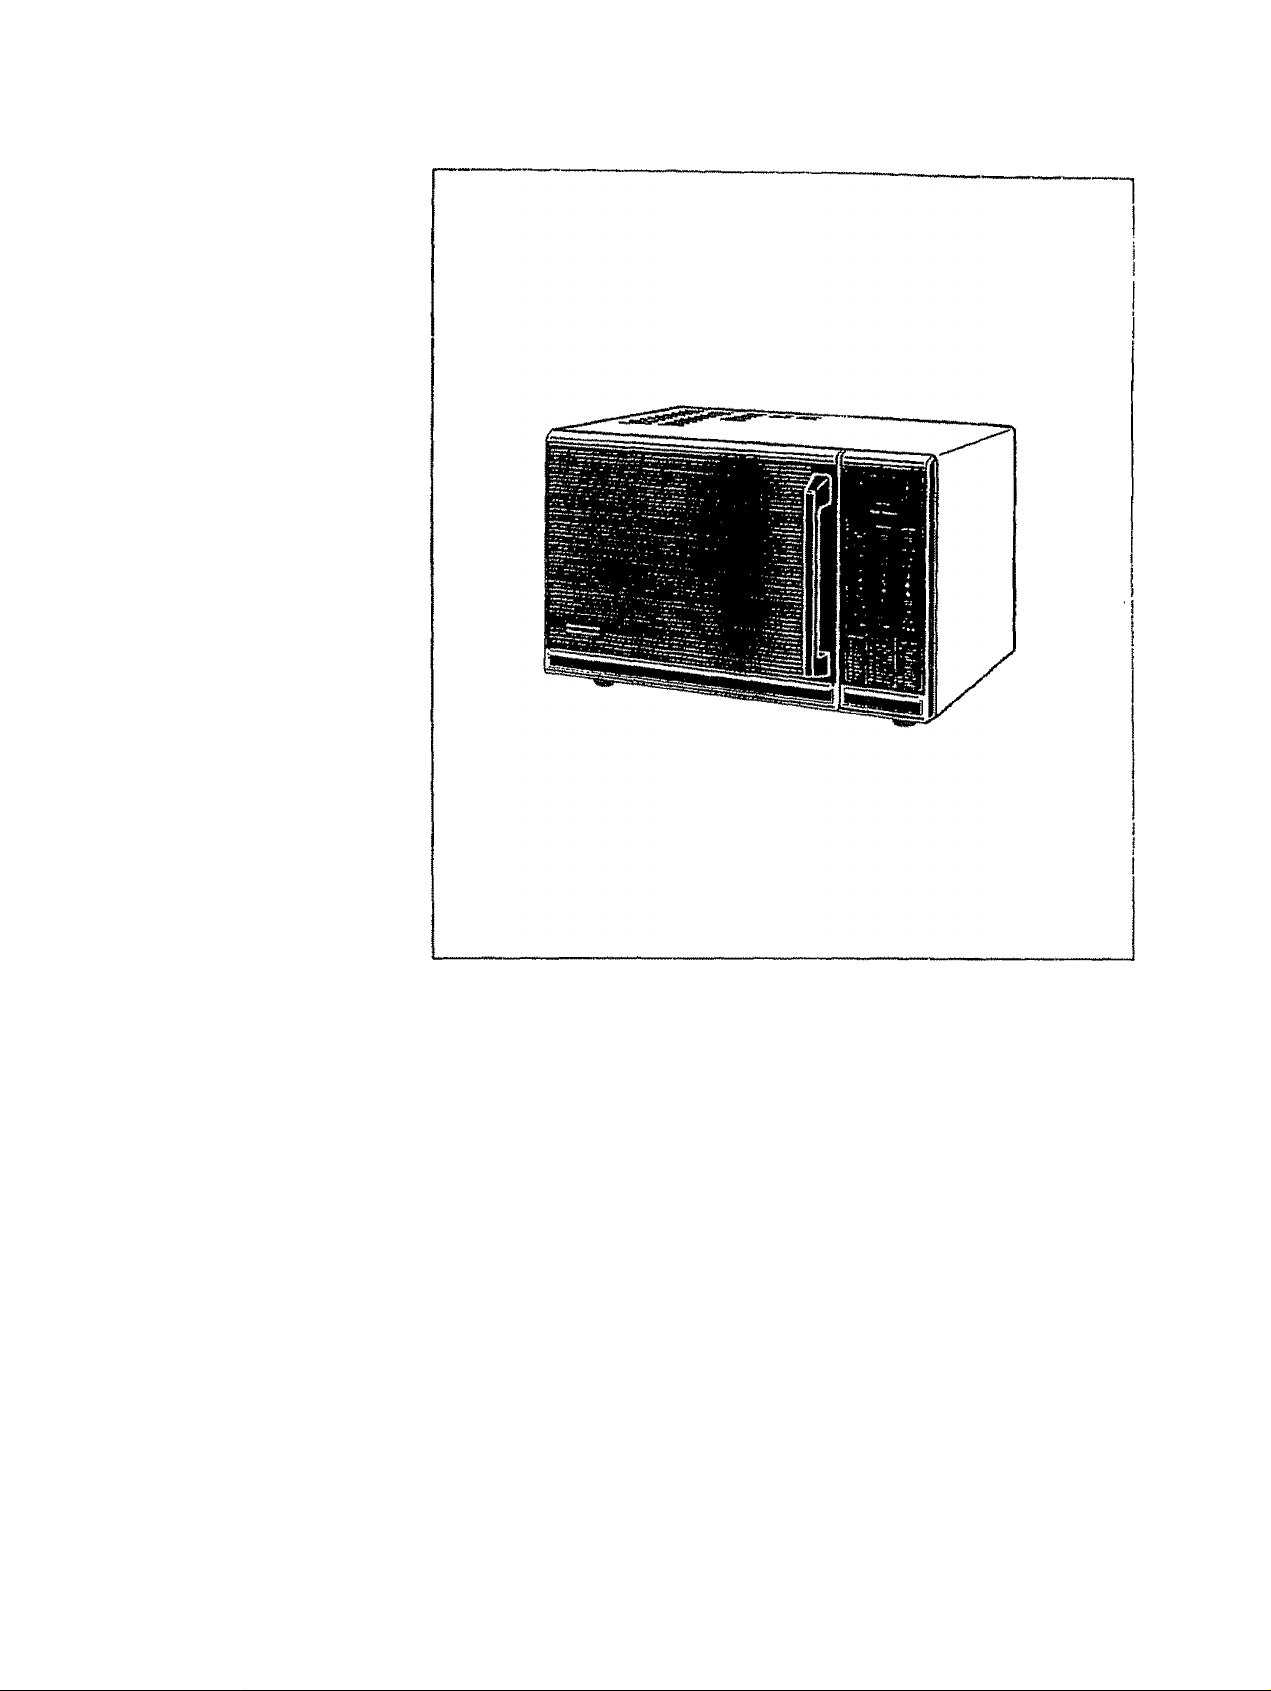
KNOW YOUR UNIT
Read this booklet so
you will be able to
enjoy all the features in
your Kenmore
Micro/Conuection
.. CX»en.
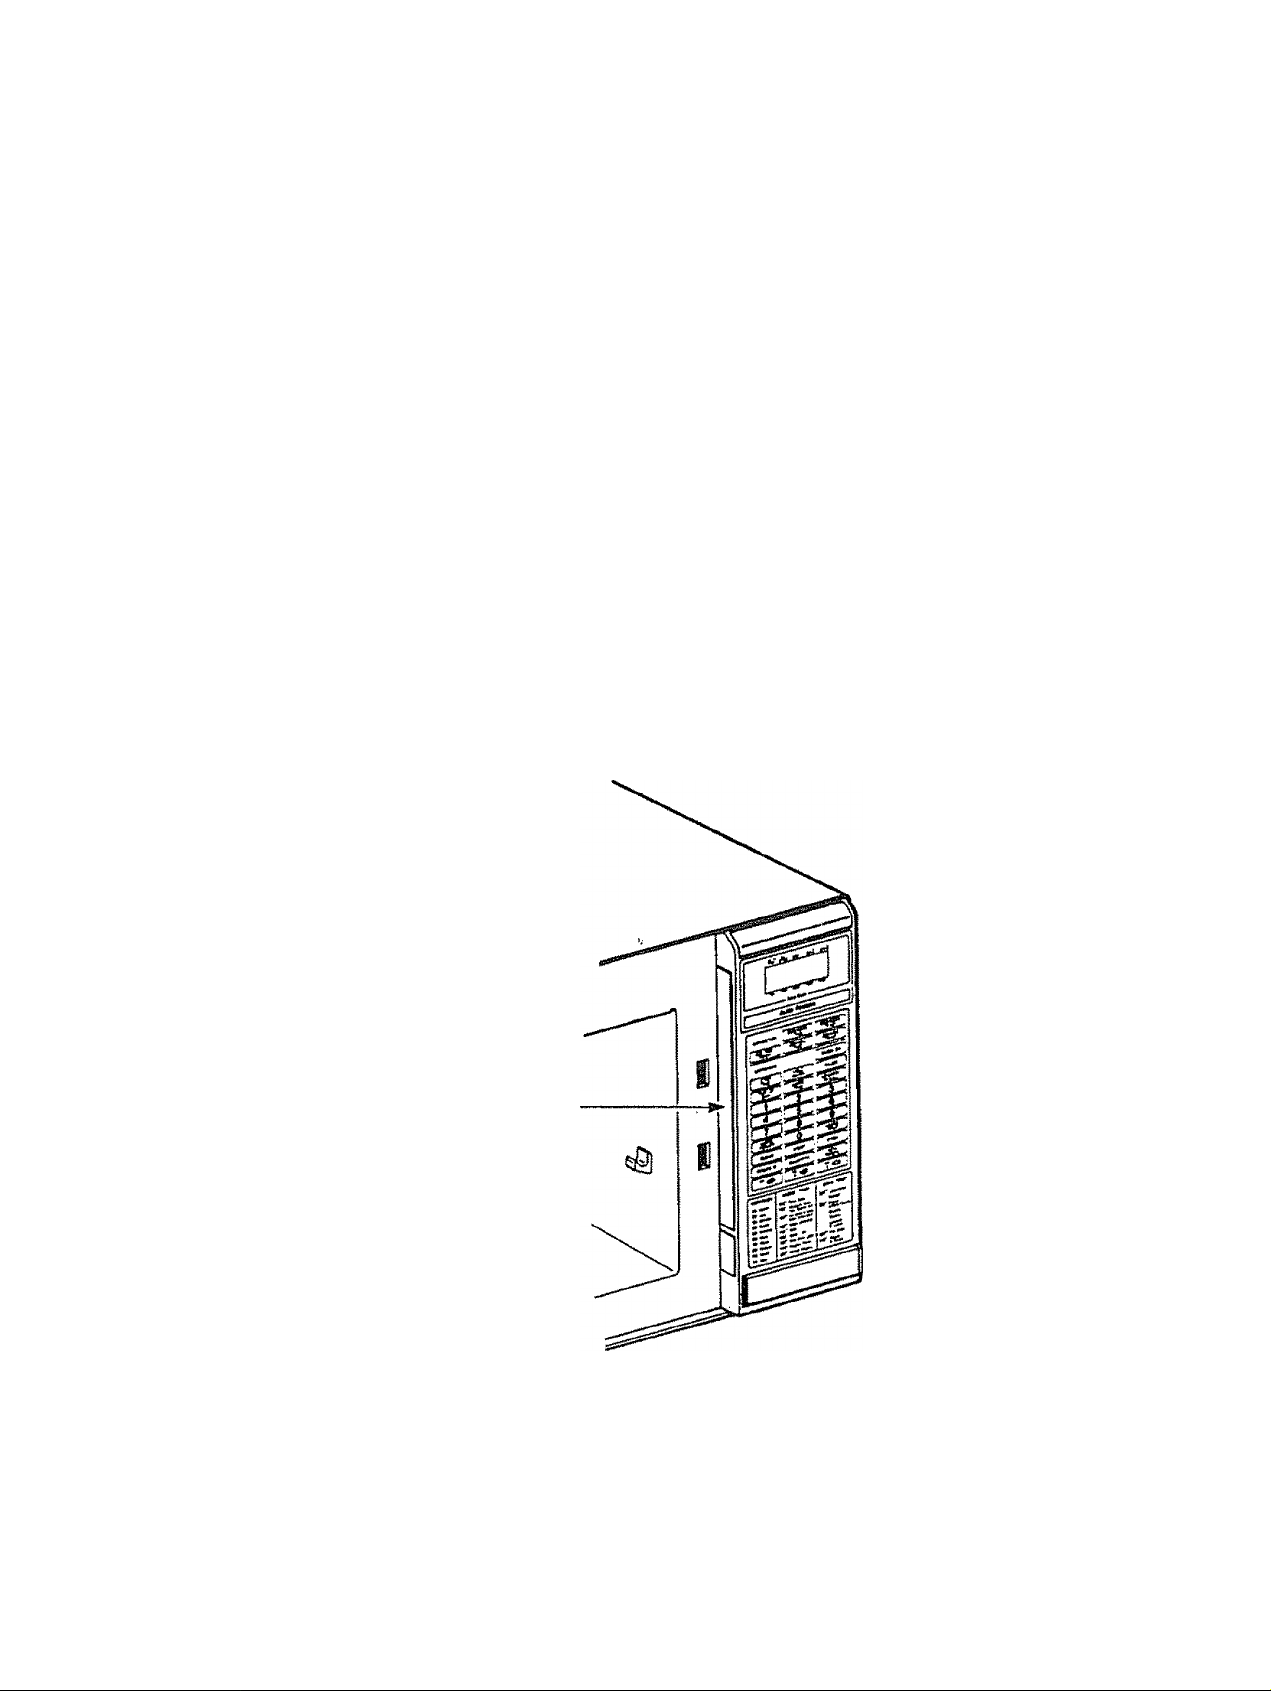
Record in space
provided below the
Model No. and the
Serial No. found
on the labels on
the inner left side
of control panel
Model No,
Serial No.
Retain this information
for future reference.
14846
MICRO/CONVECTION
OVEN
Use and Care
Sears, Roebuck and Co., Chicago, IL. 60684. U.S.A.
Page 2

YOUR SAFETY FIRST
Tne Sears Kenmore Microwave/Convectîon Oven, thoush simple to use, is not a toy. Respect it as an ekclric
cooking appliïmce, Become familiar with microwave energy, its uses, and limitations,
PRECAUTIONS TO AVOID POSSIBLE EXPOSURE TO EXCESSIVE MICROWAVE ENERGY
(a) DO NOT ATTEMPT to operate this oven with the door open since open-door operation can result in
harmful exposure to microwave energy. It is important not to defeat or tamper with the safety
interlocks. ^
(b) DO NOT PLACE any object between the oven front face and the door or allow soil or cleaner residue
to accumulate on sealing surfaces.
(c) DO NOT OPERATE the oven if it is damaged. It is particularly important that the oven door dose
properly and that there is no damage to the:
CD DOOR (bent)
(2) HINGES AND LATCHES (broken or loosened)
(3) DOOR SEALS AND SEALING SURFACES:
(d) THE OVEN SHOULD NOT BE ADJUSTED OR REPAIRED BY ANYONE EXCEPT PROPERLY
QUAUFED SERVICE PERSONNEL.
IMPORTANT-FOR PROPER AND SAFE USE OF YOUR OVEN
o The oven must be level
« The electrical power cord must be kept dry and must not be ptrsclied or crushed in any way.
t The ceramic tray must be in the oven for the microwave or micro/convec cooking. However, the ceramic tray
must be removed from oven for the convection cooking. (See Rage 8 for detailed instructions.)
e The metal rack must be removed from oven when rack is not used for cooking,
o Place the cookware gently on the ceramic tray and handle the tray carefully to avoid breakage.
» When a browning dish is used, the browtung dish bottom must be at least 3/16 in. above cooking tray. Carefully
read and follow the instructions for the browning dish. Incorrect usage may cause the ceramic tray to break.
o The oven should be thoroughly checked by a trained service technician, should it be dropped or damaged, before
it is operated again
e The oven has several built-in safety switches to make sure the power remains off when the door is open. DO NOT
try to defeat these switches.
DONTS -
« DO NOT attempt to operate this oven with the door open.
• DO NOT run the oven empty without food in it.
• DO NOT operate the oven empty with the temperature probe plugged in.
• DO NOT let the temperature probe touch the side walls, ceramic tray or door of the cavity when in use!
• DO NOT plug the pointed end of the temperature probe into the socket inside the cavity,
e DO NOT use the temperature probe in a regular oven. This probe is designed for microwave/convection oven
only
• DO NOT use metal baking pan for microwave or micro/convec cooking,
e DO NOT cook bacon directly on the ceramic tray to avoid excessive local heating on the ceramic tray.
• DO NOT store burnable material, such as food, in your microwave/convection oven.
» DO NOT heat any types of baby bottles or baby food. Uneven heating may occur and possibly cause personal
injury.
o DO NOT heal small necked containers, such as syrup bottles, in the microwave oven.
• DO NOT use this microwave/convection oven for comercial purposes. This Sears Kenmore
Microwave/Convection Oven is made for household use only.
SAFETY CERTIFICATION
The Sears Kenmore Microwave/Convecthn Oven is designed and fhroughfy tested to meet exacting safety
standards. It meets UL and FCC requirements and complies ufith safety performance standards of the U.S.
Department of Health and Human Services.
Page 3

IMPORTANT SAFETY INSTRUCTIONS
When using electrical appliances basic safety precautions should be followed, including the following:
WARNING -To reduce the risk of
burns, electric shock, fire, injury to persons or
exposure to excessive microwave energy:
1, Read all instructions before using the appliance,
2 Read and follow the specific "PRECAUTIONS
TO AVOID POSSIBLE EXPOSURE TO EX
CESSIVE MICROWAVE ENERGY” found on
page 2.
3. As with most cooking appliances, close
supervision is necessary to reduce the risk of a
fire in the oven cavity .
NOTE: If a fire should start:
*KEEP THE OVEN DOOR CLOSED
*TURN THE OVEN OFF
♦AND DISCONNECT THE POWER CORD
OR SHUT OFF POWER AT THE FUSE OR
CIRCUIT BREAKER PANEL.
a. Do NOT grossly overcook foods. As many
grossly overcooked foods will cause fires in
the oven cavity, carefully attend the oven;
especially, if paper, plastic, or other com
bustibles are placed inside the oven.
b. Do NOT store combustible items such as,
bread, cookies, etc. inside the oven because if
lightening strikes the power lines it may cause
the oven to turn ON.
5. Install or locate this appliance only in
accordance with the provided installaiion
instructions.
6. Some products such as whole eggs, water with
oil or fat, sealed containers and closed glass jars
for example may explode and should not be
heated in this oven.
7. Use this appliance only for its intended use as
described in this manual,
8. As with any appliance, close supervision is
necessary when used by children.
9. Do not operate this appliance if it has a damaged
cord or plug, if it is not working properly or if it
has been damaged or dropped.
10. This appliance should be serviced only by
qualified service personnel. Contact nearest
authorized service facility for examination,
repair or adjustment.
11. Do not cover or block any openings on the
appliance.
12. Do not use outdoors.
13. Do not immerse cord or plug in water.
14. Keep cord away from heated surfaces.
c. Do NOT use wire twist-ties in the oven. Be
sure to inspect purchased items for wire
twist-ties and remove them before the item is
placed in the oven.
«
4. This appliance must be grounded. Connect only
to properly grounded outlet. See "GROUND
ING INSTRUCTIONS” found on page 6.
SAVE THESE INSTRUCTIONS
15. Do not let cord hang over edge of table or
counter.
16 , When cleaning surfaces of door and oven that
cdmes together on closing the door, use only
mild, non-abrasive soaps or detergents applied
with a sponge or soft cloth (See “Care and
Cleaning” instructions on page 47 .)
Page 4

TABLE OF CONTENTS
General Instructions.
■ Location of Model Number Label....
B IMPORTANT—Electrical Grounding Instructions
■ Installation.,..........................................
B Setting "Time of Day'*
B Names of Oven Parts
H Oven Control Panel
B How The Microwave/Convection Oven Works....................
User Instructions
H Easy Use Chart
H Recall and Change of Settings
■ Pause between Stages
B Regular Timer
B Hold Warm......,,....,
H Child Lock-Out
Detailed Directions
........................................................................................................................
8 Microwave Cooking
•> Quick-start Cooking---------------
..................................................
..................
............
......................
..........
.......................................................
....
..............................................
..................
....
........................................................................................
.....
......
................
• Cooking Guide for Multi-Power Settings/Wattage of Output Power
® “H!-Power'7‘'Multi-Power"Cooking
® "Temperature Controlled" Cooking
® Temperature Controlled “HI-Powcr"/“Multi'Power” Cooking
® Automatic Defrost
® Multi-Stage Cooking.............................
• Whole Meal Cooking..,..,.....,.,.
S Convection Cooking
® Convection Cooking with Automatic Preheat. ..,.................
» Temperature Probe Convection Cooking
» Cooking Guide for Convection Cooking
» Micro/Convec Cooking,
» Temperature Probe Miao/Conuec Cooking
» Temperature Controlled Cooking for Micro/Convcc Cooking
® Multi-Stage Cooking
■ Delay Start Cooking... B Preset Recipe Cooking...,.,
• Use of Quantity key
• ® Preset Recipes List....
■ Programming New Recipes.....
Oven Utensils Guide
Care and Cleaning
Questions and Answers
SearsService
Sears Warranty
...............................................
..............................
......
.......................................................................................
..............
...
....
.................................................
............................
...........................................
.................
.........—.....
............
..........................................-......................
.................................................
............................................................
.................-.....
..................................
.............
......
...........
..........
....................................................
...........................................
.........................
........
....................—....
i.....-
......
.............—
-----—
.........................
...............
........................................
.........—......................................................................
.....
.......................................................................
......
............
.......
..............
...................-..................................................................................
......................
...
....................
.............................................................................
................... ....................................................................................................
.....................
......
.........
...........
..............
................
..............................
.....................
..............
....................
...........................
.................
................
......—
............................
....
........
..............
.......-......................
.....................
..............
..................................
..........
—.—
.....................
......
..........
.............
....................................................
..........................................................................
..............................
................
..............................
..............
...............
.......
................................
..............
...................................... ..
..........................................,
............................................
......................—..........................
...............................
.......... ..
......................................
..............
.......
...
.....................................
.....................
........
.......................................... ...........
..........................................................16
«
............
............................
....................................................................... 20
.......................................................
...........
..........................................
......................................
.....................
.................
.......................
.........................................................................
.........
........
.............................
.......................
................................ 15
.....................
......
..........................................................
.......
..........
......
.........
...................—-------
......
.........—
.....................
........................
............................................................ .37—38
...............................
..................................................
......................—..............
....................................
...............................
........
................................ 7
........
........................ 9—10
................
.....
............................
................................
...........
........
.........
................................
......................................... 24
...............................
.................
.....................................
......................................
..........................................
..............
............
.............................. 46
.........
.................
......
....
.................... 17—29
..............
...................................
..........
..
.................
........... .
.........
.......................
........
-------------— 29
...........
....................
......—
..................
...
.............................. 35
.............................
.........
..................
................................
............
.............. 47
................. Back Cover
......'........
............
..... 8
........
...........
...........
.........
........
.........
......
......
........
5
5
7
11
12—14
15
16
16
17—18
19
21—23
25—26
27—28
30—38
31
32
33
34
36
39
40—41
40
41
42—45
48—49
50
Page 5
SEARS KENMORE MICROWAVE/CONVECTION OVEN
ÖSE AND CARE MANUAL-
MICRO WAVE/CONVECTION OVEN USE INSTRUCTIONS
Enjoy a пеш cooking experience from Sears. Please read this booklet
It takes only a few minutes — time well spent to learn how to use all of the
features.
Advice on the use and care of Sears appliances is always available at
your nearest Sears store. When seeking information, be sure you have
the complete model number which is located on the plastic label.
See below for its location.
MODEL NUMBER
To make a request for service, information or replacement of parts, Sears will require the complete model
number of your microwave/convection oven. The number is on the inner left side of the control panel. (You
must open the door to see the number).
The number will look like this: 564 8000000,
Model Number Label
Page 6

important-
electrical GROUNDING INSTRUCTIONS
This appliance must be grounded. In the event of an electrical short circuit, grounding reduces the risk
of electric shock by providing and escape wire for the electric current. This appliance is equipped with
a cord having a grounding wire with a grounding plug. The plug must be plugged into an outlet that is
properly installed and grounded.
WARNING
Consult a qualified electrician or Sears Service Department if the grounding instructions are not
completely understood, or if doubt exists as to whether the appliance is properly grounded.
A short power-supply cord is provided to reduce the risks resulting from becoming entangled in or
tripping over a longer cord.
Longer cord sets or extension cords are available and may be used if care is exercised in their use.
If a long cord or extension cord is used, (1) the marked electrical rating of the cord set or extension
cord should be at least as great as the electrical rating of the appliance*, (2) the extension cord must
be a grounding-type 3 wire cord, and (3) the longer cord should be arranged so that it will not drape
over the countertop or tabletop where it can be pulled on b^ children or tripped over accidentally. The
electrical power cord must be kept dry and must not be pinched or crushed in any way.
‘NOTE: This oven draws a 13.,8-ampere electrical current on 120 volts.
Improper use of the grounding plug can result in a risk of electric shock.
PROPERLY POLARIZED AND
Page 7
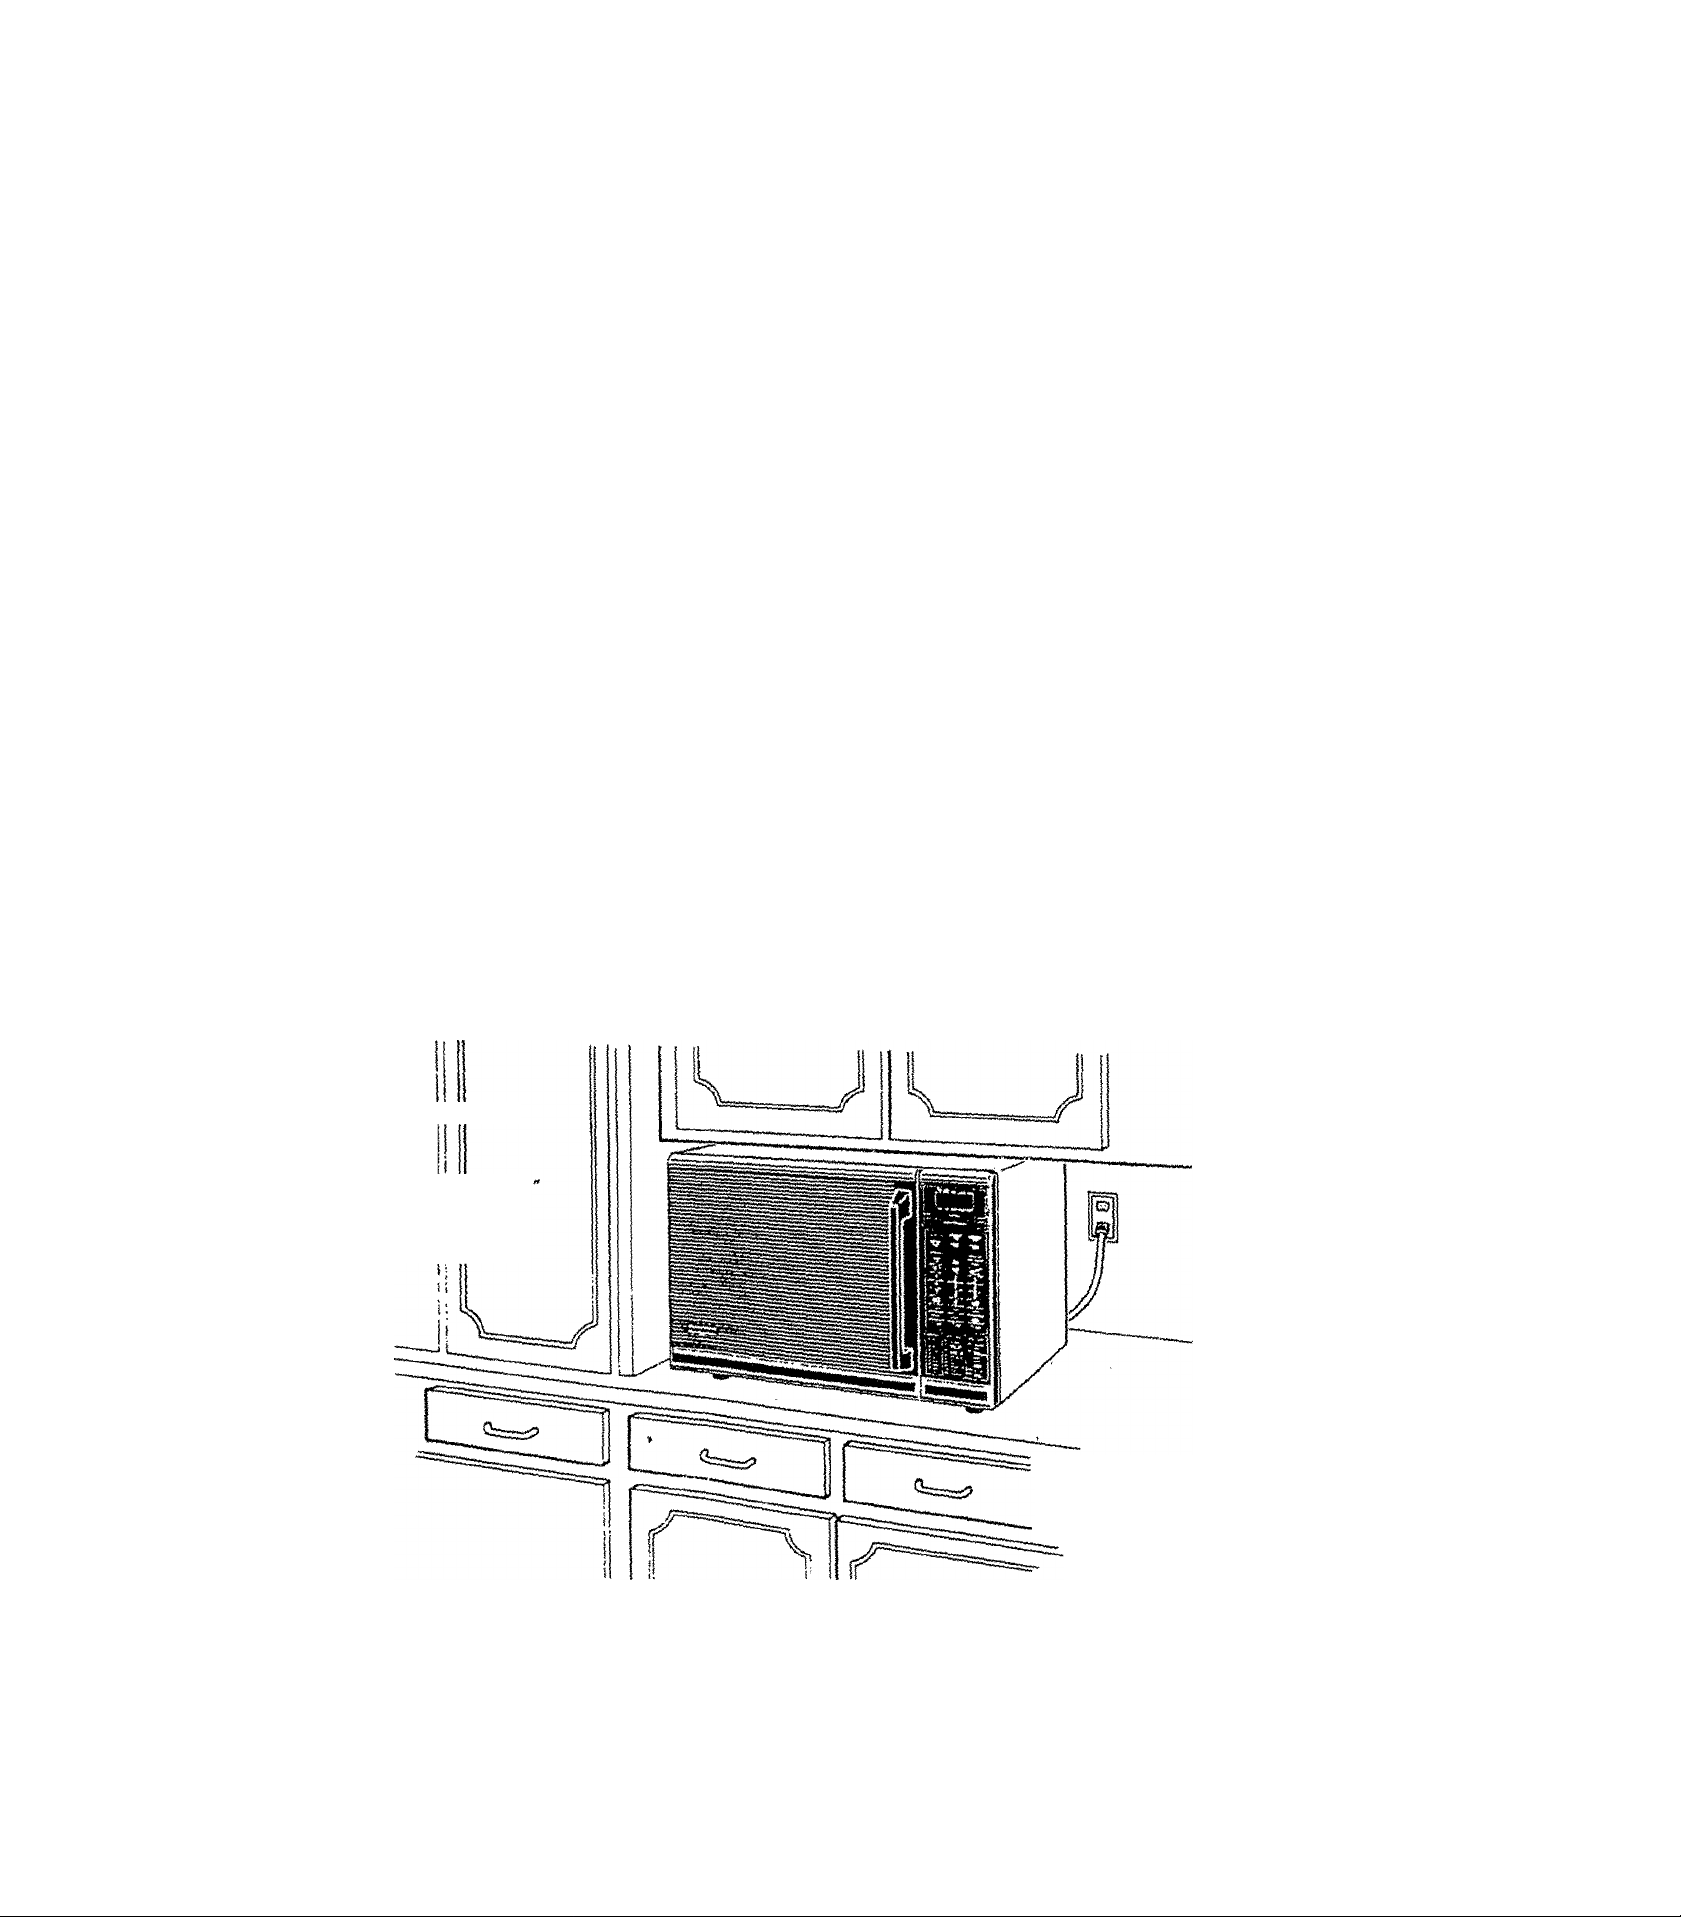
INSTALLATION
Install your oven by iollowins these four simple steps:
Step 1: Remove ail packing materia! and accessories. Then remove the protection sheet on wrapper.
Step 2: Place the oven in the level location of your choice, but make sure there is at least one inch of
space on the top and at the rear for proper ventilation. Top of the oven should be kept dear and
the plastic feet must be kept on the oven so there is air flow ventilation. The exhaust vents are
at the rear and top of the oven. “DO NOT place any objects such as books, papers, or
cooking accessories over the top of the exhaust vents ’* Blocking the vents can damage the
oven.
Step 3: Plug your oven into a Standard 120 volt household outlet. Be sure the electrical circuit is at least
15 amperes and that your microwave/convection oven is the only appliance on the drcu'rt.
Step 4: When your microwave/convection oven is plugged in for the first time or when power resumes
after a power interruption, the numbers in the display window will show “0;00" plus the hours and
rmnutes that have elapsed since the oven was plugged in or the power was restored. This means
that tl e TIME OF DAY dock must be set. Refer to "Setting Tane of Day" below.
NOTE: If your oven does not operate properly, unplug the oven from the 120-volt household outlet and
then plug it back in.
This unit is not designed for 50 Hz or any circuit other than a 120 voit/60 Hz AC circuit,
SETTING TIME OF DAY
« Touch CLEAR,
• Touch TIME OF DAY.
» Touch numbers indicating the correct time.
» Touch TIME OF DAY.
(This is also explained in the “Easy Use Chari” Time of Day Section on Page 12.)
DIMENSIONS
Height: 15-3/4
Width: 24'
Depth: 21'
Weight: 68 lbs.
When one side is
installed flush to
the wall, the opposite
side or top must be open.
Page 8

Exhaust Easy*cleaii
stainless steel cavity
Remove your Sears Kenmore Microwave/Convectipn Oven and al! items from the shipping carton,. Your oven
will be packed with the following items;
Ceramic Tray
Metal Rack
Tempcrature Probe.. , .
“Use and Care Manual” .
"Easy Use Chart” Card,,.
Cook Book,.
*The ceramic tray should always be in the oven when either the microwave or micro/convec cooking is used.
Microwaves pass through the tray and are reflected by the oven bottom back up to the underside of the food.
As a result, the food receives microwave energy on the bottom, top, and sides all at the same lime. However,
the tray should be removed for convection cooking to allow for the most even heating,
*Do not use this Sears Kenmore Microwave/Convection Oven for commercial purposes. This microwave/
convection oven is made for household use only
-----------------
...............
...... .
.............
................
*
1 each
1 each
1 each
1 each
1 each
1 each
Page 9
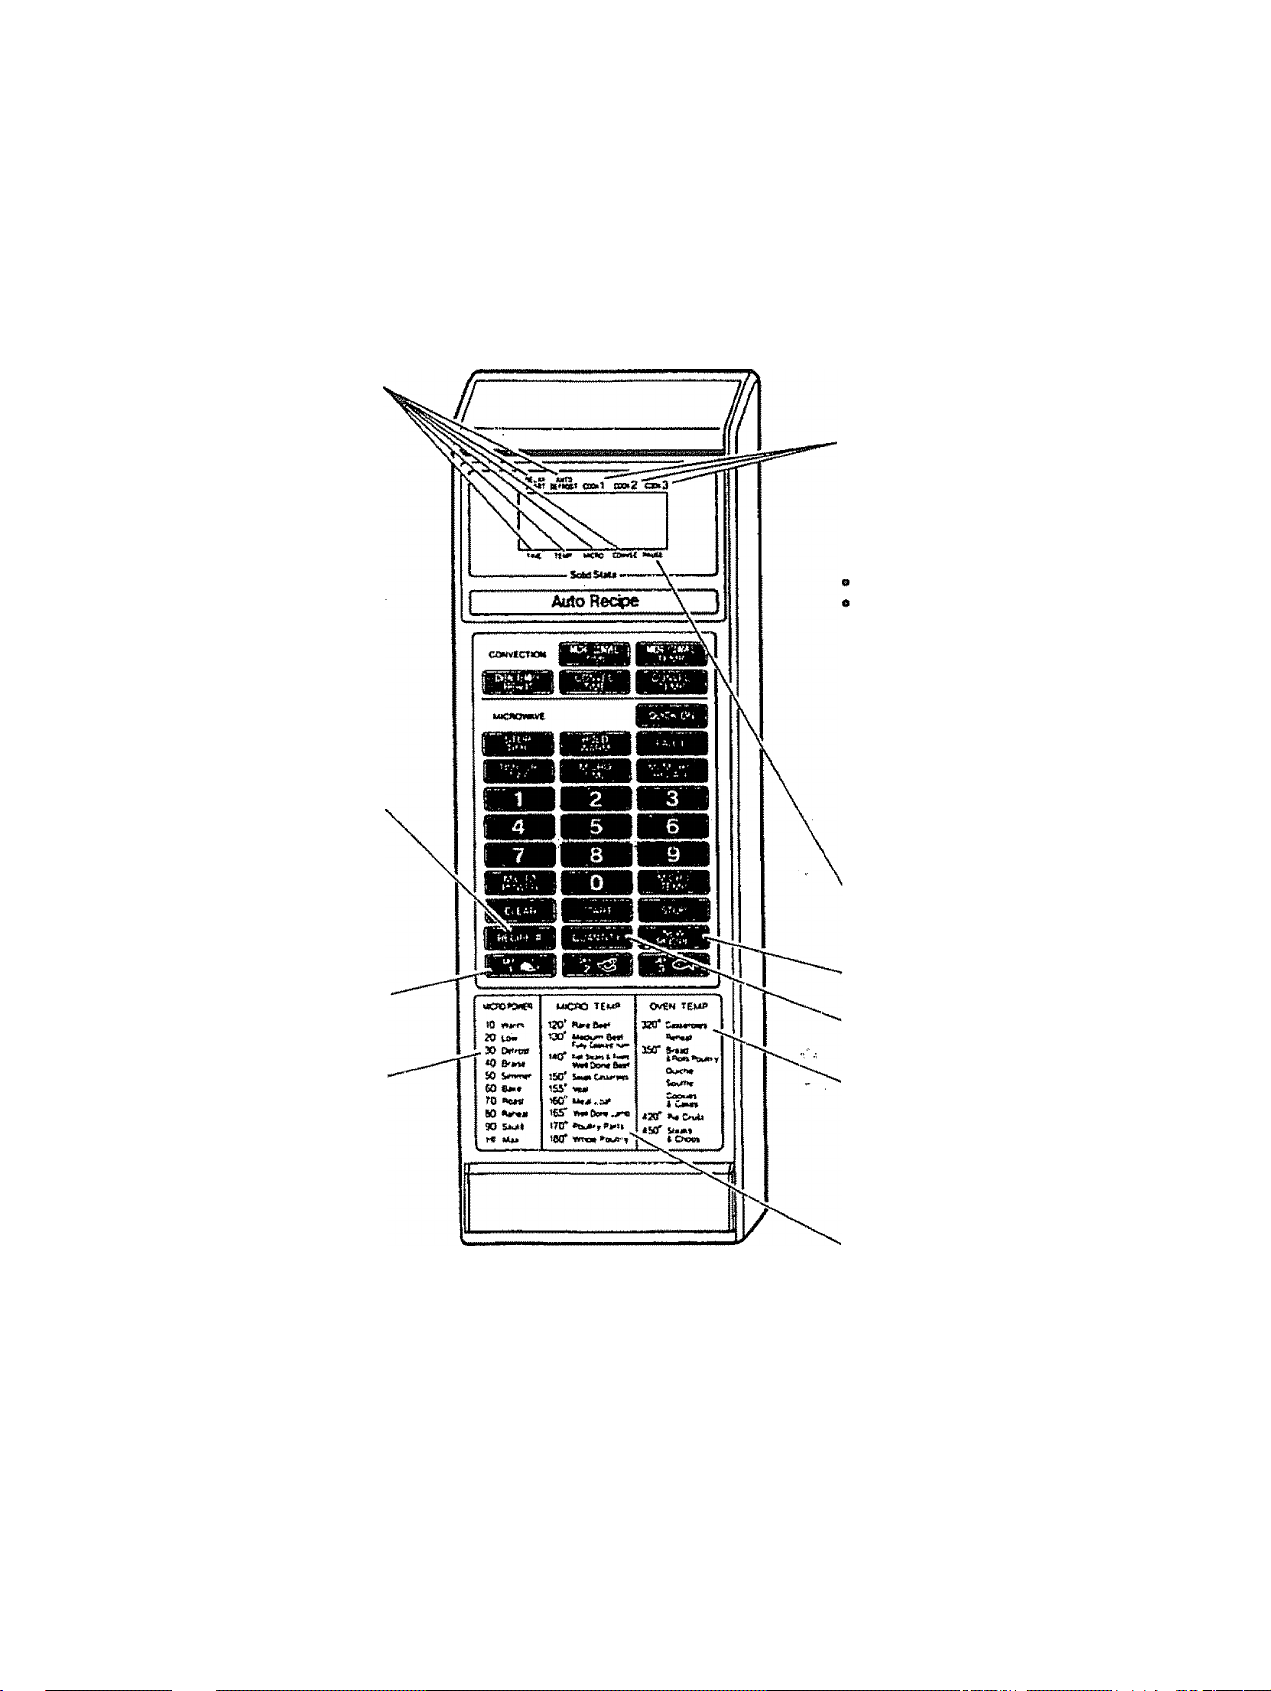
OVEN CONTROL PANEL
{ndicator Light—Time, Temp.
Micro. Convec Delay Start and
Auto Defrost lights indicate
which cooking operation is
being used.
Recipe w—Used in preset recipe
cooking.
Stage Lights—When cooking
stages are set, lights will go on
indicating the stage in which
your oven is cooking.
Display Window—Used to
show;
Time of Day
Cooking Time
o Microwave Cooking Power
Level
o Cooking Probe Temperature,
o Oven Temperature
» Auto Defrost (dEFl, dEF2,
dEF3)
® Recipe #, Quantity #
• Hold, End, PAUS (Pause),
Prob (Probe).
It also functions as countdown
timer or temperature indicator
when cooking.
Auto-Defrost Selection-
in setting auto defrost,
Micro Power Guide—Lists the
Types of Cooking that most
often occur at these Microwave
Cooking Power Levels.
-Used
Pause Light—Shows Oven has
been set to pause between the
Cooking Stages.
New Recipe—Used in
prograrnming new recipes.
Quantity—Use in multiplying
base quantity of preset recipes.
Oven Temp Guide-Usts
examples of Oven Temperature
for Convection Cooking,
Micro Temp Guide—Lists
examples of food that are best
cooked to these Microwave
Cooking Temperatures with
Temperature Probe,
Page 10
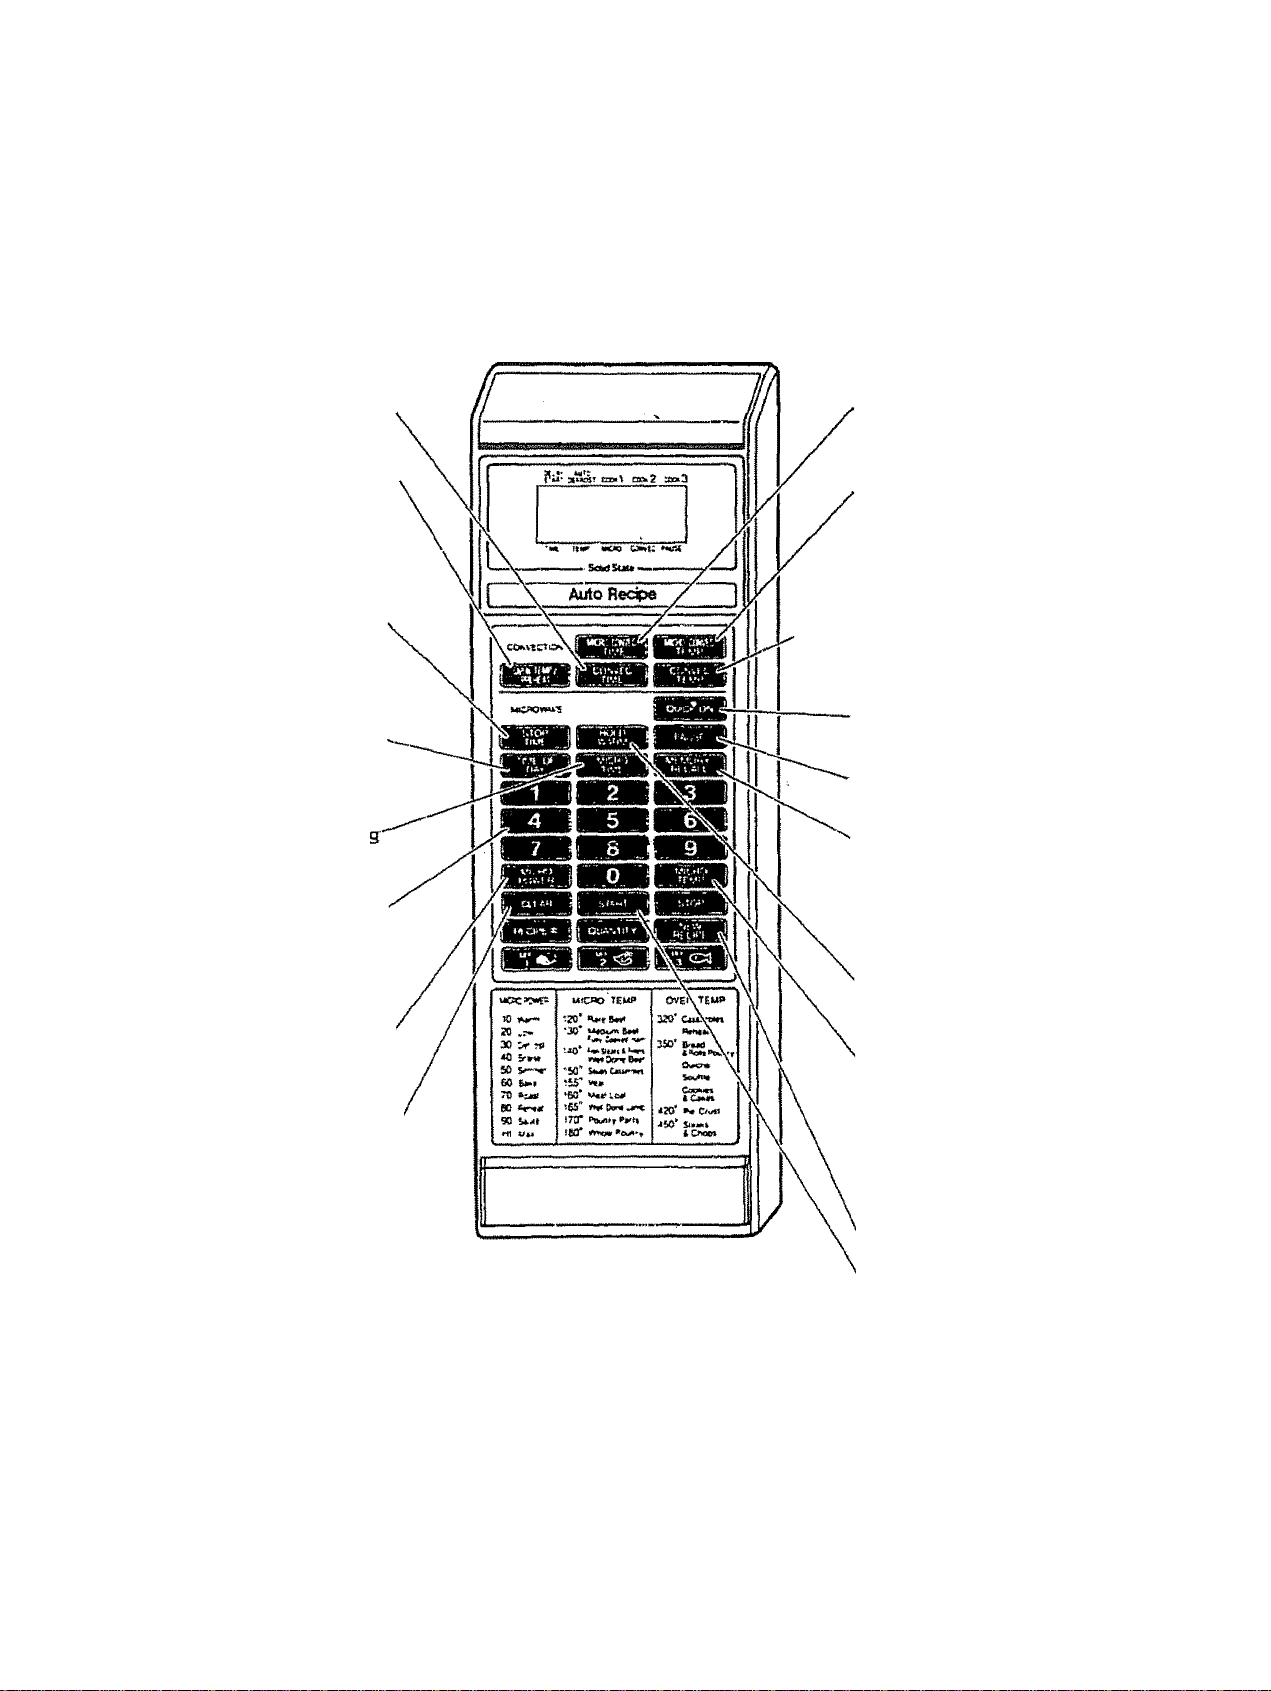
OVEN CONTROL PANEL
Convec Time—Used in setting
Convection Cooking Time,
Oven Temp/Preheat—Used in
setting the desired Oven
Temperature or Preheat
Temperature.
Stop Time—Used in setting a
Delay Start Cooking Cooking
can be finished at a preset stop
time.
Time of Day—Used in setting
Time of Day and Child Lock-Out
Micro Time-Used in settin
Microwave Cooking Time,
Numbers—Used to enter the
Time of Day, Delay Stan Time,
Cooking Times, Cooking Powers
and Cooking Temperatures.
Micro Power-Used in setting'
Microwave Cooking Power
Levels,
Clear—Clears all entries except
Time of Day. Once cooking has
begun, however, CLEAR will
function only after STOP has
been touched
Micro/Convec Time—Used in
setting Micro/Convec Cooking
Time.
Microi/Convec Temp-Used in
setting the desired probe
temperature during Micro/
Convec Cooking
Convec Temp—Used in setting
the desired probe temperature
during Convection Cooking.
Quick-On—Used in setting first
start cooking at high power.
Pause—Used to stop Oven
between the Cooking Stages.
Memory/Recall—Used in
setting Cooking Time, Power
Level and Temperature for Multi
Stage Cooking. Also used to
recall each memory stage in a
multiple stage program.
Hold Warm—Used hi setting a
Hold Warm, Cooked food can
be kept warm.
Micro Temp—Used in setting
the desired probe temperature
during MiCTowave Cooking.
Temperature Controlled Cook
ing can be done only when the
Temperature Probe is plugged
into the socket inside the oven.
Stop—Stops Oven.
10
Start—Starts Oven.
NOTE: A "beep tone" sounds when a "pad” on
the control panel is touched, to indicate a
setting has been entered
Page 11

HOW THE MiCROWAVE/CONVECnON OVEN
WORKS
Stirrer Fan
Microwave Cooking
Using the energy of miaowaves only, food is cooked quickly without
altering the color or shape. Microwaves generated by a magnetron are
uniformly distributed fay the fan so that the food in the oven heats and
is cooked. Microwave power in 99 steps implies it takes 99 steps, ena
bling the various kinds of foods to cook at the most desirable cooking
power for the best results.
Convection Cooking
A way of cooking with hot air alone that heats and cooks food from the
outside This method allows food to be browned evenly without losing
any of the juices. Air heated by the heater Is uniformly circulated in the
oven by a fan to enable the heating and cooking of food. Since hot air
remains in the oven as it circulates, cooking is very efficient. The tem
perature inside the oven can be controlled according to the type of food
being cooked.
Micro/Convec Cooking
With both microwave energy and hot air utilized, this method cooks food
much more quickly than any conventional method. The solid state con
trol alternates cooking energy between microwave and hot air cycles to
provide efficient cooking fully utilizing the advantages of both microwave
and hot air cooking systems.
When foods with high moisture content are cooked by the micro/convec method, beads of water may accumulate on the top and/or sides of
the oven door, but will dissipate after use.
Stirrer Fan Convection Fan
11
Page 12

MICROWAVE
EASY USE CHART-MICROWAVE COOKING
Ybur new Solid State Control allows you to use your microwaue/convection oven in many ways
TIME OF DAY
To Set
1.. Touch CLEAR.
2 , Touch TIME OF DAY.
3, Touch numbers for correct time of
day '■
4 Touch TIME OF DAY*
•This “locks” in the time and starts the
dock running.
TEMPERATURE CONTROLLED
“HI-POWER7“MULTI-POWER’*
COOKING
To Set
1. Plug In Temperature Probe
2. Touch CLEAR,
3. Touch MICRO TEMP.
4. Touch numbers for dcared food
temperature
5.. Touch MICRO POWER
i 6 Touch numbers for desired cooking
; power level.
■ 7. Touch START.
NOTE: It is not necessary to touch
MICRO POWER when cooking with
; the highest power {"N1”). To set “HI*
' POWER” Cooking, skip steps 5 and 6
above.
i (See Page 24 (or more detailed
: Instructions)
TIMER
To Set
1 Touch CLEAR,
2 Touch MICRO TIME.
3 Touch correct numbers for the
time. '•
4. Touch MICRO POWER.
5. Touch “0” (power level 0).
6. Touch START,
(See Page 16 for more detailed
instructions.)
MUUT-SmGE COOKING
To Set
1 Touch CLEAR,
2.. Touch MICRO TIME or MICRO
TEMP.
3. Touch numbers for desired cooking
time or temperature
4 . Touch MICRO POWER.
5. Touch numbers for desired cooking
power leveL
6.. Touch MEMORY/RECALL or
PAUSE and repeat steps 2-5 to set
2nd cooking stage
7. Touch MEMORY/RECALL or
PAUSE and repeat steps 2-5 to set
3rd cooking stage
8. Touch START
[See Pages 27 and 28 for more detailed
instructions.)
9
“HI-POWER7“m6lTI.POWER"
COOKING
To Set i
1. Touch CLEAR
2. Touch MICRO TIME
3. Touch numbers for desired cooking
tíme,
4. Touch MICRO POWER.
5. Touch numbers for desired cooking
povuer level.
6 Touch START
NOTE: It is not necessary to touch
MICRO POWER when cooking with
the highest power (“HI”). 1b set "Hl-
POWER" Cooking, skip steps 4 and 5
above.
(See Page 20 for more detailed
instructions.)
■
QUICK-START COOKING
To Set
1„ Touch CLEAR,
2 . Touch QUICK-ON
3. Touch number (single digit. 1-9)
for desired cooking time
(See Pages 17 and 18 for more detailed
instructions.)
AUTOMATIC DEFROST
To Set .
1. Touch CLEAR.
2 . Touch DEFl, DEF2. or DEF3 to
select the appropriate Auto
Defrosting Sequence.
3. Enter the weight of your food in
decimal increments from 01 to 9 9
pounds.
4 Touch START.
5, At pause, follow the cookbook
instructions for rearranging, turning
food over, etc.
6 To resume defrosting, touch
START,
(Sec Pages 25 and 26 for more detailed
instructions.!
12
CHILD LOCK-OUT
To Set
1. Touch CLEAR,
2, Touch TIME OF DAY.
3 Touch "9" four times.
4. Touch START,
To Clear
1. Touch CLEAR.
2. Touch TIME OF DAY
3 Touch *'7” four times.
f
4 Touch START,
I (Time of Day wiD return to the
display window)
(See Page 16 for more detailed
; instructions )
Page 13

EASY USE CHART- CONVECTION COOKING
CONVECTION COOKING
To Set ■
1, Touch CLEAR.
2 Touch OVEN TEMP/ PREHEAT
3, Touch numbew for desired oven
lemperaitirc.
4 Touch PAUSE.
5 Touch CONVEC TIME
6 Touch numbets for desired cook-
ing time.
7 Touch START
(See Page 31 for more detailed
instruciionsj
MICRO/CONVEC COOKING
To Set
1 Touch CLEAR.
2 Touch OVEN TEMP/PREHEAT
3 Touch numbers for desired oven
temperature.
4 Touch MICRO/CONVEC TIME temperature.
' 5. Touch numbers for desired
cooking time
6 Touch START,
(See Page 34 for more detailed
j instructions Ì
1
i
I
1 **
■ AUTOMATIC PREHEAT
To Set
1 Touch CLEAR.
2 Touch OVEN TEMP/PREHEAT
3 Touch numbers for desired oven
temperature.
4 Touch START
(Sec Page 31 for more detailed
instniciions.)
TEMPERATURE PROBE
MICRO/CONVEC COOKING
To Set
1. Plug itr Temperature Probe 1. Touch CLEAR.
2, Touch CLEAR.
3 Touch OVEN TEMP/PREHEAT.
4. Touch numbers for desired overt
5 , Touch MICRO/CONVEC TEMP.
6. Touch numbers for desired food
iemperatute. cooking time
7 Touch START
(See Page 36 for more detailed
Instructions)
1
i
1
1
1
TEMPERATURE PROBE
CONVECTION COOKING
To Set
1. Plug itt Temperature Probe.
2. Touch CLEAR.
3,. Touch OVEN TEMP/PREHEAT.
4 Touch numbers for desired oven
temperature
5. Touch CONVEC TEMP.
6 , Touch numbers for desired food
temperature.
7,, Touch START.
(See Page 33 for more detailed
instrurtions.)
MULTl-SIAGE COOKING
To Set
2, Touch OVEN TEMP/PREHEAT,
3 Touch numbers for desired oven
temperature.
4. Touch PAUSE.
5 Touch CONVEC TIME.
6. Touch numbers for desired
7 Touch PAUSE
8- Touch MICRO/CONVEC TIME
9. Touch numbers for desired
cooking time
Ш. Touch START
NOTE: Any combination is possible in
multi-stage cooking
During convection cooking, the oven
keeps the same temperature in second
stage as for preheating if, however,
third stage is used, and a temperature
other than 350°F is desired, the oven
temperature must be set in third stage.
(See Pages 37 and 38 for more
detailed instructions.)
13
Page 14

DELAY START COOKING
For those times when you must he awiy from the kitchen, but want dinner ready when you return, cooking
can be started and finished at the time of day selected. The directions below show Microwave Cook
ing only. Also Convection and Micro/Convec Cooking can be set in Delay Start Cooking. See page
39 for detailed direcfions.
EASY USE CHART
DELAY START COOKING
To Set
1. Touch CLEAR.
2. Touch STOP TIME.
3. Touch numbers for time of day to
finish cooking.
Touch MICRO TIME.
*4.
5. Touch numbers for desired
cooking time.
Touch MICRO POWER.
6.
Touch numbers for desired
7.
cooking power level.
8. Touch START,
‘Multi-Stage Cooking can be used
with Delay Start.
After step 3 above, follow
instructions for Multi-Stage Cooking
beginning with step 2,
(See Page 39 for more detailed
instructions]
PRESET RECIPE COOKING
You can set the oven to cook 28 recipes automatically Recipes 1-25 are preprogrammed, and recipes
26-28 can be programmed by you for 55 of your fovorite recipes. Simply touch RECIPE #, the num
bers corresponding with the desired preset recipes, then START.
See pages 40 thru 42 for detailed directions.
To store the desired recipes in the oven, follow these steps:
EASY USE CHART
PRESET RECIFE COOKING
To Set
1. Touch CLEAR.
2. Touch Recipe =.
3. Touch numbers for correct Preset
Recipe #.
4. Touch START.
(See Pages 40 and 41 for more
detailed instructions)
PROGRAMMING NEW RECIPES
To Set
1. Touch CLEAR.
2. Touch NEW RECIPE.
3. Touch RECIPE
4. Touch numbers for New Recipe #.
5. Program Recipe following suitable
operating instructions,
6. Touch NEW RECIPE.
(See Page 42 for more detailed
instructions.)
14
Page 15

RECALL AND CHANGE OF SETTINGS
To Recall a Setting
To recall (check) a setting before you start the oven, follow the directions below.
»To check the Setting for a given stage, touch MEMORY/RECALL once or more until the correct Stage
Light and Indicator Light turn on. The set Time, Temperature or Oven Temperature for that stage will
show in the display window.
e To check the Microwave Cooking Power level, touch MICRO POWER.
• To check the Oven Temperature, touch OVEN TEMP/PREHEAT.
® To check Probe Temperature, touch Miao Temp. Convec Temp and Micro/Convec Temp.
» To check TIME, touch Micro Time, Convec Time, and Micro/Convec Time.
To recall (check) a setting while the oven is operating, follow the directions below.
« To check settings while the oven is operating, touch the desired pad to recall the setting for the operating
stage.
B To recall a future stage, touch STOP, follow the directions above for nxalng (checking) a setting before
starting the oven, and then touch START to continue cooking.
»To recall TIME OF DAY while the oven is running, touch TIME OF DAY. It will show momentarily in the
display window.
» To recall Recipe number(s) while the oven is running, touch RECIPE #, and it will show momentarily in
' the display wnndow,
• To check the cooking power level during cooking, touch MICRO POWER.
Power level will show momentarily in the display window.
To Change a Setting
Recall the Setting to be changed by followñng directions above and make the change as follows:
TIME
......................................................
(MICRO TIME, CONVEC TIME. MICRO/CONVEC TIME) the Display Window. Set Cooking
......................................................
Touch “0” until only one "O" shows in
Time.
TEMPERATURE CONTROL
(MICRO TEMP. CONVEC TEMP. MICRO/CONVEC TEMP)
MICRO POWER.
OVEN TEMP/PREHEAT
.....
A
.....
.................
..................... ..................... .................................. Set Microwave Cooking Power Level.
...............................
....................
...................... .....................
................. Set Cooking Probe Temperature.
To reset to “HI”, set “W\
Set Oven Temperature.
PAUSE BETWEEN STAGES
Some recipes require separating, turning and adding or removing foods between stages. To set the oven
to stop between stages, touch PAUSE rather than MEMORY/RECAL.L when setting the oven. If pause is
set, the oven will automatically stop and the word “PAUS" will flash in the display window, To restart the
oven after the pause, touch START
15
Page 16

REGULAR TIMER
Your Ouen also has a timer that can be used for non cooking functions.. When used as a regular timer, the
Oven is not running. The timer is simply counting down in seconds. ’
Rir detailed instructions on using this timer, see below. •
To use the Regular Timer feature:
1. Touch CLEAR.
2. Touch MICRO TIME.
3. Touch numbers for the time.
4. Touch MICRO POWER.
5. Touch “0” {power level 0)
6. Touch START. The time will begin counting down in the display window with no cooking or heating in
the oven.
A tone will sound and the word "End" will show in the display window for 2 seconds when the time is
over.
“HOLD WARM”
Your overt has "Hold Warm” feature that keeps food warm after the cooking is done.
To use the “Hold Warm” feature:
1. Touch CLEAR.
2. Touch HOLD WARM •
3. Set the desired cooking cycle following suitable operating instructions on pages 17 through 42 in this
manual. '
4. Touch START. . ,
When the cooking cycle is over, the oven will switch into "Hold Warm” to keep the food warm. "Hold ’
wiD show in the display window. The cook control setting changes to Power Level 1.
The “Hold Warm” will continue for up to 100 iranutes or until the door has been opened or STOP has
been touched.
16
If you want to keep your cooked food warm, the "Hold Warm” feature can be used independently without
setting the cooking cycle.
To use the “Hold Warm” feature independently:
1. Touch CLEAR.
2. Touch HOLD WARM, '
3. Touch START.
The oven will begin to keep the food warm with microwave power level 1 for up to 100 minutes or until the
door has been opened or STOP has been touched.
NOTE: Do not use metal utensils when operating with "Hold Warm" feature since arcing may happen and
damage to the oven may result.
CHILD LOCK-OUT
Your oven has a “Child Lock-Out” feature to prevent a playful or accidental running of the oven by a
child.
After this feature is set, the display will return to the Time of Day, If the oven is accidentally
programmed to cook, the oven may appear to be cooking, but no cooking can occur after this feature
is set,
To set:
1 Touch CLEAR.
2. Touch TIME OF DAY.
3. Touch “9" four times
4. Touch START
(Time of Day will return
to the display window.)
To clear:
1. Touch CLEAR.
2. Touch TIME OF DAY
3. Touch “7” four times
4. Touch START
(Time of Day will return
to the display window )
Page 17

:íMIG:RQ.WAVE.
QUICK-START COOKING (Hl-power only)
This feature was designeH for simple setting of the oven with convenience cooking and/or reheating in mind To
set, simply touch the "QUICK-ON" pad. and touch a number pad from 1 to 9. The oven starts instantly
1. Touch CLEAR, and a beep tone will sound. The
CLEAR erases all previous settings. Place food in
oven, then dose the door.
2. Touch QUlCK-ON.
The lights above TIME and below COOK 1 will go
on. rO” will show in the display window)
3. Touch a number (single digit, 1~9) for desired
cooking time in minutes.
The oven will begin to cook on HTpower and the
display window will show the time counting down in
minutes and seconds
4. A tone will sound and the word “End" will show in the
display window for two seconds when the cooking
time is completed. The oven will automatically shut
off.
NOTE: To stir or rearrange food during cooking, simply
open the door, stir or rearrange and dose the door.
Touch "START.
The oven will automatically continue to count down the
remaining amount of time left in the display window.
EXAMPLE: To reheat 1 cup of coffee, you would use
Hl -power for I minute.
To do this, follow these steps:
1. Touch CLEAR. CEEI
Place coffee in oven, then
dose the door.
2. Touch QUICK-ON. C=Z
3. Touch"!”. QZ:The oven begins to cook and
the time will begin to count
down in the display window.
4. A tone will sound and the word
"End” will show in the display
window for two seconds when
the 1 minute is over. The oven
will automatically shut off.
End
! “Mr I! ■^3^1 •Sg
17
Page 18

■• .• ~r iw'r; • »-E—
QUICK-START REHEATING GUIDE
This guide shows the food Hems and some special notes for reheating with "Quick-start” feature.
Touch CLEAR, touch QUICK'ON, touch numbers from 1 to 9 for minutes of heating.
Food 1
!
BEVERAGES 1
Water Based . ,1 cup j
Milk Based
2 cups
Broth-based soups
Cream-based soups
Sandwich
Cooked pizza.
10 Inches,
cut in 8 portions
Casseroles
MEAT
Sliced thin
Sliced thick
Barbecued beef, chili,
Slews, hash, etc.
Hamburgers, Meat loaf 1 serving
slices, Sausage patties 2 servings
1
10% oz. can
10% oz. can
1-2
2 wedges
4 wedges
whole
1 gt. (4 cups)
3-5 oz.
‘4"-l' thick
16 oz. can
4 servings
i POULTRY
j Chicken pieces
1
2
4
6
Creamed chicken
Chicken, turkey, sliced
10% oz, can
3-5 02.
/Unionist 1 Time ; Special Notes ■
!
1-2 min ; Heat uncovered. Use 6-8 ounce cup. |
2 cups 1
1 cup - !
3-4 min
2 iTiiiri -
3-4 min !
4-5 min i
1 min !
2 min 1
2-3 min j
4-5 min !
5-7 min 1
1 min
3 min :
Use 1%-quart casserole. Cover
Use 1 %-quart casserole. Cover.
Place on paper plate or towels.,
1
Place on paper towels or paper plate or
leave in uncovered cardboard box, points
toward center.
Cover, Stir once
Heat on microproof plate, covered with
waxed paper
2 min 1
4-5 min
1 min
2-3 min
4-5 min
1 min
1-2 min
2-3 min
4-6 min
3-4 min
1-2 min
Place in microproof dish. Cover. Stir half-
way through cooking time.
Place on microproof plate Cover with
paper towel Turn over once.
Heat on microproof plate Cover with
waxed paper. If fried, cover with paper
towel. 1
Cover. Stir once.
Heat on microproof piate. Cover with
waxed paper.
1
j
i
i
IS
SEAFOOD
Shrimp, aab, or scallops
in sauce, frozen
Seafood or fish
casseroles, frozen
SIDE DISHES
Rice, Pasta
Vegetables, frozen in
pouch
Mashed potatoes, instant
1 r *
Canned vegetables
Pudding and pie filling
mix
5% oz..
16 oz
% cup
1-2 cups
10-12 oz.
4 servings
(3% oz. packet)
8 oz.
15 02,
17 oz
3% oz
4-6 min
5-7 min
Slit pouch and place on miaoproof plate.
Flex pouch to mix halfway through cooking
time.
Remove from package to 1-quart microproof
casserole. Cover. Stir once during cooking,
1
1 min
2 min
5-8 min
5-7 min
1
j 1-2 min
j 2-3 min
3-4 min
i 6-7 min Follow package directions. Stir once
Heat in miaoproof casserole, covered
; tightly with plastic wrap.
: Slit pouch Place on microproof plate. Flex
j half way through cooking time to mix-
Follow package directions. Reduce liquid
; by 1 tablespoon..
Use 4-cup microproof casserole, covered.
' Stir once..
Use 4-cup glass measure.
Page 19

COOKING GUIDE FOR “MULTI-POWER” SETTINGS
The “Multi-Power" feature lets you cook at the best power level for the food being cooked Cooking directioris
can be found in the"cookbook.
POWER
LEVEL
POWER
SETTINGS
10 WARM
20 LOW
30
40
50
60 BAKE
70 ROAST
80
90
100
^ W)
DEFROST
MED LOW
BRAISE
SIMMER 0 Cooking stews and soups after bringing to a boil.
MED HIGH
REHEAT o Reheating precooked or prepared food quickly,
SAUTÉ 0 Cooking onior^, celery and green peppers quickly ,
MAX
POWER
HIGH
.
...................i .......................................................... 1 ............
EXAMPLES
» Softening cream cheese.
0 Keeping casseroles and main dishes wann.
6 Softening chocolate.
0 Heating breads, rolls, pancakes, tacos, tortillas
and French toast
0 Clarifying butter.
0 Taking the chill out of fruit.
» Heating small amounts of food.
o Thawing meat, poultry and seafood.
o Completing the cooking cycle of casseroles,
stews and some sauces.
0 Cooking small quantities of food.
o Cooking less tender cuts of meat in liquid or
slow cooking dishes.
» Completing the cooking cycle of less tender roasts.
0 Cooking baked custards and pasta.
0 Cooking scrambled eggs.
0 Cooking cakes.
0 Cooking rump roast, ham, veal and Iamb.
0 Cooking cheese dishes,
o Cooking e^s and milk.
0 Cooking quick breads and cereal products.
o Heating sandwiches.
0 Reheating meat slices quickly.
0 Cooking tender cuts of meat.
0 Cooking poultry, fish, vegetables
and most casseroles,
o Preheating the browning dish,
0 Boiling water.
0 Thickening some sauces.
.
MICROWAVE
OUTPUT POWER«
165
230
295 i
36Ó '
425
490
555
620
685
750
aimllilll
!
* Approximate watts as measured by 2-!iter method.
As you get to know your microwave oven, you may find that a particular setting is too low or too high for
the results you desire.
Multiple-power control gives you the means to obtain greater precision in setting power levels. For instance,
if you want a power level between ROAST and REHEAT, you would set the lime as usual: touch MICRO
POWER, and then touch "7” and "5". The display window will show '*75’’, indicating that your oven is set to
mn at power level 75—halfway between ROAST and REHEAT.
I '
FAST DEFROST
Your oven is equipped with an Auto Defrost system which is the best defrost method for this oven
FAST DEFROST is explained in order to show other defrosting possibilities.
To speed up the defrosting of dense food items over 1 lb. start on ' Hi”, then reduce to the 30 (DEFROST)
setting
1. Microwave on ' Hr' for 1-2 minutes per pound of dense food items,
2. Then Microwave on 30 (DEFROST) for 3 minutes per pound or until food is thawed Defrosting time
will be greatly reduced
19
Page 20

^iHl|=iliyW/iVt-
'Ira:*.
“HI-POWERTMIJLTI-POWER” COOKING
“HI" gives the highest cooking power possible with your oven. It is the recommended setting for cooking foods with high
moisture content or for cooking foods that need fast cooking to maintain their natural flavor and texture. Many foods
need slower cooking {at less than full power) in order to give you the best results, in addition to “HI” there are ninety-nine
multi-power settings. The cookbook tells you which power setting is recommended for the food being cooked.
To Cook
{Remove metal rack, place ceramic tray in oven.)
1. Touch CLEAR, and a beep tone will be heard. The
CLEAR erases all previous settings. Place food in
oven, then dose the door,
2. Touch MICRO TIME. The lights above TIME and
MICRO, below COOK 1 will go on. (“0” will show in
the display unndow.)
3. Touch the correct numbers on the control panel to
set the cooking time. The time set will show in the
display window at the top of the control panel For
example:
o To set 30 seconds, you would touch “3” and then
“0”.
e To set 3 minutes, touch "3”, “0” and “0".
B To set 3-1/2 minutes, touch “3", “3” and “0".
Remember, the timer is a digital dock that is divided
into 60 seconds. Therefore, 1/2 minute is equal to 30
seconds. Touch 30 and not 50 (as with a calculator)
to indicate 1/2.
4. Touch MICRO POWER. The lights above MICRO
and below COOK 1 will go on. Also, the word “HI”
will show in the display window until a lower setting
is entered This is to tell you that the oven will be
operating on "HI” unless a different power setting is
chosen,
5. Touch numbers for desired cooking power level. For
example, if the recipe calls for cooking at the “20
(LOW)" setting, you would touch “2” and “0". The
display window will show "20" This means that in
the LOW setting, the oven is cooking at power level
20 ■
NOTE: l! is not necessary to touch MICRO POWER
when cooking writh the highest power (“HI”). To set
"HI-POWER" cooking, skip steps 4 and 5 above.
However, if MICRO POWER is touched, the light
above MICRO will go on and the word “HI” will show
in the display window. This is to let you know that the
oven will be operating on “HI” power unless a different
power setting is chosen
6. Touch START, The oven begins to cook and the
display window will show the time counting down.
A tone will sound and the word "End” will show in
the display window for two seconds when the
cooking time is completed. Then the oven wiD shut
itself off
20
EXAMPLE: To warm 4 doughnuts, you would cook at
power level 80 or “80 (REHEAT)” for 35 seconds. To
do this, follow these six steps.
1. Touch CLEAR.
3S
2. Touch MICRO TIME
Place doughnuts in oven,
then dose the door.
3. Set 35 seconds by touching
“3”andthen“S”.“35”wfll
show in the display window.
4. Touch MICRO POWER.
The display window will show
“HI”.
5. Choose the “30 (REHEAT)” w_s_
setting by touching the num
bers “8” and “0”, The display
window will show “80”. This
means the oven is cooking at
power level 80, :
Jis.
6. Touch START. The oven
begins to cook and the time
will begin to count down in
the display window,
A tone will sound and the
word “End” will show in the
display window for 2 seconds
when the 1-1/2 minutes are
over. Then the oven will shut
itself off.,
NOTE: If you want to keep the
food warm after finishing the
cooking, you can use "Hold
Warm" feature. For detailed
instructions on using "Hold
Warm" feature, sec page 16.
Page 21

¿¿=r-Íg.;i-:=^
jmt:Ku,WAVt=í.
ijm
“TEMPERATURE CONTROLLED” COOKING
?»wái¡?.;síi'i
The temperature probe is used to judge doneness
when cooking or reheaÌing food. Set the desired food
temperature with the MICRO TEMP, and the desired
power leve! with the MICRO POWER.
When “Hold Warm" is set, after completing the
cooking cycle the oven will hold the food warm up to
100 minutes.
TEMPERATURE SETTING & DISPLAY TEMPERATURE
Temperatures from 115“F to 1S5°F can be chosen
and set in the oven. The temperature should be set in
five-degree increments. The display window will show
the rise in food temperature in five-degree increments.
For example, when a temperature of 125°F is set, the
display window will show the temperature as It rises
from 115°F to 120®F and then to 125°E, The lowest
temperature number that can be displayed is 115°F.
Therefore, even though the food may be less than
115*F, the display will remain at 115°F until the food
is heated to above 115°E
MEATS
■ Choose only fresh, completely thawed meat.
■ Place meat fat side down on the microwave
roasting rack in a microproof baking dish,.
■ Microwave cook on the first “multi-power" setting
for half of the total cooking time. (Sec ' Temperature
Controlled" Meat Cooking Guide on Page 22.)
■ Turn meat to fat side up and:
1. Place the temperature probe sensor into the meat
with the first inch of the sensor in the center of
the meat. The sensor should not touch the bone
or fat pocket. The sensor should be put in from
the side or from the front — it should not be put
in from the top of the meat.
2. Plug the temperature probe into the socket on
the side of the oven wall.
3. Choose the doneness temperature from the
chart on Page 22. Set the temperature with the
MICRO TEMP.
4. Microu,/ave cook the meat on the second “multi
power" setting. The microwave oven will turn
itself off when the preset temperature is reached.
Take the food out of the oven as soon as the
display window shows “End”,.
5. Remove the temperature probe sensor. Let the
meat stand, covered with foil for about 10
minutes before serving. The temperature will rise
about 15° F during standing time .
Wash probe immediately for easy clean-up
DEFINITIONS
TEMPERATURE PROBE SENSOR: The pointed
metal portion of the probe which is placed ipto the
food.
SENSITIVE AREA OF SENSOR: The first Inch, or
tip, of the temperature probe sensor.
PLUG: The end of the temperature probe that is
plugged into the oven socket.
SOCKET: The outlet on the side of the oven wall..
CAUTION; Do not plug the pointed end of the
temperature probe into the socket. ,
DISPLAY WINDOW: Shows the cooking
temperature rising as the food is cooking. Chosen
temperature may be seen during cooking by touching
MICRO TEMP,, When “Hold Warm” is set, after
the cycle has been completed the display will show
“Hold" for 100 minutes or until the door is opened or
STOP is touched
NOTE; It is normal for meats to become slightly over
cooked in a small circular area in the immediate vicinity
of the hole made by the meat probe.
Microwave Roasting Rack Temperature Probe
Microproof Baking Dish
21
Page 22

r.7-_W« f ■
rnSÙlltLia
iMicìKewAvt:
“TEMPERATURE CONTROL” POINTS TO REMEMBER
DO
B Place the temperature probe sensor into the thickest
part of the meat or in the center of the food to be
reheated. Avoid touching bone or fat.
0 Check that the first inch of the sensor is in the densest
part of the food to be cooked.
B Remove the temperature probe from the oven after
use. '
0 Be sure to turn meat between first and second settings.
B Refer to cookbook for other information .
“TEMPERATURE CONTROLLED”
Refer to “Meats" section on Page 21.
MEAT 1
BEEF ■
j Meat Loaf
i 2 lbs.
f
] Rib Roast, boneless
1
1
• Rib Roast, with bone
1
i
j
: POULTRY
1 Chicken, whole
i 3-1/2—5 lbs.
j Chicken, pieces
1 2.1/2-4 lbs.
! Duckling
• 4—5 lbs.
! Turkey, whole
■ 10—12 lbs.
i
' Turkey breast
; 3—4 lbs.
• PORK
\ Pork Loin Roast, boneless
1 4—5 lbs. '
1 Pork Loin, center cut
i 4-5 lbs.
1
j Ham, boneless, precooked
f
■ Center Cut Ham Slice
; 1—1-1/2 lbs.
j 3-5 lbs.
i
1
i
HI (Max. Power)
12—14 min.. ■
HI (Max. Power)
Rare 4—5 min. per lb.
Medium 5—6 min., per Ifa.
HI (Max., Power)
Rare 3—4 miri, per lb.
MetSum 4—5 min., per lb.
WcB done 5—6 min. per lb.
HI (Max. Power)
3—4 min, per lb.
HI (Max. Power)
10 min.
70 (Roast)
4 min. per !b.
HI (Max. Power)
5—6 min. per lb
HI (Max. Power)
7 min. per Ib
HI (Max, Power)
5—7 min, per lb.
HI (Max. Power)
5—7 min., per ib.
70 (Roast)
5_6 min. per lb,.
70 (Roast)
4—5 min. per lb.
S—6 min. per ib.
FIRST SETTING
TIME
70 (Roast)
DO NOT
0 Do not operate the oven empty with the temperature
probe plu;^d in.
0 Do not leave the temperature probe unplugged in the
cavity when operating the oven,
o Do not let the temperature probe touch the side walls,
ceramic tray or door of the cavity when in use.
o Do not plug the pointed end of the temperature probe
into the socket inside the cavity,
o Do not use the temperature probe in a regular oven.
This probe is designed for micro/convection oven only.
MEAT COOKING GUIDE
SECOND SETTING
1
-----------
1....................................
1 •
i
:
1
Ì
T
TIME OR
! 70 (Roast) i
Rare 3—4 min. per lb. !
' Medium S—6 min. per lb.
! 70 (Roast)
I Rare 3—4 min, per lb. \
Medium 3—5 min. per lb. i
1 Well done 5—6 min. per lb. 1
; Ì
HI (Max: Power)
: 4—5 min. per lb.
1 70 (Roast)
; 4 min. per lb
70 (Roast)
4 min, per lb.
. 70 (Roast) :
' 5 min. per Ib
: 70 (Roast)
• 5—6 min,, per Ib, ^
; 4—5 min. per lb. ;
5—7 min. per Ib.
70 (Roast)
5—6 min per Ib,
Canned Ham ■ .
. 70 (Roast)
5—6 min. per lb.
^ HI (Max, Power) j
4—5 nun. per lb. ;
70 (Roast) ;
70 (Roast) i
TEMPERATURE
L
PROBE
HI (Max. Power)
160-F
70 (Roast)
120-F
130-F
70 (Roast)
120-F
130° F
140-F
Hi (Max, Power)
180° F
HI (Max. Power)
170° F
70 (Roast)
170° F
70 (Roast)
170°F
70 (Roast)
170°
70 (Roast)
165°F
70 (Roast)
165° F
70 (Roast)
130” F
70 (Roast)
130° F
70 (Roast)
130-F
I STANDING
TIME j
^ 1
I 1
f
( 5—10 min.
1 i
i 10 min. !
; 10 min. ;
! ?
’ 10 min. 1
' 10 mia. j
i 10 min. j
1 5 min. 1
1 !
1 5 min.
■ 8—10 min.
1 10—15 min. j
j 10—15 min,
[
i
: 10—15 mia
1
1 5-10 min.
! 5 min.
10 min.
t
i \
! t
i
22
Page 23

MICROWAVE
REHEATING FOODS
«» Place the temperature probe sensor into the food to
be reheated with the first inch of the sensor in the
center of the food.
o Plug the temperature probe into the socket on the
side of the oven vwal!.
o Cover the food if desired.
• Set the temperature of the desired doneness. (See
chart below.)
‘TEMPERATURE CONTROLLED" REHEATING GUIDE
Select “multi-power" setting as shown below.
The miaowave oven will stop cooking when the
set temperature is reached and then it will "Hold
Warm", wliicn “Hold Warm" is set.
Remove the temperature probe from the oven after
use.
FOOD
Beverages
Soups
Precooked
Casseroles
Canned
Vegetables
Leftovers
Meat Sandwiches
(Thick)
;
Baked Foods
Syrup *
SETTING ! DONENESS
HI (MAX POWER)
80 (REHEAT)
80 (REHEAT) 150° F
80 (REHEAT)
80 (REHEAT)
80 (REHEAT)
80 (REHEAT)
70 (ROAST)
t
150“ F
150° F
150°F
150° F
120° F
120° F
150° F
INSTRUCTIONS
Place the temperature probe sensor in the center of the i
beverage glass. ' ' |
Place the temperature probe sensor into the center of the !
soup. Cover with casserole lid, waxed paper, or plastic '
wrap. 1
Place the temperature probe sensor in the center of the ’
food. Cover with a casserole lid, waxed paper, or plastic
wrap. ;
Place the temperature probe sensor into the center of the
food to be reheated The sensitive area of the sensor
should rest in the middle of the food.
Place the temperature probe sensor in the densest or
largest amount of food.
Place the temperature probe sensor into the thickest part
of the sandwich to be warmed. The sensitive area of the ■
sensor should be located in the sandwich filling.
Place the temperature probe sensor into the center of the .
food to be reheated. The sensitive area of the sensor i
should rest in the middle of the food.
Place the temperature probe sensor into the center of the
container.
i
i
j
CAUTION: From time to time, the same kind of foods
may vary in shape, form and density, and, therefore will
not produce the same results each time. For this
reason, we do not recommend using the temperature
controlled settings for thin food items dr for foods that
require tenderizing by simmering. Aso, in some cases
the microwave oven may shut off prematurely. This
means that either the temperature probe is not placed
properly or that it should not be used with this type of
food.
23
Page 24

rgL'*Vy*?f^y^'* rs»,v.' J»* vqJI,■ ytVT-rwr-yCT
S^Sgr7
TEMPERATURE CONTROLLED
“HI-POWERTMULTLPOWER” COOKING
The "Temihfirature.Controlled Meat Cooking Guide * and "Reheating Guide” on Pages 22 and 23 will show
you which multi-power setting and temperature setting are recommended for the food you are cooking
When cooking with the temperature control settings, the timer is not used.
SE aS iE S
Place the temperature probe into the
food with the first inch of the
sensor in the center of the food.
The probe should be in a
level direction or on an
angle as shown. It should
NOT be put in from
the top.
2. Plug the temperature
probe into the socket on
the side of the oven.
CAUTION: Do not plug
the pointed end of the
temperature probe into
the socket.
3. Touch CLEAR.
4. Touch MICRO TEMP.
The lights above TEMP and
MICRO, below COOK 1 will
go on, and *T” will show in
the display window.
5. Choose the food temperature
and touch the corresponding
numbers. For example, if the
recipe calls for doneness at
165° F, you would touch
numbers‘T’%" and "5"
When you touch “165", the
display window will show
“165F” , If the temperature
probe is not plugged into the
socket, the word “Prob” will
flash and the oven wiD not
work.
NOTE: The highest tempera
ture that can be set is 18S°F.
^ J i, , 5 _J
rwi
IS Sf
, rss^snpa^wT^
£g~ir^nnsn
« /
7. Choose the power control
setting you desire and touch
the corresponding numbers.
For example, if the recipe
should calí for cooking at the
“70 (ROA$T)” setting, you
would touch numbers "7” and
When you touch “7" and “0",
the display window will show
“70”. This ¡means that in the
"70 (ROAST)" setting, the
oven is at ^wer level 70.
NOTE: You do not need to
touch MICRO POWER when
you ate cooldng with HI (max
power). To set "Hi -POWER"
Cooking, skip steps 6 and 7
above. However, if MICRO
POWER is touched, the light
above MICRO will go on and the
word “HI” will show in the
display window. This is to tcB
you that the oven wiU work at HI
(highest microwave power)
unless a different power setting is
chosen.
8. Touch START. The oven will
begin to cook and you will be
able to see the temperature of
the food rising in the display
window.
9. A tone will sound and the
word “End” will show in the
display wipdow for 2 seconds
when the desired temperature
is reached.
6. Touch MICRO POWER. ™
The word "HI” will show in
the display window untE you
enter a lower power setting.
This is to remind you that the
oven will always operate at full
power unless you set a lower
power.
24
IPSnnigt
NOTE: If you want to keep the food warm after
finishing the set cooking, you can use "Hold Warm"
feature. For detailed instructions on using "Hold
Warm" feature, see page 15.
Page 25

:jyili=tll4WAVJEr
im.m'
AUTOMATIC DEFROST
Three defrosting sequences are preset in the oven. The "Auto Defrost" feature provides you with the best defrosting
method for most frozen foods.
The cookbook will show you which defrost sequence is recommended for the food you are defrosting
AUTO DEFROST SEQUENCE LIST
SEQUENCE # i FOOD
DEFROST 1 ■ ® BEEF
(DEFl) : Rib roast (rolled). Rump
MEAT roast. Chuck roast. Stew beef j
DEFROST 2 »CHICKEN
(DEF2) «CORNISH
POULTRY HENS
DEFROST 3 » FISH
(DEF 3) Whole fish
FISH » SEAFOOD ................................... Lobster tails Crabmeat, ^
(Remove metal rack, place ceramic tray in oven,)
1. Touch CLEAR, Place food in oven, then dose the
door, ■ '
2. Touch DEFl, DEF2. or DEF3 to select the
appropriate defrosting sequence. The light below
AUTO DEFROST will go on and the sequence
selected (dEFl. dEF2, or dEF3i will be displayed.
3. Enter the weight of your food in decimal increments
from 0.1 pounds to 9 9 pounds.
Remember to convert ounces to tenths of a pound.
For example to defrost 2 pounds 8 ounces, touch
number keys “2" and “5" for 2,5 pounds.
The display window will show “2 5”,
NOTE: It is not necessary to enter the food weight
when defrosting one pound of food. Unless changed,
the Auto Defrost feature is automatically set for one
pound.
t BASE
1 . .
...........
...................... Ground beef. Round steak, j 1 lb
" LAMB
: iamb, Chops. Leg |
' ® PORK................. , . . Chops, Spareribs, Country- j
’ style ribs, Sausage, Roast !
; «VEAL
«VARIETY MEAT .. Liver slices. Tongue !
..........................................
»DUCKLING
«TURKEY................
.............
...................
................................
................
...............................
... .... .
Cubed for stew. Ground j
..........
Chops, Roast j
Whole or Cut up ; 1 lb
Whole .
Whole i
.......
Whole. Breast Drumsticks,
Roast (boneless)
..........
Fish fillets. Fish steak, ‘ 1 lb = 14 min. 0,l/9.9 lbs.
Shrimp ;
DEFROST TIME MIN./MAX,
PER BASE QTY i QUAhfmY
9-1/4 min. ! 01/3.9 lbs,
1
< M
j
:
i
14-1/4 min. 1 4.0/9.9 lbs,
I
15 min. ’ 0.1/6.9 lbs.
■ 11 min, 7.0/95 lbs,
1
5. At the pause, follow the cookbook instructions for
separating, rearranging, covering and turning over.
NOTE: If the oven door is not opened during the
pause time segment, the oven will restart automatical
ly after 5 minutes. Because turning, separating, etc.
are usually necessary for proper defrosting and
cooking, follow steps 1 thru 6 for best results.
6. After tuming over, separating the food, etc,, touch
START. The oven will resume defrosting and the
display window will show the time remaining.
At the end of the required time, a tone will sound
and “End” will appear in the display window for
2 seconds The oven shuts off automatically,
NOTE; Standing time is calculated as a part of Auto
Defrost sequence in the oven,
4. Touch START, The oven will begin the defrosting
sequence you selected and the display window will
show the time of the first segment as it '‘counts
down".
The oven will stop automatically at the end of the
first time segment and "PAUS” will appear in the
display window
25
Page 26

1 »>• * - r ■
;MIGRO®4m.,,, _
AUTOMATIC DEFROST (Confd)
EXAMPLE: To defrost 2 pounds of Ground Beef
1. Touch CLEAR,
Place beef In oven, then dose
the door.
nirri
2. Touch “DEF 1". The lights
below AUTO DEFROST and
above MICRO wiD go on and
"d£Fl” will show in the
display window.
3. Enter the weight of the
ground beef by touching “2”
and then “0”. ODCSD
"2.0’* will show in the display
window.
f !
i"'‘=s'.;.ipgnf sa»'"i
AUTO DEFROSTING INSTRUCTIONS.
® The benefit of this Auto Defrost feature is
autornatic setting and control of defrosting, but just
like cdnuentional defrosting, you must check the
foods during the defrosting time
To check the foods “Pause" is preset in this Auto
Defrosting cycle.
Turn over, separate or rearrange food items per
cookbook instructions when the word "PAUS”
appeas in the display window.
o For best results, remove fish/seafoocVmcat/poultry
from its original paper or plastic closed package
(wrapper).
Otherwise, the wrap will hold steam and juice close
to the foods which can cause the outer surface of
the foods to cook.
® When; it is difficult to remove the wrap from the
.foods,: defrost the wrapped food for about a quarter
of the;total defrost time, which is displayed at the
beginning of the defrost cycle. Remove the foods
from the oven and remove the wrap from foods,
® Place foods in a shallow microproof baking dish or
microwave roasting rack to catch drippings-
4. Touch START. The oven will
bepn the defrosting sequence
you selected and display
window wil show the time of
the first segment as it “counts
down".
The oven will stop auto
matically at the end of the first
time se^ent and “PAUS” will
appear in the display window.
5. At the pause, follow the
cookbook instructions for
separating, rearranging, cover
ing and turning food over
6. After turning over, separating
etc., touch START. The oven
will resumé defrosting and
the display window will show
the time remaining, At the
end of the required time, a
tone will sound and “End"
will appear in the display
window for 2 seconds
The oven shuts off
automatically
i it^5!}
o Food should still be somewhat icy In the center
when removed from the oven.
IMPORTANT NOTE: The defrost power setting
(power level 30 DEFROST) should not be confused
with this "Auto Defrost" feature. The defrost cooking
level is a low-encrgy setting used to cook foods that
need slow, gentle cooking. Also use the defrost cooking
level to thaw small ground beef patties, bacon and bread
items.
26
Page 27

MULTI-STAGE COOKING
Multi-Stage cooking allows you to set the oven to cook in one stage at a certain power level for a chosen time or
temperature and then in a second and a third stage at a different power level for a chosen time or temperature.
The cooking process can be set for four memory stages when Auto Defrost is included as the first stage.
The stage are set before cooking and will follow automatically when oven is started.
(Remove metal rack, place ceramic tray in oven.)
1. Touch CLEAR. Place food in oven, then dose the
door,
2. Touch MICRO TIME or MICRO TEMP. The
lights above TIME or TEMP and MICRO, below
COOK 1 win go on. The display window will show
“0” or "F”.
3. Touch the correct numbers for the time or
temperature of the first cooking stage.
4. Touch MICRO POWER. The lights above
MICRO and below COOK 1 will go on. The
display window wiD show “HI”.
5. Touch the correct numbers for the cooking
power level of the first cooking stage (if other
than "HI”).
6. Touch MEMORY/RECALL or PAUSE. The light
below COOK 2 will go on. The display window
will show "0”.
7. Touch MICRO TIME or MICRO TEMP.
8. Touch the correct numbers for the time or tempera
ture of the second cooking stage.
9. Touch MICRO POWER, The display window will
show'W'.
10. Touch the correct numbers for the cooking
power level in the second cooking stage (if other
than “HI”}.
11 A. Touch START for two stage cooking.
IIB. If three-stage cooking is desired, touch
MEMORY/RECALL or PAUSE. The light below
COOK 3 unll go on. The display window will show
"0".
Repeat steps 7-10 above to set the third cooking
stage at the same or a different power level for a
chosen time or temperature.
12. Touch START for three-stage cooking.
MULTI-STAGE COOKING WITH
AUTO DEFROST
If you want to cook after using the Auto Defrost cycle,
first set the Auto Defrost and touch MEMORY/
RECALL or PAUSE, then follow the above
instructions numbered 2-12. The cooking process can
be set up to four stages when Auto Defrost is one of
the stages. See pages 25 and 26 for the detailed in
structions on Auto Defrost. ’
•
EKAMPLE: {Three-stage cooking)
English Beef Rib Broth
(30 minutes, power level HI) (PAUSE)
(60 minutes, power level 50) (MEMORY/RECALL)
(15 minutes, power level 20)
The following steps explain how
to set the ovea
First Statre
(30 minutes; Power level “HI")
1. Touch CLEAR.
Place English Beef Rib Broth
in oven, then close the door.
PSïnr^'lf'W'l
2. Touch MICRO TIME.
3. Set 30 minutes by touching
"3", “0" then “0” twice. “3000"
will show in the display
window. (Power is on HI.)
J
nyirssor
7~H a ira
CX3 CZID C33 CE3
The first stage has been set.
Second Stage
(60 minutes; Power level 50
SIMMER)
4. Touch PAUSE.
The light below COOK 2 will
go on. The display window will
show “0”.
• To pause between stages
To set the oven to stop between stages, touch
PAUSE when setting the oven. See page 15 for
more detailed information,
NOTE; If you touch MEMORY/RECALL instead of
PAUSE, the oven will not stop but will remember
the next stage and continue cooking.
27
Page 28

-JC3S2S
‘ШШШ1Ш2
MULTI-STAGE COOKING (Cont’d)
7. Touch MICRO POWER. :
“KI” will show in the display
window to remind you that
the oven wiH operate at
highest power unless you
enter a lower power setting,
8. Touch numbers “5” and *’0”,
“53" will show in the display
window (indicating that you
have set the oven to operate
at power level 50). ■ —1—
Tne second stage has been
Set,»
Third Stage
(15 irinutes; Power level 20 LOW)
9. Touch MEMORY/RECALL. 3
Тле light below COOK 3 will
go on. The display window will
show “0”.
■ "'»ty
12. Touch MICRO POWER and
nurnbers "2” and "0”. QZ
“20” will show in the display
window,
The third stage has been Set.
13. Touch START. The first stage IH:
will begin. “3000” will show in
the display window. The oven
will besn to cook (power level
HI) and the time can be seen
counting down in the display
window. When the 30 minutes
are up, a tone will sound and
the oven will stop automati
cally at the end of the first stage and “PAUS" wl appear
in the display window. At the
pause, stir the food and touch
START again. The oven will
proceed into the second
stage. The oven will begin
cooking at ”50" power level
and the time will be counting
down in the display window
When the 60 minutes are up.
a tone will sound and the
oven will proceed into the
third stage. When the 15
minutes are over, a tone will
sound and the word “End"
will show in the display
window and the oven will
automatically shut off.
The oven will have finished
all stages.
1 ^ i
2S
NOTE: If you want to keep the food warm after
finishing,the cooking cycle, you can use “Hold Warm
feature. For detailed instructions on using “Hold
Warm" feature, see page 16, '
Page 29

&
^0ROWÁyE
IS
WHOLE MEAL COOKING
(See Cookbook for detailed explanation)
Whole Meal cooking lets you cook two or more different foods at the same time. Foods need not be placed
in the oven at the same time, nor be removed at the same time, unless needed. By using PAUSE rather
than MEMORY/RECAU,, the oven wilt slop between stages for time to add or remove food.
1. Place the Meta! Rack in guides on the side wall of oven cavity as shown.
To change rack from lower to upper position, simply turn it over.
2. Place food into the oven.
3. Set the oven following the instructions given in the cookbook.
Metal Rack at Upper Position
The ceramic tray should always be in the oven for the Microwave or Micro/Convec methods.
Metal Rack at Lower Position
METAL RACK CARE
H Remove Metal Rack from oven when not being used for whole meal cooking.
B Do not run the oven empty with the Metal Rack in it excepting for Preheat.
B Do not place the Metal Rack directly on the oven floor when using the Microwave or Micro/Convec
methods for cooking..
® The Metal Rack may get hot during cooking. Pot holders may be needed to remove Rack after cooking.
■ Do not use browning dishes on Metal Rack.
■ Do not use foil or meta! containers on the Metal Rack when using the Microwave or Micro/Convec
methods for cooking.
29
Page 30

CONVECTION COOKING
The convection cooking will be best use4 for items like souffles, breads, angel food cakes, pizza, and also
for meat and fish. .
No special techniques are required to adapt your favorite oven recipes to convection cooking. You may
need to use lower temperatures by 25°F“3S°F than in a conventional oven, because the convection
cooking method is identical to a conventional oven except for the increased efficiency of fan-circulated
hot air.
When baking cakes, cookies, breads, rolls or other baked foods, most recipes call for preheating. Preheat
the empty oven just as you do the conventional oven. Heavier dense foods such as meats, casseroles,
poultry can be started without preheating ' All heatproof cookware or metal utensils may be used in convection cooking.
CERAMIC TRAY
The ceramic tray should be removed from oven prior to convection cooking to allow for the most even
heating.
METAI.RACK
The metal rack has two positions; upper and lower. As conventional cooking, the distance of the food
from heat source affects cooking results. Always consider the cooking method and desired results when
deciding which cooking position to use.
There is no standard nie for rack position for every food type, therefore, please refer to your cookbook
food charts in each chapter of the book. Also, finding a similar recipe in the cookbook index and referring to
the recipe’s suggested position will be helpful.
Cooking Position
Upper
'
1
Lower
To change Metal Rack from upper to lower position, simply turn it over.
The ceramic tray must always be removed for convection cooking.
NOTE; The ceramic tray must always be in the oven for microwave or micro/convec cooking.
Steak, Hamburger Patty, Pork Chops, Chicken Pieces, Cookies,
Brownies, Biscuits
1 Beef Roast, Leg of Lamb, Whole Chicken, Pie Crust, Angel Food Cake,
Í Apple Pie, Souffle
Upper Position
Recipe
Lower Position
30
BAKING PAN/METAL UTENSILS
Any Baking Pan less than 1.3 " x 13" can be used with this oven The Baking Pan or metal utensils should
be placed on the Metai Rack for convection cooking.
METAL UTENSILS should only be used in convection cooking, Metai utensils should be placed on
the metal rack or oven floor. Never use metal utensils for microwave or micro/convec cooking.
Page 31

CONVECTION COOKING WITH AUTOMATIC PREHEAT
An Automatic preheating temperature of 350“ F for
convection cooking has been factory set into the oven.
(See step 3 below.)
1. Remove ceramic tray from
oven. Set the metal rack in
the desired cooking position;
upper or lower.
2. Touch CLEAR then touch CHE3
OVEN TEMP/PREHEAT. ( ■ sS" i
The light below COOK 1 wifl
go on and “F” shows in the
display window,
3. If you do not touch the
numbers for the oven
temperature, the oven starts
preheating to the 350® F uhen
START is touched.
If you want to preheat the
oven to the temperature other
than the 350® F, touch the
desired numbers For example,
to preheat the oven to 400°F.
touch 4,0 and 0. The“400F‘
will show in the display window,
4. Touch PAUSE. S
Light below COOK 2 will go
on and “0” shows in the
display window.
5. Touch CONVEC TME, [S
Lights above TIME and
CONVEC will go on and "0”
shows in the display window.
6. Set the convection cooking
time by touching the
corresponding numbers as
. Instructed in the Cookbook,
For example, set 45 minutes
by touching the numbers for
“4".'‘5'V'0”and'‘(r.Then
“4500" shows in the display
window, r~T~ir~5~ir~5~~ir‘o~l
NOTE: During convection
cooking, the oven keeps the
same temperature in second
stage as for preheating. If,
however, third stage is used, and
a temperature other than 350® F
is desired, the oven temperature
must be set in third stage.
7. Touch START, GED
The oven is working when the
oven light is on. Lights below
COOK 1, above PAUSE and
CONVEC will go on, and
“200F" is shown in the display
window.
As the oven temperature rises
above 200° F, the display
temperature increase in
10°Fsiep (210F, 220F, 230Fetc,}
» I C n n
1 J u u
f..'Rif..irsn
( 'll.« ÌI \
'ir"! 1
1 r
1 ♦
( 9 1
rSST'lf”»"! [ TSP
#r
•jT
5 ilT*
9 W»
3 1
6 1
m
mr
te
MTlmp.
When the temperature in the
oven reaches the preheat
temperature, "350F” or the
set temfjerature is displayed
and a pulsating beep tone will
sound to tell that the
preheating is over.
8, WARNING: The temperature in the oven is quite
high. Never touch the metal rack or oven wails with
bare hands. Open the door, the beep sound wii! stop
and the temperature display will change to “PAUS”.
Place the food inside the oven as quickly as possible.
While the door is open, the heated air will escape
from the oven and the oven temperature will drop.
. Touch START again .
The oven restarts, the oven
light and the lights below
COOK 2. above TIME and
CONVEC are on. The
"PAUS" display switches to
the time display. The time in
the display window counts
down.
A tone will sound and the
word “End” will show in the
display window for 2 seconds
when the 45 minutes are over.
Then the oven will automati
cally shut off.
NOTES: To display the
temperature of the oven
during cooking, touch OVEN
TEMP/PREHEAT,
After preheating is over, the beep tone will sound until
either the door is opened or 30 minutes have elapsed,
The oven temperature should be chosen in ten-degree
steps. For example, if a temperature of 325°F is
programmed, the oven will stop at the temperature
of 320° F.
Avoid opening the door often during cooking Hot
air will escape from the oven and the oven
temperature will drop very quickly, adversely
affecting the cooking results.
Use Pot holders to remove the Metal Rack after cook
ing as the Rack will be hot during cooking.
31
Page 32

TEMPERATURE PROBE CONVECTION COOKING
Before starting Temperature Probe Convection
Cooking, choose the correct temperature by
consulting with the “Cooking Guide” on page 33 in
this manual or in the Coonbook. The following direc
tions show “One-Stage Cooking” only.
1. Remove ceramic tray
Set the metal rack in the
desired positions; upper or
lower.
Before placing the food into
the oven, put the
Temperature Probe in food,
with the first inch of the
Sensor In center of food.
Probe should be in a let el
direction or an angle as
shown. Place food on the
metal rack.
2, Plug Temperature Probe into
socket on side of oven,
CAUTION: Do not plug the
Pointed End of the Temperature
Probe into the socket-
3- Touch CliAR.
4. Touch OVEN TEMP/
PREHEAT.
The light below COOK 1 will
go on and "F” shows r. the
display window.
5. Set the oven tempcratia-e by
touching the correspoming
numbers.
For example 390“ is set by _
touching the numbers for "3",
“9” and “0”, ••390F" then
shows in the display window,
■ r~n i~9~ ~~P~
■ ! ly
6. Touch CONVEC TEMP.
Lights below COOK i, above .
TEMP and CONVEC will go
on and "F’ shows in the
display window.
NOTES: CONVEC TEMP
means that the cooking is done
by measuring and controlling the
internal food temperature with
the Temperature Probe,
r~;|—o~.f
Set the desired food temperature
for Temperature Probe by
touching the corresponding
numbers.
For Instance, if 185“ F is
desired touch the numbers
•T, “8” and “5”.
‘T85F" then shows in the
display window. COi~~Pr~5~
Touch START. *
The oven is working when the
oven light is on, and the lights
below COOK 1, above TEMP
and CONVEC will go on. The
temperature of the food will
be shown in the display
window. When the
temperature of the food
reaches 185°F a tone will
sound and the word “End”
will show in the display
window for 2 seconds and
the cooking is over.
NOTES: The oven temperature of
350°F is memorized in the oven.
This means that if the desired oven temperature is
350 “F, you need not touch OVEN TEMP/PREHEAT
or the numbers to set an oven temperature- Skip
steps 4 and 5.
Avoid opening the door often during cooking, Hot
air will escape from the oven and the oven tempera
ture will drop very quickly, adversely affecting the
cooking results.
“Preheating” can be set according to the directions
on page 31. Follow the instructions numbered 1—4
on page 31, then follow the instructions beginning
with step 4 on this page. During pause after preheat
ing, place food in the oven and plug temperature
probe in as shown steps 1 and 2 above, then touch
START again.
(Be careful to plug temperature probe in, because the
oven interior is hot)
'S Si
E o
DCsDCsJ
jq_jCZZZ
MJLJ»-...JL3gU
è^l 9
m
OVEN TEMP means tha: the
cooking is done by contolUng
the interior oven temperature.
32
“Multi-Stage Cooking” can be set according to the
directions on pages 37 and 38
Use Pot holders to remove the Metal Rack or Probe
after cooking as the Rack and/or Probe will be ho!
during cooking.
Page 33

COOKING GUIDE FOR CONVECTION COOKING
FOOD
BEEF
Ground beef
patties, 1—4,
4 oz. each
Tenderloin roast,
2-3 lbs,
Rib eye or
strip steak
1 In thick
IAMB
Lamb chops,
3/4' thick
1
VEAL
Veal chops
1/2 In. thick
1
PORK
Pork chops
1/2—3/4 in. thick
FIRST STAGE
OVEN
TEMP
TIME
450"F Rare: 6 min.
Med: 7 min.
Well: 8 min.
450°F 5 min. per lb.
Turn over
450“F
Rare: 4 min.
Med: 5 min.
Well: 6 min.
Turn over
450°F Rare: 4 min .
Med: 5 min..
Well: 7 min.
Turn over
1
450°F
4 min,
! Turn over
i
1
t
j =
450“F
i Med; 7 min.
Well: 9 min.
1 Turn over
SECOND STAGE
TIME or
2— 3 min
3— 4 min.
4— 5 min.
5—10 min. per lb.
3— 6 min.
4— 7 min.
5— 8 min.,
3— 5 min.
4— 6 min,
4—6 min.
3—4 min.
4— 5 min
5— 7 min
T
PROBE
TEMP
Rare; 120°F
Med: 130°F
Well: 140°F
SPECIAL NCHTES
Remove ceramic tray.
Upper position.
Preheat. Use broiling pan
or aluminum tray.
Remove ceramic tray.
Upper position. Preheat.
In heatproof shallow
baking dish.
Let stand 5 min.
Remove ceramic tray
Upper position. Preheat.
Metal pan or foil tray.
Remove ceramic tray.
Upper position. Preheat
Metal pan or foil tray.
Remove ceramic tray.
Upper position. Preheat.
Metal pan or foil tray
Remove ceramic tray.
Upper position. Preheat,
Metal pan or foil tray.
BAKERY
Angel food cake
i
Cake Mix 18 oz
1
'■ Refrigerated
i crescent,
; Butterilake rolls
■ ; 8 oz.
350°FI35—40 min.
1
350°F
J 28—30 min.
!
I
t »
1
1
t
380'^F
1 10-13 min.
j
Remove ceramic tray.
Place on oven bottom.
10 inch metal tube pan.
Let cake cool completely
before removing from pan
Remove ceramic tray.
Place metal rack in upper
position.
Preheat, Use two 8-inch
round baking pans. Rotate
halfway through cooking
time. Repeat with second
layer.
Remove ceramic tray.
Place metal rack in upper
position. Preheat
1
i
Cookie sheet or foil tray.
---
...................
.............................................
33
Page 34

MICRO/CONVEC COOKING
Cooking is done by both mkrowawe and hot airMicro/Convec cooking is fast and efficient.
The following directions show “One-Stage Cooking”
only.
(Place ceramic tray in oven.)
1. Touch CLEAR.
Place food in oven, then
close the door.
2. Touch OVEN TEMP/
PREHEAT.
The Bght below COOK 1 will
go on and “F” shows in the
display window,
3. Set the desired oven
temperature by touching the
corresponding numbers. For
example, 400“F is set by
touching the numbers "4”, “C
and “0”.
"400F” will then show in the
display window.
CZDCOt
4. Touch MICRO/CONVEC C
■ nME.
Lights below COOK 1, above
TIME and MICRO and
CONVEC will go on, and "0”
shows in the display window.
5, Set the desired cooking time
by touching the
corresponding numbers. For
example, to set 16 minutes
and 30 seconds, touch
numbers"!”, “6”, "3” and “0”,
"1630" then shows in the
display window.
I..i
......
11 B I r~in C
1
n.. *^.. JiJsiSI»-’
(.tk
1- t
i *
1 1
f ¡Smi- .0 .’K ^ •
f «M«
i T«i-
» ^
•
m «Bn
i«:"]
U Si.
•li X ip-a -'i
s it', «.«l
^l B it S '
ii 1« ;i K» ,
'1, ,
6. Touch START. CE
The oven is working when the
oven light is on and the time
in the display window begins
counting down. When the
figure in the display window
counts down to ”0” while the
oven temperature is
programmed for 400“ F a tone
will sound arid the word "End"
will show in the display window
for 2 seconds and the cooking
is over.
NOTES: The oven temperature of 350“ F is
memorized in the oven. This means that if the desired
oven temperature is 350“ F, you need not touch OVEN
TEMP/PREHEAT or the numbers to set an oven
temperature.
Skip steps 4 and 5.
Ayoid opening the door often during cooking. Hot
air will escape from the oven and the oven
temperature will drop very quickly, adversely
affecting the cooking results,
“Preheating" can be set according to the directions
on page 31. Follow the instructions nurnbered 1—4
on page 31, then follow the instructions beginning
with step 2 on this page. During pause after preheat
ing. place food in the oven, then touch START again
“Multi-Stage Cooking" can be set according to the
directions on pages 37 and 38.
Use Pot holders to remove the Metal Rack after
cooking as the Back will be hot during cooking.
Ceramic tray should always be in the oven for
micro/convec cooking
End
nsg-npgnfwl
34
Page 35

TEMPERATURE PROBE MICRO/CONVEC COOKING
Consult the "Temperature controlled Cooking
Guide” on page 36 before you start Temperature
Probe Micro/Conuec Cooking. The following
directions show "One-Stage Cooking” only.
1. Put the Temperature Probe in
food, with the first inch of the
Sensor in center of food.
Probe should be in a level
direction or on an an^le as
shown.
2. Plug Temperature Probe into
socket on side of oven.
CAUTION: Do not plug the
Pointed End of the Temperature
Probe into the socket.
3. Touch CLEAR.
35 Df
4. Touch OVEN TEMP/
PREHEAT.
The light below COOK 1 will
go on and “F” shows in the
display wndow,
5. Set the oven temperature by
touching the correspjonding
numbers. "•
For example, set 390° F by
touching numbers "3”, “9”
and “0”.
“390F” then shows in the
display window. „
rwii ■c»' It «gl
8. Touch START, G=
The oven is working when the
oven light is on. Lights below
COOK 1. above TEMP and
MICRO and CONVEC wiD go
on and the food temperature
is shown in the display window.
When the temperature of the
food reaches 185® F while the
oven temperature is
programmed for 390° F, a
tone wU sound and the word
“End” wiD show in the display
window for 2 seconds and the
cooking is over.
: tZSl
NOTES: The oven temperature of 350° F is
memorized in the oven. This means that if the desired
oven temperature is 350“ F, you need not touch OVEN
TEMP/PREHEAT or the numbers to set an oven
temperature. Skip steps 4 and 5,
Avoid opening the door often during cooking., Hot
air will escape from the oven and the oven
temperature will drop very quickly, adversely affecting the cooking results.
“Preheating” can be set according to the directions
on page 31. Follow the instructions numbered 1—4
on page 31, then follow the instructions beginning
with step 4 on this page. During pause after preheat
ing, place food in the oven and plug temperature
probe in as shown steps 1 and 2 above, then touch
START again.
{Be careful to plug temperature probe in. because the
oven inferior is hot)
"Multi-Stage Cooking” can be set according to the
directions on pages 37 and 38
6. Touch MICRO/CONVEC C
TEMP.
Lights below COOK 1, above
TEMP and MICRO and
CONVEC wffl go on and “F”
shows in the display window,
7. Set the desired food
temperature for Temperature
Probe by touching the
corresponding numbers. If
185°F is desired, for example,
touch numbers “1", "8” and
“5” “185F* will shows in the
display window
_______^____
Use Pol holders to remove the Metal Rack or Probe
IB Sf
psirifwirwi
raadScii"'
[HZiEisa
r-^fyr3ffll
~5~irW1
,
after cooking as the Rack and/or Probe will be hoi
during cooldng.
Ceramic tray should always be in the oven for
miao/convec cooking
35
Page 36

•Mie,Rma¥JSiG.gnTfìlTFitfnr
TEMPERATURE CONTROLLED COOKING GUIDE FOR MICRO/CONVEC COOKING
FOOD
BEEF
Meat Loaf
1.1/2-1-3/4 lbs.
Beef rib »ast,
boneless
Beef rib roast,
bone in. 5 lbs.
Beef round, rump,
j orchuck
j boneless. 3 lbs.
1 LAMB
1 Lamp leg or
shoulder roast,
bone in.
64/2 lbs.
Lamb roast,
boneless.
3-4 lbs.
ri’imM
TEMP
400'’F
330°F
330°F
330°F
330°F
330°F
FIRST STAGE
TIME
25 min.
or Probe Temp.
160°F
6 min, per lb.
Turn over
8 min. per !b.
Fat side down
Turn over
7 min, per Ib.
Turn over
3 min. per lb.
Fat side down
Turn over
4 min. per lb-
Fat side down
Turn over
SECOND STAGE
6 min. per lb.
8 min. per lb,
7 min. per lb •
5—6 min., per lb
4—5 min. per lb.
TIME or
1
PROBE
TEMP
Rare: 120°F
Med: 130°F
Rare: 120°F
Med: 130°F
Weil: 140“F
Med: 130°F
Well: 140°F
Rare: 145°F
Med: 155“F
Well: 165°F
150°F
SPECIAL NOTES
Lower Position.
Preheat Let stand 5—10
min.
Lower position. In micro
proof and heatproof dish
with trivet
Lower position. In micro
proof and heatproof dish.
Lower position . Casserole
with tight cover or cooking
bag.
Lower position. In miaoproof and heatproof dish ;
with trivet.
Lower posiüon. In micro
proof and heatproof dish
with trivet
VEAL
Shoulder or rump
roast, boneless,
3-34/2 lbs.
PORK
Pork loin roast,
boneless.
4-5 lbs.
Pork loin, center
cut, 4—5 lbs
POULTRY
Chicken.
Whole, 3-4 lbs, •
Cornish Hens
1-14/2 lbs.
Turkey
i Breast 3—4 lbs.
j
36
330°F
320°F
320“F
400°F
350"F
350^F
1
3—5 min. per lb.
Turn over
5—7 min. per lb.
Turn over
5—7 min. per lb.
Turn over
1
5—6 min. per lb„
Breast down
Turn over
10 min. per Ib-
Breast up
j Turn over
! 4 min. per ib.
j Skin down
• Turn over
4—5 min. per Ib
5—7 min. per Ib
5—7 min. per Ib,
6 min per lb
6—9 min.
j
34/2-44/2 min.
! per lb
ISS^’F
165“F
165“F
180° F
180° F
170°F
Lower position. In micro
proof and heatproof baking
dish with trivet.
Lower position. In micro
proof and heatproof baking
dish.
Lower position. In micro
proof and heatproof baking
dish.
Lower position. In miaoproof and heatproof baking
dish with trivet,
Lower position. In micro
proof and heatproof baking
dish.
Lower position. Preheat
In microproof and heat
proof baking dish
Page 37

WII №
MULTI-STAGE COOKING
In three-stage cooking, different modes of cooking can be combined for sequential cooking. To make Party
Cake, for example. Preheating is the 1st stage. Convection Cooking is the 2nd stage and Micro/Convcc
Cooking is the 3rd stage.
First Stage
1. Touch CLEAR.
2. Touch OVEN TEMP/
PREHEAT. Light below
COOKlwiHgoonand“F”
shows in the display window.
NOTE: Since the oven
temperature is 350° F in this
case, the temperature need not
be pre-set since this temperature
is memorized in the oven.
Second Stage
3. Touch PAUSE. .
Light below COOK 2 will go
on and “0" shows in the
display window.
!ps as
Third Stage
6. Touch PAUSE
Light below COOK 3 and "0”
shows in the display window.
7. Touch MICRO/CONVEC
TIME.
Lights betow COOK3, above
TIME, MICRO and CONVEC
will go on and “0" shows in
the display window.
8. Set the desired time for 3rd
stage cooking, 6 minutes, by
touching numbers “6”, “0”
and “0”, "600” will shows in
the display window.
:c3i
NOTE: During convection
cooking, the oven keeps the
same temperature in second
stage as for preheating If,
however, third stage is used, and
a temperature other than 350° F
is desired, the oven temperature
must be set in third stage.
5 as
!'.t
...i(..
rrnrirnr
cg^f~=nr
4. Touch CONVEC TIME.
Light below COOK 2, above
TIME and CONVEC will go
on and “0" shows in the
display window.
5. Set the desired time for 2nd
stage cooking, 25 minutes, by
touching numbers "2”, “5”,
"0” and “0”. "2500” wiU shows
in the display window,
f
...2...
i f~5~l t O
...........
I ~~0~l
37
Page 38

MULTI-STAGE COOKING (Cont’d)
9. Remove ceramic iray from
oven. Place the mela! rack in
the desired cooking position;
upper or lower
Touch START,
The oven is working when the
oven light is on.
Lights below COOK 1, above
PAUSE and CON VEC will go
on and the oven temperature
is shown in the display
window. As the oven
temperature rises, the
increasing temperature will be
shown in the display window.
When the temperature
reaches 350° F, “350F” shows
in the display window and a
beep tone will sound to indi
cate that the preheating time
is over.
10. The beep sound stops when
the door is opened. Place the
food in the oven and close the
door quickly. The word
“PAUS” flashes in the display
window,
11. Touch START,
The oven starts working when
the oven light is on. Lights
below COOK 2, above TIME
and CONVEC and PAUSE
will go on and the time in the
display window counts down
to "0” and the 2nd cooking
stage is over The beep tone
sounds then the oven will
stop and the word “PAUS”
will flash in the display win
dow, At pause, place the cer
amic tray into the oven
nt nr
1
«
t ,
U U
□L^JL
___
ODCOQZ3
¡ 4 H 5 \rTl
jc
NOTE: if you want to keep the food warm after
finishing the set cooking, you can use "Hold Warm"
feature. Meta! utensils can not be used for "Hold
Warm” operation since arcing may happen and
damage to the oven may result,
For detailed instructions on using “Hold Warm"
features, See page 16.
When Auto Defrost is used in the 1st stage, up to 4
stage cooking is possible
Use Pol holders to remove the food and/or the Metal
Rack after cooking as the utensil and the Rack may get
hot during cooking.
“Standing time” allows the food to finish cooking and
the heat to be uniform throughout. See the cookbook
for detailed explanation,
IMPORTANT NOTE:
The ceramic tray should be always in the oven when
either the microwave or micro/convec cooking is
uSed, even when you are planning to place the food
on the metal rack.
Microwaves pass through the tray and are reflected by
the oven bottom back up to the under-side of the
food. As a result, the food receives microwave energy
on the bottom, top, and sides all at the same time.
However, remove the tray for convection cooking.
12. Touch START,
Lights below COOK 3, above
TIME and MICRO and
CONVEC will go on and the
time in the display window
counts to “0" and the 3rd
stage of cooking is over. The
beep tone will sound and the
word “End" will show In the
display window for 2 se
conds The oven will have
finished three stages.
38
£ n d
jCsjeIsj
f-i3nrg~li
—i-jcilDi
'irSTTi. Ifjgi
JSSSSSBnSBMT
Page 39

DELAY START COOKING
Delay Start cooking can be programmed to start the
cooking automatically and finish at a preset delay
time. Choose cooking time for Microwave, Convec
tion and Micro/Convec or any combination cooking.
1. Touch CLEAR.
2. Touch STOP TIME €M3
The light below DELAY
START goes on. A display
window wall read “0:00”.
3. Touch numbers for the time
of day to finish cooking. For
example, touch numbers "7”,
“3” then “0” for the cooking
to be finished at “7:30”.
"7:30” will show in the display
window.
огзсзжзсжз
Touch MICRO TIME.
Touch numbers for cooking
time..
For example, set 12 minutes
by touching *'l” and “2” then
“0” twice. “1200” will show in
the display window.
1:3B
£r"ir'^’irW
ODGDCZDCZD
6, Touch MICRO POWER.
7. Touch numbers for cooking
power level.
For example, touch numbers
“5” then'‘0". "50” will show in
the display window, гтп г*н~,
8. Touch START- Q
The time of day will show in
the display window and the
fight below DELAY START
goes on. As soon as the clock
shows the Cook Start Time
which has been subtracted
from the Cook-Finish Time,
the oven will start cooking.
The cooking time counts
down in the display window,
When the Cook-Finish Time
for "7:30”) arrives, the oven
will shut itself off
NOTE: A preset delay time
must be no more than 12 hours
‘Multi-Stage Cooking can be used
with Delay Start. After step 3
above, follow instructions for
Multi-Stage Cooking beginning
with step 2.
— r=n
i
......
...
.........
"^B=.
?:3G
'''(марак 1
1Г5Г1Г==~1
^ ■еГМте- 1
V
1
- «
..
..Й. ..0
2самнмнш(^[ ¡исЖаМСт
л ^
' ¡¡¡;f
.............
и » Р*1
't( T'i
!l S il e" 1
JLJULeJ
И...
щ
иг
The display shows
the time of day,
For Bxampie:
a half past two.
‘The Delay Start cooking Is controfied by time.
When 'Temperature Controlled" cooking is set in a
stage, cooking may be finished at the stop time with
a slight time difference,,
‘Fresh food should not stand at room temperature over
four hours prior to cooking.
' Auto Defrost cooking cannot be used w ith Delay
Start.
39
Page 40

PRESET RECIPE COOKING
You can set the oven for cooking 80 recipes by sirnpSy
touching RECIPE the numbers corresponding with
the desired preset recipe, then START.
The preset control system in the oven contains 25
recipes that have been preset. The Times or
Temperatures and Power Levels for these recipes
cannot be changed- However the amount of food
cooked in preset recipes #1 through 17 can be
increased up to 5.9 times the preset quantity, and up to
2.9 times in recipes #18 and 19. To increase the
quantity in these recipes, follow the direction on this
page. Refer to the cookixok for detailed instructions
on the 25 preset recipes.
To cook one of the 25 preset recipes, simply follow
the steps below.
1. Touch CLEAR,
2. Touch RECIPE #.
"0” will show in the display window.
3. Touch numberfs) for Preset Recipes. Refer to
Preset Recipes List on page 41.
EXAMPLE: When you cook Brownie Mix of
Recipe # 19, touch “1” then “9”. “19" will show in
the display window.
4. Touch START.
Time of the first cooking stage will show in the dis
play window and you can see the time counting
down. As soon as the first cooking stage Is over,
the second cooking stage begins. When the se
cond cooking stage is over, a tone will sound and
the oven will automatically shut off.
USE OF QUANTITY KEY
To Increase Quantity of Recipes #1—#19
1. Touch CLEAR,
2. Touch RECIPE #.
3. Touch numbers for the Preset Recipe.
4:TouchQUANTrrY.-
“O.O" will show in the display window.
5. Touch numbers for the multiplication factor.
To double the recipe, touch “2” and “0”.
To triple the recipe, touch “3” and “0”.
6. Touch START.
NOTES: The range of multiplication is 1.1 times to 5.9
times (Recipes #1—17) and to 2.9 rimes
(Recipes #18 and 19} of the Base Quantity
which Is preset in the oven. The increments
within the above range is 0.1. Multiplication
can be used in Recipes # 1-^19. When you
set the multiplication of Base Quantity be
* yond the range of 1.1—5.9 (Recipes
#1—17) or 1,1—2.9 (Recipes #18 and 19),
the oven will not start even if you touch
START.
EXAMPLE: To cook three hot dogs per Recipe #4.
1. Touch CLEAR.
2. Touch RECIPE#.
3. Touch "4”.
4. Touch QUANTITY.
5 Touch “3” and “0",
6 Touch START.
You can program favorite recipes often used. These
can be assigned as Recipes # 26—80.
1 stage recipes should be stored in # 26—40
2 stage recipes should be stored in #41—70.
3 stage recipes should be stored in #71—80.
Directions for programming new recipes are on page
42. .
If you have not stored a recipe in Recipe # 26 to
Recipe # 80, the display window will flash and tell
you that no preset recipe has been stored in the oven
for that recipe number.
40
Page 41

PRESET RECIPES UST (RECIPES #1—#25)
25 recipes have been stored in this oven.
To cook one of the25 preset recipes, touch the recipe number corresponding to preset recipe. These 25 recipes
have been preset, so you caii not erase or substitute them
Refer to the cookbook for detailed instructions on the 25 preset recipes.
Recipe# Ingredients
1. Cup of Coffee
2. Bacon
3. Baked Potato
4. HotDog
5. Scrambled Eggs
6. Fresh Com-on*The Cob
7. Basic White Rice (long grain)
8. Frozen Vegetables
9. Defrosting Ground Beef .....
10. Melted Butter ______________
11. Hamburger Patty
12. Fish Steaks
13. Chicken Pieces
14. Pork Chop, 3/4" thick .......
15. Scalloped Potatoes
16. Basic White Sauce , .
17.
Pudding Mix ..
Cake Mix . ... . .
IS.
Brownie Mix ..
19.
20,
Muffins
21.
Canned Entrée
22.
Canned Soup .
Meat Loaf
23.
...
.................
...
.............
..............—.....
.............
........
..............................
.
....
................
--------
..............
.........
...
............
__
_________
______
.
.
............
____
.
Base Q’ty
...1 cup (Soz.)
,..2 slices (2 oz)
....
1 potato(6oz.) ...
,..l hot dog (3 oz.) ..
...2 eggs (54/2 oz.) .
...1 ear (7 oz.)
...1/2 cup
....
iPoz,pkg
...lib
..............................
.2 tablespoons
, 1 patty (1/4 lbs.)
.............
.2 steaks, (8 oz. each)
.1/2 ib.................................
..1 chop(8oz.)
.54/4 oz. pkg (2 ibs.)
.....
..............
1 cup (10 oz.)
. 34/4 02. pkg (21 oz.) .....
.1 layer, 9 oz. pkg. (19 oz.).
.16 oz. pkg, (14/3 lbs.)
.6 muffins
. 1 can, 16 oz.
.1 can (10 3/4 02.).,,..,.. ....
. 14/2 lb. ground beef.....
(3 Ibs.)
........................
....
...................
..............
.......
.......
Directions
•Turn Potatoes over at Pause.
.Place Hot Dog in bun at Pause.
.Stir Eggs at Pause.
Removed thawed portions.
Return unthawed portions at Pause.
.Turn Patty over at Pause.
.Turn Fish over at Pause.
Rearrange Pieces at Pause.
.Turn Chops over at Pause.
.Combine package ingredients with
wet and dry Ingredients listed on box.
At pause, stir or follow package
directions.
■ Melt butter. At 1st pause, stir flour
into butter, blending well. Add pepper
and nutmeg, whisk in Milk. At 2nd
pause, stir until smooth,.
. Stir Pudding Mix at Pause.
-Rotate 1/4 turn at Pause.
.Rotate 1/4turn at Pause.
.
.Repeat three times to cook 18 muffins.
.
Plug in Temperature Probe.
Plug in Temperature Probe.
.
Plug in Temperature Probe.
24. Precooked Ham .,.,
25. Reheating Casserole
NOTE: Temperature affects cooking time. The preset recipe times are based on food at its norma! storage
temperature. For example, meats and dairy products are refrigerator temperature, Canned goods are room
temperature.
.3-5 lbs..
.4—6 servings
.....
...................
{ ) shows total weight including all ingredients in the recipe.
............
■ Plug in Temperature Probe.. Tum
Ham over at Pause.
Plug in Temperature Probe.
41
Page 42

PROGRAMMING NEW RECIPES
!n addition to the 25 preset recipes, you can program
55 more favorite recipes. To store the desired recipes
in the oven, foibw these steps:
1. Touch CLEAR.
2. TouchNEWffiCIPE.
The display window reads “0”.
3. Touch RECIPE#.
4. Touch suitable number from 26 to 80 according to
the number of cooking stages of your recipe as
shown below:
«»Store One-stage Cooking between
RECIPE #26 and 40.
«Store Two-stage Cooking between
RECIPE #41 and 70.
«Store Three-stage Cooking between
RECIPE #71 and 80. .
EXAMPLE: Touch “7” then "3”.
The display window reads “73”.
5. Program your new recipe cooking instructions.
NOTES: A recipe which has been stored in this
manner can be changed to a new recipe.
If you want to change to a new recipe, the
previously stored recipe is erased when a
new recipe is entered over the old recipe.
The Back-up Energizer (Capacitor) built
into this oven protects the customer
Programmed Recipes for about 24 hours
If power failure lasts longer than 24 hours,
the 55 customer Programmed Recipes
may be erased.
Make a list of the recipe numbers and their
recipes which arc stored in this manner so
that you can have easy reference for a later
time.,
Pages 43—45 are printed for this purpose.
6. Touch NEW RECIPE.
New recipe is now programmed and Time of Day
will appear in the display window.
42
Page 43

NEW RECIPES
Recipe # Name, Directions
26
27
28
29
30
Recipe # Name Directions
36
37
38
39
40
31
32
33
34
35
41
42
*
43
44
45
43
Page 44

NEW RECIPES
Recipe # Name Directions
46 -
47
48 !
49
50
Recipe # Name Directions
56
57
- 58
Í
59
60
51
52
53 .
54
55
61
62
*
63
64
65
44
Page 45

NEW RECIPES
Recipe # Name Directions
66
67
68
69
70
Recipe # Name Directions
76
78
79
80
71
72
n
74
75
45
Page 46

OVEN UTENSILS GUIDE
A variety of Utensils and Materials may be used for cooking in your microwave/conuection oven. For your
safety and to prevent damaging utensils and your oven, choose appropriate utensils and materials for each
cooking method. The list below is a general guide for you to select utensils and materials.
Material
Ceramic & Glass
Chira
P Jttery
Plastic
Metal
Paper
Waxed Paper
Wood NO
OK: Utensiis to
NO: Utensils to
NOTE: METAL RACK is provided for Whole Meal, Convection or Micro/Convec cooking. Remove Metal
Rack from oven when not being used for cooking..
' Ceramic Tray
•* Metal Baking Pan
■ ’‘Aluminum Foil
use
avoid
The ceramic tray should be removed for Convection cooking, only. However the tray should
always be in the oven wheri either the Microwave or Micro/Convec cooking is used.
Limited use on the ceramic tray only for Micro/Convec cooking. '
For shielding purposes only when Microwave cooking is used
•Kenmore Ceramic Tray
Coming Ware
Heat resistant Glass Ware
Glass Ware vrith metal decoration
Lead Glass
Without metal decoration
Regular Oven Heat proof Ware
Plastic Wrap
Metal Baking Pan NO
Aluminum Foil
Cups, Plates, Towels * OK NO
Utensils
Microwave
Cooking
^ OK
OK
OK
NO
NO
OK
OK
OK
OK
'■ ■ OK
OK
Micro/Convec
Cooking
OK .
OK
OK
NO
NO
OK
OK
OK
NO
”ok
OK
NO
NO
Convection
Cooking
NO
OK
OK
NO
NO
OK
OK
OK
NO
OK
OK
NO
NO
NO
46
Page 47

CARE AND CLEANING
The oven cavity is made of stainless steel and should be cleaned with a detergent speciaOy formulated for
stainless steel. •
After convection cooking in particular, the interior of the oven tends to be stained with spattered oil. It is
recommended that the oven be cleaned each time after use before the oil spatters harden and become
difficult to remove
For best performance and safety, the inner door panel should be free of food or grease build-up. Wipe
often with a mild detergent, rinse, and wipe dry. Never use rough powders or pads.
After cleaning the control panel, touch CLEAR. This will dear any entries that might have been entered
acddentally while cleaning the panel.
REMOVABLE PABIS
After each use of the Temperature Probe, it must be removed from the socket Use pot holder, as the
wire, plug and sensor sections may be hot. Wipe food or liquid from sensor with damp cloth.
The Ceramic Tray and Metal Rack can be removed for cleaning at the sink. Wipe up spillovers with paper
towel or doth before removal the tray
Wash In warm soapy water and wipe dry. Do not use rough cleaning powders, steel wood, or rough
cleaning pads,
Tbe fan cover {inside oven top) can be gently wiped in place or removed for washing with detergent in a
sink. Handle with care when washing in a sink The fan cover can be removed by taldng out the soew
used to hold it in place, then slide the cover carefully to the right.
Avoid hitting or bending the metal stirrer blade, as this may cause uneven cooking or microwave power loss
To replace, set the cover in the tab at the top of the oven and secure it using the saew at right,
CAUTION:
The fan cover is coated with Teflon’ for easy cleaning. Do not apply abrasive powders, metal or nylon
wash pads, nor any metal objects such as knives and forks to the fan cover. Hard objects and abrasive
cleaners may scratch the coating. To dean, use only a foam sponge or wash cloth with a mild kitchen
cleaner.
NOTE: Should the Teflon* coating be scratched off, the oven function will not be affected.
SPECIAL CARE
For best performance and safety, the inner door panel and the oven front frame should be free of food or
grease build-up. Wipe both often with a mild detergent. Then rinse and wipe dry. Never use rough
powders or pads '
After cleaning the control panel, touch CLEAR. This will clear any entries that might have been entered
accidentally while cleaning the panel-
47
Page 48

QUESTIONS AND ANSWERS
OPERATION
Q, What is wrong when the oven light will not glow during cooking or when the oven door is open?
A- There may be seuera! reasorts why the oven light will not glow. Perhaps;
® Door is not dosed and locked, fktsh door firmly to be sure fhof door is locked properly,
о The light bulb has burned out.
Q. Wh>/ does steam come out of the air exhaust vent?
A. Steam is normally pmduced during cooiting. The mkmwave/convection ouen has been designed to
vent this steam out of thb rear and tap vent -
Q. Why does the oven not work or stop during cooking?
A, Objects that block the exhaust vents cause the oven thermostat to shut off the oven power uniti the
interior components have cooled.
DO NOT PLACE ANY OBJECTS SUCH AS BOOKS, PAPER, OR COOKING ACCESSORIES
OVER THE TOP OF THE EXHAUST VENTS.
Q. Wifl the microwave oven be damaged if it operates empty?
A. Vfes, Never run it empty and without the ceramic tray for microivaue or micro/convec cooking.
Q. Does microwave energy pass through the viewing screen In the door?
A. No. The metal screen bounces the energy back into the Sven cavity. The holes (or ports) are made to
allow light to pass through. They do not let microwave energy pass through,
Q. Why does the “beep tone” sound when a "pad” on the control panel is touched?
A. The "beep tone" sounds to assure that the sefíing is being property entered,
Q, Why does the Display Window flash?
A. Flashing numbers indicate there has been a loss of electrical power to the Oven and the Time of Day
must be reset
Prolonged loss of power can also result in loss of programmable recipes Be sure they are recorded.,
Q, Why does smoke come out of the exhaust vent at the top and back of the oven?
A, ft is normal for smoke to come out of the vent during convection cooking.
The smoke will be produced when the food is over-cooked, and will be through the vent.
Q. Why does it take so long to preheat sometimes?
A. When the oven door is opened during the preheating, the hot air will escape from the oven and the
oven temperature will drop, making the preheating time longer.
Avoid opening the oven door during preheating, conuection cooking or micro/convec cooking, when
ever possible.
Q. Why do i see light reflecrion around the outer case?
A, This light is from the oven light which is located outside the ouen cavity.
Q. Is the moisture accumulation on the top and/or sides of the oven door normal when cooking using the
Micro/Convection method?
A. Yes, when foods with high moisture content are cooked, water beads may form on the top and/or sides
of the ouen door, but will dissipate after use.
Q. Why does my oven show time counting down in the display window but no cooking is occuring?
A. The microcomputer In your ouen has caused this Simply unplug the ouen and then plug it back in
48
Page 49

QUESTIONS AND ANSWERS (Cont’d)
FOODS
Q. What is vwong when baked foods have a hard, dry, brown spot?
A A hard, dry, brown spot shows ouercooking. Shorten the cooking or reheating time.
Q. Why do eggs sometimes pop?
A. When bddngjrymg or poaching the yolk may pop due to steam build-up inside the yolk membrane.
To prevent this, simpfy pierce the yolk with a toothpick before cooking it
CAUTION: Never microwave cook e^s in the shell
Q. Why are scrambled eggs sometimes a little dry after cooking?
A Eggs dry out if they are overcooked. Though the some recipe is used each time, one may need to vary the
cooking time for one of these reasons:
® Eggs vary in size.
• Eggs are at room temperature one time and at re/i%erafor temperature another time.
» The shcipes of utensils vary, thereby making it necessary to vary the cooking time.
’« Eggs continue cooking during standing time.
Q.Is it possible to pop com in a microwave oven?
A Yes, if ttskig one of the two methods described belou/.
(1) Microuwue-poppfrig deuices designed spec ficatly for this type of microwave cooking or
(2) Prepackaged commercial microwave popcorn that contains specific times and power outputs
needed for on acceptable final product
FOLLOW EXACT DIRECTIONS GIVEN BY EACH MANUFACTURER FOR THEIR POPCORN
POPPING PRODUCT AND DO NOT LEAVE THE OVEN UNATTENDED WHIUE THE CORN IS
BEING POPPED.
IF CORN FAILS TO POP AFTER THE SUGGESTED TIMES, DISCONTINUE COOKING.
OVERCOOKING COULD RESULT IN AN OVEN FIRE.
CAUTION: NEVER USE A BROWN PAPER BAG FOR POPPING CORN.
Q.What is wrong when three potatoes bake thoroughly and the fourth one is still not cooked?
A The/ourih potato moy be slightly heavier than the others and should be cooked 30 to 60 seconds longer.
Remember to aBow space around each potato when bakmg. Also, for more even cooking, put potatoes in
a circle.
Q. Why do baked apples sometimes burst during cooking?
A ThepeeEnghm not been removed/rom the top half of each apple to allow far expansion of the interior of
the apple aimug cootang, As in regular cooking methods, the interior of the apple expands during the
coaldr^ process.
Q.How are boil-overs avoided?
A When cook%/oc^^t fend to boil over, use a larger utensil than usual for cooking. If you open the
oven doorortoum STOP, the food will stop boiling. (Remember to touch START again after closing the
door to restart the cooking cycle.)
Q. Why Is a standing tíme recommended after microwave cooking is over?
A. Standing time allows foods to continue cooking evenly throughout for a few moments after the
actual microwave oven coqking cycle. The amount of standing time depends upon the density of the
food.
Q. Why is an additional time required for cooking food stored in refrigerator? '
A, As in comenBonal cooking the initial temperature of food affects total cooking time. More time is
needed to cook food just taken out of a refrigerator versus food at a room temperature.
49
Page 50

SEARS SERVICE
“WE SERVICE WHAT WE SELL”
“We Service What We Sell” is our assurance to you that you can depend on Sears for service because
Sears service is nationvdde.
Your Kenmore Microwaue/Conuection Oven has added value «/hen you consider that Sears has a service unit
near you, sta№d by Sears Trained Technicians — professional technicians specifically trained on Kenmore
Microwavc/Convcction Ovens, having the parts, tools and equipment to insure that we meet our pledge to you
- "We Service What We Sell!"
TO FURTHER ADD TO THE VALUE OF YOUR MICROWAVE/CONVECTION OVEN, BUY A
SEARS MAINTENANCE AGREEMENT.
Sears Microwav^Convcction Ovens are designed,
manufactured, end tested for years of dependable operation".
Yet any modem appliance may require service from tíme to
time, A Sears Maintenance Agreement is more than an
extension of the Warranty.
ft provides complete protection from unexpected repair bills
and undue inconvenience It assures you of maximum
efficiency from your Microwave/Convection Oven,.
Here's a comparative Warranty and Maintenance
Agreement chart showing you the benefits of a Sears
Microwave/Convection Oven Maintenance Agreement.
.■i
YEARS OF ownership
COVERAGE
1st Yr.
2nd Yr.
thru
5th Yr.
1. Replacemenl of defective
W
MA
parts other than
magnetron
Z Replacement of
W
W
magnetron
3. Annual preventative
MA MA
maintenance check at
your request
W-WASRANTY
MA-MAiNTENANCE AGREEMENT
Contact your Sears salesperson or local Sears Service Center today and purchase a Sears Maintenance
Agreement.
50
Page 51

smm
USE & CARE
ANNUAL
STOCK NO.
88963
MICRO/CONVECTION
OVEN
WARRANTY
FULL ONE YEAR WARRANTY ON
MICBOWAVE/CONVECTION OVEN
FOR ONE YEAR FROM THE DATE OF PURCHASE, IF THIS KENMORE
MICROWAVE/CONVECnON OVEN FAILS DUE TO A DEFECT IN
MATERIAL OR WORKMANSHIP, SEARS WILL REPAIR IT, FREE OF
CHARGE.
FULL FIVE YEAR WARRANTY ON THE MAGNETRON
FOR FIVE YEARS FROM THE DATE OF PURCHASE, IF THE
MAGNETRON IN THIS KENMORE MICROWAVE/CONVECTION OVEN
FAILS DUE TO A DEFECT IN MATERIAL OR WORKMANSHIP, SEARS
WILL REPAIR rr, FREE OF CHARGE
THE ABOVE WARRANTY COVERAGE APPUES ONLY TO
MICROWAVE/CONVECTION OVENS WHICH ARE USED FOR PRIVATE
HOUSHOLD PURPOSES.
14846
Pan No. t4Bd6
WARRANTY SERVICE IS AVAILABLE BY SIMPLY
CONTACTING THE NEAREST SEARS STORE OR SERVICE
CENTER IN THE UNITED STATES.
THIS WARRANTY APPLIES ONLY WHILE THIS PRODUCT IS IN USE IN
THE UNITED STATES,
THIS WARRANTY GIVES YOU SPECIFIC LEGAL RIGHTS. AND YOU
MAY ALSO HAVE OTHER RIGHTS WHICH VARY FROM STATE TO
STATE.
SEARS, ROEBUCK AND CO.
DEPT. 698/731A, SEARS TOWER, CHICAGO, IL. 60684
Sears, Roebuck and Co., Chicago, IL 60684 U.S.A.
1D/"S7 Primee in .Japan
 Loading...