

Page 1
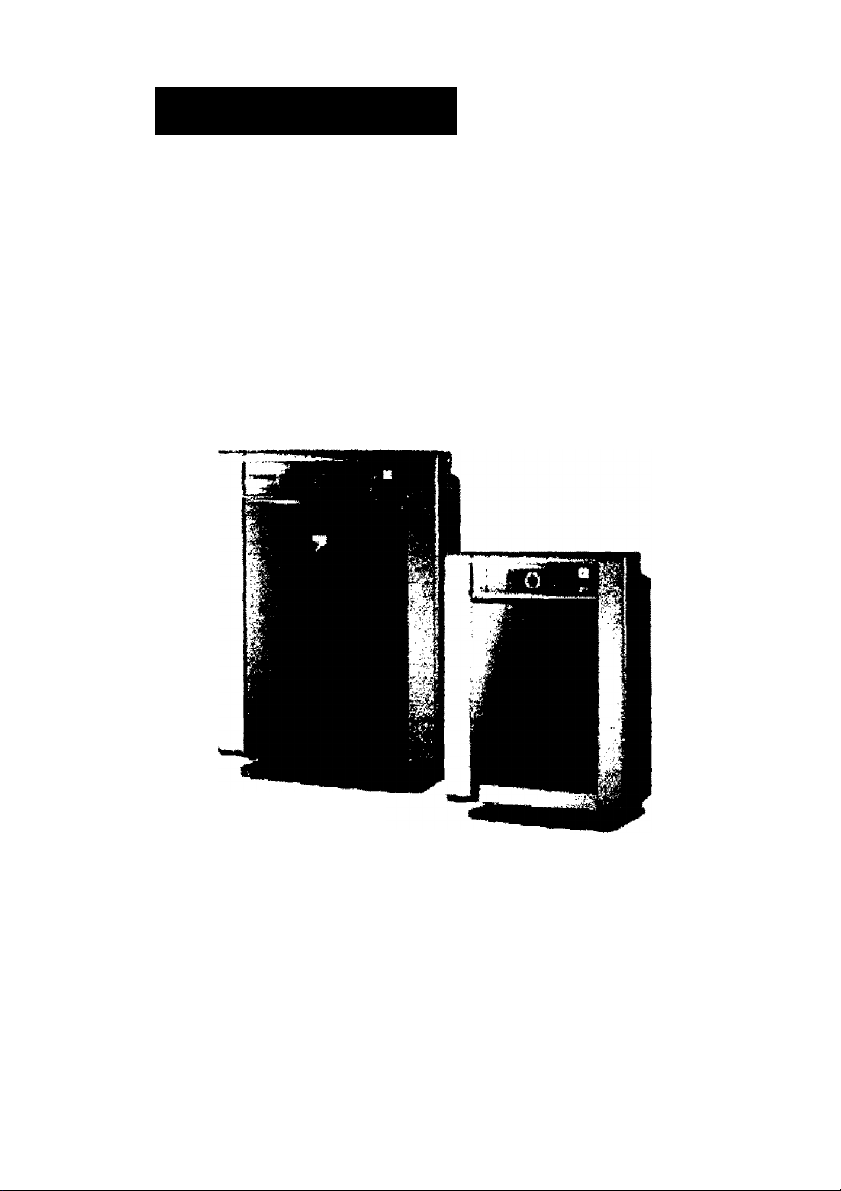
Kenmore
EnviroSense™
True HEPA Air Cleaner
Operator’s Manual
85500
85501
CAUTION:
Read and follow all
safety rules and instructions
before operating this equipment
Sears, Roebuck and Co. Hoffman Estates, JL 60179 U.S.A.
www.sears.com
OM-85500
Español: p.13
T3
ho
Page 2

TABLE OF CONTENTS
SAFETY INSTRUCTIONS
WARRANTY
ONE YEAR LIMtTED WARRANTY ON KENMORE ENVIROSENSE™ AIR CLEANER
If this air cleaner falls due to defects in materlaf or workmanship within one year from the
date of purchase, return it to place of purchase end you will receive a new one free of
charge.
• This warranty does not include the air deaner's replaceable filler cassette, that is an
expendable pari that can wear out from normal use before one year expires.
• This warranty is void if this product is used for commercial or rental purposes.
■■ This warranty gives you specific legal rights, and you may also have other rights, which
vary from state to state.
Sears, Roebuck and Co., Dept, 81 TWA, Hoffman Estates, IL60179
PACKAGE CONTENTS
Kenmore EnviroSerrse™ Atr Cleaner
Remote Control (1 unit)
Batteries (2 AA batteries)
Use & Care Guide
Thank you for purchasing a Kenmoro air
cteaner. Please read this manual carefully
before using. This product is for household
use only.
IMPORTANT CAUTIONS FOR USING YOUR AIR CLEANER
WARNING: Follow the instructions In this
manual to reduce the risk of eledric shock,
short circuit, and/or fire:
• Do not repair or modify the unit uniass
specifically recommended in this manual.
All other repairs should be compteted by
a qualified technician.
• The plug for this unit is polarized with
one blade wider than the other. Do not
force the plug into an electricai ouflel. Do
not alter the plug irt any way. If the plug
does not fit into the outlet, reverse the
plug. If it still does not fit, contact a
qualified technician to install a proper
outlet.
• Do not use if the power cord or plug is
damaged or the connection to the wall
outlet is loose.
• Use AC 120V only.
• Do not damage, break, forcefully bend,
pull, twist, bundle, coat, p»nch, or place
heavy objects on the power cord.
• Periodically remove dust from the power
plug. This wilt reduce the diance that
humidity will accumulate, which
increases the risk of electric shock.
• If the power plug is damaged, it must be
replaced by the manufacturer or a
qualified technician.
• Remove the power plug from the outlet
before cleaning the unit. When removing
the power plug, grasp by holding the plug
itself, never hold by the cord.
• Remove the power plug from the outlet
when the unit Is not In use.
• Do not handle the power plug with wet
hands.
• Do not operate the unit when using
indoor smoke-generating insecticides.
• Do not clean unit with benzene or paint
thinner. Do not spray insecticides on the
unit.
• Do not use the unit where it is humid or
where the unit may get wef, such as In a
bathroom,
• Do not insert fingers or foreign objects
into the air intake or outlet
' Do not use the unit near flammable
gases. Do not use near cigarettes,
incense, or other spark-creating items,
• Unit will not remove carbon monoxide
emitted from heating appliances or other
sources,
IMPORTANT INSTRUCTIONS FOR
USING YOUR AIR CLEANER
• Og not block the intake or outlet vents.
• Do not use near hoi objects, such as a
stove. Do not use where the unit may
come info contai with steam.
• Do not use the unit on its ^e.
• Keep away from products that generate
oily residue, such as a deep fryer.
■ Do not use detergent to dean the unit.
• Do not operate wilfrau! a filler.
• Do rrotwastr and reuse the True HEPAFto.
• Hold the handle on the back of the unit to
transport. Do not hold by the front pane!.
Page 3
PRODUCT SPECIFICATIONS
85501
Room Size
Power Supply
Power Rate Low 6W, Turbo 20W
Fan Speed 4 Speeds 4 Speeds
Display
Control Type Auto/Manual
Timer
Sleep Mode
Remote Control Yes Yes
Dust Sertsor Yes Yes
Odor Sensor
Filters
Cleaniftg System
CADR
Primery Filter
Ion Generator
Color
Dimension 13,8”(W)X8.1"(D)X18.5"(H)
Weight
210 sq. ft. 280 sg. ft.
AC 120V/e0(Hz)
Digital Digital
1,4,8 hour(s)
Yes
Yes Yes
1 Replaceable Cesseite
Pre-Filler / True HEPA Filter /
Washable Nano-Silver/Carbon
Filter / PtasmaOoctor™
SmcAe/Dusl/Polten (135/140/
145)
True HEPA Filter
PlasmaDoctor™
Metallic Blue
13.2 lb
85500
AC 120V/6O(Hz)
Low OW, Turbo 26W
Auto/Manual
1,4,8 hourfs)
Yes
1 Replacteebte Cassette
Pre-Filter / True HEPA Filter /
VWshaUe Nano-Silver/Carbon
Filter / PlasmaDoctor“
Smoka/Dtisl/Pollen (180/100/
180)
True HEPA Filter
PlasmaDoctor™
wietalllc Blue
16.3* (W) X 8.5" (D) X 21 7" (H)
17.01b
AIR CLEANER FEATURES
Note; The features of your air cleaner may
vary according to model,
' Ultra-Quiet Operation
This Kenmore air cleaner has a four-
speed fan with ultra-quiet operation that
is ideal for nighttime operation.
* Easy Maintenance
Kenmore air cleaners are simple and
economical to mainlain. For optirnuin
performance, replace the Pre-Filter,
True HEPA Filter, and the Washable
NanD-Silver/Carbon Filter once yearly.
These tillers are sold together tn one
convenient cassette.
inviroSense™
Kenmore sir cleaners have digital
sensors that delect the presence
of dust and odors in the air, The unit
automatically iiicreases fan speed to
clean mere air volume and remove the
impurities quickly.
Simple Operation
Kenmore air deaners have a remote
control and user-friendly display for your
convenience.
FIVE-STAGE CLEANING
Air undergoes five separate processes
before returning, freshened and cleaned, to
the room.
• Washable Pre-Filter
This reusable filter coBecis large
particles, pollen, pel hair, lint, etc,
• True HEPA Fitter
Captures 99,99% of particles and
Impurities as small as .03 microns.
■ Nano-Sllver Filter
A shield of silver particles one billionth of
a meter in size.
REMOTE CONTROL
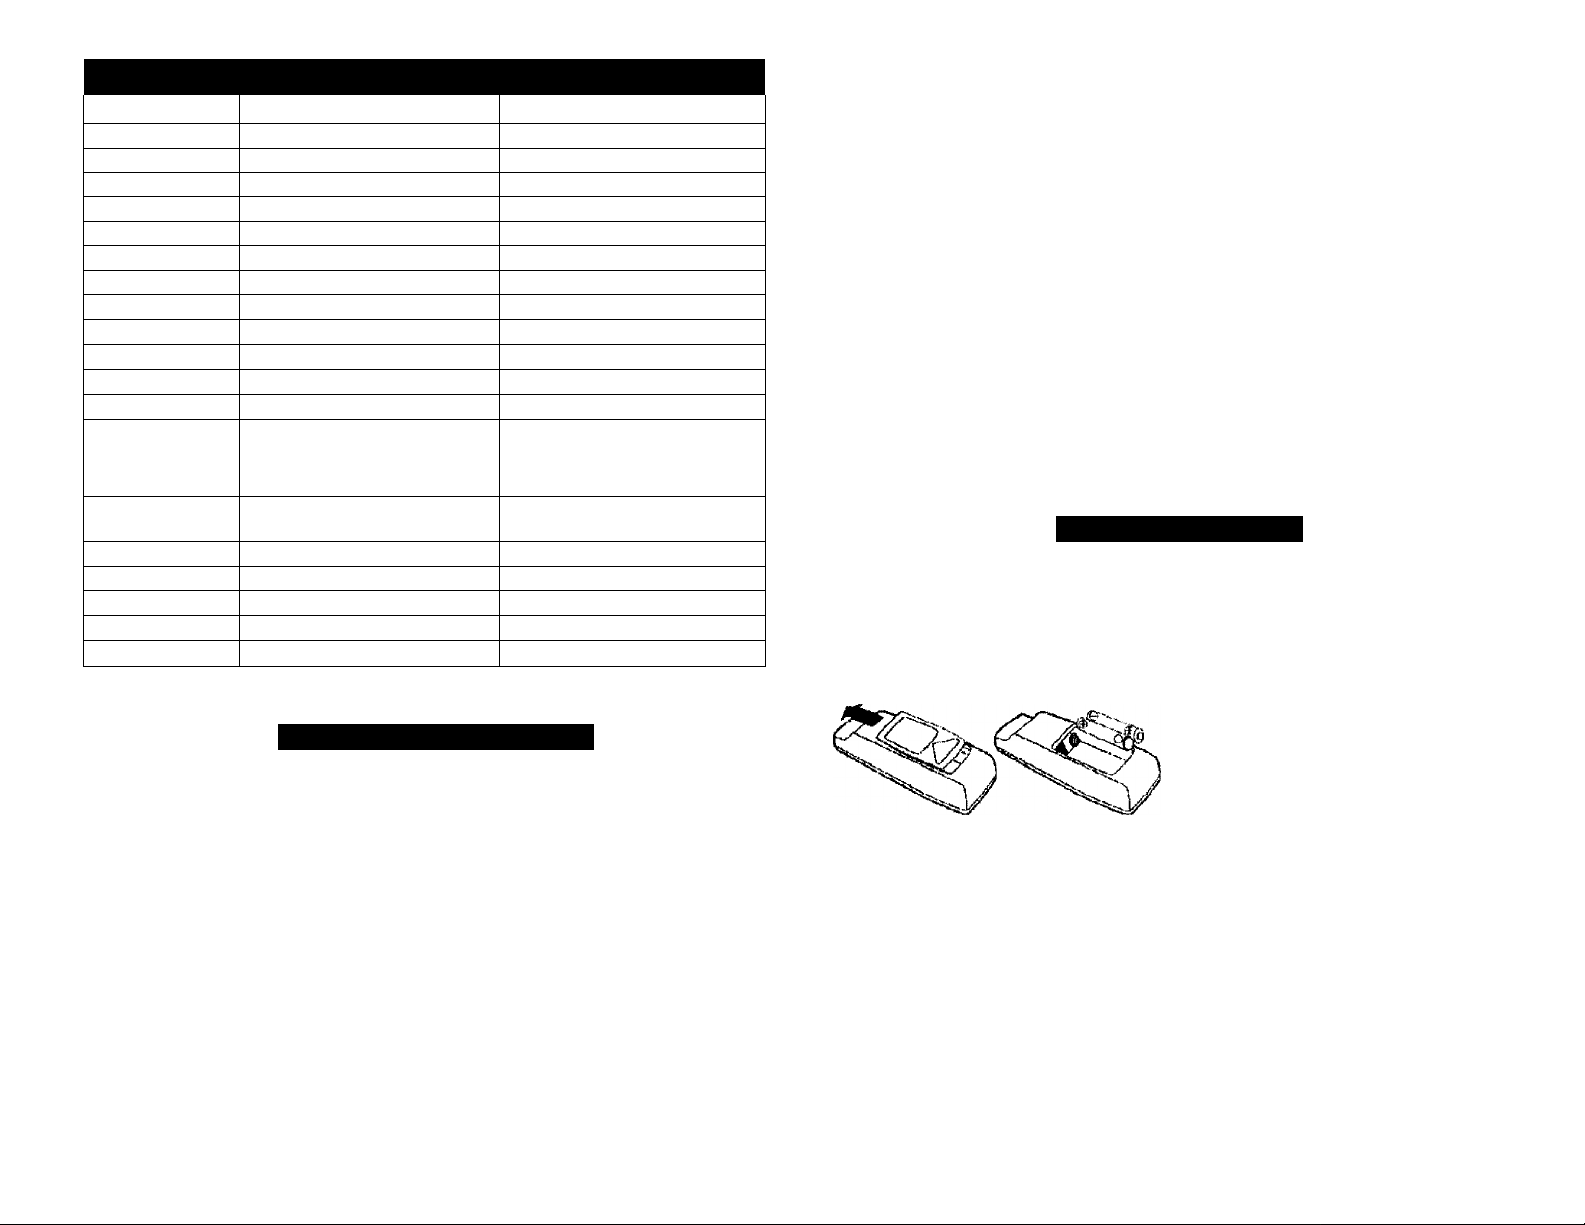
REMOTE CONTROL OPERATION Preparation
• Press and slide the back o)ver of tha
remote to remove.
• Insert batteries as shown.
• Close the back cover.
Battery Use
’ The batteries for the remote control are
for initial use only. Change the batteries
when necessary.
• When replacing the batteries, replace
both at once with 2 new AA batteries.
• Incorrect battery usage may cause
battery fluid leakage and/or damage.
• When not using the remote control for
ah extended period of time, remove the
batteries.
• Avoid dropping or damaging the remote
control. Keep remote coirirol away from
direct sunlight or heaters.
Washable Carbon Filter
Activated granular carbon effectively
collects chemical vapors and odors
caused by cigarette smoke, organic
decay, and cooking.
PlasmaDoctor™
In the final stage of cleaning, the
PlasmaDoctor generates positive
and negative ions.
Note; This equipment has been tested
and found to comply with the limits
for a Class B digital device, pursuant
to 15 of the FCC Rules. These limits
are designed to provide reasonable
protection against harmful interference
in a residential instatlatiori. This equip
ment generates, uses, and can radiate
radio frequency energy and, if not
installed and used in accordance wilti
the Instructions, may cause harmful
interference to radio communications.
However, there is no guarantee that
interference will not occur in a particu
lar installation. If this equipment does
cause harmful interference to radio or
television reception, which can be de
termined by turning the equipment off
and on, the user Is encouraged to try
to comets the interference through one
or more of the following meaeunes:
< Reorient or relocate the receiving
antenna.
• Increase the distance between the
equipment and receiver.
• Connect the equipment to an
outlet on a circuit different from that
to which tee receiver is connected.
• Consult an experienced radio/TV
technician for help.
TJ
Page 4
Uaiitg tha Remote Control
Improper use:
• Any location where there is inverter
lighting equipment or electronic
spontaneous lighting equipment.
• When cleaning unit is located in direct
sunlight, as suntighi may Interfere with
the infrared sensor.
• In areas where fluorescent lighting is
flickering due to worn out bulbs
Proper use:
• Operate with the remote control facing
the air cleaner.
• Operate vmthtn 23 feet of the air cleaner.
• Make sure there are no objects between
the remote centre! and the unit.
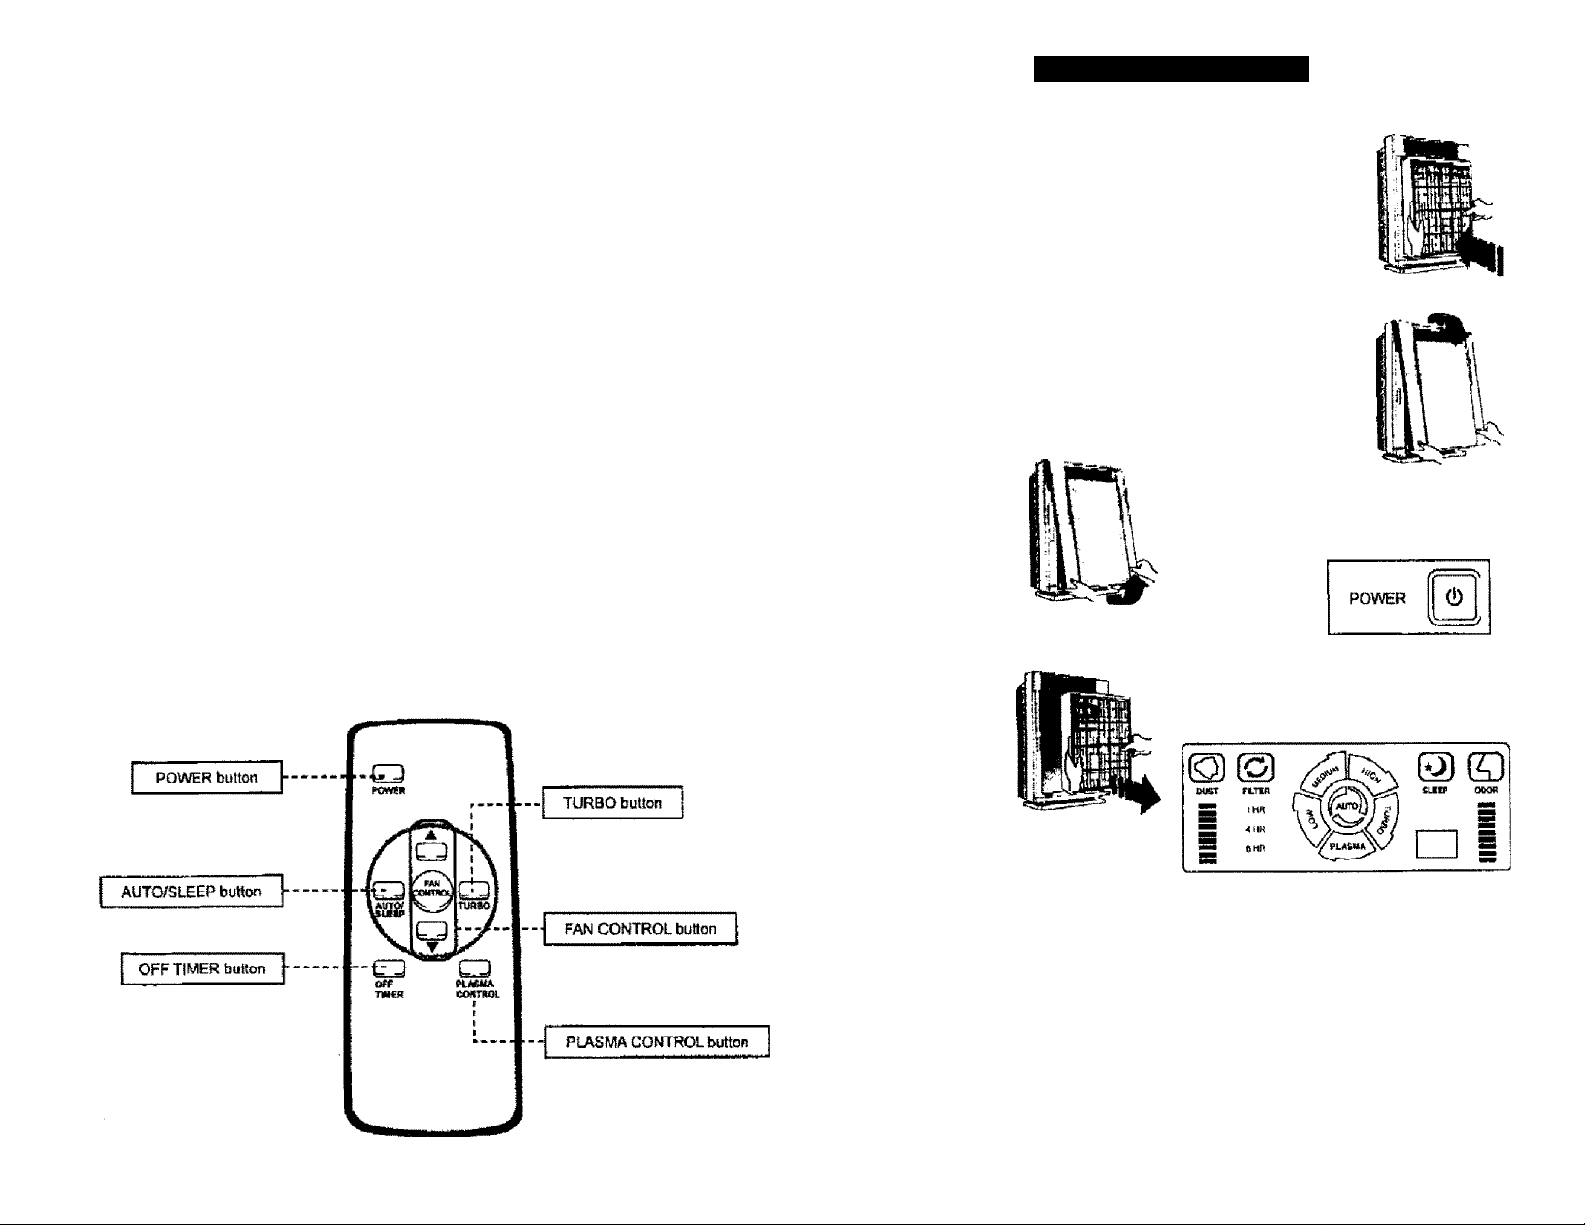
OPERATING THE REMOTE CONTROL
Use the POVtER button to turn the power
ofT and off. A short beep will sound when
you turn the unit on or off. Once the unit
is on, It will automatirailly switch into
Automatic operation. Turn the unit to
manual coniroi by pressing one of Ihe
FAN CONTROL buttons.
OFF TIMER
This button is used to set the timer.
Press the button repeatedly to set the
unit to run for 1, 4, or 8 hours or to
cancel. Each time you press the button,
it will advance to the next pre-set amount
of time. The indicator light on the unit
will show the remaining amount of time.
The unit will stop operating when the set
amount of time runs out.
FAN CONTROL
■ UP
Use this button to switch from
Automatic operation and increase the
fan speed level.
• DOWN
Use this button to decrease the fan
speed level.
TURBO
Use this button to switch from
Automatic operation and begin the
maximum amount of room cleaning
and air movement.
' AUTOiSLEEP
Use this button to switch between
Sleep, operation and Automatic
operation.
‘ PLASMA CONTROL
Use this button to turn the
Plasma Doctor on or off.
AIR CLEANER SET-UP
Note: Follow these instructions for best
results.
■ Place unit at least 7 feet from equipment
that emits electric waves such as
televisions or radios.
• Place unit at least 2 feet from the wall.
• Keep sensors away from drafty areas.
• Keep curtains away from sensors, as
they may interfere with air intake/oullet.
• Place unit on a stable surface with plenty
of air circulation.
1. Remove protective film from the control
panel.
2, Remove the front panel by pulling gently
on the silver labs
located on each side
of (he unit.
3.Pull out the filter cassette by grasping the
black tabs located
on each side.
5, Place the filter cassette back mto m c
main unit.
6, Replace the front panel by hooking the
panel on the top pf the
unit. Swing panel in
by pushing gently on
the silver tabs located
on each side of the unit
and then lock it into
place.
7. Plug in the power cord to a wall outlet.
8- Press POWER button until a short “beep*
IS heard.
For the first 4 minutes after the unit is
turned on, the unit will check the air
quality, and the dust and odor pollution
level indicators wilt flash.
4. Remove the plastic wrap from the
filter cassette.
T)
im
Page 5

OPERATION
AUTOMATIC OPERATION
The unit is set to default to Automatic operation when It is first fumed on. The air cleaner
will automatically sense to the amount of impurities in the air, and adjust the fan speed
accordingly.
AUTOMATIC
SLEEP
TIMER
Set the timer for 1,4, or 8 hours by pressing the OFF TIMER button on the Remote or the
unit. The unit will stop operating when the set lime is up. Cancel the timer by pressing the
OFF TIMER button until the 1-, 4-, and 8-hour indicator light on the unit disappears.
► Cancel
85500
1 hour-—►4 hour
DUST
POLLUTION CHANGE
l.evSL FILTER
INDICATOR INDICATOR
► 8 hour '
TURBO
HIGH
MANUAL OPERATION
After you turn on the unit, you can switch
to manual operation by pressing the FAN
CON IROL buttons on the remote, or the
FUNCTION button on the unit.
• SLEEP
The ufHt will wortc in ultra-quiet mode.
- LOW, MEDIUM, AND HIGH
These levels are recommended for
standard, daytime use, HIGH will activate
automatically when sertsors detect high
levels of dust or odors.
■ TURBO
TTie TURBO level, the highest fan speed,
can be activated manually for maximum
air circulation.
* PLASMADOCTOR«*
Turn on the PlasmaDocfor by pressing
the PLASMA CONTROL button on the
Remote, or the FUNCTION button on the
unit. The PlasmaDocfor generates
positive and negative ions.
PARTIS
BUMKING
DUST AND ODOR SENSORS
The dust and odor sensors show three
levels of air cieanliness—green, orange,
and red. The greca tight indicates clean
air, the orange light Indicates unclean air,
and the red light indicates very undean air.
If the unit is set to Automatic operation, It
wBI change fan speeds to compensate for
different levels of air pollution.
LOW HIGH
Indoor Dust Voluma
Odor Sensor
The odor sensor responds to cigarette
smcriie and pet odors, as well as other
air contaminants such as insecticides,
cosmetics, alutohul, or aerosol sprays.
Dust Sensor
The dust serisor detects particles in the air
sucit as cigarette smoks, dust, and pollen.
LOW
MEDIUM
0 0©
LOW HIGH
Indoor Odor Volume
OFF CHANGE
TIMER HUEK
BUTTON INDICATOR
8S5D1
FUNCTION
BLTrrON
DUST
SENSOR
CARE AND MAINTENANCE
CLEANING
• Clean unit as necessary
by wiping with a dry, soft
cloth; for stubborn stains,
use a warm, damp cloth.
Do not use volatile fluids such as
benzene, paint thinner, or scouring
powder, as they may damage the unit
surface.
RFMOTE ODOR POWER
CONTROL SENSOR BUTTON
RECEIVER
POWER
BUTTON
• Keep the unit dry.
• Clean the wall behind the air outlet
periodically, as It may become dirty.
Filter Cassette Replacement
The CHANGE FILTER INDICATOR will
signal when to replace the filter cassette.
The replacement period wtli vary depending
on the hours of use, air quality, and location
of the unit. However, most fillers in normal
use need to be replaced annually.
TI
o>
Page 6

For your conwsniance, all thre« fillers (Pre
Fitter. Washable Nano-Silvsr/Carbon Filter,
and True HEPA Filter) come in one pre
packaged replacement cassette.
For optimum unit efficiency, wash the Pre
Filter and Washable Nano-Silwer/Carbon
Filter as described betow (Filter Cleaning)
every three months.
Do not wash and reuse the True HEPA
Filter—(t will not work effectively.
WARNING: Before replacing or cleaning
any filters, make sure to remove the
power plug front the wall outlet.
Replacemeitt Procedure
1. Remove the frorit panel by pulling gently
on the sliver labs
located on eadi side
of the unit.
6. Plug in the power cord to a wall outlet
and turn on the unit.
7. To turn off the CHANGE FILTER
INDICATOR, press the FUNCTION and
OFF TIMER buttons at the same time for
five seconds: the CHANGE FILTER
INDICATOR will flash five times and turn off.
Filter Cleaning
We recommend leaning the Pre-Filter (A)
and the Nano-Silver/Carbon Filter ¡C) every
three months with normal use. The interval
between cleanings will vary based on room
conditions.
1. Remove the front panel and filter
cassette as described in Replacement
Procedure.
2. Remove the Pre-Filter by gently puling
one side of the cassette frame outward
while lifting the Pre-Filler tab at the same
time. When one edge is clear of the
frame, the Pre-Filter will slide out for
cleaniftiill
6. Do not dry the two filters—running the
unit will be suffident to dry them.
7. Replace each filter in the cassette frame
by inserting one tong edge first, then
snapping into place by pushing sideways
and down at the same lime. Make sure
both filters are completely inside the
cassette frame and secured by the short
tabs. If a filter is on top of one or more
tabs, pull outward, slightly flexing the
cassette frame, while gently pushing
down on the edge of the filter.
NANO-SILVER/CARBON FILTER
CASSETTE
SHORT
6, Replace the filter cassette and front
panel as described In Replacement
Procedure.
a Plug in the power cord to a wall outlet
and turn on the unit.
Note; Never attempt to remove the True HEPA
Filter from the cassette frame. Never attempt to
dean the True HEPA Filler. Replace the entire
cassette only when CHANGE FILTER alert
acSvates, (Modd 85500 replacanenf #85501;
Model fS501 replacement #85511)
GRAY TAB
CASSETTE
LONG TAB
2, Pull out the filter cassetteby grasping the
black tabs located
on eadt side.
3. Remove the plastic wrap from tha new
filter cassette.
4. Place the new filter cassette in the
main unit.
5. Replace the front
panel.
3. Lightly vacuum the Pre-Filler and wash
with water and a mild household deter
gent. Rinse, and shake off excess water.
4. To remove the Washable Nano-S liver/
Carbon Filter, turn the cassette over and
place facedown on an even surface.
Grasp the tali white tab nearest to the
gray lab. Slightly flex the cassette frame
outward while pulling up on the gray
iab. When the first corner is released,
pull Qui on the other tall frame tab while
a>ntinuing to pull up on the gray lab.
When one long edge of the filler is free,
slide out for cleaning.
5. Wash the filter in warm water with a mild
household detergent. Rinse, and shake
off excess water.
FRONT SIDE
Power Plug
Plasma Doctor’^“
Display Panel
DC Motor
Washable Nano-
Sitver/Carbon Piter
Filter Cassette with
True HEPA Filter inside
Front Panel
TOPSIDE
Remote
ConlroJ
Air Outiel Cradle
XJ
Page 7

TROUBLESHOOTING
Before You Call
Solutions lo Common Problems
Review this list before you call for service. This list includes occurrences that do not result
from defective malerrals or workmanship in this unit.
ÍNDICE DE MATERIAS
OCCURRENCE
The remote control
does rrot work.
The unit leaves smoke
and odors in the air.
The unit seems to
produce odors.
The dust or odor light
is green, but there is
still dusl/odor in the air.
The dust or odor light
is orange or red. but
the air seems dean.
Unit makes a tidiing
sound,
Unit irtlerteres with
radio or television
reception.
POSSIBLE GAUSE/SOLUTION
• Uncharged batteries. Replace with fresh batteries.
• Poor insertion. Make sure the batteries are inserted correctly
into the remote control.
■ Filter saturation, Replace the fitter if needed,
■ Unit location. Move the unit closer to the offending odors,
• Sensor blockage. Check to see that the sensor is not blocked
or clogged.
• FUter saturalion. Replace the filter if needed.
• Ozone production. The unit produces a virtually undetectable,
harmless amount of ozone that may have an odor. The ozone
will break down quickly and will not accumulate.
• Clear the sensor with a vacuum cleaner as it may he blocked
or clogged.
• Clear the sensor with a vacuum cleaner as it may be blocked
or dogged-
• The unit is working property to generate ions. If the sound is
annoying, turn off the PlasmaDoctor fufretion when you are
in the room.
• Reorient the television/radro antenna. This unit complies with
the limits for a Class B digital device, pursuant to FCC rules.
This unit generates, uses, and can radiate radio frequency
energy.
• Move the unit away from the affected televtsioniradio,
• Plug the unit power cord into a different outlet than the
televiaonfradio power cord.
GARANTIA
GARANTIA UMITADA OE UN AÑO PARA EL PURIFICADOR DE AIRE ENViROSENSE™
DE KENMORE
Si este purificador de aire deja de funcionar apropiadamente debido a defectos de
materiai o mano de obra dentro de un período de un año a partir de la fecha de compra,
devuélvalo ai lugar donde lo compró y recibirá uno nuevo sin costo sdguno.
• Esta garantía no incluye el cassette de filtros reemplazable, el cual es una parte de la
unidad que se desgasta como consecuencia del uso normal antes de que expire un año.
• Esta garantía será gmulada si este producto es usado con fines comerciales o de
alquiler.
• Esta garantía le da deredios legales, y es posible que usted tenga otros derechos, los
cuales podrían variar en cada e^ado.
Sears, Roebuck and Co., Dept. 817WA, Hoffman Estates, !L 60179
CONTENIDO DEL PAQUETE
Purificador de Aire KenmcMH
EnvIroSense™
Control Remoto (1 unidad)
Baterías (2 baterías AA)
Guía de Uso y Cuidado
The CHANGE FILTER
indicator remains
lit alter replacing the
filter cassette.
‘ Press the FUNCTION and OFF TIMER buttons at the same
time for five seconds. The CHANGE FILTER INDICATOR will
Bash five times and turn off.
XI
i»
Page 8

INSTRUCCIONES DE SEGURIDAD
Gracias por comprar un purificador de
aire Ksnmore. Lea esle manual aríies de
usariD. Esle producto ha sido fabricado
para ser usado en hogares solamente.
PAUTAS DE PRECAUCIÓN
IMPORTANTES PARA SU PURIFICADOR
DE AIRE
ADVERTENCIA; Siga las instrucciones
en este manual para reducir el riesgo
de toques eléctricos, cortocírcuilos y/o
incendios;
• No repare ni modifique la unidad
a menos que esto sea recomendado
específicamente en este manual.
Todas las demás reparadones deben ser
completadas por un técnica ealiflcado.
• El enchufe para esta unidad está
potari?ado <Kin una clavija más ancha
que la otra. No fuerce el enchufe para
insertarlo en la toma eléctrica. No altere
el enchufe de ningún modo. Si el
enchufe no encaja en la toma, invierta
d enchufe. Si aún así no encaja,
comuniqúese con un técnico calificado
para instalar una toma apropiada,
• No use la unidad si el caWe eléciriíto o la
toma están dañados, o si la conexión a
la toma de la pared está floja.
• Use rxjrriente alterna (AC) de 120V
solamente.
• No dañe, rompa, dobla forzando, jale,
amontone, cubra con capa ni punce el
cable eléctrico, ni coloque ítojelos
pesados encima del mismo.
» Remueva periódicamente el polvo
de! enchufe eléctrico. Esto redudrá
la probabilidad de que se acumule la
humedad (lo cual aumenta el riesgo de
toques eléctricos).
• Si el enchufe eléctrico está dañado, éste
debe ser reemplazado por e! fabricanle o
por un técnico calificado.
• Saque el enchufe eléctrico de la toma
antes de limpiar la unidad. Al sacar el
enchufe eléctrico, hágalo sosteniendo el
enchufe, y nunca lo haga sosteniendo el
cable.
‘ Desenchufe la unidad de la toma cuando
la unidad no esté siendo usada.
> No manipule e! enchufe eléctrico con las
manos mojadas.
> No opere ía unidad al usar insecticidas
que generan humo en al interior.
• No limpie la unidad con bencina
o tíiluyente para pintura. No rocié
insecticidas en la unidad.
• No use la unidad donde haya humedad
o en los lugares donde ésta se pudiera
mojar, como por ejemplo en un baño.
- No Inserte los dedos ni ningún objeto
exiemo en la toma de aire de la unidad
ni en la toma eléctrica de Ja parad,
• No use la unidad cerca de gases
Inflamables, ni tampocxr la use r^rca de
cigMiiilos, incienso o artículos que
generan chispas.
• La unidad no eliminará el monóxido de
carbono emitido por electrodomésticos
de calefacción y por otras fuentes.
INSTRUCCIONES IMPORTANTES PARA
USAR SU PURIFICADOR DE AIRE
' No bloquee la torna de aire ni los ofificlos
de ventilación.
• No use la unidad cerca de objetos
callantas, como por ejemplo una estufa.
No ia use en los lugares donde ésta
pudiera entrar en contacte con vapor.
• No usa la unidad colocada lateralmente
sobre su costado.
• Mantenga alejados tos productos que
generan residuos aceitosos, como por
ejemplo freidoras de comida.
• No use detergentes para limpiar la
unidad.
• No opere la unidad sin un filtro.
• No lave ni vuelva a usar el Filtro Trué
HEPA.
• Agarre el mango en la parte Irasera de la
unidad para transportarla. No ia agarre
del panel frontal.
ESPECIFICACIONES DEL PRODUCTO
85501 185500
Tamaño de la Habitación
Suministro de Corriente
Clasificación de Potencia
Velocidad del Ventilador
Visuallzador
Tipo de Control
Timer
Modalidad de Dormir
Control Remoto
Sensor de Polvo
Sensor de Olor
Filtros
Sistema de Purificación
CADR
Filtro Primarlo
Generador de Iones
Color
Dimensión
Peso
210 pies cuadrados
AC 120V/60(Hz)
Baja 6W, Turbo 20W
4 Veloddades
Digital
Automático/Manuai
1.4.8 hora(s)
SI
Si
Si
Si
1 Cassette Reemplazable
Pre-Filtro / Filtro True
HEPA / Filtro Lavable de
Nano-Plata ! Carbón /
PlasmaDoctor™
Humo/Polvo/Poten
(135/140/145)
Filtro True HEPA
PlasmaDoctor^
Azul Metálico
13.8”(A) X 8.1’(P) X18.5"(H)
13.2 Ib
CARACTERÍSTICAS DEL PURIFICADOR DE AIRE
Nota; Las características de su purificactor
de aire podrían variar según el modelo.
• Operación Ultraeilenciosa
Este purificador de aire Kanmore tiene
un ventilador de cuatro velocidades con
operación ultrasilenciosa que es ideal
para usarlo durante la noche.
• Mantenimiento Fácil
Los puríficadores de aíre Kenmore
requieren un manteniiriíento sencilla y
económico. Para un rendimiento óptimo,
reemplace el Pre-Filtro, el Filtro True
HEPA, y el Filtro de Nano-Plata/Carbón
Lavable una vez al año. Estos filtros
son vendidos Juntos en un solo cassette
conveniente.
280 pies cuadrados
AC 120V/60(Hz)
Baja 6W, Turbo 26W
4 Veloddades
Digital
AutomálicQ^anual
1,4.8 hora(s)
SI
Sí
Sí
Sí
1 Cassette Reemplazable
Pre-Filtro / Filtro True
HEPA / Filtro Lavable de
Nano-Ptata ¡ Carbón /
PlasmaDottor^Humó/Polvo/Polen
(180/180/180)
Filtro True HEPA
PlasmaDodor™
Azul Metálico
16.3"(A)X8.5”(P)X2l.r (H)
17.0 Ib
EnviroSense™
Los puríficadores de aire Kenmare
tienen sensores digitales que detectan
la presencia de polvo y olores. La unidad
aumenta automáticamente la velocidad
del ventilador para purificar un mayor
volumen y eliminar las impurezas
rápidamente.
Operación Sencilla
Los puríficadores de aire Kenmore tienen
un control remoto y un visuallzador fácil
de leer para conveniencia del usuario.
T3
CD
Page 9

PURIFICACIÓN DE CINCO ETAPAS
El airs es sometido a cir co procesos
separados antas de retomar aire fresco y
purificBdo a la habitación.
• Pre-Filtro Lavable y Germicida
Este filtro reutilizable recolecta partículas
grandes, polen, pelo de mascotas, hilas,
etc
» Filtro True HEPA
Recolecta 99.99% de las partículas e
impurezas cofi un lanvaflo míninM de .03
micrones.
• Filtro de Nano-Plata
Las particajias de pista con un tam^o
de un mil milionèsima de metro
rteutralizan tos bacter as é hacer
contacto can ellas, lo cual resulta ert gue
dichas bacterias dejen de ser
perjudiciales.
CONTROL REMOTO
Filtro de Carbón Lavable
El carbón granular activado recolecta
de manera eficaz los vapores <juí micos
y tos olores causados por la nicotina, la
descomposición orgènica y la cocción.
PlasmaOoctor^“
En la etapa final de purificación, el
PiasmaOoclor genera iones positivos
y negativos c¡ue atraen y aglomeran las
moléculas de agua. Se ha demostrado
que elplasma agrupado restrftanle es
eficaz para reducir el número de
microbios en el aire.
OPERACIÓN DE CONTROL REMOTO
. POWER (energía)
Use el botón POWER (energía) para
encender y apagar la unidad. Se
escuchará un tono sonoro corlo al
encender y apagar la unidad. Después
de encender la unidad, ésta pasará
automáticamente a la operación
Automática. Ajuste la unidad en la
modalidad de contrd manual oprimiendo
uno de tos botones FAN CONTROL
(control de ventilador).
• OFF TIMER (timer de apagado)
Este botón se usa para ajustar ei timer.
Oprima el botón repetidamente para
que la unidad opere durante 1,4 u 8
horas o para cancelar. Cada vez que
oprima el botón, éste avanzará a la
siguiente cantidad de tiempo preajusta
da La luz tndicadcKa en la unidad
mostrará la cantidad de tiempo restante.
La unidad dejará de operar cuando
transcurra el tiempo del ajuste.
FAN CONTROL (control da ventilador)
• UP (arriba)
Use este botón para cambiar de op
eración Automàtica y aumentar el nivel
de velocidad del ventilador.
• DOWN (abajo)
Use este botón para reducir el nivel de
velocidad del ventilador.
TURBO
Use este botón para dejar la operación
Automática y dar Inicio & lá cantidad
máxima de purificación de ia
habitación y movimiento de aire.
AUTO/SLEEP (automátlcúldornilr)
Use este botón pana cambiar entre la
operación Sleep (dormir) y la
operación Automatic (automética).
• PLASMA CONTROL (control de
plasma)
Use este botón para encender y
apagar el PlasmaDoctor.
OPERACIÓN DE CON"ROL REMOTO
Preparación
• Oprima y deslice la t£ pa trasera del
control remoto para quitarla.
• Inserte balerías lat c£ mo se muestre.
• Cierre la tapa trasera.
Uso de Baterías
• Las baterías para el control remoto son
para el uso inicia! solamente. Cambie
las baterías cada vez que sea necesario
hacerlo,
• Al reemplazar las baterías, reemplace
ambas a la vez con 7 nuevas baterías
AA.
• El uso incorrecto de baterías podría
causar fugas de liquido de baterías o
dados.
• Al no usar el control remoto por un
período de tiempo extendido, quite tos
baterías.
• Evite dejar caer o dañar el control
remoto. Mantenga el control remoto
alejado de la luz sofar directa o de los
calefactores.
Manera de Usar el Control Remoto
Uso inaproptodo;
• Cualquier ubicación donde haya
equipo inversor o equipo de iluminación
espontánea ^ectrónica,
• Cuando la unidad de purificación está
ubicada en un lugar expuesto a ía luz
solar directa, debido a que la luz sotar
podría interferir con el sensor írtfrarrojo,
• En áreas donde la iluminación
fluorescente está debilitándose
intermitentemente debido a bombillos
desgajados.
Uso apropiado:
• Opere la unidad con el atnlrol remoto
orientado hada el purificador de aire.
• Opere e! control remote a una distancia
máxima de 23 pies con respecto al
purificador de aire.
' Asegúrese de que no haya objetos entre
el (tentrol remoto y ia unidad.
Nota; Este equipo na sido proPado y se ha determinado que cumple con los limites para dlspoBllivos
digitales Clase B, según 15 da los Regiamantos de la FCC. Estos limites están diseñados para
proporctonar protección razonable contra interferencia nociva en una irtstalacíón residencial. Esta equipo
genera, usa y puede irradiar cnwpia de rodiolrecuencia y, de no aer instalado y usado de canfotmidad
con las instrucciones, podría cau.'tar interferencia nociva a las comunicaciones da radio. Sin embargo,
no se fiarantlza que la tnteiferencia no ocurriré en una instaiadón particular. s¡ este equipo caiisa
interferencia nociva a la recepdOn de radio o televisión, lo cual puede ser determinado apagando y
encendiendo ei equipo, se le recomienda al usuario que trate de corregir la interterenda afrticando urta o
más de las siguienies medidas:
' Reoriente o vuelva a posicíonaf la antena de recepción. • Aumente la distanda entie el equ^o y el
receptor. • Conede el equipo a una toma o drcdito diferente de aquél al que ha sdo conectado el
receptor. • Consulta a un técnico de radlo/TV con experiencia para obtener asistencia
p
O
Page 10

AJUSTE DEL PURIFICADOR DE AIRE
OPERACIÓN
Nota: Siga estas instrucciones para
obtener resultados óptimos.
• Coloque la unidad a por lo menos 7 pies
de distancia de cualquier unidad de
equipo que emite ondas eléctricas, como
por ejemplo televisores o radios.
< CoEoque la unidad a por lo menos 2 pies
de distancia de ia pared,
< Mantenga los sensores alejados de las
áreas donde hay corrientes de aire.
• Mantenga las cortinas alejadas de
los sensores, puesto que éstas podrían
interferir con las tomas y salidas de aire.
• Coloque la unidad sobre una superficie
estable con bastante circulación de aire.
1
Quite la película protectora del panel de
control.
Quite el panel frontal jalando
suavemente las
lengOetas plateadas
ubicadas a cada iado
de la unidad.
3. Saque ei cassette de ftlfros agarrando
las lengüetas negras
ubicadas a cada
lado.
4. Quits la envoltura plástica del cassette
de fittros.
5. Coloque el cassette de filtros
nuevamente en la
unidad principal.
6, Coloque nuevamente el panel frontal
engandiando el panel
en la parte superior de
la unidad. Rote el panel]
para meterlo
empujando suavemente!
las lengüetas plateadas f
ubicadas a cada lado
de la unidad y fíjalo en
su lugar.
7, Enchufe el cable eléctrico a una toma de
pared.
8, Oprima el botón POWER (energía) hasta
escuchar un “bip" breve.
Durante tos primeros 4 minutos después
de encenderla unidad, éste revisará
calidad del aire, y bs indicadores de
la
nivel de conlaminaciótt de polvo y olor se
iluminarán intermitentemenle.
OPERACIÓN AUTOMÁTICA
La unidad está ajustada para functortar en operación Automática al ser encendida por
primara vez, El purificador de aire evaluaré automáticamente la cantidad de Impurezas en
el arre y ajustará la velocidad del ventilador como consecuencia de eio.
AUTOMATfC
(automático)
OPERACIÓN MANUAL
Después de encender la unidad, puede
cambiar a operación manual oprimiendo
los botones FAN CONTROL (control da
ventilador) en et contrc« remoto, o el bolón
FUNCTION (fundón) en la unidad.
• DORMIR
La unidad fundonará en b modalidad
ultrasilendosa.
^ LOW, MEDIUM AND HIGH (bajo,
mediano y alto)
Estos rtiveles son recomendados para
uso normal durame el dia. El nivel HIGH
(alto) se activará autométicamenle
cuando los sensores detetíen niveles
altos de polvo u oicwes.
• TURBO
El nivel TURBO es la velocidad de
ventilador más alta, y puede ser activado
manualmente para una circulación de
aire màxima.
• PLASMADOCTOR™
Encienda el PlasmaDoctor oprimiendo
el botón PLASMA CONTROL en el
Ccmlrol Remoto, o el botón FUNCTION
(función) en la unidad. La fundón
PlasmaDoctor genera iones positivos y
negativos.
SENSORES DE POLVO Y OLOR
Los sensores de polvo y olor muestran
tres niveles de purificación de aire—verde,
anaranjado y rojo. La luz verde Indica
aire puro, la luz anaranjada indica aíre
impuro, y la luz roja indica aire muy
impuro Si la unidad está ajustada en
operadón Automàtica, ésta cambiará las
velocidades de! ventilador para compensar
los diferentes niveles de contaminación del
aíre.
SLEEP
(dormir)
©Q(D
i
= в
LOW (bajo) HIGH(alto)
Volumen de Polvo
en el Interior
LOW (bajo) HlGHtaltû
Volumen de Olor
en el Interior
sa
ш
Page 11

Sensor da Olor
El sensor de olor responde et humo de
ciganillos y a los olores de les mascotas,
asi como a diferentes coMaminantes del
aire lates como insecticidas, cosméticos,
alcohol o rodadores de aerosol.
Sensor de Polvo
El sensor de polvo detecta partículas en
el aire tales asmo humo de dgarrillos,
polvo y polen.
horas “► 8 horas
INDICADOR
ОЕСАЫВЮ
DE FUTRO
A
INDICADOR
DE NIVEL DE
CONTAMINACIÓN DE
B5500
SENSOR !NOIC«>OR
DE POLVO OÉ TIMER
85501
BOTÓN
FUNCTION
POLVO
l^fasaxi»
f <Í i. l t Л H l R
APAGADO
BOTÓN
OFF TIMER mOICADOft
(timer DE CAMBIO
apagado) DE FILTRO
INDICADOR
DE NIVEL DE
CONTAMINACIÓN DE
1 hora
POLVO
CUIDADO Y mantenimiento
LIMPIEZA
• Limpie la unidad según
sea nacesarío con un
trapo seco y limpio; para
las manchas resistentes,
use un trapo húmedo y
callente.
TIMER
Ajuste el timer para 1,4 u 8 horas
oprimiendo el botón OFF TIMER (timer
apagado) en el Control Remoto o en la
Unidad. La unidad dejará de operar una
vez transcurrido el tiempo establecido.
Cancele el timer oprimiendo el botón OFF
TIMER (timer apagado) hasta que la luz
indicadora ds 1,4 y 8 horas en la unidad
desaparezca.
►Cancelar botón
INDICADOR DE Ü£ N№t DE y
MODALIDAD DE CONTAMINACIÓN / BOTÓN
DORMIR OLOR / j FUNCTiON
INDICADOR
DE NIVEL DEL
ventilador
INDICADOR
PLASMADOCTOR™
RECEPTOR
DE CONTROL
REMOTO
INDICADOR ápágádo)
RECEPTOR SENSOR BOTÔK
DECONTROL DE OLOR POWER
REMOTO íeneiglB)
INDICADOR DE SOTÓN
MODALIDAD DE POVtCR
INDICADOR
OE NIVEL OE
CONTAMINACIÓN
OFF TtMER
DORMIR ¡eneffiíaí
DE OLOR
(llmer
• No use liquidas volátiles tales como
bencina, diluyente de pintura o polvo
abrasivo, puesto que éstost podrían
dañar la superficie de le unidad.
• Mantenga la unidad seca.
• Limpie periódicamente la pared detrás
de la toma de aire, puesto que ésta se
podría ensuciar.
SENSOR
DE OLOR
Reemplazo del Cassette de Filtros
В INDICADOR DE CAMBIO DE FILTRO
indicará cuándo reemplazar el cassette
de filtros. El período de reemplazo variara
dependiendo de las horas de uso, la
calidad del aire y la ubicación de la unidad.
Sin embargo, la mayoría de loa filtros bajo
uso normal deben ser reemplazados una
vez al año.
Para su conveniencia, los tres filtros (Pre
Filtro, Filtro de Nano-Plata/Carbón Lavable
y Filtro True HEPA) vienen en un cassette
de reemplazo preempacado.
Para una eficiencia óptima de la unidad,
lave el Pre-Fíltro y el Filtro de Nano-Plata^
Carbón Lavable tal como se describa abajo
(Limpieza de Filtros) cada tres meses.
No lave ni vuelva a usar el Filtro True
HEPA—éste no fundonará eficazmente.
AOVERTENCIA; Antes de reemplazar
o limpiar ios filtros, asegúrese de
desenchufar el enchufe eléctrico de la
toma de la pared._________________
Procedimiento de Reemplazo
1, Quite el panel frontal jalando
suavemente las lengüetas
plateadas localizadas a
cada lado de la unidad.
2. Jale y saque el cassette de filtros
agarrando las
lengüetas negras
ubicadas a cada
Jado.
3. Quite lg envoltura plástica del nuevo
cassette de filtros.
4. Coloque el nuevo cassette de filtros en la
unidad prindpaL
5. Coloque nuevamente
el panel ffonial.
6. Enchufe el cabla eléctrico en una toma
de pared y encienda la unidad.
7. Para apagar e! INDICADOR DE CAMBIO
DE FILTRO, oprímalos botones
FUNCTION (fundón) y OFF TIMER
(llmer apagado) al mismo tiempo
durante cinco segundos: él INDICADOR
DE CAMBIO DE FILTRO Se iluminará
intermitentemente cinco veces y se
clpcf^cilt ei.
Limpieza de Filtros
Recomendamos limpiar el Pre-Filíro (A) y
el Filtro de Nano-Plata/Carbón (C) cada
tres meses a! usar la unidad normrrtmente.
El Intervalo entre las Imipiezas estará
basado en las condidones de la habitación,
1. Quite el panel frontal y el cassette
de filtros tal como se describe en
Procedimiento de Reemplazo.
2. Quite el Pre-Filtro jalando suavemente
un lado del marco del cassette hada
afuera y levantando la lengüeta del
Pre-Filtro al mismo tiempo. Cuando un
borde esté alejado de( marco, el Pre
Filtro se deslizará hada afuera para
poder ser limpiado.
3. Aspire suavemente ei Pre-Filtro y lávelo
con agua y un detergente suave para
uso doméstico. Enjuague y agite el
exc&so de agua.
•p
Page 12

4. Pata quitar el Filtro de Nano-Plata/
Carbón Lavable, voltee el cassette y
colóquelo cara abajo sobre una
superficie uniforme. Agarre la lengüeta
alta y blanca más cercana a la lengüeta
gris. Flexione un poco el marm del
cassette bada afuera mientras jala hacia
arriba la tefiflüela gris. Después de soltar
la primera esquina, jale hacía afuera la
otra lengüeta alta del marco y continúe
jalando la lengüeta gris hada arriba. Al
soltór el borde largo del filtro, desiíceto
hada afuera para limpiarlo.
5. Lave el fJiro en agua caliente con un
detergerete suave para uso doméstico.
Enjuague y agite el exceso de agua.
6. No seque los dos filtros—operar la
Uhi dad será suficiente para secarlos.
FILTRO DE NANO-PLATA/CARBÓK
LENGÜETAS
CORTAS DEL
CASSETTE
7. Reemplace cada uno de los filtros en
el marco del cassette Insertando primero
un borde largo, y después rilándolo en
su lugar empujando hacia un lado y
hacia abajo ai mismo tiempo. Asegúrese
de que ambos filtros estén
completemenle adentro del marco del
cassette y que estén sujetados fwr las
lengüetas cortas. Si uno de los filtros
está encima de una o más lengüetas,
jale hada afuera, flexionando un poco
el marco del cassette, mientras empuja
suavemente hacia abajo sobre el borde
del filtro.
S. Coloque nuevamente el cassette
de filtros y el panel frontal tal como ss
describe en Procedimiento de
Reemplazo.
9l Enchufe el cable eléctrico en una toma
de parad y endenda la unidad.
LENGOETAGRIS
LENGÜETA
LARGA DEL
CASSETTE
RESOLUCIÓN DE PROBLEMAS
Antes de Llamar
Soluciones 3 Problemas Comunes
Lea esta lisia antes de llamar para recibir servicio. Esta lista incluye tos eventos que no
resultan debido a malanales o mano de obra defectuosos en esta unidad.
EVENTO
El control remoto no
funciona.
La unidad deja humo y
olores en el aíre.
La unidad aparenta
producir olores.
La luz de polvo u olor
es verde, pero aún
hay polvo/olor en e!
aire.
CAUSA POSIBLE/SOLUCIÓN
• Baterías descargadas. Reemplácelas con baterías nuevas.
• Mala inserdón. Asegúrese da que las baterías sean
insertadas oorrectamente en el contrd remoto.
• Saturación de filtro. Reemplace el filtro si es necesario.
• Ubicación de la unidad. Mueva la unidad más cerca en
dirección de los malos olores.
• Bloqueo de sensor. Revise para verificar que el sensor no
esté bloqueado u obturado.
« Saturatìón de filtro. Reemplace el filtro si es necesario.
< Pmducdón de ozono. La unidad produce una cantidad
de azor» virtualmente indetectabte e inofensiva que podría
tener un olor. El ozono se descompondrá rápidamente y no
se acumulará.
• Limpie el sensor con una aspiradora, puesto que ésta podría
estar bloqueada u obturada.
LADO FRONTAL
Encllufe Eléctrico
PlasmaDoaor™
Panel del S/lsuslizador
Motor DC
Fillfo de Nano-Piataf
Csrbón Lavable
Cassette del Filtro con
el Filtro True HEPAAdentro
Noia; No trate nunca de sacar el ffldo
Tn» HEPAdd marco del cassaOe.
No trate nuncíuie limitar eí rito True
HEPA. Reenteiace kxto el csswie
únicamente cuantío se adm la seAal
CHANGE FiLtER ÍCSI«IS WO).
IModelo №600 leemplaico #85601 ;
Modelo 85501 reemplazo 885511)
Panel Frontal ,,
Orificio de detconttúl
Ventitadún Remoto
LADO
SUFCRIOR
Horqu“'®
La luz de polvo u olor
es arraranjada o roja,
pero el aire aparenta
estar limpio.
La unidad hace un
ruido de tic.
La unidad Interfiere
con la recepción de
radio 0 televisión.
El INDICADOR
DE CAMBIO DE
FILTRO permanece
encendido despirès de
reemplazar el cassette
de filtros.
• Limpie el sensor con una aspiradora, puesto que ésta podría
estar bloqueada u obturada.
• La unidad está fundonando apropiadamente para
generar iones. Si el sonido es molesto, apague la función
PlasmaOoctor cuando usted esté en la habitación.
• Vuelva a orientar la antena de televiaión/radiQ. Esta unidad
cunqjls con los límites para dispositivos digitales de Clase
B, de conlormidad con los reglamentas da la FCC. La unidad
genera, usa y puede irradiar energia de radiofreojencia.
• Mueva la unidad alejándola del televisor/radlo afectado.
• Enchufe el cable eléctrtoo de la unidad en una toma diferente
donde no esté conectado el cable elédrico dal televisor/
radio.
- Oprima los botones FUNCTION (fundón) y OFF TIMER
(timer apagado) al mismo tiempo durante anco segundos.
El INDICADOR DE CAMBIO DE FILTRO se iluminará
intermitentemente cinco veces y sa apagará.
p
w
Page 13

Get ¡t fixed, at your home or oursl
Your Home
For repair - in your home - of all major brand appliances,
lawn and garden equipment, or heating and cooling systems,
no matter who made It, no matter who sold It!
For the replacement parts, accessories and
owner's manuals that you need to do-it-yourself.
For Sears professional installation of home appliances
and items like garage door openers and water heaters,
1-800-4-MY-HOIVIE® Ariytims, day or night
<1-800-463-4663) (U.S.A. and Canada)
www.sears.com www.sears.ca
Our Home
For repair of carry-in products like vacuums, lawn equipment,
and electronics, call or go on-line for the nearest
Sears Parts and Repair Center.
1-800-488-1222 Anytime, day or night (U.S.A. only)
www.sears.com
To purchase a protedion agreement (U.S.A)
or maintenance agreement (Canada) on a product serviced by Sears:
1 -800-82r-88S5 iU.SA) 1 -800-361 -6665 (Canada)
Para pedir servicio de reparación
a domidiio, y para ordenar piezas;
l-eSB-SUHOGARB»-
{14388-784642?)
©SSeo(s, Rœbudi and Co.
® Registered Traâarnsrk ¡ ™ Tradamarit / * Sarvica Mark, af Sean, Rnanuctt anci Co.
® Maica RetjMradâ ( r« Marca efo Fábrica / Marca de Serwicio de Seáfí. Roebuck and CO,
Marque de commerce J <» Marque déposée de Sears, Roebuck end Co
Au Canada pour service en français;
1-600-I.E-FOYERMC
d-«)0a356937}
www.sears.ca
 Loading...