

Kenmore 83230, 83234, 83353, 83354, 83355 Owner's Manual
Sears, Roebuck and Co., Hoffman Estates,IL 60179 U.S.A.
INFO-LINE:
After reading this manual, if you have any questions or comments on your
Kenmore Air Cleaner, call: 1-800-4MY-HOME (1-800-469-4663)
True HEPA Air Cleaner
Installation Instructions
OWNER'S MANUAL
Models:
83230
83234
83353
83354
83355
®
Part No. 1183291 Rev.A
Contents – Safety Information
2
Contents
Safety information . . . . . . . . . . . . . . . . . . . . . . . . . . . . . . . . . . . . . . . . 2-3
Electrical requirements . . . . . . . . . . . . . . . . . . . . . . . . . . . . . . . . . . . . . . 4
Location requirements . . . . . . . . . . . . . . . . . . . . . . . . . . . . . . . . . . . . . . . .5
Operating air cleaner . . . . . . . . . . . . . . . . . . . . . . . . . . . . . . . . . . . . . . . . 5
Caring for air cleaner . . . . . . . . . . . . . . . . . . . . . . . . . . . . . . . . . . . . . . . 6-7
Warranty . . . . . . . . . . . . . . . . . . . . . . . . . . . . . . . . . . . . . . . . . . . . . . . . . 8
Your safety and the safety of others are very important.
We have provided many important safety messages in this manual and on
your appliance.Always read and obey all safety messages.
This is the safety alert symbol.
This symbol alerts you to potential hazards that can kill or hurt
you and others.
All safety messages will follow the safety alert symbol and either the word
“DANGER” or “WARNING”.These words mean:
You can be killed or seriously injured if you don’t immediatel
y follow
instructions.
You can be killed or seriously injured if you don’t follow instructions.
All safety messages will tell you what the potential hazard is, tell you how to
reduce the chance of injury, and tell you what can happen if the instructions
are not followed.
WARNING
DANGER
Congratulations
You now own a quality HEPA air cleaner
that has been engineered and crafted for
your satisfaction.
This Kenmore air cleaner incorporates a
True HEPA filter. HEPA is an acronym for
High Efficiency Particulate Air.
Customer Assistance Line
There are no customer-serviceable parts
inside this air cleaning system. If you
experience any problem, please see the
warranty for information. Please do not
attempt to repair this unit yourself.
Doing so will void your warranty and
could cause damage to the air cleaner or
personal injury to yourself. If you have
any questions concerning this appliance,
please call toll free:
1-800-4MY-HOME
(1-800-469-4663)
.
Safety information
3
WARNING — To reduce the risk of fire, electrical shock, injury or
sickness when using your air cleaner, follow these basic precautions:
• Plug into a grounded 3-prong
outlet.
• Do not remove ground prong.
• Do not use an adapter.
• Unplug air cleaner before
servicing.
• Shut off and unplug air cleaner
before moving.
• Do not immerse air cleaner in
water or other liquids.
• Do not use air cleaner near water
or in damp locations such as
bathtubs or a wet basement.
• Keep power cord out of heavy
traffic areas.
• Do not pull on or carry air cleaner
by the power cord or place the
power cord in contact with sharp
edges or corners.
• Do not use the air cleaner if
supply cord has been damaged.
• Do not put power cord under rugs,
near heat registers, radiators,
stoves or heaters.
• Always unplug air cleaner before
moving it, opening the grill,
changing filters, before cleaning or
whenever air cleaner is not in use.
Turn air cleaner off before
unplugging.
• Do not put foreign objects in air
cleaner.
• Do not use air cleaner if it
malfunctions or has been
damaged. Return air cleaner to
manufacturer for examination,
electrical or mechanical repairs.
See Warranty, back cover.
• Supervise use of air cleaner if
used in area near children or
disabled people.
— SAVE THESE INSTRUCTIONS —
It is your responsibility to connect the air cleaner only to the proper kind of
outlet, with the correct electrical supply and ground. See “Electrical
Requirements,” Page 4.
IMPORTANT SAFETY INSTRUCTIONS
Safety informationElectrical Requirements
WARNING
Grounding Instructions:
A 115-volt (104 volt min. to 126 volt
max.), 60-Hz, AC-only, 15- or 20-ampere
fused and properly grounded electrical
supply is required. A time-delay fuse or
time-delay circuit breaker is
recommended.
For your personal safety, this air cleaner
must be grounded.This air cleaner is
equipped with a power supply cord
having a 3-prong ground plug.
To minimize possible shock hazard, the
cord must be plugged into a mating
3-prong ground-type outlet, grounded
in accordance with local codes and
ordinances. If a mating outlet is not
available, it is the personal
responsibility and obligation of the
customer to have the properly
grounded outlet installed by a qualified
electrician.
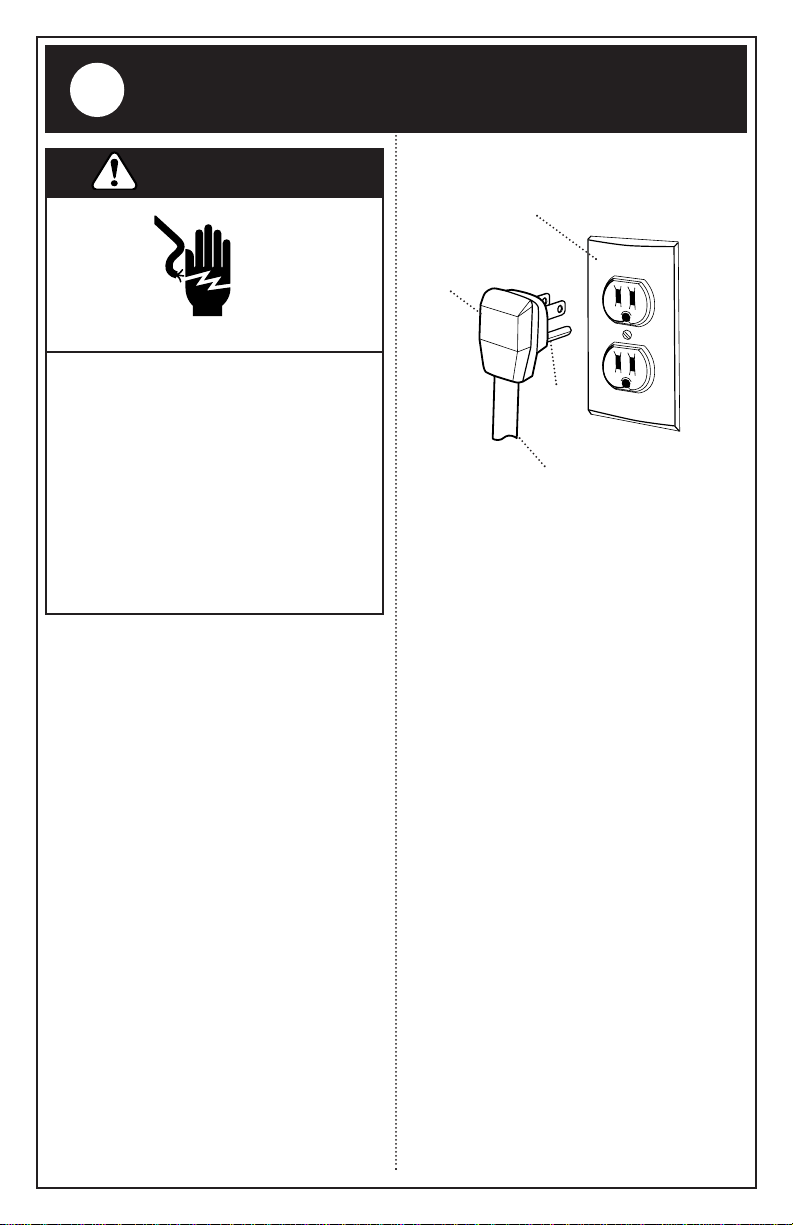
Electrical Shock Hazard
Plug into a grounded 3-prong
outlet.
Do not remove ground prong.
Do not use an adapter.
Do not use an extension cord.
Failure to follow these
instructions can result in death,
fire, or electrical shock.
3-Prong
Ground
Plug
3-Prong Ground-Type
Outlet
Ground
Prong
Power Supply Cord
4
CHANGE
HEPA
CHANGE
PRE-FILTER
HIGH
LOW
FILTER
RESET
OFF
Safety information
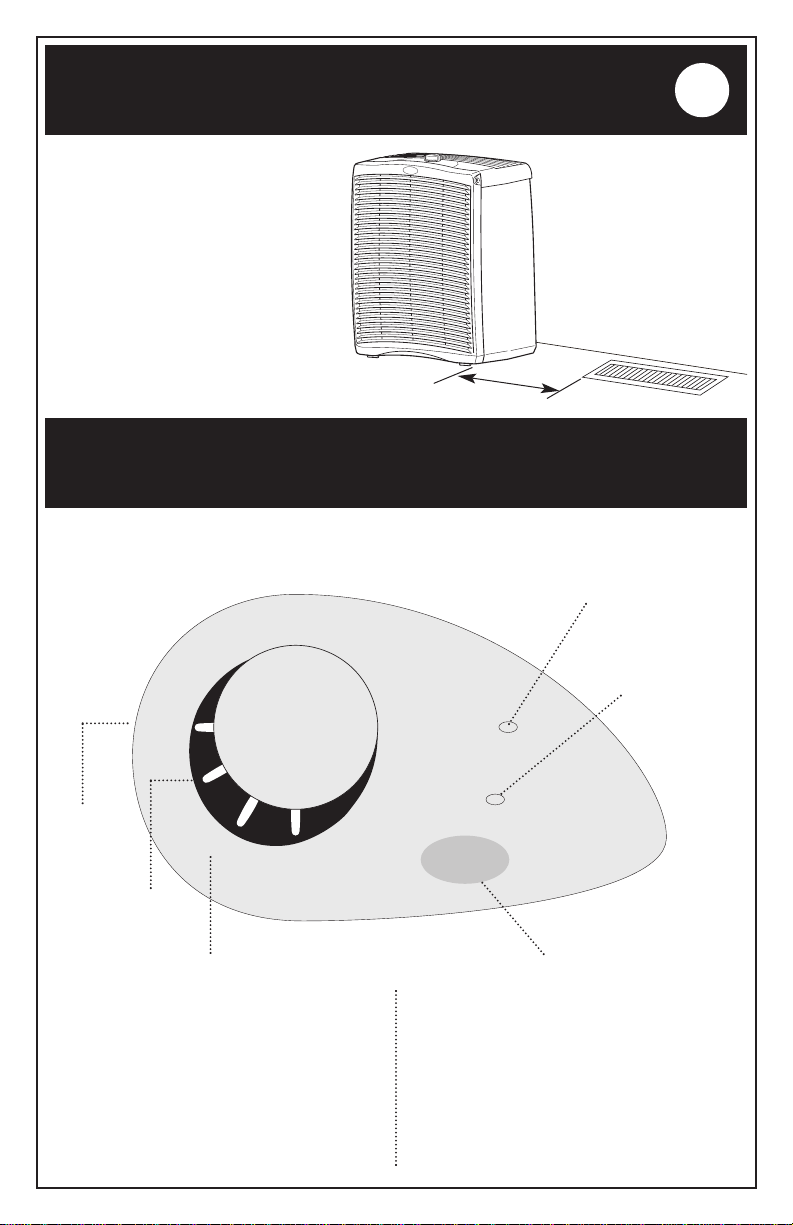
Location Requirements
Operating Air Cleaner
• Do not block air openings or
place air cleaner on soft surface
such as bed or sofa. This could
cause air cleaner to tip over,
blocking air intake opening.
• Place air cleaner on a flat, level
surface at least 6 inches away
from heat sources such as
ranges or heaters.
• This product is intended for
indoor use only.
5
1. Plug air cleaner into a grounded
3-prong outlet.
Note: Both filter lights will flash once
during a self-test when the air cleaner
is turned on or after a power
interruption.
2. Turn the knob clockwise to HIGH, MED
or LOW to select the speed you want.
3. When the HEPA filter or pre-filter light
comes on, open the front grill and
replace the indicated filter. See
“Caring for Air Cleaner”,Pages 6-7.
4. Whenever you change either filter,
press the “Reset” button.
HIGH
LOW
MED
HEPA Filter Light
Pre-Filter Light
Reset Button
6" Min. Clearance
NOTE: Before operating air cleaner,record date of installation on HEPA filter so you
can replace it annually.To remove and replace HEPA filter,see instructions on Page 7.
 Loading...