

Kenmore 79077471790, 79077475790, 79077476790, 79077478790 Owner’s Manual
Record Your Model & Serial Numbers ................................ Cover
Important Safety Instructions .................................................. 2-4
Grounding Instructions
(electric ignition models only) .................................................... 5
Control Pad Functions ................................................................. 5
Setting the Clock & Minute Timer .............................................. 6
Flame Size .................................................................................... 7
Proper Burner Adjustments ......................................... ;.............. 7
Setting Surface Controls ............................................................. 7
Before Setting Oven and Warm & Ready Drawer Controls ..... 8
Setting Oven Controls ............................................................ 9-11
Adjusting Oven Temperature ................................................... 11
Setting Warm & Ready Drawer Controls ................................. 12
I I IIIII I IIII II IIIIIIIIIIIll I IIIIII
Read al! instructions before using
this appliance. This book contains
valuable information about:
• Operation
• Care
• Service
Keep it in a safe place.
Oven Cleaning ...................................................................... 13-14
General Cleaning .................................................................. 15-17
Changing Cooktop and/or Oven Lights (some models) ......... 18
Avoid Service Checklist ........................................................ 19-20
Warranty .................................................................................... 21
Sears Service .............................................................................. 22
Read and Save These Instructions
Record Your Model and Serial Numbers
The model and serial numbers of your range are found on the right
side of the oven front frame in the storage compartment or on the
oven floor shield. Record and retain these numbers.,
Model Number:
Serial Number:
Date of Purchase:,
i , i iiiiiii1,1111111111 , , iiiiiiiiiiiiiiiii i,ii II iiiiiiii , i iiii iiii
Sears, Roebuck and Co., Hoffman Estates, IL 60179 U.S.A.
P/N 316000923 (9704)
IMPORTANT SAFETY INSTRUCTIONS
Read all instructions before using this •
appliance. Save these instructions for future
reference.
This guide contains important safety symbols and °
instructions, Pleasepay special attention to these symbols
and follow aJlinstructionsgiven° Here is a brief explanation
of the use of these symbols
_This symbol will help alert you to situations
that may cause serious bodily harm, death or property
damage.
_This symbol will help alert you to situations
that may cause bodily injury or property damage.
If the information in this
manual is not followed exactly, a fire or
explosion may result caus!ng property
damage, personal injury or death.
FOR YOUR SAFETY:
Do not store or use gasoline or other
flammable vapors and liquids in the
vicinity of this or any other appliance.
WHAT TO DO IF YOU SMELL GAS"
o Do not try to light any appliance.
• Do not touch any electrical switch; do
not use any phone in your building.
• Immediately call your gas supplier from
a neighbor's phone. Follow the gas
supplier's instructions.
e If you cannot reach your gas supplier,
call the fire department.
Installation and service must be
performed by a qualified installer,
servicer or the gas supplier.
Remove all tape and packaging wrap before using
the range. Destroy the carton and plastic bags after
unpacking the range° Never allow children to play with
the packaging material
Proper Installation--Be sure your appliance is
properly installed and grounded by a qualified
technician in accordance with the National Gas Code
ANS! Z223.1--1atest edition, or in Canada CAN/CGA
B149.1, and CANfCGA B149.2, and the National
Electrical Code ANSIINFPA No. 70--latest edition, or
in Canada CSA Standard C22_1, Canadian Electrical
Code, Part 1, and local code requirements. Instalf only
per installation instructionsprovided in the literature
package for this ranger
Ask your dealer to recommend a qualified technician and
an authorized repair service_ Know how to disconnect the
electrical power to the range at the circuit breaker or fuse
box in case of an emergency
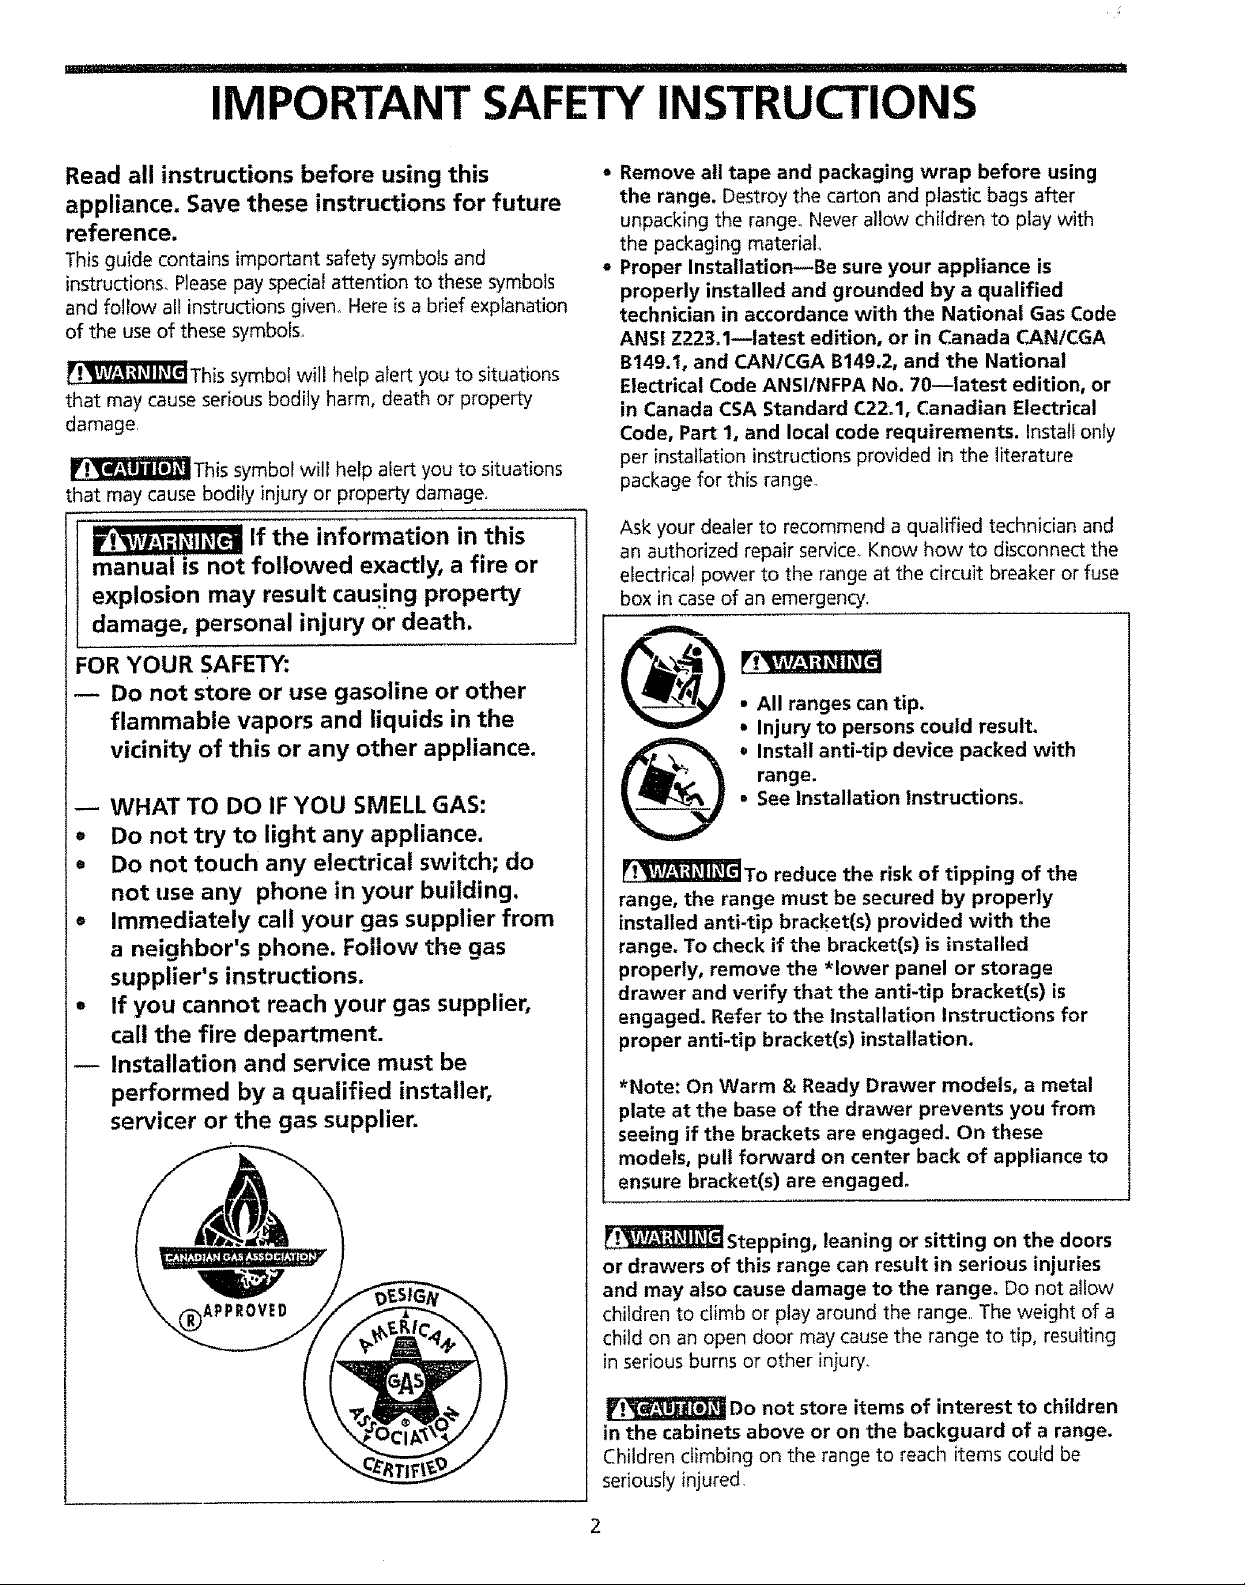
A
• All ranges can tip.
• injury to persons could result.
o Install anti-tip device packed with
range.
• See Installation Instructions°
_]_To reduce the risk of tipping of the
range, the range must be secured by properly
installed anti-tip bracket(s) provided with the
range. To check if the bracket(s) is installed
properly, remove the *lower panel or storage
drawer and verify that the anti-tip bracket(s) is
engaged. Refer to the Installation Instructions for
proper anti-tip bracket(s) installation,
*Note: On Warm & Ready Drawer models, a metal
plate at the base of the drawer prevents you from
seeing if the brackets are engaged. On these
models, pull forward on center back of appliance to
ensure bracket(s) are engaged°
_Stepping, leaning or sitting on the doors
or drawers of this range can result in serious injuries
and may also cause damage to the range° Do not allow
children to climb or play around the range The weight of a
child on an open door may cause the range to tip, resulting
in serious burns or other injury_.
Do not store items of interest to children
in the cabinets above or on the backguard of a range.
Children climbing on the range to reach items could be
seriously injured.
IMPORTANT SAFETY INSTRUCTIONS
I
_Do not use the oven or Warm & Ready
Drawer for storage.
Do not store items of interest to children
in the cabinets above a range or on the backguard of a
range, Children climbing on the range to reach items
could be seriously injured.
• Storage in or on Appliance--Flammable materials
should not be stored in the oven, near surface
burners, in the storage drawer (if equipped) or in the
Warm 8=Ready Drawer (if equipped). Thisincludes
paper, plastic and cloth items, such as cookbooks,
piasticware and towels, as well asflammable liquids. Do
not store explosives, such as aerosol cans on or near the
range Flammable materials may explode and result in fire
or property damage
• Do not leave children alone, Children should not be
left alone or unattended in the area where an
appliance is in use. They should never be allowed to sit
or stand on any part of the appliance.
• Do not touch surface burners, areas near these
burners, oven burner, interior surfaces of the oven
or Warm & Ready Drawer. Areas near surface burners
may become hot enough to cause burns During and after
use, do not touch, or let clothing or other flammab!e
materials touch these areas until they have had sufficient
time to cool Among these areas are the cooktop,
surfaces facing the cooktop, the oven vent openings and
surfaces near these openings, oven door, Warm & Ready
Drawer and window
• Wear Proper Apparel--Loose-fitting or hanging
garments should never be worn while using the
appliance. Do not let clothing or other flammable
materials contact hot surfaces,
Never use your appliance for warming or
heating the room.
• Do Not Use Water or Flour on Grease Fires--Smother
the fire with a pan lid, or use baking soda, a dry
chemical or foam-type extinguisher.
• When heating fat or grease, watch it closely. Fat or
grease may catch fire if allowed to become too hot
• Use Only Dry Potholders--Moist or damp pothotders
on hot surfaces may result in burns from steam, Do
not let the pothotders touch the flame or burners, Do not
use a towel or other bulky cloth instead of a pothotder,,
• Do Not Heat Unopened Food Containers--Build-up
of pressure may cause the container to burst and
result in injury,
• Remove the oven door from any unused range if it is
to be stored or discarded.
_Cold temperatures can damage the
electronic control. When using the appliance for the first
time, or when the appliance has not been used for an
extended period of time, be certain the unit has been in
temperatures above 32°F for at least 3 hours before turning
on the power to the appliance,
• IMPORTANT--Do not attempt to operate the oven
during a power failure, if the power fails, always
turn the oven off. if the oven isnot turned off and the
power resumes, the oven will begin to operate again,
Food left unattended could catch fire or spoil
Important Instructions for Using Your
Cooktop
• Know which knob controls each surface heating
unit.
• Use Proper Flame Size--Adjust flame size so it does not
extend beyond the edge of the utensil, The use of under-
sized utensils will expose a portion of the burner flame to
direct contact and may result in ignition of clothing,
Proper relationship of utensil to flame will also improve
efficiency.
• Utensil Handles Should Be Turned Inward and
Should Not Extend Over Adjacent Surface Burners--
To reduce the risk of burns, ignition of flammable
materials, and spillage due to unintentional contact with
the utensil, the handle of the utensil should be positioned
so that it is turned inward, and does not extend over
adjacent surface burners
- Never Leave Surface Burners Unattended at High
Settings--Boilovers causesmoking and greasy spillovers
that may ignite, or a pan that has boiled dry may melt
• Protective Liners--Do not use aluminum foil to line
surface burner pans, the oven bottom or any other
part of the range Only use aluminum foil as
recommended for baking if used as a cover placed on the
food Any other use of protective liners or aluminum foil
may interfere with heat and air distribution, and
combustion. Damage to the range or personal injury may
result.
• Glazed Cooking Utensils---Only certain types of glass,
glass/ceramic, ceramic, earthenware, or other glazed
utensils are suitable for rangetop service without breaking
due to the sudden change in temperature° Check the
manufacturer's recommendations for rangetop use,
• Do Not Use Decorative Surface Burner Covers. If a
burner is accidentally turned on, the decorative cover will
become hot and possibly melt. You will not be able to see
that the burner is on Burns wil! occur if the hot covers are
touched. Damage may also be done to the cooktop or
burners because the covers may cause overheating. Air
will be blocked from the burner and cause combustion
problems
........................ iiii
IMPORTANT SAFETY INSTRUCTIONS
Important Instructions for Using Your Oven/
Warm & Ready Drawer
• Use Care When Opening the Oven Door or Warm
& Ready Drawer--Stand to the side of the range
when opening the door of a hot oven/Warm & Ready
Drawer Let hot air or steam escape before you remove
or replace food in the oven/Warm & Ready Drawer,
• Keep Oven Vent Ducts Unobstructed. The oven is
vented below the backguard. Touching the surfaces in
this area when the oven is operating may cause severe
burns AIso, do not place plastic or heat-sensitive items
on or near the oven vent. These itemscould melt or
ignite+
• Placement of Oven/Warm & Ready Drawer Racks.
Always place racks in desired location while oven/
Warm & Ready Drawer is cool if rack must be moved
while oven is hot, use extreme caution Use pothoiders
and grasp the rack with both hands to reposition Do
not let potholders contact the oven burner flame or
interior of the oven/Warm & Ready Drawer Remove alt
utensils from the rack before removing rack
+ Do not use the broiler pan without its insert. The
broiler pan and grid allow dripping fat to drain and be
kept away from the high heat of the broiler+
• Do not cover the broiler grid or Warm & Ready
Drawer with aluminum foil. Exposedfat and grease
could ignite
+ Do not touch a hot light bulb (some models) with
a damp cloth. Doing so could cause the bulb to break
Disconnect the range or turn off the power to the
range before removing and replacing the light bulb
Important Instructions for Cleaning Your
Range
• Clean the range regularly to keep all parts free of
grease that could catch fire. Payparticular attention
to the area underneath each surface burner+ Exhaust
fan ventilation hoods and grease filters should be kept
clean Do not allow grease to accumulate Greasy
deposits in the fan could catch fire+ Refer to the hood
manufacturer's instructionsfor cleaning
• Kitchen cleaners/aerosols--Always follow the
ma_ufacturer's recommended directions for use Be aware
that excessresiduefrom cleaners and aerosols may ignite
causing damage and/or injury
Self-Cleaning Ovens:
° Clean in the self-cleaning cycle only the parts of
the oven listed in this owner's guide. Before self-
cleaning the oven, remove the broiler pan and any
utensils stored in the oven,
• Do not clean the oven door gasket. The door gasket
isessential for a good seal. Care should be taken not to
rub, damage or move the gasket
+ Do not use oven cleaners. No oven cleaner or oven
liner protective coating of any kind shouid be used in or
around any part of the oven+
SAVE THESE
i ................. II III1'111'11
Grounding Instructions
(electric ignition models only)
IMPORTANT: READ AND SAVE THESE INSTRUCTIONS.
_'!'_IWal_,!_ll_[€lThis appliance is equipped with a 3 prong grounding plug for
.................... I lll III
your protection against shock hazard and should be plugged directly into a
_i'_Wz_lL_lh_l_IAvoidfire hazard or
electrical shock Do not use an adaptor
properly grounded receptacle DO NOT cut or remove the grounding prong
from this plug,
_lug, an extension cord, or remove
grounding prong from electrical power
cord Failure to follow this warning can
cause serious injury, fire or death,
Grounding lyre
waft _ecep{acte
I ROt undOl'
Forpersonal safety, the oven must be properly grounded For maximum safety,
the power cord must be plugged into a t20V--60 Hz outlet that is correctly
polarized and properly groundedr If a 2-prong walt receptacle is the only
available outlet, it is the personal responsibility of the consumer to have it
replaced with a properly grounded 3-prong wall receptacle installed by a
qualified electrician
Do not under any circumstances cut or remove the third round ground-
ing prong from the power cord plug_ See the Installation Instructions
Power sup¢¥
cord wilb 3,prong
grounding pt_g
....... ,,,, ,,,,,,,, ,,, ,,,,,i,
I_ackagedwith this oven for complete installation and grounding
instructions. Do not operate the oven using a 2-prong adapter or an
extension cord.
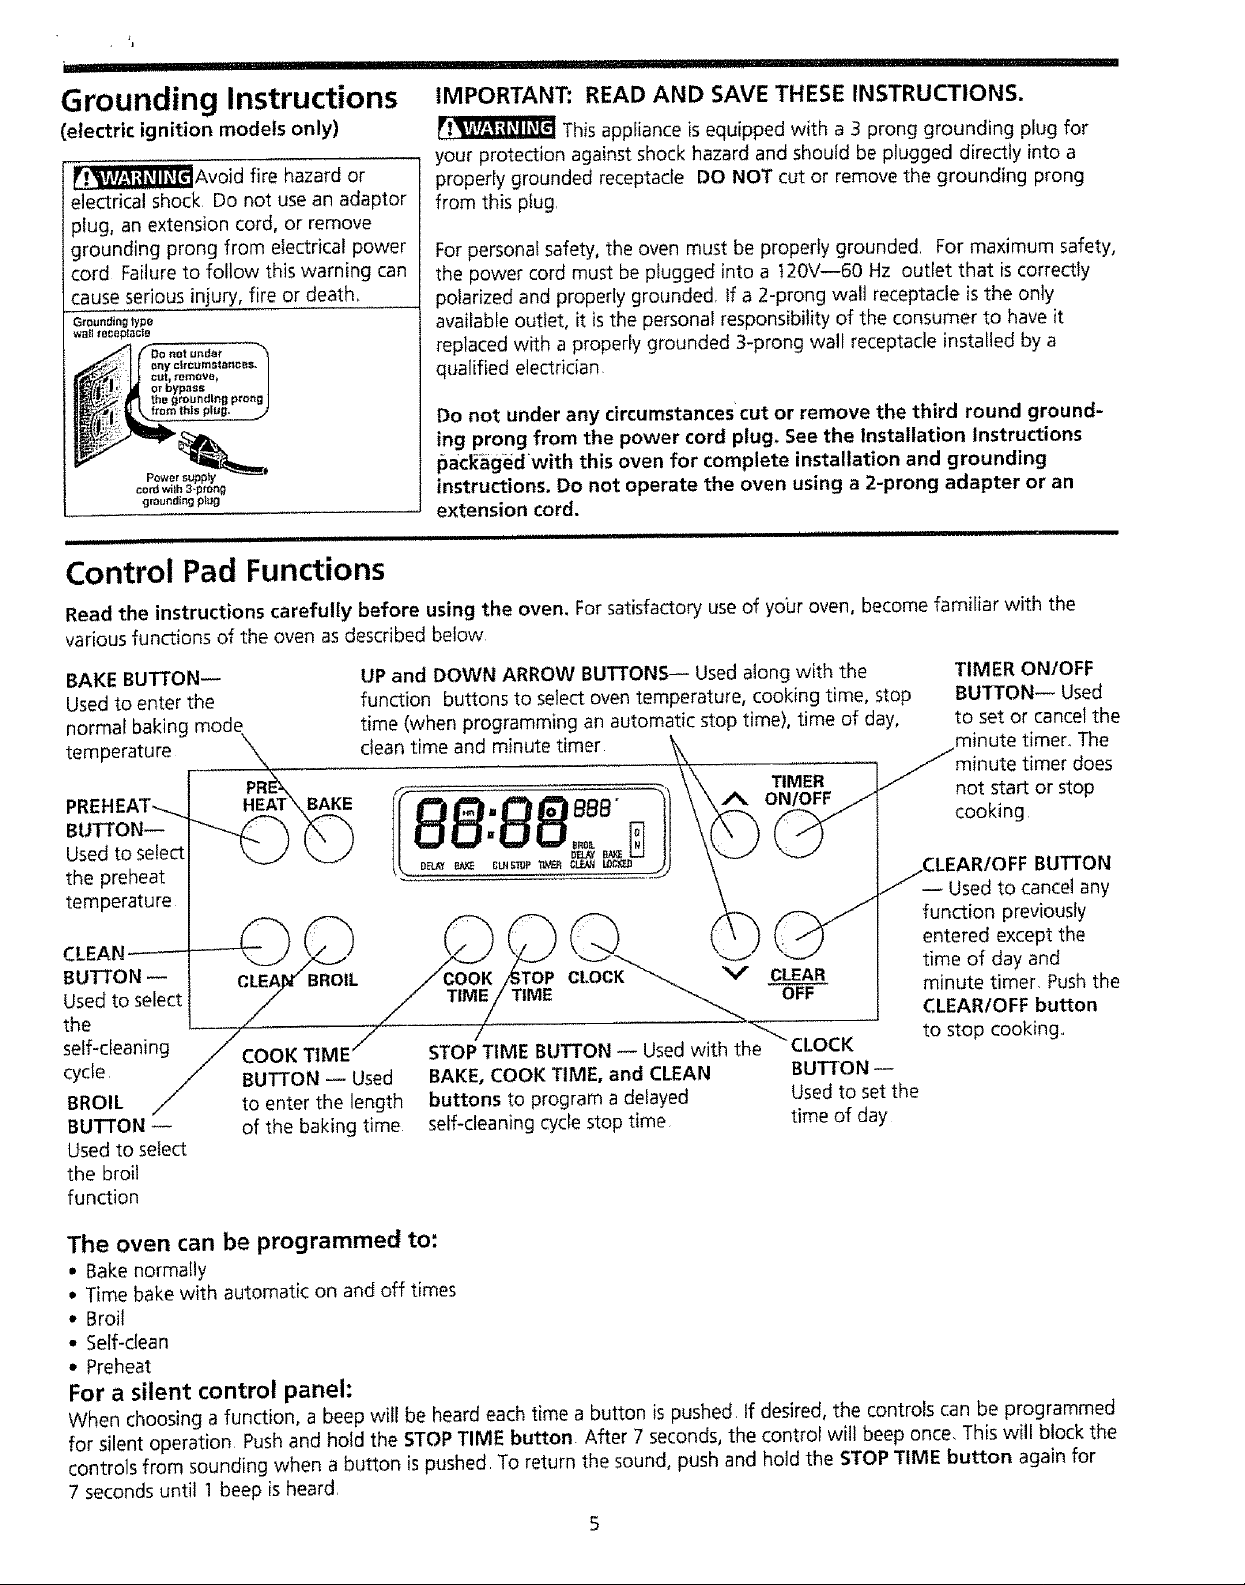
Control Pad Functions
Read the instructions carefully before using the oven. For satisfactory useof yo'ur oven. become familiar with the
various functions of the oven asdescribed below
BAKE BUTTON-- UP and DOWN ARROW BUTTONS-- Used along with the TIMER ONIOFF
Used to enter the function buttons to select oven tern )erature, cooking time, stop BUTTON-- Used
normal baking mode time (when programming an automatic stop time), time of day, to set or cancel the
temperature
x_ clean time and minute timer _ minute timer. The
\ ...................... V\ /minute timer does
PREHEAT--.... HEAT_ BAKE _ _=_ =_ _, _° / ON/OFF / ot start: o p
PR_ -- = = = \\\A TIMER // n r sto
Usedtose ectVJ t! I \\_J
the preheat _ "_ _ "_"_" _ _ _" / \ /CLEAR/OFF BUTTON
temperature _ / II -- Used to cancel any
_ _ _ _ _ /_-'_/ function previously
II:a.__ /))_ _/ ) _/ ) _, ...) _ _ ) t.-/) entered except the
t-BU_.I_ON _'') /x..j _ -..._._ "L:__" "-'I" time of day and
CLEA/_ BROIL / COOK /STOP CLOCK "--.. V CLEAR m ........
Used to select --7 -- // :I'JIv]E/_riMi= - -_ OF--"-€-- C Inule _:imer, rush tne
the ......./ ,. / _'_ ,LEARIOFF button
self cleamn /
• / / _ to stop cooking
" g /COOK TIME STOPTIME BUTTON -- Used with the CLOCK
cycle /BUTTON -- Used BAKE, COOK TIME, and CLEAN BUTTON
BROIL //to enter the length buttons to program adelayed Usedto set the
BUTTON _ of the baking time self-cleaning cyclestop time time of day
Used to select
the broil
function
The oven can be programmed to:
• Bake normally
* Time bake with automatic on and off times
, Broil
- Self-clean
. Preheat
For a silent control panel:
When choosing a function, a beep will be heard each time a button is pushed If desired, the controls can be programmed
for silent operation Push and hold the STOP TIME button After 7 seconds, the control will beep once, This will block the
controls from sounding when a button is pushed To return the sound, push and hold the STOP TIME button again for
7 seconds until 1 beep is heard
4_
r_....., ...............................................
Setting the Clock and
Minute Timer
PRE-
HEAT BAKE
TIMER
A ON/OFF
©©
©© ©
CLEAN BROIL COOK
TIME
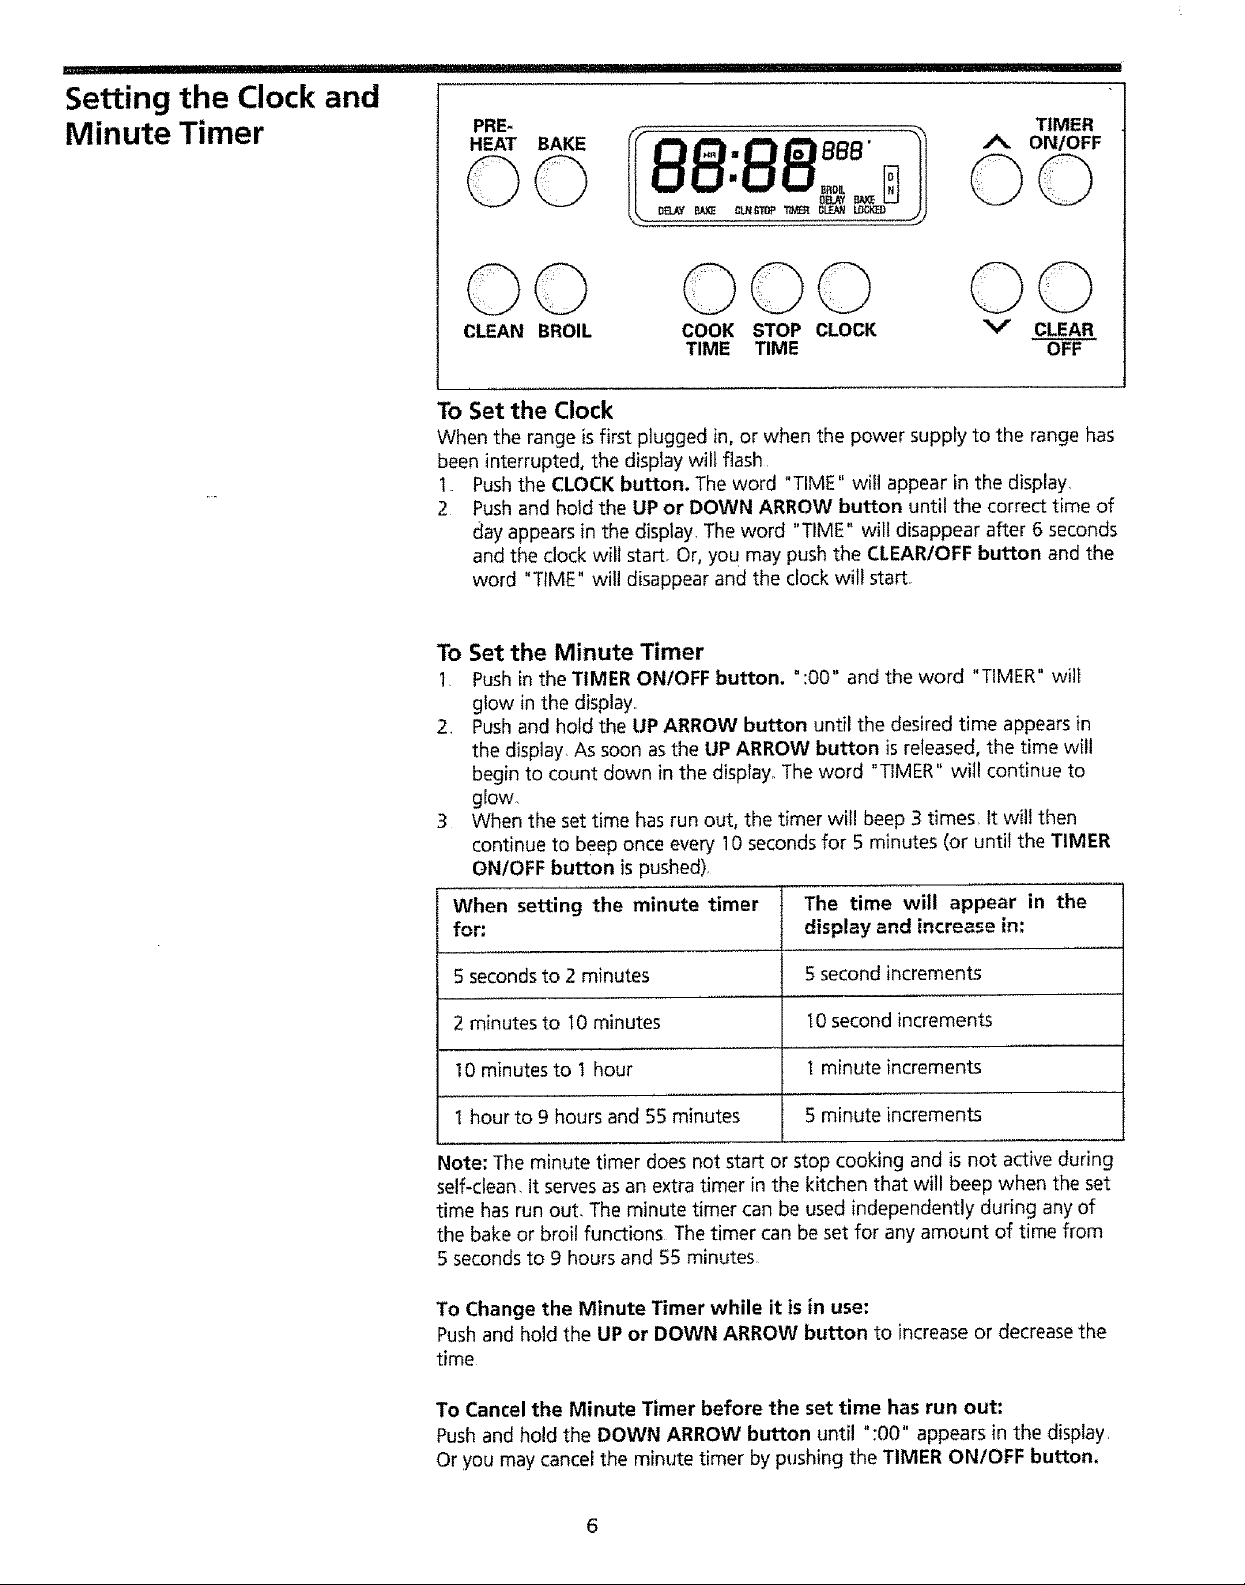
To Set the Clock
When the range isfirst plugged in, or when the power supply to the range has
been interrupted, the display wilt flash
1 Pushthe CLOCK button. The word "TIME" will appear in the display.
2 Push and hold the UP or DOWN ARROW button until the correct time of
day appears in the display. The word "TIME" will disappear after 6 seconds
and the clock will start. Or, you may push the CLEAR/OFF button and the
word "TIME" will disappear and the clock will start
To Set the Minute Timer
1. Push in the TIMER ON/OFF button. °:00" and the word "TIMER" wilt
glow in the display..
2. Push and hold the UP ARROW button until the desired time appears in
the display As soon asthe UP ARROW button isreleased, the time will
begin to count down in the display_The word "TIMER" will continue to
glow.
3 When the set time has run out, the timer will beep 3 times_ It will then
continue to beep once every 10 seconds for 5 minutes (or until the TIMER
ONIOFF button ispushed).
STOP
TIME
© ©©
CLOCK V CLEAR
©©
OFF
When settingthe minute timer The time will appear in the
for: display and increase in:
5 seconds to 2 minutes 5 second increments
2 minutes to I0 minutes t0 second increments
10 minutes to t hour I minute increments
1 hour to 9 hours and 55 minutes 5 minute increments
Note: The minute timer does not start or stop cooking and is not active during
self-clean, it serves asan extra timer in the kitchen that will beep when the set
time has run out. The minute timer can be used independently during any of
the bake or broil functions The timer can be set for any amount of time from
5 seconds to 9 hours and 55 minutes
To Change the Minute Timer while it is in use:
Push and hold the UP or DOWN ARROW button to increase or decrease the
time
To Cancel the Minute Timer before the set time has run out:
Push and hold the DOWN ARROW button until ":00" appears in the display
Or you may cancei the minute timer by pushing the TIMER ON/OFF button,
' I
'1'' I lll
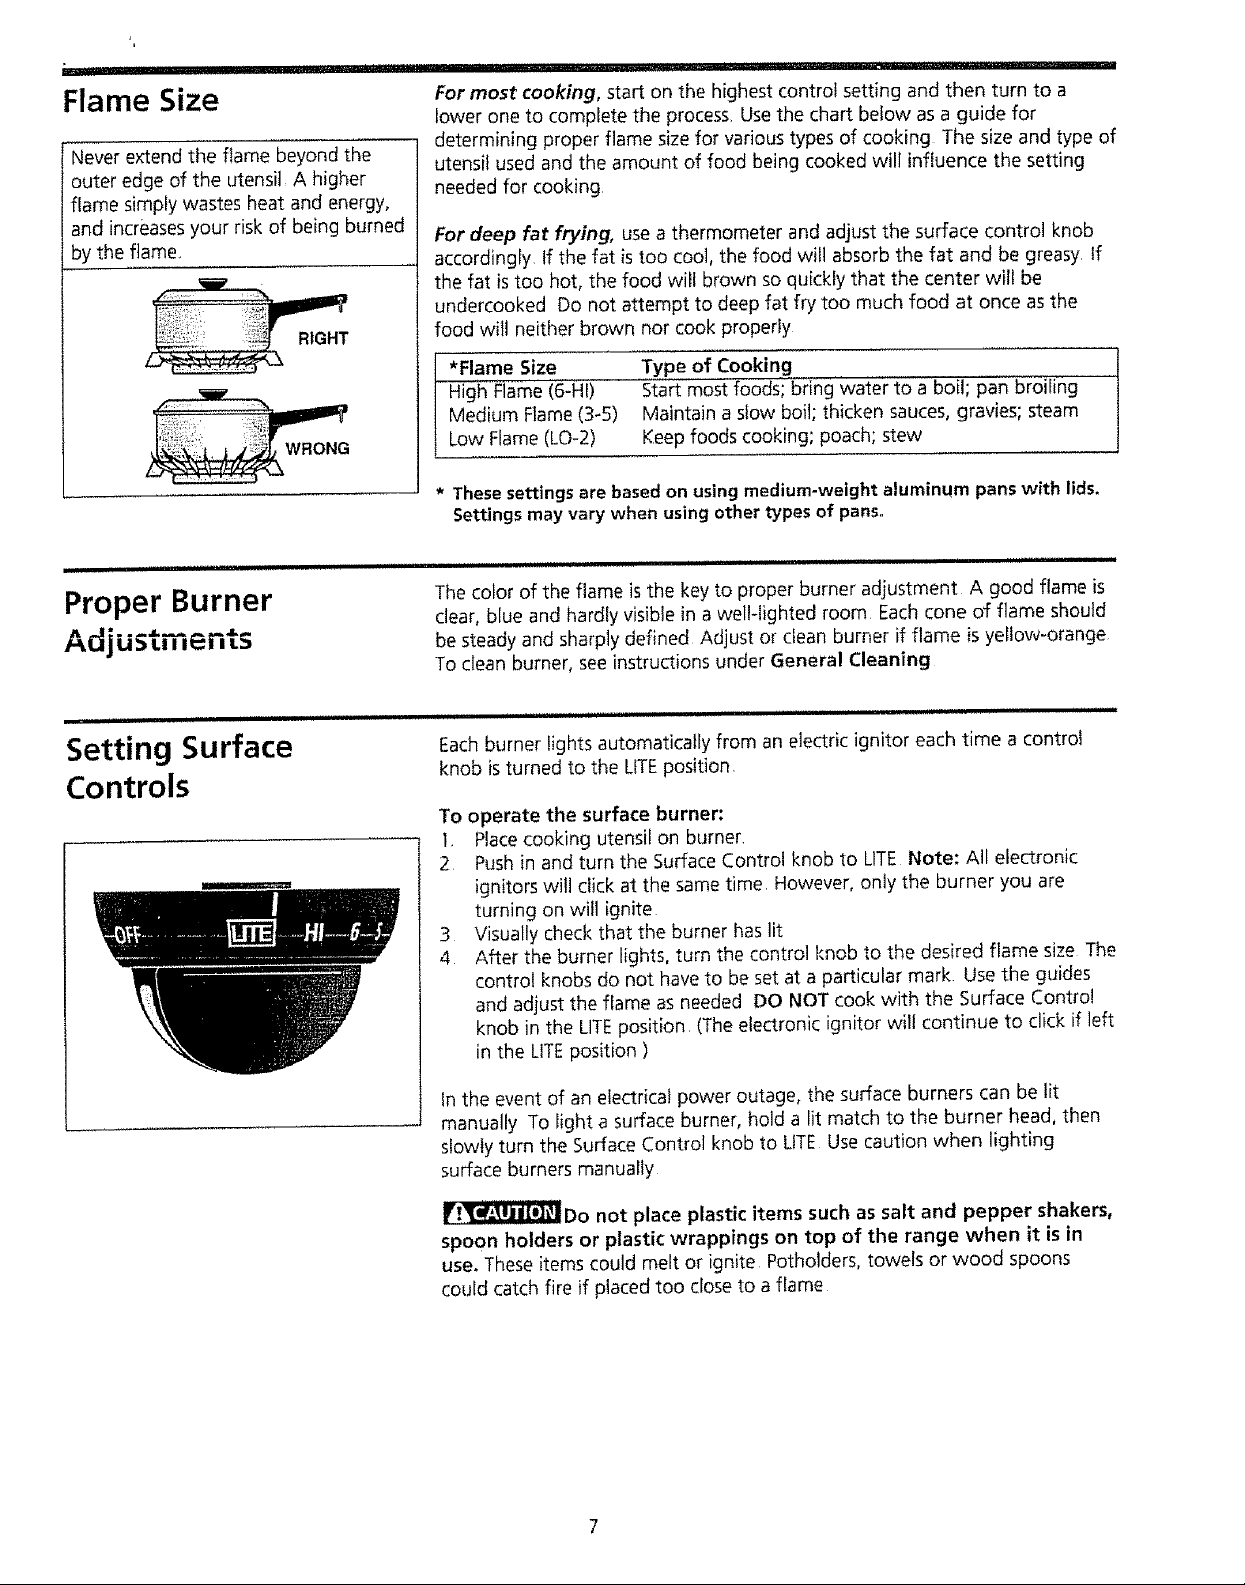
Flame Size
Never extend the flame beyond the
outer edge of the utensil A higher
flame simply wastes heat and energy,
and increases your risk of being burned
by the flame,.
RIGHT
Ull
Proper Burner
Adjustments
m r
For most cooking, start on the highest control setting and then turn to a
lower one to complete the process, Use the chart below as a guide for
determining proper flame size for various types of cooking The size and type of
utensil used and the amount of food being cooked will influence the setting
needed for cooking
For deep fat frying, use a thermometer and adjust the surface control knob
accordingfy, If the fat is too cool, the food will absorb the fat and be greasy, If
the fat is too hot, the food will brown so quickty that the center will be
undercooked Do not attempt to deep fat fry too much food at once as the
food will neither brown nor cook properly
*Flame Size Type of Cooking
High Flame(6-HI) Start most foods; bring water to a boil; pan broiling
Medium Flame (3_5) Maintain a slow boil; thicken sauces, gravies; steam
Low Flame (LO-2) Keep foods cooking; poach; stew
* These settings are based on using medium-weight aluminum pans with lids.
Settings may vary when using other types of pans=
The color of the flame is the key to proper burner adjustment A good flame is
clear, blue and hardly visible in a well-lighted room Each cone of flame should
be steady and sharply defined Adjust or clean burner if flame is yellow-orange
To clean burner, see instructions under General Cleaning
ulllur i u ii
Setting Surface
Controls
i uuu i uullluu i lUU uuluul i ii iiii u
Eachburner lights automatically from an electric ignitor each time a control
knob isturned to the LITEposition,
To operate the surface burner:
1. Placecooking utensii on burner,
2 Pushin and turn the Surface Control knob to Life Note: All electronic
ignitors will dick at the same time, However, only the burner you are
turning on will ignite
3 Visually check that the burner has lit
4 A_er the burner lights, turn the control knob to the desired flame size The
control knobs do not have to be set at a particular mark. Use the guides
and adjust the flame as needed DO NOT cook with the Surface Contro!
knob in the Life position (The electronic ignitor will continue to click if left
in the LITEposition )
in the event of an electrical power outage, the surface burners can be lit
manually To light a surface burner, hold a lit match to the burner head, then
slowly turn the Surface Control knob to Life Use caution when lighting
surface burners manually
_Do not place plastic items such as salt and pepper shakers,
spoon holders or plastic wrappings on top of the range when it is in
use. These items could melt or ignite Potholders, towels or wood spoons
could catch fire if placed too close to a flame
 Loading...