

Kenmore 79077464802, 79077483805, 79077462802, 79077463803, 79077469802 Instructions For
...
iNSTALLATiONAND SERVICE MUST BE PERFORMED BY
A QUALiFiED iNSTALLER.
iMPORTANT: SAVE FOR LOCAL ELECTRICAL iNSPECTOR'S USE.
READ AND SAVE THESE iNSTRUCTiONS FOR FUTURE REFERENCE.
This conversion kit must be installed by a qualified service technician in accordance with the
manufacturer's instructions and all applicable codes and requirements of the authority having jurisdiction. Fail_
to follow instructions may result in fire, explosion or production of carbon monoxide causing property damage
personal injury or loss of life. The qualified service agency is responsible for the proper installation of this kit.
installation is not proper and complete until the operation of the converted appliance is checked as specified in
manufacturer's instructions supplied with this kit.
Before proceeding with the conversion, shut off the gas supply before disconnecting electrical po_
to the range. Be sure both power supplies are off before installing the conversion kit. Failure to do so could c_
serious bodily injury.
Note: When surface burners are converted from Natural to L.P. the BTU ratings become:
5,000 BTU* Natural Gas to 4,500 BTU* L.P. Gas
9,500 BTU* Natural Gas to 8,000 BTU* L.P. Gas
12,000 BTU* Natural Gas to 10,000 BTU* L.P. Gas
16,200 BTU* Natural Gas to 14,000 BTU* L.P. Gas
L.P. Kit Contents Kit pin 316467202 (yellow label)
Part Description Part Number Qty.
re
The
the
'er
use
Surface Burner Orifice marked 0.68mm 4,500 BTU* (blue)
Surface Burner Orifice marked 0.89mm 8,000 BTU* (no color)
Surface Burner Orifice marked 0.95mm 10,000 BTU* (green)
Surface Burner Orifice marked 1.15mm 14,000BTU* (black)
L.P. Kit Installation Instructions
*NOTE: For operation at elevations above 2000 ft., appliance
rating shall be reduced at the rate of 4 percent for each 1000 ft.
above sea level.
How to Convert the Range for use with LP/
Propane Gas
1. Convertthe Pressure Regulator
To access the gas regulator, remove the storage drawer or warmer
drawer. If equipped with a storage drawer, open & remove the drawer
completely. For models equipped with a warmer drawer, follow the
instructions below to remove the warmer drawer.
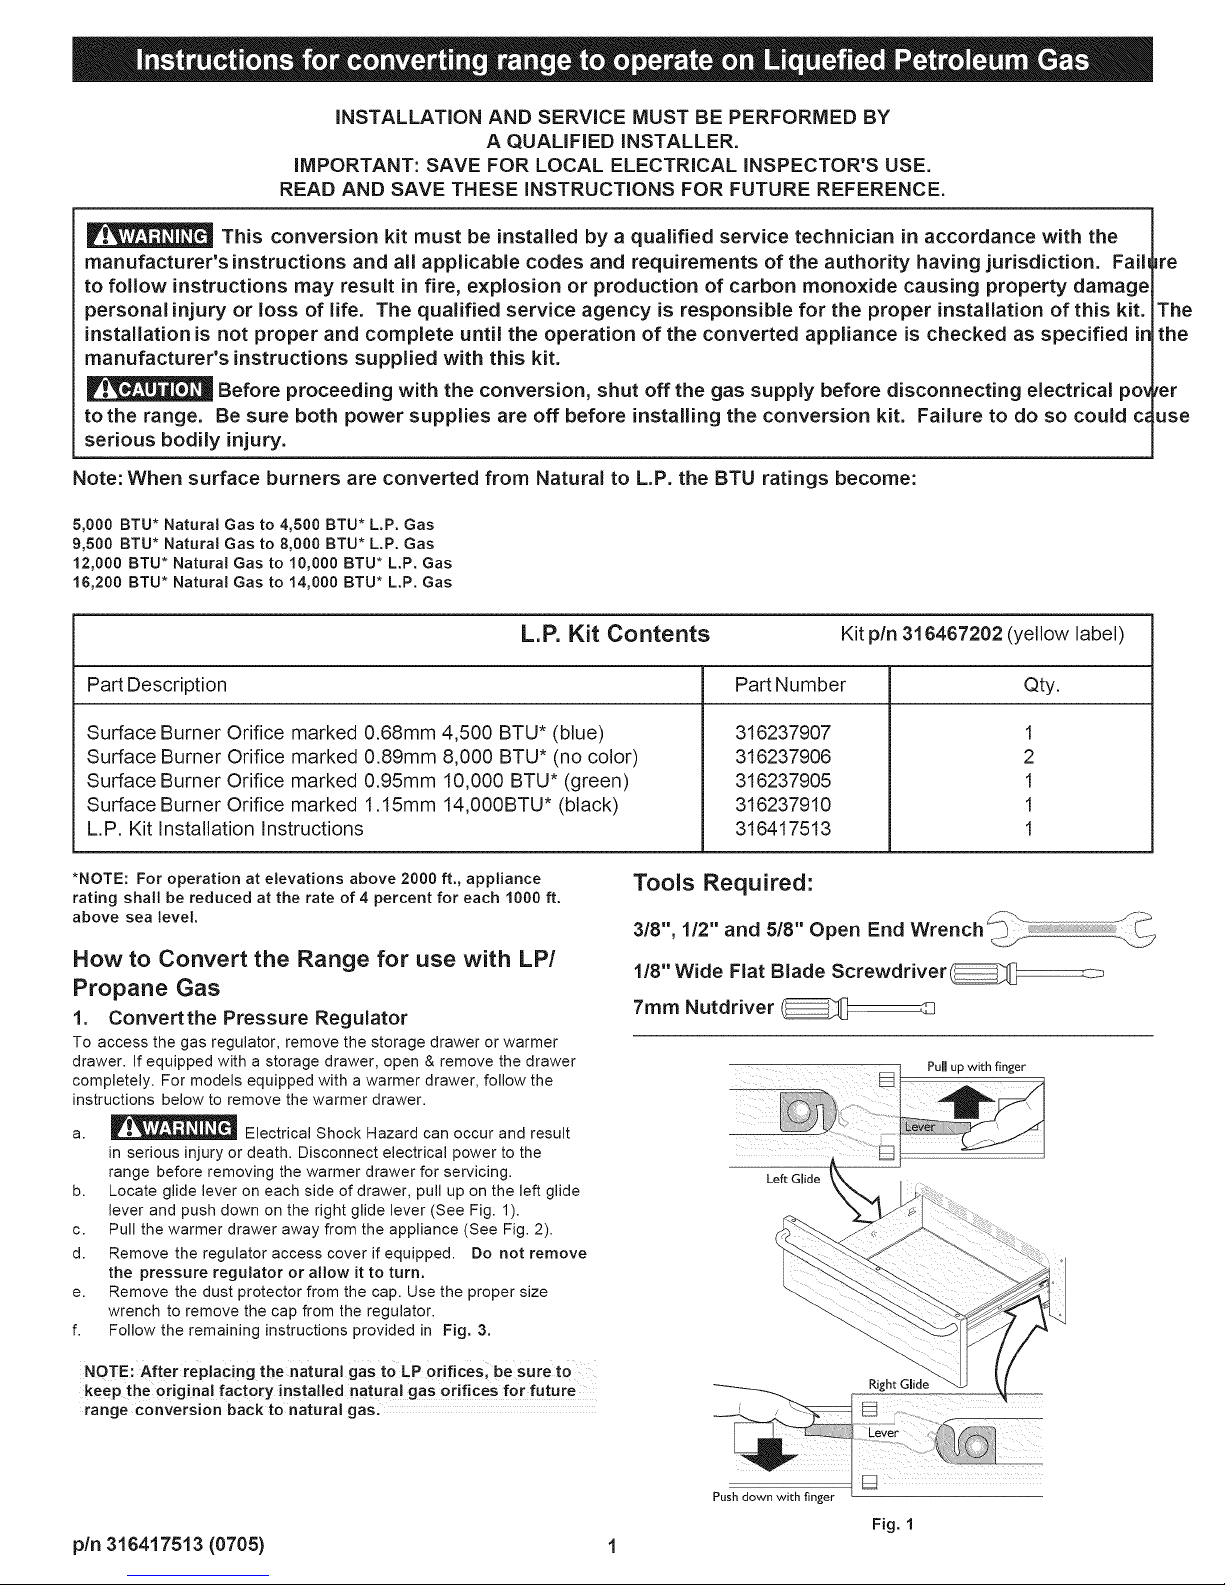
a. _ Electrical Shock Hazard can occur and result
in serious injury or death. Disconnect electrical power to the
range before removing the warmer drawer for servicing.
b. Locate glide lever on each side of drawer, pull up on the left glide
lever and push down on the right glide lever (See Fig. 1).
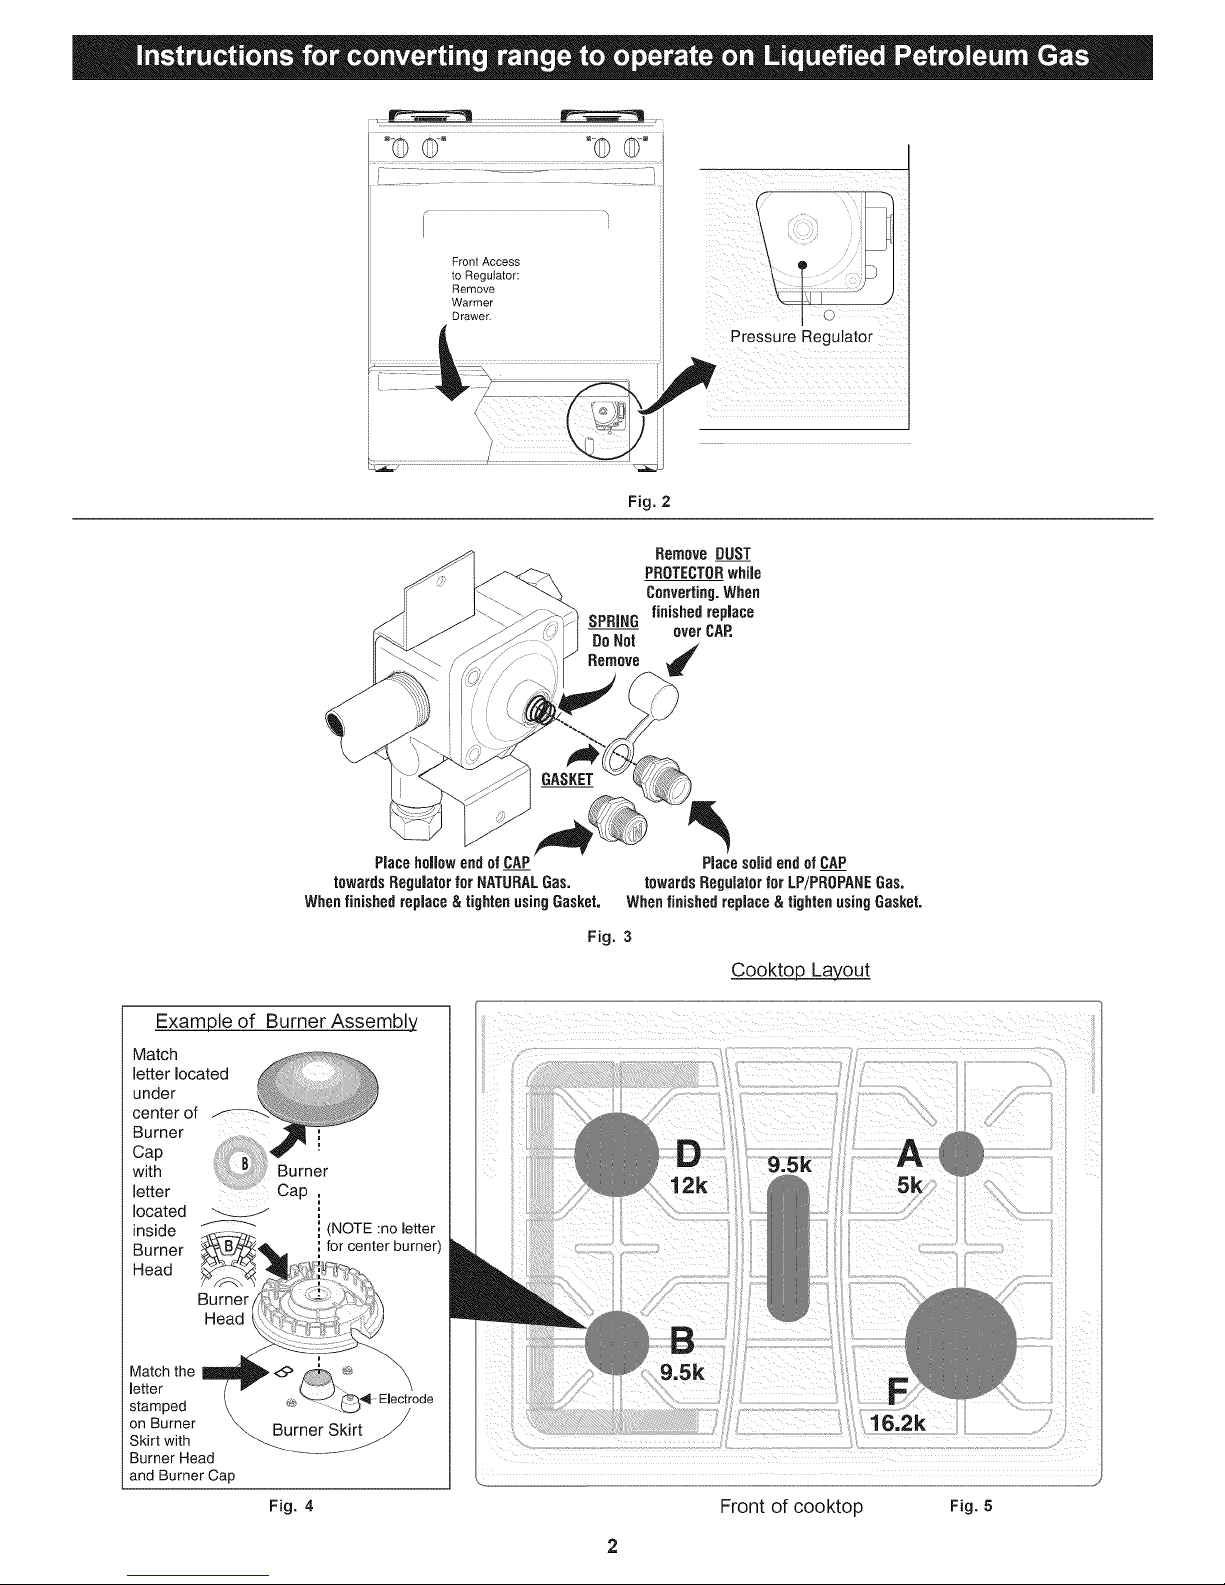
c. Pull the warmer drawer away from the appliance (See Fig. 2).
d. Remove the regulator access cover if equipped. Do not remove
the pressure regulator or allow it to turn.
e. Remove the dust protector from the cap. Use the proper size
wrench to remove the cap from the regulator.
f. Follow the remaining instructions provided in Fig. 3.
316237907
316237906
316237905
316237910
316417513
Tools Required:
3/8", 1/2" and 5/8" Open End Wrench
1/8" Wide Flat Blade Screwdriver
7mm Nutdriver
Pull up with finger
Left Glide
1
2
1
1
1
NOTE: After rep!aCing the natural gas to LP orifices; be sure to
keep the original factory installed natural gas orifices for future
range conversion back to natural gas.
pin 316417513 (0705) 1
Right Glide
Push down with finger
Fig. 1
°© ©.... ©
o- . oi_ o __ _ o " ..... "
Front Access
to Regulator:
Remove
Warmer
Drawer
Fig. 2
SPRING
DoNot
Remove
Pressure Regulator
RemoveDUST
PROTECTORwhile
Converting.When
finishedreplace
overCAP,
Whenfinishedreplace&tightenusingGasket,
Example of Burner Assembly
Match
located
inside
Burner
Head
Burner
Head
Match the
letter
stamped
on Burner
Skirt with
Burner Head
and Burner Cap
(NOTE :no letter
for center burner)
Burner Skirt
Fig. 4 Front of cooktop Fig. 5
PlacehollowendofCAP
towardsRegulatorforNATURALGas.
PlacesolidendofCAP
towardsRegulatorforLP/PROPANEGas.
Whenfinishedreplace& tightenusingGasket.
Fig. 3
Cooktop Layout
 Loading...