

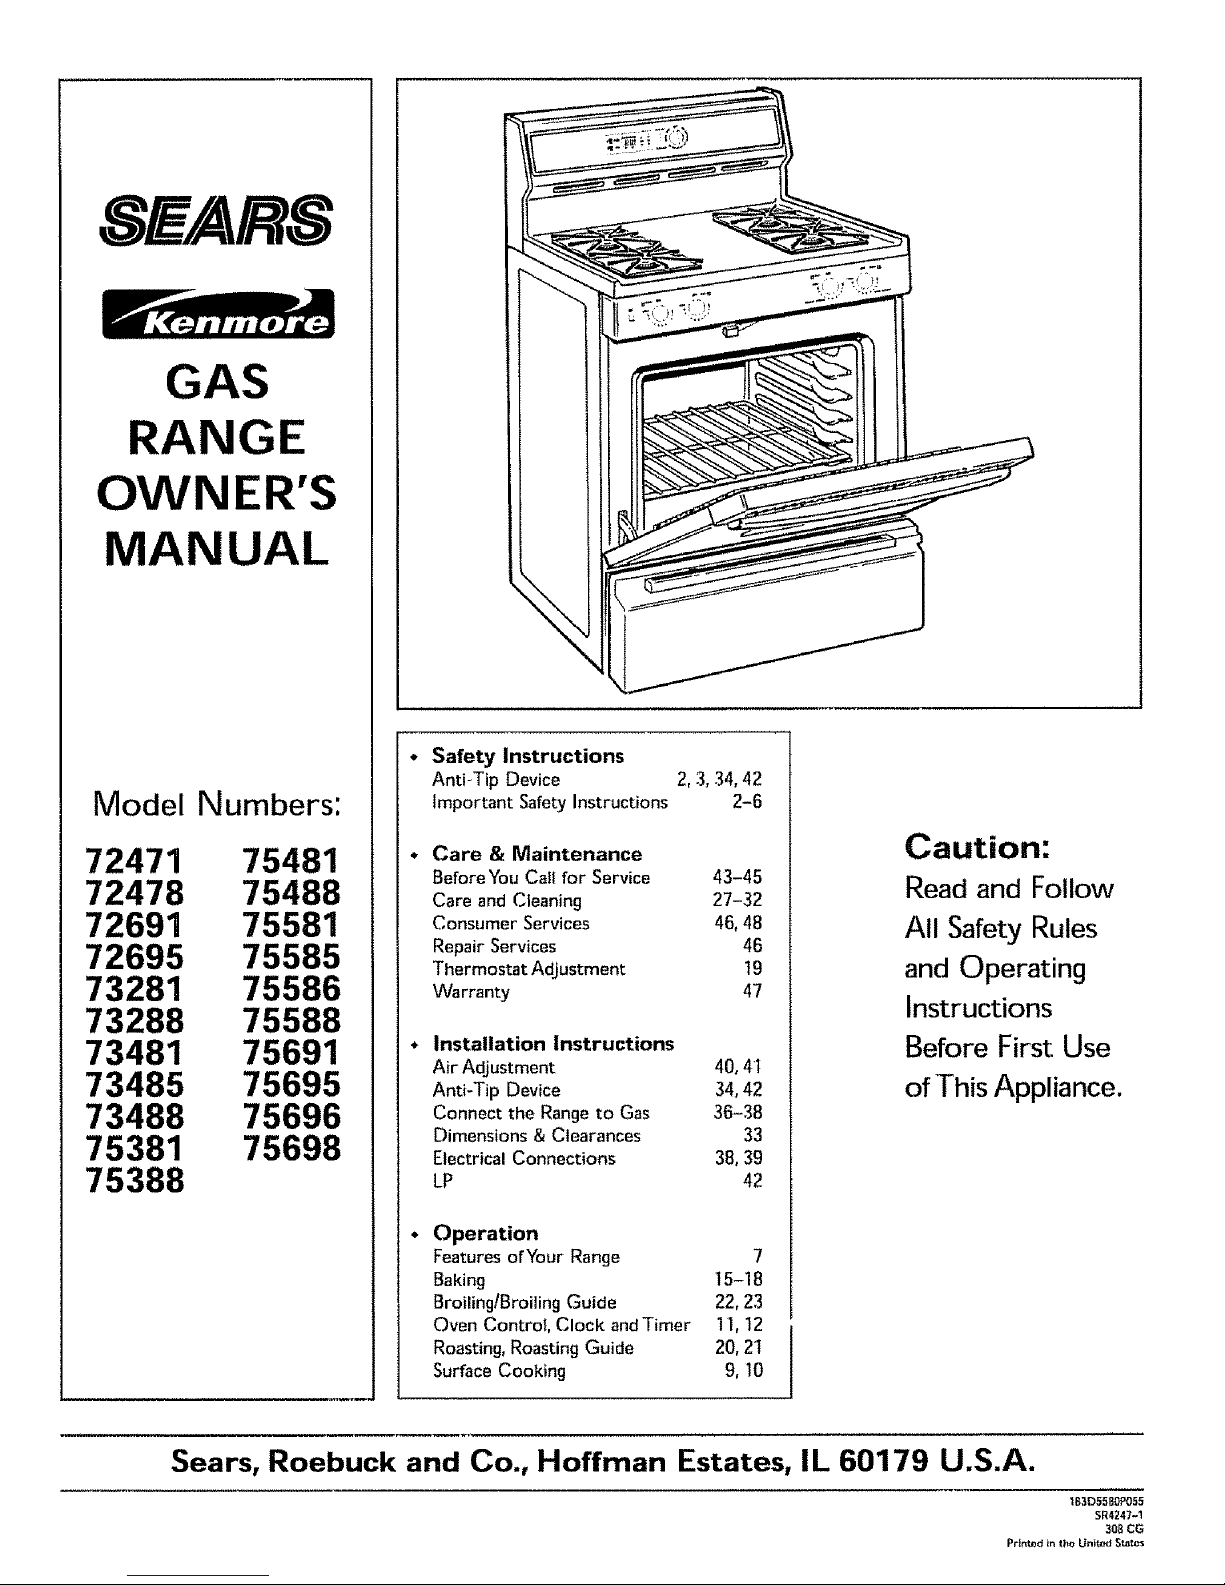
RANGE
OWNER'S
MANUAL
Model
Numbers:
72471 75481
72478 75488
72691 75581
72695 75585
73281 75586
73288 75588
73481 75691
73485 75695
73488 75696
75381 75698
75388
Safety Instructions
Anti-Tip Device 2, 3, 34, 42
Important Safety Instructions 2-6
Care & Maintenance
Before You Gait for Service 43-45
Care and Cleaning 27-32
Consumer Services 46, 48
Repair Services 46
Thermostat Adjustment 19
Warranty 47
Installation Instructions
Air Adjustment 40, 41
Anti-Tip Device 34, 42
Connect the Range to Gas 36-38
Caution:
Read and Follow
All Safety Rules
and Operating
Instructions
Before First Use
of ]'his Appliance.
Dimensions & Clearances 33
Electrical Connections 38, 39
LP 42
Operation
Features of Your Range 7
Baking t5-18
BroilingtBroiling Guide 22, 23
Oven Control, Clock andTimer 1I, 12
Roasting, Roasting Guide 20, 2t
Surface Cooking 9, !0
Sears, Roebuck and Co., Hoffman Estates, IL 60179 U.S.A.
t83D55gOP055
SR4247-1
3OSCG
PrUned in {_eU_itadSt_bes
Important Safety instructions
Read all instructions before using this appliance.
WARNING: If the information in this manual
is not followed exactly, a fire or explosion may
result causing property damage, personal
injury or death.
--Do not store or use gasoline or other
flammable vapors and liquids in the vicinity
of this or any other appliance.
WHAT TO DO IF YOU SMELL GAS
= Do not try to light any appliance.
• Do not touch any electrical switch; do not
use any phone in your building.
o Immediately call your gas supplier from a
neighbor's phone. Follow the gas suppliers
instructions.
= If you cannot reach your gas supplier, call
the fire department.
--Installation and service must be performed
by a qualified installer, service agency or the
gas supplier.
IMPORTANT SAFETY NOTICE
* The California Safe Drinking Water and Toxic
Enforcement Act requites the Governor Of r
California to publish a list of substances known to
the state to cause cancet_ birth defects or other
reproductive harm, and requires businesses to warn
customers of'potential exposure to such substances.
Gas appliances cause minor exposure to four of
these substances, namely benzene, carbon
monoxide, formaldehyde and soot, caused primarily
by the incomplete combustion of natural gas or LP
fuels. Properly adjusted burners, indicated by a bluish
rather than a yellow flame, will minimize incomplete
combustiom Exposure to these substances can be
minimized further by venting with an open window
or using a ventilation fan or hood.
* Fluorescent light bulbs and safety valves on
standing pilot ranges contain mercury. If your
model has these features, they must be recycled
according to local, state and federal codes.
When You Get Your Range
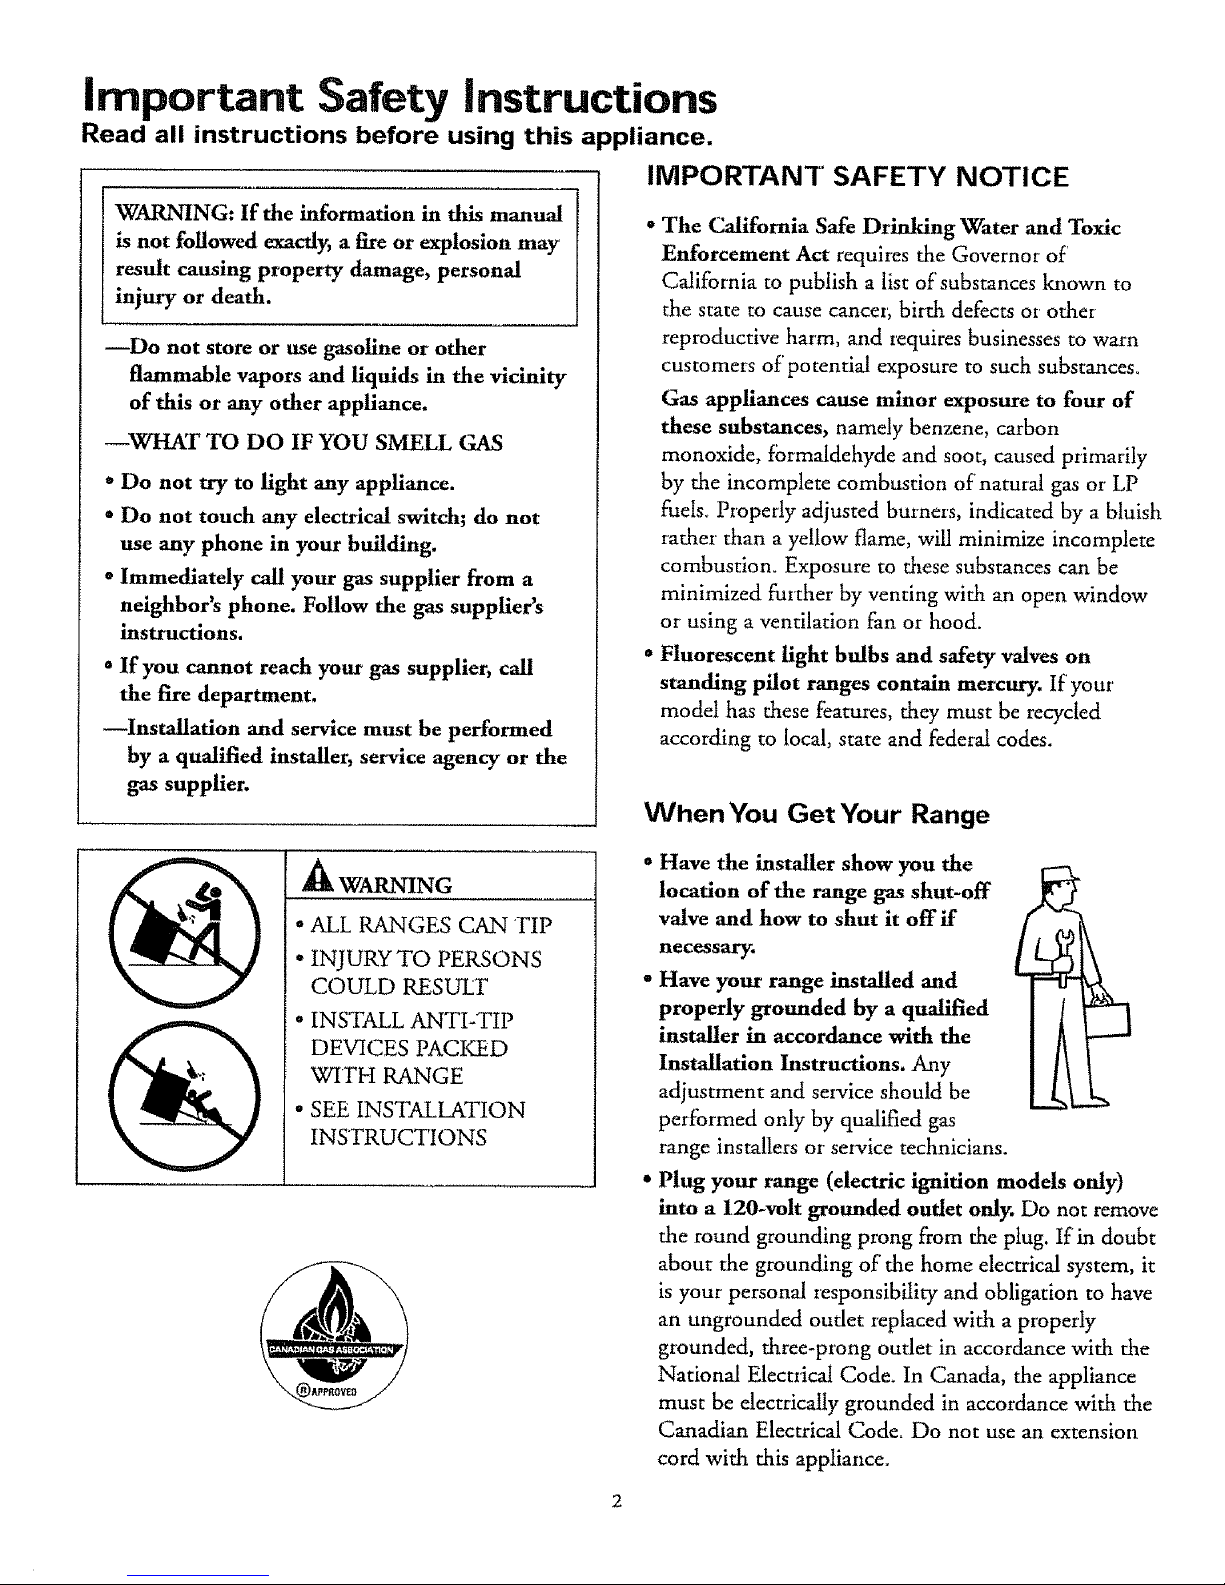
A WARNING
. ALL RANGES CAN TIP
• INJURY TO PERSONS
COULD RESULT
• INSTALL ANTI-TIP
DEVICES PACKED
WITH RANGE
" SEE INSTALLATION
INSTRUCTIONS
Have the installer show you the
location of the range gas shut-off
valve and how to shut it off ff
cord with this appliance_
necessary.
Have your range installed and
properly grounded by a qualified
installer in accordance with the
Installation Instructions. Any
adjustment and sercice should be
performed only by qualified gas
range installers or service technicians.
Plug your range (electric ignition models only)
into a 120-volt grounded outlet only. Do not remove
the round grounding prong from the plug. If in doubt
about the grounding of the home electrical system, it
is your personal responsibility and obligation to have
an ungrounded outlet replaced with a properly
grounded, three-prong outlet in accordance with the
National Electrical Code. In Canada, the appliance
must be electrically grounded in accordance with the
Canadian Electrical Code= Do not use an extension
• Do not attempt to repair or replace any part of
your range unless it is specifically recommended
in this manual. All other servicing should be
referred to a qualified technician
• Be sure all packing materials are removed from
the range before operating it to prevent fire or
smoke damage, should the pacldng material ignite_
• Locate the range out of kitchen traffic path and out
of drafty locations to prevent pilot outage (on models
with standing pilots) and poor air circulation.
• After prolonged use of a range, high floor
temperatures may result and many floor coverings
will not withstand this kind of use. Never install
the range over vinyl tile or linoleum that cannot
withstand such type of use. Never install it directly
over interior ldtchen carpeting.
• Be sure your range is correctly adjusted by a
qualified installer for the type of gas (natural or
LP), that is to be used. Your range can be converted
for use with either type of gas, See the Installation
Instructions,
WARNING: The conversion of your range to LP gas
must be made by a qualified LP installer in accordance
with the manufacturer's instructions and all codes
and requirements of the authority having jurisdiction.
Failure to follow these instructions could result in
serious injury or property damage. The qualified
agency performing this work assumes responsibility
for the conversion.
Using Your Range
• Do not leave children alone
or unattended where a range
is hot or in operation. They
could be seriously burned.
* Do not allow anyone to
climb, stand or hang on the
door, storage or broiler
drawer (on some models) or cook-top. They could
damage the range and even tip it over; causing severe
personal injury.
• Let the burner grates and other surfaces cool
before touching them or leaving them where
children can reach them.
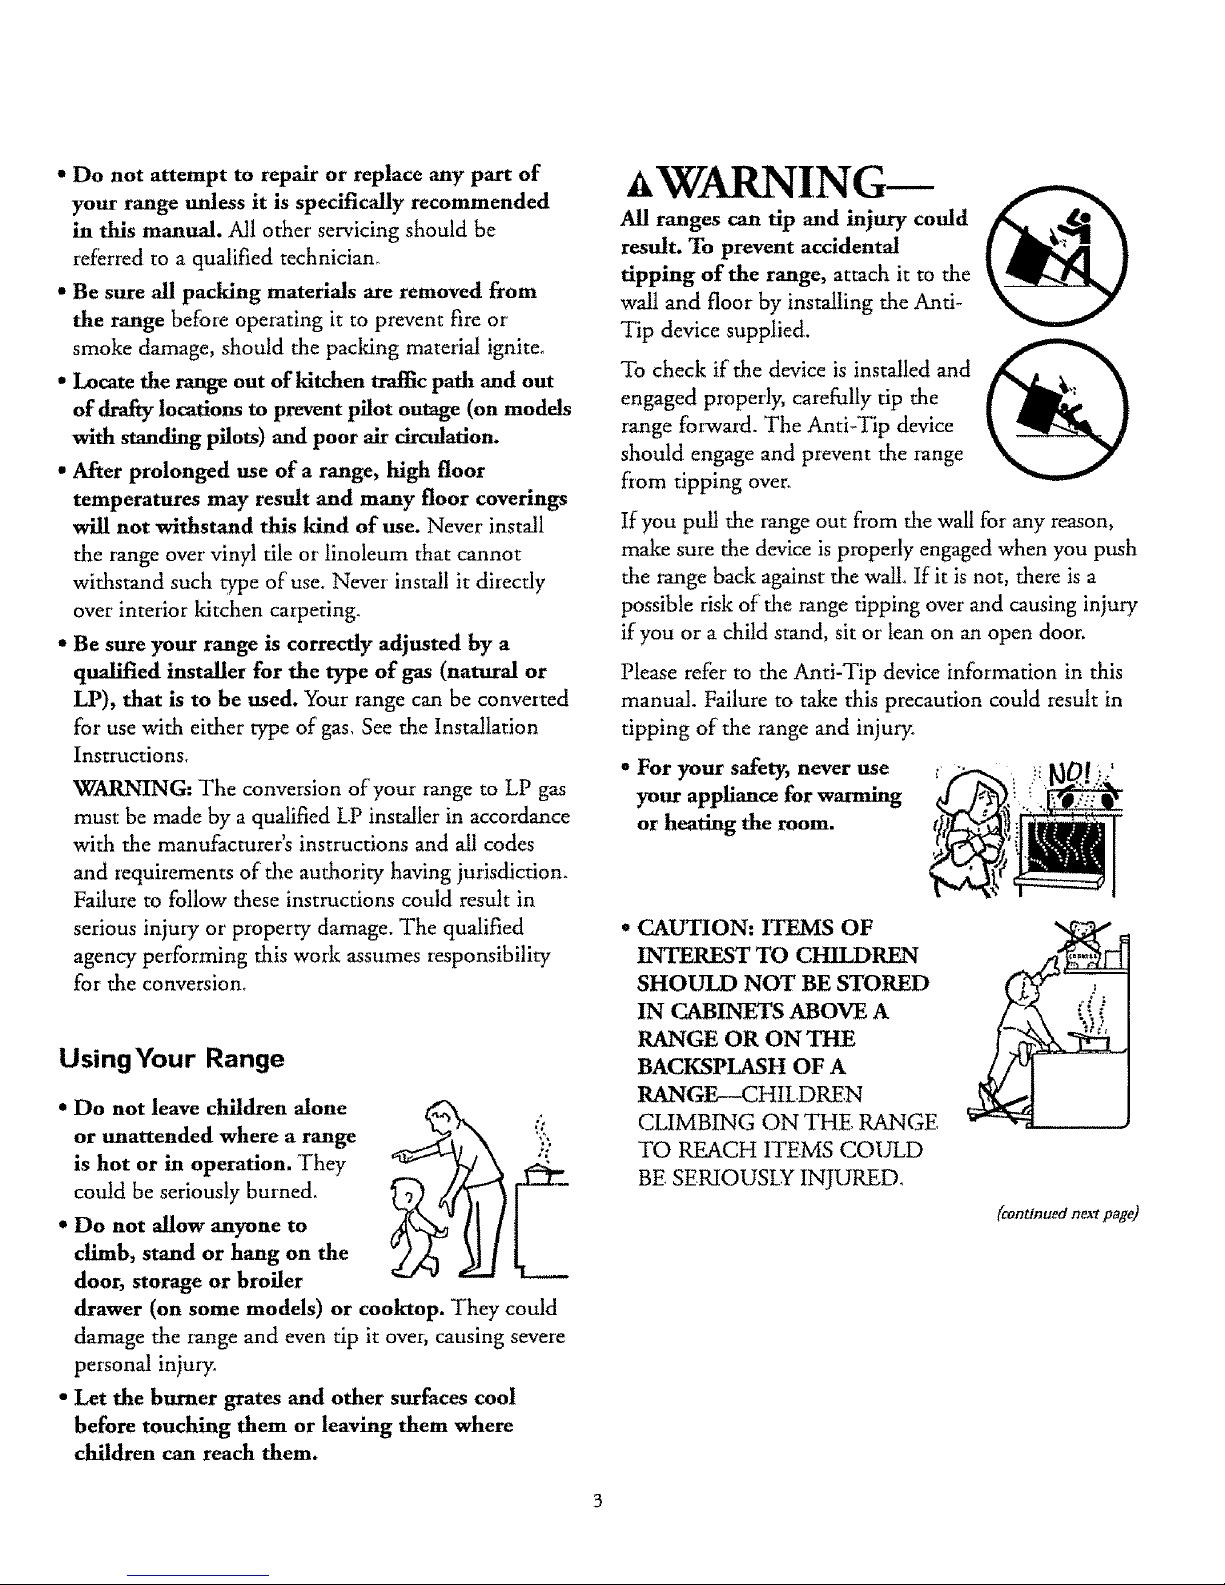
tLV4ARNING--
All ranges can tip and injury could
result. To prevent accidental
tipping of the range, attach it to the
wall and floor by installing the Anti-
Tip device supplied.
To check if'the device is installed and
engaged properly, carefully tip the
range forward. The Anti-Tip device
should engage and prevent the range
from tipping over.
If you pull the range out from the wall for any reason,
make sure the device is propedy engaged when you push
the range back against the wall. If it is not, there is a
possible risk of the range tipping over and causing injury
if you or a child stand, sit or lean on an open door.
Please refer to the Anti-Tip device infbrmation in this
manual. Failure to take this precaution could result in
tipping of the range and injury°
° For your safety, never use _'
your appliance for warming
or heating the room.
• CAUTION: ITEMS OF
INTERF_T TO CHILDREN
SHOULD NOT BE STORED
IN CABINETS ABOVE A
RANGE OR ON THE
BACKSPLASH OF A
RANGE,--CHILDREN
CLIMBING ON THE, RANGE,
TO REACH ITEMS COULD
BE SERIOUSLY INJURED.
(continued neatpage)
important Safety instructions (cont,°°ed)
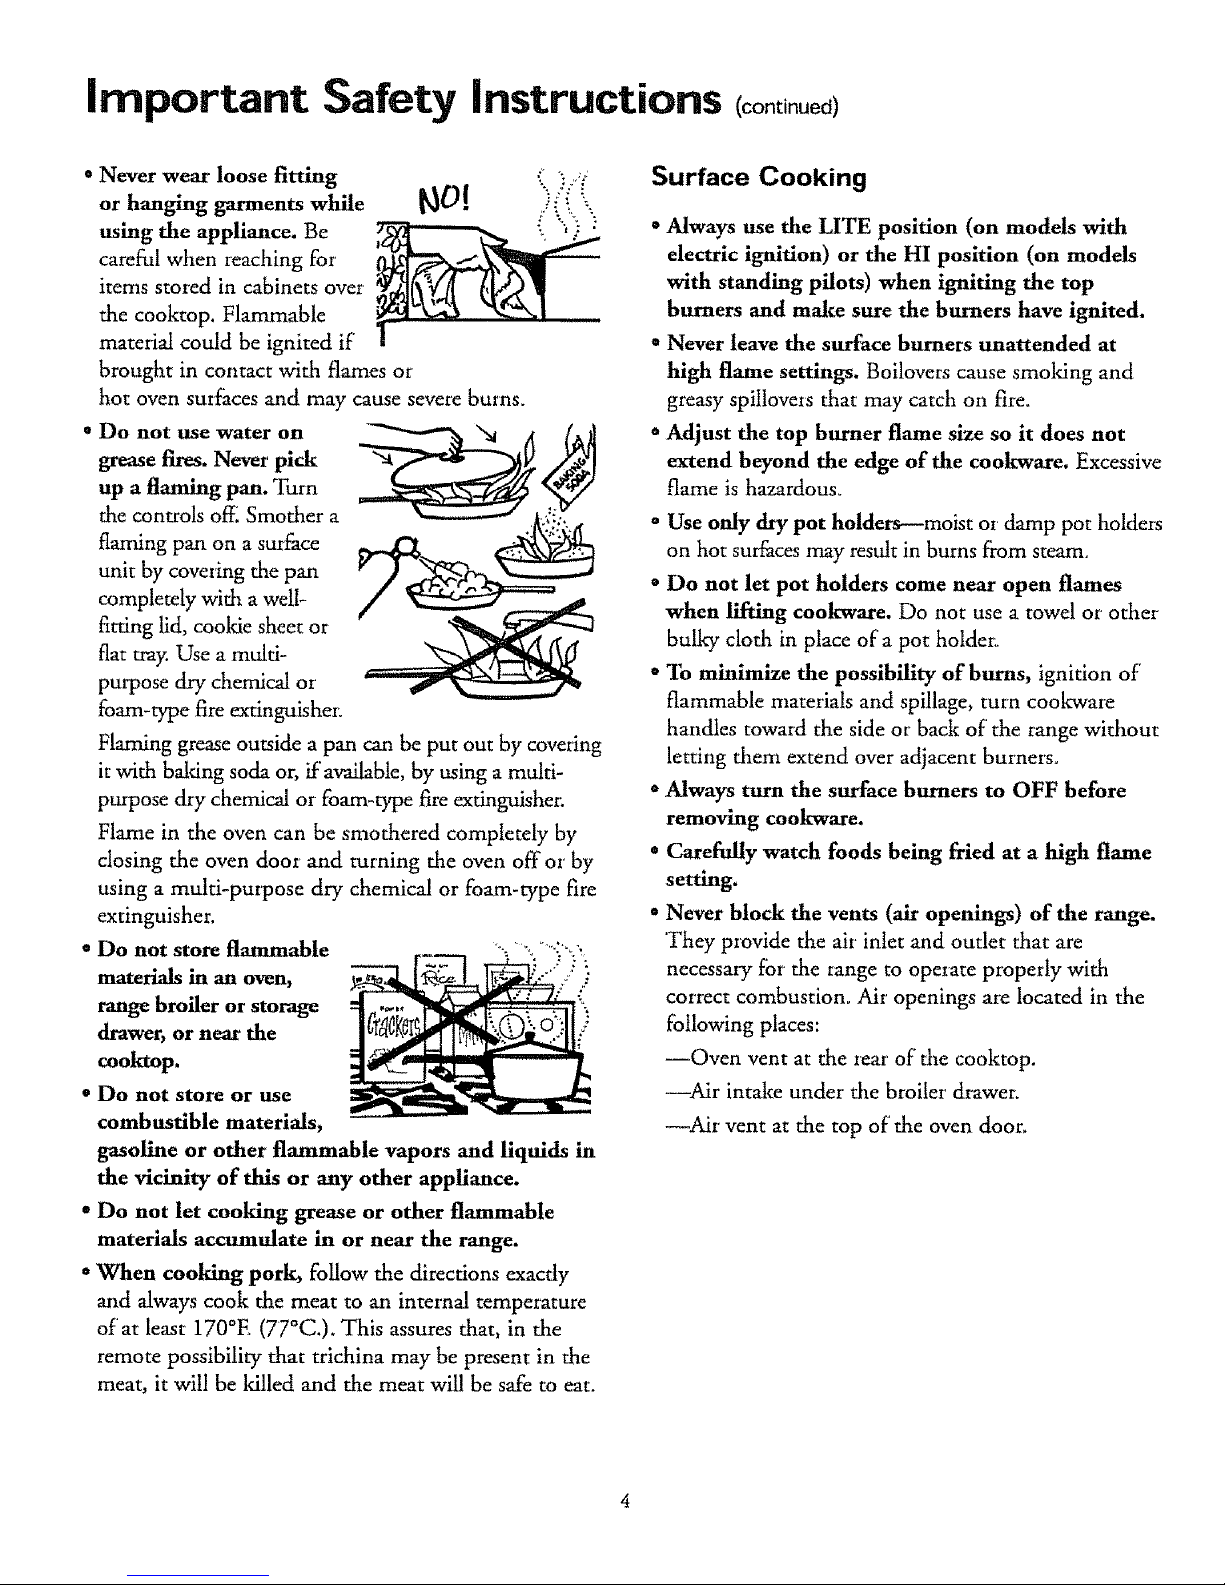
• Never wear loose fitting ( '::9
h ginggarm tswhil )_:
or an en e
using the appliance. Be
careful when reaching for
items stored in cabinets over
the cooktop. Flammable
material could be ignited if'
brought in contact with flames or
hot oven sutfimes and may cause severe burns.
• Do not use water on
grease fires. Never pick
up a flaming pan. Turn
the controls off_ Smother a
flaming pan on a surface
unit by covering the pan
completely with a welb
fitting lid, cookie sheet or
flat tra?_ Use a multi-
purpose dry chemical or
foam-type fire extinguisher:
Flaming grease outside a pan can be put out by covering
it with baking soda or, if'available, by using a multi-
propose ck'y chemical or- foam-type fire extinguisher;
Flame in the oven can be smothered completely by
closing the oven door and turning the oven offor by
using a multi-purpose dry chemical or foam-type fire
extinguisher.
° Do not store flammable ..... _ "_" "I'1'_*'_.'1
materials in an oven, _'" : :
range broiler or storage
drawer, or near the
cooktop.
• Do not store or use
combustible materials,
gasoline or other flammable vapors and liquids in
the vicinity of this or any other appliance.
= Do not let cooking grease or other flammable
materials accumulate in or near the range.
° When cooking pork, follow the directions exacdy
and always cook the meat to an internal temperature
of at least 170°E (77°C.). This assures that, in the
remote possibility that trichina may be present in the
meat, it will be killed and the meat will be safe to eat.
Surface Cooking
° Always use the LITE position (on models with
electric ignition) or the HI position (on models
with standing pilots) when igniting the top
burners and make sure the burners have ignited.
° Never leave the surface burners unattended at
high flame settings. Boilovers cause smoking and
greasy spillovers that may catch on fire.
= Adjust the top burner flame size so it does not
extend beyond the edge of the cookware. Excessive
flame is hazardous_
" Use only dry pot holders--moist or' damp pot holdem
on hot surfaces may result in burns from steam
o Do not let pot holders come near open flames
when lifting cookware. Do not use a towel or other
bulky cloth in place of a pot holder.
* _b minimize the possibility of burns, ignition of
flammable materials and spillage, turn cookware
handles toward the side or back of the range without
letting them extend over adjacent burners°
o Always turn the surface burners to OFF before
removing cookware.
° Carefully watch foods being fried at a high flame
setting.
° Never block the vents (air openings) of the range.
'They provide the air inlet and outlet that are
necessary for the range to operate properly with
correct combustion. Air' openings are located in the
following places:
--Oven vent at the tear of the cooktop.
--Air intake under' the broiler' drawer.
---_r vent at the top of' the oven door.
• Do not use a wok on models with sealed burners
ff the wok has a round metal ring that is placed
over the burner grate to support the wok. This
ring acts as a heat trap, which may damage the
burner grate and burner head° Also, it may cause the
burner to work improperly. This may cause a carbon
monoxide level above that allowed by current
standards, resulting in a health hazard°
• Foods for frying should be as dry as possible. Frost
on frozen foods or moisture on fresh foods can cause
hot fat to bubble up and over the sides of the pan°
" Use the least possible amount of fat for effective
shallow or deep-fat frying. Filling the pan too full
of fat can cause spillovers when food is added.
• If a combination of oils or fats will be used
in frying, stir together before heating or as fats
melt slowly.
• Always heat fat slowly and watch as it heats°
• Use a deep-fat thermometer whenever possible to
prevent overheating fat beyond the smoking point°
• Never try to move a pan of hot fat, especially a
deep fat fryer. Wait until the fat is cool.
• When using glass cookware, make sure it is
designed for top-of-range cooking,
° Use proper pan size. Avoid pans that are unstable or
easily tipped. Select cookwate having flat bottoms
large enough to properly contain food and avoid
boilovers and spillovers and large enough to cover
burner grates. This will both save cleaning time and
prevent hazardous accumulations of food, since heavy
spattering or spillovers left:on the :ange can ignite.
Use pans with handles that can be easily grasped and
will remain cool
° Keep all plastics away from the top burners.
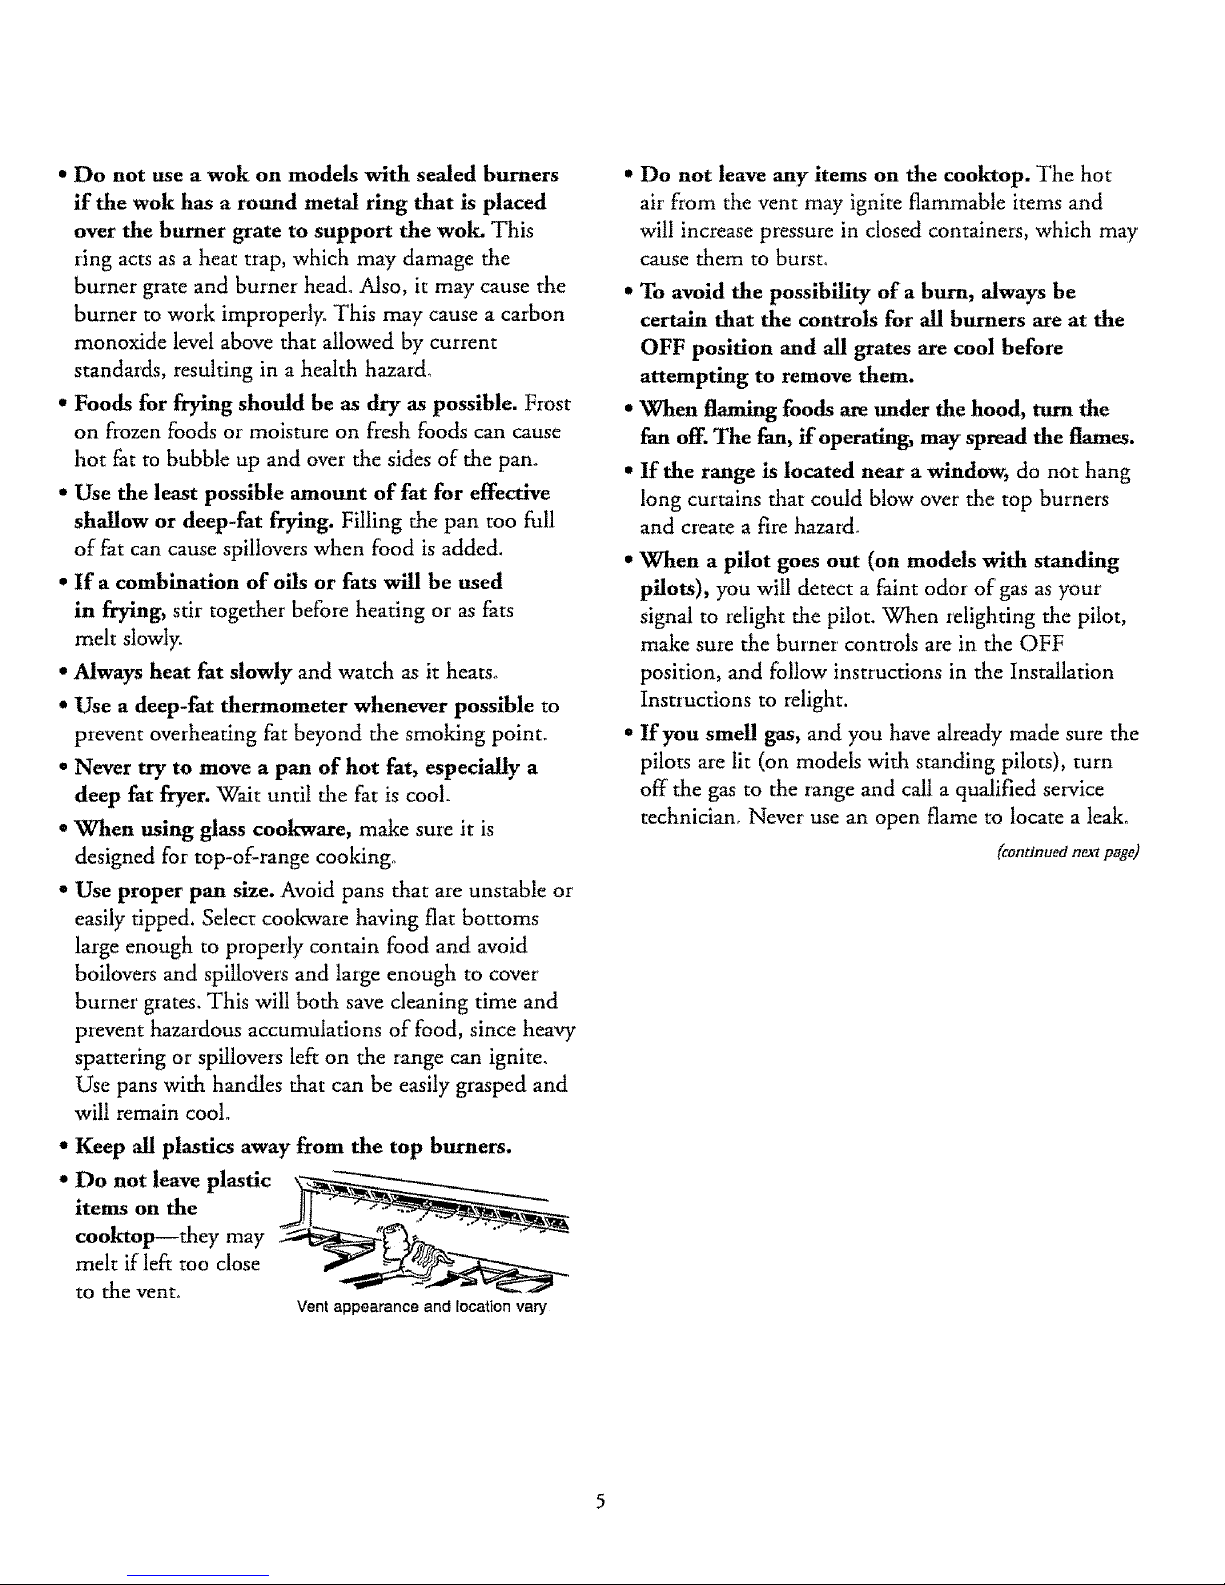
•Do°ot,oa e , .O.omso°
cooktop--they may __.__
melt if left too close
to the vent,,
Vent appearance and location vary
* Do not leave any items on the cooktop. The hot
air from the vent may ignite flammable items and
will increase pressure in closed containers, which may
cause them to burst°
* To avoid the possibility of a burn, always be
certain that the controls for all burners are at the
OFF position and all grates are cool before
attempting to remove them.
• When flaming foods are under the hood, turn the
fan off. The fan, if operatin_ may spread the flames.
• If the range is located near a window, do not hang
long curtains that could blow over the top burners
and create a fire haza_d.
• When a pilot goes out (on models with standing
pilots), you will detect a faint odor of gas as your
signal to relight the pilot. When relighfing the pilot,
make sure the burner controls are in the OFF
position, and follow instructions in the Installation
Instructions to relight.
• If you smell gas, and you have already made sure the
pilots are lit (on models with standing pilots), turn
off the gas to the range and call a qualified seIvice
technician. Never use an open flame to locate a leak.
(continued nex'i page)
Important Safety Instructions
Baking, Broiling and Roasting
= Do not use the oven for a storage area. Items
stored in the oven can ignite.
e Stand away from the range when opening the
door of a hot oven. The hot air and steam that
escape can cause bums to hands, face and eyes.
o Keep the oven free from grease buildup.
• Place the oven shelves in the desired position
while the oven is cool.
. Pulling out the sheff to the shelf-stop is a
convenience in lifting heavy foods. It is also a
precaution against burns from touching hot
surfaces of the door or oven walls. The lowest
position (R) is not designed to slide.
- Do not heat unopened food containers. Pressure
could build up and the container could burst,
causing an injury.
= Do not use aluminum foil anywhere in the oven
except as described in this manual. Misuse could
result in a fire hazard or damage to the range.
• Never use aluminum foil to line the oven bottom.
Improper use of foil could start a fire.
° When using cooking or roasting bags in the oven,
fbllow the manufacturer's directions_
° Use only glass cookware that is recommended for
use in gas ovens.
= Always remove broiler pan from the oven or the
broiler compartment as soon as you finish broiling.
Grease left in the pan can catch on fire if' oven is used
without removing the grease from the broiler pan.
= When broiling, if meat is too close to the time,
the fat may ignite. Trim excess fat to prevent
excessive flare-ups.
• Make sure the broiler pan is in place correctly to
reduce the possibility of grease fires.
• If you should have a grease fire in the broiler pan,
turn the oven off and keep the broiler' compartment
door closed to contain fire until it burns out.
Self-Cleaning Oven
* Do not dean the door gasket. The door gasket is
essential for a good seal Care should be taken nor to
rub, damage or' move the gasket,
=Do not use oven cleaners. No commercial oven
cleaner or oven liner protective coating of any kind
should be used in or around any part of' the oven.
Residue from oven cleaners will damage the inside of'
the oven when the self-clean cycle is used.
° Before self-denning the oven, remove the broiler'
pan, grid, the shelves and other coolcwareo
* IMPORTANT. The health of some birds is
extremely sensitive m the fumes given off during
the Self:Cleaning cycle of' any range. Move birds to
another well ventilated room_
o Be sure to wipe up excess spillage before starting
the self-dean cycle.
° If the self-cleaning mode malfunctions, turn the
oven off and disconnect the power supply. Have it
serviced by a qualified technician.
= Clean only parts listed in this Use and Care Manual.
. Keep the range dean and free of accumulations of
grease or spillovers, which may ignite.
SAVE THESE
INSTRUCTIONS
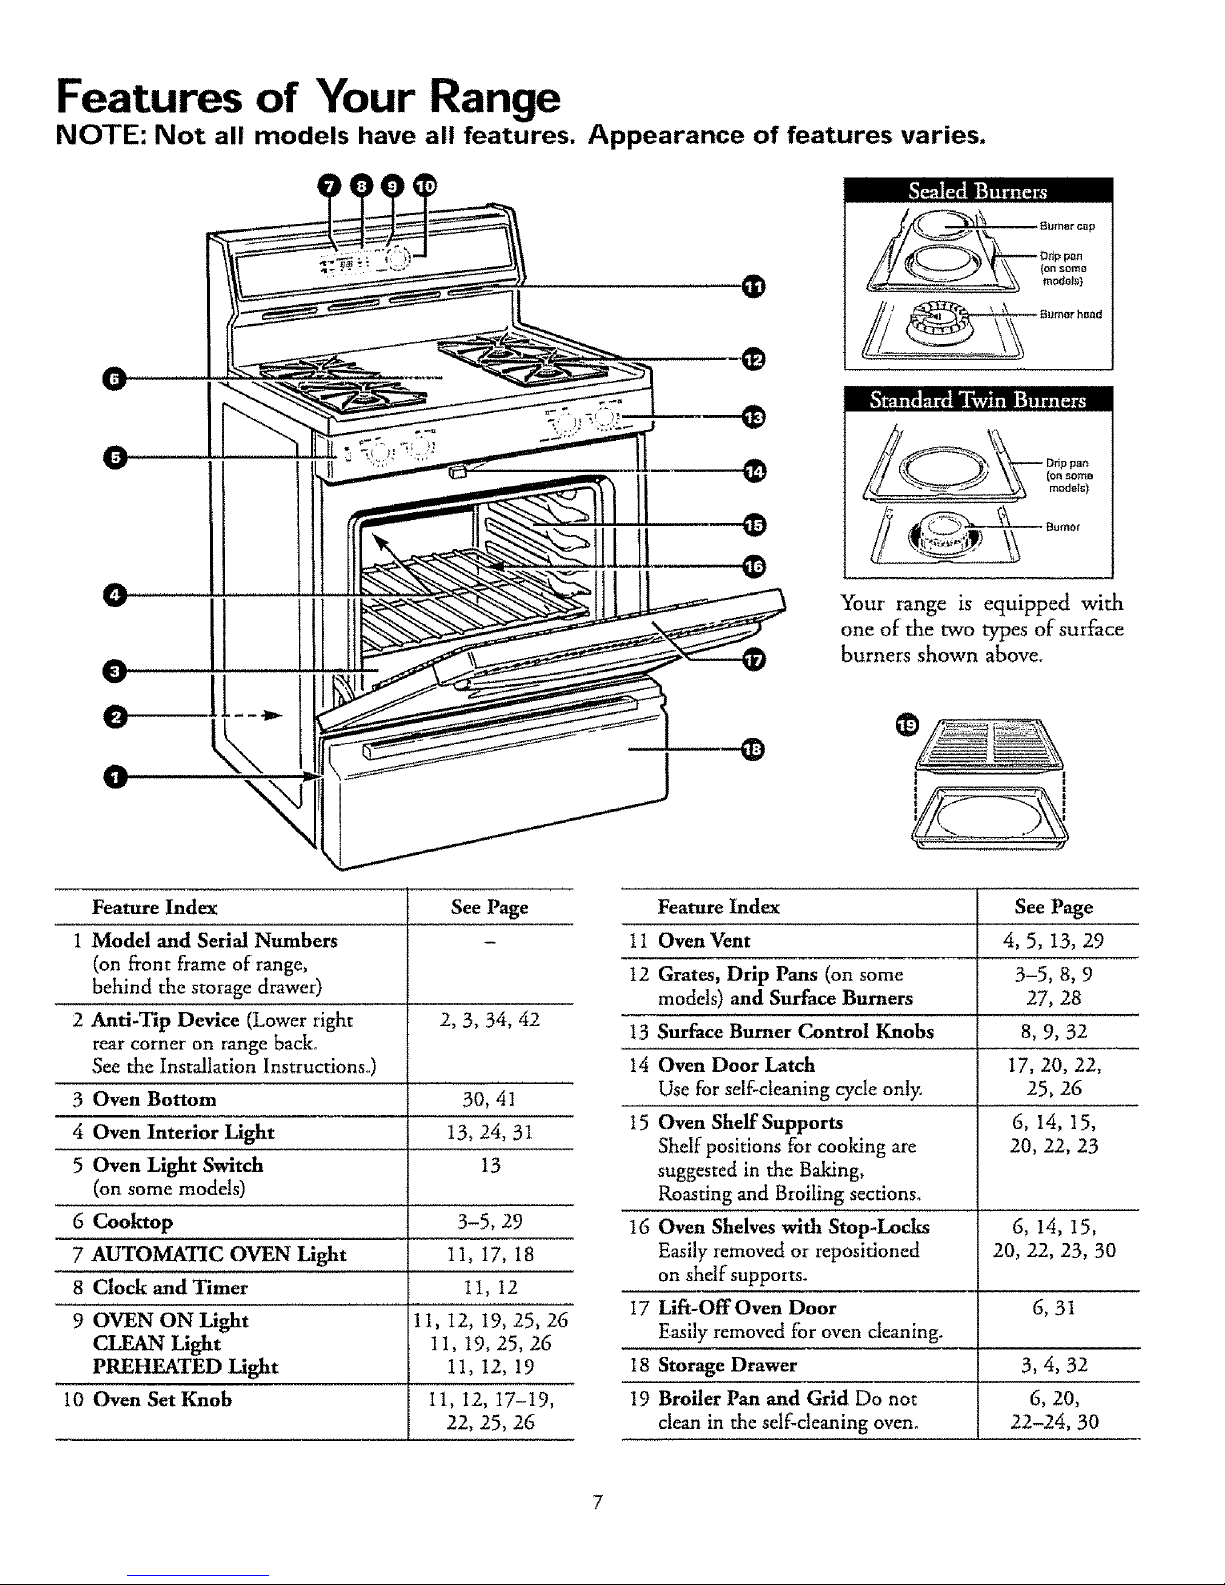
Features of Your Range
NOTE: Not all models have all features. Appearance of features varies.
¢
¢
¢
€
0
¢
I
___ Burner c_p
Or_p p_n
i
_Bu,oo,
Your range is equipped with
one of the two types of surface
burners shown above.
©
1 l
1
Feature Index See Page
1 Model and Serial Numbers
(on front frame of range,
behind the storage drawer)
2 Anti-Tip Device (Lower right 2, 3, 34, 42
rear corner on range back°
See the Installation Instructions_,)
3 Oven Bottom 30, 41
4 Oven Interior Light 13, 24, 31
5 Oven Light Switch 13
(on some models)
6 Cooktop 3-5, 29
7 AUTOMATIC OVEN Light 1I, I7, 18
8 Clock and Timer t I, I2
9 OVEN ON Light 11, I2, I9, 25, 26
CLEAN Light 1I, 19, 25, 26
PREHEATED Light 11, 12, 19
10 Oven Set Knob 11, 12, t7-19,
22, 25, 26
tl
t2
13
14
15
16
Feature Index
Oven Vent
Grates, Drip Pans (on some
models) and Surface Burners
Surface Burner Control Knobs
I7
18 Storage Drawer
19 Broiler Pan and Grid Do not
clean in the self-cleaning oven°
Oven Door Latch
Use for self-cleaning cycle only.
Oven Shell: Supports
Shelf positions for cooldng are
suggested in the Baking,
Roasting and Broiling sections_
Oven Shelves with Stop-Locks
Easily I_moved or repositioned
on shelf supports.
Lift-Off Oven Door
Easily removed for oven cleaning.
See Page
4, 5, 1,3, 29
3-5, 8,9
27, 28
8,9,32
17, 20, 22,
25, 26
6,14,15,
20, 22, 23
6,14,15,
20,22,23,30
6,31
3,4,32
6,20,
22-24,30
Surface Cooking
Lighting Instructions
Your surface burners ate lighted by electric ignition,
eliminating the need for standing pilots with
constantly bus'ning flames.
In case of a power failure, you can light the surface
burners on your range with a match_ Hold a lighted
match to the burner, then tus'n the knob to the LITE
position° Use extreme caution when lighting burners
in this manner.
Surface burners in use when an electrical power failure
occurs will continue to operate normally°
The electrode of' the spark igniter is exposed. When
one busner is mr'ned to LITE, a/! the burners spark.
Do not disassemble ot clean around any burner while
another bus'her is on. An electric shock may result,
which could cause you to knock over hot cookware.
Surface Burner Controls
The toaobs that turn the surface burners on and off are
located on the control panel in front of' the burners.
The two knobs on the left control the left front and
left rear burners. The two knobs on the right control
the right f_ont and right rear burners.
On ranges with sealed burners:
. The smaller burner (right rear position) will give
the best simmer results. It offers precise cooking
performance for delicate foods, such as sauces or
foods which need to cook over low heat for a
long time. It can be turned down to a very low
simmer setting.
" The right fi'ont burner is higher powered than the
others and will bring liquids to a boil quicker
(natural gas installations only).
Before Lighting a Burner
" If' drip pans are supplied with your range, they
should be used at all times_
- Make sure all grates on the range are in place before
using any burner.
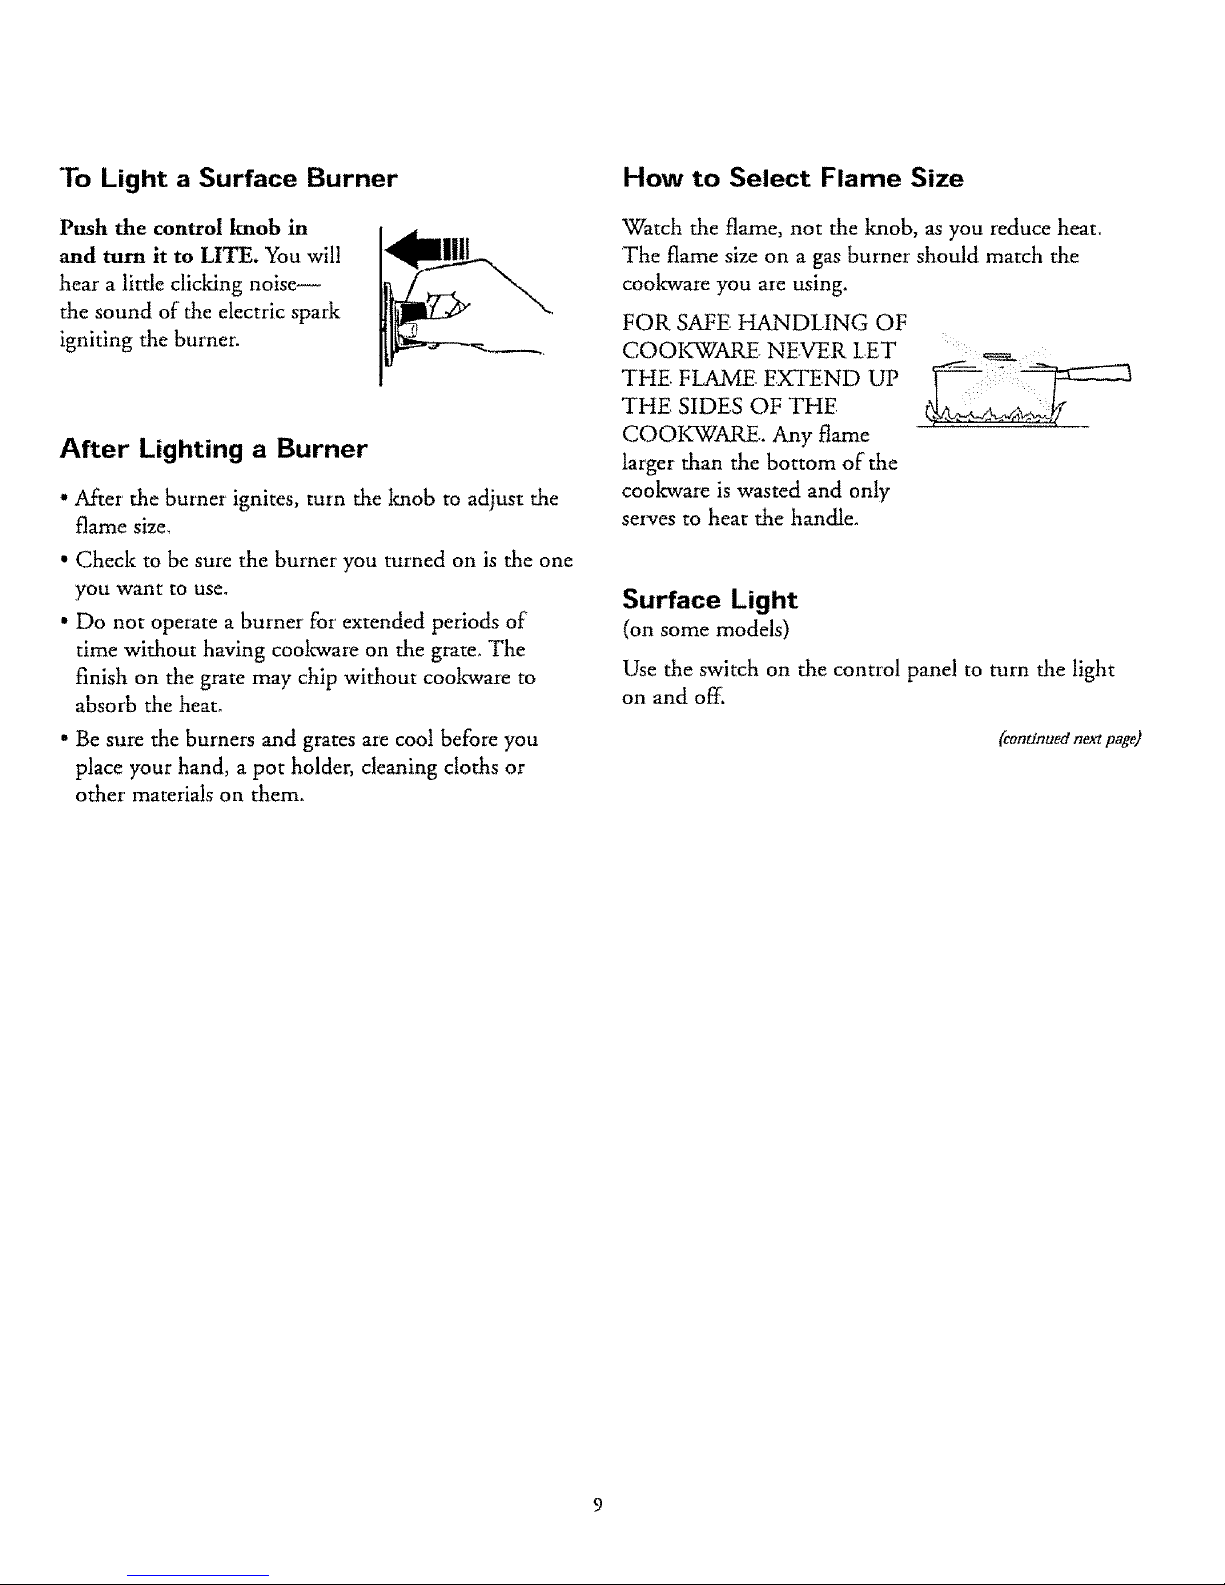
To Light a Surface Burner
Push the control knob in
and turn it to LITE. You will
hear a little clicking noise--
the sound of the electric spark
igniting the burner.
After Lighting a Burner
"AaCter the burner ignites, turn the knob to adjust the
flame size,
• Check to be sure the burner you turned on is the one
you want to use.
• Do not operate a burner for extended periods of
time without having cookware on the grate_ The
finish on the grate may chip without cookware to
absorb the heat°
• Be sure the burners and grates are coot before you
place your hand, a pot holder, cleaning cloths or
other materials on them.
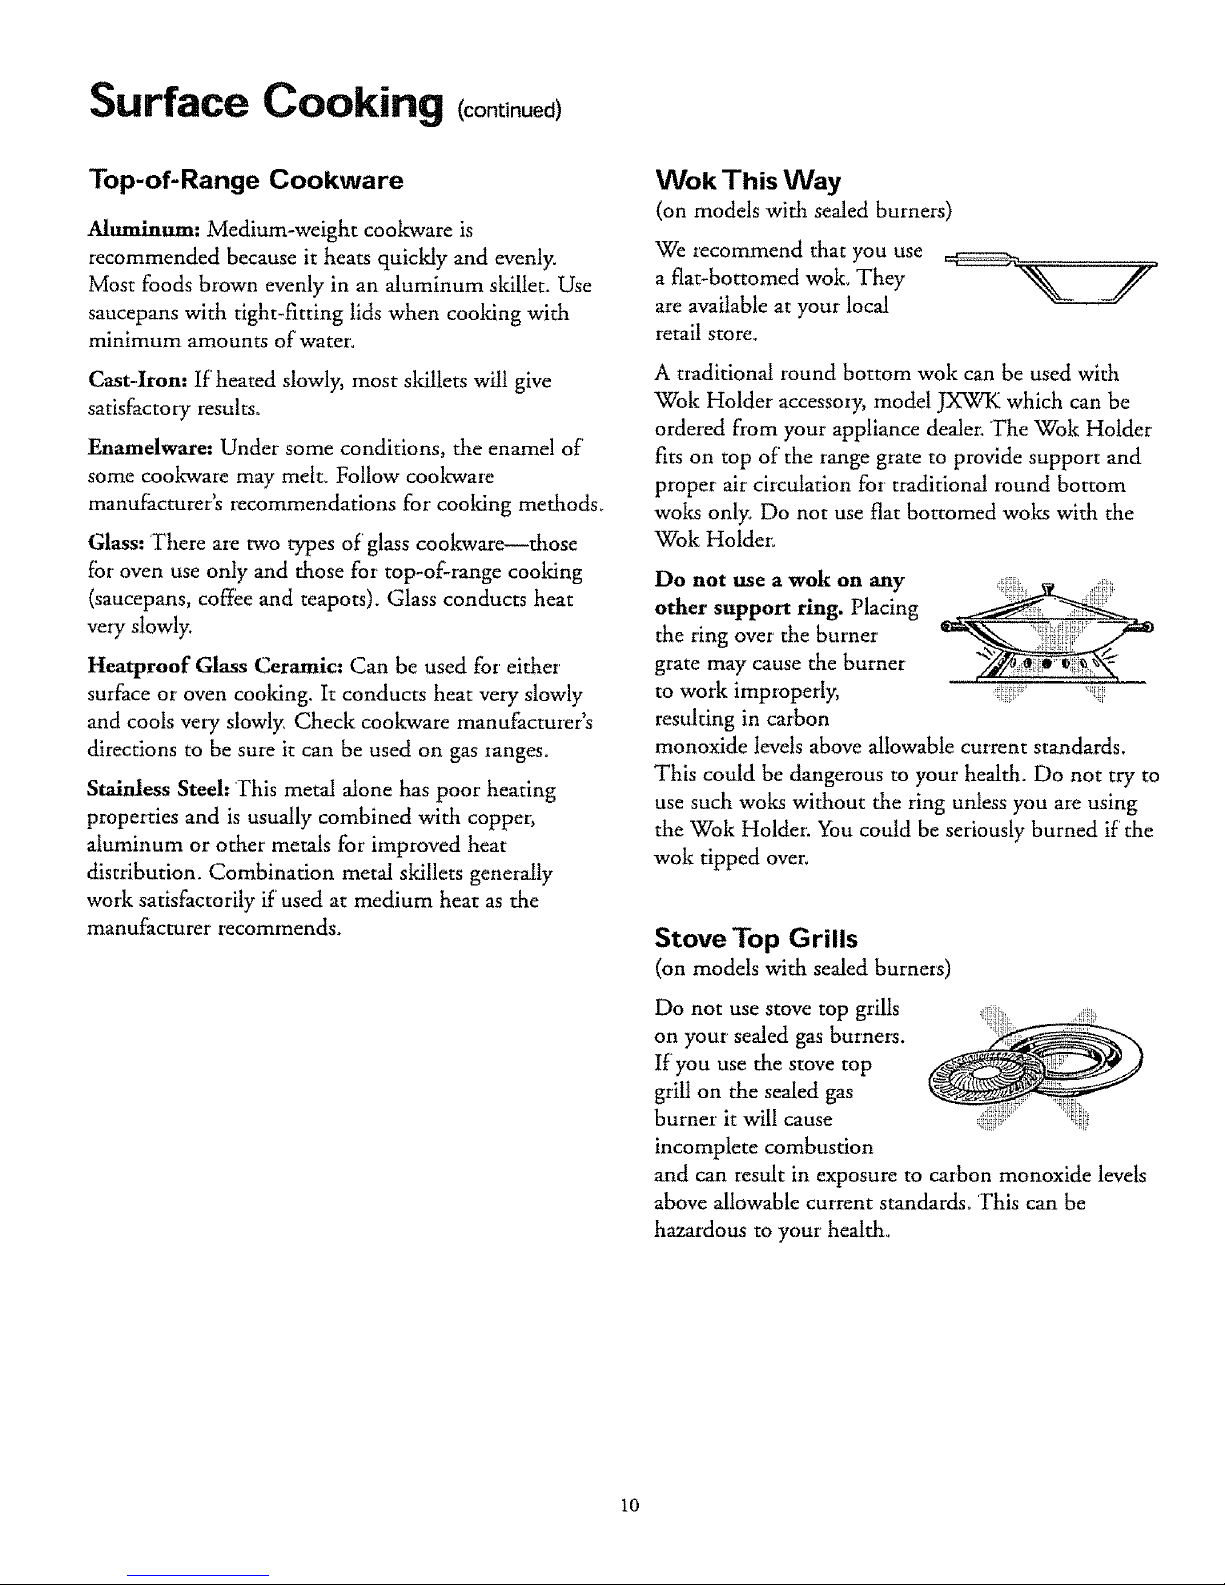
How to Select Flame Size
Watch the flame, not the knob, as you reduce heat.
The flame size on a gas burner should match the
cookwam you ate using.
FOR SAFE HANDLING OF
COOKWARE NEVER LET
THE. FLAME EXTEND UP
THE SIDES OF THE
COOKWARE. Any flame
larger than the bottom of the
coolcware is wasted and only
seives to heat the handle.
Surface Light
(on some models)
Use the switch on the control panel to turn the light
on and off.
(continued next page)
Surface Cooking (co.t °ued)
Top-of-Range Cookware
Aluminum: Medium-weight cookware is
recommended because it heats quickly and evenly.
Most foods brown evenly in an aluminum skillet. Use
saucepans with tight-fitting lids when cooking with
minimum amounts of water,
Cast=Iron= If' heated slowly, most skillets will give
satisfactory results°
Enamelware: Under-some conditions, the ename! of'
some cookware may melt. Follow cooltware
manufacturer's recommendations for cooking methods.
Glass: There are two types of' glass coottware--those
fbr oven use only and those for top-of-iange cooking
(saucepans, coffee and teapots). Glass conducts heat
very slowly.
Heatproof Glass Ceramic= Can be used for either
surface or oven cooking. It conducts heat veiy slowly
and cools very slowly. Check cookware manufacturer's
directions to be sure it can be used on gas Ianges.
Stainless Steel: This metal alone has poor heating
properties and is usually combined with copper,
aluminum or other metals for improved heat
distribution. Combination metal skillets generally
work satisfactorily if used at medium heat as the
manufacturer recommends.
Wok This Way
(on models with sealed burners)
We recommend that you use
a fiat-bottomed wok° They
are available at your local
retail store.
A traditional round bottom wok can be used with
Wok Holder accessory, model JXWK which can be
ordered from your appliance dealer. The Wok Holder
fits on top of the range grate to provide support and
proper air circulation for traditional round bottom
woks only. Do not use flat bottomed wolcs with the
W'ok Holder"
Do not use a wok on any
other support ring. Placing
the ring over the burner
grate may cause the burner
to work improperly,
resulting in carbon
.............i ........ i
_!i;i:!:i;l;!_
monoxide levels above allowable current standards.
This could be dangerous to your health. Do not try to
use such woks without the ring unless you are using
the Wok Holder, You could be seriously burned if' the
wok tipped over.
Stove Top Grills
(on models with sealed burners)
Do not use stove top grills .._iii,
on your sealed gas burners.
If you use the stove top
grill on the sealed gas
burner it will cause
incomplete combustion
and can result in exposure to carbon monoxide levels
above allowable current standards° This can be
hazardous to your health.
10
Oven Control, Clock and Timer ( ppo oo o
AUTOMATIC OVEN
/O.OD-
tD.'aD "°°" ""
HR MIN
450"
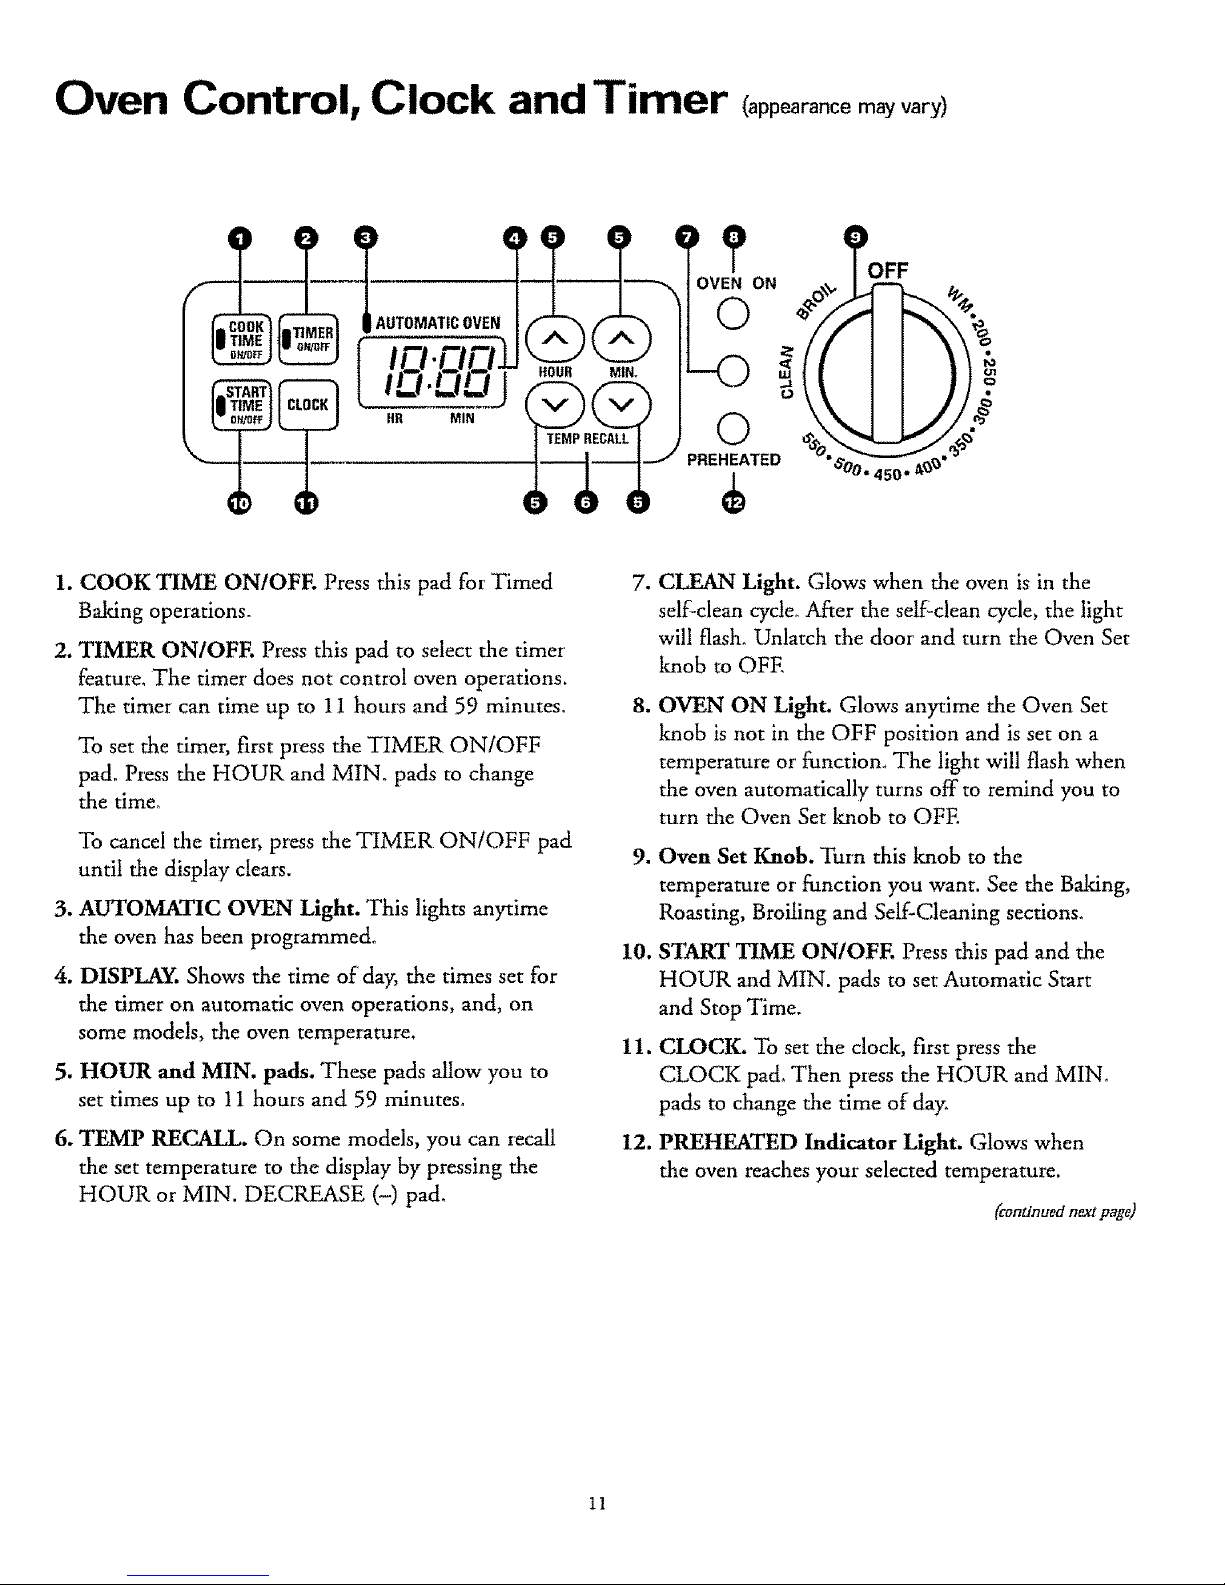
1. COOK TIME ONtOFF. Press this pad for Timed
Baldng operations.
2. TIMER ON/OFF. Press this pad to select the timer
feature, The timer does not control oven operations.
The timer can time up to 11 hours and 59 minutes.
To set the timer, first press the TIMER ON/OFF
pad. Press the HOUR and MIN. pads to change
the time°
To cancel the timer, press the TIMER ON/OFF pad
until the display- clears.
3. AUTOMATIC OVEN Light. This lights anytime
the oven has been programmed°
4. DISPLAY. Shows the time of day, the times set for
the timer on automatic oven operations, and, on
some models, the oven temperature.
5. HOUR and MIN. pads. These pads allow you to
set times up to 11 hours and 59 minutes°
6. TEMP REC._3_. On some models, you can recall
the set temperature to the display by pressing the
HOUR or M1N. DECREASE (-) pad.
,
=
CLEAN Light. Glows when the oven is in the
self-clean cycle. After the setf2clean cycle, the light
will flash. Unlatch the door and turn the Oven Set
knob to OFE
OVEN ON Light. Glows anytime the Oven Set
knob is not in the OFF position and is set on a
temperature or function, The light will flash when
the oven automatically turns off to remind you to
turn the Oven Set lmob to OFE
9. Overt Set Knob, Turn this knob to the
temperature or function you want. See the Baiting,
Roasting, Broiling and Self-Cleaning sections.
10. START TIME ON/OFF, Press this pad and the
HOUR and MIN. pads to set Automatic Start
and Stop Time.
11. CLOCK, To set the clock, first press the
CLOCK pad° Then press the HOUR and MINo
pads to change the time of day.
12. PREHEATED Indicator Light. Glows when
the oven reaches your selected temperature.
(conU'nuednext page}
11
Oven Control, Clock and Timer (coot,..e )
Automatic Clock
The clock must be set for the automatic oven timing
functions to work properly. The time of day cannot be
changed during a Timed Baiting or Self-Cleaning cycle.
To Set the Clodu
I. Press the CLOCK pad.
(_(_ 2. Press the HOUR and MIN. pads
to set the time of day.
HOUR MIN.
@@
Timer
The timer- is a minute time: only.
The time:' does not control oven operations. The
maximum setting on the time:' is 11 hours and
59 minutes.
To Set the Timer:
1. Press the TIMER ON/OFF pad,
2. Press the HOUR and MIN. pads until the
amount of' time you want shows in the
display. The timer will start automatically
within a few seconds of"releasing the pad°
To Reset the Timer:
If the display is still showing the time iemaining, you
may change it by p:essing the HOUR and MIN. pads
until the time you want appears in the display.
If the remaining time is not in the display, recall the
remaining time by pressing the TIMER ON/OFF pad
and then pressing the HOUR and MIN. pads until the
new time you want shows on the display.
To Cancel the Timer:
'To cancel the timer, the remaining time must be in the
display. To recall tile time remaining, press the TIMER
ON/OFF pad once. "To cancel the timer press the
TIMER ON/OFF pad again.
End of Cycle Tones
(on some models)
The end of cycle tone can be cleared by pressing the
TIMER ON/OFF pad or, on some models, by pressing
the COOK TIME ON/OFF pad depending on which
function you are using.
Power Outage
On some models, after a power' outage the oven
wil! automatically resume its setting once the power
is restored.
For models with a CLOCK pad, when the power is
restmed the display will flash the time of day until a
pad is pressed or the knob is turned. Reset the clock to
the correct time of day.
If' the oven was in operation when the power outage
occurred, the Oven Set knob must be turned back to
OFE Then :eset the knob to the way it was before the
power outage.
If your model has a COOK TIME ON/OFF pad
and your oven was set for timed baking or roasting
when the power outage occurred, the clock and all
prog:ammed functions must be reset, 'To reset them,
first turn the Oven Set knob back to OFF, reset the
clock, functions and knob back to the way they were
before the power outage_
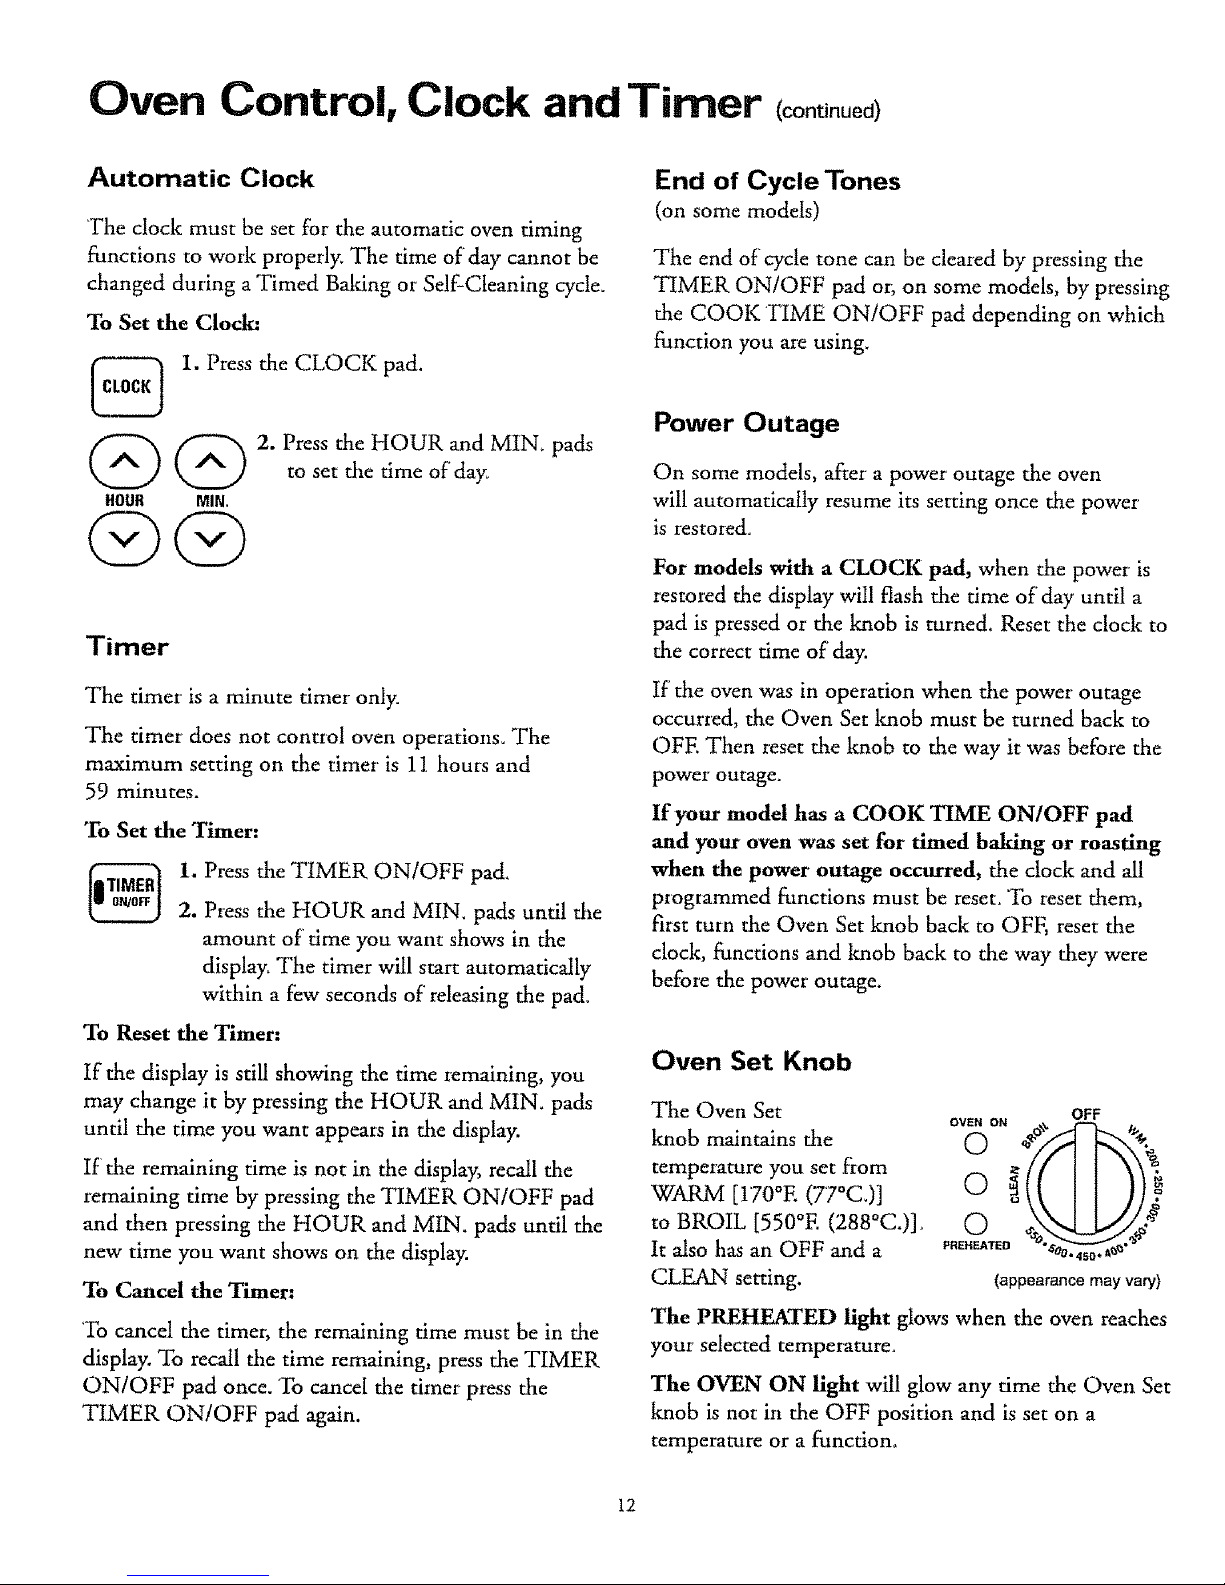
Oven Set Knob
The Oven Set
knob maintains the
tempe:ature you set f_om
WARM [170°E (77°C.)]
to BROIL [550°E (288°C.)].
It also has an OFF arid a
CLEAN setting.
OFF
OVEN ON _ _ /_
o°:F
m II//Y
PREHEATED "O-_@ ._J"
• 450
(appearance may vary)
The PREHEATED light glows when the oven reaches
your selected tempemture_
The OVEN ON light wil! glow any time the Oven Set
knob is not in the OFF position and is set on a
temperature or a function.
12
Using Your Oven
Before UsingYour Oven
Be sure you understand how to set the control
properly_ Practice tenaoving and replacing the shelves
while the oven is coolo Read the information and tips
on the following pages. Keep this manual handy where
you can refer to it, especially during the first weeks of
using your new range°
Electric Ignition
The oven burner and broil burner are lighted by
electric ignition.
To light either burner, turn the Oven Set knob to the
desired temperature. The burner should ignite within
30-90 seconds.
After the oven reaches the selected temperature, the
oven burner cycles--off completely, then on with a
full flame--to keep the oven temperature controlled.
Power Outage
CAUTION: Do not make any attempt to operate
the electric ignition oven during an electrical power
failure. The oven or broiler cannot be lit during a
power failure. Gas will not flog, unless the glow
bar is hot,
If the oven is in use when a power failure occurs,
the oven burner shuts off and cannot be re-lit until
power is restored.
Oven Vents
The oven is vented through duct openings at the rear
of the cooktop, See the Features sectiom Do not block
these openings when cooldng in the oven--it is
important that the flow of hot air from the oven and
flesh air to the oven burners be uninterrupted.
• The vent openings and nearby surfaces may
become hot. Do not touch them.
= Handles of pots and pans on the cooktop may
become hot if left too close to the vent.
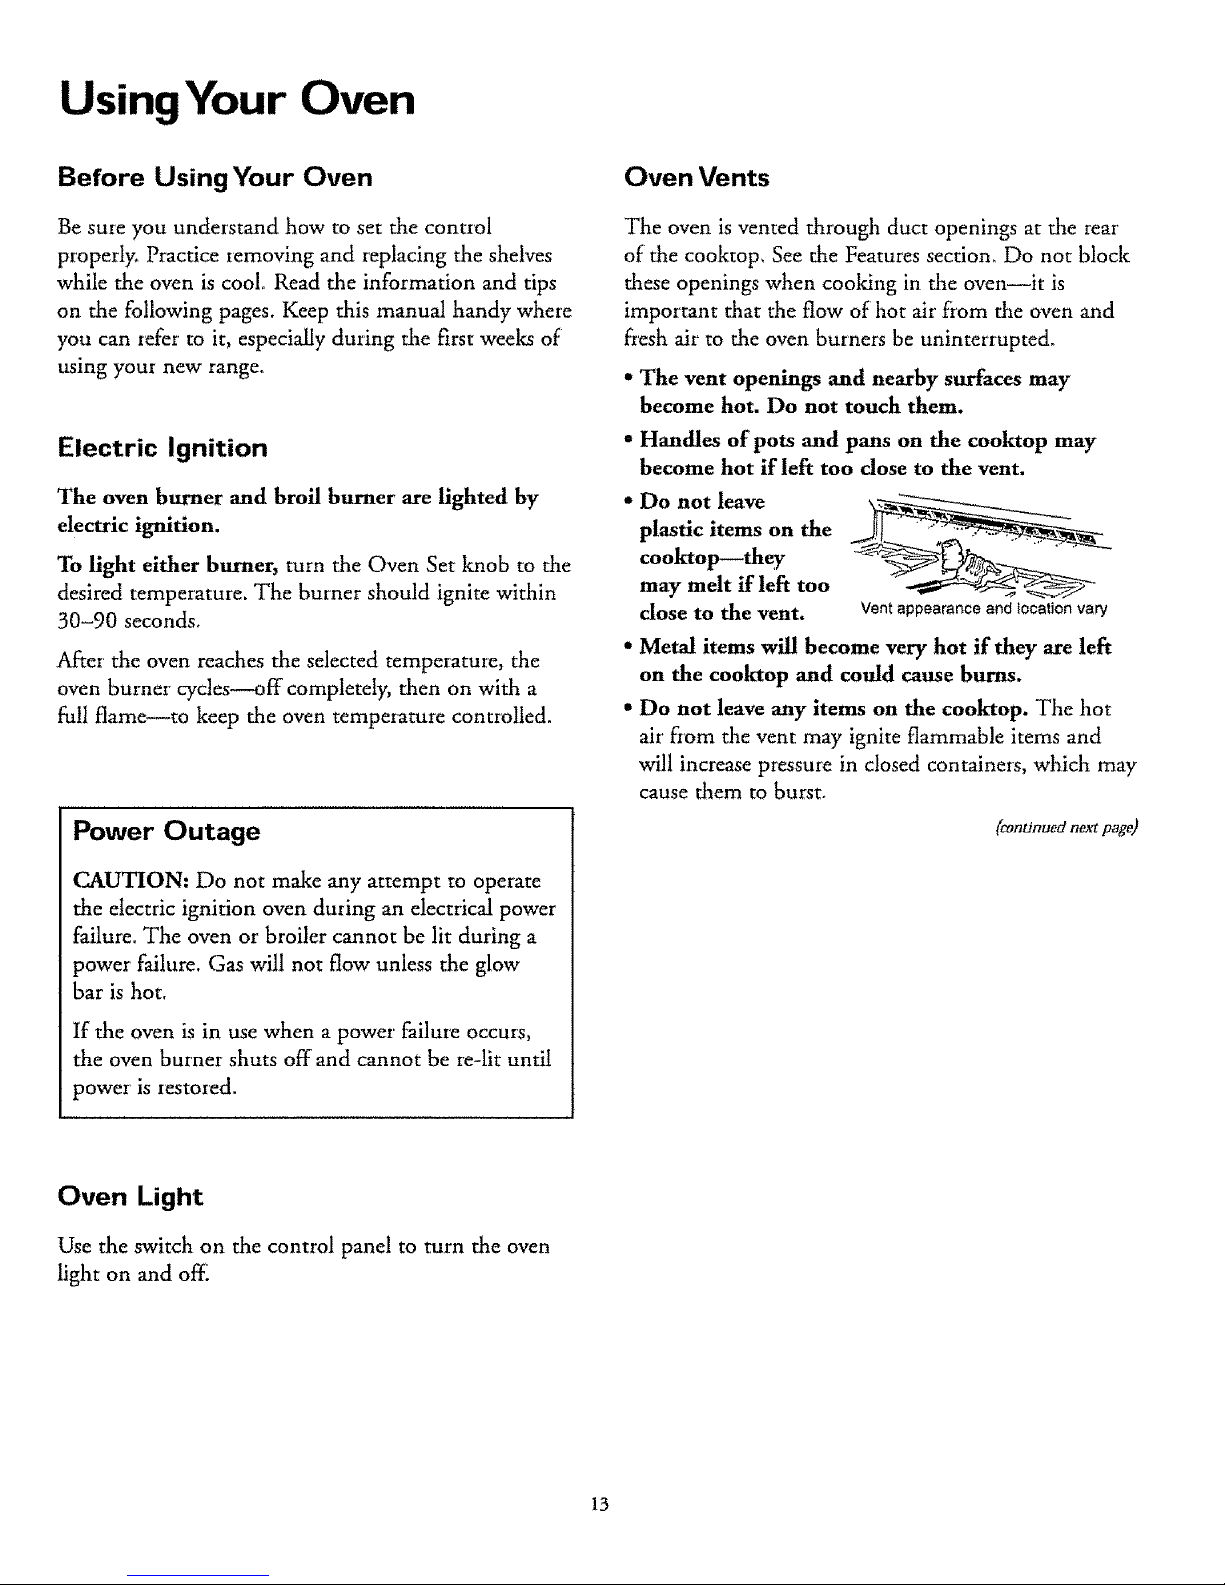
= Do not leave
plastic items on the
cooktop--they
may melt ff left too
close to the vent. Vent appearance and iecation vary
• Metal items will become very hot if they are left
on the cooktop and could cause burns.
• Do not leave any items on the cooktop. The hot
air from the vent may ignite flammable items and
will increase pressure in closed containers, which may
cause them to burst.
(continued next page)
Oven Light
Use the switch on the control pane! to turn the oven
light on and off:
13
Using Your Oven (co.t .00 )
Oven Shelves
The shelves are
designed with stop- -_
locks so, when placed
correctly on the shelf
supports, they will stop
before coming
completely out of the
oven and will not tilt
when you are removing
food from them or placing food on them.
When placing cookware on a shelf; pull the shelf out
to die bump on the shelf support. Place the cookware
on the shelf_ then slide the shelf back into the oven.
This will eliminate reaching into the hot ovem
To remove a shelf
from the oven, pull
it toward you, tilt
the front end upwaM
and pull the shelf out.
To replace, place the
shelf on the shelf
support with the
stop-locks (curved
extension of shelf) facing up and toward the teat of the
oven. Tilt up file front and push the shelf' toward the
back of' the oven until it goes past the bump on the
shelf'support. Then lower the fi'ont of the shelf and
push it all tile way back.
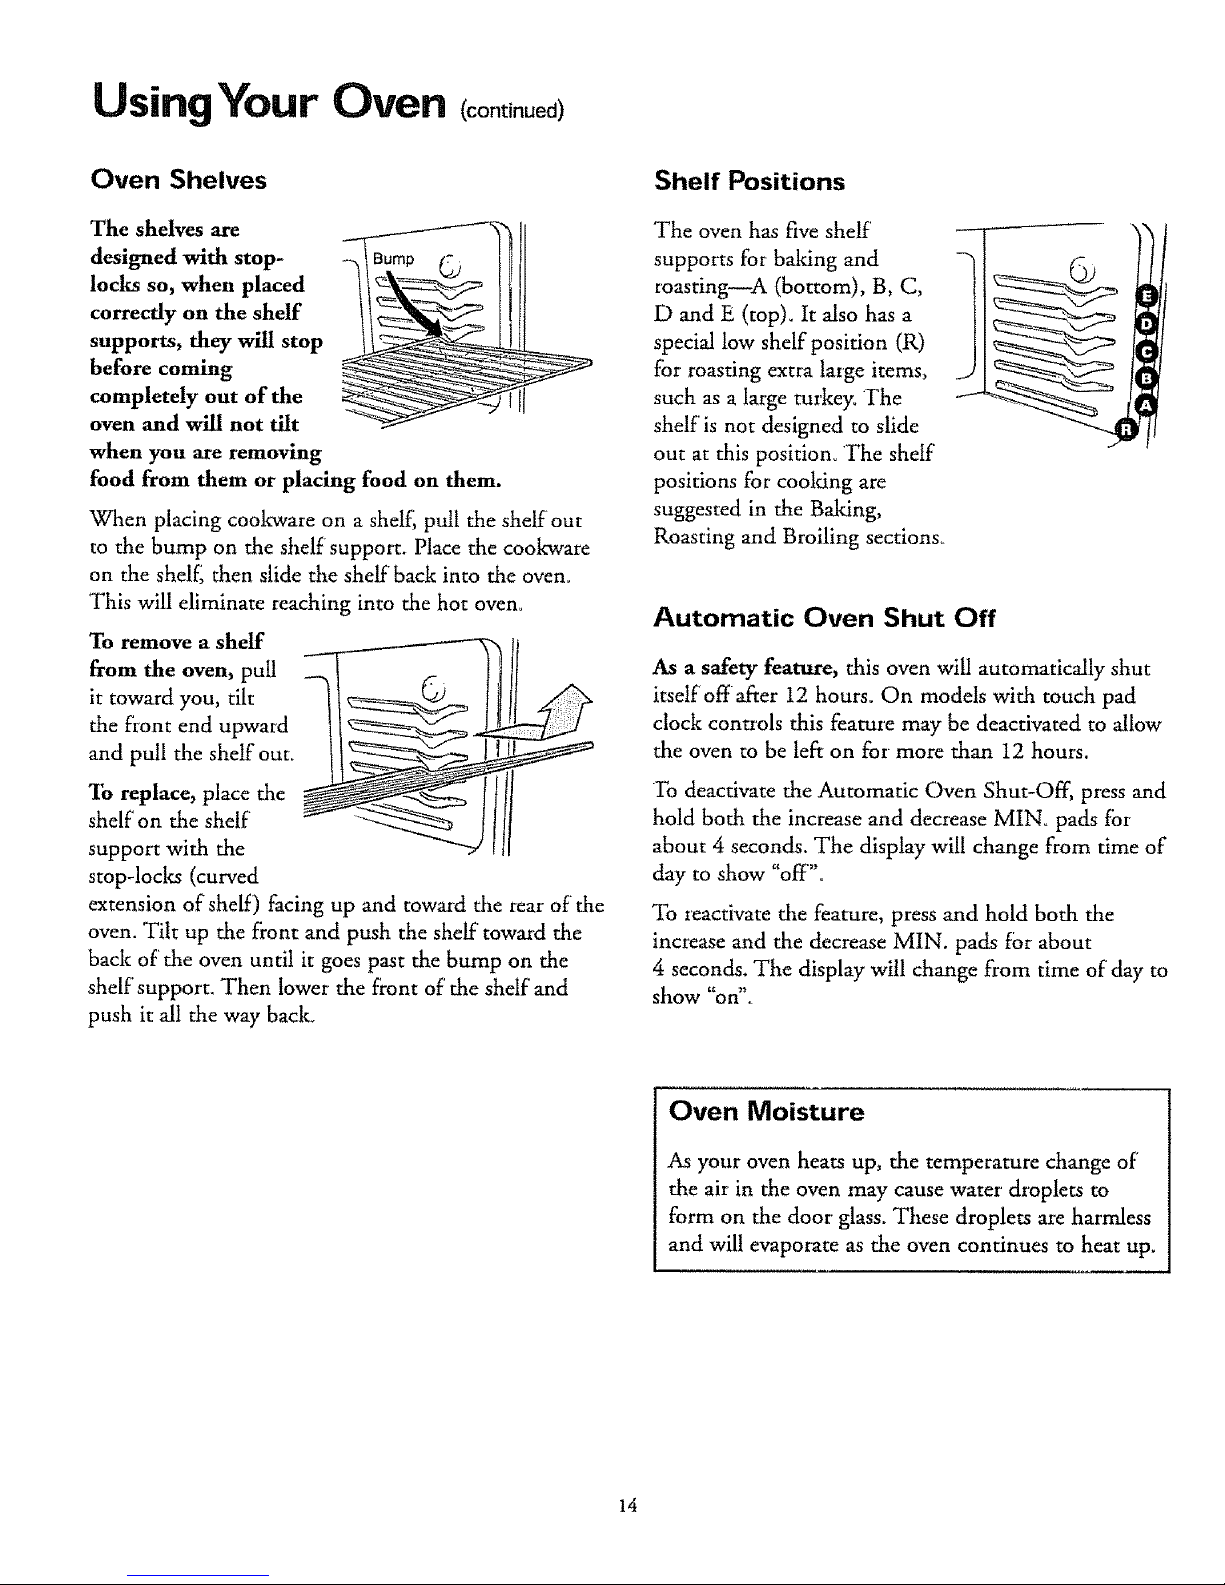
Shelf Positions
The oven has five shelf'
supports for baking and
roasting A (bottom), B, C,
D and E (top). It also has a
specia! low shelf position (R)
for roasting extra large items,
such as a large turkey° ]7he
shelf is not designed to slide
out at this position° 'The shelf"
positions for cooling are
suggested in the Baldng,
Roasting and Broiling sections,.
Automatic Oven Shut Off
As a safety feature, this oven will automatically shut
itself offafter 12 hours. On models with touch pad
clock controls this feature may be deactivated to allow
the oven to be left on for more than 12 hours.
To deactivate the Automatic Oven Shut-Off, press and
hold both the increase and decrease MINo pads for
about 4 seconds. The display will change from time of
day to show "off'.
To :eactivate the feature, press and hold both the
increase and the decrease MIN. pads for about
4 seconds. The display will change from time of day m
show "on".,
Oven Moisture
As your oven heats up, the temperature change of
the air' in the oven may cause water droplets to
form on the door glass. These droplets are harmless
and will evapoiate as the oven continues to heat up.
14

Baking
Do not lock the oven door with the latch during
baking. The latch is used for self-cleaning only.
Your oven temperature is controlled very accurately
using an oven control system. It is recommended that
you operate the oven for a number of weeks to become
familiar with your new oven's performance. If you
think an adjustment is necessary, see the Adjust the
Oven Thermostat section.
How to SetYour Range for Baking
To avoid possible burns, place the shelves in the
correct position before you turn the oven on.
1. Close the oven door. Turn the Oven Set knob to
the temperature you desire.
2. Check the food for doneness at the minimum time
on the recipe. Cook longer if necessary.
3. Turn the Oven Set knob to OFF and then remove
the food°
Oven Shelves
Arrange the oven shelf
or shelves in the
desired locations while
the oven is cool. The
correct shelf position i'_
depends on the tdnd O
of food and the
browning desired, As a
general rule, place most foods in the middle of the
oven, on either shelf position B or C. See the fo!lowing
chart for suggested shelf positions,
Type of Food Shelf Position
Angel food cake A
Biscuits or muffins B or C
Cookies or cupcakes B or C
Brownies B or C
Layer cakes B or C
Bun& or pound cakes A or B
Pies or pie shells B or C
Frozen pies A (on cookie sheet)
Casseroles B or C
Roasting B or R
15
Preheating
Preheat the oven if the recipe calls for it. Preheat means
bringing the oven up to the specified temperature
before putting the food in the oven. To preheat, set the
oven at the correct temperature--selecting a higher
temperature does not shorten preheat time°
Preheating is necessary for good results when baking
cakes, cooldes, pastry and breads. For most casseroles and
roasts, preheating is not necessar]a For ovens without a
preheat indicator light or tone, preheat 10 minutes. After
the oven is preheated place the food in the oven as
quickly as possible to prevent heat from escaping.
Baking Pans
Use the proper baking pan. The type of finish on the
pan determines the amount of browning that wil! occur.
" Dark, rough or dull pans absorb heat resulting in a
browner, crisper crust. Use this type for pies_
" Shiny, bright and smooth pans reflect heat, resulting
in a lighter, more delicate browning. Cakes and
cookies requite this type of pan.
• Glass baking dishes also absorb heat. When baking in
glass baking dishes, the temperature may need to be
reduced by 25°E (13°C.).
° If you are using dark non-stick pans, you may find
that you need to reduce the oven temperature 25°E
(13°C.) to prevent over-browning.
Pan Placement
For' even cooking and proper browning, there must be
enough room for air circulation in the oven. Baking
results will be better if baking pans are centered as
much as possible rather than being placed to the front
or to the back of the oven.
Pans should not touch each other or the walls of the
oven. Allow 1- to !_A-inch (L5- to 4-cm) space
between pans as well as from the back of the oven, the
door and the sides. If you need to use two shelves,
stagger the pans so one is not directly above the other.
Baking Guides
When using prepared baking mixes, follow package
recipe or instructions for the best baking results.
(continued ne_ page)
aking (continued)
Cookies
When baking cookies,
flat cookie sheets
(without sides) produce
better-looking cooldes.
Cookies baked in a jelly
roll pan (short sides all
around) may have darker
edges and pale or light
browning may occur.
Do not use a cookie sheet so large that it touches
the walls or the door of the oven.
For best results, use only one coolde sheet in the oven
at a time.
Pies
For best results, bake pies in dark, rough or dull pans
to produce a browner, crisper crust. Frozen pies in foil
pans should be placed on an aluminum cookie sheet
for baking since the shiny foil pan reflects heat away
from the pie crust; the cookie sheet helps retain it.
Cakes
When baking cakes, warped or bent pans will cause
uneven batdng results and poorly shaped products,
A cake baked in a pan Iaiger than the recipe
recommended will usually be crisper, thinner and drier
than it should be. If' baked in a pan smaller than
recommended, it may be undercooked and batter may
overflow. Check the recipe to make sure the pan size
used is the one recommended.
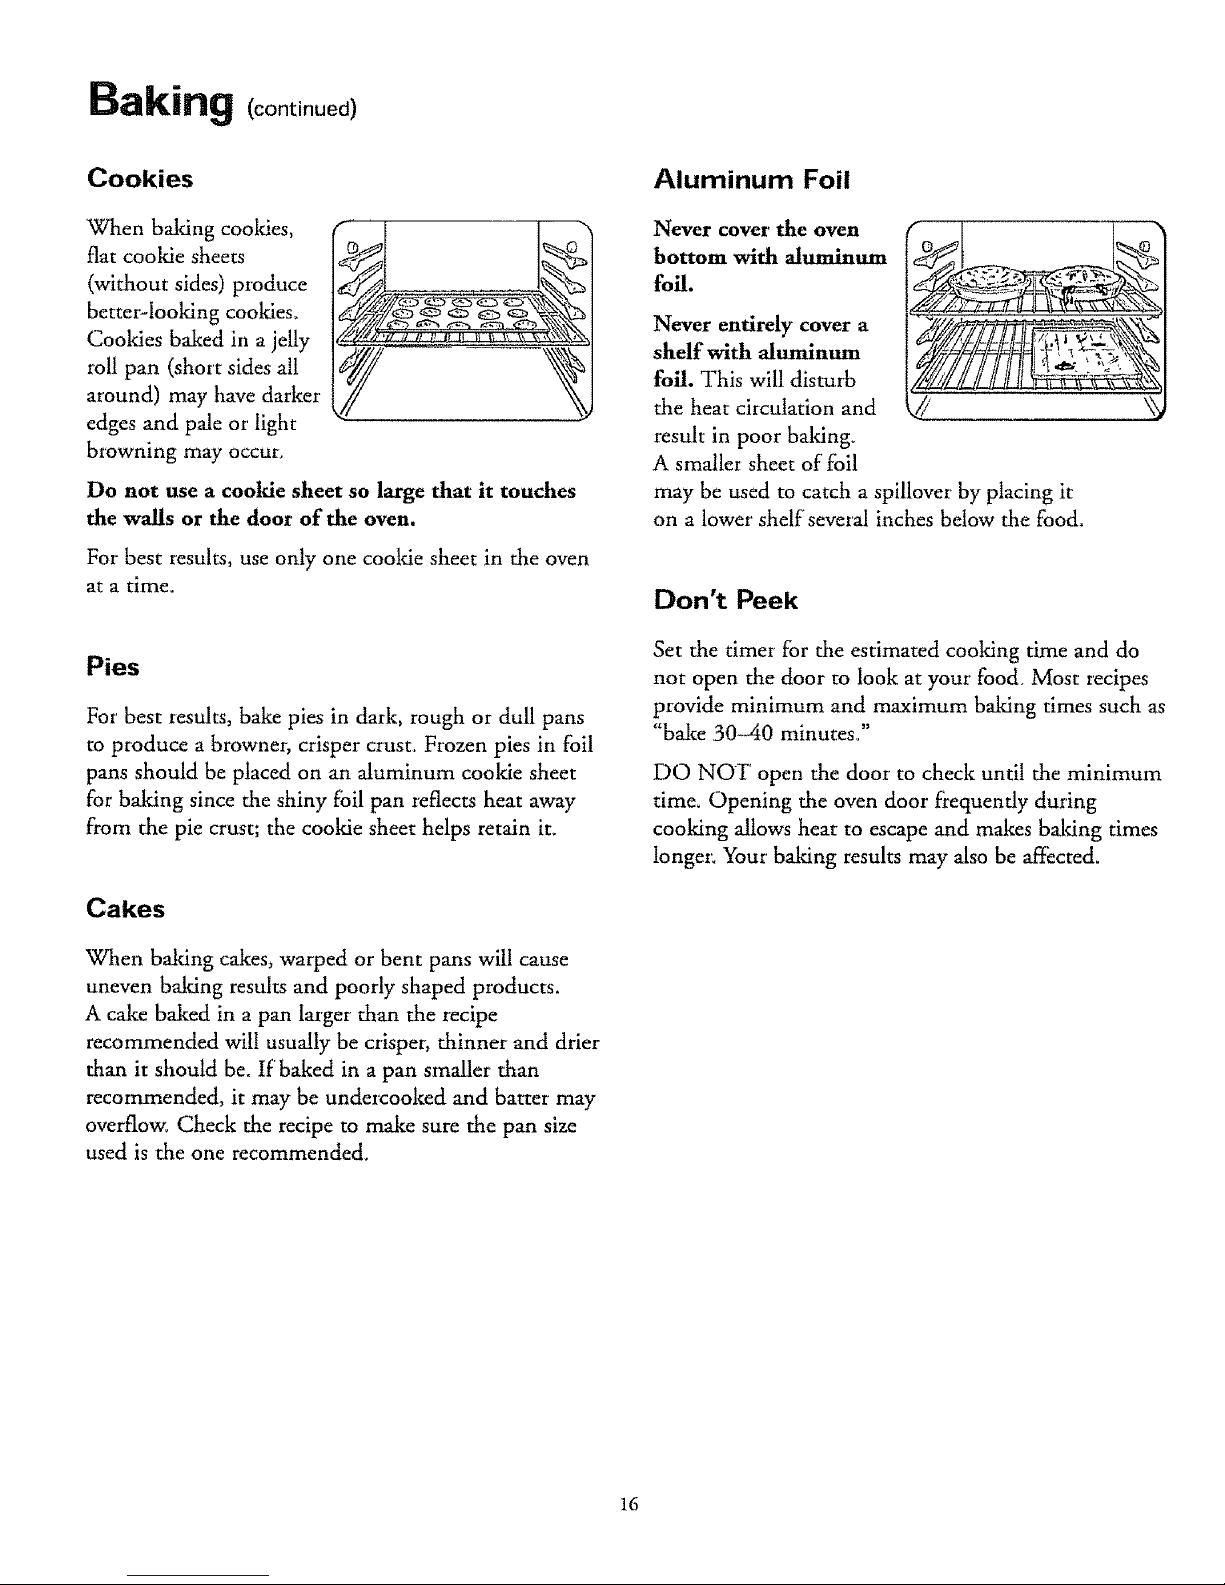
Aluminum Foil
Never cover the oven
bottom with aluminum
foil.
Never entirely cover a
shelf with aluminum
foil. This will disturb
the hear circulation and
result in poor baking°
A smaller sheet of foil
may be used to catch a spillover by placing it
on a lower shelf" several inches below the food.
Don't Peek
Set the timer fbr the estimated cooking time and do
not open the door to look at your food. Most recipes
provide minimum and maximum baking times such as
"bake 30-40 minutes°"
DO NOr open the door' to check until the minimum
time. Opening the oven door frequently during
cooking allows heat to escape and makes baldng times
longer: Your baking results may also be affected.
16
Timed Baking (on some models)
How to Time Bake
Do not lock the oven door with the latch during
timed baking. The latch is used for self-deaning
only.
The oven control allows you to turn the oven on or off
automatically at specific times that you set° Examples
of Immediate Start (oven turns on now and you set it
to turn off automatically) and Delay Start and Stop
(setting the oven to turn on automatically at a later
time, cook for a preset amount of time and then turn
off automatically) will be described_
NOTE: Before beginning, make sure the oven clock
shows the correct time of day.
___0_ To set the dock, first press the CLOCK
pad_ Then press the HOUR and MIN. pads
until the correct time of day is displayed,
How to Set Immediate Start and
Automatic Stop
To avoid possible burns, place the shelves in the
correct position before you turn the oven on.
The oven will turn on immediately and cook for a
selected length of time. At the end of Cook Time the
oven will turn off automatically.
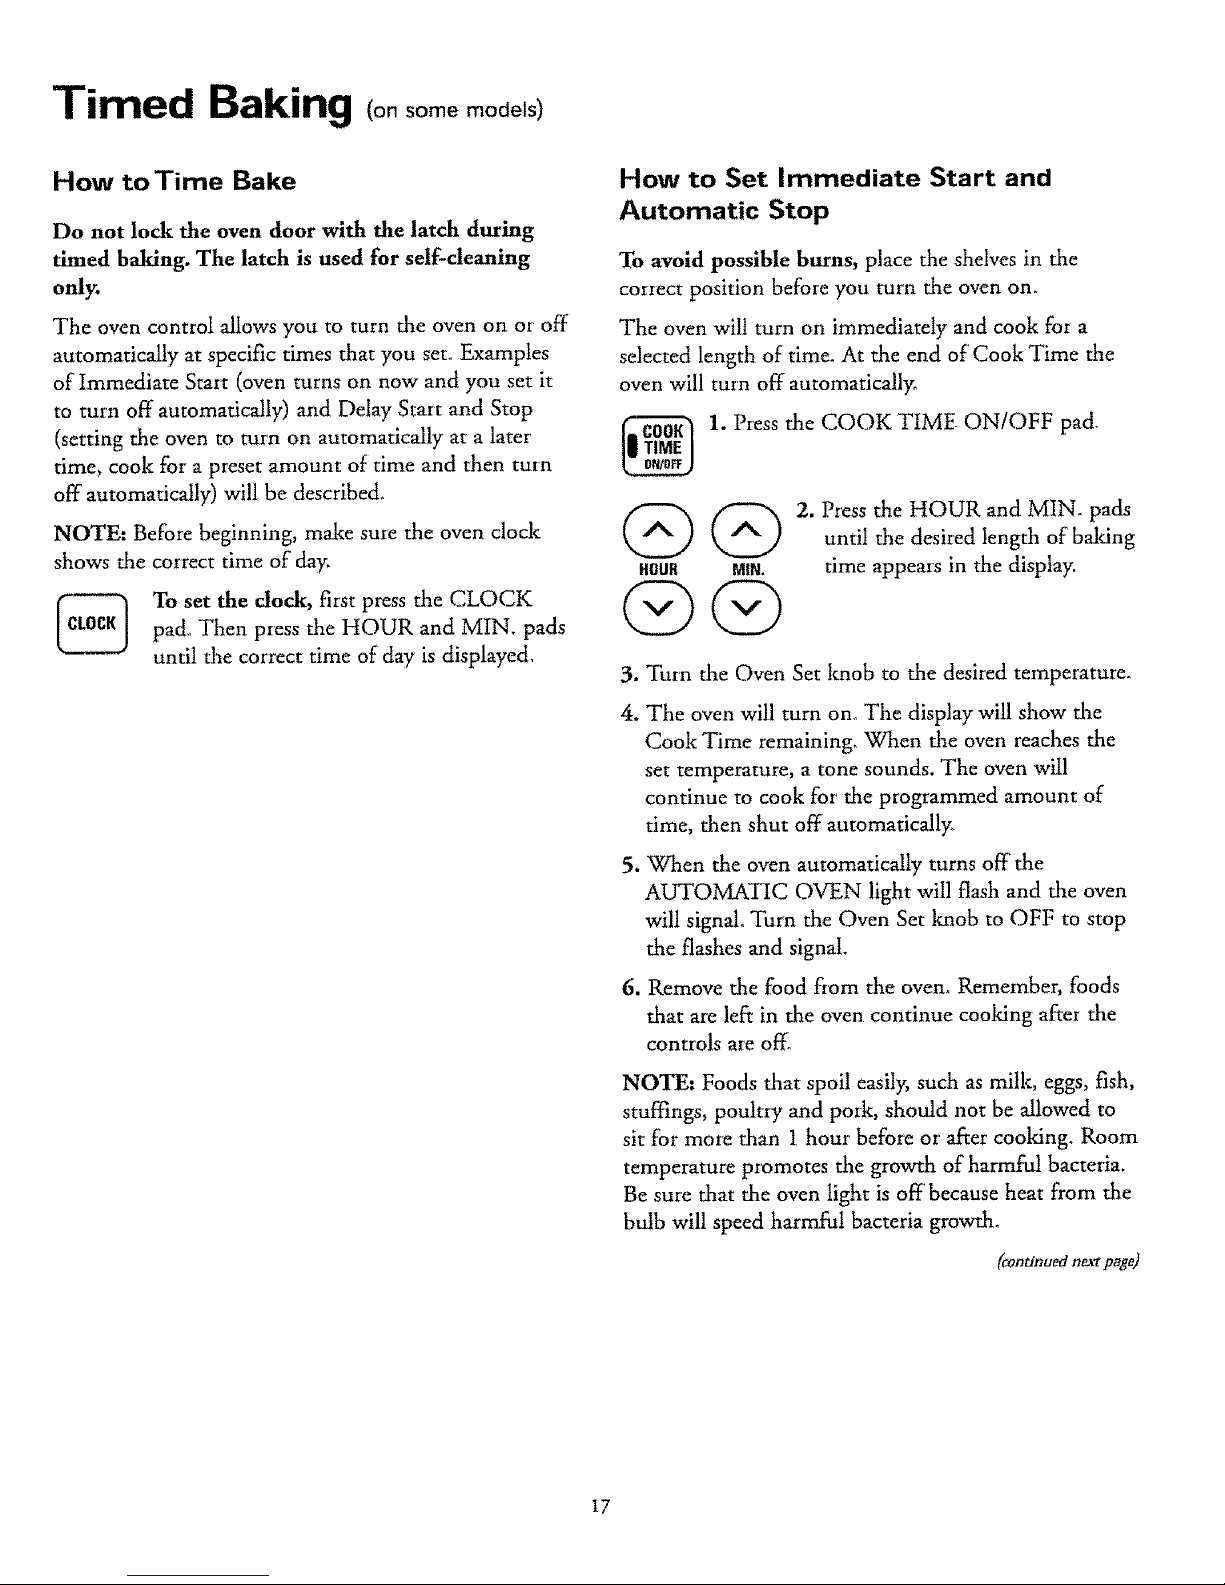
1. Press the COOK TIME ON/OFF pad
GG
HOUR MIN.
@@
2. Press the HOUR and MIN. pads
until the desired length of baking
time appears in the display.
,
4.
5_
,
Turn the Oven Set tmob to the desired temperature.
The oven will turn ono The display will show the
Cook Time remaining. When the oven reaches the
set temperature, a tone sounds. The oven will
continue to cook for the programmed amount of
time, then shut off automatically_
When the oven automatically turns off the
AUTOMATIC OVEN light will flash and the oven
will signal° Turn the Oven Set loaob to OFF to stop
the flashes and signal.
Remove the food from the oven. Remember, foods
that are left in the oven continue cooldng after the
controls are off°
NOTE: Foods that spoil easily, such as milk, eggs, fish,
stuffings, poultry and pork, should not be allowed to
sit for more than 1 hour before or after cooking. Room
temperature promotes the growth of harmful bacteria.
Be sure that the oven light is off because heat from the
bulb will speed harmful bacteria growth.
(conU'nuednm_ page)
17
Timed Baking (continued)
How to Set Delay Start and
Automatic Stop
Quick Reminder:
1. Press the COOK TIME ON1OFF pad,
2. Press the HOUR and MIN. pads to set the
desired length of cooking time.
3. Press the STAP,_T TIME ON/OFF pad°
4. Press the HOUR and MIN, pads to set the time
of day you want cooking to stare
5. Turn the Oven Set knob to the desired
temperature°
To avoid possible burns, place the shelves in the
correct position before you program the oven.
You can set the oven control to delay_start the oven,
cook fox' a specific length of' time and then turn off'
automatically.
For example: Let's say it's 2:00 and dinner time
is shortly after 7:00. The recipe suggests 3 hours
cooking time at 325°E (163°C.).
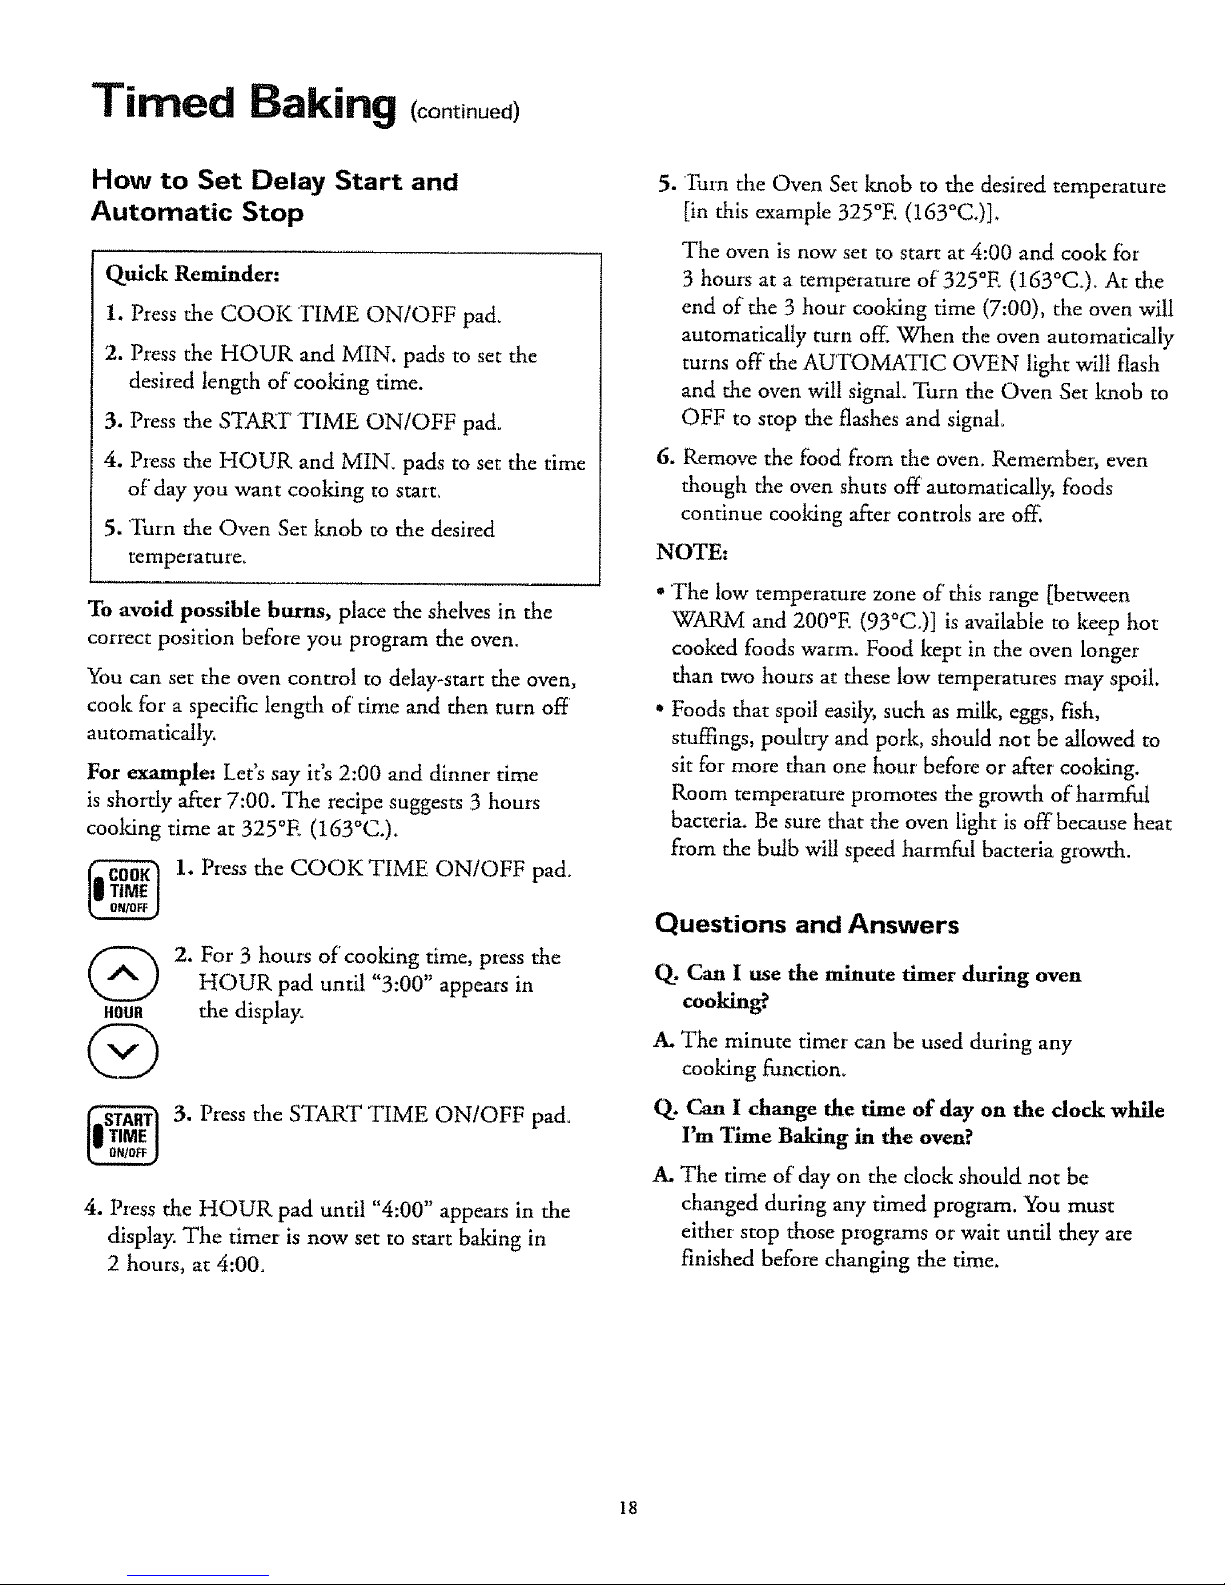
1. Press the COOK TIME ONIOFF pad°
G
HOUR
2. For 3 hours of cooking time, press the
HOUR pad until "3:00" appea_s in
the display_
3. Press the START 'TIME ON/OFF pad°
4. Press the HOUR pad until "4:00" appears in the
display. The timer is now set to start baking in
2 hours, at 4:00.
Q
o
Turn the Oven Set knob to the desired temperature
[in this example 325°E (163°C.)],
The oven is now set to start at 4:00 and cook for
3 hour's at a temperature of325°E (163°C.)_ At the
end of the 3 hour cooking time (7:00), the oven will
automatically turn off[ When the oven automatically
turns off' the AUTOMATIC OVEN light wilt flash
and the oven will signal. Turn the Oven Set knob to
OFF to stop the flashes and signal.
Remove the food from the oven. Remembe:; even
though the oven shuts off automatically, foods
continue cooking after controls are off.
NOTE:
"The low temperature zone of' this range [between
WARM and 200°E (93°C.)] is available to keep hot
cooked foods warm. Food kept in the oven longer
than two hour-s at these low temperatures may spoil.
° Foods that spoil easily, such as milk, eggs, fish,
stuffings, poultry and pork, should not be allowed to
sit for more than one hour before or after cooldng.
Room temperature promotes the growth of harmful
bacteria. Be sure that the oven light is off because heat
from the bulb will speed harmful bacteria growth.
Questions and Answers
Q. Can I use the minute timer during oven
cooking?.
A. The minute timer can be used during any
cooking function_
Q. Can I change the time of day on the dock while
I'm Time Baking in the oven?
A, The time of' day on the clock should not be
changed during any timed progiam. You must
either stop those programs or wait until they are
finished before changing the time.
18
Adjust the Oven Thermostat--Do It Yourself!
You may Find that your new oven cooks differently
than the one it replaced. We recommend that you use
your new oven for a few weeks to become more
familiar with it, following the times given in your'
recipes as a guide,
If you think your new oven is too hot or too cold,
you can adjust the thermostat yourself. If you think
it is too hot, adjust the thermostat to make it coolei:
If you think it is too cool, adjust the thermostat to
make it hotter:
We do not recommend the use of thermometers,
such as those found in grocery stores, to check the
temperature setting of your new oven. These
thermometers may vary 20--40°E (11-22°C.)o
To Adjust the Thermostat:
1. Put the Oven Set knob in the OFF position,
2, Press and hold the HOUR increase and
the HOUR decrease pads at the same time
it0UR for 5 seconds until the display changes,
@
3. Immediately, before display changes back, press the
HOUR increase or decrease pad to increase or'
decrease the temperature in 5 degree increments.
The oven temperature can be increased up to 35°E
(19°C,) hotter or decreased 35°E (19°C.) cooler,
If the oven adjustment is set cooler than the factory
setting a minus sign "-" and the new temperature will
appear in the display,
4. Wait several seconds for the control to automatically
set and return to its previous setting,
NOTE: This adjustment will not affect the broiling or
the self-cleaning temperatures, The adjustment will be
retained in memory after a power failure.
To AdJust the Temperature on Models
with Only an Oven Set Knob
1. Put the knob in the OFF position.
2. Pull the knob off by pulling straight out.
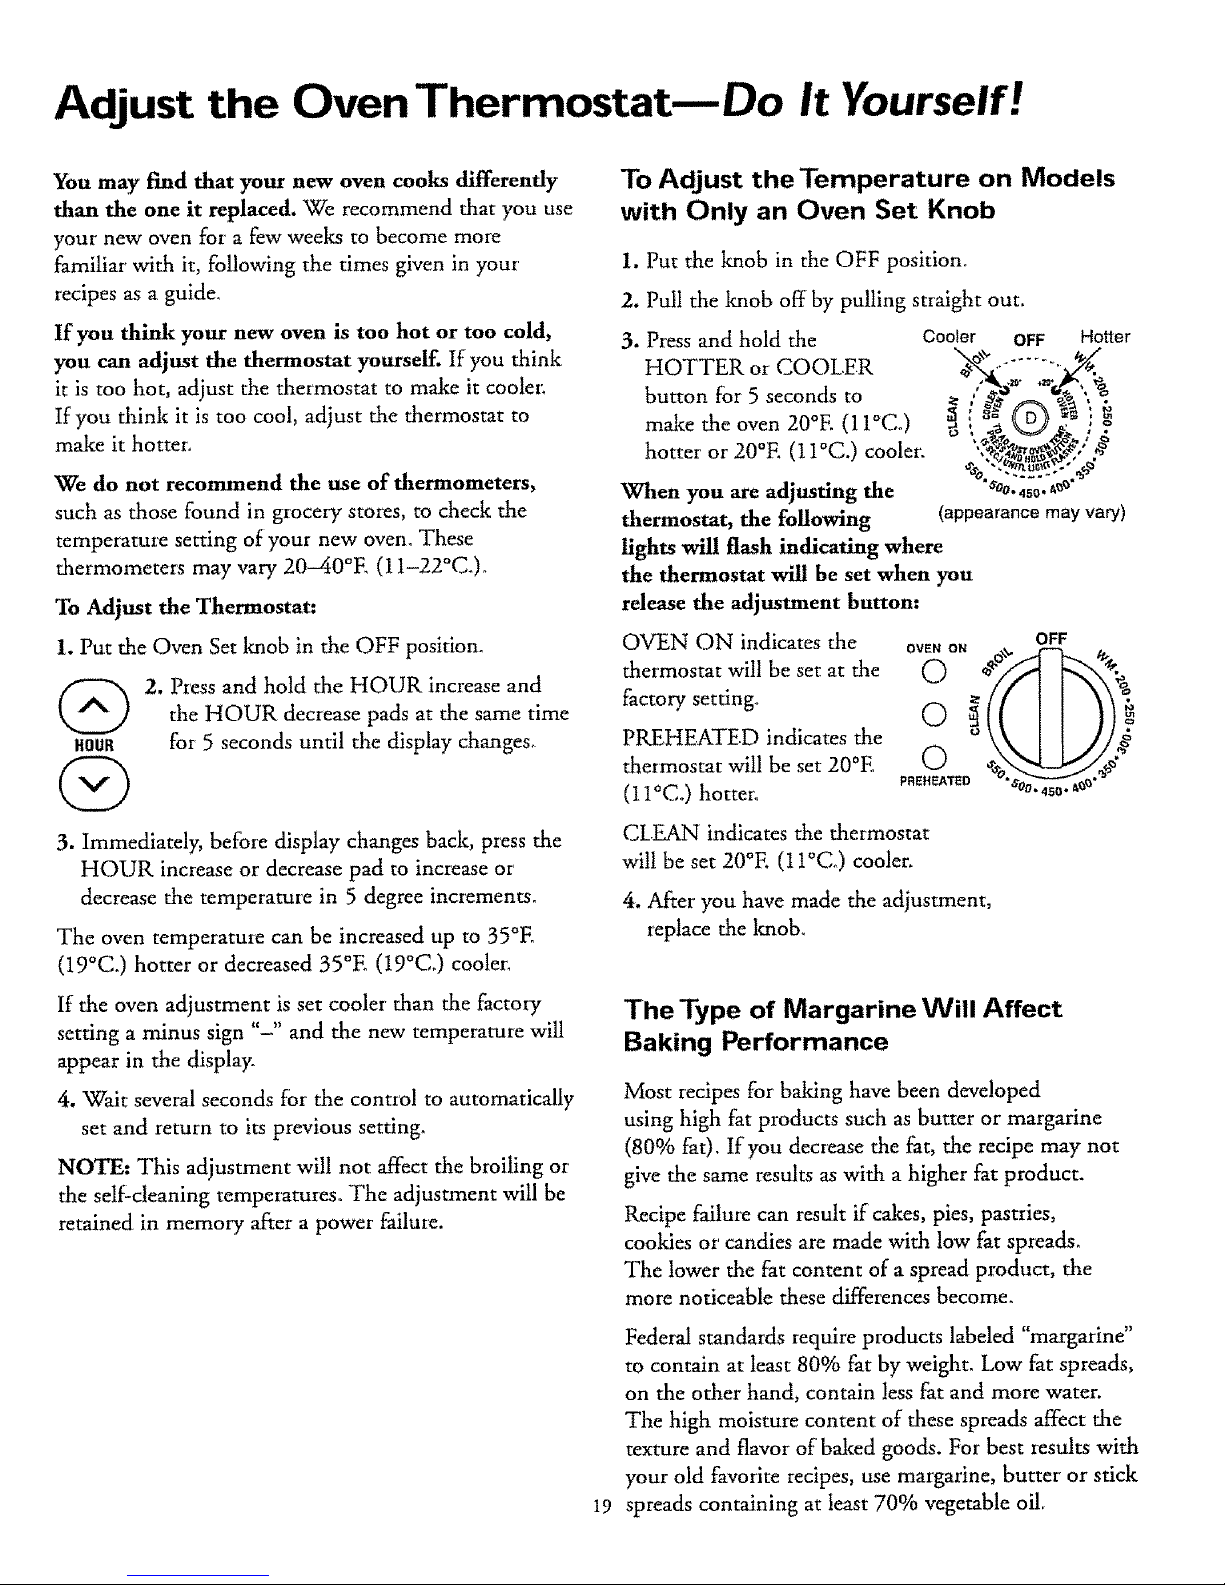
3. Press and hold the Cooler
N
HOTTER or COOLER
button for 5 seconds to
make the oven 20°E (11°Co)
t_
hotter or 20°E (I1°C.) cooler,
When you are adjusting the
thermostat, the following
lights will flash indicating where
the thermostat will be set when you
release the adjustment button:
OVEN ON indicates the
thermostat will be set at the
factory setfing_
PREHEATED indicates the
thermostat will be set 20°E
(t I°Co) hotter.
OFF
OVENON @x._
o
o :((11
o
PREHEATED _O%en_-_-'_._" _
_00. 450• _
CLEAN indicates the thermostat
wilt be set 20°E (I t°Co) cooler.
4, After you have made the adjustment,
replace the tmobo
19
The Type of Margarine Will Affect
Baking Performance
Most recipes for baking have been do'eloped
using high fat products such as butter or margarine
(80% fat), If you decrease the fat, the recipe may not
give the same results as with a higher fat product.
Recipe failure can result if cakes, pies, pastries,
cookies or candies are made with low fat spreads.
The lower the fat content of a spread product, the
more noticeable these differences become.
Federal standards require products labeled "margarine"
to contain at least 80% fat by weight. Low fat spreads,
on the other hand, contain less fat and more water.
The high moisture content of these spreads affect the
texture and flavor of baked goods. For best results with
your old favorite recipes, use margarine, butter or stick
spreads containing at least 70% vegetable oil
Roasting
Do not lock the oven door with the latch during
roasting. The latch is used for self-cleaning only.
Roasting is cooldng by dry heat. Tender meat or
pouttIy can be roasted uncovered in your ovem
Roasting temperatures, which should be low and
steady, keep spattering to a minimum.
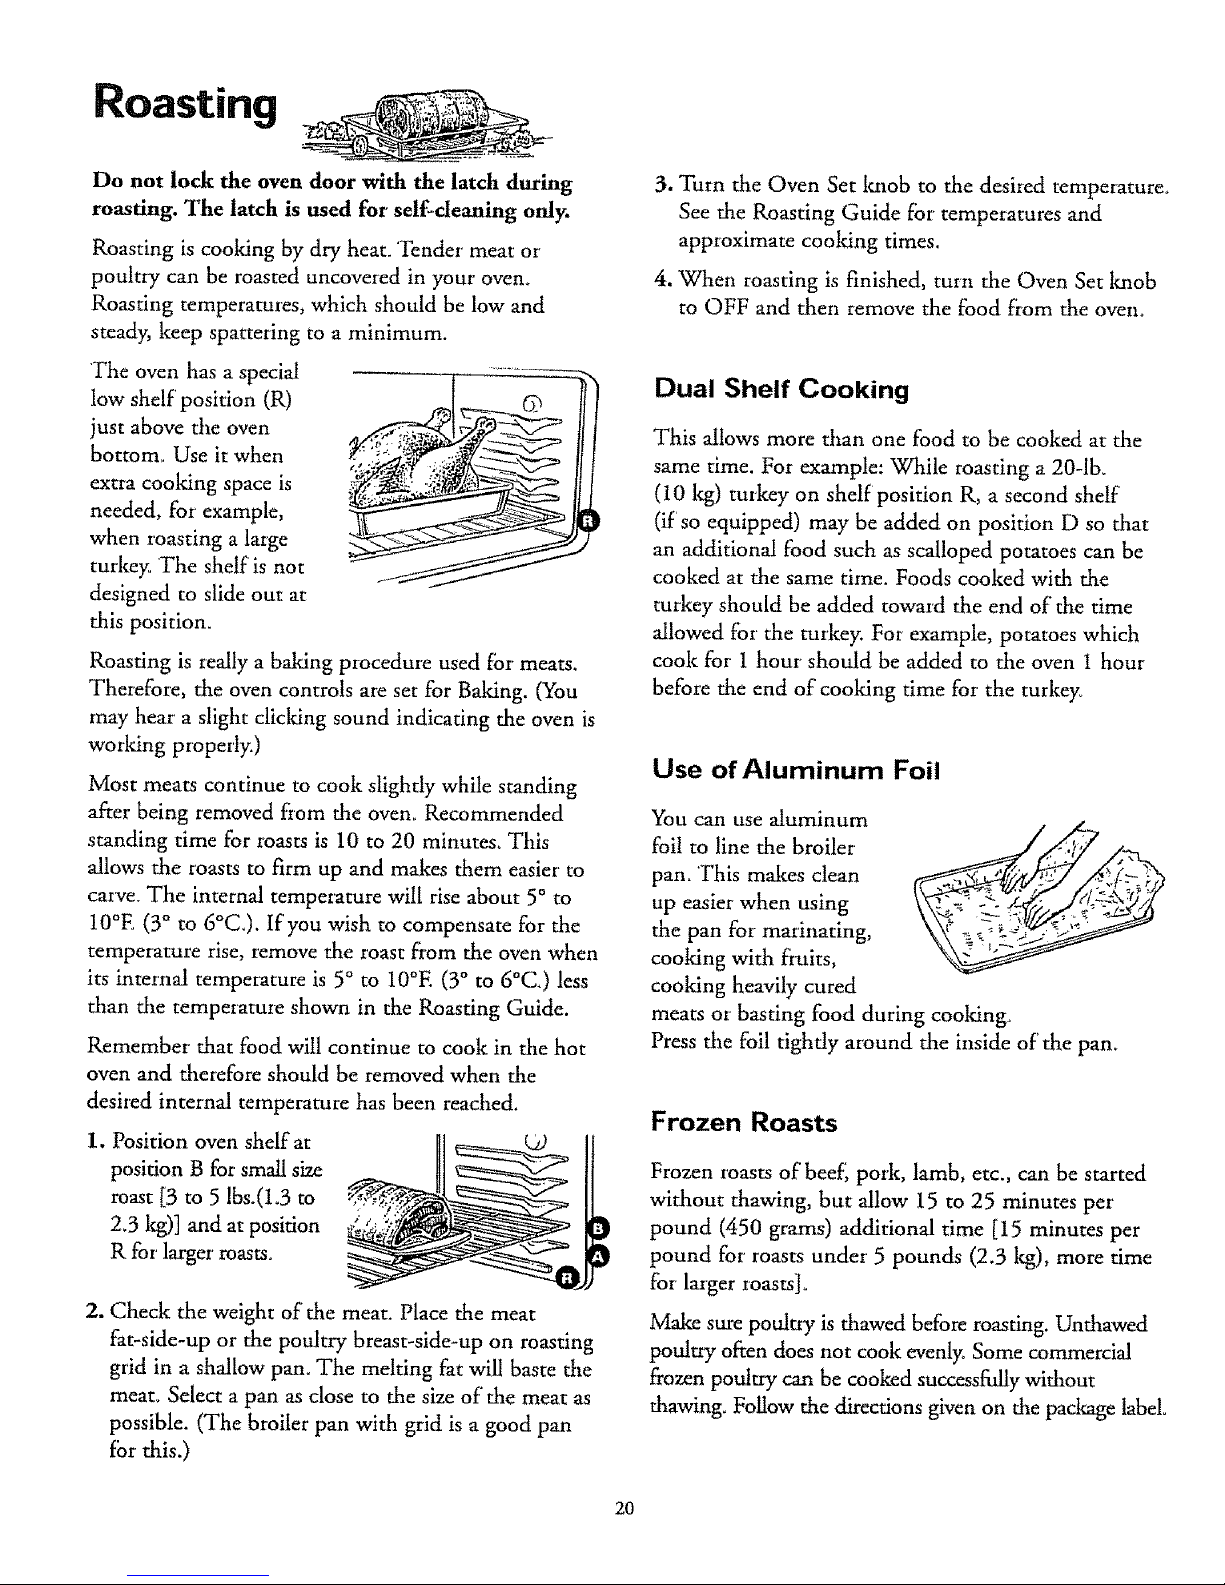
The oven has a special
low shelf' position (R)
just above the oven
bottom_ Use it when
extra cooking space is
needed, for example,
when roasting a large
turkey° 'The shelf is not
designed to slide out at
this position.
Roasting is really a baking procedure used fbr meats.
Therefore, the oven controls are set for Baking. (You
may hear a slight clicking sound indicating the oven is
working properly.)
Most meats continue to cook slightly while standing
after being removed from the oven. Recommended
standing time for roasts is !0 to 20 minutes. This
allows the roasts to firm up and makes them easier to
carve. The internal temperature will rise about 5° to
10°E (3° to 6°C.). If'you wish to compensate for the
temperature rise, remove the roast from the oven when
its internal temperature is 5° to 10°E (3 ° to 6°C.) less
than the temperature shown in the Roasting Guide.
Remember' that food will continue to cook in the hot
oven and therefore should be removed when the
desired internal temperature has been reached.
I. Position oven shelf at
position B for small size
roast [3 to 5 lbs.(l_3 to
2.3 kg)] and at position
R for larger roasts.
2. Check the weight of the meat. Place the meat
fat-side-up or the poultry breast-side-up on roasting
grid in a shallow pan. The melting fat will baste the
meat. Select a pan as close to the size of the meat as
possible. (The broiler pan with grid is a good pan
fbr this.)
3. Turn die Oven Set knob to the desired temperature°
See the Roasting Guide for temperatures and
approximate cooking times.
4. When roasting is finished, turn the Oven Set tmob
to OFF and then remove the food from the oven.
Dual Shelf Cooking
This allows more than one food to be cooked at the
same rime. For example: While roasting a 20-lb.
(10 kg) turkey on shelf position R, a second shelf'
(if so equipped) may be added on position D so that
an additional food such as scalloped potatoes can be
cooked at the same time. Foods cooked with the
turkey should be added toward the end of the time
allowed for the turkey. For example, potatoes which
cook for 1 hour should be added to the oven i hour
before the end of cooking time for the turkey°
Use of Aluminum Foil
You can use aluminum
foil to line the broiler
pan. This makes clean
up easier when using
the pan for marinating,
cooking with fruits,
cooking heavily cured
*' tt X
meats or basting food during cooldng.
Press the foil tighdy around the inside of' the pan.
Frozen Roasts
Frozen roasts of' beef_ pork, lamb, etc., can be started
without thawing, but allow 15 to 25 minutes per
pound (450 grams) additional time [15 minutes per
pound for roasts under 5 pounds (2.3 kg), more time
fbr latger roasts]°
Make sure poultry is dlawed before roasting. Unthawed
poultry often does not cook evenly. Some commercial
frozen poultry can be cooked successfully without
thawing_ Follow the directions given on the package label.
2O
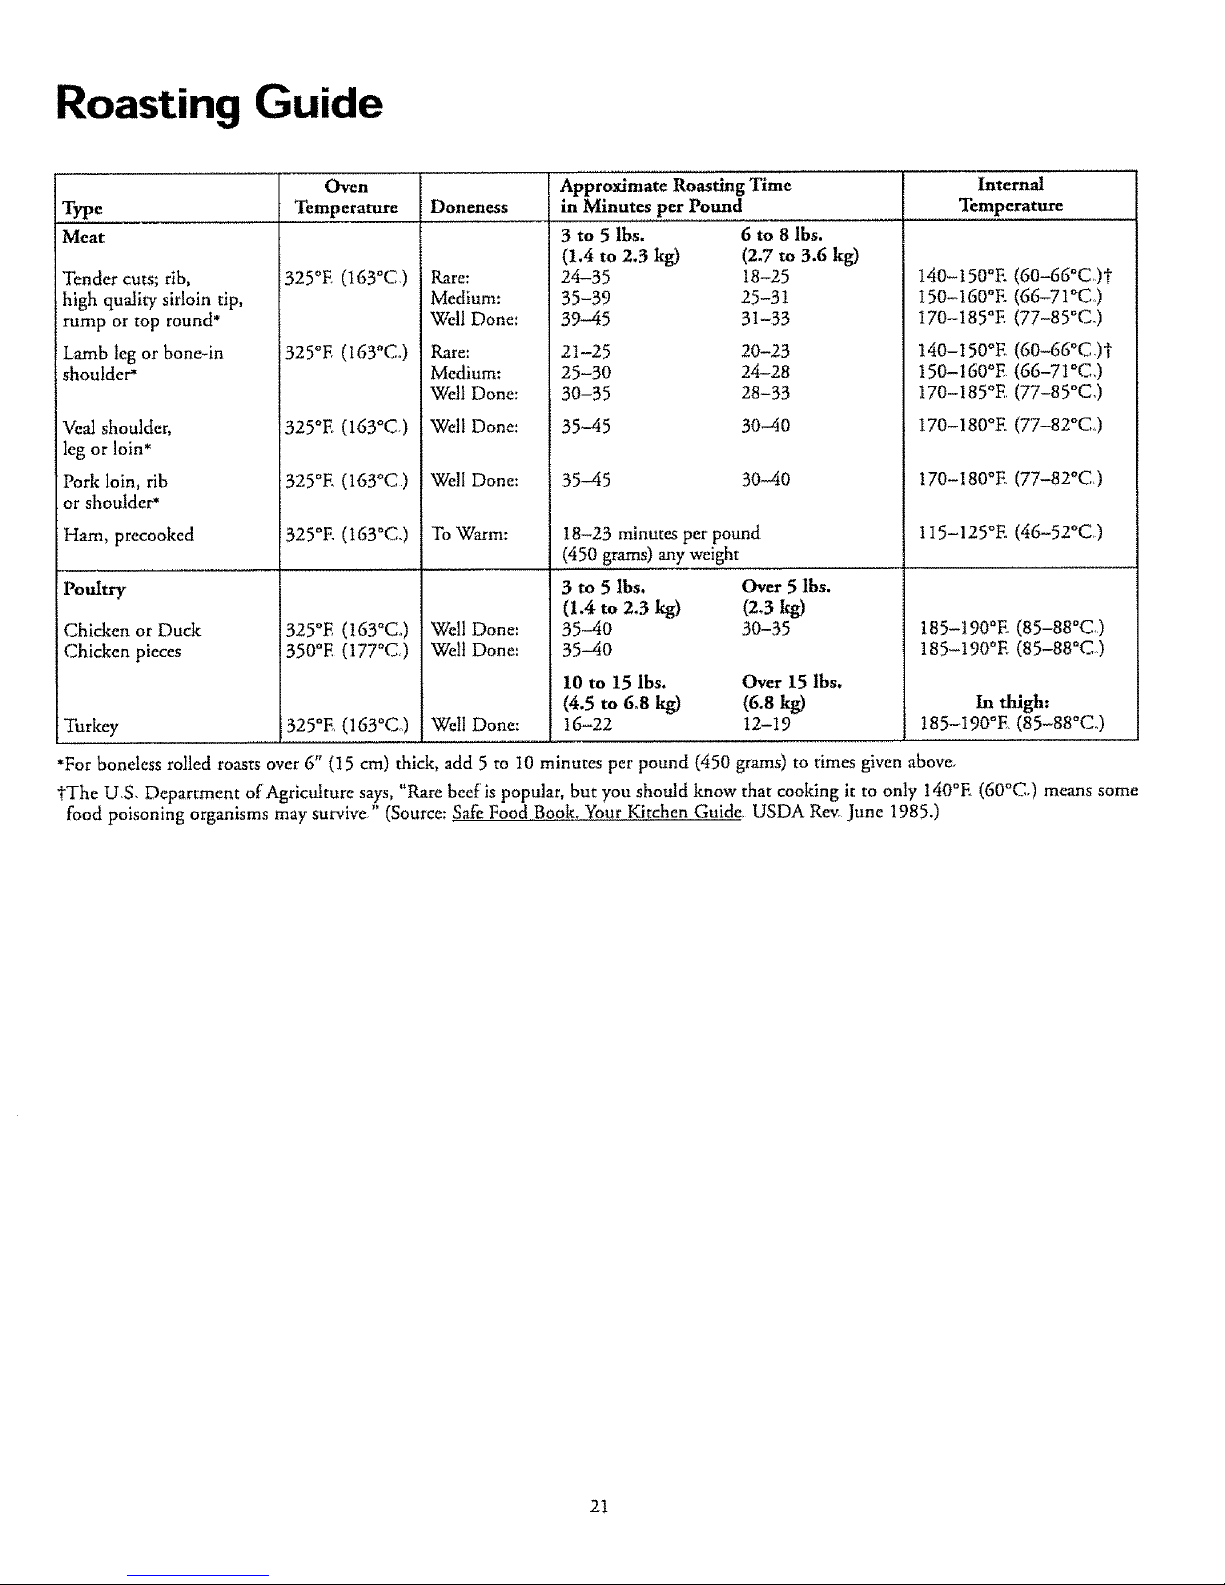
Roasting Guide
Oven Approximate Roasting Time Internal
Type Temperature Doneness in Minutes per Pound Temperature
Meat
Tender cuts; rib,
high quality sirloin tip,
rump or top round*
Lamb leg or bone-in
shoulder*
Veal shoulder,
leg or loin*
Pork loin, rib
or shoulder*
Ham, precooked
Poultry
Chicken or Duck
Chicken pieces
Turkey
325°E (t63°C)
325oE (163°C.)
325OE (163°C)
325OE (163°C)
325°E (163°C.)
Pare:
Medium:
Well Done:
Rare:
Medium:
Well Done:
Well Done:
Well Done:
TO Warm:
3 to 5 lbs. 6 to 8 lbs.
(1.4 to 2.3 kg) (2.7 to 3.6 kg)
24-35
35-39
39-45
21-25
25-30
30-35
35-45
35-45
18-25 140-150°E
25-31 150-16WE
31-33 I70-185°E
20-23 140-I 50°E
24-28 150-160°E
28-33 170-185°E
30-40 I70-180°E
30-40
18-23 minutes per pound
,(4,SO,,g_m_)any,,,e_ght
(6o-66°C)1
(66-71°C)
(77-85°C.)
(60-66°C)l
(66-71°C,
(77-85°C,
(77-82°Co
170-180°E (77-82°C
1I5-125°E (46-52°C)
325°E (!63_Co)
350°E (177°C,)
325°E (163°Co)
Well Done:
Welt Done:
Well Done:
3 to 5 Ibs. Over 5 lbs.
(1.4to 2.3 _ (2.3kg)
35-40 30-35
35-40
10 to 15 lbs. over 15 Ibs.
(4.5 to 6.8 kg) (6.8 kg)
16-22 12-19
185-190°E (85-88°C)
185-190°E (85-88_C.)
_othigh: o
i 185-i90F,(8>88c,)
*For boneless rolled roasts over 6" (15 cm) thick, add 5 to I0 minutes per pound (450 grams) to times given above
tThe U,S, Department of Agriculture says, "Rare beef'is popular, but you should know that cooking it to only !40°E (60°C) means some
food poisoning organisms may survive," (Source: Safe Food,Bo,Qk.,your Kitchen Guide, USDA Revr June 1985.)
21
Broiling
Do not lock the oven door with the latch during
broiling. The latch is used for self-cleaning only.
Broiling is cooking food by direct heat fiom above the
food. Most fish and tender cuts of meat can be broiled.
Follow these directions to keep spattering and smoking
to a minimum_
It is recommended that meat be cooked to at least
an INTERNAL temperature of' 160°E (71°C.) and
poultry to at least an INTERNAL temperature of
180°E (82°C,) Cooking to these temperatures usually
protects against foodborne illness.
The oven door should be closed during broiling.
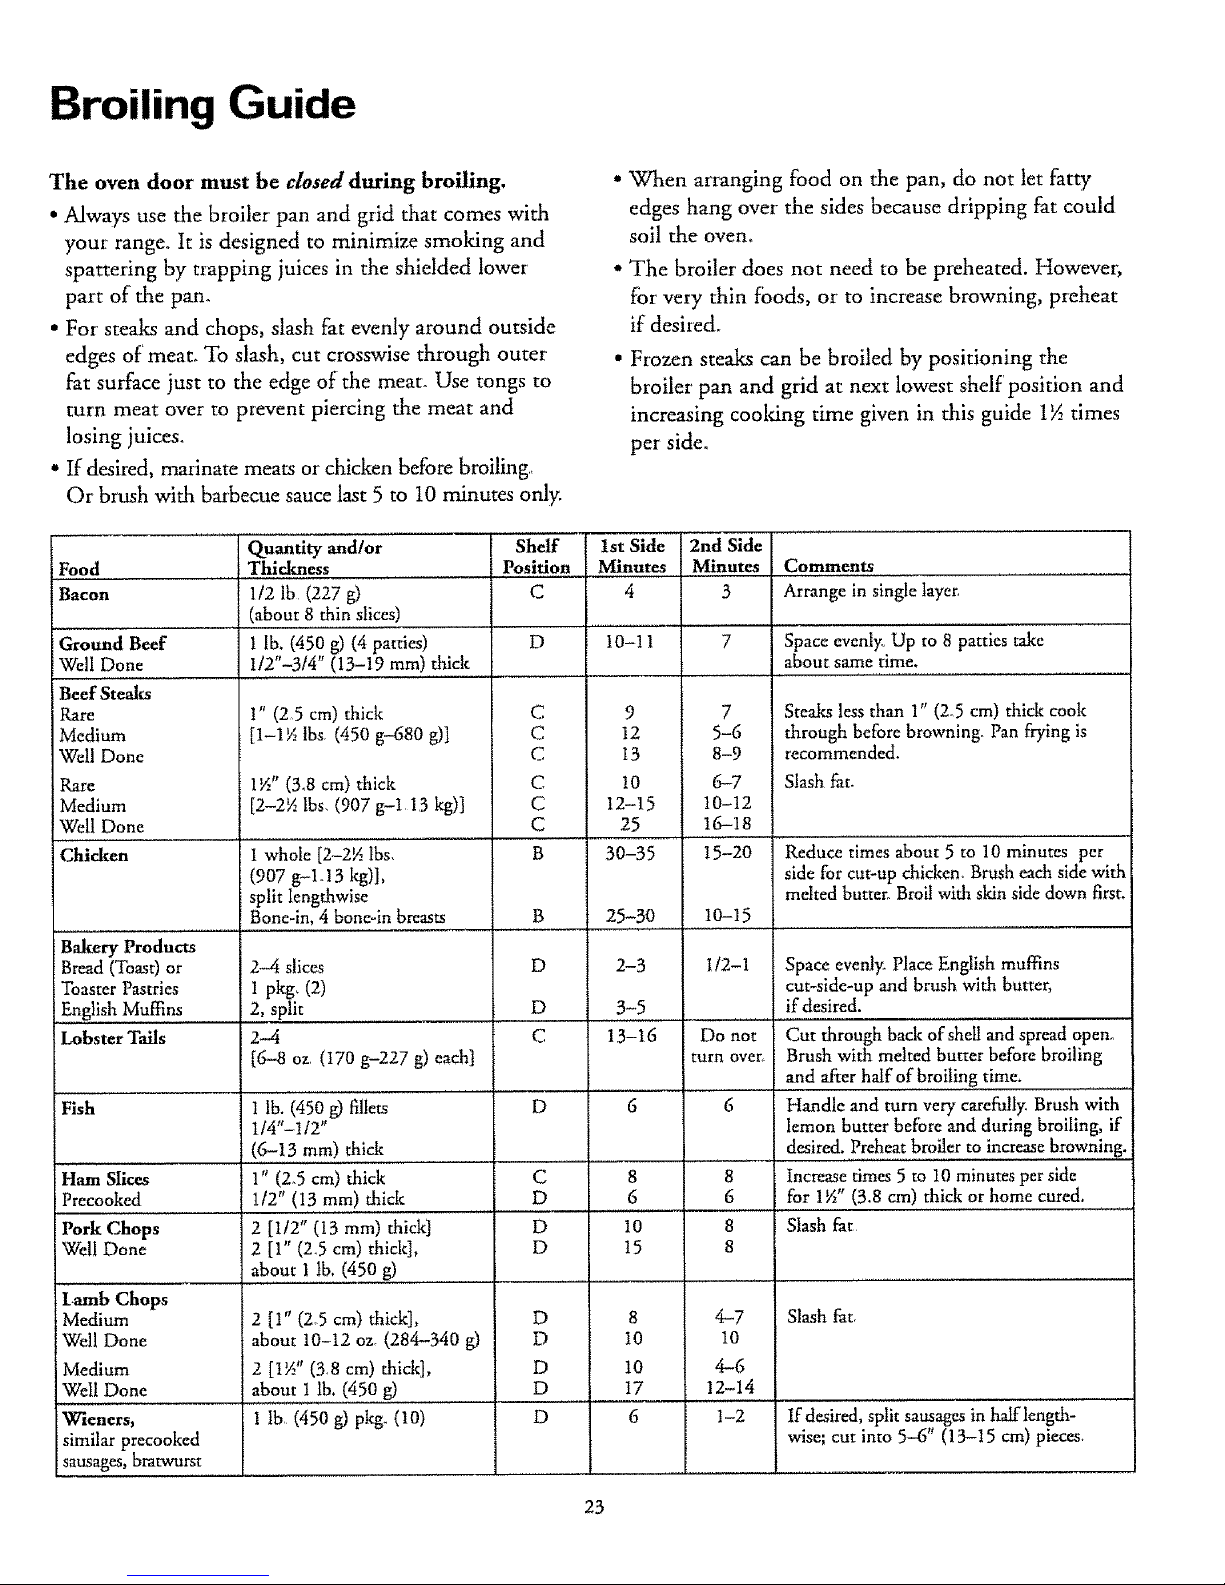
Turn the fbod only once
during cooldng. Time the
foods for' the first side
according to the Broiling
Guide.
Turn the food, then use
the times given for the
second side as a guide to
the pref&red doneness.
1, If the meat has fat or gristle around the edge, cut
vertical slashes through both about 2" (5 cm) apart,
If desired, the fat may be trimmed, leaving a layer'
about 1/8" (3 rum) thick.
2. Place the meat on the broiler' grid in the broiler pan
which comes with the range. Always use the grid so
fat drips into the broiler pan; otherwise the juices
may become hot enough to catch fire.
3. Position the shelf on the recommended shelf'
position as suggested in Broiling Guide.
4. Close the oven door' but do not latch it. If the door
latch is moved to the right during a broil
operation the door may lock and you may not be
able to open it until the oven cools.
5. Turn the Oven Set lmob to BROIL.
6. When broiling is finished, turn the Oven Set kmob
to OFE Remove the broiler pan from the range and
serve the food immediately. Leave the pan outside
the range to cool
Use of Aluminum Foil
You can use aluminum
foil to fine your broiler pan
and broiler grid. HoweveI;
you must mold the foil
tightly to the grid and cut
slits in it just like the grid.
Without the slits, the foil will prevent fat and meat
juices fi'orn draining to the broiler pan, The juices
could become hot enough to catch on fire. If you do
not cut the slits, you are fkying, not broiling.
Questions & Answers
Q.When broiling, is it necessary to always use a
grid in the pan?
A. Yes. Using the grid suspends the meat over the pan,
As the meat cooks, the juices fat! into the pan, thus
keeping the meat drier; Juices are protected by the
grid and stay cooler; thus preventing excessive
spatter and smoking°
Q. Should I salt the meat before broiling?.
A. No. Salt draws out the juices and allows them to
evaporate. Always salt after' cooking. Turn the meat
with tongs; piercing the meat with a fork also allows
the juices to escape. When broiling poultry or fish,
brush each side often with butter:
Q.Why are my meats not turning out as brown as
they should?
A. Check to see if' you ale using the recommended
shelf'position. Broil for the longest period of time
indicated in the Broiling Guide. Turn the food only
once during broiling.
22
Broiling Guide
The oven door must be closed during broiling,
• Always use the broiler pan and grid that comes with
your range+ It is designed to minimize smoldng and
spattering by trapping juices in the shielded lower
part of the pan.
• For steaks and chops, slash fat evenly around outside
edges of meat. To slash, cut crosswise through outer
fat surface just to the edge of the meat+ Use tongs to
turn meat over to prevent piercing the meat and
losing juices+
• If desired, m_inate meats or chicken before broiling,
Or br_h with barbecue sauce last 5 to 10 minutes only.
• When arranging food on the pan, do not let fatty
edges hang over the sides because dripping fat could
soil the oven.
• The broiler does not need to be preheated. However,
for very thin foods, or to increase browning, preheat
if desired+
• Frozen steaks can be broiled by positioning the
broiler pan and grid at next lowest shelf' position and
increasing cooldng time given in this guide 1_ times
per side.
Quantity and/or Sheff tst Side 2nd Side
Food Thidmess Position Minutes Minutes Comments
Bacon 1/2 lb (227 g) C 4 3 Arrange in single layer,
(about 8 thin slices)
1 lb. (450 g) (4 patties) D 10-11 7 Space evenly.+Up to 8 patties take
tt2"-3/4" (13-19 mm) thick about same time.
Ground Beef
Well Done
Beef Steaks
Rare
Medium
Well Done
Rare
Medium
Well Done
Chidien
I" (25 cm) thick
[1-1 _ lbs, (450 g-680 g)]
1½" (3.8 cm) thick
[2-2_ Ibs, (907 g-I 13 kg)]
I whole [2-2½ lbs,
(907 g-l.13 kg)],
split lengthwise
Bone-in, 4 bone-ln breasts
C
C
C
C
C
C
B
9
12
13
I0
12-15
25
30-35
7
5-6
8-9
6-7
10-12
16-18
15-20
Steaks less than 1" (2°5 cm) thick cook
through before browning. Pan frying is
recommended.
Slash fat,
Reduce times about 5 to 10 minutes per
side for cut-up chicken_Brush each side with
melted butter. Broil with skin side down first.
B 25-30 10-15
Bakery Products
Bread (Toast) or 2-4 slices D 2-3 1/2-1 Space evenly+ Place English muffins
Toaster Pastries 1 pkg+ (2) cut-side-up and brush with butter,
Eng}ish Muffins 2, split D 3-5 if desired.
Lobster Tails 2-4 C 13-16 Do not Cut through back of shell and spread open°
[6-8 oz+ (I70 g-227 g) each] turn over, Brush with melted butter before broiling
and after half of broiling time.
Fish 1 lb. (450 g) fillets D 6 6 Handle and turn very carefully. Brush with
1/4"-II2" lemon butter before and during broiling, if
(6-13 ram) thi& desired. Preheat broiler to increase browning.
Ham Slices 1" (2.5 cm) thick C 8 8 Increase times 5 to t 0 minutes per side
Precooked t12" (13 mm) thick D 6 6 for !½" (3.8 cm) thick or home cured.
Pork Chops 2 [1/2" (13 mm) thick] D 10 8 Slash fat
Well Done 2 [1" (2,5 cm) thick], D t5 8
about I lb, (450 g)
Lamb Chops
Medium 2 [1" (Z5 cm) thick], D 8 4-7 Slash fat+
Well Done about 10-12 oz+ (284-340 g) D I0 10
Medium 2 [!½" (38 cm) thick], D 10 4-6
Well Done about 1 lb, (450 g) D 17 12-14
1 lh (450 g) pkg. (10) D 6 1-2Wleners_
similar precooked
sausages, bratwurst
If desired, split sausages in half length-
wise; cut into 5-6" (13-15 cm) pieces+
23
Operating the Self=Cleaning Oven 20
Before a Clean Cycle
_'e recommend venting with an open window or using
a ventilation fan or hood during the first self clean cycle.
I. Remove the broiler pan, broiler grid, all coolcware
and any aluminum foil from the oven--they cannot
withstand the high cleaning temperatures,
NOTE: Take the shelves out of' the oven before you
begin tile self-clean cycle.
2. Wipe up heavy soil on the oven bottom. If you
use soap, rinse thoroughly before self-cleaning to
prevent staining.
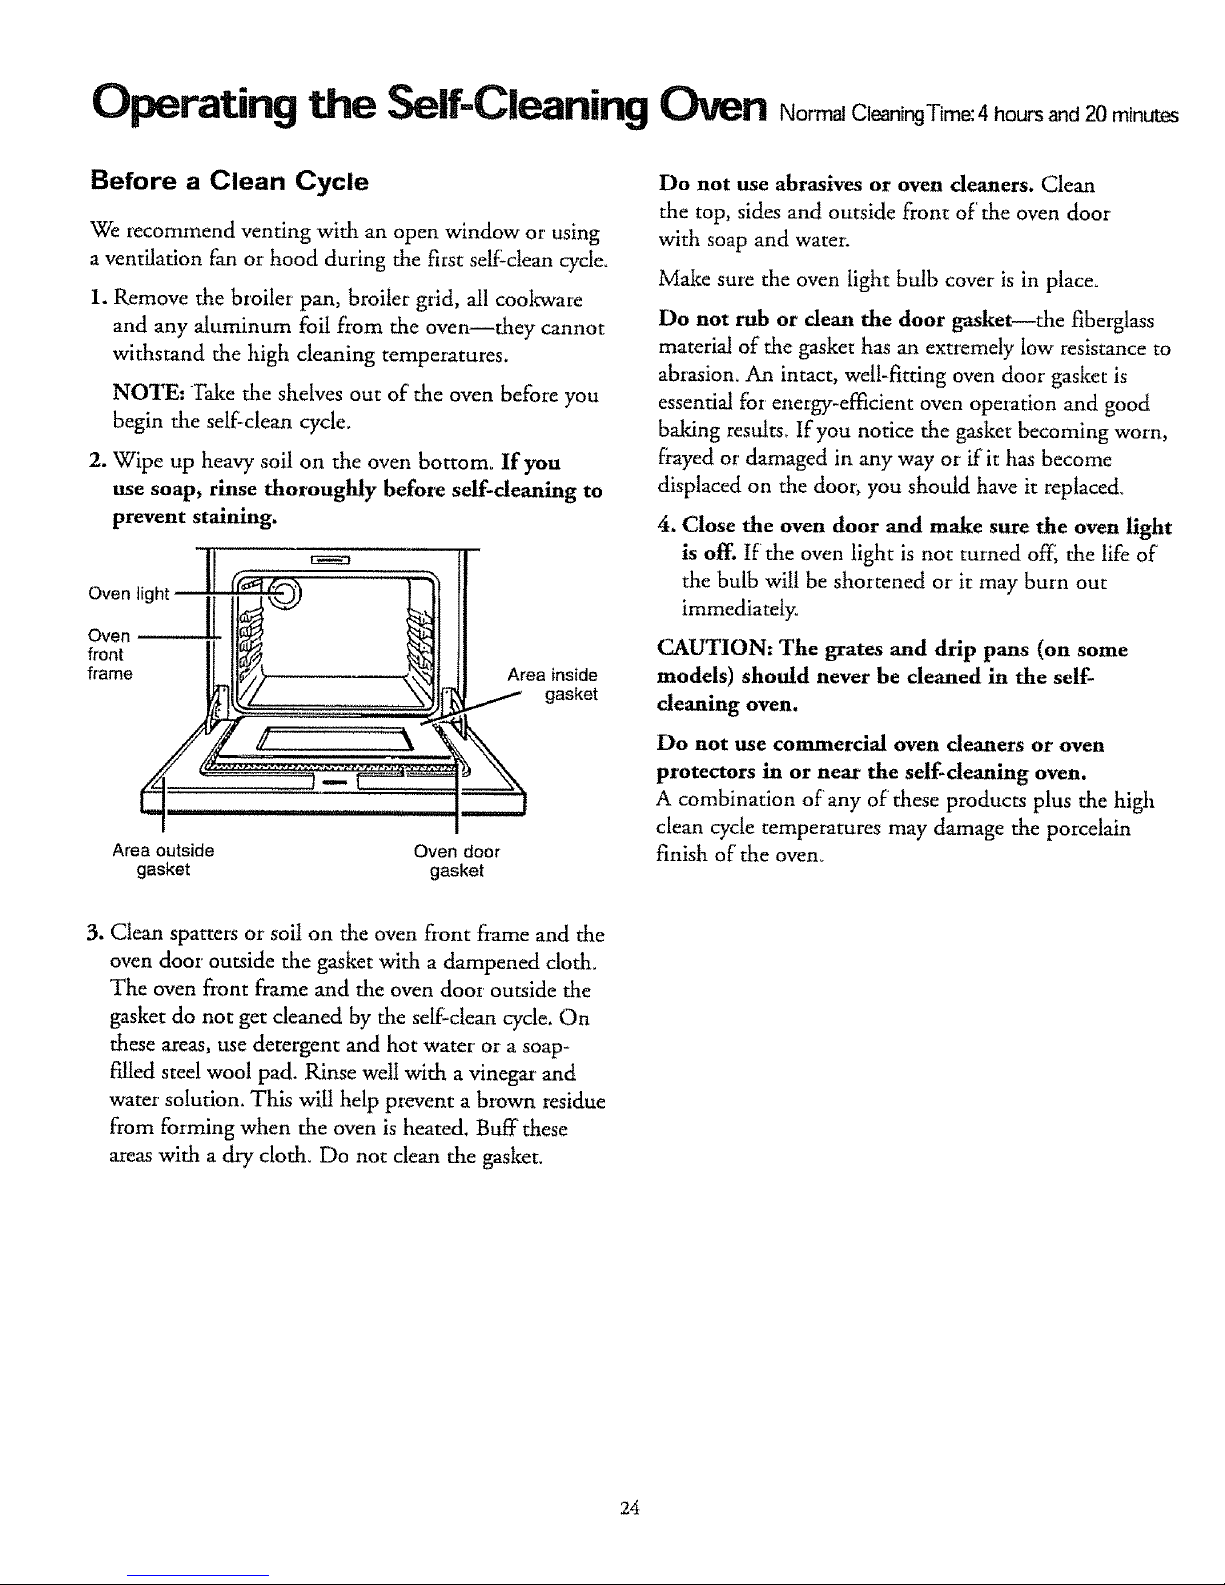
Oven light
Oven
front
frame
II
Area inside
gasket
Area outside Oven door
gasket gasket
Do not use abrasives or oven deaners. Clean
the top, sides and outside front of the oven door
with soap and water.
Make sure the oven light bulb cover is in place_
Do not rub or dean the door gasket the fiberglass
material of the gasket has an extremely low resistance m
abrasion, An intact, well-fitting oven door gasket is
essential fbr energy-efficient oven operation and good
baking results_ If you notice the gasket becoming worn,
flayed or damaged in any way or if it has become
displaced on the door; you should have it replaced.
4. Close the oven door and make sure the oven fight
is off. If the oven light is not turned off_ the life of'
the bulb wilt be shortened or it may burn out
immediately.
CAUTION: The grates and drip pans (on some
models) should never be cleaned in the self-
cleaning oven.
Do not use commercial oven cleaners or oven
protectors in or near the self-deaning oven.
A combination of any of' these products plus the high
clean cycle temperatures may damage the porcelain
finish of' the oven_
3. Clean spatters or soil on the oven front fiame and the
oven door outside the gasket with a dampened cloth_
The oven front frame and the oven door outside the
gasket do not get cleaned by tile self'clean cycle. On
these areas, use detergent and hot water' or a soap-
filled steel wool pad. Rinse well with a vinegar and
water solution. This will help prevent a brown residue
from forming when the oven is heated, Buff' these
areas with a dry cloth. Do not clean the gasket.
24

How to Set the Oven for Cleaning
Quick Reminder:
1. Latch the door.
2. Turn the Oven Set knob to CLEAN_
If the oven is too hot and you start to set a clean cycle,
you will not be able to slide the latch.
Allow additional time for cooling before you try to set
the cycle.
1. Follow directions to prepare the oven for cleaning.
2. Slide the latch handle to the
right as far as it will go.
Never force the latch
handle. Forcing the handle I1|111_
will damage the door lock
mechanism.
3. Turn the Oven Set knob to CLEAN° The CLEAN,
AUTOMATIC OVEN, OVEN ON and COOK
TIME ON/OFF lights will glow.
NOTE: If you turn the Oven Set knob before
you slide the latch, the CLEAN light wilt flash.
Slide the latch to the right.
Clean cycle time is normally 4 hours and
20 minutes. On some models you can change the
Clean Time to anywhere between 3 hours and 5 hours,
and 59 minutes, depending on how dirty your oven is.
You have one minute to change your Clean Time.
Use the HOUR and MIN. pads to change the total
Clean Time.
Both the O'_qENON light and the CLEAN light will
flash when the Clean Time is finished.
After using the dean cycle, the door latch and the
Oven Set knob must be returned to their original
positions before you can use the oven.
When the CLEAN light flashes, slide the latch
handle to the left as far as it will go, turn the
Oven Set knob to OFF and open the door°
Never force the latch handle. Wait until the
CLEAN light flashes and the latch slides easily.
Forcing the latch handle may damage the door lock.
To Stop A Clean Cycle
1. Turn the Oven Set knob to OFE
2. Wait until the oven has cooled below the locking
temperature to unlatch the door. You will not be
able to open the door right away unless the oven has
cooled below the locking temperature.
After a Clean Cycle
You may notice some white ash in the oven. Just
wipe it up with a damp cloth after the oven cools_
If white spots remain, remove them with a soap-filled
steel wool pad. Be sure to rinse thoroughly with a
vinegar and water mixture° These deposits are usually a
salt residue that cannot be removed by the clean cycle°
If the oven is not dean after one dean cycle,
repeat the cycle.
NOTE:
• You cannot set the oven for cooking until the oven is
cool enough for the door to be unlatched.
• While the oven is self-cleaning, you can press the
CLOCK pad to display the time of day. To return
to the clean count down, press the COOK TIME
ONIOFF pad.
(continued next page)
25
Operating the Self=Cleaning Oven (cont,000 )
How to Set Delay Start of Cleaning
(on some models)
Quick Reminder:
1. Latch the doon
2. Turn the Oven Set knob to CLEAN.
3. Press the START TIME ON/OFF pad.
4. Press the HOUR and MIN. pads to set the
time of day you want cleaning to start_ The
self-clean cycle will automatically begin at the
time you selected.
Delay Start is setting the oven to start the clean
cycle automatically at a latex' time than the present
time of day,
For example= Let's say it is 7:00 and you want the
oven to begin self-cleaning at 9:00 after you'xe finished
in the ldtchen. The oven is just soiled a normal
amount so the normal Clean "Time of 4 hours and
20 minutes is preferre&
1. Follow steps to prepare the oven for cleaning°
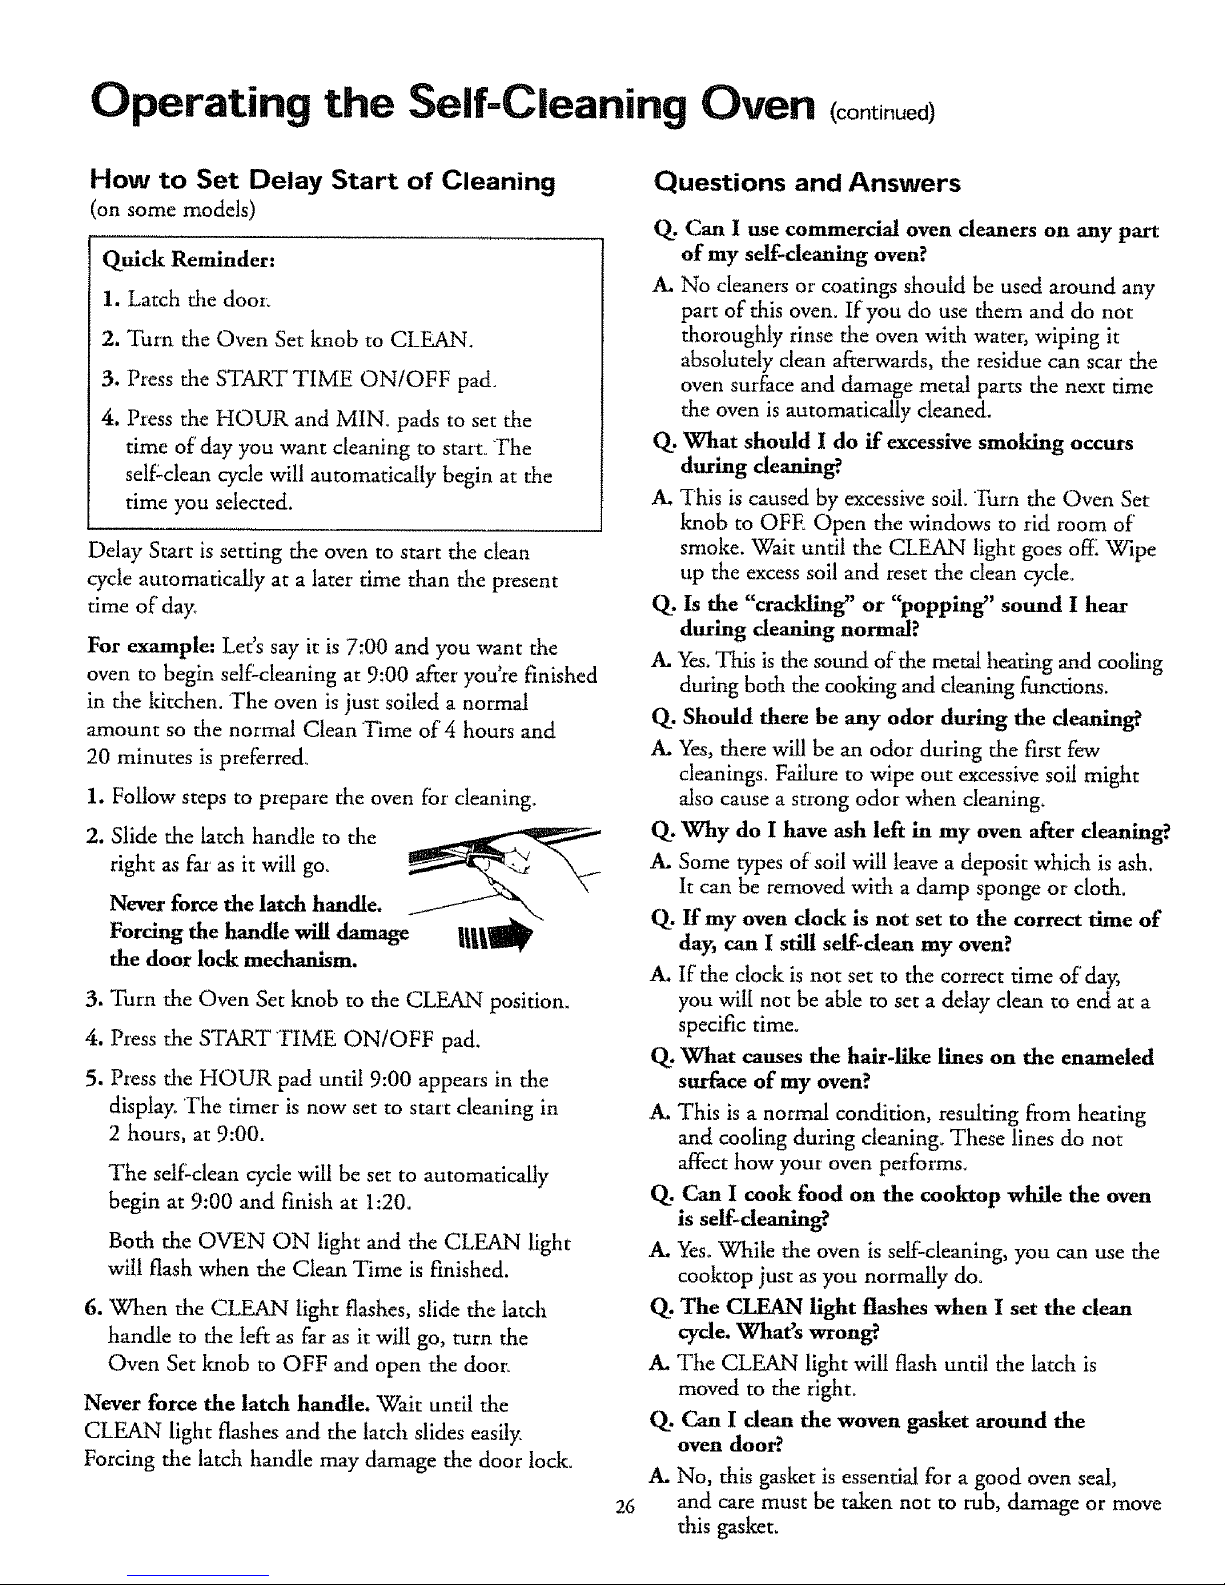
2. Slide the latch handle to the
right as far as it will go. __'.._ _.
Never force the latch handle.
Forcing the handle will damage ||_p_
the door lock mechanism.
3. Turn the Oven Set knob to the CLEAN position.
4. Pxess the START 'TIME ON/OFF pad.
5. Press the HOUR pad until 9:00 appears in the
display° The timex' is now set to start cleaning in
2 hours, at 9:00.
The self-clean cycle will be set to automatically
begin at 9:00 and finish at 1:20.
Both the OVEN ON light and the CLEAN light
will flash when the Clean Time is finished.
6. When the CLEAaN light flashes, slide the latch
handle to the left as far as it will go, turn the
Oven Set knob to OFF and open the door,
Never force the latch handle. Wait until the
CLEAN light flashes and the latch slides easily,
Forcing the latch handle may damage the door lock.
Questions and Answers
26
Q. can I use commercial oven cleaners on any part
of my self-deaning oven?
A. No cleaners or coatings should be used around any
part of this oven. If you do use them and do not
thoroughly rinse the oven with water, wiping it
absolutely clean afterwards, the residue can scar the
oven surface and damage metal parts the next time
the oven is automatically cleaned.
Q. What should I do if excessive smoking occurs
during deauin_
A. This is caused by excessive soil, Turn the Oven Set
knob to OFE Open the windows to rid room of
smoke. Wait until the CLEAN light goes off[ Wipe
up the excess soil and reset the clean cycle.
Q. Is the "crackling' or "popping" sound I hear
during cleaning normal?
A, Yes. This is the sound of the metal heating and cooling
during both the cooking and cleaning functions.
Q. Should there be any odor during the deauing?
A. Yes, there will be an odor during the first few
cleanings. Failure to wipe out excessive soil might
also cause a strong odor when cleaning_
Q. Why do I have ash left in my oven after deaning?
A. Some types of soil will leave a deposit which is ash.
It can be removed with a damp sponge or cloth.
Q. If my oven dock is not set to the correct time of
day, can I still serf-dean my oven?
A. If the clock is not set to the correct time of day,
you will not be able to set a delay clean to end at a
specific dme.
Q. What causes the hair-I_e lines on the enameled
surface of my oven?
A. This is a normal condition, resulting from heating
and cooling during cleaning. These lines do not
affect how your oven performs_
Q. Can I cook food on the cooktop while the oven
is seff-deauing?
A, Yes. While the oven is self2cleaning, you can use the
cooktop just as you normally do.
Q. The CLEAN light flashes when I set the clean
cycle. What's wrong?.
A. The CLEAN light will flash until the latch is
moved to the right,
Q. Can I dean the woven gasket around the
oven door?
A, No, this gasket is essential for a good oven seal,
and care must be taken not to rob, damage or move
this gasket.
Care and Cleaning
Proper care and cleaning are important so your range
will give you efficient and satisfactmy service. Follow
these directions carefully in caring fm it to help assure
safe and proper maintenance.
BE SURE ELECTRICAL POWER IS
DISCONNECTED BEFORE CLEANING
ANY PART OF YOUR RANGE.
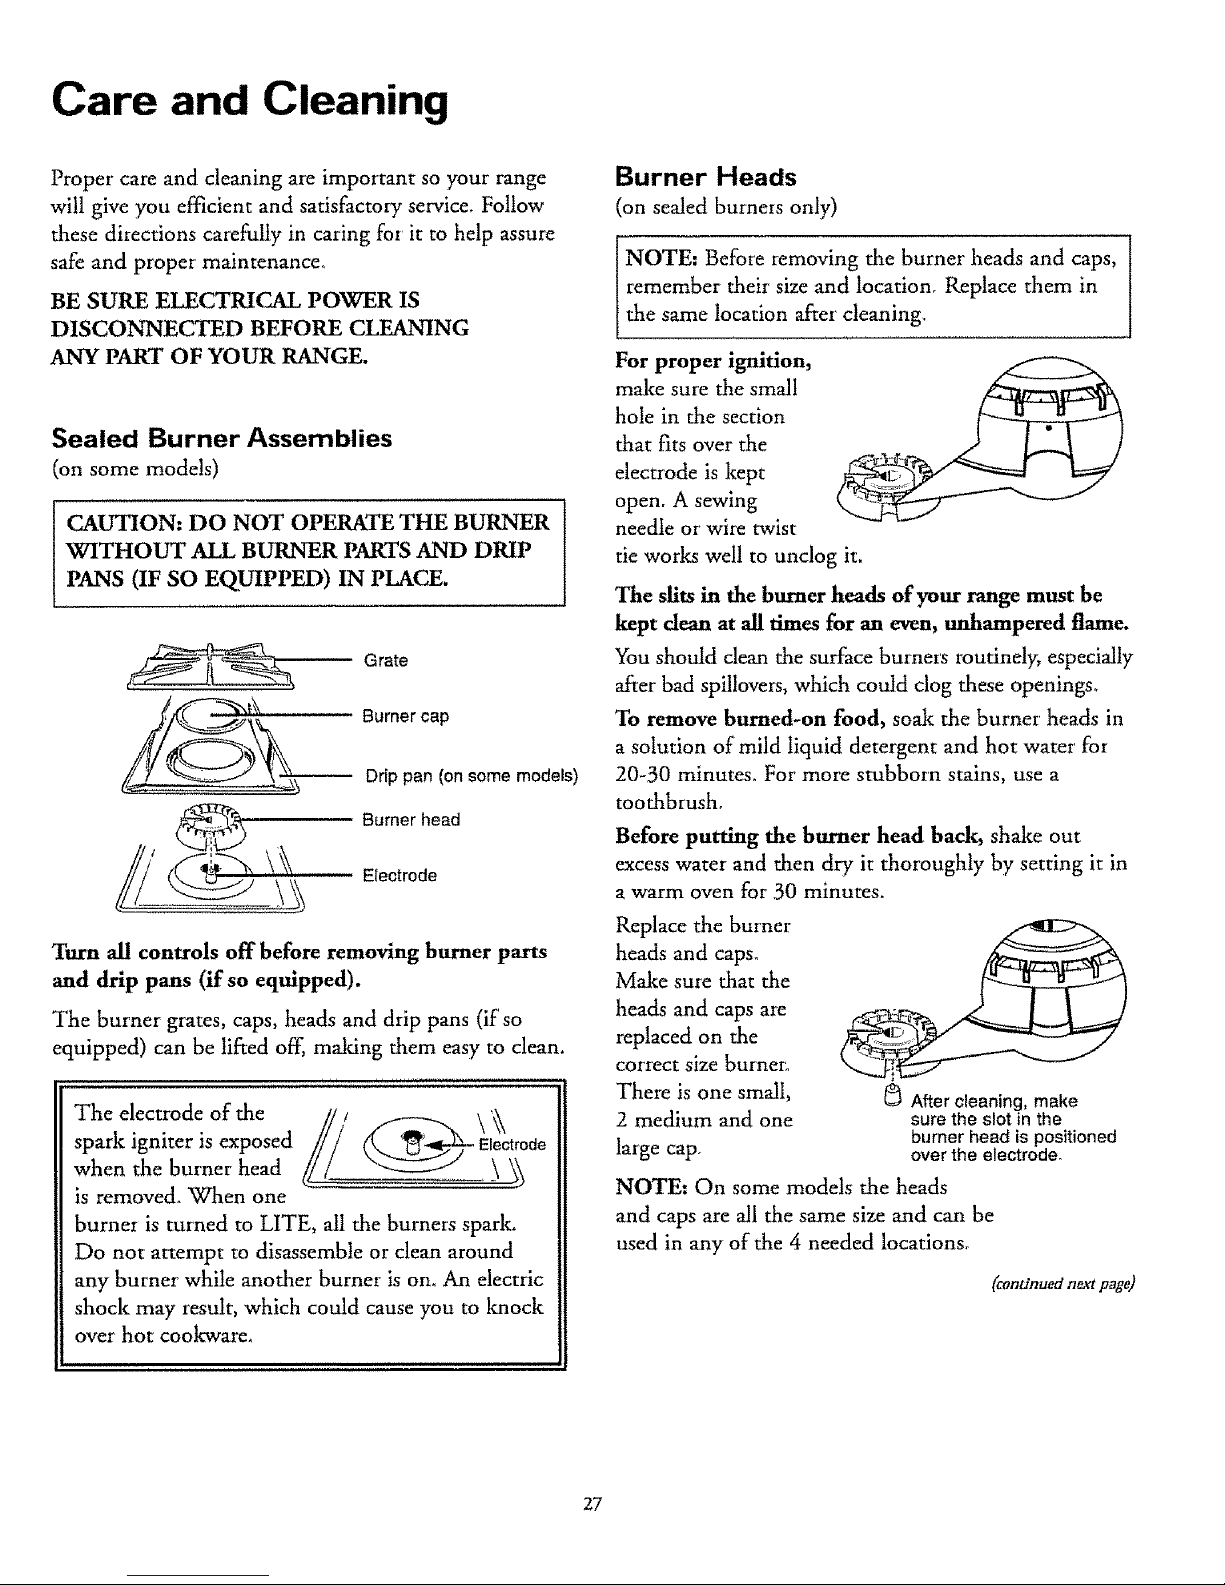
Sealed Burner Assemblies
(on some models)
CAUTION: DO NOT OPERATE THE BURNER
WITHOUT ALL BURNER PARTS AND DRIP
PANS (IF SO EQUIPPED) IN PLACE.
Grate
Burner cap
Drip pan (on some models)
_ Burner head
Turn all controls off before removing burner parts
and drip pans (if so equipped).
The burner grates, caps, heads and drip pans (if so
equipped) can be lifted off, making them easy to clean.
The electrode of the _\ _
spark igniter is exposed r_ _r_..d-ia- Electrode
when the burner head \_ _ _
is removed. When one
burner is turned to LITE, all the burners spark.
Do not attempt to disassemble or clean around
any burner while another burner is on. An electric
shock may result, which could cause you to knock
over hot cookware_
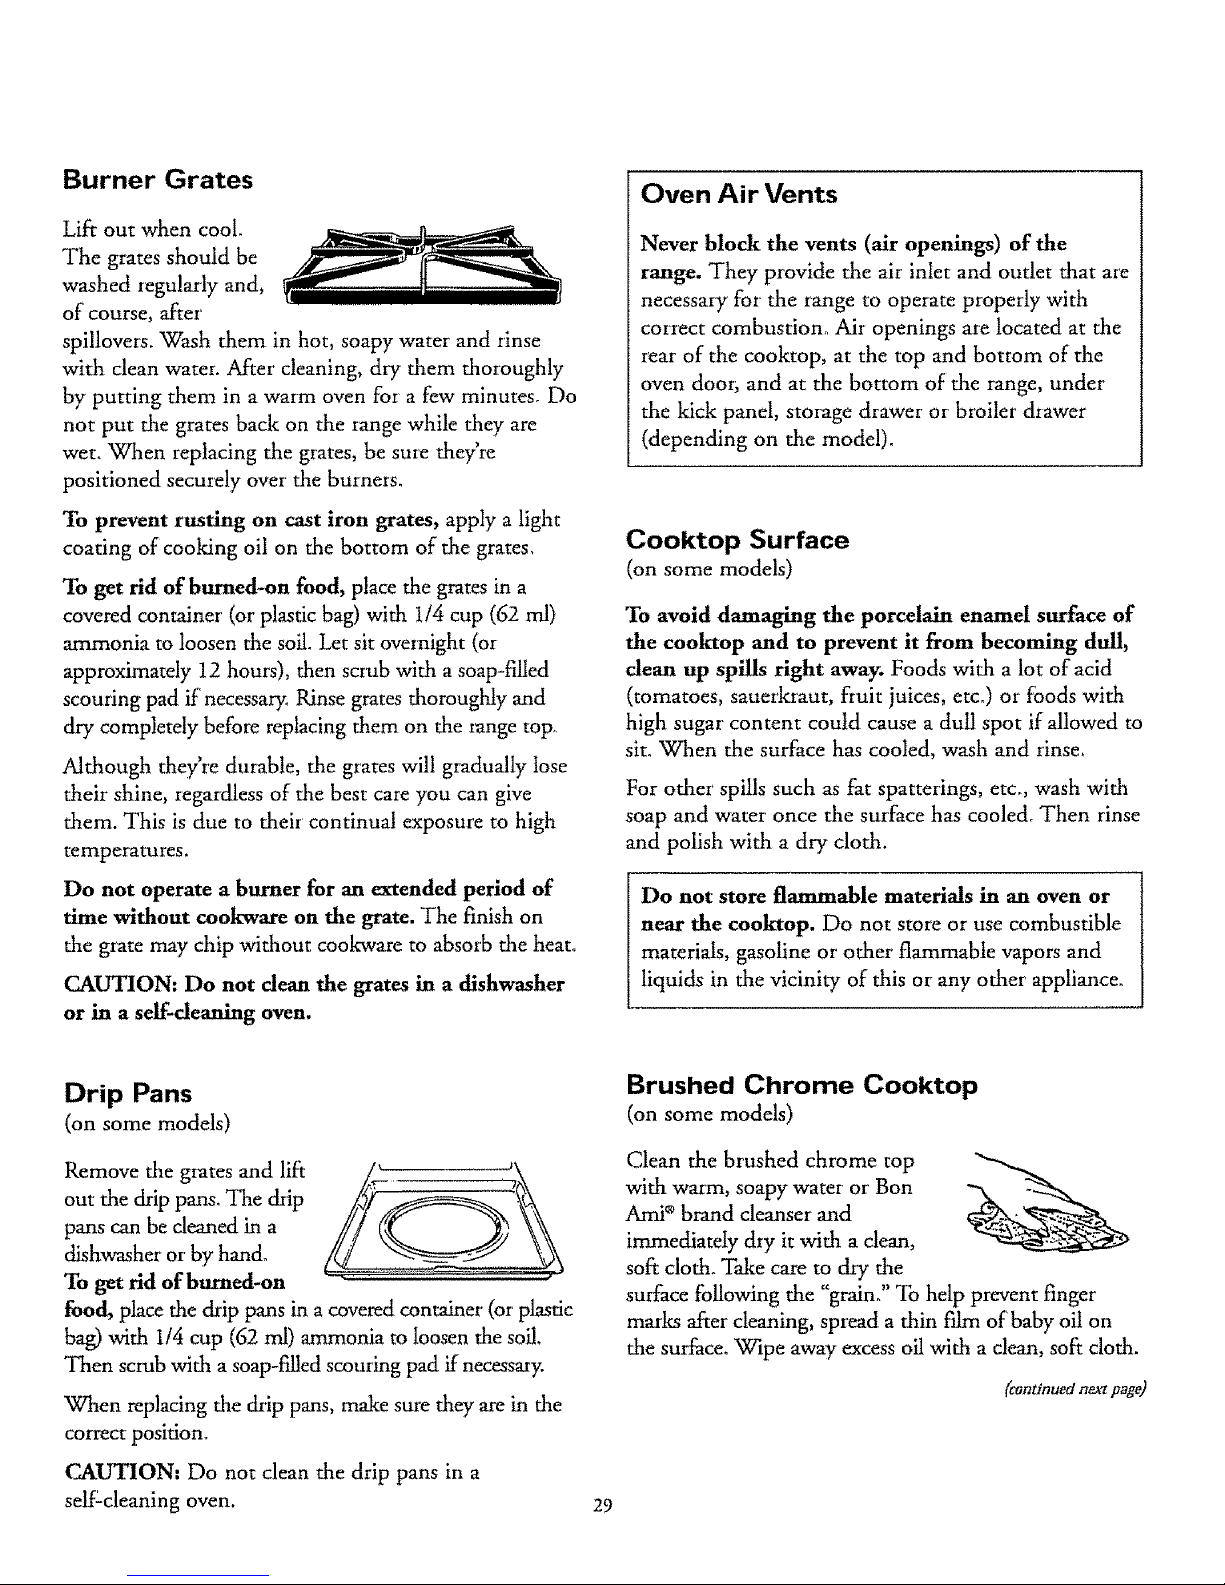
Burner Heads
(on sealed burners only)
NOTE: Before removing the burner heads and caps,
remember' their size and location. Replace them in
the same location after cleaning.
For proper ignition,
make sure the small
hole in the section
that fits over the
electrode is kept
open. A sewing
needle or wire twist
tie works well to unclog it.
The slits in the burner heads of}our range must be
kept dean at all times for an even, unhampered flame.
"Youshould clean the surface burners routinely, especially
after bad spillovers, which could clog these openings.
To remove burned-on food, soak the burner heads in
a solution of mild liquid detergent and hot water for
20-30 minutes. For more stubborn stains, use a
toothbrush°
Before putting the burner head back, shake out
excess water and then dry it thoroughly by setting it in
a warm oven for 30 minutes.
Replace the burner
heads and caps.
Make sure that the
heads and caps are
replaced on the
correct size burner.
There is one small, 8 Aftercleaning,make
2 medium and one sure the slot in the
burner head is positioned
large cap. over the electrode.
NOTE: On some models the heads
and caps are all the same size and can be
used in any of the 4 needed locations.
(continuednext page)
27

Care and Cleaning
Burner Caps
(on sealed burners only)
Lift offwhen cool. Wash burner caps in hot, soapy
water and rinse with clean water. You may scour with a
plastic scouring pad to remove burned-on food particles.
Dry them in a warm oven or with a cloth---don't
reassemble them wet. Replace the burnei caps.
Medium Small
Medium _Q
Large Medium _ _- Large
Front of range
Make sure that caps are replaced on the correct size
burner_ There is one small, 2 medium and one large cap°
NOTE: On some models the caps are all the same size
and can be used in any of the 4 needed locations.
Standard Twin Burners
(on some models)
CAUTION: DO NOT OPERATE THE BURNER
WITHOUT ALL BURNER PARTS AND DRIP
PANS (IF SO EQUIPPED) IN PLACE.
Grate
Drip pan
(on some models)
Surface burner
On models with standard twin burners, the
cooktop lifts up for easy access.
Turn all controls off before removing burner parts
and drip pans (ff so equipped).
The burner' grates and drip
pans (if' so equipped) can
be lifted off', making them
easy to clean.
The holes in the surface
burners of your range must
be kept clean at all rimes
for proper ignition and an
even, unhampered flame,
these holes
thoroughly
on each
bume[
You should clean the surface burners routinely,
especially after bad spillovers, which could clog these
holes. Wipe off' surface burners. If"heavy spillover
occurs, remove the surface burners from the range.
Burners lift out for cleaning. Lift up the cooktop and
then lift out the surface burners.
To remove burned-on food, soak the surf_lce burner
in a solution of mild liquid detergent and hot water.
Soak the surface burner for 20 to 30 minutes. For
more stubborn stains, use a cleanser like Soft Scrub ®
brand or Bon Arni _ brand. Rinse well to remove any
traces of the cleanser that might clog the surface
burner openings. Do not use steel wool because it will
clog the surface burner' openings and scratch the
surface burners. If the holes become clogged, clean
them with a sewing needle or twist tie_
Before putting the surface burner back, shake out
excess water' and then dry it thoroughly by setting it in
a warm oven for 30 minutes. Then place it back in the
range, maldng sure it is properly seated and level.
Check the flame pattern of' each burner. If' the flames
are "jumpy" (not steady), clean the holes again with a
sewing needle or' twist tie.
Lift-Up Cooktop
(on models with standard twin burners)
Clean the area under the cooktop often. Built-up soi!,
especially grease, may catch on fire.
To make cleaning easier, the cool:top may be lifted upo
To raise the cook'top:
1. Be sure the burners
aie turned off[
2. Remove the grates°
3. Grasp the two fi'ont
burner wells and lift up.
Some models have dual suppolz rods that will hold the
cooktop up while you clean underneath it.
After cleaning under the cooktop with hot, soapy
water' and a clean cloth, lower the cooktop° Be careful not
to pinch your fingers. Lower cooktop gently to avoid
blow;rag out pilot flames (on models with standing pilots).
28
Burner Grates
Lift out when cool
The grates should be
washed regularly and,
of course, after
spillovers. Wash them in hot, soapy water and rinse
with clean water. A_er cleaning, dry them thoroughly
by putting them in a warm oven for a few minutes_ Do
not put the grates back on the range while they are
wet. When replacing the grates, be sure they're
positioned securely over the burners.
To prevent rusting on cast iron grates, apply a light
coating of cooking oil on the bottom of the grates,
To get rid of burned-on food, place the grates in a
covered container (or plastic bag) with t/4 cup (62 ml)
ammonia to loosen the soil. Let sit overnight (or
approximately 12 hours), then scrub with a soap-filled
scouring pad if necessary, Rinse grates thoroughly and
dry completely before replacing them on the range top
Although they're durable, the grates will gradually lose
their shine, regardless of the best care you can give
them. This is due to their continual exposure to high
temperatures.
Do not operate a burner for an extended period of
time without cookware on the grate. The finish on
the grate may chip without cook-ware to absorb the heat°
CAUTION. Do not dean the grates in a dishwasher
or in a self-deaning oven.
Oven Air Vents
Never block the vents (air openings) of the
range. They provide the air inlet and outlet that are
necessary for the range to operate properly with
correct combustion° Air openings are located at the
rear of the cooktop, at the top and bottom of the
oven door; and at the bottom of the range, under
the kick panel, storage drawer or broiler d:awer
(depending on the model).
Cooktop Surface
(on some models)
To avoid damaging the porcelain enamd surface of
the cooktop and to prevent it from becoming dull,
dean up spills right away. Foods with a lot of acid
(tomatoes, sauerlaaut, fruit juices, etco) or foods with
high sugar content could cause a dull spot if allowed to
sit. When the surface has cooled, wash and rinse_
For other spills such as fat spatterings, etc., wash with
soap and water once the surface has cooled_ Then rinse
and polish with a dry cloth.
Do not store flammable materials in an oven or
near the cooktop. Do not store or use combustible
materials, gasoline or other flammable vapors and
liquids in the vicinity of this or any other appliance.
Drip Pans
(on some models)
Remove the giates and lift
out the drip pans. The drip
pans can be cleaned in a
dishwasher or by"hand°
To get rid of burned-on
food, place the drip pans in a covered container (or' plastic
bag) with 114 cup (62 ml) ammonia to loosen the soil.
Then scrub with a soap-filled scouring pad if necessary.
When replacing the drip pans, make sure they are in the
correct position°
Ca_.UTION. Do not clean the drip pans in a
self-cleaning oven.
Brushed Chrome Cooktop
(on somemodels)
Clean the brushed chrome top
with warm, soapy water or Bon "_
Ami ® brand cleanser and
immediately dry it with a dean,
soft cloth. Take care to dry the
surface following the "grain°" To help prevent finger
marks after cleaning, spread a thin film of baby oil on
the surface. Wipe away excess oil with a clean, soft cloth.
(continued n_'t page)
29

Care and Cleaning (cont,0oo )
Broiler Pan and Grid
After broiling, remove the
broiler pan fi'om the oven
or broiler compartment
(depending on your model).
Remove the grid from the
pan_ Carefully pour out
grease ft'om the pan into a
proper' containet_ Wash and
I I
! ' "-7" !
! i
rinse the broiler pan and grid in hot water-with a
soap-filled or' plastic scouring pa&
ff food has burned on, sprinkle the grid with detergent
while hot and cover with wet paper' towels or a dishcloth.
Soaldng the pan will remove burned-on foods.
"The broiler pan and grid may be cleaned with a
commercial oven cleaner.
Both the broiler' pan and grid can also be cleaned in a
dishwasher.
Do not store a soiled broiler pan and grid anywhere
in the range.
CAUTION: Do not clean the broiler pan or grid in
a self-cleaning oven.
Oven Shelves
Clean the shelves with an abrasive deanser or steel
wool. After' cleaning, rinse the shelves with clean water
and dry with a clean clod:.
NOTE: Take the shelves out of the oven before you
begin the self-clean cycle.
Oven Bottom
The oven bottom has a
porcelain enamel finish.
To make cleaning easier;
protect the oven bottom
fiom excessive spillovers by
placing a cootde sheet on
the shelf below the shelf"
you are cooldng on_ You
can use aluminum foil if
you do not cover the whole sheIf[ This is particularly
important when baldng a fiuit pie or other foods with
a high acid content. Hot fruit fillings or' other foods
that are highly acidic (such as tomatoes or sauerkraut
and sauces with vinegar or lemon juice) may cause
pitting and damage to the porcelain enamel surface
and should be wiped up immediately.
To clean up spiUovers, use soap and water, an abrasive
cleaner or soap-filled steel wool pad. Rinse well to
remove any soap before self-cleaningo
3O
Surface Light and Starter
(on some models)
CAUTION: Do not
touch the bulb with wet
hands or when bulb is
hot. Never wipe tile
light area with a wet
doth. Electrical power
must he shut offffyou
have to replace a bulb.
Carlo
up
Starter
To replace the starter:
I. Open the canopy and remove the bulb as
explained above.
2. Grasp the starter, turn it counterclockwise about
one-quarter turn and lift out° Replace with one of
the same wattage,
3, Replace the bulb and lower the canopy°
To replace the bulb:
1, With one hand at each Lightbulb
end of tile hinged
canopy, grasp it by the
front edge and flip it up.
2. Remove the fluorescent light bulb. Replace the bulb
with one of the same length and wattage.
3. Lower the canopy,

Oven Light Replacement
(on some models)
CAUTION: Disconnect electrical power to the
oven at the main circuit breaker or fuse box before
attempting to replace the oven light bulb. Do not
touch a hot light bulb with wet hands or a wet
doth. Wait until the bulb has cooled and use a
dry cloth.
The oven light (bulb) is
covered with a removable
glass cover that is held in
place with a bait-shaped
wire° Remove the oven
door; if desired, to reach
the cover easily_
To remove:
Wire cover hotder
I. Hold a hand under the cover so it doesn't fall
when released. With fingers of the same hand,
firmly push back the wire cover holder. Lift off
the cover. DO NOT REMOVE ANY SCREWS
TO REMOVE THE COVER.
2, Replace the bulb with a 40-watt household
appliance bulb.
To replace cover:
I. Place it into the groove of the light receptacle° Pull
the wire forward to the center of the cover until it
snaps into place° When in place, the wire holds the
cover firmly° Be certain the wire is in the depression
in the center of the cover.
2. Connect electrical power to the range,
To replace the door, make sure the hinges are in the
specia! stop position. Position the slots in the bottom
of the door squarely over the hinges. Then lower the
door slowly and evenly over both hinges at the same
time. If the hinges snap back against the oven frame,
pull them back out.
TO CLEAN THE DOOR:
(Do not immerse the door in water.)
Inside of the door:
Because the area inside the gasket is cleaned during
the self-clean cycle, you do not need to clean this by
hand. Any soap left on the liner causes additional
stains when the oven is heated.
The area outside the gasket can be cleaned with a
soap-filled steel wool or plastic pad.
Do not rub or clean the door gasket--the
fiberglass material of' the gasket has an extremely low
resistance to abrasion. An intact and well-fitting oven
door gasket is essential for energy-efficient oven
operation and good baking results_ If you notice the
gasket becoming worn, frayed or damaged in any
way or if it has become displaced on the door, you
should have it replaced,
Inside gasket
gasket
Lift-Off Oven Door
The oven door is removable,
but it is heavy. You may need
help removing and replacing
the door,
To remove the door, open it a
few inches to the special stop
position that will hold the
door open. Grasp firmly on
each side and lift the door
straight up and off the hinges.
/
NOTE= Be careful not to place hands between the
hinge and the oven door flame as the hinge could snap
back and pinch fingers.
Outside of the door:
Use soap and water to thoroughly clean the top, sides
and front of the oven door. Rinse well. You may also
use a glass cleaner to clean the glass on the outside of
the door,
Spillage of marinades, fruit juices, tomato sauces and
basting materials containing acids may cause
discoloration and should be wiped up immediately.
When the surface is coot, clean and rinse.
Do not use oven cleaners, cleansing powders or
harsh abrasives such as steel wool pads on the
outside of the door.
(continued n_ page)
31

Care and Cleaning
Removable Kick Panel
(on some models)
The ldck panel may be removed for cleaning under
the range.
To remove, lift up the
bottom of' the panel slightly
to disengage the panel from
the tabs at the base of' the
range. Pull the bottom of' the
panel forward until the spring
clips are released at the top of
die panel.
To replace, insert the two
slots at the bottom of the
panel onto the two tabs at the
base of the iange and push
the top of the panel forward
to engage the spring clips_
Removable Broiler Drawer
(on some models)
To remove:
1. When the broiler is cool, remove the grid and pan.
2. Pull the broiler drawer out until it stops, then push
it back in about one inch.
3. Grasp the handle, lift and pull the broiler drawer
out. Clean the broiler drawer with hot, soapy water.
To replace:
Hold the broiler
drawer in the
raised position as
you slide it partway
into the range_
Then lower the
drawer and push it
completely closed.
Removable Storage Drawer
(on some models)
T'he storage drawer is a good place to stole cookware
and bakeware. Do not store plastics and flammable
material in the drasver.
Do not overload the storage drawer. If' the drawer is
too hea W, it may slip off the track when opened.
The storage &awer may be removed for' cleaning under
the range. Clean the storage drawer with a damp clod:
or sponge. Never use harsh abrasives or scouring pads.
To remove the storage drawer:
1. Pull the drawer straight
out until it stops.
2. Tilt the front of" the
drawer up and flee of'
the range_
To replace the storage drawer:
1. Set the stops on the back of the drawer over the
stops in the range.
2. Slide the drawer evenly and straight back, so that
the rails in the range are engaged.
32
Control Panel and Knobs
It's a good idea to wipe the control panel after each
use of the oven. Clean with mild soap and water_ or
vinegar and water; rinse with clean water and polish
dry with a soft cloth.
Do not use abrasive deansers, strong liquid
cleaners, plastic scouring pads or oven cleaners on
the control pane! they will damage the finish. A
50/50 solution of vinegar and hot water works well.
The control knobs may be removed for easier
cleaning. To remove the knob, pull it straight off the
stem. If knob is difficult to remove, place a towel or
dishcloth between the knob and control panel and pul!
gently. Wash the knobs in soap and water; or vinegar
solution, but do not soak.
Metal parts can be cleaned with soap and water. Do
not use steel wool, abrasives, ammonia, acids or
commercial oven cleaners. Dry with a soft clod:,

Installation Instructions
FORYOUR SAFETY
If you smell gas:
1. Open windows.
2. Don't touch electrical switches.
3. Extinguish any open flame.
4. Immediately call your gas supplier.
FOR YOUR SAFETY
Do not store or use combustible materials, gasoline
or other flammable vapors and liquids in the
vicinity of this or any other appliance.
BEFOREYOU BEGIN
Read these instructions completely and caref_ly.
IMPORTANT: Save these instructions for the local
electrical inspector's use.
INSTALLER: Leave these instructions with the
appliance after installation is completed.
CONSUMER: Keep this Use and Care Manual and
the Installation Instructions for future use.
This appliance must be properly grounded.
WARNING
Improper installation, adjustment, alteration,
service or maintenance can cause injury or property
damage. Refer to this manual. For assistance or
additional information, consult a qualhqed installer,
service agency, manufacturer (dealer) or the gas
supplier.
Never reuse old flexible connectors. The use of old
flexible connectors can cause gas leaks and personal
injury. Always use NEW flexible connectors when
installing a gas appliance.
CAUTION
Do not attempt to operate the oven of this range
during a power failure (electric _tion models only).
IMPORTANT
Remove all packing material and literature from oven
before connecting gas and elect_ric_ supply to range.
DIMENSIONS AND CLEARANCES
Provide adequate clearances between the range and
adjacent combustible surfaces.
Mira---Max depth with door
46 ½" 36 ¼" ± 1/4"
(1181 cm) (92.1 cm ± 6 mm)
Depth with door open: "" "_
46%" (1178 cm) \ "_
(Glass door) \\
46¼" (117.5 cm) _ \x--
(Porcelain door) x_,__ * Depth varies depending on
model. See specifications
sheet for you model
1-
Minimum___
tocabinets
on eRher Maximum depth for
Isifle o! cabinets above
Crange _ 30"
countertops
L---..--
I_48; F'/6 2 cm_ , 1_ (?L5em) TOwafl Or_either
30" _inimum,_,__.s[de.standardbu
7 era) 2" (Sere)To wall o
.... side-sealedbuml
Tocabinets ] Iof range
below
'gFcooktop and 36" 1 .J_ paneE
(91,5 cm) (6 rr
at rangeback I[ forward
O%tD,
(0cm)
(continued next page)
33

Important Safety Instructions
• Installation of this range must conform with local
codes, or in the absence of local codes, with the
National Fuel Gas Code, ANSI Z223.1, latest
edition. In Canada, installation must conform
with the current Natural Gas Installation Code,
CAN/CGA-B149.1 or the current Propane
Installation Code, CAN/CGA-B149.2 and with
local codes where applicable.
This range has been design<ertified by the American
Gas Association according to ANSI Z21.1, latest
edition and Canadian Gas Association according to
CANiCGA-1.I latest edition. As with any appliance
using gas and generating heat, there are certain safety
precautions you should follow. You will find these
precautions in the Important Safety Instructions section
in the fi'ont of this manual. Read them carefially.
• Have your' range installed by a qualified installer.
• Your range must be electrically grounded in
accordance with local codes oi; in the absence of
local codes, in accordance with the National
Electrical Code (ANSI/NFPA 70, latest edition). In
Canada, electrical grounding must be in accordance
with the current CSA-C22.1 Canadian Electrical
Code Part 1 andtor local codes. See Electrical
Connections in this section.
- Before installing your range on linoleum or any other'
synthetic floor covering, make sure the floor covering
can withstand 180°E (82°C.) without shrinking,
warping or discoloring. Do not install the range over
carpeting unless a sheet of' 1/4" (6 ram) thick
plywood oz. similar insulator is placed between the
range and carpeting.
° Make sure the wall coverings around the range
can "withstand heat generated by the range up to
200°F. (93°C.).
° Avoid placing cabinets above the range. To reduce
the hazard caused by reaching over the open flames
of operating burners, install a ventilation hood over
the range that projects forward at least 5" (12.7 cm)
beyond the front of the cabinets.
• The ventilating hood must be constructed of sheet
metal not less than 0.0122" (.31 ram) thick. Install
above the cooking top with a clearance of not less than
t/4" (6 mrn) between the hood and the underside of
the combustible material or metal cabinet° The hood
must be at least as wide as the appliance and centered
over the appliance. Clearance between the cooking
surface and the ventilation hood surface MUST
NEVER BE LESS THAN 24" (61 cm).
EXCEPTION: Installation of a listed microwave
oven or cooking appliance over the cooktop shall
confsrm to the installation instructions packed with
that appliance.
° If cabinets are placed above the range, allow a minimum
cleatance of 30" (76.2 cm) between the cooking surface
and the bottom of unprotected cabinets.
• Ira 30" (76.2 cm) clearance between cooldng surface
and overhead combustible material or metal cabinets
cannot be maintained, protect the underside of the
cabinets above the cooking top with not less than
1/4" (6 turn) insulating millboard covered with sheet
metal not less than 0_0122" (3t mm) thick.
° Clearance between the cooking surface and protected
cabinets MUST NEVER BE LESS THAN 24"
(61 cm). The vertical distance from the plane of the
cooking surface to the bottom of' adjacent overhead
cabinets extending closer than 1" (2.5 cm) to the
plane of' the range sides must not be less than 18"
(45.7 cm). (See the Dimensions and Clearances
illust_ation in this section.)
° CAUTION: Items of interest to children should not
be stored in cabinets above a range or' on the
baclcsplash of a range--children climbing on the
range to reach items could be seriously injured.
34

WARNING
All ranges can tip and injury could
result. To prevent accidental tipping
of the range, attach an approved
Anti-Tip device to the wall. (See
Installing the Anti-Tip Device in this
section.) To check if the device is
installed and engaged properly,
carefully tip the range forward. The
Anti-Tip device should engage and
prevent the range from tipping over.
lfyou pt_ the range out from the
wall for any reason, make sure the Anti-Tip device is
engaged when you push the range back against the wallo
• For your safety, never use your range for warming or
heating the room. Your oven and cooktop are not
designed to heat your Icitchen_ Top burners should
not be operated without cookware on the grate. Such
abuse could result in fire and damage to your range
and will void your warranty°
• Do not store or use combustible materials, gasoline
or other flammable vapors and liquids in the vicinity
of this or any other appliance, Explosions or fires
could result.
• Do not use oven for a storage area. Items stored in
the oven can ignite°
• Do not let cooking grease or other' flammable
materials accumulate in or near the range°
GENERAL
" See the Dimensions and Clearances illustration in
this section for all rough-in and spacing dimensions.
These dimensions must be met for safe use of your
range. The location of the electrical outlet and pipe
opening (see Gas Pipe and Electric Outlet Locations)
may be adjusted to meet specific requirements.
• The range may be placed with 0" (0 cm) clearance
(flush) at the back wall and side walls of the range.
LOCATION
Do not locate the range where it may be subject to
strong drafts. Any openings in the floor or wall
behind the range should be sealed. Make sure the
openings around the base of the range that supply fresh
air for combustion and ventilation are not obsuucted by
carpeting or woodwork.
PROTECT YOUR FLOOR
You: range, like many other household items, is heavy
and can settle into soft floor' coverings such as
cushioned vinyl or' carpeting_ Use care when moving
the range on this type offlooringo It is recommended
that the following simple and inexpensive instructions
be followed to protect your floor_
The range should be installed on a sheet of plywood
(or similar material). When the floor covering ends at the
front of the range, the area that the range will rest on
should be built up with plywood to the same level or
higher than the floor covering. This will al!ow the
range to be moved for' cleaning or servicing.
MODEL AND SERIAL NUMBER
LOCATION
Depending on your range, you'll find the model and
serial numbers on a label on the front frame of the range,
behind the storage drawer; broiler drawer or kick panel.
TOOLSYOU WILL NEED
" Phillips and flat-blade screwdrivers
• Penci! and ruler
° Two pipe wrenches (one for backup)
• I¾" open-end or' adjustable wIench
° Nut drivers or wrenches: 3/i6" and 114"
ADDITIONAL MATERIALS YOU
MAY NEED
• Gas line shut-offvalve
• Pipe joint sealant or UL,appioved pipe thread tape
with Teflon* that resists action of natural and LP gases
° Flexible metal appliance connector (1/2" LD.).
A 5-foot (1.5 m) length is recommended for ease of
installation but other lengths are acceptable. Never
use an old connector when installing a new ranger
• Flare union adapter for' connection to gas supply line
(314" or 112" NPT x !/2" I.D.)
° Flare union adapter for connection to pressure
regtflator on range (112" NPT x !12" LD.)
• Teflon: Registered trademark of DuPont
35
(continued nextpage)

Installation Instructions (continued)
PREPARATION
• Remove all tape and packaging° Lift up the cooktop
(on models with standard twin burners) and remove
any pacldng material under it. Make sure the
standard twin burners are properly seated and level.
• Remove plastic film that covers some chrome parts
(around oven door, side trim).
° 'Take the accessory pack out of' the oven.
o Check to be sure that no range parts have come loose
during shipping.
STEP 1
Provide Adequate Gas Supply
"Yourrange is designed to operate at a pressure of 4"
(10.2 cm) of water column on natural gas or, if designed
for LP gas (propane or butane), I0" (25.4 cm) of water
column. Make sure you are supplying your range with
the type of gas for which it is designed. This range is
convertible for use on natura! or propane gas. If you
decide to use this range on LP gas, conversion must be
made by a qualified LP installer before attempting to
operate the range on that gas.
For proper operation, the pressure of natural gas
supplied to the regulator must be between 4" (10o2 cm)
and 13" (33 cm) of water column. For' LP gas, the
pressure supplied must be between 10" (25.4 cm) and
13" (33 cm) of water column. When checldng for
proper operation of' the regulator, the inlet pressure must
be at least 1" (2.5 cm) greater than the operating
(manifold) pressure as given above. The pressure
regulator located at the inlet of the range manifold must
remain in the supply line regardless of whether natural
or LP gas is being usedL A flexible metal appliance
connector used to connect the range to the gas supply
line should have an I.D. of I/2" and be 5 feet (1.5 m)
in length for' ease of installation. In Canada, flexible
connectors must be single wall metal connectors no
longer than 6 feet (1.8 m) in length.
STEP 2
Connect the Range to Gas
Shut off' the main gas supply valve before disconnecting
the old range and leave it off' until new hook-up has
been completed. Don't fi_rget to relight the pilot on
other gas appliances when you turn the gas back on.
Because hard piping restricts movement of the range,
the use of an AoG_A.-certified flexible metal appliance
connector is recommended unless local codes require a
hard-piped connection. Never use an old connector
when installing a new range. If' the hard piping
method is used, you must carefully align the pipe; the
range cannot be moved after the connection is made.
To prevent gas leaks, use pipe joint compound or
wrap Teflon* pipe thread tape around all male
(external) pipe threads.
*Teflon: Registered trademark of DuPont
Gas Pipe and Electric Outlet Locations
for Models Equipped with Sealed Burners
This area allows
for flush range
installation with
through-the-wall
connection of pipe
stub/shut-off
valve and rear
wail 120V outlet.
Shortest
connection
from hard pipe
stub location to
range hookup=
This area allows for
flush range installation
with through-the-floor
connection of pipe
stub/shut-off valve,
36

Gas Pipe and Electric Outlet Locations
for Models Equipped with Standard
Twin Burners
This area allows Shortest
for flush range Jl connection
instalfation with I from hard pipethrough-the- 30- stub location
wall connection to range
of pipe hookup.
stub/shut-off
4r
valve and rear
wall 120V outlet.
This area allows
for flush range
insta!lation with
through-the_ftoor
connection of pipe
stub/shut-off valve.
Flexible Connector Hookup for Models
Equipped with Sealed Burners
Pressure ,_
(provided)
Adapter
Flex Connector
6 it, (1 8 m) max
Installer: Inform the
consumer of the
location of the gas
shut-off vaive
1/2" or 3/4"
Gas Pipe
Rigid Pipe Hookup for Models
Equipped with Sealed Burners
._., Pressure
___ j_ r_ Regulator
Nipple Union _ Black Iron Pipe
i_ Union
Installer: Inform _L-._t----- Nippte
the consumer of _L_ Gas
the location of the t12" or 3/4" Shut-off
gas shut-off vatve, Gas Pipe _ L_ L_ valve
Flexible Connector and Rigid Pipe
Hookup for Models Equipped with
Standard Twin Burners
t" Flexible I {Rigid Pipel
Pressure I Connector ] [ Hookup ]
Regulator { Hookup I I r
B,aok,,onPipe-"U
Rex Connector _
6ft (18m) max _ Union_ Gas
I_ Shut-off
Adapter _]J Nipple ---_ ;U Valve
Manifo{d Pipe _ - I,II /
Valve
10sta_er:_nfo_the ]_ lit _# I!l
consumerof the location 1 !_.._ 1/2,or 3/4 # = I _1_
of the gas shut-off va ve, t,_-q_---- Gas Pipe _ L_
(continued next page)
37

installation Instructions ( o0 ,000 )
1. Install a manual gas line shut-offvalve in the gas line
in an easily accessed location outside of' the range°
Make sure everyone operating the range lmows where
and how to shut off the gas supply to the range.
2. Install male 1/2" flare union adapter to the I/2"
NPT internal thread elbow at inlet of pressure
regulator. On models equipped with standaid twin
burners, install the male pipe thread end of the I/2"
flare union adapter to the 1/2" NPT internal thread
at inlet of pressure regulator. Use a back-up wrench
on the regulator fitting to avoid damage.
When installing the range f}om the front, remove the
90 ° elbow for' easier installation.
5. Install male 1/2" or 3/4" flare union adapter to the
NPT internal thread of' the manual shut-offvalve,
taking care to back up the shut-offvalve to keep it
f?om turning.
4. Connect flexible metal appliance connector to the
adapter on the range. Position range to permit
connection at the shut-offvalve.
5. When all connections have been made, make sure all
range controls are in the OFF position and turn on the
main gas supply valve. Use a liqtfid leak detector' at all
joints and connections to check for leaks in the system.
CAUTION: DO NOT USE A FLAME TO
CHECK FOR GAS LEAKS.
When using test pressures greater than 112 psig to
presstue test the gas supply system of' the residence,
disconnect the range and individual shut-offvaIve
f?om the gas supply piping. When using test pressures
of 1/2 psig or tess to test the gas supply system, simply
isolate the range from the gas supply system by closing
the individual shut-offvalveo
STEP 3
Electrical Connections
(on some models)
Hectric_ Requirements
120-volt, 60 Hertz, properly grounded branch circuit
protected by a I5-amp or 20-amp circuit breaker or
time delay fuse_
Extension Cord Cautions
Because of' potential safety hazards associated with
certain conditions, we strongly recommend against the
use of an extension cor& However, if you still elect to
use an extension cord, it is absolutely necessary that it
be a UL-listed, 3-wire grounding-type appliance
extension cord and that the current carrying rating of'
the cord in amperes be equivalent to, or gleater than,
the branch circuit rating.
Grounding--IMPORTANT (Please read carefidly)
FOR PERSONAL SAFETY, THIS APPLIANCE
MUST BE PROPERLY GROUNDED.
The power cord of' this PREFERRED
appliance is equipped METHOD t_
with a three-prong Q_ )_E
(grounding) plug which
mates with a standard
three-prong grounding ns
_,,_[ J ground exists
wall receptacle to _ before use
minimize the possibility
of elect_'ic shock hazard
f}om this appliance.
The customer should have the wall receptacle and
circuit checked by a qualified electrician to make sure
the receptacle is properly grounded.
Where a standard two-prong wall receptacle is
encountered, it is the personal responsibility and
obligation of the customer to have it replaced with a
properly grounded three-prong wail receptacle.
DO NOT, UNDER ANY CIRCUMSTANCES, CUT
OR REMOVE THE THIRD (GROUND) PRONG
FROM THE POWER CORD.
38

A: Usage Situations Where Appliance Power Cord
W'dl Be Disconnected infrequently.
TEMPORARY METHOD
(Adapter ptugs not _.-_..__.
permitted in Canada) _ '¢'
A,ign large prongs/slots 1_.._ _'_ I
\ ) } h/ _ Ensure properground
\ / [ [ and firm connection
before use
An adapter may be used only on a 15-amp circuit. Do
not use an adapter on a 20-amp circuit. Where local
codes permit, a TEMPORARY CONNECTION may
be made to a properly grounded two-prong wall
receptacle by the use of a UL-listed adapter; available
at most hardware stores. The larger slot in the adapter
must be aligned with the larger slot in the wall
receptacle to provide proper polarity" in the connection
of the power cord.
CAUTION: Attaching the adapter ground terminal
to the wall receptacle cover screw does not ground
the appliance unless the cover screw is metal, and
not insulated, and the wall receptacle is grounded
through the house wiring. The customer should
have the circuit checked by a qualified electrician
to make sure the receptacle is properly gioundedo
When disconnecting the power cord fiom the adapter,
always hold the adapter with one hand. If this is not
done, the adapter ground terminal is very likely to
break with repeated use. Should this happen, DO
NOT USE the appliance unti! a proper ground has
again been established.
B: Usage Situations Where Appliance Power Cord
Will Be Disconnected Frequently.
Do not use an adapter plug in these situations because
disconnecting of the power cord places undue strain
on the adapter and leads to eventual failure of the
adapter ground terminal° The customer should have
the two-prong wall _eceptacle replaced with a three-
prong (grounding) receptacle by a qualified electrician
before using the appliance°
The installation of appliances designed for mobile
home installation must conform with the
Manufactured Home Construction and Safety
Standard, Title 24 CFR, Part 3280 (formerly the
Federal Standard for Mobile Home Construction and
Safety, Title 24, HUD, Part 280) or, when such
standard is not applicable, the Standard for
Manufactured Home Installations, latest edition
(Manufactured Home Sites, Communities and Set-
Ups), ANSI A225.1, latest edition, or with local codes.
In Canada, mobile home installation must be in
accordance with the current CAN/CSA Z240/Mtl
Mobile Home Installation Code.
Electric Disconnect
1. Locate disconnect plug on the range back.
2. Pinch sides of connector and pull out of range back.
You will have this disconnect plug:
STEP 4
Seal the Openings
Seal any openings in the wail behind the range and in
the floor under the range when hookups are completed.
(continued next page)
59

Installation Instructions
STEP 5
Check Ignition of Surface Burners
Operation of all cooktop and oven burners should be
checked after the range and gas supply lines have been
carefully checked for leaks.
Electric Ignition Models
Select a top burner lmob and simultaneously push in as:d
turn to LITE position. You will hear a snapping sound
indicating proper operation of' the spaIk module. Once
the air has been purged from the supply lines, burners
should light within 4 seconds. After burner lights, rotate
tmob out of the LITE position. Try each burner in
succession until all burners have been checked.
Quality of Haines
Tire combustion quality of burner flames needs to be
determined visually.
(A) Yellow flames--Call
for service
(B)Yellow tips on outer
cones--Normal for LPgas
(C) Soft blue flames--
Normal for natural gas
STEP 6
Check Ignition of Oven Burner
Your oven is designed to operate quietly and
automatically. To operate the oven, turn the OVEN
SET knob to a setting above 300°E (149°C.). After
30-90 seconds, the oven burner will ignite and burn
until the set temperature is reached. The oven burner
wil! continue to cycle on and off as necessary to
maintain the oven at the temperature indicated by the
OVEN SET Imobo
To check ignition of the broil burner, turn the OVEN
SET knob to BROIL After 30-90 seconds, the broil
burner will ignite_
Electric ignition models require electrical power to
opeiateo In case of a power' outage, the oven burners
on these models cannot be lit manually with a match,
Gas wit! not flow unless the glow bar is hot.
If the oven is in use when a power outage occurs, the
oven burner will shut offand cannot be re-lit until
power' is restored.
STEP 7
AdJust Broil and Oven Burner Air
AdJustment Shutters If Necessary
Mr adjustment shutters for' the top and bottom
burners regulate the flow of air' to the flames.
If burner flames look like (A), call for service. Normal
burner flames should look like (B) or (C), depending
on the type of gas you use.
With LP gas, some yellow tipping on outer cones is
normal
The air adjustment shutter for the top (broil) burner is
in the center of' the reax"wall of the oven.
4O

The shutter for the bottom (oven) burner is neat the
back wall behind the storage drawer or kick panel
(depending on the model). Remove the drawer or
panel. See the Care and Cleaning section in this guide,
To adjust the flow of air to either burner, loosen the
Phillips head screw and rotate the shutter toward open
or closed position as needed°
The flames for the top (broil) burner should burn
steady with approximately 1" blue cones and should
not extend out over the edges of the burner baffler
To determine if the bottom burner flames are burning
properly, remove the oven bottom. Flames should have
approximately 1" blue cones and, if range is supplied
with natural gas, should burn with no yellow tipping.
(With most LP gas, small yellow tips at the end of
outer cones are normal.) Flames should not lift off
burner ports. If lifting is observed, gradually reduce air
shutter opening until flames are stabilized.
l/i
To remove the oven bottom:
1. Remove the knurled screws holding down rear of
the oven bottom.
2. Grasp the oven bottom at finger slots on each side.
3. Lift the rear of the oven bottom enough to clear the
tip of the range frame, then pull out.
STEP 8
Leveling the Range
1,
kick panel,
2. Use a 3/t6" open_end or socket
wrench to back out both rear
leveling legs approximately
tWO turns°
3_
Remove the storage drawer, broiler drawer or
Use a I%" open-end or
adjustable wrench to back out
the front leveling legs two mrnso
Install the oven shelves in the
oven, then position the range
where it wilt be installed.
/
5. Check for levelness by placing a spirit level or a
partially filled cup of water on one of the oven
shelves_ If using a spirit leve!, take two readings--
with the level placed diagonally first in one direction
and then the other.
6. Adjust the leveling legs until the range is level.
7. After the range is level, slide the range away from
the wall so that the Anti-Tip device can be installed.
(continued next page)
41

Installation instructions (co0t,00e )
STEP 9
Installing the Anti-Tip Device
WARNING:
• Range must be secured with an approved Anti-
'Tip device,
• Unless properly installed, the range could be
tipped by you or a child standing, sitting or
leaning on an open door.
" AJCter installing the Anti-Tip device, verify that it
is in place by carefully attempting to tilt the range
forward.
° This range has been designed to meet all
recognized industry tip standards for all normal
conditions_,
" The use of' this device does not preclude tipping
of the range when not properly installed.
• If the Anti-Tip device supplied with the range
does not fit this application, use the universal
Anti-Tip device WB02X7909_
1. Mark the wall where the RIGHT EDGE of the
range is m be located. Be sure to allow for the
countertop overhang if you intend to install the
range next to cabinets.
_,_ Anti-Tip I
Id°v cei
Slotted L_LJJ_ _ _[L_ I
head l --'-'- +----
s0,ew..... ,,l il wo,, ,a,oI
ApproXo 20 ° I
/ 2_" //Marked edge of range
(5.4 cm) /_
./
2. Locate the outside edge of the device 2_" (5.4 cm)
towaId the center of' the range from the marked
edge of the _ange.
3. Using the device as a template, mark the position of"
the hole for the screw.
4. For wood construction, drill a pilot hole at an angle
of 20 degrees fiom the horizontal. A nail or awl may
be used if a drill is not available.
Mount the Amti-Tip device with the screw provided.
For cement or concrete construction, you will need a
114" x !_" lag bolt and a 112" O.D. sleeve anchor;
which are not provided. Drill the recommended size
hole fbr the hardware.
Install the sleeve anchor into the drilled hole and then
install the lag bolt through the device. The bolts must be
propedy tightened as recommended for the hardware.
: :\"k
Wallboard
Anti-Tip
device
Wood screw
Wallplate
Back of range
5. Slide the range against the wall, and check fbr
proper installation by grasping the fi'ont edges of the
rear surface unit openings and carefully attempting
to tilt the range forward.
WHEN ALL HOOKUPS ARE COMPLETED:
MAKE SURE ALL OF THE CONTROLS ARE
LEFT IN THE OFF POSITION.
MAKE SURE THE FLOW OF COMBUSTION
AND VENTILATION AIR TO THE RANGE IS
LrNOBSTRUCTED.
Converting to LP gas
(or converting back to natural gas from LP)
This range leaves the factory set for use with natural
gas° If you want to convert to LP gas, the conversion
must be performed by a qualified LP gas installer:
"The conversion instructions, sticker and LP orifices
can be found attached to the range next to the pressure
regulator,
There is a second set of instructions included in the
envelope containing the product wiring diagrams on
the back of' the range. Keep these instructions and the
orifices in case you want to cor:vert back to natural gas.
42

Questions? Before You Call for Service...
PROBLEM
TOP BURNERS DO NOT
LIGHT OR DO NOT
BURN EVENLY
BURNER FLAMES VERY
LARGE OR YELLOW
SURFACE BURNERS
LIGHT BUT OVEN
DOES NOT
POSSIBI_ CAUSE
• Make sure electrical plug is plugged into a live power oudet.
• Burner holes on the side or around the top of burner may be clogged° Remove
burners (on models with standard twin burners) or burner heads (on models
with sealed burners) or burner caps on spill-proof models, and clean them
v¢ith a sewing needle or twist tie. Make sure you do not enlarge the holes.
On spill-proof models, check electrode area for' burned-on food or grease.
° Make sure drip pans (on some models) are installed correctly.
• If range is connected to LP gas, contact the person who installed your range
or made the conversion.
• The oven gas shut-offvalve may have accidentally been moved during
cleaning or moving.
To check the oven gas shut-offvalve on standard twin burner models, raise
the cooktop and look for the gas shut-off lever at the extreme right rear corner.
Follow the directions in box A or B that match your regulator type.
Lever shown dosed
PULL TO OPEN
Standard Twin Burner Models Standard Twin Burner Models
To check the oven gas shut-offvalve on sealed burner models, remove the
storage drawer, broiler drawer or kick panel and look for the gas shut-off
lever at the back of the range.
Sealed Burner Models
(continued next page)
43

Questions? .=foreYou Call for Service...
PROBLEM
CLOCK AND TIMER
DO NOT WORK
"F_AND A NUMBEW'
FLASH IN THE DISPLAY
THE DISPLAY GOES
BLANK OR INDICATOR
LIGHTS COME ON WHEN
THE RANGE IS NOT IN USE
CLEAN LIGHT FLASHES
OVEN LIGHT DOES NOT
COME ON
SURFACE LIGHT
DOES NOT WORK
OVEN WILL NOT WORK
OVEN TEMPERATURE
TOO HOT OR TOO COLD
FOOD DOES NOT ROAST
OR BAKE PROPERLY
POSSIBLE CAUSE
• Range electrical plug must be securely seated in a live power outlet. Check
for blown fuse or tripped circuit breaker.
• Check for power outage_
° Review the Oven Control, Clock and Timer section of this guide.
° If' the time display flashes "F--and a number", you have a function error code.
If a function error code appears during the self'cleaning cycle, check the oven
door latch. The latch may have been moved, even if only slightly, from the
latched position, Make sure the latch is moved to the right as far as it will go,
Turn the Oven Set knob to off'. Allow the oven to cool for one hout_
Put the oven back into operatiom
• Disconnect all power to the range for 5 minutes and then reconnect power.
If' the failure code repeats, then call for service.
° Disconnect power to the range at the fuse box or circuit breaker for at least
10 seconds. Turn power back on. If'the indicator lights are still on, caU for service.
• The Oven Set knob is set at CLEAN before the door latch handle is
moved to the right.
- Bulb may be loose or burned out.
o Electrical plug must be plugged into a live power outlet.
° Fluorescent bulb is loose or defective. Adjust or replace.
° Switch operating light is broken. Ca!! for service.
° Plug on the range is nor completely inserted in the electrical outlet.
° The circuit breaker in your house has been tripped, or a fuse has been b!own.
° Door left in lock position after self-cleaning.
• Oven controls not properly set.
° The oven thermostat needs adjustment_ See the Adjust the Oven
Thermostat--Do It Yourself section.
• Oven controls not properly set. See the Baking or Roasting section.
" Shelf position is not correct.
° Incorrect cookware or cookware of improper size is being used.
° Oven thermostat needs adjustment. See the Adjust the Oven
Thermostat--Do It Yourself section.
° Clock not set correctly.
° Aluminum foil used improperly in the oven.
° Oven bottom not securely seated in position,
44

PROBLEM
FOOD DOES NOT
BROIL PROPERLY
OVEN WILL NOT
SELF-CLEAN
OVEN NOT CLEAN AFTER
CLEAN CYCLE
OVEN DOOR WILL
NOT UNLOCK
DOOR ACCIDENTALLY
LOCKED WHILE BAKING
STRONG ODOR
POSSIBLE CAUSE
- Oven controls not properly set, See the Broiling sectiom
• Oven door and/or broiler drawer not closed,
• Impioper shelf position being used, See the Broiling section.
• Food is being cooked on a hot pan,
• Cookware is not suited for broiling,
• Mtuninum foil used on the bIoiler pan grid has not been fitted properly
and slit as recommended°
° Oven bottom not securely seated in position,
• Oven temperature is too high to set self-cleaning operatiom
Mtow the range to cool to room temperature and reset the controls,
• Oven Set knob not set to CLEAN.
• Dool latch handle not moved all the way to the right.
• Oven controls not set properly. See the Operating the Self-Cleaning
Oven section,
• Heavily soiled ovens require at least 5 hours and 59 minutes of cleaning time,
• Heavy spillovers should be cleaned up before starting clean cycle.
° The oven must cool below the locking temperature after the clean cycle
is complete. Do not lock door with door latch except when using the
serf-dean feature or the oven may lock.
• Tam the Oven Set knob to OFE
• Improper air/gas ratio in oven. Adjust oven burner air shutter.
• An odor from the insulation around the oven liner is norma! for the first few
times oven is used. This is temporary.
45

For in-home major brand repair service:
Call 24 hours a day, 7 days a week
1=800-4-MY-HOM ESM(1-800-469-4663)
Para pedir servicio de reparaci6n a domicillo- 1-800-676-5811
In Canada for all your service and parts needs call
- 1-800-665-4455
Au Canada pour tout le service ou les pi6ces
For the repair or replacement parts you need:
Call 7 am - 7 pm, 7 days a week
1-800-366-PART (1-800-366-7278)
Para ordenar piezas con entrega a domicilio - 1-800-659-7084
For the location of a Sears Parts and Repair Center in your area:
Call 24 hours a day, 7 days a week
1=800-488=1222
For information on purchasing a Sears Maintenance Agreement
or to inquire about an existing Agreement:
Call 9 am - 5 pro, Monday - Saturday
1-800-827-6655
HomeCentralTM
The Service Side of Sears."
4_

®
FREE-STANDINGRANGEWARRANTY
FULL ONE YEAR WARRANTY ON ALL PARTS
If,within oneyear fromthe date of installation,anypartfails to function properlydue to a detectin material or workmanship,
Searswill repair or replaceit, at our option, freeof charge
If this product is subjectedto other thanprivatefamily use,the abovewarrantyis effectivefor only 90 days
WARRANTY SERVICE IS AVAILABLE BY CONTACTING THE NEAREST SEARS SERVICE
CENTER/DEPARTMENT IN THE UNITED STATES.
This warrantygivesyou specifictegal rights, andyou mayalso have otherrights which vary from stateto state
SearsRoebuckandCo, Dept 817WA HoffmanEstates,fL 60179
To Further Add To The Value Of Your Range, Buy a Sears Maintenance Agreement.
f
Years of Ownership Coverage 1 st Year 2nd Year 3rd Year
11. Replacement of Defective Parts W MA MA
2. Annual Preventive Maintenance
k,_. Check at your request.
MA
W - Warranty
MA MA
J
MA - Maintenance Agreement
KenmoreRangesaredesigned, manufacturedandtestedfor yearsof dependableoperation Yet,anymodern appliancemay requireservice
from time to time The SearsWarrantyplus theSearsMaintenanceAgreementhelps provideprotection from unexpectedrepairbiffs
Thechart abovecomparesthe Warrantyand MaintenanceAgreementandshowsyou the benefits of a SearsRangeMaintenanceAgreement
Contactyour SearsSalesAssociateor LocalSearsServiceCentertoday andpurchasea SearsMaintenanceAgreement,
47

OWNER'S
MANUAL
Model Numbers:
72471 75481
72478 75488
72691 75581
72695 75585
73281 75586
73288 75588
73481 75691
73485 75695
73488 75696
75381 75698
75388
To Call Toll Free
For Service:
1-800-4-MY-HOME "_
(1-800-469-4663)
For Parts:
1-800-FON-PART
(1-800-366-7278)
SWARS
GAS RANGE
The model number of your gas range is
found on the serial plate fastened to the
front frame behind the broiler" compartment,
storage drawer or kick panel.
All repair parts are available for immediate
purchase or special order when you visit
your nearest Sears Service Center, or" the
Service Department at most Sears Stores.
To request service or" order parts by phone,
call the toll free numbers listed to the left.
When requesting service or ordering parts,
always provide the following information:
• Product Type
• Model Number
• Part Number
• Part Description
Sears, Roebuck and Co., Hoffman Estates, IL 60179 U.S.A.

,SEARS
COClNA
(ESTUFA)
DE GAS
MANUAL DEL
PROPIETARIO
Numeros de
los modelos:
72471 75481
72478 75488
72691 75581
72695 75585
73281 75586
73288 75588
73481 75691
73485 75695
73488 75696
75381 75698
75388
Instrucciones de seguridad
Dispositivo anti-volcaduras 2,3, 38, 46
Instrucciones de seguridad 2-6
Cuidado y mantenimiento
Antes de tlamar para servicio 47-49
Cuidado y limpieza 28-35
Servicios al consumidor 50, 52
Servicios de reparacion 50
Ajuste del termostato del horno 19
Garantia 51
Instrucciones para la instalaci6n
Ajuste del aire 44, 45
Dispositivo anti-volcaduras 38, 46
Conecte la cocina af gas 40, 41
Dimensiones y espacios 36
Conexiones el_ctricas 42
LP (propano) 46
Funcionamiento
Caracter[sticas de su cocina 7
Hornear 15, 16
Asar af fuego directo/Guia 22, 23
Control det homo, Reloj y
contador de tiempo 1t-13
C6mo asar!Guia 20, 2'1
Cocinando en la superficie 9, 10
Precaution:
Lea y siga todas las
reglas de seguridad
y las instrucciones
de funcionamiento
antes de usar
por primera vez
este aparato
elect rodo mestico.
Sears, Roebuck and Co., Hoffman Estates, IL 60179 U.S.A.
_B30558OP055
SR4247~1
30BCG

instrucciones importantes de seguridad
Lea estas instrucciones antes de usar este aparato,
AVISO IMPORTANTE DE SEGURIDAD
ADVERTENCIA: Si usted no sigue con
_ctltud la informaci6n de esta guh, pudiera
causar un incendio o una explosi6n clue
resultarla en dafios a la propiedad, lesiones
personales o muerte.
-- No almacene o use gasolina u otros vapores
y Rquidos inflamables en proximidad a _ste
o a cualquier otto aparato electrodom_stico.
-- QUE HACER SI DETECTA OLOR A GAS
= No trate de encender nlngfin aparato
electrodomesuco.
* No toque ninKtln interruptor eldctrico;
11o USe nJngl_n teldfono en su edifkio.
= Llame inmediatamente a la compafi_a
suministradora de gas desde el te|dfono
de un vecino. Siga las instrucciones de la
compafila de gas.
= Si no pudiera comunicarse con la
compafila de gas, flame a la estaci6n de
bomberos.
La instalaci6n y los servicios de reparaci6n
deberdn ser realizados por un instalador
calificado, una agencia de servicios o ia
compafu'a suministradora de gas.
• El California Safe Drinking Water and Toxic
Enforcement Act (Ley sobre los productos t6xicos y
de agua potable de California) requiere que el
gobernador de California publique una llsta de
sustancias que el estado sabe causan c_ncer, defectos
de nacimiento u otros dafios de reproducci6n, y
requiere que los negocios les avisen a los dientes
contra la exposici6n potencial a tales sustancias.
Los aparatos de gas causan exposicifn minima a
cuatro de estas sustancias, tales como el benceno, el
mon6xido de catbono, el formaldeMdo y el hollfn,
causados primordialmente pot la combusti6n
incompleta de gas natural o gas LP (Propano). Los
quemadores bien ajustados, indicados pot una llama
azul en vez de una llama amarilla, minirnizar_n la
combusti6n incompleta. La exposici6n a estas
sustancias puede minimizatse mils, ventilando con
una ventana abierta o usando un ventiladot o una
campana de ventilaci6..
• Las bombillas fluorescentes y Ins vdlvulas de
seguridad sobre las cocinas con pilotos
permanentes contienen mercurio. Si su modelo
tiene estas catacterfsticas, se deben teciclar de acuerdo
con c6digos locales, del estado y federales.
A ADVERTENCIA
TODAS LAS COCINAS SE
PUEDEN VOLCAR
LESIONES PERSONALES
PUEDEN OCURRIR
INSTALE LOS
DISPOSITIVOS ANTI-
VOLCADURAS QUE
VtENEN CON SU COCINA
VEA LAS INSTRUCCIONES
PARA LA INSTALACION
Cuando reciba su cocina
Hda que el instalador le muestre
el lugar de la vdlvula que corm el
gas de la cocina y c6mo apagarla
si fi_tera necesario.
Haga que un instalador calificado
instale y conecte a tierra su
cocina de acuerdo con las
Instrucciones para la instalaci6n.
Cuaiquier ajuste o set-dcio debe set
completado s61o pot instaladores de
cocinas de gas calificados o tdcnicos de servicio.
No trate de reparar o reemplazar ninguna parte de
su cocina a menos clue se recomiende
especi_camente en este manual. Todo otro servicio se
debe remitir aun tdcnico de setvicio calificado.

* Enchufe su cocina (s61o modelos de ignici6n
el_ctrica) a una toma de corrlente de pared conectada
a tierra de 120 voltios. No quite la punta redonda con
conexi6n a tierra de1enchufe, Si cabe duda de h
conexi6n de tierra dd sisterna el&trico de h casa, es su
responsabilidad personal y su obligaci6n reemphzath
por un contacto adecuado para tres puntas con conexi6n
a tierra de acuerdo con el National Hectrical Code
(C6digo et&trico nacional). En Canada, el aparato debe
estar el&tricamente conectado a tierra de acuerdo con el
Canadian Hectrical Code (C6digo el_ctxico de Canadfi),
No use un cable de extensi6n con este apaiato_
. Asegtlrese de quitar todos los materiales de envase de
la cocina antes de operafla para evitar incendio o dafios
del humo, si los materiales de envase se encendieran.
• Sitfie la cocina fuera de las Leas muy transitadas
en la cocina y fuera de lugares ventilados para
evitar el apagado de los photos (en modelos con
pilotos permanentes) y circulaci6n de aire
inadecuada.
* Despu&s del uso prolongado de una cocina, se
pueden producir temperamras ahas del piso y
muchos recubrimientos del suelo no pueden
resistir este tipo de uso. Nunca instale ta cocina
sobre baldosas de vinilo o lin6teo po_que no pueden
resistir este uso, Nunca la instale directamente sobre
la alfombra de cocina.
* Asegtlrese de que su cocina est_ ajustada
correctamente por un t_cnico de servicio o
instalador calificado para el tipo de gas [natural o
LP (Propano)], que se va a usar. Su cocina se puede
convertir para uso con cualquier ripo de gas.
Consulte la secci6n Instrucciones para la instalaci6n.
ADVERTENCIA: Estos ajustes deben ser
completados por un t&nico de servicio calificado de
acuerdo con 1asinstrucciones del fabricante y todos
los c6digos y requisitos de la autoridad que tiene
jurisdicci6n. No seguir estas instmcciones podrh
resulrar en heridas serias o dafios a la propieda& La
agencia calificada que reaiice este t_abaio asume la
responsabilidad de la conversi6n.
AI usar su cocina
" Deje que las parrillas de los quemadores y otras
superficies se enfrien antes de tocarlas o dejarlas
donde los nifios puedan tocarlas.
* No deje a los nifios solos o
desatendidos donde hayuna
cocina caliente o en
operaci6n. Pueden quemarse
gravemente.
* No permita que nadie se
suba, se pare, o se cuelgue de
la puerta, dd cairn de almacenamiento o de] asador
(en ciertos modelos) o de la superficie de cocci6n de
la cochaa. Podffa dafiaxse la cocina o volcarla, causando
dafio personal grave.
* PRECAUCION: ARTICULOS
DE INTERES PARA LOS
NIlqlOS NO SE DEBEN
GUARDAR DENTRO DE LOS
ARMARIOS ENCIMA DE
lENA COCINA O SOBRE LA
CONSOLA POSTERIOR DE
LA COCINA LOS NIlqOS
QUE SUBEN A LA COCINA PARA TOMAR
ALGO PUEDEN DAI'qARSE GRAVEMENTE.
AADVERTENCIA-
Todas Ias cocinas se pueden volcar /_ ,_x
y producir heridas personales. Para
evitar el volcado imprevisto de la
cocina, suj&ela a la pared instalando
el dispositivo anti-votcaduras,
Para asegurar que el dispositivo est_
bien instalado y conectado,
cuidadosamente incline la cocina
hacia adelante. E! dispositivo anti-
volcaduras debe engranarse y evitar
que la cocina se vuelque.
Si se separa la cocina de la pared pot cualquier raz6n,
asegfirese de que el dispositivo est6 bien conectado
cuando vuelva a colocar la cocina contra ta pared. Si
no lo est,, hay riesgo posible de que la cocina vuelque
y cause dafios si Udo o un nifio se sube, se asienra o se
inclina sobre una puerta abierta.
Favor' de consultar la informaci6n sobre el dispositivo
Anti-volcaduras en esta gutao No tomar esta precauci6n
podHa resultar en el volcado de la cocina y hefidas
personaleso
(continda en & pggina siguiente)

Instrucciones importantes de seguridad (continuaci6n)
• No Ueve nunca vestidos
desabrochados o ca/dos
al usar el aparato. Tenga
cuidado al tomar los
artfculos guardados en
los armarios sobre la
superficie de cocci6n..
,":. ".. \
Los materiales inflamables se podAan encender si
tuvieran contacto con llamas o superficies calientes
del homo y podrian causar quemaduras gIaves.
Por su seguridad, nunca
use su aparato para calentar
la habitaci6n.
= No use agua para fuegos
causados por la grasa.
Nunca recoja una sart_n
en llamas. Apague los
controles. Ahogue una
sartdn en llamas sobre un
quemador cubriendo
completamente la sartdn
con una tapa que ajuste,
una hoja de hornear, o una
hoja plana. Use tin extintor
de sustancia qtt_mica seca de
rnulti-uso o de dpo espuma°
La grasa en llamas fue_a de una sartdn se puede
extinguir cubridndola con bicarbonato s6dico, o si
est_i disponible, usando un extintor de sustancia
qulmica seca de mutti-uso o de tipo espurna.
Las llamas en el homo se pueden ahogar
completamente cerrando la puerta del homo y
apagando el homo o usando un extintor de sustancia
quimica seca de multi-uso o de tipo espuma.
* No guarde los materiales
inflamables dentro del
homo, del asador de la
cocina o del caj6n de
almacenamiento o cerca
de la superficie de
cocci6n.
• No guarde ni use materiales combustibles,
gasolina u otros vapores o liquidos inflamables
cerca de este o cualquier otro aparato.
• I"4odeje clue la grasa de cocina u otros materiales
inflamables se acumulen dentro o cerca de h
coclna.
=.M cocinar puerco, siga 1asinstmcciones
precisamente y siempre cocine el puerco a una
teraperatura interna de al menos 170°E (77°C.).
Esto asegura que, en la posibilidad remora que se
presente triquina en el puerco, se mueIa y se pueda
comer el puerco sin peligro.
Cocinando en la superficie
" Siempre use la posid6n HTE (encender) (en
modelos con ignid6n d&trica) o la posici6n HI
(alto) (en moddos con pilotos permanentes) al
encender los quemadores de superfide pa_
asegurarse de que hayan encendido los quemadores.
• Nunca deje desatendidos los quemadores en las
posiciones de llamas altas. Las salpicaduras pueden
causar humo y de_rames de grasa que pueden
encenderse.
o Ajuste el tamafio de la llama det quemador de
superficie para que no extienda sobre la e_ctaremidad
de la cacerola. Las llamas excesivas son peligrosas.
• Use s61o agarraderas secas_las agarraderas
htlmedas o mojadas sobre superficies catientes
pueden resuttar en quemaduras por el vapor°
• No deje que las agarraderas se acerquen a las
llamas al levantar una cacerola. No use una toalla
u otto trapo abuttado en vez de usar una agarradera.
• Para minimizar la posibilidad de quemaduras,
el incendio de materiales inflamables y derrames,
coloque los mangos hacia la parte de arras de la
cocina sin extenderlos sobre los quemadores.
• Siempre apague los quemadores de superficie
antes de quitar una cacerola.
• Vigile con atencidn los alimentos que se frlen en
llama alta.

• Nunca obstxuya los w_spiraderos (abermras de aire)
de la cocina. Estas proporcionan la entmda y la salida
de aire necesarias para que la cocina fimcione
adecuadamente con una comhusti6n correcta. Los
respiraderos de aire se localizan en los lugares siguientes:
Respiiadero det homo en la pa_xe posterior de la
superficie de cocci6n de la cocina.
--Entrada de aire debajo del caj6n del asador.
--Respiradero de aire en la parte superior de la puerta
del homo.
• No use ollas metglicas (tipo "wok") en los
modelos que vienen con quemadores seUados si la
olla met,41ica tiene anillo met_co que se coloca
sobre la parrilla del quemador para soportar la
olla metAlica_ Este anilloactfia como trampa de
ca]or, 1o cual puede dafiar la parrilla det quemador y
la cabeza del quemador. Tambidn, puede causar que
e! quemador funcione de manera inadecuada. Esto
puede causar que el nivel de mon6xido de carbono
sea superior a los est_ndar actuales permkidos,
msultando en un petigro papa la salud.
• Los alimentos para fre/r deben estar tan secos
como sea posible. La escarcha sobre los alimentos
congelados o la humedad sobre los alimentos frescos
pueden provocar que la grasa ca]iente burbuiee y se
salga por los lados del recipienteo
• Use la cantidad minima de grasa para ffelr de una
manera mds eficaz. Ltenar e! recipiente de grasa
puede causar salpicaduras al afiadir alimentos.
• Si una combinaci6n de aceites o grasas se usara al
frelr, revuelva antes de calentar o mientras la grasa se
derrite lentamente.
° Ntmca trate de mover una sart_n de grasa callente,
especia]mente un fieidor con bastante aceite. Espele
hasta que se enfife el aceiteo
• Siempre caliente la grasa lentamente y obs&vela
cuando se calienta.
• Use un term6metro para freer con aceite cuando
sea posible paIa evitar sobrecalentar la grasa y que
eche humo.
° AI ttsar recipientes de vid_io, asegfitese de que estdn
disefiados para la coccidn sobre la cocina.
* Aleje todos los ard_culos de material de pl_tico de
los quemadores de superficie.
• No deje ardculos de
pldstico sobre la
superficie --se
pueden derretir si se
La apariencia y Ia ubtcact6n det
dejan muy cerca del respiradero vadan
respiradero.
° Use el tamafio correcto de recipiente. Evite usar los
recipientes que no son estables o se vuelcan
fdcilmente. Seteccione los recipientes con rondo
piano bastante grandes para contener el alimento y
evitar las salpicaduras y derrames, y lo bastante
grandes para cubrir las parriltas de los quemadores.
Esto ahor,ar_ el tiempo de limpieza e impedir_ la
acumulaci6n peligrosa de alimentos; las salpicaduras
o los derrarnes dejados sobre la cocina pueden arder.
Use recipientes con mangos que se pueden agarrar
filciImente y que se mantengan tiros.
• No deje arttculos sobre la superficie de la cocina.
El aim caliente del respiradero puede hacer que
los objetos inflamables ardan y aumente la presi6n
de los recipientes cerrados, lo que puede originar
que estallem
• Para evitar la posibilidad de tma quemadura,
siempre asegfirese de que los controles para todos
los quemadores est_n apagados y que todas las
parrillas de los quemadores est_n frlas antes de
tratar de quitarlas.
° Cuando los alimentos incendiados estS.n debajo de
la campana, apague el ventilador. El ventilador, si
esta funcionando, puede propagar las llamas.
• Si la cocina est,4 localizada cerca de la ventana, no
cuelgue las cortinas largas que podrhn ser !levadas
por el viento sobre los quemadores de superficie y
crear un peligro de incendio.
• Cuando un piloto se apaga (en modelos con pilotos
permanentes), descubrir_ un olor ligero de gas como
una serial para volver a encender el piloto. A1 volver a
encender el piloto, asegfirese de que los conttoles de los
quemadores estdn apagados, y siga Ias instrucciones en
las [nsttucciones para la instalaci6n para volver a
encender_
Si huele a gas, y se ha asegurado ya de que los
pilotos estLu encendidos (en modetos con pilotos
per'manentes), apague e[ gas de la cocina y llame a un
tdcnico caliiqcado_ Nunca use una llama viva papa
encontrar una fugao
(contlndaen lapggtna sigulente)

lnstrucciones importantes de seguridad
Hornear, asar ai fuego directo y asar
• No use el homo para guaxdar cosas. Los arrlculos
guardados en el homo se pueden quemar.
e Permanezca lejos de la cocina al abrir la puerta de
un homo caliente. El aire cafiente y el vapor que
escapan pueden causar quemaduras en las manos,
la cara y los ojos.
" Mantenga el homo fimpio de la grasa que se
acumula.
= Coloque las parrillas del homo en las posiciones
deseadas mientras que el homo est_ frlo.
= Sacando la parrlUa hasta la posici6n en que se
detiene podrd levantar fiicilmente los alimentos
pesados. Es tambi_n una precauci6n contra
quemaduras al tocar las superficies cafientes de la
puerta o las paxedes del homo. La posici6n rods
baja "R" no est.4 dlsefiada para deslizarse.
• No cafiente los recipientes sellados que contienen
comida. La presi6n podrla aumentar y el
recipiente podrla estallar, causando dafios.
° No use papel aluminio en ningfin sitio del homo
excepto como se describe en este manual. El real
manejo pod_la resultar en un peligro de incendio o
dafio a la cocina.
• No se debe jamds utilizar papel de aluminio para
revesfir la superficie inferior del homo. El uso
inapropiado de aluminio pudiera iniciar un incendio.
• AI usar las bolsas de cocci6n o de asar en el homo,
siga las instrucciones del fabricanteo
o Use s61o los recipientes de vidrio que se
recomiendan para uso en los homos de gas.
• Siempre quite la bandeja del asador dd homo o del
compartimiento del asador al fuego directo tan
pronto como termine de asar.
La giasa dejada en la bandeja se puede encender si se
usa el homo sin quitar ta grasa de la bandeja del asadot_
=AI asar al fuego directo, si ia came estd demasiado
cerca de la llama, la grasa puede encenderse. Corte
la grasa excesiva para evitar llamas attas.
• Asegtlrese de que la bandeja del asador est_
colocada correctamente para reducir la posibilidad
de incendios causados por la grasa.
• Si hubiera un incendio causado por la grasa en la
bandeja del asador, apague el control del horno y
mantenga cerrados el caj6n del asador y la puerta del
hotno para contener el fuego hasta que se apague.
Horno de auto limpieza
" No limpie la junta de la puerta. La junta de la
puerta es esencial para un se!lo hermdtico. Tenga
cuidado de no frotar, dafiar o mover la junta°
• No use limpiadores para hornos. Ningtin limpiador
cornerciat para hornos ni ningfm revestimiento
protectivo de los bordes det homo de cualquier tipo
se deberla usa_ dentro o alrededor de cualquier parte
del homo° El residuo de los limpiadores para hornos
dafiard el interior del homo cuando se use el ciclo de
auto limpieza.
• Antes de usar auto fimpieza, quite las parrillas, la
bandeja del asador, la rejilla del asador y otros
recipientes.
• IMPORTANTE: Ciertas ayes son extremadamente
sensibles al humo emitido durante el ciclo de
limpieza de una estufa y su satud puede set afectada_
Mueva alas ayes a otra habitaci6n que tenga mejor
ventilaci6n_
= Asegfirese de limpiar ias salpicaduras excesivas
antes de iniciar el cido de auto fimpieza.
o Si el ciclo de auto fimpieza tuviera un fallo,
apague el homo y desconecte la corriente
el_ctrica. Haga que un tdcnico califlcado lo revise.
o Limpie s61o las partes enumeradas en este
Manual de uso y de cuidado.
° Mantenga la cocina fimpia y fibre de
acumulaciones de grasa o salpicaduras, las cuales
se pueden encender.
GUARDE ESTAS
INSTRUCCIONES

Caracter|sticas de su cocina
NOTA: No todos los modelos tienen todas las caracteristicas. La apariencia de las caracteristicas varia,
€
Tapa dDl quemador
Charol_ f_oloct ot_
(oncE_nosm_dolos)
Cab_z_ dol qu_mador
_ harola recolectot_
(onclenosmodolos)
Su cocina esrA equipada con uno
de los dos tipos de quemadores de
superficie que se muestran aquL
i t
.3
4
5
6
7
8
Indice de caracter_sticas
1 Ntimeros de modelo y de serie
En la parte delante=a de la
estructura de la cocina, detr;is
del caj6n de almacenamiento
2 Dispositivo anti-volcaduras
Esquina posterior derecha inferio_
en la parte trasera de la cocinao
Solera del homo
Luz interior del homo
Interruptor de la luz del homo
(en ciertos modelos)
Superficie de cocci6n
Luz automdtica del homo
Reloj y contador de tiempo
Lttz de OVEN ON
Luz de CLEAN
Luz de PREHEATED
t0 Bot6n de Oven Set
I1 Respiradero del homo
Vea la pdgina
2, 3, 38, 46
32
I3, 24, 34
13
4,5,3I
11, 12, 17-19, 25
!1, 12, 17
I8, 26, 27
11,12, 19, 25, 26
1t, I9, 25-27
I1, 12, 19
11, 12, 15,
17-20, 22, 25, 26
4, 5, 13, 31
Indice de caracter_sticas Vea la pdglna
I2 4, 5, 8-I0,
28-30
13 9, 32
14 I5, I7, 20,
22, 25, 26
t5 6, I4, 15,
20, 22, 23
Parrillas, charolas recolecmras
(en ciertos modelos),
y quemadores de superficie
Botones de mando que
controlan los quemadores
de superficie
Manija del seguro de la puerta
Use s61o para el ciclo de
auto limpieza
Soportes para las parrillas
delhomo Se ofi'ecen sugerencias
sobre las diferentes posiciones de
coccion para Ias parrillas en las
secciones de Hornear, Asar y
Asar aI fuego directo.
Parrillas del homo Se sacan
o se waelven a colocar f_cilmente
sob_e lot soportes de tas parrillas_
Puerta desmontable del homo
!6 6, t4-I8, 20,
22-24, 33
17 3, 6, 23,
24, 33
!8 Caj6n de almacenamiento 3, 4, 35
19 Bandeja y rejilla del asador 6, 20,
No fas limpie con e! ciclo de 22-24. 33
auto limpieza deI homo

Cocinando en la superficie
Instrucciones de encendido
Sus quemadores se encienden pot ignici6n eldctrica,
eliminando asf la necesidad de pilotos permanelites con
llamas que estdn encendidas de manera colistante.
Eli caso de una interrtlpd6n de la ignJci6n el_ctrica,
puede elicender los quemadores de su cocina con un
cerillo. Acerque un ceriUo encendido al quemador, y
luego haga girar el bot6n det quemador hasta la posici6n
LITE (elicendet)_ Tome precaudones extremas
cuando encienda los quemadores de este modo.
Los quemadores de superflcie que se estdn usando
cuando haya una interrupci6li de la ignici6n eldctrica
continuar_n operando de manera normal
El electrodo del encelidedor de chispa estfi expuestOo
Cuando se pone un quemador en posici6n de LITE
(encender), todos los quemadores producen una
chispao No desarme ni limpie los alrededores de
ningtfn quemador mientras otto estd encendidoo
Esto puede provocarte un choque eldctrico y hacer
que vuelque o tire ollas calientes.
Controles de los quemadores de
superficie
Los botones de mando que encienden y apagan los
quemadores de superficie est_n localizados en el panel
de control al frente de los quemadores.
Los dos botones en el lado izquierdo controlan los
quemadores izquierdos, delantem y tiasero. Los dos
botolies eli el lado derecho contmlan los quemadores
derechos, delantero y rrasero,
En las cocinas con quemadores sellados:
" E! quemador m_is pequefio (el trasero del tado
derecho) Ie dar_i los mejores resultados al cocinar a
fuego lelim, Of_ece un resuhado m_is preciso al
cocinar alimentos delicados, tales como salsas o
alimentos que necesitan set cocinados a fuego
lento por un largo perfodo de tiempo. La llama
se puede reducir a uli nivel bajo para cocinar a
fuego lento,
• E1 quemador delantero dei lado derecho tiene m_is
potencia que los otros y haiti que los lfquidos
alcancen el punto de ebullici6n con mayor rapidez,

Cocinando en la superficie
Luz de superflcie
(en ciertos modelos)
Utilice el interruptor del panel de control para
encender y apagar la luz.
Antes de encender un quemador
de superficie
Si su cocina incluye charolas recolectoras, debe
utilizartas siempre_
Aseg6rese de que todas ias parrillas de los
quemadores de la cocina estdn en su lugar antes de
usar cualquier quemadon
Para encender un quemador de
superficie
Modelos con ignici6n el_ctrica:
Empuje el bot6n de control hacia
adentro y h_alo girar para la
posici6n de LITE (encender),
Usted oir_ un chasquido ligero
("clic'), que es el sonido de la
chispa eldctrica encendiendo el
quemadon
Despues de encender un quemador
• Despuds de encender et quemador, haga girar el
bot6n p_ra ajustar el tamatio de la llama.
• No deje un quemador funcionando pot un peIfodo
largo de tiempo sin poner tm recipiente sobre la
parrilla. El acabado de la paMIla pudiera astillarse si no
tiene algfin recipiente disponible para absorber el calor,
• Asegfirese de que los quemadores y tas parriltas estdn
fffos antes de tocarlos con tas manos, agarraderas,
patios para timpiar u otros materialeso
• Aseg_rese de que el quemador que encendi6 sea el
que quiere usar.
C6mo seleccionar el tamano de la llama
Observe la llama, no el bot6n de control, al reducir
el calon
E1 tamafio de la llama de un quemador de gas deberfi
equipararse con el utensilio que estd usando_
PARA USAR CON
SEGURIDAD LOS
UTENSIL.IOS DE
COCCION NUNCA
DEJE QUE LA LLAMA
SE EXTIENDA POR
FUERA DE LOS
BORDES DE LOS MISMOS.
Es un despeMicio usar una llama que exceda el rondo
del recipiente; esto s6!o sirve para calentar el mango.
(continJa en la p_gina siguJente)

Cocinando en la superficie
Utensilios de cocci6n para ia superficie
Aluminio= Se recomienda el uso de utensilios de peso
mediano, ya que dstos distribuyen el calor r@idamente
y de manera uniformeo La mayorla de los alimentos se
doratfin de manera uniforme en una sartdn de
atuminio. Use una cazueta con tapa ajustada cuando
cocine con una pequefia cantidad de aguao
Hierro fundido: La mayoda de las sartenes producM.n
resultados satisfactorios si dstas se calientan con lentitu&
Utensilios de esmalte. El esmalte de algunos utensilios
pudiera derreti:se bajo ciertas condiciones. Siga las
recomendaciones del fabricante de estos utensilios en
cuanto a los m&odos de cocci6no
Vidrio: Hay dos tipos de utensilios de cocci6n de
vidrio, aqudllos que se usan solamente en el homo y
aqudllos para cocinar sobre la superficie de cocci6n
(cazuelas, cafeteras y teteras)° Los conductores de vidrio
se calientan con mucha lentitud.
Cerlimica de vidrio resistente al calor: Puede usatse
para cocinar en la superflcie o en el homo. Conduce el
ca!or muy lentamente y enfrh tambidn muy lentamente,.
Consulte las instrucciones del fabricante para asegurarse
de que se puede usal' en las cocinas de gas.
Acero inoxidable. Este metal pot sl mismo no es un
buen conductor del calory genetalmente se combina
con cobre, almninio u otros metates para rnejorar la
distribuci6n del calor. Por lo general, las sartenes
hechas de metal combinado funcionan
satisfactoriamente si se usan sobre una llama de
tarnafio mediano como 1o recomienda el fabricante.
Cocinando con ollas metdlicas
(tipo "wok")
(en los modelos con quemadores sellados)
Recomendamos que use
olla tipo "wok" que tenga el
rondo plano. Estas se pueden
comprar en su tienda
minorista local°
Una olla metAlica tipo "wold' tradicional con el fbndo
redondo se puede usar con el accesorio "Wok Holder"
(soporte de wok), modelo JXWK, el cual se puede
solMtar de su distribuidor de apalatos electrodom_ticos.
E1 "Wok Holder" (soporte de wok) encaja en la
superficie de la parrilla de la cocina y provee soporte y
una circulaci6n apropiada de aire finicamente papa los
"wolcs" aadicionales de rondo tedondo.
No use un "wok" con rondo piano con el "Wok Holder,"
No use el "wok" con
ningtln otro soporte en
forma de aro. El colocar el
aro sobre la parrilla del
quemador pudiera causar que .....
el quemador fiJncionam
inapropiadamente y esto causarfa niveles de mondxido
de carbono m_is altos que los permitidos poE'las normas
acmales,, Esto podrh set peligroso para su saludo No
trate de usar tales ollas tipo "wok" sin el aro. Usted
podr[a recibir quemadutas graves si el "wold' se voicara.
Asadores a la parrilla
(en modelos con quemadores sellados)
No use los asadores a la :,:i_ _:t:
parrilta sobre los quemadores
sellados de su cocina de gas.
Si 1o hiciera, esto causarfa
una combustidn incompleta ....
del gas, exponidndolo a usted
a niveles de mondxido de
carbono m_s altos que los pe_mitidos por las normas
acmales. Esto podrfa ser peligroso para su salud.
10

Control del horno, reloj y contador de tiempo
(la apariencia puede variar)
tAUTOMATIC OVEN
HR MIN
1. COOK TIME ON/OFF (tiempo de cocci6n
encendido/apagado). Optima este bot6n para
horneado autom_tico operaci6n.
2. TIMER ON/OFE (contador de tiempo
encendldo/apagado). Oprima este bot6n para
seleccionar la fianci6n del contadoL E! contador no
controla las operaciones del homo. Se puede poner
el contador hasta 11 horns y 59 minutos.
Para poner el contador de tiempo, optima primero
el bot6n TIMER ON/OFF (contador de tiempo
encendido/apagado), Optima los botones HOUR
(hora) y MIN. (minuto) para poner la cantidad de
tiempo que quiereo
Para cancelar el contador de tiempo, optima el
bot6n TIMER ON/OFF (contador de tiempo
encendido/apagado) hasta que desaparezca de la
ventanilla.
3. Luz de AUTOMATIC OVEN (luz automlifica
del homo). Se enciende cada vez que el homo ha
sido programado.
4. VENTANILI_ Muestra Ia hora del dia, los
pefiodos de tiempo que se fijan para el contador del
tiempo durante las funciones autom_ticas del homo
y, en ciertos modelos, la temperatura del homo.
5. Botones de HOUR y MIN. (botones de hora y
rain.), estos botones le permiten programar
tiempos hasta de 11 horns y 59 minutos.
6. TEMP RECa__LL (indicacion visual de la
temperatura). En ciertos modelos, usted puede
hacer que la temperatura fijada se muestie de
nuevo en la ventanilla indicadora, oprimiendo e!
bot6n de HOUR (horn) o MIN. (minuto)
DECREASE (disminuir) [-].
?
)VEN ON
©
0
PREHEATED
OFF
450'
7. Luz de CLEAN (luz de limpieza). Se enciende
cuando el homo esrd en ciclo de auto limpieza,
Despu_s de terminado e! ciclo de auto limpieza, la
luz se hard intermitente. Quite el seguro de ta puerta
y haga girar el bot6n de Oven Set (temperatura del
homo) hasta OFF (apagado).
8. Luz de OVEN ON (luz de encendido del
homo). Resplandece cada vez que el bot6n de
Oven Set (temperatura del homo) no est_i en la
posici6n de OFF (apagado) y esrd fijado en una
temperatura o funci6n. La luz se har_ intermitente
cuando et homo se apague para _ecordarle que
debe poner el bot6n de Oven Set (temperatura
del homo) en OFF (apagado).
1
Bot6n de Oven Set (bot6n de temperamra del
homo), Haga girar este bot6n hasta la funci6n o
tempetatura que deseeo Vea las secciones Homear,
Asar, Asar al fuego &recto y auto limpieza.
10.
START TIME ON/OFF (tiempo de inicio
encendido/apagado). Optima este bot6n y
HOUR (hora) y MIN. (minuto) para fijar la
automfitico encendido y apagado tiempo.
11.
CLOCK (reloj). Para poner el reloj, primero
optima e! bot6n CLOCK (reloj). Entonces, optima
el bot6n HOUR (hora) y MIN. (minuto) pata
cambiar la hora.
12. Luz indicadora de PREHEATED (luz indlcadora
de precalentamiento). Se enciende cuando et homo
alcanza la temperatura que usted ha seleccionado_
(continOa en ta p@Jna _Iguiente)
tl

Control del horno, reloj y contador de tiempo
(continuaci6n)
Reloj Automatico
Pata que el retoj funcione apropiadamente, debe de
ponerse para las funciones autom_ticas de tiempo del
homo. La hora del dfa no puede modificarse du_ante
un ciclo de horneado autom_tico o un ciclo de auto
limpieza.
Para fijar el reloj:
1. Optima el bot6n CLOCK (reloj),
(__ 2. Oprima el bot6n HOUR (hora) y
MIN. (minuto) para fijar Ia hora
XOUR MIN. del dia.
@@
Contador de tiempo
E1 contador de dempo es s61o un contador de minutos.
No controla las opemciones det homo. E1 tiempo mLximo
clue se puede esmblecer en el contador es de 24 bolas.
Para fijar el eontador de tiempo:
1. prima el bot6n TIMER ON/OFF
(contador de tiempo ertcendido/apagado)0
2. Oprima el bot6n HOUR (hora) y MIN,
(minuto) para establecer la cantidad de
tlempo en el contadot: E1 contador se
iniciar_ autom;iticamente &spuds de algunos
segundos de haber liberado et bot6n,
Para volver a porter el contador:
Si la ventanilla sigue mostrando el dempo sobrante,
usted puede cambiarlo oprimiendo los bot6nes HOUR
y MIN. (hora y minutos) hasta que la hora que usted
quiera aparezca en la ventanilla, Si el tiernpo sobrante
no aparece en la ventanilla, vuelva a hacerlo aparecer
oprimiendo el bot6n TIMER ON/OFF (contador
encendido/apagado) y luego oprima los bot6nes
HOUR y MINo (hora y minutos) hasta que ta nueva
hora que usted quiere aparezca en la ventanilla.
Para ca_celar el contador:
Pata cancetar el contador; el tiempo sobrante debe
aparecer en la ventanilla. Papa volver a poner el tiempo
sobrante, oprima una vez et bot6n TIMER ON!OFF
(contador encendido/apagado). Para cancelar el
contador, oprima de nuevo el bot6n TIMER ON/OFF
(contador encendido/apagado).
Tonos de final de ciclo (en ciertos modelos)
El tono de final de ddo puede quitarse oprimiendo el
bot6n TIMER ON/OFF (contador encendidoiapagado)
o, en ciertos modelos, oprLmiendo el bot6n COOKTIME
ON/OFF (tiempo de cocci6n encendido/apagado).
Interrupci6n de la energia el_ctrica
En ciertos modetos, despu& de una fa!la en la energ/a
el&tfica se reanudar_ autom_ticamente ta programaci6n
del homo cuando vue|va la eneigfa etdctrica.
Para modelos con un bot6n CLOCK (reloj), cuando
vuelva la enetgia el&trica, la ventanilla se encender_ y
apagar_i pa:a :ndicarte que debe fijar la hora del dh
basra que se oprima el bot6n o se haga girar el bot6n.
Vue|va a programar el relo i en la hora correcta del dh.
Si el horno estaba en operaci6n cuando ocurri6 la falla
en el suministro el&trico, el bot6n de Oven Set
(temperatuta del homo) debe volver a ponerse en OFF
(apagado). Luego vuelva a poner el bot6n como estaba
antes de la falla en la ene:gfa el&trica.
Si su modelo tiene tm bot6n COOK TIME
ON/OFF (tiempo de cocci6n encendldolapagado)
y su homo estaba programado para horneado
automfitico o asar cuando ocurri6 la faUa en la
energla d_ctrica, el reloj y todas las funciones deben
volver a programarse., Papa programarlos de nuevo,
primero ponga el bot6n de Oven Set (tempeIatu_a del
horno) en OFF (apagado), vuelva a programar el reloj, las
funciones y el bot6n otra vez como estaban antes de
que se presentara la falla en [a ene_gh el&trica.
Botbn de Oven Set (temperatu:a del homo)
El bot6n de Oven Set (tempe_atura del homo) mantiene
la temperatuta que usted program6 desde _VARM (fibio)
[t70°E (77°C,)] basra BROIL (asar al fuego &recto)
[550°E (288°C.)]° Tambidn posee la programaci6n OFF
(apagado) y CLEAN (auto limpieza).
La luz PREHEATED (luz de precalentamiento)
se endende cuando el homo alcanza la temperatura
que usted seleccion&
La luz OVEN ON (luz de encendldo del homo) se
encender_i cada vez que el bot6n de Oven Set
(temperatura del homo) no estd en posici6n OFF
(apagado) y estd en una temperatura o funci6n
p_ogIamada.
12

Usar su horno
Antes de usar su horno
Ce_ci6rese de que listed sabe c6mo fijar los controles
correctamente. Pracdque quitar y coloca:' las parrillas
cuando el homo estd frio. Lea Jainformaci6n y las
sugerencias en las p_ginas siguientes. Conserve esta gtffa a
mano, en un lugar don& pueda cons_tarla, especialmente
duvante las primeras semanas.
lgniciOn el_ctrica
E1 quemador del homo se enciende por ignicifn
el_ctrica.
Para encender et quemador, haga girar el bot6n de
Oven Set (temperatura del horno) hasta la temperatura
deseada. El quemador deber_i encenderse en los
siguientes 30-90 segundos.
Despuds de que et horno alcance la temperatura
seleccionada, el homo realiza un ciclo--se apaga
completamente y luego se enciende con la llama a toda
intensidad--para mantener controlada la Oven Set
(temperatura del homo)°
Interrupcibn del suministro el_ctrico
PRECAUCION: No intente encender el homo de
ignici6n eldctrica durante un falto del suministm
eldctrico. No ser;t posible encender e! homo ni el
asador cuando ocurra una intermpci6n det
suministro el&trico, E1 gas no circular_i a menos
que Ia barra incandescente estd catiente.
Si et homo est;t encendido cuando ocurre una
interrupci6n del suministro eldctrico, et quemador
del horno se apagar;i autom_ticamente y dste no se
podr:i encender de nuevo hasta que regrese la
electricidad
Luz del horno (en ciertos modelos)
Use el intermptor del panel de control para encender
o apagar la luz.
Los respiraderos del horno
El homo :ecibe ventilaci6n a trav& de aberturas en los
conductos de Ia parte posterior de la superficie de
cocci6no Vea la secci6n de CaracterMicaso No bloquee
estas aberturas cuando est6 cocinando en el horno--es
importante que no se interrumpa la circulaci6n de aire
caliente que sale del horno y el aim fresco que va a los
quemadores del homo,
• Las aberturas del respiradero y las superficies
cercanas pudieran calentarse demasiado. No
las toque.
• No deje arrdculos de
pl_tico sobre la
superficie de
cocci6n---_tos
podrlan derretirse si se
La apariencia y la ubicaci6n det
dejaran muy cerca del resptradero varMn
respiradero.
° Los mangos de las cazuelas y sartenes sobre la
superficie de cocci6n pudieran calentarse
demasiado si se dejan muy cerca del respiradero.
• Los arrdculos de metal se pondrdn calientes si se
dejan sobre la superficie de cocci6n y podr_an
causar quemaduras.
° No deje ningtln articulo sobre la superficie de
cocci6n. E1 aire caliente que sate por el respiradero
pudiera incendiar tos a:tfculos inflamables. Tambidn
pudiera causar un aumento de p:esi6n en los
recipientes ceriados, a tal punto que dstos pudieian
reventarse°
(continOa en la p'dgina ffguiente)
13

Usar su horno (continuaci6n)
Parrillas del horno
Las parrillas est_in
disefiadas con topes de
parada, de modo que al
colocarlas correctamente
dentro de sus soportes,
&tas se detendrdn antes
de salirse completamente
del homo. Tampoco se
incllnardn at quitar o
colocar alimentos en elias.
Protuberancia
Cuando cotoque utensilios de coccidn sobie una
parrilla, deslice la parritla hacia afuera hasta alcanzar
Ia protuberancia que se encuentra en el soporte de
la parrilla. Coloque el recipiente sobre la parrilla
y deslice la parrilla de nuevo hacia el interior del
horno. Esto eliminar_i la necesidad de meter las manos
dentro del homo caliente.
Para quitar ilna
paxrilla del homo,
deslfcelo hacia usted,
incline ef extremo
delantero hacia
arriba y saque la
parrilia.
Para volver a
colocarla, ponga la
parrilla en el soporte con los topes de parada (ta
extensi6n cmva de la parrilla) mitando hacia arrriba y
hacia la parte trasera del homo. Incline la parte
delantera hacia arriba y empuje la parrilla hacia el
rondo det horno hasta que pase la ptomberancia del
soporte. Entonces baje la parte delantera de Ia parrilla
y emptljela hacia adentro.
Posiciones de las parrillas
El homo dene cinco
soportes de parrillas para
hornear, asar y asar al fuego
directo, identificados en esta
ilustraci6n como A
(inferior), B, C, D, y E
(superior). Tambi_n tiene
una posici6n baja especial
(R) para asar cosas de gtan
tamafio, como un pavo grande--la partilla en esta
posici6n no est:i disefiada para deslizatse hacia afuera.
En las secciones de Hornear, Asar y Asar al fuego
directo se sugieren posiciones de cocci6n para las
parrillas_
Apagado automatico del horno
Como una funci6n de seguridad, este horno se
apagar_i automfiticamente despuds de 12 horas. Se
puede desactivar esta caractertstica en los mode!os que
incluyen controles de reloj usando los botones de
toque, y esto permite que el horno permanezca
encendido durante m_s de 12 hotas._
Para desactivar el Apagado autom_tico del homo,
pmsione los dos botones de aumento y disminuci6n de
MIN, (minutos) y mantenga la presi6n durante 4
segundos, La pantalla dejar_ de indicar la hora del dh
y en cambio exhibir_ "off".
Pata reactivar esta funci6n, presione los dos botones de
aumento y disminuci6n de MIN. (minutos) y mantenga
la presi6n dutante 4 segundos. La pantalta dejar_i de
indicar la hora det dfa yen cambio exhibir_ "on".
Humedad en el horno
A medida que su horno se calienta, el cambio de
temperarura en et aire dentro del horno puede
causar que se formen gotas de agua en et cristal
de la puerta. Estas gotas no causan dafio y se
evaporar3.n a medida que el horno continde
calent_ndoseo
14
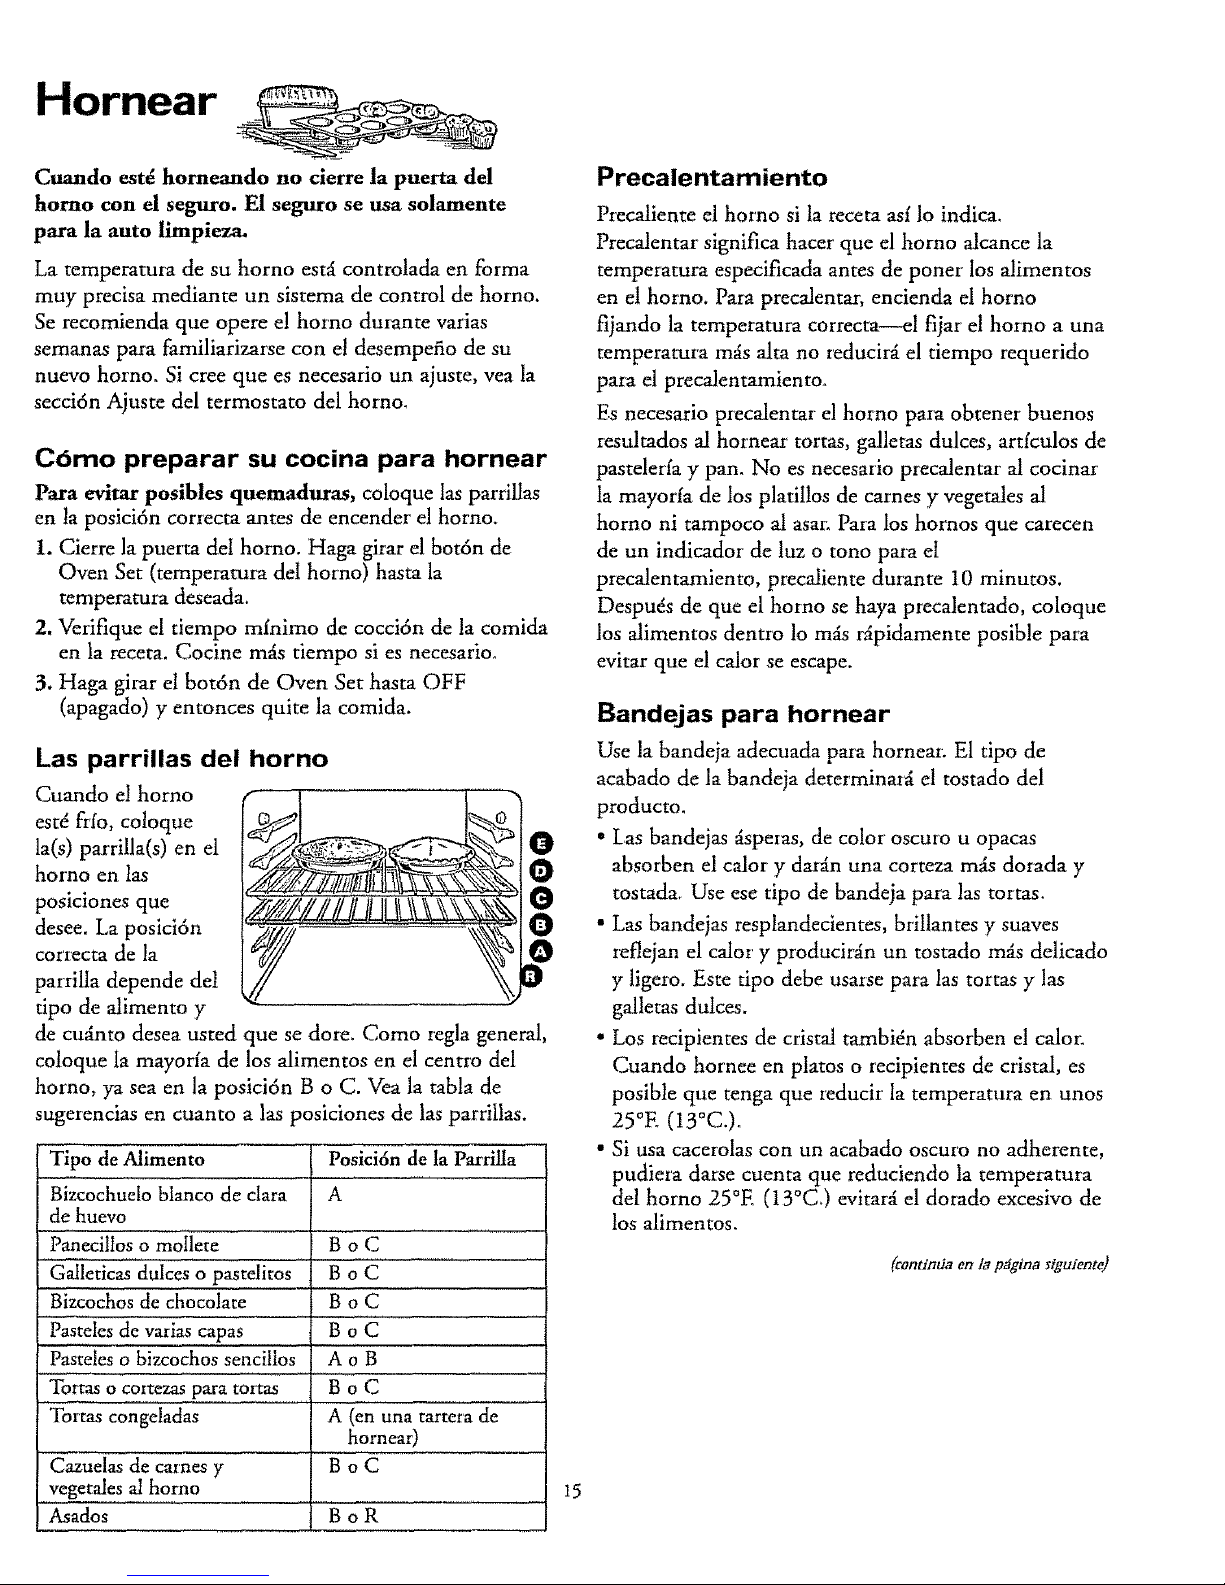
Hornear
Cuando estd horneando no cierre la puerta del
homo con el seguro. El seguro se usa solamente
para la auto limpieza.
La temperatura de su horno ester controlada en forma
muy precisa mediante un sistema de control de homo.
Se recomienda que opere e! homo durante varias
semanas para familiarizarse con el desempefio de su
nuevo horno, Si cree que es necesario un ajuste, vea la
secci6n Ajuste del termostato del homo,
C6mo preparar su cocina para hornear
Para evitar posibles quemaduras, coloque las parrilIas
en ta posici6n cor:ecta antes de encender el homo.
1. Cierre la puerta deI homo. Haga girar el bot6n de
Oven Set (tempeiatura deI horno) hasta la
temperatura deseada,
2. Verifique el tiempo mfnimo de cocci6n de la comida
en la receta. Cocine mlis tiempo si es necesario,
3, Haga girar el bot6n de Oven Set hasta OFF
(apagado) y entonces quite la comida,
Las parrillas del horno
Cuando el horno
estd fi'fo, cotoque
la(s) parrilla(s) en el
homo en las
posiciones que
desee. La posici6n
corlecta de la
parrilla depende det
tipo de atimento y
de cu_nto desea usted que se dote, Como regla general,
co!oque Ia mayorh de los alimentos en el centre del
homo, ya sea en la posici6n B o C. Vea la tabla de
sugerencias en cuanto alas posiciones de las parriltas.
Tipo de Alimento
Bizcochuelo blanco de clara
de huevo
Panecillos o mollete
Galleticas dulces o pastelitos
Bizcoch0s de chocolate
Pasteles de vai:ias capas
Pasteles o bizcochos sencillos
Tortas o cmtezas para tor_as
Tortas congeladas
Posici6n de la Parrilla
A
BoC
BoC
BoC ....
Boc ....
AoB
.....t30c .......
A (en una tartera de
hornear)
Cazuelas de carnes y B o C
vegetaies al homo
Asados B o R
Precalentamiento
Precaliente el homo si la receta asf lo indica,
Precalentar significa hacer que el homo alcance la
temperatura especificada antes de poner los alimentos
en el horno. Para precalentar, encienda el homo
fijando la temperatura correcta---el fijar el horno a una
temperatura m_s alta no reducir_i el tiempo requerido
para el precalentamiento_
Es necesario precalentar el horno para obtener buenos
resultados al hornear tortas, ga!letas dukes, artfculos de
pastelerfa y pan, No es necesario precalentar al cocinar
ta mayorfa de los platiI!os de carnes y vegetales al
homo ni tampoco al asar. Para los hornos que carecen
de un indicador de luz o tono para el
p:ecalentamiento, precaliente durante 10 minutos.
Despuds de que el homo se haya pmcalentado, coloque
los alimentos dentro 1o m_s r_pidamente posible para
evitar que el calor se escape.
Bandejas para hornear
Use la bandeja adecuada para horneaL El tipo de
acabado de la bandeja determinard el tostado del
producto,
°/.as bandejas _speras, de color' oscuro u opacas
absorben el calory darwin una corteza m_ dorada y
tostada, Use ese tipo de bandeja para las tortas.
• Las bandejas resplandecientes, brillantes y suaves
reflejan el calory producir_in un tostado miis delicado
y ligero. Este tipo debe usarse para las tortas y las
galletas dulces.
° Los recipientes de cristal tambidn absorben e! calor,
Cuando hornee en platos o recipientes de cristal, es
posible que tenga que reducir la temperatura en unos
25°E (13°C.).
• Si usa cacerolas con un acabado oscuro no adherente,
pudiera darse cuenta que reduciendo la temperatura
del homo 25°E (13°C.) evitar_ el dorado excesivo de
los alimentos.
(condmia on la p#gina siguiente)
15

Hornear (0o0u000 i 0)
Colocaci6n de las bandejas
Para que los alJmentos se cocinen de manera tmiforme y
se doren de rnane_a adecuada, debe haber suficiente
espacio en el horno para que el aire circule. Los resultados
obtenidos al hornear ser'an mejores si [as bandejas de
hornear se colocan 1o m_is posibte en el centro del homo
en vez de en ta parte delantera o la posterior.
Las bandejas no deber_n tocarse entre sf o tocar las
paredes del homo° Deje un espacio de 1 a 1_ pigs.
(2.5- a 4-cm) entre las bandejas, asf como tambi_n
entre Ins bandejas y la paIed posterior del horno, la
puetta y los lados. Si necesita usar dos parritlas,
col6quelas de forma escalonada de manera que una no
quede directamente sobre la otra.
Guia para hornear
Cuando use masas ya preparadas para hornear, siga ios
pasos de la receta o las instrucciones det paquete para
obtener mejores resuitados_
Galletas dulces
Cuando homee
galletas, las hojas planas
para hornear
(las que no tienen lados),
producen galletas con
mejor aspecto. Las -- _',,gk%.""
galletas horneadas en
bandejas con peque_os
costados que las to&an pueden tenet orillas m_
oscuras y el dorado podrla set p_lido o muy ligem.
Las galletas se pueden hornear sobre varias parrillas a Ia
vez pero el dorado puede set' disparejo debido a la
circulaci6n de aire reducida.
No utilice una hoja de hornear tan grande que
toque las paredes o la puerta del homo.
Para mejores resultados, meta en el homo s61o una
hoja de hornear.
Tortas
Para obtener mejore.s resultados, hornee Ins tortas en
bandejas _isperas, de color oscum u opacas, que producen
una corteza n_ dorada y tostada, AI hornear las tortas
congeladas que vienen en recipientes de papal de
aluminio deber'an colocarse sobre una ta,era de aluminio,
ya que la superficie brillante del papel de aluminio refleja
el calory 1o aleja de ta cot*eza de la tot*a; la tatera de
aluminio ayuda a retenerlo.
Pasteles
Cuando hornee pastetes, tenga en cuenta que los
moldes doblados o combados provocarfin un horneado
disparejo y productos con una forma inadecuada. Un
pastel que se hornee en un motde m_is grande que el
que recomienda ta receta, por lo general quedar_ m_is
crujiente, delgado y seco de !o que debeth. Si se
hornea en un molde m_is pequefio que el
recomendado, puede quedar crudo y la masa puede
desborda_e, Verifique la receta para asegurarse de que
el tamafio de! molde que use sea e! recomendadoo
Papel de aluminio
No se debe jamds
cuhrir la superficie
inferior del homo con
papel de aluminio.
Nunca cubra una
parrilla completamente
con papel de aluminio.
Esto perturbar_ la
circulaci6n de! calory evitar_i que se obtengan buenos
iesuttados al horneaL Una hoja de papel aluminio m_is
pequefia se puede usar para recoiectar las salpicadmas,
ponidndola en una parrilla m_is baja que estd unas
cuantas pulgadas por debajo de los alimentos.
16
No eche miraditas
Fije el contador de tiempo papa el tiempo estimado de
cocci6n y no abta ta puerta dd homo para mirar a los
alimentos. La mayor_a de las recetas le dan tiempos
mfnimos y mfiximos para hornear, tal como "hornee de
30 a 40 minutos."
NO abra la puerta del horno hasta que haya
transcurrido el tiempo mfnimo.. E1 abrir f?ecuentemente
la puerta deI homo dulante el tiempo de cocci6n har_
que el calor se escape y prolongat_i el tiempo requeddo
para hornear. Esto tambidn afectar:i el resultado final.

Horneado automatico (00d0 o,
COmo cocinar con cocci6n por tiempo
No cierre con seguro la puerta del homo durante el
homeado automdtico. El seguro se usa s61o para la
auto limpieza.
E! control del homo le permhe encender y apagar el
homo autom_iticamente en momentos especfflcos que
usted fije. Se describirirl ejemplos de Immediate Start
(encendido inmediato--el homo se enciende en ese
momento y usted lo fija para que se apague
autom_ticamente) y Delay Start (encendido demorado)
y Stop (usted puede fijar el control del homo para que
_ste encienda mils tarde, cocine pot un perfodo de
tiempo especffico y tambi6n se apague
autom_ticamente).
NOTA: Antes de empeza:; asegtirese de que el retoj de!
homo muestre la hora correctao
Para porter el reloj, optima el bot6n
CLOCK (reloj). Optima el bot6n HOUR
(hora) y MINo (minuto) hasta que se muestre
la hora correcta en la ventanilla°
COmo fijar el inicio inmediato y el
apagado automdtico
Para evitar posibles quemaduras, co!oque las partillas
en la posici6n correcta antes de encender e! horno.
H homo se encender_i inmediatamente y cocinar_i pot
un tiempo seleccionado. AI fin de! Tiempo de cocci6n,
el homo se apagar_ autom_ticamente.
1. Optima el bot6n COOK TIME ONIOFF
(tiempo de cocci6n encendido/apagado).
GG
HOUR MIN.
@@
2. Optima e! bot6n HOUR (hora)
y MIN_ (minuto) hasta que el
tiempo de horneado que desee
aparezca en la ventanilla°
3. Haga girar el bot6n de Oven Set (temperatura del
horno) hasta la temperatma deseada.
4. El homo se encenderL La ventanilla mostrar_i el
Tiempo de cocci6n que quedao Cuando el homo
alcance ta temperatura seleccionada, un tono
suena. E1 homo continuarfi cocinando la cantidad
de tiempo programada, entonces se apagar_
autom_ticamente.
5. Cuando el homo se apaga autom_iticamente, la luz
AUTOMATIC OWAN (la luz automfitica del
homo) parpadear_ y el control deÂhomo dar_i una
serial. Haga girar e! bot6n de Oven Set (temperatura
del homo) hasta OFF (apagado) para que deje de
parpadear y de hacer la serial.
6_
Retire la comida del homo. Recuerde, aunque el
homo se apaga de maneta autom_tica, los alimentos
siguen cocinfindose despuds de que los controles se
hayan apagado.
NOTA: Los alimentos que se echan a perder con facilidad,
tales como leche, huevos, pescado, alimentos rellenos, aves
y puerto no deben petmanecer en el homo m_ de una
hora antes o despu_s de cocinarse. La temperatura
ambiente promueve el desarroUo de bactefias dafiinas,
Asegfitese de que la luz del homo est_ apagada porque el
calor de la bombilla acelerarfi e! crecimiento de bactefias
dal']inaso
(contintia en la pJgtna sigulente)
17

Horneado automatico
C6mo fijar el inicio demorado y el
apagado automdtico
Breve recordatorio:
1. Optima el bot6n COOK TIME ON/OFF
(tiempo de cocci6n encendidolapagado)_
2. Oprima el bot6n HOUR (hora) y MIN, (minuto)
para poner el tiempo de cocci6n.
3. Oprima el bot6n START TIME ON/OFF
(tiempo de inicio encendidolapagado),
4. Oprima el bot6n HOUR (hora) y MINo
(minuto) para poner ta hora en que quiere que
ernpiece la cocci6n.
5. Haga girar e! bot6n de Oven Set (temperatura del
horno) basra la temperatuta deseada.
Para evitar posibles quemaduras, cotoque las parrillas
en la posici6n correcta antes de encender e! horno_
Puede fijar el control del homo para usar el inicio
demorado, cocinar pot un tiernpo especffico y entonces
apagarse autom_iticamente.
Por ejemplo: Digamos que son las 2:00 y que la hora
de la comida ser_ poco despuds de las 7:00_ La receta
sugiere 3 ho_as de horneado a 325°E (163°C,).
1, Optima el bot6n COOKTIME ON/OFF(tiempo de cocci6n encendido/apagado).
(_2. Pat_ 3 hotas de cocci6n, oprima el bot6n"3 00"
HOUR (hora) hasta que : aparezca
N0uR en la ventanilla.
@
_.'STA_ 3, Optima el bot6n START' TIME ON/OFF
I| T!M_[ (tiempo de inicio encendidolapagado).
4. Optima el bot6n HOUR (hota) i:asta que
"4:00" aparezca en la ventanilla. El contador
est_ puesto ahora para comenzar a cocinar en
2 horas, alas 4:00_
5. Haga gkar e! bot6n de Oven Set hasta la
temperatura deseada [por ejemplo 325°E (163°C.)].
H horno est,4 programado ahota pala empezar alas
4:00 y cocinar pot 3 horas a una temperatuta de
325°E (163°C,), At final de las tres horas de tiempo
de cocci6n (7:00), el homo se apagar_i
autom_ticamente. Cuando el homo se apaga
autom_iticamente, la luz AUTOMIKTIC OVEN (luz
autom;itica del homo) se encender-,l de maneta
internfitente y et homo dat;i una serial. Haga girar el
bot6n de Oven Set (temperatura del homo) hasta
OFF (apagado) para que el horno deje de encenderse
de manera intermitente y de dar la serial.
6. RecueMe, aunque el horno se apague
automfi.ticamente, los alimentos siguen cocin_ndose
una vez que los controles estfi.n apagadoso
NOTA:
" La zona de temperatuta baja de esta cocina [entre 150°E
y 200°F, (65°C. y 93°C,)] est,4 disponible para conservar
calientes los alimentos cocidos. Los alimentos que se
dejen en el homo por m_ de dos horas a estas
tempetaturas bajas, pueden echarse a perdero
° Los alimentos que se echan a perder con facilidad,
como ia leche, los huevos, el pescado, los rellenos, tas
aves y el puerco, no deben dejarse a la tempe_atu:a
ambiente pot' mils de una hota antes o despuds de
cocinarlos_ La tempetatuta ambiente promueve el
crecimiento de bacterias dafiinas. Cerci6rese de que la
luz del horno est_ apagada, ya que et calor de la
bombiUa acelerar;i e! crecimiento de bactedas dafiinas,
Preguntas y respuestas
P, _Puedo usar el contador de minutos durante la
cocci6n en el homo?
IL E1 contador de minutos se puede usar durante
cualquier funci6n de cocci6n.
R _Puedo cambiar la hora del reloj mientras eocino
por tiempo en el homo. _
K La hota en el tetoj no se debe canibiar durante
ningtln piograma de tiempo. Se deben parar esos
programas o esperar hasta que se rerminen antes de
cambiar la hora,
I8

Ajuste el termostato del horno..-iHagalo usted mismo!
Usted pudiera encontrar que su nuevo homo cocina
de manera diferente al otto que tenla. I_e
recomendamos que use su homo durante varias semanas
para que se familiarice con &re, tomando como guh los
perlodos de tiempo que aparecen en sus IecetaSo
Si tree que su nuevo homo es muy caliente o muy
frlo, usted mlsmo puede ajustar el termostato. Si
cree que es muy catiente, ajuste el termostato pata
hacerlo mil fifo. Si cree que es muy fifo, ajuste el
termostato para haceflo mil caliente.
No recomendamos el uso de term6metros, tales
como los que se pueden encontra: en las tiendas de
vfveres, para comprobar los puntos de fijaci6n de
tempetatura de su nuevo homo° Estos term6metros
pudieran tener una variaci6n de 20-40°E (11-22°C.).
Para ajustar el termostato:
1. Coloque el bot6n de Oven Set (temperatura del
homo) en la posici6n de OFF (apagado)°
2. Optima los botones de HOUR (hora) paraaumentar y disminuir a! mismo el tiempo
XOUR y mantenga la presidn durante 5 segundos
hasta que la pantalla cambie°
3. Inmediatamente antes de que cambie Ia pantalla,
presione el botdn de HOUR (hora) para aumentar o
disminuir la temperature en inc:ementos de 5 grados.
Se puede aumentar la Oven Set (temperatura del homo)
un miiximo de 35°E (19°C.) o disminuirla un mfiximo
de 35°E (19°C.).
Si se fija el ajuste del homo a menos de 1o que la
f_brica ha fijado, aparecer_ en el mostrador una serial
de menos "-" y la nueva temperatura apa:ecerfi en la
ventanilla.
4. Espete varios segundos para que el control se fije
automfi.ticamente y regrese a su fijaci6n previa.
NOT_A=Este ajuste no afectar_ilas temperaturas de asado
o de auto limpieza. El ajuste se retendr_ en la memoria
atln despuds de una interrupcidn de la corriente eldctfica.
Ajuste de la temperatura en modelos
con un solo boton de Oven Set
(temperatura dei horno)
1. Ponga el botdn en la posicidn OFF (apagado).
2. Saque el botdn tirando hacia afuerao
3. Oprima y mantenga oprimido
el botdn HOTTER (mil
caliente) o COOLER (rnil
fifo) durante 5 segundos para
aumentar la temperatura del
homo en 20°E (11°C.) o
disminuir ia temperatura en
Cooler Hotter (m_s
(m_lslifo)OFF caliente)
':%.%. -,*_;,,
20°F, (1 l°C.). (la apadencia puede variar)
Al ajustar el termostato, las luces siguientes se
encenderdn de manera intermltente indicando
d6nde se programard el termostato cuando libere el
bot6n de ajuste:
OVEN ON (encendido del orE,on .,__OFF o.
homo) indica que el te_mostato L.) _/.-"1 r'-.\
se programara en la o
prograrnacidn de f_brica. C)
PREHEATED (precalentado) C) _k,_ JA_ ,_
PREHEATED _O" _¢a"_"
indica que el termostato se o0°,s0.__
programaril en 20°E (1 I°C.) rail caliente.
CLEAN (limpieza) indica que el termostam se
programa:_i en 20°E (1 I°C.) mils fr_o.
4. Despuds de haber hecho el ajuste, restablezca el
bot6n.
19
El tipo de margarina afectara la
calidad del producto horneado
La mayor/a de las recetas para hornear se han
elabmado usando pmductos de alto contenido de
grasa como, por ejemplo, mantequilta o margarina
(80% de grasa). Si usted disminuye la cantidad de
grasa, es posible que la receta no dd los mismos
resultados que se obtienen con un producto que
tenga un contenido m_is alto de grasa°
L.a receta puede no darle buenos resultados si los
pastetes, tortas, pastelitos, galletas o dukes se elabotan
con productos para untar que tengan un bajo
contenido de g_asa. Mientras menor sea el contenido
de grasa taI pmducto para unta:, mil notables se har_in
estas diferencias.
Las normas fedeMes exigen que los producms etiquetados
como "margatina" contengan al menos 80% de grasa pot
peso. Por otra pate, las materias para untar que contienen
poca grasa, contienen menos gmsa y m_ agua. E1alto
contenido de humedad de estas productos para untax
afecta la texmra y el sabot de los alimentos homeados.
Para obtener mejores resultados con sus antiguas recetas
favoritas, use margarina, mantequitla o producms para
untar que contengan al menos 70% de aceite vegetal.

Como asar
No cierre la puerta del homo con seguro mlentras
clue estd asando. El seguro se usa solamente para la
auto llmpieza.
Asar es cocinar con calor seco. Las carnes demas o las
ayes pueden zsarse en su homo sin necesidad de
cubrirlas. Las temperamras de asar, clue deben ser ba_as
y estables, reducen las salpicaduras al mfnimo.
E1 homo tiene una posici6n
baja especial (R)
justamente encima de la
solera det homo. Usela en
esa posici6n cuando
necesite espacio adicional
papa cocinar, pot ejemplo,
cuando vaya a asa, un
pavo grande. La parrilla en esta posici6n no estd
disefiada para deslizarse hacia afuera.
Asar es reafmente un procedimiento que se usa para
homear las carnes_ Pot lo tanto, los controles del homo se
sittlan en hornea: (Listed puede oft como un chasquido,
indicando que el homo estit fiancionando adecuadamente).
La mayorh de las carnes condntlan cocin;indose
lige_mente cuando se dejan asentar despuds de haberse
sacado de! homo. El tiempo de asentamiento que se
recomienda para las carnes asadas es de 10 a 20
minutos° Esto permite que la came se endurezca un
poco hacidndola mils f;icil de corta: La temperatura
interna aumentar;i de unos 5° a 10°E (3 ° a 6°C.); para
compensa' pot este aumento de temperature, si 1o desea,
saque la came del homo m_s tempmno (cuando se
encuentre a unos 5° 6 10°E (3 ° a 6°C.) pot debajo de la
tempemm_a indicada en la Gula para asar).
Recuerde que los alimentos condnuanln cociMndose en
un homo caliente y pot Io t,'mto debe_n sacarse cuando
hayan alcanzado la temperatura interna que se desee.
2,
.
Coloque la parritla
en la posici6n B en el
homo para las carnes
pequefias (3 a 5 libias
[1,3 a 2,3 kg]) yen la
posici6n (R) para asar
las carnes mis grandes°
Compruebe el peso de la carne. Coloque la came
con el lado grasoso hacia arriba o las ayes con la
pechuga hacia arriba en la parrilla de asar sobre un
recipiente piano. Bafie la came con la gI_sa que se
va escurriendoo Seleccione una bandeja para asar de
un tamafio que se aproxime 1o m_ posible al tamafio
de la came° (La bandeja det asador a fuego directo,
con su rejilla, es un buen recipiente para esto).
Haga girar el bot6n Oven Set (temperatma del homo)
hasta la temperatura deseada, Vea la Guda para asar
papa las tempemtu:as y los tiempos aproximados de
COCCitSH.
AI terminar de asar, haga girar et bot6n de Oven Set
(temperatura del homo) basra OFF (apagado) y
entonces saque la comida del homo.
C6mo usar el papel de aluminio
Usted puede usar pape!
de aluminio para cubfir la
bandeja del asador. Esm
facilita Ia lirnpieza si usa ta
bandeja pata adobar,
cocinar con fmtas, cocLuar
carnes bien curadas o
;/, f ,i1',F
echar aderezos a los alimentos mientaas que se cocinan.
Coloque el papeI de aluminio de manera bien ajustada
alrededor de la bandeja.
2O

Carnes de asar congeladas
I_as carnes de asar congeladas de res, puerco, cordero, etc.
pueden empezarse a cocinar sin descongetarlas, pero
habrfi que aumentar e! tiempo de cocci6n entre 15 y 25
minutos adicionales pot cada libra (450 g) [15 minutos
por cada libia (450 g) para cames de asar de menos de 5
libras (2.3 kg) y mils tiempo para las carnes de mils peso].
Procure que las ayes est6n descongeladas antes de
asarlas. Las aves sin descongelar muchas veces no se
cocinan de manera uniforme. Algunas aves congeladas
se cocinan satisfactoriamente sin set descongeladaso
Siga las instrucciones que se indican en la etiqueta del
paqueteo
Cocinando con dos parrillas
Esto permite cocinar m_is de un alimento al mismo
tiempo. Pot ejemplo, mientras que se est_ asando un
pavo de 20 libras (10 kg) en la parrilla (R), se puede
afiadir otra parrilla en la posici6n D para que se pueda
cocinar otro !limento al mismo tiempo, como pot
ejemplo unas patatas en salsa btanca. Otros alimentos
que se cocinen junto con el pavo, deben afiadirse
hacia el fin!l del tiempo de cocci6n fijado para el
pavo. Pot ej. las patatas, que se cocinan en 1 hora,
deber_in afiadirse en el homo 1 hora antes de que
finalice el tiempo de cocci6n de pavo.
Gu|a para asar
Temperatura Grado de Tiempo de asar aproxlmado
Tipo del homo cocci6n en minutos por llbra/lrg Temperamra interna
Came
Cortes demos; costillas,
bola de alta calidad
o anca o aguay6n*
Pernil o paleta con
hueso de cordero*
Paleta, pemil o Iomo
de temera*
Lomo o costillas
o paleta de puerco*
Jam6n, precocido
Ayes
Polio o pato
Ped_os de polio
Pavo
325°E (163°C.)
325°E (163°C.)
325°E (163oC)
325_E (163_C.)
325OE (163oC.)
325°E (I63OC)
350°E (177oC,)
325°E (163°C.)
Crudo:
Medio:
Bien cocido:
Crudo:
Medio:
Bien cocido:
Bien cocido:
Bien cocido:
Para calentar:
Bien cocido:
Bien cocido:
Bien cocido:
3 a 5 llbras 6 a 8 llbras
(1.4 a 2.3 IW,) (2.7 a 3.6 kg)
24-35 18-25
35-39 25-31
39-45 31-33
21-25 20-23
25-30 24--28
30-35 28-33
35-45 30-40
35-45 30-40
18-23 minutos por libra
(450 gramos) (cualquier peso)
3 a 5 libras M_ de 5 libras
(1.4 a 2.3 lw,,) (2.3 kg)
35-40 30-35
35-40
10 a 15 llbras MKs de 15 libras
(4.5 a 6.8 kg) (6.8 kg)
16-22 12-19
140-I 50°E (60-66°C,)t
6 o o
150-1 0 E (66-7! C.)
170-185°E (77-85°C.)
140-150°E (60-66"C )t
150-160°E (66-7 I°C,)
170-!85°E (77-85°C_)
170-180°E (77-82°C.)
170-I80°E (77-82°C)
115-125°E (46-52°C,)
185-19O°E (85-88°C,)
185-190°E (85-88°C.)
En el muslo:
I85-190°E (85-88°C)
*Para carnes de asar sin hueso, enrolladas, de m_ de 6 pulgadas (15 cm) de espesor, afiada de 5 a 10 minutos pot libra (450 gramos) a los
perfodos de tiempo indicados anteriormente.
tel Departamento de Agricultura de los Estados Unidos dice "La came poco cocida es popular, pero usted debe saber que si se cocina
soIamente hasta los 140°E (60°C°), esto significa que algunos organismos que ptoducen envenenamiento pudieran sobrevivir". (Fuente:
Safe Food Book Your Kitchen Guide, USDA Rev. junio de 1985).
21

Como asar al fuego directo
No cierre la puerta del homo con seguro mientras
que est_ asando al fuego dlrecto. El seguro se usa
solamente para ia auto limpieza.
Asar al fuego directo es cocinar los alimentos
poni_ndolos directamente en contacto con las llamas
pot encima de los alimentos_ La mayorh de los
pescados y los cortes fiemos de came pueden ser asados
al fuego directo0 Siga estas instrucciones para reducir
las salpicaduras y el humo al mlnimo.
Es recomendable que Ia came se cocine a una
temperatura INTERNA de 160°F. (71°C,) y la ayes a
por lo menos a una temperatura INTERNA de 180°E
(82°C.). Si se hornea a estas temperaturas por to
general se puede proteger contra enfermedades
transportadas y transmitidas pot los alimentos_
La puerta del homo deberii estar cerrada mientras
que se est_ asando al fuego directo.
Voltee los alimentos solamente
una vez al asarlos_ Aselos pot
un lado, de acuerdo con el
tiempo indicado en la Guia
para asar paxa el primer lado_
Voltee los alimentos y use el
fiempo indicado paxa el
segundo lado como su gufa de cocci6n.
1. Si la came tiene grasa o cartflago alrededor de los
bordes, haga cortes verticales a travds de ambos con
una separaci6n de unas 2" (5 cm). Si desea, la grasa
se puede recortar, dejando una capa de 1/8" (3 ram)
de espesor aproximadamente.
2. Coloque la came en la rejilla y sobre la bandeja del
asador que viene con su cocinao Siempre use la rejilla
para que la gtasa pueda gotear en la bandeja del
asador; de otra forma los jugos pudieran calentaxse
1o suficiente como pa:a incendiarse_
3. Coloque la parrilla en la posici6n recomendada que
se sugiere en la Gufa para asax_
4. Cierre la puerta del homo pero sin ponerle el seguro.
Si el seguro se mueve hacia la derecha durante
una operaci6n de asar al fuego directo, la puerta
puede quedar cerrada y no pock_ abrirla sino hasta
que el homo se enfrfeo
5. Haga girax el bot6n de Oven Set (temperatura del
homo) hasta BROIL (asado al fuego directo)o
6. AI terminar de asar al fuego directo, haga girar e!
bot6n de Oven Set (temperatura del homo) hasta
OFF (apagado). Saque ia bandeja del asador del
homo y sirra el atimento de imnediato. Deje la
bandeja fuera de la cocina para enfi'iarse.
Uso del papel de aluminio
Usted puede usar papel de ,/,j
aluminio para recubrir la
bandejaylarejilladel _._<_ _
asado:. Sin embargo, tiene !_,'-
que moldear el aluminio %_
apret_indolo a la rejilla y
cortar las ranu:as de la
misma manera que tas tiene la rejilla.
Sin las :anuras, et papel de aluminio evitar_i que h
g:asa y los jugos de la carne goteen en la bandeja del
asadot. Los jugos se podHan calentar 1o suficiente
como para incendiarse. Si usted no hace las ranuias,
est_i fi'iendo, no asando.
22
Preguntas y respuestas
P. _Cuando se asa al fuego directo, es necesario que
se use siempre la rejilla en la bandeja?
R. Si. La rejilla suspende Ia carne por encima de la
bandeja. A medida que ta carne se cocina, los jugos
caen dentro de la bandeja, conservando la came mlis
seca. Los jugos son ptotegidos por la rejilta y se
mantienen m_is fHos, evitando asI las salpicaduras y
el humo excesivo.
P. _Deber_a ponerle sal a las carnes antes de asarlas
al fuego directo?
R. No. La sal extrae los jugos y permite que se
evapoten° Siempre eche la sal despu_s de cocinar.
Voltee la cax'ne con tenazas; si la pincha con un
tenedot; los jugos escapar_n. Cuando estd asando
ayes o pescado, unte cada uno de los lados a
menudo con mantequillao
P. _Por qu_ las carnes que aso al fuego directo no se
doran como es debido?
R. Compruebe si est_i usando h posici6n recomendada
para Ia parriUa. Ase al fuego di:ecto los alimentos
pot el perfodo de tiempo m_s lax'go que se indique
en la Guta pata asar al fuego directo. Voltee los
alimentos solamente una vez mientras que los asa.

Guia para asar al fuego directo
La puerta del homo debe estar cerrada durante el
proceso de asar al fuego directo.
• Siempre use la bandeja y la rejilla det asador que
vienen con su cocina. Estfin disefiadas para
minimizar la cantidad de humo y salpicaduras ya que
atrapan los jugos en la parte inferior de la bandeja
de! asador, que estfi protegida. •
• Para filetes o chuletas, haga cortes parejos en las orillas
exxeriores de la came. Para cortar, realice cortes
tm_nsversates a ttav& de la superficie exterior de la grasa,
llegando basra la orilla de la came. Use pinzas para
voltear la came y asf evitar'a picarla y que pierda jugos.
Posici6n de ! = lado
Alimento Cantldad y/o espesor parrillas minutos
Tocino 1/2 libra (227 g) C 4
(aprox, 8 trozos finos)
Came molida I libra (450 g) D I0-I 1
Bien coclda (4 hamburguesas) 1t2"-314"
(I3-19 ram) de espesor
Bistec
Poco cocido
Medio cocido
Biea cocido
Poco cocido
Medio cocido
Bien cocldo
Polio
I/t (2.5 cm) de espesor
[I-!¼ libras
(450 g-680 g)]
1½" (3.8 cm) de espesor
[2-2½ libras
(907 g-IA3 kg)]
1 entero [2-2½ libras
(907 g-l. 13 kg)]
separado a Io largo
Con hueso
4 trozos de pechuga
C
C
C
C
C
C
B
9
t2
13
10
12-15
25
30-35
B 25-30
Pan, pastel
Pan (tostado) o 2-4 trozos D 2-3
Pasteles de pan I paquete (2)
Panecil!os ingleses 2, separados D 3-5
Colas de langosta 2-4 C I3-I6
[6-8-oz, clu
(170 g-227 g)]
Pose,ado Filetes de I libra (450 g) D 6
1/4"-1/2"
(6-13 ram) de espesor
Trozos de jam6n I" (25 cm) de espesor C 8
Precocidos 1/2" (13 ram) de espesor D 6
Chuletas de puerto 2 {I/2" (13 mm)j de espesor D 10
Bien cocidas 2 [I" (2,5 cm)} de espesor, D I5
aprox. 1 libra (450 g)
Chuletas de cordero
Medio cocidas 2 [I" (25 cm)] de espesor; D 8
Bien cocidas aprox, I0-12 oz, D I0
(284-340
Medio cocidas 2 [1 _" D I0
Bien cocidas aprox. I libra (450 g) D 17
Salchlchas de Viena, Paquete de I libra D 6
salchichas semejantes, (450 g) (10)
_recoddas, bratwurst
23
Si 1o desea, adobe las carnes o polio antes de asarlos
a! fuego direcm. O ctlbralos con salsa para barbacoa
de 5 a 10 minutos solamente.
Cuando acomode los alimentos en la bandeja, no
deje que las orillas grasosas cuelguen a los tados, pues
podrfan ensuciar d homo con la grasa que escurre.
E1 asador no necesita precalentarse. Sin embargo, para
alimentos muy delgados, o para aumentaa el dorado,
precaliente si lo deseao
Los filetes congelados pueden asarse al fuego directo
colocando la bandeja y la rejilla del asador en la
siguiente posici6n m_s baja y aumentando el tiempo
de cocci6n que se da en esta gufa 1'/2veces por lado.
2_lado
minums Observadone.s
3 Coloque en un solo hive!,
Separe il_almente Hasta 8 porciones toman
aprox, e* mismo tiempo.
7 Los bistecs de menos de I" (2.5 cm) de espesor se
5-6 cocinan completamente antes de dorarse.
8-9 Se recomier_da ffeff en una sartdn
6-7 C6rtetes Ia grasa_
10-12
I6-18
15-20 Reduzca el tiempo 5 a I 0 minutos pot lado para polio
ell [rozo$,,
Cubra con mantequil[a derrerida,
Ase al fuego dlrecto primero el lado con piel
I0-15 hada abajo,
1t2-1 Separe igualmellte. Coloque los panecilIos ingleses Iado
cortado arriba y cubra con mantequilla si Io desea.,
No dd Corte a travds de la concha y separe hasxa abierm
vuelta. Bamice con mantequilta derretida antes de mat'
al fuego dlrecto y despu& de ta mitad del tiempo.
' 6 Malleje y dd vudta con cuidado Cubra con
mantequilla de lim6n antes de maxal fuego directo
y durante el asado af fuego directo si 10 &sea.
Precaliente el asador para aumentar el dorado.
...... 8 - Aumente el tiempo de 5 a 10 minutos pot lado para
6 jam6n de 1½" (3.8 cm) de espesor o curado en casa.
8 C6rteles la grasa.
8
4-7 C6r_eles [a grasa
I0
4-6
12-I4
I-2 Si 1o de.sea, separe las salchichas por la mitad a 1o
largo; corte trozos de 5-6' (I3-15 cm)

Operacion del horno de auto limpieza
Tiempo normal de fimpieza: 4 horas y 20 minutes.
Antes de un ciclo de limpieza
Recomendamos que deje una ventana abierta pare
ventilar o que utilice una campana de ventilador
durante el primer ciclo de auto limpieza.
1, Saque de[ homo la bandeja del asador, la rejilla, todas
las ollas y cualquier pedazo de papel aluminio que
haya quedado pues no podr_n resistir las altas
tempemmras de limpieza.
NOTA: Quite las parrillas del homo antes de iniciar
el ciclo de auto limpieza.
2, Limpie las manchas m_s grandes de la solera del
homo. Si usa jab6n, enjuague muy bien antes de la
auto limpieza para evitar la formaciSn de manchas.
LUz de ;,::::,, ,,, I Estructura
_L_,_ , { delantera
homo _ del homo
la puerta
o 0o,.o o
Area exterior
.............,i:i.................:i | a:ajunt_
3. Limpie las salpicaduras o derrames en la pate delantera
de la estmctura de! homo y s61oel fil'eaen la puerta del
homo exterior a la junta con una malla htlmeda. La
parte delantera de la estmctma deI homo y el fireaen la
pueila del homo exterior a la junta no son limpiadas
pot' el cido de auto limpieza. Use detergente y agua
caliente con un estropajo de acem enjabonado y luego
enjuague bien con una me_la de agua y vinagreo Esto
ayudar_ a evitar que quede tin residuo color card que se
forma cuando el homo est_ c_ente, Seque estas _eas
con tma teta seca. No limpie la junta.
Lirnpie con agua y jab6n ta pate superior, los costados
y la pate delantera exterior de la puerta det homo.
No atilice abrasivos ni limpiadores para homos.
Asegtlrese de que la cubierta de la bombilla estd
bien puesta.
No frote ni limpie la junta de la puerta--el material
de fibre de vidrio de ta junta tiene una resistencia
extremadamente baja a la abrasi6n. E1que la junta de
la puerta estd intacra y ajuste peffectarnente es esenciat
para la opemci6n eficiente del horno, desde el punto
de vista de la ene_gfa, y para obtener buenos msultados
al homean Si observa que la junta se desgasta, se roe o
se datha de cualquieta forma, o si no est,4en su sitio en
la puerta, debe_ pedk que la reemplacen.
4. Cierre y ponga el seguro de la puerta. Asegfirese
de que la luz del homo est_ apagada. Si no se
apaga la luz del homo, la vida de la bombilla se
acortar.4 o se puede fundir inmediatamente.
PRECAUCION: Las parrillas de los quemadores y
charolas recolectoras (en ciertos modelos) nunca
deben limpiarse en el homo de auto limpieza.
No ufilice limpiadores comerdales para homo o
protectores para homo dentro o cerca dd homo de
auto limpieza. Una combinaci6n de cualquiem de estos
productos agregada a las altas temperaturas del ciclo de
limpieza puede dafiar d acabado porcelanizado del homo.
24

C6mo preparar el horno para la limpieza
Breve recordatorio:
1, Cierre ta manija del seguro de la puerta.
2, Coloque el bot6n de Oven Set (temperatura del
homo) en la posici6n de CLEAN (timpieza).
Si e! homo est;i demasiado caliente y usted empieza a
programar un ciclo de limpieza, no podr_, deslizar et
seguro.
Deje tiempo adicionai para que se enfrfe antes de tratar
de empezar el ciclo.
1. Siga las instrucciones para preparar el homo paxa
la limpieza.
2. Deslice la manija det seguro
hacia Ia derecha hasta donde
sea posible.
Nunca fuerce la manija del iI|iMI_
seguro, E1 hecho de forzar la
manija da.fiarli el mecanismo del seguro.
3. Ponga el bot6n de Oven Set (temperatura del
horno) en CI_EAN (limpieza)_ Se encenderfin las
luces de CLEAN (limpieza), OVEN ON
(encendido del horno), AUTOMATIC OVEN (luz
autom_itica del homo) y COOK TIME ON/OFF
(tiempo de cocci6n encendido!apagado).
NOTA: Si usted hace girar el bot6n de Oven
Set (temperatura del homo) antes de cotter el
seguro, la luz de CLEAN (limpieza) se encender_
intermitentemente° Deslice el seguro hacia la de:echa.
La duracifn del cido de limpieza normalmente es
de 4 horas y 20 minutos, F n ciertos modelos usted
puede cambiar el tiempo entre 3 horas y 5 horas y 59
minutos, dependiendo de 1o sucio que estd el horno_
Usted tiene un minuto para cambiar el tiempo de
limpieza. Use los botones de HOUR (hora) y MtN.
(minutos) para cambiar el tiempo total de limpieza.
Tanto la luz OVEN ON (luz de encendido del homo)
como la luz CLEAN (limpieza) se encender_in
intermitentemente cuando el tiempo de limpieza haya
terminado.
Despu_s de usar el cido de limpieza, et seguro de la
puerta y el bot6n de Oven Set (temperatura del homo)
deben volver a ponerse en su posici6n original antes de
que pueda usar el homo,
Cuando la luz del CLEAN (limpieza) se encienda de
modo intermitente, deslice la manija del segu:o hasta
Ia izquierda, tanto como sea posibte, ponga el bot6n de
Oven Set (temperatura del homo) en OFF (apagado) y
abra la puerta.
Nunca fuerce la manija del seguro. Espere hasta que
la luz del Oven Set (tempeiatura del homo) se
encienda de manera intermitente y e! seguro se
deslizar_i con facilidad. Forzar ta manija del seguro
puede dafiar el mecanismo del seguro de la puerta.
Para parar un ciclo de limpieza
1. Ponga el bot6n de Oven Set (temperatura del
homo) en OFF (apagado)o
2. Espere hasta que et homo se haya enfriado por
debajo de la temperatura del seguro antes de quitar
el seguro. No podr_ abrir la puerta de inmediato a
menos que el homo se haya enfriado por debajo de
la temperatuia del seguro_
('cuntJnda en la p.4gina siguiente)
25

Operacion del horno de auto limpieza (co0t,000d 0)
C6mo demorar el inicio de ia limpieza
(en ciertos modelos)
Breve recordatorio:
1. Cierre la manija del seguro de la puerta_
2. Coloque el bot6n de Oven Set (temperatura del
horno) en la posici6n de CLEAN (limpieza),
3. Oprima el bot6n START TIME ONIOFF
(hora de inicio encendido/apagado).
4. Oprima los botones HOUR (hora) y MIN.
(minuto) pala programar la hora det dfa en
que quiere que empiece ta limpieza. El Ciclo de
auto limpieza empezar:i autom_ticamente en la
hota seleccionada.
Tanto las luces de OVEN ON (encendido del
horno) y CLEAN (limpieza) se encender_in de modo
intermitente cuando el ciclo de limpieza haya
terminado.
6. Cuando la luz de CLEAN (limpieza) se encienda
intermitente, deslice la manija del seguro hacia la
izquierda hasta donde sea posible, haga girar el
bot6n de Oven Set (temperatura del homo) hasta
OFF (apagado) y abra la puerta.
Nunca fuerce la manija del seguro. Espere hasta
que la luz del seguro de ta puerta se encienda de
manera intermitente y el seguro se deslizar_i con
facilidad. Forzar ta manija del seguro puede dafiar
el mecanismo del seguro de la puerta.
El inicio demorado consiste en fijar el contador del
horno para iniciar el ciclo de limpieza en un momento
posterior a la hoia actual del dh.
Por ejemplo: digamos que son las 7:00 y que usted
quiere que el homo comience la auto limpieza alas
9:00, despuds de que haya terminado de usar ta cocina.
El homo est_i sucio con suciedad normal, pot' Io que se
preferir_ el Ciclo normal de 4 horas y 20 minutos°
1. Siga los pasos pata prepa_ar el homo para ta limpi_a.
2. Destice la manija del seguto hacia la derecha hasta
donde sea posible.
Nunca fuetce la manija del seguro. El hecho de
forzar la manija dafiar_ el mecanismo del seguro.
3. Coloque el bot6n de Oven Set (tempetamra
del horno) en la posici6n de CLEAN (limpieza).
4. Oprima el bot6n STAt_r TIME ON/OFF
(hota de inicio encendido/apagado).
5. Optima ei bot6n HOUR (hora) hasta que tas
9:00 aparezca en la ventanilla. El contador de
tiempo est,. ahora programado para empezar a
limpiar en 2 horas, a Ias 9:00,
El Ciclo de auto limpieza se programarii de modo
autom_itico pata empezar a tas 9:00 y terminar
a la 1:20_
Despues de un ciclo de Umpieza
Despu_s de un cido de limpieza, es posible que
observe un poco de ceniza blanca en el homo. $61o
Ifmpiela con una toalla hfimeda.
Si las manchas blancas permanecen, qultelas con una
fibra de acero llena de jab6m Cetci6rese de enjuagar
perfectamente con una mezcta de vinagre y agua. Estos
dep6sitos pot' 1o general son residuos de sales que no
pueden quitarse en ciclo de limpieza.
Si el homo no queda limpio despu_s de un cido de
limpieza, el ciclo puede tepetirse.
NOTA_
° No se puede ajustar el homo para ta coccidn hasta
que el homo se enfrie 1o bastante como para que se
pueda abrir la puerta.
• Durante la auto limpieza del homo, se puede oprimir
el bot6n CLOCK (reloj) para mosttar la hora. Para
volver al conteo regresivo, optima el botdn COOK
TIME ON/OFF (tiempo de cocci6n
encendido/apagado).
26

Preguntas y respuestas
P, _Puedo utillzar limpiadores comerciales para
homo en cualquiera parte de mi homo de auto
limpieza?
R. No deber_n usarse limpiadores ni recubfimientos en
ninguna parte de este homo. Si los usa y no !os
enjuaga perfectamente con agua y limpia con una
tela hasta dejar la superficie perfectamente limpia
despuds, e! residuo puede corroer la superficie del
homo y dafiar las partes met_licas la siguiente vez
que Iimpie automfiticamente el horno_
P. _Oud debo hacer si durante la limpieza se
produce humo en exceso?
R. Esto es causado pot un exceso de suciedad. Haga
girar el bot6n de Oven Set (temperatura del horno)
hasta OFF (apagado), Abra las ventanas para que e!
humo salga de la habitaci6n. Espere hasta que la luz
de CLEAN (limpieza) se apague. Limpie con una
tela el exceso de suciedad y vuelva a programar el
ciclo de limpieza.
P. _Es normal el "crujido" y el "ruido" que escucho
durante la limpieza?
R. Sf. Es el sonido de! metal que se calienta y se enfrh
tanto en las fanciones de cocinar como las de limpian
P. _Debe percibirse algiln olor durante ta limpieza?
R, Sf, puede haber un olor leve dumnte las primeras
limpiezas. Si no se limpi6 bien el exceso de
suciedad, _ste podrh originar un olor cuando se
haga la limpiezao
P. _Por qud quedan cenizas en mi homo despu_s de
ia limpieza?
R. Algunos tipos de suciedad dejan un depdsito, que es
ceniza. Puede quitarse con una esponja o tela
htimedao
R Si el reloj de mi homo no estli puesto en la hora
correcta, _puedo aun as_ llevar a cabo la auto
limpieza de mi homo?
IL Si el reloj no est_ en la hora correcta, no podr_
programar la funci6n para demorar la limpieza para
que termine a una hora dete_minada.
P. _Qu6 origina las rayas parecidas a cabellos en la
superflcie esmaltada de mi homo?
R. Esta es una condici6n normal que resulta de
calentar y enfriar durante la limpieza. Estas rayas no
afectan et desempefio de su homo.
P. _Puedo cocinar comida sobre la superficie
mientras el homo est_ en el ddo de auto
limpiez_
IL SL Mientras et horno estd en el ciclo de auto
limpieza, se puede usar la cubierta como lo hace
normalmente_
R La luz de CLEAN (limpieza) se enciende de
manera intermitente cuando programo el ciclo
de limpieza. _Qu_ pasa?
R. La luz de CLEAN (limpieza) se encenderfi de
manera intermitente hasta que la manija de1 seguro
se mueva a la derecha_
P. _Puedo limpiar la junta alrededor de la
puerta del homo?
IL No, esta junta es esencial papa un sello bueno del
homo, y se debe tener cuidado de no frotar, dafiar o
mover esta junta.
27

Cuidado y limpieza
Et cuidado y la limpieza apropiados son importantes
para que su cocina le proporcione un servicio eficiente
y satisfactorio. Siga con exactitud estas instrucciones
para el cuidado de su cocina, para ayudarle a asegurar
un mantenimiento seguro y adecuado.
CERCIORESE DE QUE LA ENERGIA
ELECTRICA ESTA DESCONECTADA ANTES DE
LIMPIAR CUALQUIER PARTE DE SU COCINA.
PRECAUCION" NO HAGA FUNCIONAR EL
QUEMADOR SI NO TIENE TODAS I.AS
PIEZAS DE ESTE Y LAS CHAROLAS
RECOI_CTORAS (SI ESTA EQUIPADO CON
ELLAS) COLOCADAS EN SU LUGAR.
Ensamblaje de quemadores sellados
(en ciertos modelos)
Parrilla
Tapa del quemador
Charola recolectora
(en ciertos modelos)
Cabeza del quemador
Electrodo
Apague todos los controles antes de quitar las
piezas del quemador y las charolas recolectoras
(si las hubiera).
Las parrillas y tapas de los quemadores y las cabezas de
los quemadores y las charolas recolectoras (si las hubiera)
meden levantarse f_cilmente, 1o que facilita su limpieza.
El electrodo del encendedor _ \
pot dfispa queda expuesto (k. U_Electrodo
cuando se quita la cabeza "-_ _ _
del quemadm_ Cuando tmo de los quemadores se
pone en la posici6n de LITE (encender) todos los
quemadores chispeano No intente desarmar o limpiar
alrededor del quemador mient_as que otto quemador
estd encendido. Usted podi'h recibir tm electrochoque
y pudieta volcar cualquier recipiente c_iente que se
encuentre sobre Ia supefficie de cocci6n_
Cabezas de los quemadores
(en los quemado:es seHados solamente)
NOTA= Antes de quitar las cabezas de los
quemadores y las tapas, recuerde su tamafio y el
sitio donde est_in Iocalizadas. Despu& de
limpiarlas, vuelva a colocarlas en el mismo tugar.
28
Para una ignici6n
adecuada, cerci6rese de
que el hueco pequefio de
la secci6n que se ajusta
sob_e el electiodo se
mantenga abierto.
Una aguja de coser o un alambre
delgado es bueno para quitar atascos.
Las ranuras en las cabezas de los quemadores de su
cocina deben mantenerse limpias en todo
momento, para obtener una llama unfforme y fibre.
Usted debe limpiar los quemadores de superficie
peri6dicamente, especiatmente despuds de que ocurran
dertamamientos, los cuales pueden obstruir las
abermras.
Para quitar los alimentos requemados, sumeija las
cabezas de los quemadores en una solucidn de agua
caliente y detergente lfquido suave durante unos 20 a
30 minutos. Para manchas m_is dif_ciles de quitar; use
un cepillo de dientes.
Antes de colocar de
nuevo las cabezas de los
quemadores, sacuda et
exceso de agua y sdquelas
completarnente
ponidndolas en un homo
a temperatura templada
durante 30 minutos.
Vueiva a colocar en su sitio las
cabezas de los quemadmes y las
tapas. Cietci6rese de volver a colocarlas en e! lugar
correcto. Hay una tapa pequefia, dos de tamafio
medio y una grande.
Despu6s de la limpieza,
cerci6rese de que la
ranuta en la cabeza del
quemador est6 cotocada
sobre el electrodo
NOTA: En ciertos modelos todas cabezas de los
quemadores y las tapas son del mismo tamafio y
pueden ufilizarse en cualquiera de los 4 sitios
requeridos.

Tapas de los quemadores
(en los quemadores sellados solamente)
Lev_ntelas cuando estdn fHas. Lave las tapas de los
quemadores con agua jabonosa caliente y enjufiguelas
con agua lirnpia. Las puede restregar con un estropajo
de pl_stico para quitarle las partfculas de alimentos
requemadas.
S_quelas en el homo a temperatura templada o con un
patio--no las vuelva a ensamblar mientras que est6n
mojadas. Reponga las tapas de los quemadores.
Ceri6rese de que las tapas se vuelvan a poner en el
quemador al que pertenecen de acuerdo con su tamafio.
Hay una tapa pequefia, 2 medianas y una grande.
pequefia
mediana
mediana--
mediana
-Q O-
-- pequefia
--grande
Parte delantera de la cocina
NOTA: En ciertos modelos todas las tapas son del
mismo tamafio y pueden utilizarse en cualquiera de los
4 sitios requeridoso
Charolas recolectoras
(en ciertos modelos)
Retire tas parrillas y
levante las bandejas
recolectoras. Las
charolas recolectoras se
pueden limpiar en la
lavadora de platos o a mano. Para limpiar manchas de
alimentos requemados, coldquelas en un recipiente
cubierto (o en una bolsa de plfistico) con 1/4 de taza de
amonlaco para deshacer la suciedad. Si fuese necesario,
restriegue con un estropajo que contenga jab6n.
Cuando reemplace las charolas recolectoras, procure
que estdn en la posici6n correcta.
PREC.akUCION: No limpie las charolas recolectoras
en et ciclo de auto limpieza del homo.
Las parrillas de los quemadores
Levante las parrillas y
retffelas cuando estdn
frfas. Las parrillas
deben lavarse con
regularidad y, desde luego, despuds de ocurrir
derramamientos. L_ivelas con agua caliente y jabonosa
y enju_iguelas con agua limpia, Despuds de limpiartas,
s_quelas pot completo ponidndolas en el homo por
unos pocos minutos a una temperatura templada. No
ponga las parrillas de nuevo en su lugar mientras que
estdn mojadas, AI reponer las patrillas, cerci6rese de
que estdn colocadas correctamente sobre los
quemadores.
Para evitar que se oxlden las parrillas de hierro
fundido, aplique una ligera capa de aceite de cocinar
en la parte inferior de las parritlas.
Para limpiar los alimentos requemados, coloque las
parrillas en un recipiente cerrado (o en una bolsa de
pl_stico) con i/4 de taza (62 ml) de amonfaco para
deshacer la suciedad. Ddjelas teposar toda la noche
(o aproximadamente 12 horas) y entonces restrdguelas
con un estropajo que contenga jab6n si fuese necesario.
Enjuague bien las parrillas y sdquelas completamente
antes de volverlas a co!ocar en la cocina.
Aunque son duraderas, las parrillas gradualmente
perder_in su lustrosidad, aunque usted las cuide con
esmero. E.sto se debe a que est_in continuamente
expuestas a temperaturas altas.
No deje un quemador funcionando por un largo
perlodo de tiempo sin poner un recipiente sobre la
parrilla. E1 acabado de ta parrilla pudiera astillarse si
no hay ningtln recipiente que absorba el cator0
PRECAUCION: No limpie las parrillas en la
lavadora de platos o en el cido de auto Iimpieza
del homo.
(continda en la pggina ffguiente)
29

Cuidado y limpieza
Ouemadores estandar gemelos
(en ciertos mode!os)
PRECAUCION: NO FLAGA FUNCIONAR EL
QUEMADOR SI NO TIENE TODAS LAS
PIEZAS DE ESTE Y LAS CHAROLAS
RECOI_CTORAS (SI ESTA EQUIPADO CON
ELLAS) COLOCADAS EN SU LUGAIL
Parrilla
Charola recolectora
(en ciertos mode[os)
Quernador
En los modelos con quemadores estdndar gemelos,
la superflcie de cocci6n se puede levantar para
proveer acceso fficil.
Apague todos los controles antes de quitar las
piezas del quemador y las charolas recolectoras
(si las hubiera).
Las parrillas de los quemadores, asf como las charotas
recolectoIas (si las hubiera) se pueden levantar,
facilitando as_ la limpieza.
Para obtener una ignici6n l_
adecuada y una llama
uniforme y libre, procure
en todo momento "ti/l_._"_
mantener limpios los tVl
huecos en los quemadores
de supeKicie de su cocina.
::===.. Limpie
bien cada
uno de los
hLlecos eli
cada
quemadot
Usted debe limpiar los quemadores de supertlde,
peri6dicamente, espedalmente despu_s de clue
o_ derramamientos, que pudie_an obstruir estos
huecos. Limpie los quemadores de supeKicie.Si ocurren
derramamientos excesivos,retire los quemadores de
superflcie de su cocina. Los quemadores se pueden
levantar para limp_los. Levaate Lasupefficie de cocci6n y
entonces levante y redre los quemadores de superficie.
Para quitar los alimentos requemados, sumerja los
quemadores de supeKicie en una soluci6n de agua
catiente y detetgente lfquido suave. Ddjelos remojar
durante unos 20 a 30 minutos. Para marlchas mils
diftciles de quitar, use un limpiador como el de la marca
Soft Scrub * o el de ta marca Bon AmP. Enjuague bien
para quitar todos los residuos del limpiador que
pudieran obstruir las aberturas de los quemadores de
superficie. No use estropajos de acero porque
obstmirfin las aberturas del quemador de superficie y
arafianin los quemadores de superiqcie. Si los huecos se
obstmyeran, llmpielos con una aguja de coser o un
alambre delgado.
Antes de volver a colocar los quemadores de
superficie en su lugar, sacuda el exceso de agua y
s_que!os completamente poni_ndolos en el homo a
temperatura templada durante 30 minutos, Vuelva a
colocarlos en su lugar en la cocina, cercior_ndose de
que estdn debidamente encajados y nivelados..
Compruebe la dispersi6n de la llama en cada
quemador. Si las llamas est_n "sattando" (no est_n
estables), limpie los huecos otra vez con una aguja de
coser o un alambre delgado_
3O
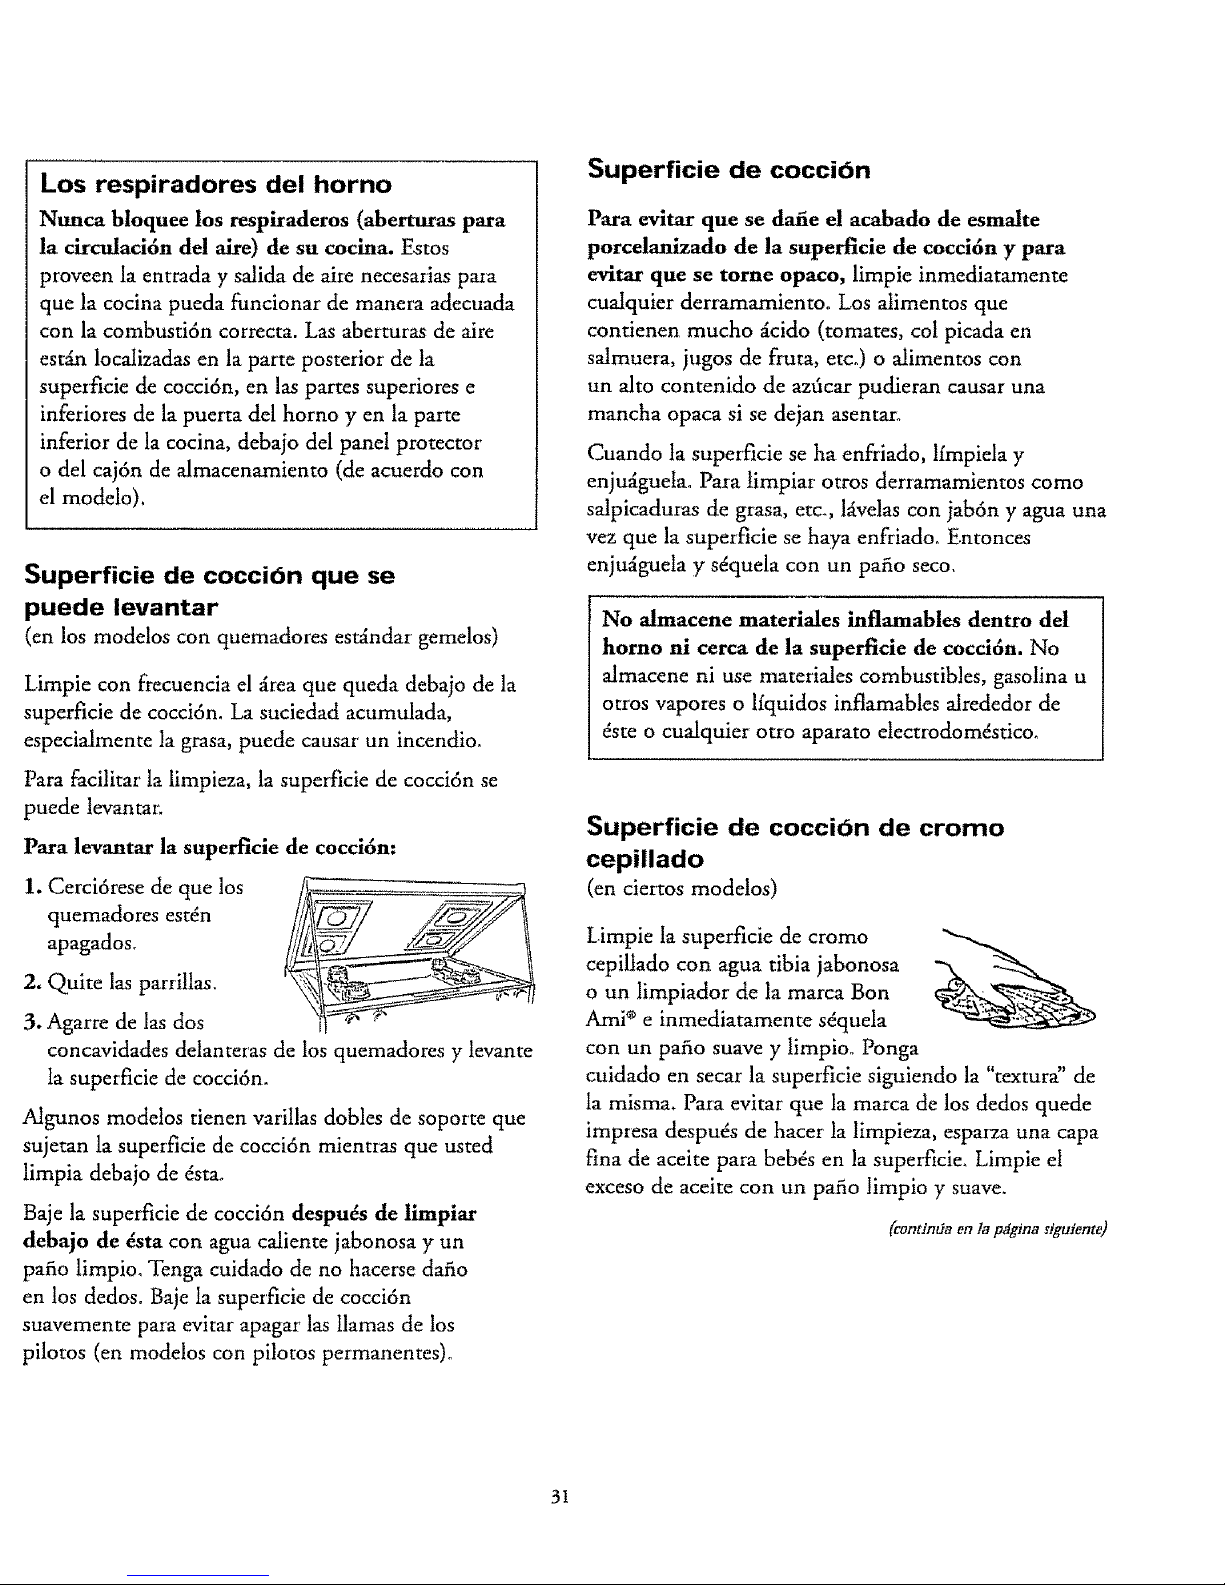
Los respiradores del horno
Nunca bloquee los respiraderos (aberturas para
la circulaci6n del aire) de su cocina. Estos
proveen la entrada y salida de aire necesarias paia
que la cocina pueda funcionar de manera adecuada
con la combusti6n correcta. Las aberturas de aire
est_ localizadas en la parte posterior de la
superficie de cocci6n, en las partes superiores e
inferio_es de la puerta del horno yen la parte
inferior de la cocina, debajo del panel protector
o del caj6n de almacenamiento (de acuerdo con
el modelo),
Superficie de cocciOn que se
puede levantar
(en los modelos con quemadores estdndar gemelos)
Limpie con fi:ecuencia el _irea que queda debajo de la
superficie de cocci6n. La suciedad acumulada,
especialmente la grasa, puede causar un incendio.
Para facilitar la limpieza, la superficie de cocci6n se
puede levantar.
Para levantar la superflcie de cocci6n:
1. Cerci6rese de que los
quemadores estdn
apagados,
2, Quite las parrillas.
3. Agarre de las dos
concavidades delanteras de los quemadores y levante
ia superficie de cocci6n.
Algunos modelos tienen varillas dobles de soporte que
sujetan la superficie de cocci6n mientras que usted
limpia debajo de _stao
Baje la superficie de cocci6n despu_ de limpiar
debajo de 4sta con agua caliente jabonosa y un
patio limpio. Tenga cuidado de no hacerse datio
en los dedos. Baje la superficie de cocci6n
suavemente para evitar apagar las llamas de los
pilotos (en modelos con pilotos permanentes)o
Superficie de cocciOn
Para evitar que se dafie el acabado de esmalte
porcelanizado de la superficie de cocci6n y para
evitar que se tome opaco, limpie inmediatamente
cualquier derramamiento° Los atimentos que
contienen mucho dcido (tomates, co! picada en
salmuera, jugos de fruta, etc_) o alimentos con
un alto contenido de azficar pudieran causar una
mancha opaca si se dejan asentar:_
Cuando la superficie se ha enfriado, lfmpiela y
enjuliguetao Para limpiar otros derramamientos como
salpicaduras de gtasa, etc., llivelas con jab6n y agua una
vez que la superficie se haya enfriadoo Entonces
enju_iguela y s_quela con un patio seco.
No almacene materiales inflamables dentro del
homo ni cerca de la superficie de cocci6n. No
almacene ni use materiales combustibles, gasolina u
otros vapores o lfquidos inflamables atrededor de
dste o cualquier otro aparato electrodomdstico.
Superficie de cocci6n de cromo
cepillado
(en ciertos modetos)
Limpie la superficie de cromo
cepiltado con agua tibia jabonosa
o un limpiador de la marca Bon
Ami _ e inmediatamente sdquela
con un patio suave y limpio° Ponga
cuidado en secar la superficie siguiendo la "textura" de
la misma. Para evitar que la marca de los dedos quede
impresa despu4s de hacer la limpieza, espalza una capa
fina de aceite para beb4s en la superficie. Limpie el
exceso de aceite con un patio limpio y suave.
(cont]ntia on [a p_igJna rtguiente)
31

Cuidado y limpieza
La bandeja y la rejilla del asador
Despu& de asar al fuego directo, saque la bandeja
del horno. Retire la rejilla de ta bandeja. Vierta con
cuidado la grasa de la bandeja en un recipiente
apropiado. Lave y enjuague la bandeja y la rejilla del
asador con agua catiente usando un estropajo de
pl_stico o un estropajo que contenga jab6m
Si los alimentos se hart quemado y est_in incrustados,
rode un poco de detergente sobre la rejilla mienaas
_sta est_ caliente y ctfbrala con toallas de papel mojadas
o con una toallita de lavar platos. E1 remojar la bandeja
eliminarii los alimentos que se han quemado.
La bandeja del asador se puede limpiar con un
limpiador paia hornos de tipo come_cial.
Tanto la bandeja como la rejilla del asador se pueden
limpiar en la lavadora de platos.
No almacene Ia bandeja y la rejilla det asador cuando
estdn sucias en ninguna paine de su cocina.
PRECAUCION: No lave la bandeja ni la rejilla del
asador en el cido de auto limpieza del homo.
La solera del homo
La solera del homo tiene un acabado de esmalte
porcelanizado. Para facilitar la limpieza, ptoteia la
solera del homo conaa dermmamientos excesivos
colocando una tarteia de hornear en la pairilla que
quede debajo de la parritla en la que usted est_
cocinando_ Puede usar papel de aluminio si no cubre
totalmente la parrilla. Esto es particulalmente
importante cuando hornee un pastel de ffuta u otros
alimentos con un £to contenido de _cido.
Los rellenos catientes de fi'uta u otros alimentos con
un alto contenido acfdico (como los tomates o la col
picada en salmuera y salsas con vinagre o jugo de
lim6n) pudieran causar picaduras y dafio a la supet'ficie
de esmalte potcelanizado y pot eso deben limpiarse
inmediatamente.
Pata limpiar los dermmamientos use jab6n y agua, un
limpiadot abrasivo o un estropajo de virutas de acero
tlenas de jab6n. Enjuague bien para quitar los r'esiduos
de jab6n antes de iniciar el ciclo de auto timpieza.
Las parrillas del homo
Limpie las parrillas con un limpiador abrasivo
o un estropajo de acero. Despuds de limpiatlas,
enjuague las parrillas con agua limpia y sdquelas
con un patio limpio.
NOTA: Redre las parrillas det homo mutes de empezat'
el ciclo de auto limpieza.
Panel de control y botones
Es una buena idea limpiar el panel de control cada
vez que termine de usar el homo. Lfmpielo con agua
y jab6n suave o con agua y vinagre, Iuego enjudguelo
con agua limpia y sdquelo con un patio suave.
No use limpiadores abrasivos, limpiadores llquidos
fuertes, estropajos plgsdcos o productos
limpiadores para hornos para limpiar el panel de
control, ya que estos productos dafiarhn el acabado
del panel. Una soluci6n de mitad agua caliente y mitad
vinagre produce buenos resuhados_
Se pueden sacar los botones de mando para facilitar
la limpieza. Paraquitar un bot6n, ag_r:elo y sdquelo
directamente del v_istago. Si se le hiciera diffcil sacat el
bot6n, coloque una toatla para los platos entre el bot6n
y el panel de control y deslice suavemente. Lave los
botones con agua y jab6n o con una soluci6n de agua
caliente y vinagre.
Las partes de metal se pueden limpiar con agua y
jab6n. No use ningtln estropajo de acero, abtasivos,
amonhco, licidos o limpiadores para hornos de tipo
comercial. Sdquelos con un patio suave,
32

Puerta desmontable del horno
La puerta del horno es
desmontable, pero es pesada_
Usted probablemente necesite
ayuda para quitarla y volver a
colocarla_
Para quitar la puerta, _ibrala
unas cuantas pulgadas hasta la
posici6n especial de parada que
la mantendr_ abierta. Suj&eta
firmemente por cada lado y
1
lewintela hacia arriba sacfia:dola de las bisagras.
NOTA: Tenga cuidado de no poner las manos entre la
bisagra y e! marco de la puerta del horno, ya que la
bisagra pudiera saltar hacia atr_is y atraparle los dedos°
Para reporter la puerta, cerci6rese de que las bisagras
estdn en la posici6n especial de parada. Coloque las
ranuras de la parte inferior de la puerta sob_e tas
bisagraso Entonces comience a bajar la puerta
lentamente y uniformemente sobxe ambas bisagras a la
vez. Si las bisagras saltan hacia atr_s contra el marco
del homo, p6ngalas hacia afuera otra vez.
PARA LIMPIAR LA PUERTA_
(No sumerja la puerta en agua).
H interior de la puerta:
Como el _rea interior de ta junta herm&ica de la
puerta se limpia durante et ciclo de auto limpieza,
usted no necesita limpiarta a mano. Cualquier
residuo de jab6n que quede en el revestimiento
interior de la puerta causa manchas al calentarse
e! homo.
El _irea exterior de la junta herm&ica de la puerta
puede limpiarse con un estropajo de virutas de
acero llenas de jab6n.
No frote ni limpie la junta de la puerta--el
material de fibra de vidrio de la junta no tiene casi
ninguna resistencia a la ab,asi6n. Es esencial que la
junta de la puerta se mantenga intacta y ajustada para
que el homo funcione de manera eficaz y se
obtengan buenos resultados al hornear_ Si notara que
la junta se est_ desgastando, deshilachando o
dafiando de cualquier manera o si dsta se ha separado
de la puerta, tendr_, que reemplazarla.
Area interior de la junta
la junta
Exterior de la puer, a:
• Use agua y jab6n para limpiar pe:fectamente la parte
superior, los costados y el frente de ta puerta det
horno. Enjuague bien. Tambidn puede usar un
Iimpiador para vidrio para limpiar el vidrio en el
exterior de la puerta.
• Las salpicaduras de salsas, jugos de frutas, salsas de
tomate y materiates para rociar que contengan _icido
pueden causar descoloraci6n y deben limpiarse de
inmediato. Cuando la superficie estd frh, iimpie y
enjuague_
° No use limpiadores para hornos, polvos abrasivos,
estropajos de acero o abrasivos fuertes en el
exterior de la puerta.
(contJndaen la ?_gina slguiente)
33

Cuidado y limpieza
Luz superior y arrancador
(en ciertos modelos)
D0sei
Levante
PRECAUCION: No toque
la bombilla con las manos
mojadas o cuando la
bombiUa est_ caliente.
Nunca se debe limpiar el
Area alrededor de la
bombilla con tm patio
mojado. Se debe siempre
desconectar la energla I3ombilla
fluorescente
el_ctrica si hay que
reemplazar la bombilla.
Para reemplazar una bombilla:
1. Con una mano en cada extremo del dosel con bisa-
gras, tome la bombilla por la parte delantera y
lev_nteta para sacarla.
2. Saque ta bombilla fluorescente, Cfimbiela por otra
de1 mismo largo y vatiaje.
3. Baje e! doset.
Para reemplazar el arrancador:
1. Abra el dosel y quite la bombilla como se explic6
Rrltes.
2. Tome el arrancadot; Mgalo girar un cuarto de vuelta
en sentido conaario al de las manecillas del retoj y
s_quelo, Cfimbielo por uno del mismo vatiaje,
3. Reponga la bombilla y baje el dosel.
Reemplazo de la luz del horno
(en ciertos modelos)
PRECAUCION: Antes de reemplazar la bombiUa,
desconecte la energ_a el_ctrica de la cocina desde el
interruptor principal o caja de fusibles. No toque
una bombilla caliente con las manos htimedas o tela
mojada. Espere hasta que la bombilla se haya
enfriado y use una tela seca.
La bombilla del homo estfi cubietxa con un cristal
desmontable que se sujeta en su lugar con un alambre
en forma de aico. Quite la puerta del homo, si asf 1o
desea, para alcanzar la cubierta con facilidad.
Para retirarla:
.
Ponga una mano
debajo de la cubierta
para que esta dltima
no se caiga al soltarta.
Con los dedos de esa
misma mano, empuje
firmemente el alambre
sujetador de la cubierta
hacia amis. Levante y
Alambre sujetador
oe la euolerta
quite la cubiertao NO QUITE NINGUN
TORNILLO PARA QUrTAR LA CUBIERYA.
2. Reemplace la bombi!la con una bombiita para
aparatos electrodomdsdcos de 40 ratios.
Para reponer la cubierta:
.
Col6quela en la muesca del recept_culo de la luz.
Deslice el alambre hacia delante para el centro de la
cubierta hasta que dsta se encaje en su lugar. Cuando
estd bien colocado, el alambre sujetar_ fiimemente la
cubierta. Cerci6rese de que el alambre est4 en la
concavidad, en el centro de la cubierta,
2. Conecte ta energfa eldctrica a la cocina.
34

Panel de proteccion desmontable
(en cier'tos modelos)
E1 panel de protecci6n puede quitarse para limpiar
debajo de la cocina.
Para quitarlo, tevante un poco la
paixe inferior del panel para
desengancharlo de las aletas en la
base de la cocina. Desplace la parte
inferior del panel hacia adelante
hasta que se suetten las presillas de
resorte en la parte superior det panel.
Para reponerlo, inserte las dos
ranuras en la parte inferior del
panel dentro de las dos aletas en la
base de la cocina, luego empuje la
parte superior del panel hacia
adetante para enganchar las
presillas de resorte.
Cajbn del asador desmontable
(en ciettos modetos)
Para quitarlo:
1. Cuando el asador estd fifo, quite la rejilla y la
bandeja del asador.
2. Desplace el caj6n del asador hasta et tope y luego
emptijelo de regreso unos dos centfmetros y medio.
3. Sujete la manija, tevante y
saque el caj6n. Limpie el
caj6n del asador con agua
caliente jabonosa..
Para volver a ponerlo:
Sostenga el caj6n del asador en posici6n elevada
mientras 1o desliza parcialmente en la cocina. Luego
baje el caj6n y empfije!o hasta cerrado por completo.
El cajon de almacenamiento
desmontable
(en ciertos modelos)
El caj6n de almacenamiento es un lugar ideal para
guaidar los utensilios de cocina y de hornear. No
almacene artlculos de pI_stico o materiales inflamables
en el caj6n.
No sobrecargue el caj6n de almacenamiento. Si es
demasiado pesado, puede salirse del riel cuando lo abra.
H caj6n de almacenamiento puede sacarse para limpiar
debajo de la cocina_ Limpie el caj6n de
almacenamiento con un patio hfimedo o una esponjao
Nunca se debe usar abrasivos fuertes o almohadiUas de
restregat;
Para sacar el caj6n de almacenamiento:
1. Desplace e! caj6n directamente
_ hacia detante hasta que se
>/ detenga.
2. Incline la parte
delantera del caj6n hacia
arriba y s_iquelo.
Para reponer el caj6n de almacenamiento:
1. Coloque los topes de la parte trasera del caj6n sobre
los topes de la cocina.
2. Deslice el caj6n de manera uniforme hacia atr_is, de
manera que los rides de la cocina se engranen.
35

Instrucciones para la instalacion
PARA SU SEGURIDAD
Si detecta olor a gas:
1. Abra las ventanas.
2. No toque ningtin interruptor eldctrico.
3. Apague las llamas vivas.
4. Llame inmediatamente a la compafila
suministradora de gas.
PARA SU SEGURIDAD
No almacene ni use materiales combustibles,
gasolina u otros vapores o llquidos inflamables en
los alrededores de e2steo cualquier otro aparato
electrodom_stico.
ANTES DE COMENZAR
Lea estas instrucciones detenidamente yen su
totalidad.
IMPORTANTE: Guarde estas instrucciones para el
uso de los inspectores eldctricos locales.
INSTALADOR: Deje estas instrucciones junto con
el aparato electrodom_stico cuando finalice su
instalaci6n.
CONSUMIDOR: Guarde este manual de uso y
cuidado y las instrucciones para la instalaci6n para
uso futuro.
Este aparato etectrodom_stico tiene que set
conectado a tierra de manera adecuada.
ADVERTENCIA
La instalaci6n, ajuste, alteraci6n, servicios de
reparaci6n o mantenimiento inadecuados pueden
causar lesiones o dafios a la propiedad. Consulte
este manual. Para obtener asistencia o informaci6n
adicional, consulte con un instalador calificado,
agenda de servicio, fabricante (distribuidor) o la
compafila suministradora de gas.
Nunca se debe volver a utilizar los antiguos
conectores flexibles. El uso de dichos antiguos
conectores flexibles puede causar fuga de gas y
lesiones al individuo. AI efectuarse la instalaci6n de
un aparato electrodomdstico de gas, se debe siempre
utilizar NUEVOS conectores flexibles.
IMPORTANTE
Retire del homo todos los materiales impresos y de
empaque antes de conectar los suministros del gas y
la electricidad a la cocina.
DIMENSIONESY MARGENES DE
DISTANCIA
Proporcione mdrgenes de distancia adecuados entre
la cocina y las superficies adyacentes que sean
combustibles.
Profundidad Minima--M_xima
con la puerta cerrada (lncluye
] 30" ,.._p. ia manija de la puerta):
t'*- (_62cm) I"_-"---_! 27_"-26,/,"*
(70 5 cm ± 71 8 cm)
T-
46 W'
(118t cm)
Profundidad con
la puerta abietta:
\
36 ¼" ± t/4"
(92 1 cm ±6 mm)
%.
\
%
46¾" (117 8 cm) ",. _ ..-"
(Puerta de viddo) _ \X _'_ ....
46¼" (1175 cm) X_ /
(Puerta de porcelana)-' .,,-,,_-_ * i _nro/* La profundidad var_'ade acuerdo con el
mode$o Yea la hoja de especiflcactones
para su mode]o
Para los
gabinetes debajo
de ]a superfielede
._l cocci6nyen la
parte trasera
de la cocina,
Mfirgenes de ] [_
distanoIa Profundtdad
minima para ] mfixima para ins
Ins gabtnetes gabinetes encimade la
a _bos supeflicie de
coccidn
lados de ta 30" _ 1"(2,5cm)de dis hasta
coclna (76 2 cm) _ ]a pared -modalos_anquemadoresL_
__ 30" (76.2 cm) estaedat emeles18 _ MMtma _ 2"(5 cm)de d_stal hasta
t(45.7 cm) la pared-m0delos¢ _uemadares (33 era)
sellado_
36" 1
0"_1_ 19t.5cm) (6m
(0era)
/
i
PRECAUCION
No intente hacer funcionar el homo de esta cocina
durante una interrupci6n del suministro eldctrico
(para los modelos con ignicifn eldctrica solamente).
36

Instrucciones importantes de seguridad
• La instalaci6n de esta cocina de gas debe hacerse
de acuerdo con los cfdigos locales o, si no
existieran c6digos locales, de acuerdo con la
edici6n m_ reciente dd National Fuel Gas Code
(C6digo Naclonal de Normas para Instalaciones de
Gas), ANSI Z223.1. End Canadd, la instalaci6n
debe hacerse de acuerdo con el Current Natural
Gas Instalation Code (C6digo actual de Normas
para Instalaciones de Gas Natural), CAN/CGA-
B149.1 o el Current Propane Installation Code
(C6digo actual de Normas para Instalaciones de
Gas Propano), CAN/CGA-B149.2 y de acuerdo
con los c6digos locales si dstos fuesen aplicables.
El fabricante de esta cocina ha sido ceifificado por e!
American Gas Association (Asociaci6n Americana de Gas)
de acuerdo con la edici6n mils reciente de ANSI Z21o! y
la Canadian Gas Association (Asociaci6n Canadiense de
Gas) de acuerdo con la edici6n m_ reciente de
CAN/CGA-1.1. Hay cie:tas precauciones de seguridad
que usted debe observar con respecto a su cocina, que son
aplicables a cualquier aparato electrodom&dco de gas que
genere calon Encontmr_ estas precauciones en la secci6n
de 'Instrucciones impotmntes de seguridad' en la pa:xe
delantera de este manual. L&:las cuidadosamente_
• Pida que su cocina sea instalada por un instaladot o
tdcnico de seivicio competente_
" Su cocina debe ser conectada el&tticamente a tierra
de acuetdo con los c6digos locales o, si no existieran
c6digos locales, de acuerdo con el National Electrical
Code (C6digo Nacional de Normas para Instataciones
Eldctricas) (Ia edici6n m_is:eciente del ANSI!NFPA
70). En el Cana&i, la insta]aci6n eldcttica a tierra
debe hacerse de acuerdo con la Secci6n I del CSA
C22. t Current Canadian Electrical Code (C6digo
acma] de Normas para Instalaciones Eldctficas del
Canadfi CSAC22.1) ylo los c6digos locales, Vea
'Conexiones eldctricas' en esta secci6no
• Antes de instalar su cocina sobre un piso de lin61eo o
cualquier otra clase de piso sintdtico, cerci6mse de que
este tipo de piso puede resistir temperaturas de 180°E
(82°C.) sin encoge:se, combarse o descolorarse. No
instale la cocina sobre ninguna alfombra a menos que
se haya colocado entre la cocina y la alfombra una
plancha de madeta larninada de 1/4" (6 mm) de
espesor o cualquier otro aislador similar:
• Cerci6rese de que los revestimientos de tas paredes
alrededor de la cocina de gas puedan resistir el calor
generado por la cocina de hasta 200°F (93°C.).
37
• Evite poner gabinetes encima de Ia cocinao Para evitar
el peligro que causarJa el tratar de alcanzar objetos
situados encima de la cocina cuando los quemadores
estdn funcionando, instale una carnpana extractora de
aite sobre la cocina que se proyecte hacia adelante
pot 1o menos unas 5" (12°7cm) m_s alld del frente de
los gabinetes.
• La campana extractora debe estar constmlda de hojas
merAlicas de tm espesor no menor de 0.0122" (.31 mm).
Inst_ilela encirna de la superficie de cocci6n con un
margen de dismncia no menor de 1/4" (6 mm) entre la
campana y el lado inferior del material combustible o d
gabinete de metal. La campana debe ser al menos tan
ancha como el aparato electrodomdstico y debe e.star
centrada encima del aparato. Los mlirgenes de distancia
entre la superficie de cocci6n y la superficie de la
campana de ventilacidn NUNCA DEBERAN SEll
MENORE£ DE 24" (61 can.).
EXCEPCION: La instalaci6n de un homo
microondas o aparam electrodomdsdco de cocci6n
aprobado encima de la superficie de cocci6n debe ser
tealizada de acuerdo con Ias instrucciones de
instalaci6n que vienen con tal aparato.
° Si se colocaran gabinetes encima de la cocina, habr_
que dejar un margen mfnimo de distancia de 30"
(76.2 cm) entre Ia superficie de cocci6n y el f0ndo
sin protecci6n de los gabineteso
° Si no se pudiera mantener un margen mlnimo de
distancia de 30" (76.2 cm) entre la superficie de
cocci6n y los materiales combustibles o gabinetes de
metal, habrfi, entonces que proteger la parte inferior
de los gabinetes encima de la superficie de cocci6n
con un aMante de cart6n duro de 1/4" (6 mm)
cubierto con hojas metNicas de un espesor no menor
de 0.0122" (.31 ram).
• Los mllrgenes de distancia entre la superficie de
cocci6n y los gabinetes ptotegidos NUNC, A
DEBERAN SER MENORES DE 24" (61 cm), I.a
distancia vertical desde el piano de Ia superficie de
cocci6n basra el rondo de los gabinetes adyacentes que
se extiendan a una distancia de menos de I" (2.5 cm)
de los lados de la cocina de gas, no debe ser menor de
t8" (45.7 cm). (Vea la ilustraci6n de las 'Dimensiones
y m_rgenes de distancia' en esta secci6n),
° PRECAUCION: Los ardculos que sean de interds
para los nifios no deben guardarse dentro de los
gabinetes simados encima de una cocina de gas ni
sobre et tablero posterior de esa cocina--los nifios que
se subietan a la cocina para tratar de alcanzar estos
ardculos pudieran resultar gtavemente lesionados.
(continffa en la p_gina siguiento)

Instrucciones para la instalacion ( oo ,o0 d0o)
ADVERTENCIA
Todas las cocinas pueden volcarse y
causar lesiones graves. Para evitar que
la cocina se vuelque accidentalmente,
ffjela a la pared usando un dispositivo
anti-volcaduras aprobado. (Vea
'Instalar el dispositivo anti-volcaduras'
en esta secci6n). Para comprobar si el
dispositivo est_i instalado y montado
come es debido, incline con mucho
cuidado Ia cocina hacia adelante_ El
dispositivo anti-volcaduras deberl
entonces acoplalse y evitar que la cocina se vuelque_
Si tuvieIa usted que mover la cocina per cualquier
motive, separ_indola de la pared, celci6rese de que el
dispositivo anti-volcaduras vuelva a quedar encajado en
el sitio apropiado cuando regrese la cocina a su lugar.
• Per su propia seguridad, nunca use su cocina de gas paza
caleutar una habitacidn. Su homo y la superficie de
cocci6n no esrAn disefiadas para calentar la habitaci6n.
Los quemadores superiores no deben hacerse funcionar
sin antes colocar un recipiente sobre las parrillas. Un
abuse de este ripe pudiela causar incendio y dafios a
su cocina de gas y tambidn antda:i la garant_a.
o No almacene ni use materiales combustibles, gasolina u
otros vapores o Ifquidos inflamables en los alrededores
de dste o cualquier otro aparato electrodom&tico. Esto
po&fa ocasionar explosiones o incendios.
• No use el homo come _rea de almacenamiento. Los
arffculos que se guarden dentro deI homo poddan
incendiarse.
" No deje que Ia grasa para cocinar u otros materiales
inflamables se acumulen dentro o cerca de ta cocina_
GENERALIDADES
" Vea 'Dimensiones y m_irgenes de distancias' en esta
secci6n pata localizar lodes los dibujos y dimensiones
de espacio. Se deben satisfacer los requisites relatives
alas dimensiones paia procurar el funcionamiento
segum de su cocina. Se debe ajustar la ubicaci6n de
la toma de corriente eldctrica y la abertura de la
rubella del gas (yea 'Ubicaci6n de la tuberta del gas y
la toma de corriente eldctrica') para poder sarisfacer
ciertos requisites.
• La cocina se puede colocar sin ningtln margen de
distancia [0" (0 cm)] con respecto a la pared
posterior y las pa:edes laterales de la cocina_
UBICACION
No coloque la cocina en un lugar don& &ta pudiera
estar expuesta a corrientes fuertes de aire. Siemp_e se
debe sellar cualquier abermla el1 el piso o en la paled
detr_s de Ia cocina. Cerci6rese de que las abermras en
la base de la cocina que suministran aim fresco para la
combusti6n y la ventilaci6n no estdn obstruidas per
cualquier alfombra o enmaderado.
PROTEJA SU SUELO
Su cocina, come muchos otros aparatos
electrodom&ticos, es pesada y puede colocarse en
recubrimientos suaves paia suelo, tales come vinilo
acolchonado o alfiambra. Tenga cuidado cuando mueva
ta cocina en este ripe de suelo_ Se recomienda seguir las
insn'ucciones sencillas y econ6micas a continuaci6n
para proteger su pisoo
La codna debe instala,se sobre tLna hoja de madera
terciada (o de un material similar). Cuando el
recubrimiento del suelo termino en la pazte delantera de
la cocina, el fizea sobre la que descansar_ la cocina
deber_, fablicarse con madera terciada al mismo nivd o
un poco mils arriba que el mcubrimiento del sue!o. Esto
permirir_i que la cocina pueda movelse paia limpiarla o
darte se_icio.
UBICACION DE LOS NUMEROS DE
MODELOY DE SERIE
De acuerdo con su ripe de cocina de gas, usted
encontrar:i los ntlmeros de modelo y de serie en una
etiqueta en el marco delantem de la cocina, demis del
caj6n de almacenamiento o del panel de protecci6n,
HERRAMIENTAS QUE NECESITARA
• Destornilladores de cabeza 'Phillips' y de hoja plana.
° Lilpiz y regla.
° Dos llaves aprietatubos (una de Ieseix,a).
° Una llave espafiota de 1%" o una llave inglesa
ajustable
o Aprietatuercas o llaves inglesas: 3116" y 1/4"
38

MATERIALES ADICIONALES QUE
PUDIERA NECESITAR
• VNvxlla de interrupcidn de la tfnea del gas
• Un sellador pare tuberfas o cinta adhesive con Teflon*
para roscados de mbeffas, aprobada per IYL, clue resista
la accidn del gas natural y del gas LP (propane llquido)
° Conector de metal flexible pare aparatos
electrodom&ticos I12" LDo (1.3 cm de difimetro
interior). Se recomienda un largo de 5 pies (1.5
metros) para facilitar la instalacidn pete otros tamafios
tambi_n son aceptables. Nunca use un conector viejo
cuando instale una cocina de gas nueva.
• Adaptador abocinado de uni6n pare la conexi6n ala
llnea de suministro del gas 314" d 112" NPT x 112"
I.D. [!.9 cm 6 1.3 cm NPT (est_ndar nacional pare
roscas de tube) x I.2 crn de difimetro interior]_
• Adaptador abocinado de unidn para la conexidn al
regulador de presi6n en la cocina 1/2" NPT x 112"
IoD. (I.3 cm Nlrl" x 13 cm de diLmetro interio0.
"Teflon: marca registrada de DuPont
PREPARACION
° Retire todas las cintas adhesivas y tas envolturas.
Levante la supetficie de cocci6n (en los modelos con
quemadores estfindares gemelos) y retire redes los
materiales de envase que se encuentren debajo de dsta.
Cerci6rese de que los quemadores est_indams gemelos
estdn ajustados y nivelados de manera adecuada.
° Quite ia pelfcula pl_istica que cubre algunas partes
cromadas (la puerta del homo, et borde de los costados).
° Saque el paquete de accesorios de dentro del homo.
° Compruebe pare asegurarse que ninguna de las piezas
de la cocina de gas se hayan aftojado durante el
envfo.
PASO 1
Provea un suministro adecuado de gas
Su cocina de gas est_ disefiada pare funcionar a una
presi6n de 4" (10.2 cm) de columna de ague para gas
natural o, si es_ disefiada pare gas LP (propane o
butane), 10" (25.4 cm) de columna de agua. Cetci6rese
de que le es_ suministrando a su cocina el ripe de gas
para el cual rue disefiada. Esta cocina se puede adaptar
pare que funcione con gas natural o gas propane. Si
usted decide user esta cocina con gas propane, la
conversi6n deber_i ser hecha per un instalador
competente antes de que se intente poner a funcionar
esta cocina con ese tipo de gas.
Para un funcionamiento adecuado, la presidn del gas
nanlral suministrado al regulador debe ser entre 4"
(i0,2 cm) y 13" (.3,3 cm) de columna de agua. Pare el
gas LP, la presidn suministrada debe ser entre I0"
(25°4 cm) y 13" (33 cm) de columna de agua. Cuando
vaya a comprobar el funcionamiento adecuado de!
regulador, la presidn de entrada tiene que set per lo
menos de 1" (2.5 cm) mils que la presi6n de
funcionamiento (bifurcador) indicada anteriormente.
El regulador de piesidn localizado ala entrada del
bifurcador de la cocina debe permanecer en la Ifnea de
suministro sin importar qud ripe de gas, natural o LP,
se est_i usando. Para facilitar Ia instalaci6n se debe tener
un conector de metal flexible pare aparatos
electrodomdsticos que conecte la cocina ala lfnea de
suministro de gas, con un difimetro interior de 112"
I,D. (I.3 cm) y 5 pies (1.5 m) de largo. En Cane&i, los
conectores flexibles deben set conectores de metal
simples de pared, no m_s latgos de 6 pies (1.8 m).
(conttnOa en la p'dgtna dguiente)
39

Instrucciones para la instalacion ( oo ,oo0 ,oo)
PASO 2
Conecte la cocina al gas
Cierre la v_vula principa! suministradola de gas antes
de desconectar la cocina vieja y ddjela cerrada basra que
la nueva conexi6n se haya completado. No se olvide de
volver a encender los pilotos de los otros aparatos
electrodom6sticos de gas cuando vuelva a abrir et
suministro de gas.
Como las tuberfas duras restringen et movimiento de la
cocina, se recomienda el uso de un conector de metal
flexible para aparatos electrodomdsticos, certificado pot
A.GoA., a menos que los c6digos locales requieran
conexiones con tuberfas duras. Nunca use un conector
viejo al instalar una cocina nueva. Si se usa el m_todo
de tuberfa dum, usted deber_i alinear cuidadosamente
Ia tuberfa; Ia cocina no se podr_i mover despuds de que
la conexi6n haya sido hecha.
Pare evitar el escape de gas, use un compuesto para
juntas de tuberfas o envuelva todas las roscas macho
(externas) de las tubedas con cinta Teflon* para roscas
de tuberfas..
*Feflon: Marca registrada de DuPont
Ubicaci6n de las tuberias del gas y de
la toma de corriente para modelos
equipados con Quemadores Estandar
Esta &ma permite la
ins_aci6n a rasde la
cocina con una
c_nexi6n dentro de la
pared de ia v_v'uls de
derre y de tabJbe_a
del gas y la conexi6n
de una toma de
corciente de t20',/en
la pared trasera
La conexl6n m&s
corta desde el
lugar deride se
encuentra la
tubefia duta hasta
el lugar de
instalaci6n de la
cocina
Esta _lres permlte la
tnstalact6n a ras de la cocina
con una conexi6n a travSs
del piso de la v_Ivula de
cierre y la tubeda del gas.
Ubicaci6n de las tuberias del gas y de
la toma de corriente para modelos
equipados con Quemadores Sellados
Esta _res permite ta I J
instalaci6n a ras de la 30'-
cocina con urla conexi6n v_ °ml
dentro de la pared de Is
vdlvula de cierre y de la [- _._
tuber[a def gas y la 4. 1II
conexiOn de una toma _,o.]_.,_ Ii I
de corriente de 120V en /'_'I
lapared trasera _lLl°&o,II "
,,0,o ox,o,:YJ12m
I cortades_ el_uga_1i _ ! I _'
[ donde se encuentra _'_ _ _ I =_
Its tubeds dura l I I _I_ I I
IhaetaelI_Os,d_ I I I I \ I I _:;oo,
I inststaciOn de la 1 I I ) J_ I I _ ,_
Esta _rea permite la instalacldn a I _
ras de la cscina con una eenexi6n _
a travds del piso de fa v_ifvula de Iv
I cierre y la tuben'a de1gas 4O

InstalaciOn con conector flexible para
los modelos equipados con
Quemadores Sellados
ReguMdor _
Codode 9o°_ -_ _ _
(inclutdo) -_, '--_-_ Cone ctor flexible
_IF_ [de 6 (1 8 m) mdxlmo]
Adaptador _
'"i_'siaiad';;:info_eiea c0nsumao;
I ellugar donde se encuentra la ! _ _ Adaptador
[ v_ivula
Tubeffa del gas _-,,_- V_lvula de cterre
1/2" o 3/4" (1 3 o 1-9 cm) ----_ gt dei gas
nmurH,=l i
InstalaciOn con tuberia dura para los
modelos equipados con quemadores
Sellados
r-_ Macho roscado de
Regulador _ acoplamiento
de presiOn _-91_L_ I
-----_1 \=_ | union
On_I._do)_"_J' ____ Codode90o
]I_-'<t_ TuberM de
. hierro
--,i-_ UnlOn
fnstaMdor: Inf6rmeM al consumidor N
ef tugar donde se encuentra la _;L=l Macho roscado
v_ivula de cierre del gas &"_ de aco lamiento
p
,, Tuberfa del gas _ _ V_lvuM de cferre
lnstalaciones con conector flexible y
tuberia dura para los modelos equipados
con Quemadores Estandar Gemelos.
ReguMdor I InstalaciOn Macho I InstalaciOn 1
de presi0n Icon conector roscado de I con tuber{a
| I--flexible ac0ptamiento [ ---_durL J
1_ '------I _ | Unl6n| I Codo de 90"
Tubeda mOltlpM Adapt_dor J.._ ..... gJ. 1__ J
Conectorf!axtble-_J _ _ . ..
[de 6' (1,8 m) m_xlmo] - _ _ _:_.___°n
• _ dOl gas de oco ,o o 1-olIIcilerereasdel
I [nstalador: InfOrrnele al F;-_I _ _ u
I consumidor ei lugar t ;!_ Tuberfa del gab I {_
t donde se encuentra M _ It! 1_"o 3/4" _ tll 41
Iv_vula de cterre del gas [_ (I3 0 1 9 cm) --_ _
1. Instale en la linea del gas una v_vula manual de
cierre, en la parte exterior de la cocina de gas, en un
lugar f_icilmente accesible. Cerci6rese de que todas
las personas operando la cocina sepan d6nde y c6mo
se apaga el suministro de gas a la cocina.
2. A la entrada del regulador, instale un adaptador macho
abocinado de uni6n de !/2" (1.3 cm) al codo mscado
interior de t/2" (Io3 cm) NPT (est_ndaz nacional para
roscas de tubo). En los modelos equipados con
quemadores est_dar gemelos, instale et extremo
macho de tubo roscado de! adaptador abocinado de
uni6n de I/2" (1.3 cm) allroscador interior de 112"
(t.3 cm) NPT en e! punto de entrada dd regulador de
presi6n. Aplique una [lave inglesa a la pieza de ajuste
del regulador como protecci6n y para evitar dafios,
A1 instalar Ia cocina desde el frente, quite el codo de
90 ° para facilirar la instalaci6n_
3. Aplique un adaptador macho abocinado de unidn
de 1/2" (1.3 cm) 6 3/4" (1.9 cm) al mscado interior
NPT de la v_lvula manual de interrupcidn del
suministro de gas, poniendo cuidado de proteger la
vflvula de cierre para evitar que gim.
1
Conecte e! conector de metal flexible para aparatos
electrodomdsficos al adaptador en la cocina.
Coloque la cocina en una posici6n que le permirirll
hacer la conexi6n en la v_lvula de cierreo
5_
Cuando todas las conexJones hayan sido hechas,
cerci&ese de que todos los controles de la cocina
estdn apagados y abra Ia v_lvula principal del
suministro del gas. Use un detector de escape tfquido
en todas las uniones y conexiones pata compmbar
que no haya escape de gas en las tuber/as.
1
PRECAUCION: NUNCA USE UNA LLAMA VIVA /
PARA COMPROBAR SI HAY ESCAPE DE GAS.
/
Cuando al hacer pruebas de presi6n se usen presiones
mayores de I/2 psig (libras por pulgada cuadrada sobie
la presi6n atmosf&ica) para ptobar la presi6n de la red
de! suministro de gas de su residencia, desconecte la
cocina y la v_ilvuta que cierra la alimentaci6n del gas.
Cuando se usen presiones de 1/2 psig o menores para
probar el sistema de suministm de gas, simplemente
aisle su cocina de ta red del suministro de gas, cerrando
ta v_vula de alimentaci6n,
(contlndaen la pagina slgu/ente)

Instrucciones para la instalacion
PASO 3
Conexiones electricas (en ciertos mode|os)
Requisitos el_ctricos
Un circuito derivado de 120 voltios, 60 hertzios, con
toma de tierra adecuada y protegido por un interruptor
automiitico de circuito de 15 amperios o 20 amperios
o un fusible de acci6n retardada.
Precauciones con respecto al uso de cordones de
extensi6n
Debido a peligros potenciales para su seguridad,
asociados con ciertas condiciones, recomendamos
enf_iticamente que no se use ning_n cord6n de
extensi6n. Sin embargo, si usted de todas formas opta
pot usar un cord6n de extensi6n, es absolutamente
necesario que sea un cord6n de extensi6n de 3 alambres
con conexi6n de toma de tierra para apatatos
electrodomdsticos, aprobado pot UL y que la capacidad
nominal de la intensidad de la corriente det cord6n,
medida en amperios, sea igual a, o mayor que, la
capacidad nominal del circuito derivado.
Toma de tierra_IMPORTANTF_.--(Por favor lea
cuidadosamente)
PARA SU PROPIA SEGURIDAD, ESTE APARATO
ELECTRODOMESTICO DEBE SER
DEBIDAMENTE CONECTADO A TIERRA.
El cold6n de
alimentaci6n de este
aparato electrodomdsdco
est,-iequipado con un
enchufe de tres espigas
METODO
PREFERIDO _._
I IF tierra adecuada
(de toma de tierra) que se
acopla con un
recept_culo de pared
estAndar de tres espigas antes de usarlo
con toma de fietra pata
reducir al m_nirno la posibilidad de que este aparato
electrodom_srico cause un electrochoque.
El cliente deber_i procurar que un electricista calificado
inspeccione el recept_tculo de paled y el circuito para
asegurarse de que este receptdculo estd conectado
adecuadamente a tierra,
En casos donde se encuentre un lecepuiculo de pared
est_ndar de dos espigas, et cliente personalmente tiene
la responsabilidad y la obligaci6n de hacer que este
recepulculo sea reemplazado pot otto de tres espigas
debidamente conectado a tierra.
NO CORTE O QUITE, BAJO NINGUNA
CIRCUNSTANCIA, LA TERCERA ESPIGA
(TOMA DE TIERRA) DEL CORDON DE
ALIMENTACION.
A: Situaciones en las que el cordfn de alimentaci6n
del aparato electrodom_sdco serd desconectado de
manera infrecuente.
METODO PROVISIONAL
(No se permite usar --_ ,,
enchufes adaptadores _ /
en Canada.) _t_ I
Alinee las espigasl _ _'_ !
larluras orande= -_.,_tl 1?_5_r _ i
C k'k__Orese de qLe exista
f f I una toma de tierra adecuada
y una conexci6n firme antes
t1[I _e usarlo
Se puede usar un adaptador solamente en un ckcuito
de 15 amperios. No use un adaptador en un circuito
de 20 amperios. Donde lo permitan los c6digos locales,
se puede hacer una CONEXION PROVISIONAL a
un recept_iculo de pared de dos espigas con conexi6n a
tierra adecuada, usando un adaptador, aprobado pot
UL, que se puede adquirir en la mayorfa de las tiendas
de ferreterfa_ La ranura m_is grande en el adaptadol
debe alinearse con la ranuta rolls grande e!i. el
recepulculo de pared para proveer una polaridad
adecuada en la conexi6n del coid6n de alimentaci6n.
PRECAUCION: E1 unir la terminal de toma de tierra
del adaptador al torniUo de la cubietm del recept_ctdo
de pared no conecta el aparato electrodom6stico a
tierra, a menos que el tomitlo de la cubierta sea de
metal y no estd aislado y que el receprAculo de pared
est_ conectado a tierra atmv& del alambmdo de la
residencia° El cIiente deber_ procmar que tm
electricisra calificado inspeccione e! receprAcuto de
pared y el circuito pata asegurarse de que este
recept_iculo est6 conectado adecuadamente a fieira.
Siempre sujete el adaptador con una mano al desconectar
et cord6n de alimentaci6n del adaptadon Si no 1o hace
asf, ia terminal de toma de tierm del adaptador riene una
mayor posibilidad de romperse con el uso repetido= En
caso de que esto ocurta, NO USE el aparato
electrodomdsrico hasta que se vuelva a conectar a derra
de maneta adecuada.
42

B: Situaciones en las que el cord6n de alimentaci6n
del aparato electrodom_stico serd desconectado con
frecuencla.
No use un enchufe adaptador en estas situaciones, ya
que la desconexi6n de! cord6n de alimentaci6n hace
que el adaptador trabaje forzadamente y esto resultar_
en el fallo eventual de la terminal de toma de tierra del
adaptador.
Antes de usar el aparato electrodomdstico, el cliente
deber_i hacer que un electricista calificado reemplace e!
receptficulo de pared de dos espigas pot otro de tres
espigas (con toma de tierra).
Se debe hacer la instataci6n de aparatos electrodom_sficos
disefiados para casas m6viles de acuerdo con el
'Manufactured Home Construction and Safety Standard',
Tftu!o 24 CFR, Secci6n .3280 (que antes se lIamaba el
'Federal Standard for Mobile Home Construction and
Safety', T_rulo24, HUD, Secci6n 280) o cuando estas
normas no sean aplicables, el 'Standard for Manufactured
Home Installations', edici6n mis reciente ('Manufactured
Home Sites, Communities and Set-Ups'), ANSI A225_ 1,
edici6n mils reciente, o de acuerdo con los c6digos locales.
En el Cana&i, la insralaci6n papa casas m6viles debe
hacerse de acuerdo con et CAN!CSAS Z240/MH
'Mobile Home Installation Code' actual.
Desconexi6n dectrica
1. Localice la clavija de desconexi6n en la parte trasera
de la cocina de gas.
2. Agarre el conector por los lados y s_iquelo de la parte
trasera de la cocina.
PASO 5
Compruebe la ignici6n de los
quemadores de superficie
F.I funcionamiento de todos los quemadores de la
superficie de cocci6n y del horno deber_in comprobarse
despuds de que la cocina y las lfneas suministradoras de
gas hayan sido cuidadosamente inspeccionadas para
comprobar que no haya escape de gas.
Modelos con ignici6n eldctrica
Seleccione un bot6n de mando de uno de los
quemadores de superficie y a la vez empuje hacia
adentro y h_igalo girar hacia la posici6n de LITE
(encender). Usted oir_i un chasquido indicando el
funcionamiento adecuado del m6dulo de chispa. Una
vez que el aide haya sido expulsado de las llneas de
suministro, los quemadores se encende_in en unos
4 segundos. Despuds de que el quemador se encienda,
haga girar el bot6n para quitarlo de la posici6n de
LITE (encender). Pruebe todos los quemadores en
sucesi6n, hasta que todos hayan sido verificados.
Calidad de la llama
La calidad de la combusti6n de las llamas en los
quemadores debe set determinada visualmenteo
(A) Llama Amarilla_
Llame al t&nico de
setvicio
(B) Ptmtas amarillas en
los conos externos--
Es normal para et gas LP
(C) Llama de un azul
suave---Es normal para
el gas natural
PASO 4
Selle las aberturas
Cuando todas las instalaciones se hayan completado,
selle cualesquiera aberturas que existan en la pared
detrlis de la cocina o en el piso debajo de la cocina.
Si la llama del quemador luce como en la ilustraci6n
(A), llame al tdcnico de servicioo La llama normal de
un quemador deber_i lucir como (B) o (C),
dependiendo del tipo de gas que usted use_ Con el gas
LP, es normal que las puntas aparezcan amarillas en los
conos externos.
(contim2a en la p$gina siguiente)
43

lnstrucciones para la instalacion
PASO 6
Compruebe la ignici6n del quemador
del homo
Su horno estll disefiado para operar de manera
silenciosa y autom_itica. Para opera:' el horno, haga girar
el bot6n de OVEN SET (tempemtura del homo) a una
temperature superior a los 300°E (149°C8, Despu_s de
un lapso de 30 a 90 segundos, el quemador del homo
se encendenl y arder_ hasta que se alcance la
temperatura indicada. E! quemador del horno segukll
su ciclo de encenderse y apagarse segtln sea necesario
pata mantener el horno a la temperatura indicada por el
bot6n de OVEN SET' (tempe:atuta del horno).
Para verificar la ignici6n del quemador del asador; haga
girar el bot6n de OVEN SET (temperatura del homo)
hasta BROIL (asar ai fuego directo)o Despuds de un
lapso de 30 a 90 segundos, et quemador del asador se
encender_i.
Los modelos con ignicidn el_ctrica tequieren de
energfa eldctrica_ En caso de que haya una intertupci6n
del suministro eldctrico, los quemadores de! horno en
estos modelos no podriln encenderse manualmente con
un ceriito_ E1 gas no citcular_ a menos que la barra
incandescente estd caliente.
Si el horno estfi prendido cuando ocurre una
interrupci6n del suministro eldctrico, et quemador de!
horno se apagar_i y :to se podr:i encender de nuevo
hasta que la electricidad regrese.
PASO 7
Si fuese necesario ajuste los
obturadores de ajuste del aire en los
quemadores del homo y del asador
Los obturadores de ajuste del aire para los quemadores
superiores e inferiores, regulan el flujo de aire hacia las
llalns$.
El obturador de ajuste del aire pata el quemador
superio_ (asador) est'. en el centro de la pared posterior
del homo.
E1 obturador para el quemador inferior (homo) es_
cetca de la pared posterior detr_s del caj6n de
almacenamiento o del panel de protecci6n
(dependiendo del modelo). Retire el caj6n o el panel.
Vea la secci6n de Cuidado y limpieza en esta gu_a.
Para ajustar el flujo del aire hacia cualquier
quemador_ afloje el tornillo de cabeza Phillips y haga
girar el obturador hacia la posici6n de abierto o
cerrado, segtln sea necesario°
44

La llama del quemador
superior (asador) deber_
set estable con COHOS
azules de
aproximadamente I"
(2.5 cm) y no deber_
extenderse mils a_fi de !os
bordes del deflector del
quernador.
Para determinar si la
llama de! quemador
inferior est_
quemando
adecuadamente,
ietite la solera del
homo. La llama deber_i tenet conos azules de
aproximadamente !" (Z5 cm) y si la cocina fiene
suministro de gas natural, la llama debenl quemar sin
que las puntas se vean amarillas. (En la mayorfa de los
gases LP es normal que se vean puntas amarillas
pequefias en los conos externos), La llama no debe
levantarse a travds de los portillos del quemadon Si esto
ocurre, reduzca gradualmente la abe:tara del obturador
del aire hasta que la llama se estabilice.
Para quitar la solera del homo:
1. Quite los tornillos de cabeza estriada sujetando la
parte posterior de Ia solera del homo,
2. Agarre la solera del horno pot las ranuras de
sujeci6n que hay en cada lado.
3. Levante la parte
posterior de la
solera del homo
lo suficiente
como para pasar
pot encima del
horde del marco
de Ia cocina y
s_iquelao
v_
So,era del homo
PASO 8
C6mo nivelar la cocina
1. Retire el caj6n de almacenamiento o el panel de
protecci6n.
2. Use una Have espafiola
o llave de tubo de 3II6"
(5 ram) para sacar las dos
paras niveladoms traseras
aproximadarnente
dos vueltas.
3. Use una llave espafiola de
1_" (3.5 cm) o llave
ajustable para sacar las
paras niveladoras
delanteras dos vueltas.
4. Instale las parrillas dentro
del homo y coloque la cocina en el lugar en el que
se va a instalar.
5. Para comprobar si la cocina ester nivelada, coloque
un nivel de burbuja o una taza parcialmente llena de
agua en una de las parrillas del horno. Si est:i usando
un nivel de burbuja, comprudbelo dos veces---con el
nivel colocado diagonalmente, primero en una
direcci6n y despuds en la otra.
6. Ajuste las paras niveladoras hasta que la cocina estd
nivelada.
7. Despuds que la cocina estd nivelada, separe la cocina
de la paled para poder instalar el dispositivo anti-
volcaduras.
(¢ontJnda en & p_gina _tguiente]
45

Instrucciones para la instalacion
PASO 9
Cbmo instalar el dispositivo anti-
volcaduras
ADVERTENCIA:
* La cocina debe asegurarse con un dispositivo anti-
volcaduras aprobado.
° A menos que se haya instalado correctamente, la
cocina puede voicarse si usted o un nifio se paran,
se sientan o se recuestan en una puerta abierta.
o Despu& de instalar el dispositivo anti-voicaduras,
compruebe su eficacia tratando con cuidado de
inclinar |a cocina hacia adelalnte_.
* Esta cocina ha sido disefiada paia satisfacer todas
las normas sobre vuelcos reconocidas por la
industria bajo circunstancias normaJes.
o Et uso de este dispositivo no excluye la posibilidad
de que la cocina se vuelque cuando el disposifivo
no estd instalado debidamente.
° Si et disposidvo anri-voicaduras que viene con su
cocina no sirve para este prop6sito, use el
Universal Anti-Tip Device (disposidvo universal
anti-volcaduras) mode[o WB02X7909_
1. Marque la pared donde se va a colocar el BORDE
DERECHO de la cocina. Cerci6rese de que deja
espacio para la proyecci6n de los mostradores si est_
planeando instalar la cocina al lado de los gabinetes.
, _'_ Dispositivo
Torn_llo de_--/_//ll_" H antFvolcaduras
cabeza I
Apro×imadamerlte "__
/" Borde marcado
(5. cm)#_ de la cocJna
/
/
2. Localice el borde exterior del dispositivo, 2¼"
(5°4 cm) hacia el centro de la cocina desde el borde
marcado de la cocina.
3. Usando el dispositivo como patr6n, marque la
posicidn del hueco para el tornillo.
4. Paia una construcci6n de madera, abra un agujero
piloto con el taladro, a un _ngulo de 20 grados
desde el horizontal Se puede usar un clavo o una
lezna si no hay tin taladro disponibie.
Monte el dispositivo anti-volcadm_is con el tornillo
que se provee°
46
Para una construccMn de ceil-lento o concreto,
necesirmld un drafondo de i/4" x 1_" (6 mmx 3.8 cm)
y un manguito de anclaje con un di_.metro exterior de
i/2" (1.3 cm), los cu£es no inclulmos. Abra, con el
taladro, un agujero del tamafio que se recomienda para
la tornillerfa.
Instale el manguito de anclaje dentro det agujero que
abri6 con el taladro y entonces instale el tirafondo a
travds dei dispositivo_ Los pernos deben apletarse
adecuadamente segtfn se recomienda para ese tipo de
tornillerfa.
Ho]a de madera
laminada
: Dispositivo
antFvolcaduras
Tirafondo
=laca de
Parte trasera
de ta cocina
5. Cotoque la cocina cont[a la pared y verifique la
instalaci6n, agarrando el borde delantero de la
superficie de cocci6n y tratando con cuidado de
inclinar la cocina hacia adelante_
CUANDO TODAS LAS INSTALACIONES SE
HAYAN COMPLETADO:
CERCIORESE DE QUE TODOS LOS
CONTROLES QUEDEN EN LA POSICION DE
APAGADO.
CERCIORESE DE QUE EL FLUJO DE LA
COMBUSTION Y DEL AIRE DE
VENTILACION DE LA COCINA NO ESTEN
OBSTRUIDOS.
Conversion a LP (Propano)
(o conversi6n de LP (propano) a gas natural)
Esta cocina viene ajustada de f:ibrica para usar gas
natural Si usted quiere pasarse a piopano ifquido, ta
conversi6n debe ser reatizada por un instalador
calificado de cocinas usando propano lfquido.
Junto al reguiador de ptesi6n en ta cocina hallar_i
pegadas las insttucciones de conversi6n, la etiqueta
adhesiva y los orificios pa[a propano ltquido.
En la parte posterior de la cocina hay otto juego de
instrucciones incluidas en el sobre que contiene los
diagramas de cableado del producto. Conserve estas
instrucciones y los orificios en caso de que quiera
volver a cambiar al gas natural.

i,Preguntas? Antes de que usted llame para pedir
servicio de reparaci( n...
PROBLEMA
LOS QUEMADORES
DE SUPERFICIE NO
ENCIENDEN O NO
QUEMAN DE MANERA
UNIFORME
LA LLAMA DEL
QUEMADOR ES MUY
GRANDE O AMARILLA
LOS QUEMADORES DE
SUPERFtCIE SE
ENCIENDEN PERO
NO EL HORNO
CAUSA POSIBLE
° Cerci6rese de que el enchufe eldctrico est4 conectado en una
toma de corriente activa.
• Los huecos del quemador en e! lado o alrededor de la superficie del quemador
pudieran estar obstmfdos. Quite los quemadores (en los modelos con quemadores
est_aldar gemetos) o las cabezas de los quemadores (en los mode!os con
quemadores seliados) o las tapas de los quemadores en los modelos a prueba
de derramamientos y lfmpielos con una aguja de coser o un alambre delgado
Cerci6rese de no agrandar los huecos. En los modelos a prueba de
derramamientos, inspeccione la _rea del electrodo para comprobar si hay
atimentos o grasa requemadoso
• Cerci6rese que tas charolas recolectoras (en ciertos mode!os) hayan sido
instaladas correctamente.
° Si la cocina est_i conectada al gas LP, p6ngase en contacto con la persona
que instal6 su cocina o que hizo la conversi6n.
• Es posible que la vilvula de cierre del gas del homo fuera accidentalmente
movida durante una limpieza o una mudanza.
Para inspeccionar la viflvuta de cierre del gas del homo en los modelos con
quemadores esrAndar gemelos, levante ta superficie de cocci6n y busque la
vlilvula de cierre del gas en Ia esquina derecha trasera.
Siga las instrucciones en los cuadrados A o B que se ajusten at tipo de
su regulador.
se muestra cerrada
palanca cerrada
TIRE PARA
Modelos con quemadores estfindar gemelos Modelos con quemadores estfindar gemelos
Para inspeccionar la v_vula de cierre del gas del homo en los modetos
con quemadores sellados, quite el caj6n de almacenamiento, el caj6n del
asador o el panel de protecci6n y busque la palanca de intermpci6n del gas
de la parte trasera de la cocina.
"\ AB_RIR._
Modelos con quemaclores seltados
47 (continaa_n ta p@ina siguiente)

i,Preguntas? Antes de Ilamar para servicio... (coot noac o.)
PROBLEMA CAUSA POSIBLE
NO FUNCIONA_N NI EL • El enchufe el_ctrico de la cocina tiene que estar encajado firmemente en una
RELOJ NI EL CONTADOR toma de corriente activa. Compruebe para ver si hay algtfn fusible fundido
DE TIEMPO o si el interruptor de circuit{} ha sido trabado.
° Verifique que no haya una falla en la energfa eldctrica.
° Revise las secciones Controles del homo, reloj y contador de tiempo.
:'F-- Y UN NUMERO" ° Si "F y un nfimero" destellan en la ventanilla que muestra la horn, hay un
DESTELLAN EN LA c6digo de error de ftmci6n. Si un c6digo de error de funci6n aparece durante el
VENTANILLA cido de auto limpieza, inspeccione el seguro de la puerta. La manija del seguro
pudiera haberse movido fuera de la posici6n de cierre, aunque hays sido
ligeramente. Asegtfrese de mover el seguro hacia ta derecha, hasta el tope.
Haga girar el bot6n de Oven Set (temperatura del homo) hasta OFF
(apagado). Deje que el homo se enfr_e durante una hora. Vuelva a hacer
funcionar el horno.
' Desconecte el suministro de energfa de la cocina durante 5 rninutos y entonces
vudlvalo a conectar. Si se repite el c6digo de fallo, llame al tdcnico de servicio,
LA VENTANILLA SE PONE * Desconecte e! suministro de energfa en la caja de fusibles o en et interruptor
EN BI_.NCO O LAS LUCES det circuito pot lo menos durante 10 segundos. Luego vuelva a conectarlo y
INDICADORAS SE encienda la cocina. Si las luces indicadoras siguen encendidas, solicite
ENCIENDEN CUANDO un servicio.
LA COCINA NO SE ESTA
USANDO
LA LUZ LIMPIEZA " Et bot6n de Oven Set se ha fijado a CLEAN (limpieza) antes que
EMITE UN la manija de la puerta se haya movido hacia la derecha,
DESTELLO
LA LUZ DEL HORNO • La bombilla puede estar floja o fundida,
NO FUNCIONA
• El enchufe debe estar conectado a una toma de corriente activa.
LA LUZ DE SUPERFICIE ° La bombilla fluorescente est_ floja o defectuosa. Ajtlstela o reempl_cela.
NO FUNCIONA ° El conmutador que hace funcionar la luz est_ roto. Llame atm t&nico de servicio.
EL HORNO NO FUNCIONA • E1 enchufe de la cocina no esrfi bien insertado en la toma de corriente.
° El interruptor autom_tico del circuito de su casa est_i trabado o se fundi6
un fusible,
• La puerta qued6 con el seguro puesto despu& de Ia auto limpieza.
° Los controles del homo no estdn programados de manera correcta.
° El termostato necesita ajustes. Vea la secci6n Ajuste del termostato
det horno--H, qgalo Ud. mismo.
LA TEMPERATURA DEL
HOR_NO ES DEMASIADO
FRIA O CALtENTE
48

PROBLEMA CAUSA POSIBLE
LOS ALIMENTOS NO SE
ASAN NI SE HOR2qEAN
CORRECTAMENTE
LOS ALIMENTOS NO SE
ASAN AL FUEGO DIRECTO
COMO ES DEBIDO
EL CICLO DE AbvI'O
LIMPtEZA DEL HOP, NO
NO FUNCIONA
NO SE PUEDE QUITAR
EL SEGURO A LA PUERTA
DEL HORNO
EL HORNO NO ESTA
LIMPIO DESPUES DEL
CICLO DE LIMPIEZA
LA PUERTA DEL HORNO SE
CERRO ACCIDENTAI_,MENT
CON EL SEGURO
DURANTE EL HORNEADO
OLOR FUERTE
" Los controles det homo no se han fijado de manera adecuada. Vea la secci6n
de Hornear o Asar.
• La posici6n de la parrilta no es la correcta.
• Se est_n usando utensilios de cocina incorrectos o de un tamafio inapropiado.
• El termostato del homo necesita ajuste. Vea la secci6n de Ajustar el
termostato del horno--Hdgalo u_ted mismo.
• No se ha fijado bien ta hora en el reloj.
• Et papet de aluminio no se us6 apropiadamente en el homo.
• La solera del homo no estfi, asentado firmemente en su posici6n.
• Los controles del homo no est_fn fijados bien. Vea la secci6n de Asar al
fuego directo.
° La puerta del homo o del asador no est_i cerrada.
• Se estli usando la parrilla en una posici6n incorrecta. Vea la secci6n de
Asar a! fuego directo.
° Los alimentos se est_n cocinando en una cazuela caliente.
• Los utensilios empleados no son los apropiados para asar al fuego directo.
° El papel de aluminio que se us6 para cubrir la rejilla de la bandeja det asador no
se coloc6 correctamente ni tampoco se hicieron las ranuras segtin se recomienda.
• La sotera del homo no est_ asentada firmemente en su posici6n°
° La temperatura del homo est_i muy alta para programar la funci6n de auto
limpieza, Deje que la cocina se enfrfe hasta alcanzar la temperatura ambiente
y vuelva a fijar los controles.
° La manija de Oven Set (temperatura det homo) no ha sido colocada
en CLEAN (Iimpieza).
° La manija del seguro de la puerta no est,. al mfiximo hacia la derecha.
° El homo deber_i enfriarse hasta atcanzar una temperatura mils baja que ta que
tenfa a la hora del cierre. No cierre la puerta con el segm'o excepto cuando
estd usando el ciclo de auto limpieza, de 1o contrario el homo pudiera
btoquearse.
• Los controles del homo no se fijaron adecuadamente, Vea ta secci6n
Funcionamiento del homo con auto limpieza.
• Un homo que estd exttemadamente sucio requiem de 5 horus y 59 minutos
de limpieza.
• Los deiramamientos excesivos deberfin timpiarse antes de comenzar el ciclo
de limpieza,
• Haga girar el botdn de Oven Set (ternperatura del homo) hasta
OFF (apagado).
3na proporcmn madecuada de alrelgas en el homo. Ajuste el obturador
del aire del quemador det homo.
• Durante las primeras semanas de uso del homo cierto olor es normal,
debido al material aMador alrededor deI revestimiento interior det homo.
Esto es temporal,
49

For in-home major brand repair service:
Call 24 hours a day, 7 days a week
1-800-4-MY=H OMEsM(1-8o0-469-4663)
Para pedir servicio de reparaci6n a domicillo - 1-800-676-5811
In Canada for all your service and parts needs call
- 1-800-665-4455
Au Canada pour tout le service ou les pi_ces
For the repair or replacement parts you need:
Call 7 am - 7 pm, 7 days a week
1-800=366-PART (1-800-366-7278)
Para ordenar piezas con entrega a domicilio - 1-800-659-7084
For the location of a Sears Parts and Repair Center in your area:
Call 24 hours a day, 7 days a week
1-800-488-1222
For information on purchasing a Sears Maintenance Agreement
or to inquire about an existing Agreement:
Call 9 am - 5 pm, Monday - Saturday
1=800-827-6655
The Service Side of Sears,"
5o

®
GARANT/APARAUNAESTUFAAUTONOMA
/_UN ANO COMPLETO DE GARANT|A PARA TODAS LAS PIEZAS
S], dentro deun afio a partir de lafechade instalaci6n, cuaiquier partefunciona indebidamentea causadeun defectoen materiales
o fabricaci6n, Searsta reparardo tareemplazar_,a nuestradiscreci6n, sin costo alguno parael comprador
Si esteproducto se utiliza paraotros fines queno seanel uso familiar privado, las garantfasindicadasarriba s61otendr,tnvigencia
durante90 dfas
EL SERVICIO DE GARANTiA ESTA A SU DISPOSICll)N CON SOLO PONERSE EN CONTACTO CON EL CENTRO
0 DEPARTAMENTO DE SERVICIO SEARS MAS CERCANO A USTED EN LOS ESTADOS UNIDOS
Estagarantfaleotorgaderechos tegatesespeclficosyes posible que ustedtengatambi6notros derechosque varfandeun
estadoaotto.
SearsRoebuckandCo Dept. 817WA HoffmanEstates,IL 60179
Para ampliar el valor de su estufa, c0mpre un Acuerd0 de Mantenimient0 (MA) Sears
/_ Anos de cobertura para Primer afio Segundo afio Tercer afio _
el propietario
1. Reemplazo de las partes defectuosas W MA MA
2. Revisi6n anual de mantenimiento
X.. preventivo a petici6n suya MA MA MA
J
W - Garantia MA - Contrato de Mantenimiento
LasestufasKenmorehansidodise#adas,fabricadasyprobadasparabrindarleaSosdeoperaci6nconfiableSinembargo,
cualquieraparatoelectrodomdsticomodemopuederequeriralgunareparaci6ndevezencuandoLagarant_aSears,adem_s
delAcuerdodeMantenimientoSears,le brindaprotecci6ncontrafacturasinesperadasdereparaci6n
Arriba en ta tabla secompara la garantfay el Acuerdode Mantenimientoy se muestranlos benelicios detener un Acuerdode
Mantenimiento parasu estufaSears
P6ngaseen contactocon su asociado deventasSearso conel Centrode Servicio Searsde la Iocalidadboy mismo y adquiera
un Acuerdo de Mantenimiento Sears
51

SW/AR8
MANUAL DEL
PROPIETARIO
Nt_meros de
los modelos:
72471 75481
72478 75488
72691 75581
72695 75585
73281 75586
73288 75588
73481 75691
73485 75695
73488 75696
75381 75698
75388
Para Ilamar gratis
para servicio
de reparaci6n:
1-800-4-MY-HOME'"
(1-800-469-4663)
Para piezas
de repuesto:
1-800-FON-PART
(1-800-366-7278)
S£ARS
COCINA (ESTUFA) DE GAS
El numero del modelo de su cocina de gas se
encuentra en una placa sujetada a la parte
delantera del marco de la cocina detras del
caj6n del asador o de almacenamiento, o del
panel de protecci6n.
Todas las piezas de reparaci6n estan
disponibles para compra inmediata o pedido
especial cuando usted visite su Centro de
Servicios Sears mas cercano o el
Departamento de Servicios en la mayoria de
ias tiendas Sears. Para solicitar servicio o
pedir piezas de repuesto por telefono, Ilame
sin costo a los numeros telef6nicos en ia
lista de ia izquierda.
Cuando solicite servico o haga un pedido de
piezas siempre provea la siguiente informacion:
Tipo de producto
+ Ntimero de modelo
• Numero de pieza
• Descripci6n de la pieza
Sears, Roebuck and Co., Hoffman Estates, IL 60179 U.S.A.
 Loading...