

Kenmore 721.68360, 721.68361 Owner's Manual
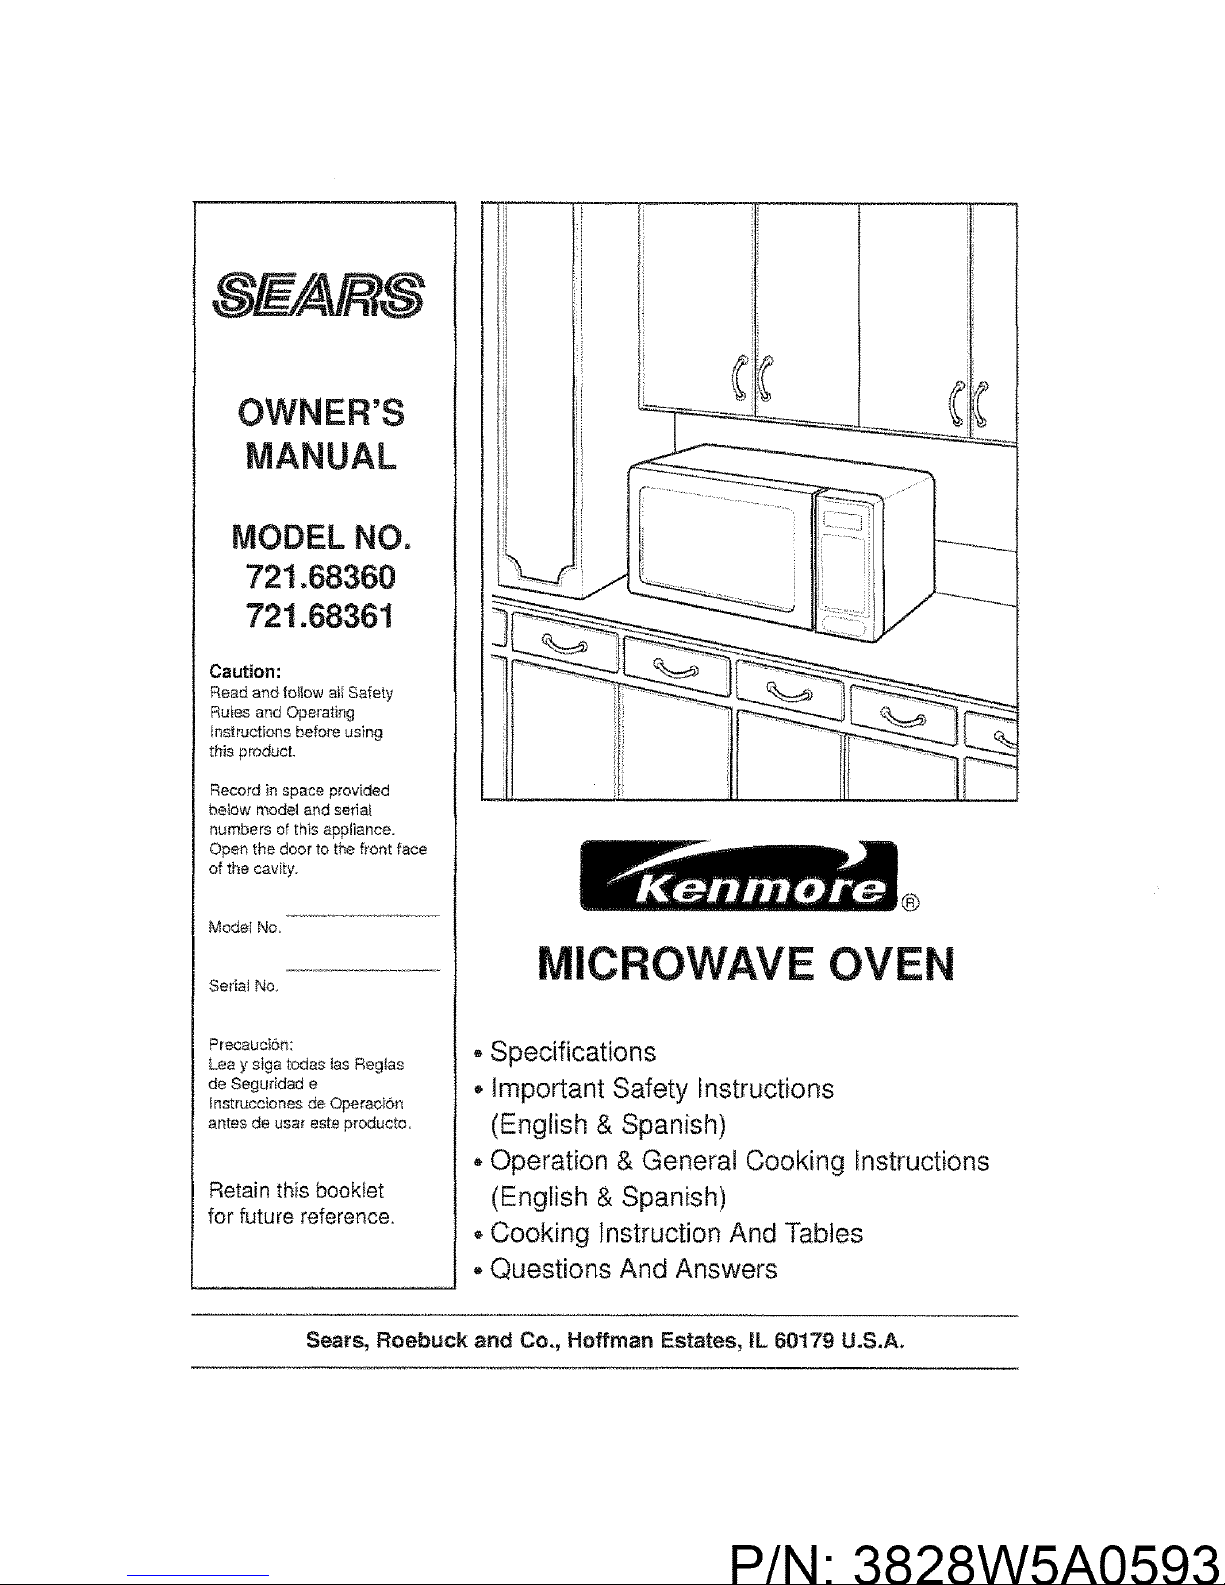
OWNER'S
MANUAL
MODEL NO.
721.68360
721.68361
Caution:
Read and follow a_fSafety
Ruies and Operati_g
_nstrvctions before using
this producL
Record in space provided
below model a_ld serial
numbers of this appliance.
Open the door to the front face
of the cavity.
Model No,
Seriat No.
PrecauciSn:
Lea y siga todas las Regtas
de Seguridad e
_nstrucciones de Operacbn
antes de usar este producto,
Retain this bookfet
for future reference.
ii
®
MICROWAVE OVEN
- Specifications
. Important Safety Instructions
(English & Spanish)
, Operation & General Cooking Instructions
(English & Spanish)
Cooking Instruction And Tables
• Questions And Answers
Sears, Roebuck and Co., Hoffman Estates, IL 60179 U.S.A.
P/N: 3828W5A0593
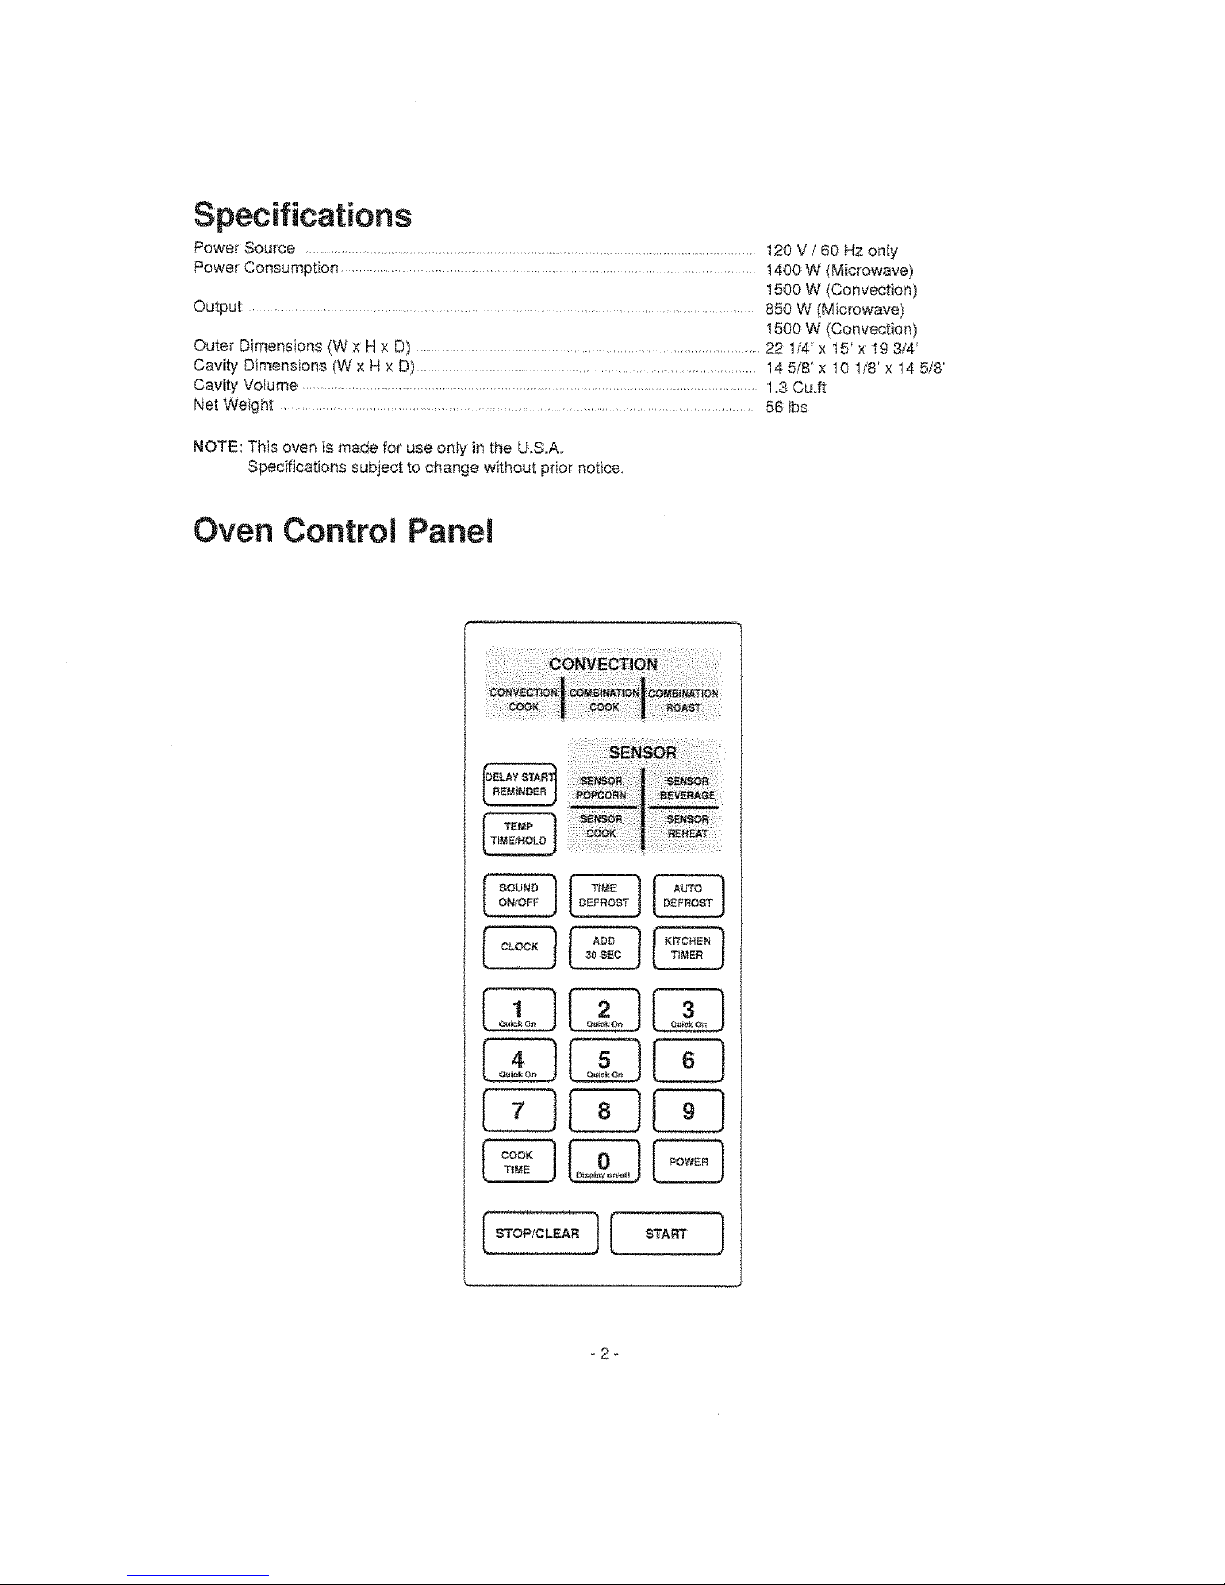
Specifications
Power Source ......................................................................................................... t20 V / 60 Hz onIy
Power Consumptbn ............................................................................ t400 W (Microwave)
t500 W (Convection)
Output ....................................................................... 850 W (Microwave)
1500 W (Convection)
Oute_ Dimensions (W x H x D) ..................................................... 22 1/4'x t5 _x t9 3/4'
Cavity Dimensions (W x H × D) ........................................... 14 5/'8' x t0 1/8' x 14 5/8'
Cavity Volume ...................................................................................................................... 1.3 Cu,ft
Net Weight .......................................................................................... 56 lbs
NOTE: This oven is made for use only in the U,S.A
Specifications subject to change w_thout pdor notice,
Oven Control Panel
C
(Sq"OPfCLEAR } I START ]
_2_
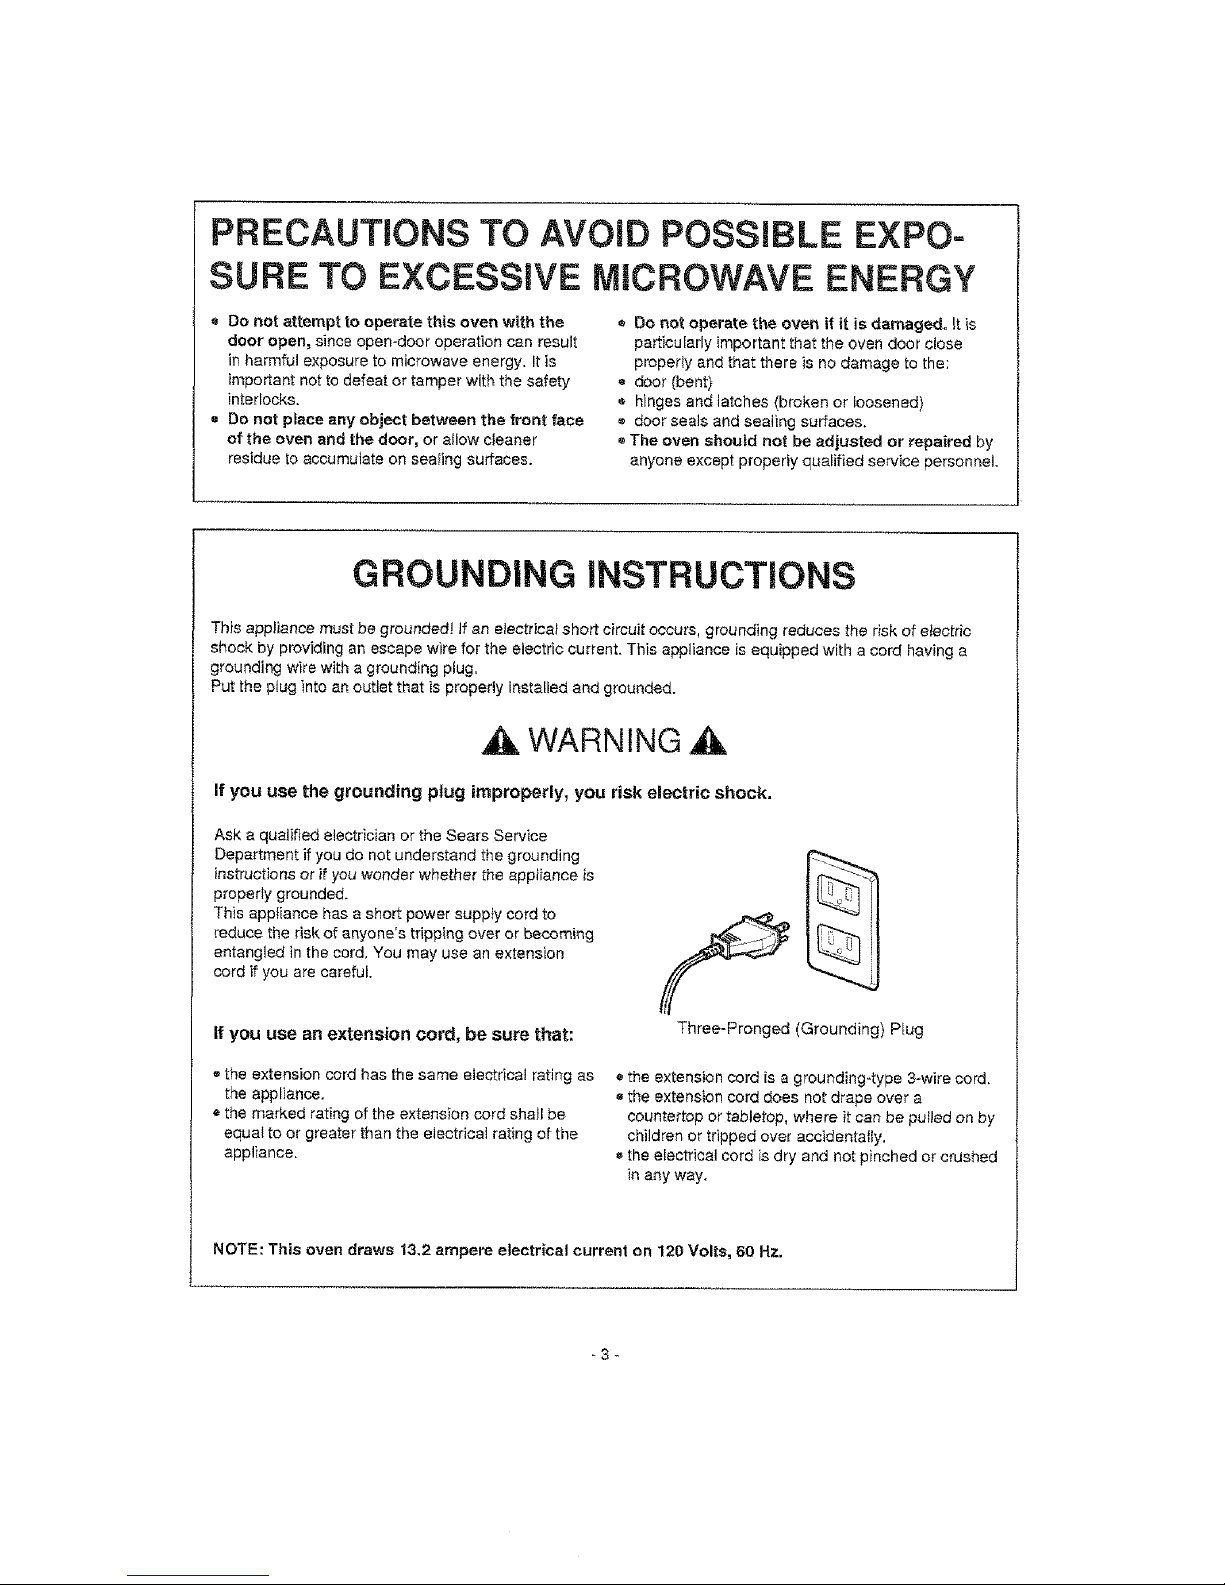
PRECAUTIONS TO AVOID POSSIBLE EXPO-
SURE TO EXCESSIVE MICROWAVE ENERGY
Do not attempt to operate this oven with the
door open, since open-door operatiot_ can result
in harmful exposure to microwave energy, it Is
important not to defeat or tamper with the safety
interlocks.
8 Do not peace any object between the front face
of the oven and the door, or a_low c{eaner
residue to accumulate on seafing surfaces.
® Do not operate the overt if it is damaged. It is
particularly important that the oven door close
properly and that there is no damage to the:
- door (bent)
• hinges and tatches (broken or loosened)
o door seals and sealing surfaces.
o The oven shoutd not be adjusted or repah'ed by
anyone except properly qualified service personnel.
GROUNDING iNSTRUCTIONS
This appliance must be grounded! If an etectrica_ short circuit occurs, grounding reduces the risk of e_ectric
shock by providing an escape wire for the electric current. TNs appliance is equipped with a cord having a
grounding wire with a grounding plug.
Put the plug into an outlet that is properly installed and grounded.
,A WARNING ,A
If you use the grounding plug improperly, you risk electric shock.
Ask a qualified electrician or the Sears Service
Department if you do not understand the grounding
instructions or if you wonder whether the appiiance is
properly grounded.
This appliance has a short power supp{y cord to
reduce the risk of anyone's tripping over or becoming
entangled in the cord. You may use an extension
cord if you are careful.
If you use an extension cord, be sure that:
Three-Pronged (Grounding) Ptug
,, the extension cord has the same electrical rating as
the appliance.
the marked rating of the extension cord shatl be
equal to or greater than the electrical rating of the
appliance.
®the extension cord is a grounding4ype 3-wire cord.
= the extensbn cord does not drape over a
countertop or tabletop, where it can be pulled on by
children or tripped over acc;dentatly.
the electrical cord ;sdry and not pinched or crushed
in any way.
NOTE: This oven draws 13,2 ampere electrical current on 120 Volts, 60 Hz.
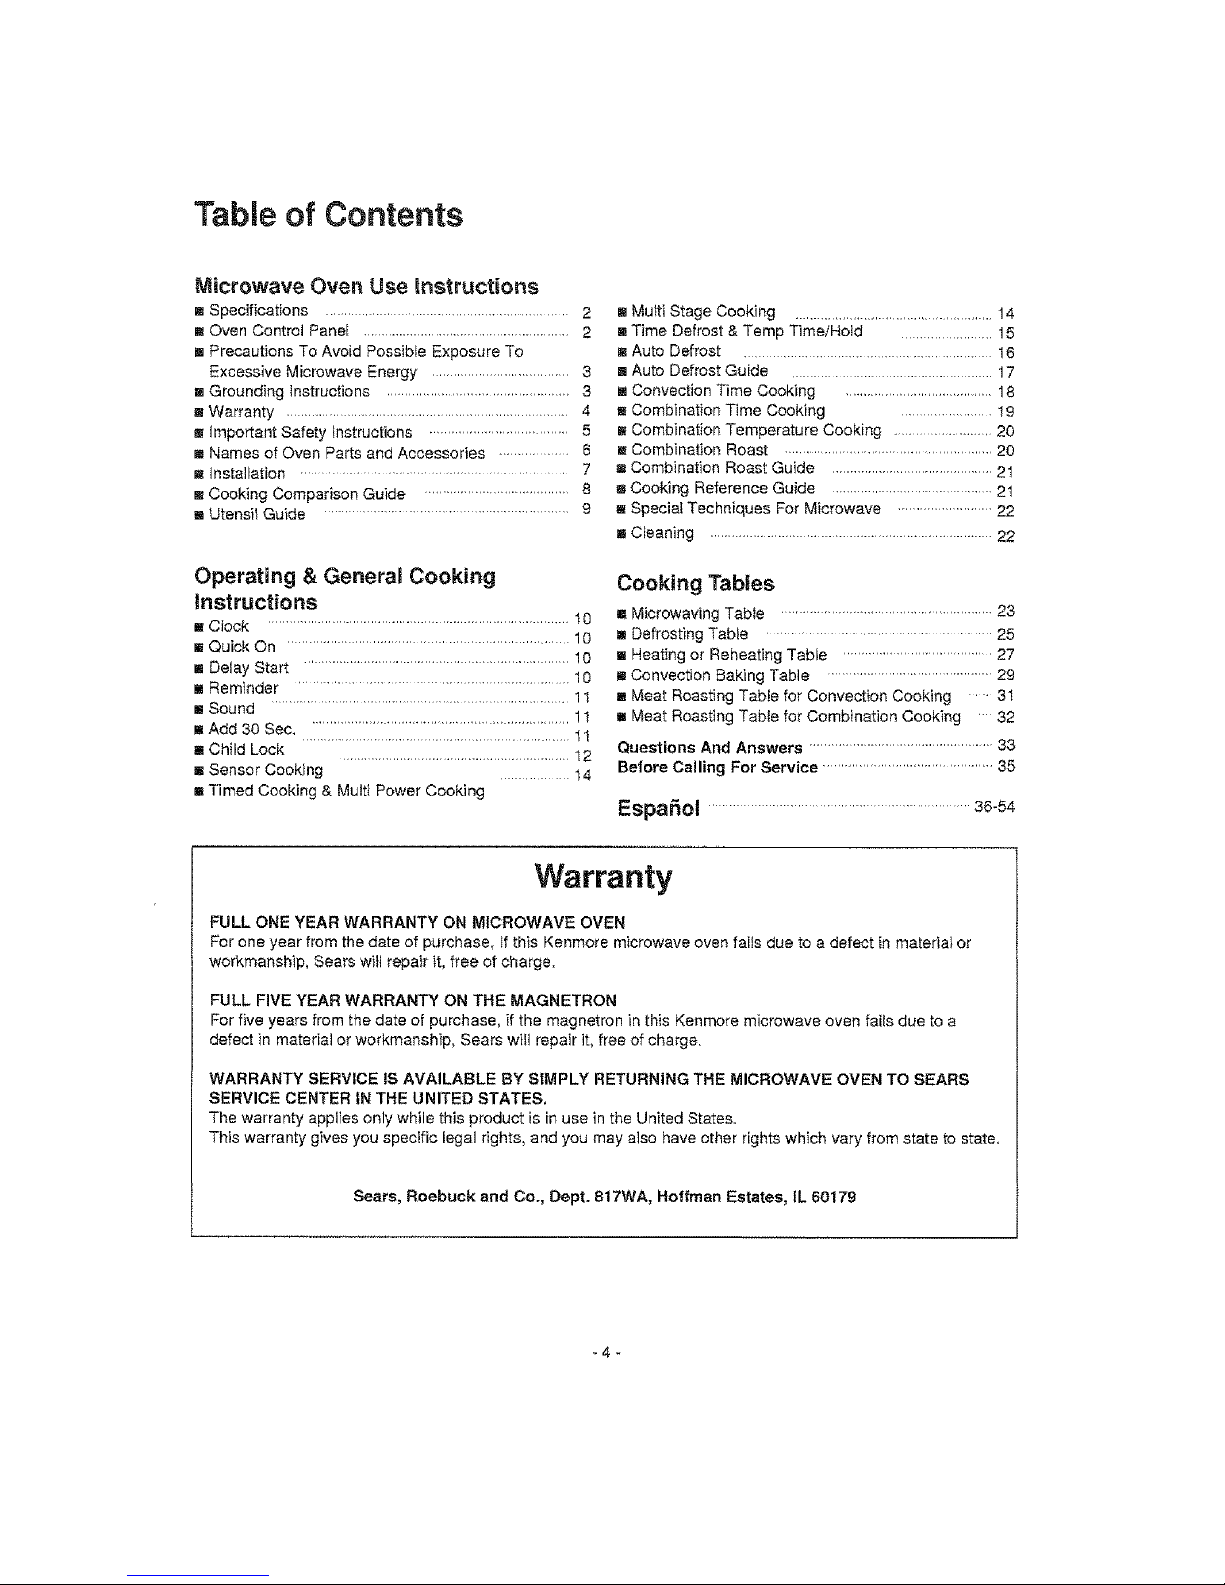
Table of Contents
Microwave Overt Use instructions
[] Specifications ....................................................................2
mOven Control PaneE .........................................................2
mPrecautions To Avoid Possible Exposure To
Excessive Microwave Energy ......................................3
[] Grounding instructions ................................................. 3
[] Warranty .............................................................................4
[] Important Safety instructions ..................................... 5
mNames of Oven Parts and Accessories ................... 8
mInstallation ..................................... 7
E Cooking Comparison Guide ........................................ 8
[] Utensil Guide ................................................................. 9
Operating & General Cooking
Instructions
==Clock ........................................................................ 10
[] Quick On ...................................................................... 10
10
mDelay Start ..........................................................................
10
mReminder ..............................................................
11
= Sound ................................................................................
11
mAdd 30 Sec. .......................................................................t I
[] Child Lock ...............................................................t2
[] Sensor Cooking ................ 14
[] Timed Cooking & Multi Power Cooking
mMulti Stage Cooking .......................................................14
[] Time Defrost & Temp Time/Hold .........................15
B Auto Defrost ............................................................... 16
[] Auto Defrost Guide .............................. 17
mConvection Time Cooking .........................................18
Combination Time Cooking ....................... !9
mCombination Temperature Cooking ...........................20
mCombination Roast ......................................................20
w Combination Roast Guide .............................................21
Cooking Reference Guide ...........................................2t
[] Special Techniques For Microwave ..........................22
m Cleaning ...............................................................................22
Cooking Tables
I Microwaving Table ........................................................... 23
[] Defrosting Table ...................... 25
[] Heating or Reheating Table .......................................27
[] Convection Baking Table ..............................................29
[] Meat Roasting Table for Convection Cooking 31
[] Meat Roasting Table for Combination Cooking .... 32
Questions And Anent, ere ...................................................33
Before Calling For Service ..............................................35
EspaSol ........................................................................36-54
Warranty
FULL ONE YEAR WARRANTY ON MICROWAVE OVEN
For one year from the date of purchase, if this Kenmore microwave oven fails due to a defect in material or
workmanship, Sears wilt repair it, free of charge.
FULL FIVE YEAR WARRANTY ON THE MAGNETRON
For five years from the date of purchase, if the magnetron in this Kenmore microwave oven fails due to a
defect in material or workmanship, Sears will repair it, free of charge.
WARRANTY SERVICE IS AVAILABLE BY SIMPLY RETURNING THE MICROWAVE OVEN TO SEARS
SERVICE CENTER IN THE UNITED STATES,
The warranty applies only while this product is in use in the United States.
This warranty gives you specific legal rights, and you may also have other rights which vary from state to state,
Sears, Roebuck and Co., Dept. 817WA, Hoffman Estates, IL 60179
44-
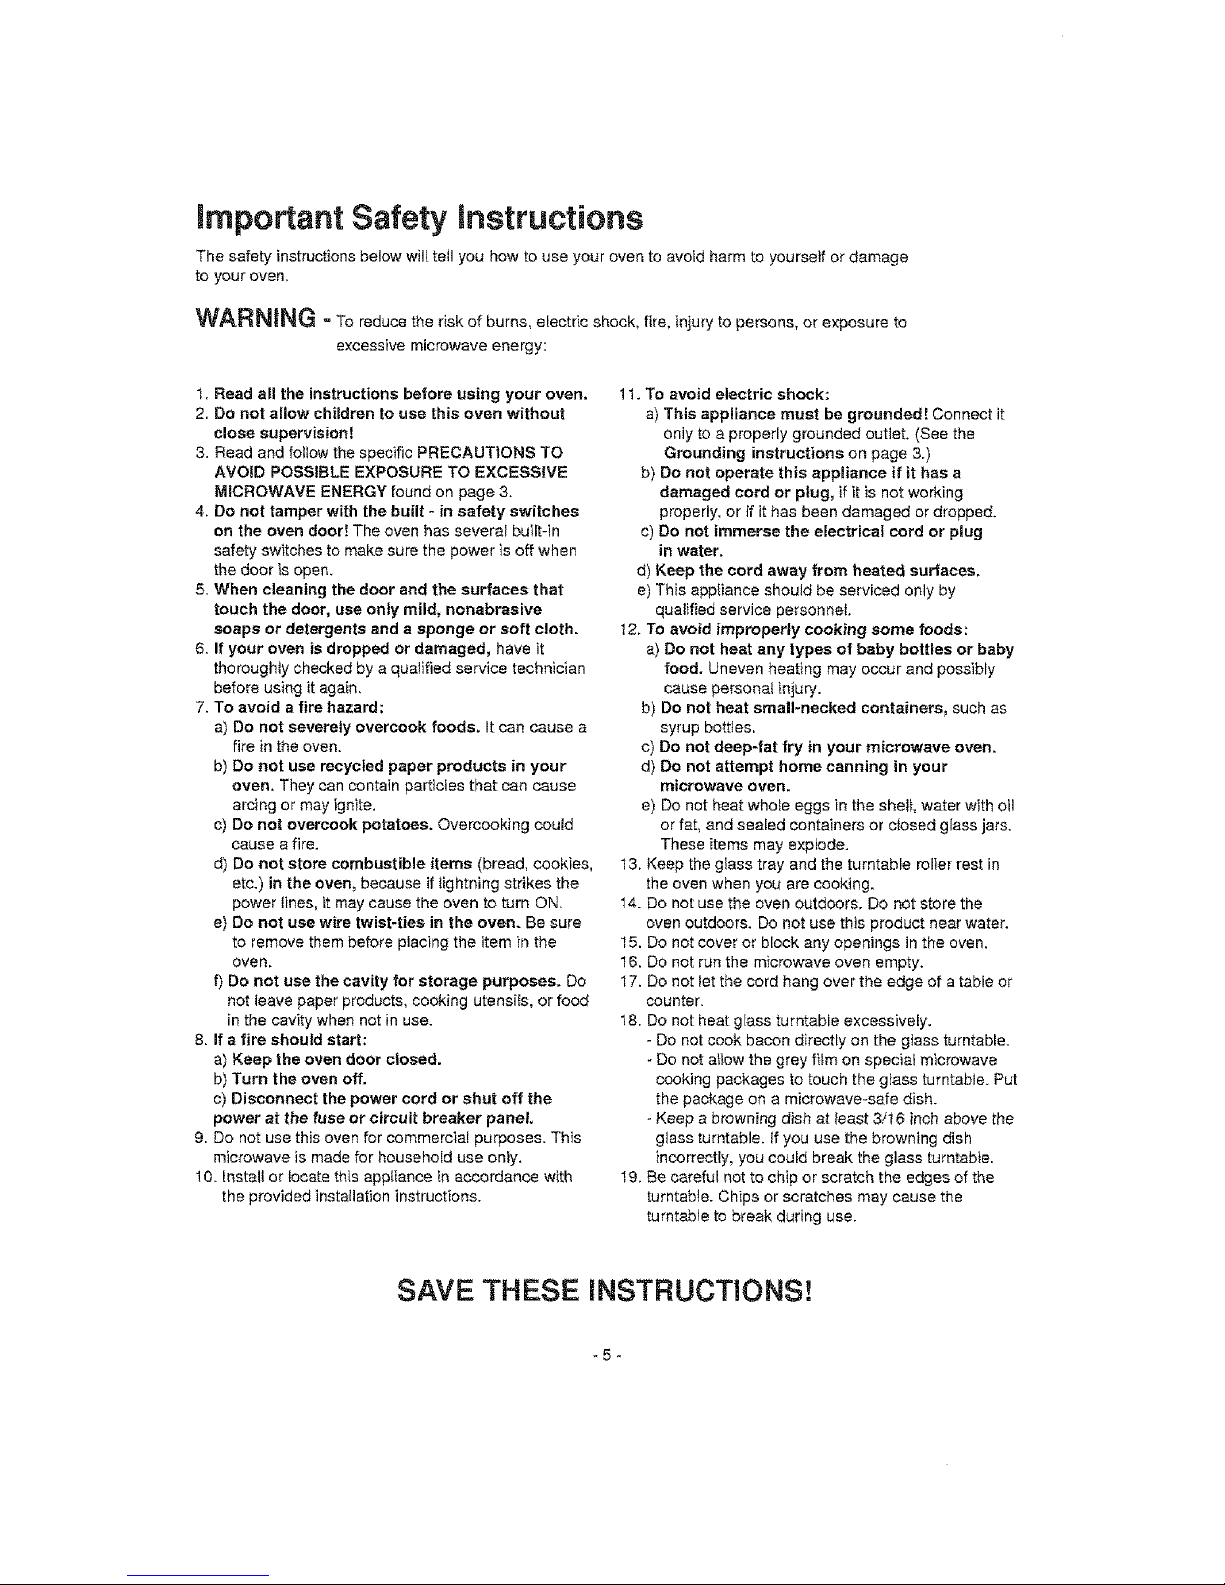
mmportant Safety instructions
The safety instructions below will tell you how to use your oven to avoid harm to yourself or damage
to your oven,
WARNING o To reduce the risk of burns, electric shock, fire, injury to persons, or exposure to
excessive microwave energy:
1. Read a!l the instructions before using your oven.
2. Do not allow children to use this oven without
close supervision!
3. Read and follow the specific PRECAUTIONS TO
AVOID POSSIBLE EXPOSURE TO EXCESSIVE
MICROWAVE ENERGY found on page 3.
4. Do not tamper with the built - in safety switches
on the oven door! The oven has several built-ln
safety switches to make sure the power is off when
the door is open.
5. When cleaning the door and the surfaces that
touch the door, use only mild, nonabrasive
soaps or detergents and a sponge or soft cloth.
6. If your oven is dropped or damaged, have it
thorougHy checked by a qualified service technician
before using it again.
7. To avoid a fire hazard:
a) Do not severely overcook foods. It can cause a
fire in the oven.
b) Do not use recycled paper products in your
oven, They can contain particles that can cause
arcing or may ignite,
c) Do not overcook potatoes. Overcooking could
cause a fire.
d) Do not store combustible items (bread, cookies,
etc.) in the oven, because if lightning strikes the
power lines, it may cause the oven to turn ON,
e) Do not use wire twist-ties in the oven. Be sure
to remove them before placing the item in the
oven.
f) Do not use the cavity for storage purposes. Do
not leave paper products, cooking utensils, or food
in the cavity when not in use.
8. If a fire should start:
a) Keep the oven door closed.
b) Turn the oven off.
c) Disconnect the power cord or shut off the
power at the fuse or circuit breaker panel.
9, Do not use this oven for commercial purposes. This
microwave is made for household use oniy,
1Q. Install or locate this appliance in accordance with
the provided installation instructions.
11. To avoid electric shock:
a) This appliance must be grounded! Connect it
only [o a properly grounded outlet. (See the
Grounding instructions on page 3,)
b) Do not operate this appliance if it has a
damaged cord or plug, if it is not working
properly, or if it has been damaged or dropped.
c) Do not immerse the electrical cord or plug
in water.
d) Keep the cord away from heated sutiaces.
e) This appliance should be serviced only by
qualified service personnel.
12, To avoid improperly cooking some foods:
a) Do not heat any types of baby bottles or baby
food. Uneven heating may occur and possibly
cause personal injury.
b) Do not heat small-necked containers, such as
syrup bottles,
c) Do not deep-fat fry in your microwave oven.
d) Do not attempt home canning in your
microwave even,
e) Do not heat whole eggs inthe sheit, water with oil
or fat, and sealed containers or closed giass jars.
These items may explode.
13. Keep the glass tray and the turntable relier rest in
the even when you are cooking.
14. Do not use the oven outdoors. Do not store the
oven outdoors. Do not use this product near water.
15. Do not cover or block any openings in the oven.
t 6. Do not run the microwave oven empty.
17. Do not let the cord hang over the edge of a table or
counter.
18. Do not heat glass turntable excessively.
- Do not cook bacon directly on the glass turntable.
- Do not a}low the grey film on speciai microwave
cooking packages to touch the glass turntable. Put
the package on a microwave-safe dish.
- Keep a browning dish at least 3/t6 inch above the
glass turntable, if you use the browning dish
incorrectly, you could break the glass turntable,
19. Be careful not to chip or scratch the edges of the
turntable. Chips or scratches may cause the
turntable to break during use.
SAVE THESE iNSTRUCTIONS!
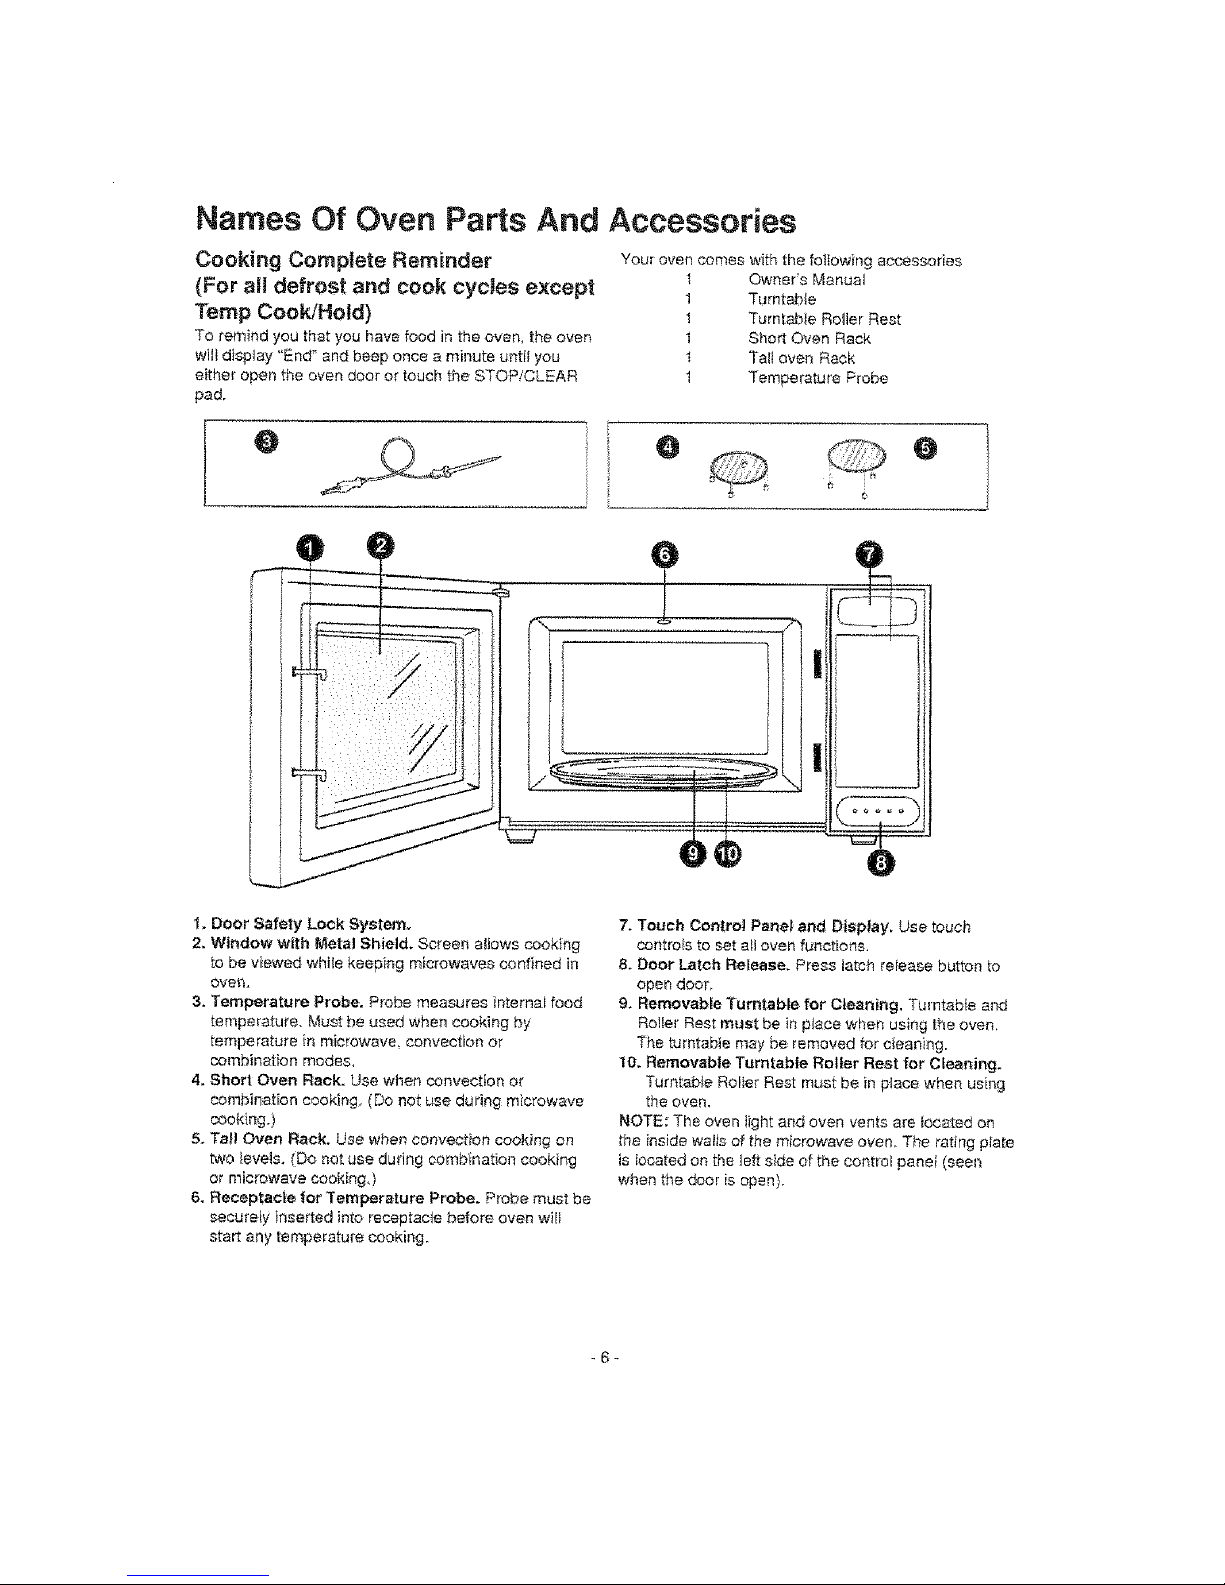
Names Of Oven Parts And Accessories
Cooking Comp|ete Reminder
(For all defrost and cook cycJes except
Tamp Cook/Hold)
To remind you that you have food in the oven, the oven
will dtsptay "End" and beep once a minute untit you
either open the oven door or touch the STOP!CLEAR
pad.
Your oven comes with the following accessories
1 Owner's Manual
1 Turntable
I Turntable Ro_ler Rest
1 Short Oven Rack
1 Tall oven Rack
1 Tempera_re Probe
[
0
Q @
t_
O
1, Door Safety Lock System.
2. Window with Metal Shield. Screen a_lows cooking
to be viewed while keeping microwaves confined in
oven,
3. Temperature Probe. Probe measures internal food
temperature. Must be used when cookir_g by
temperature in microwave, convection or
combination modes,
4. Short Oven Rack. Use when convectior_ or
combinatbn cooking, (Do not use during microwave
cooking.)
5. Tall Oven Rack. Use when convection cooking on
two _eveb, (Do not use dudng comb;nation cooking
or microwave cooking,)
6. Receptacle for Temperature Probe. Probe must be
secureky ir_serted into receptacle before oven will
start any temperature cooking.
7. Touch Control Panel ar_ Display, Use touch
controls to set all oven fur_otior_s,
& Door Latch Release. Press latch _e_easebutton to
open door,
9. Removable Turntable for Ctean_ng, TurntaMe and
Rolie_' Rest must be in place when using the oven.
The tumtabie may be removed for ciean}ng,
10. Removable Turntable Roller Rest for Clea!_irtg.
Tumtabte Rolier Rest must be in place when using
the oven,
NOTE: The oven tigt_tand oven vents are located on
the inside walls of the microwave oven, The rating pia[e
is Iocated on the Jeff side of the control panel (seen
when the deor is open),
-6-
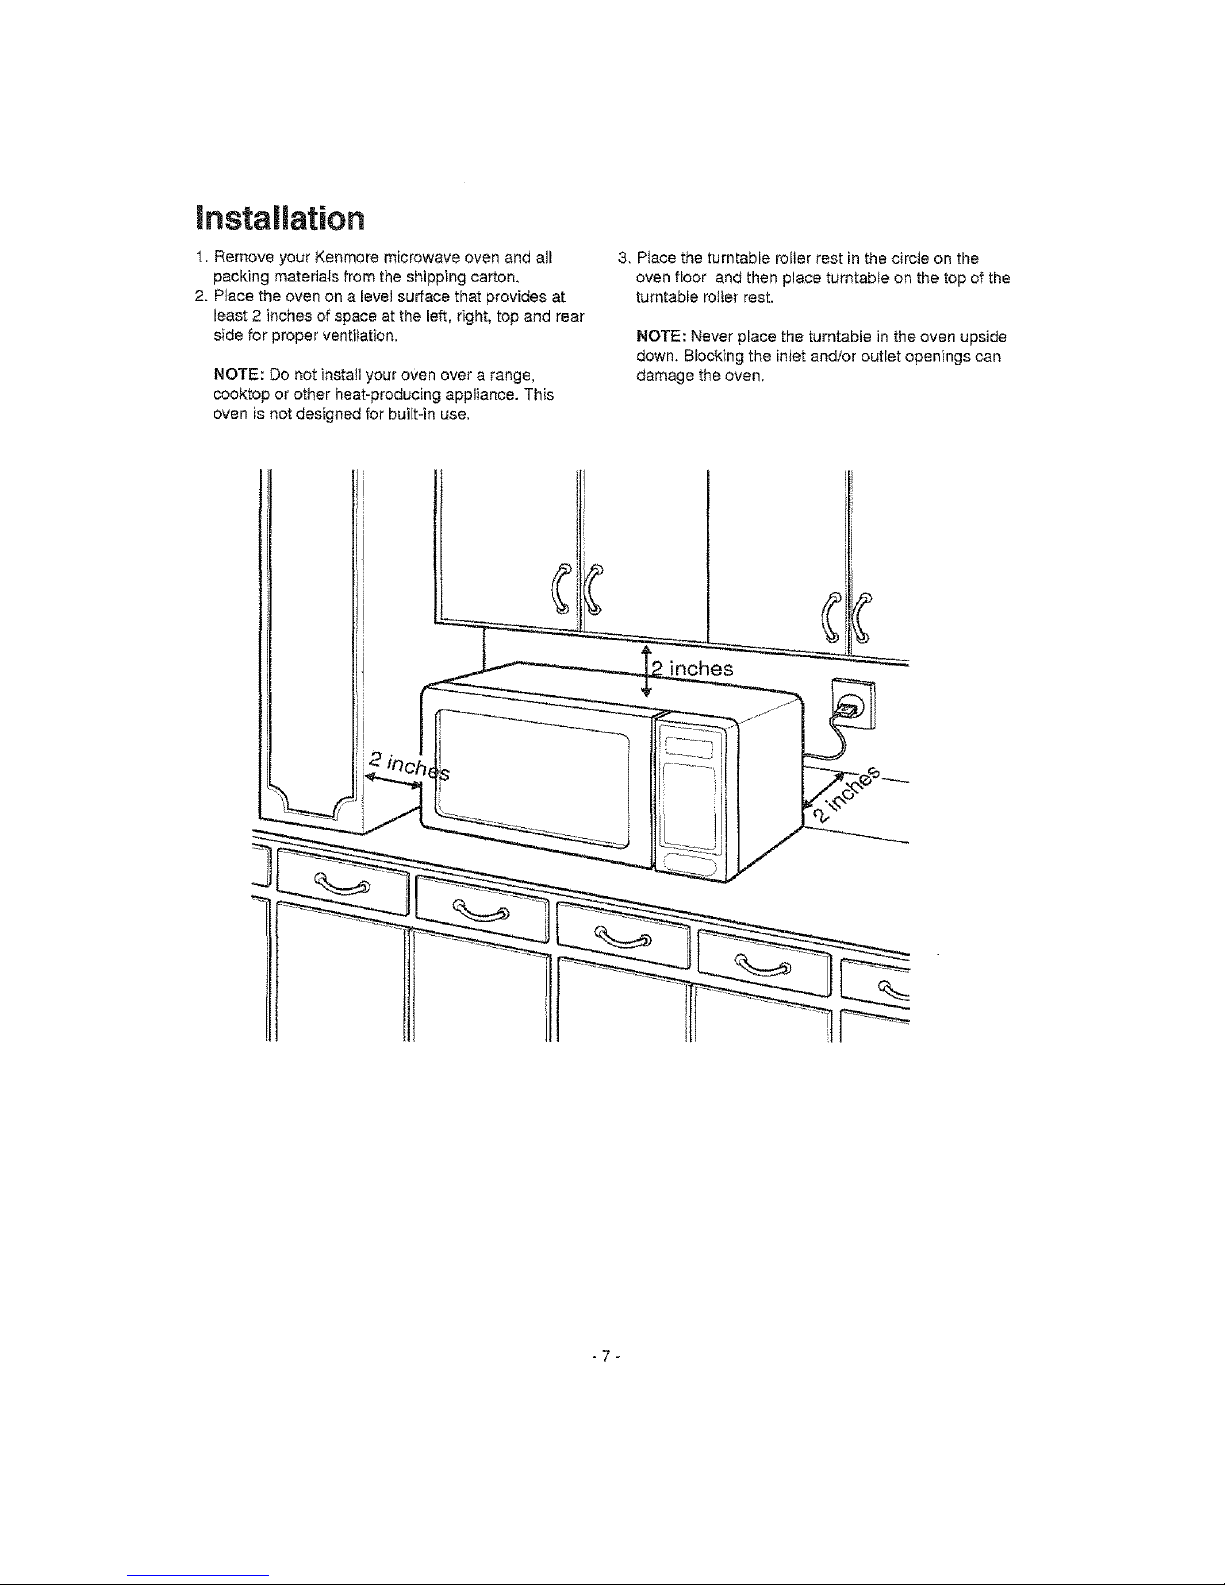
installation
l. Remove your Kenmore microwave oven and all
packing materials from the shipping carton,
2. Place the oven on a level surface that provides at
least 2 inches of space at the left. right, top and rear
side for proper ventilation.
NOTE: Do not install your oven over a _'ange,
cooktop or other heat-producing appliance. This
oven is not designed for bui[t4n use.
3, Place the turntable relier rest in the circle on the
oven fbor and then place tumtabte on the top of the
turntable relier rest.
NOTE: Never place the turntable in the oven upside
down. Blocking the iniet and/or outlet openings can
damage the oven_
C
inches
-7-
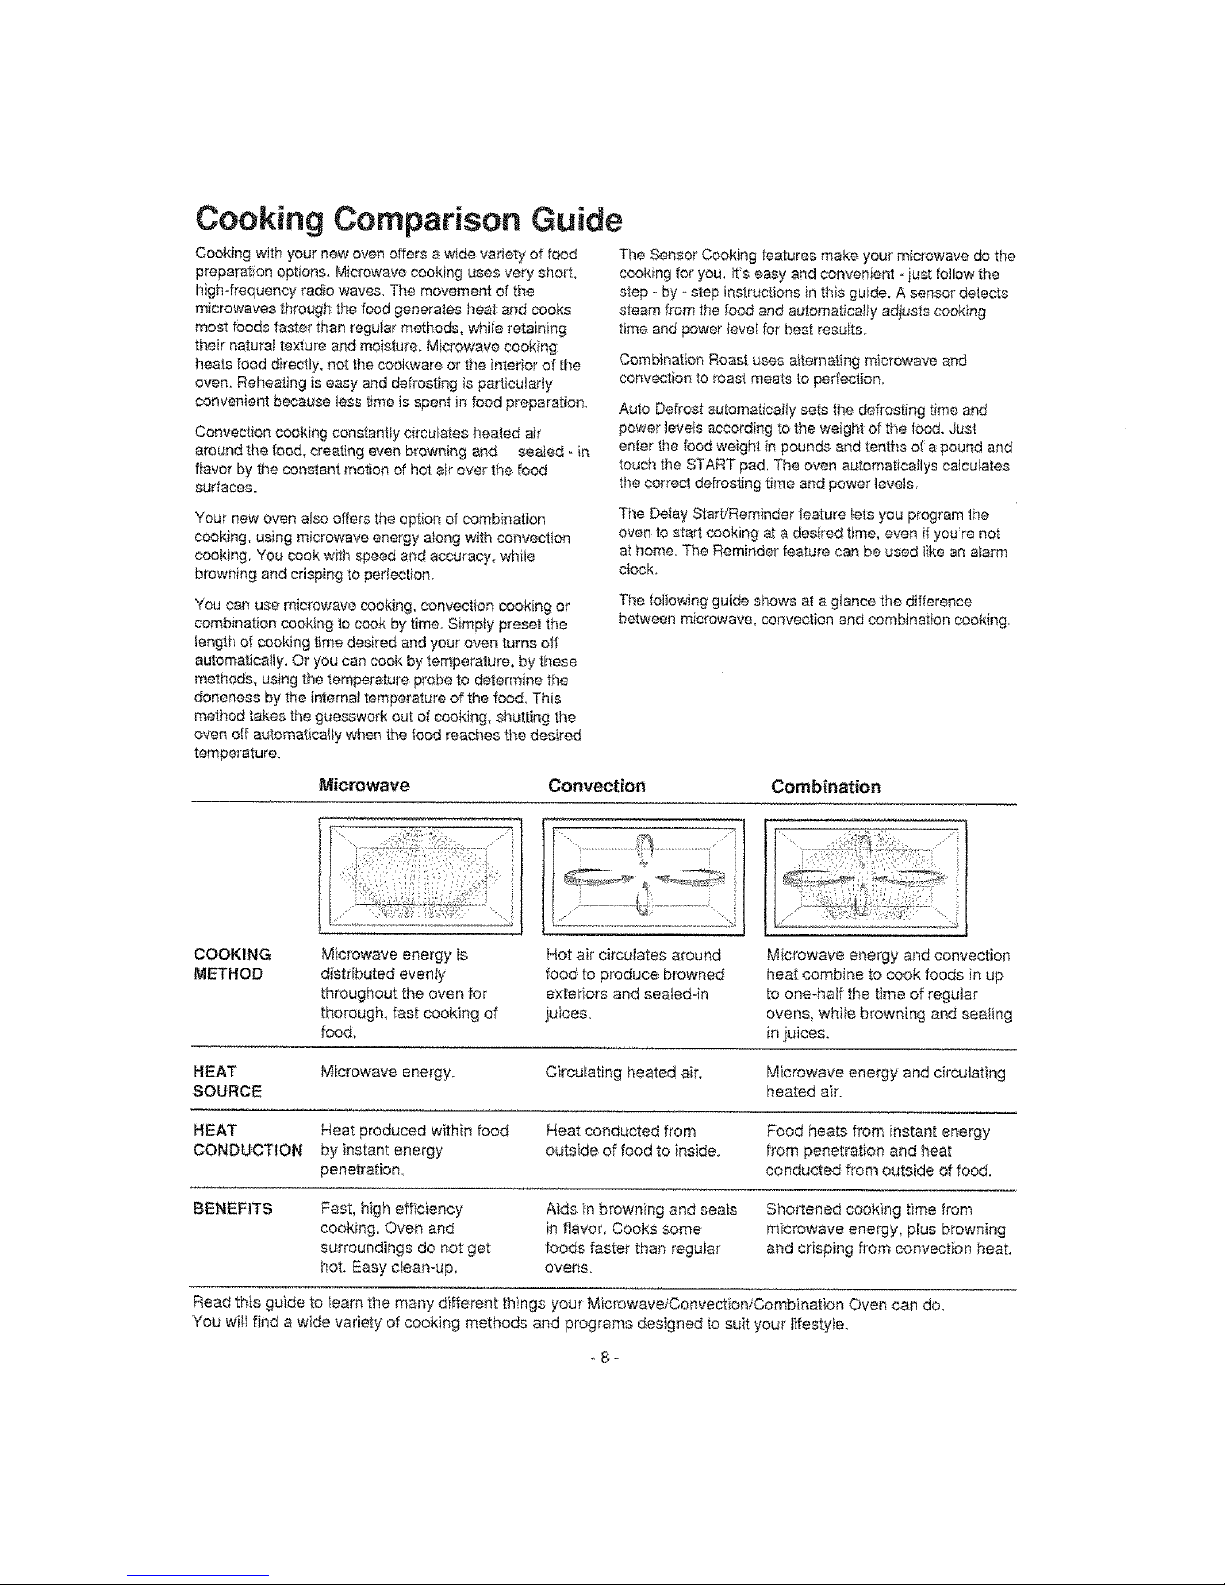
Cooking Comparison Guide
Cooking with your new oven offers a wide vadety of feed
preparation options, Microwave cooking uses very short.
Itigh-frequency radio waves. The movement of the
microwaves through the food generates heat: and cooks
moat foods faster"than regular methods, whiie retaining
their naturaI te×_ure and moisture. Mk'4"owave cooking
heats food directly, no[ the cookware or the interior of the
oven. Reheating is easy and defrosting is particularly
convenient because tess time is spent in food preparation.
Convection cooking constantly circulates heated air
aro_nd the bed, creating even browning and _._ated - in
flavor by 9_econstant motion of hot air over the food
surfaces.
The Sensor Cooking features make your microwave do the
cooking for you, It's easy and convenient - just follow the
step - by _step instructions in this guide. A sensor detects
steam from the food and automatically adiusts cooking
time and power level for best result&
Combination Roast uses _ternating microwave and
convection to roast meets to perfection.
Auto Defrost automatically sots the defrosting time and
power _evelsaccording to the weight of the bed. Just
enter the food weight in pounds and tenths el a pound and
touch the START _ad, The oven autematicaflys calculates
the correct defros:[ing time and power tevels
Your new oven also offers the option of combination
cooking, using microwave energy abng with convection
cooking, You cook with speed and eccuraey_ while
browning and crispin# to perlection.
You OaRuse microwave cooking, convection cooking or
combination cookk_g 1ocook by time. Simply prese_ the
tength of cooldng time desired and your oven turns o_t
automatically. Or you can cook by temperature, by these
methods, using the temperature probe to determine the
deneness by the internal temperature of the food, This
method takes the guesswork out of cooking, strutting tl_e
oven off automatically wl_n the _ood reaches tt_e desired
temperature.
The Detay Start/Reminder feature b_s you program the
ove_ to start cooking at a, desired time, even ifyou're not
at lleme, The Remit,dot feature can be used like an alarm
ctock.
1"heioltowing guide shows a_e glance the difference
between microwave, convection end combination cooking.
Microwave Convection Combination
COOKING Hot air circulates around
METHOD food to produce: browned
exteriors and seated-in
juices,
Microwave energy is
d!Strbuted evenly
throughout the oven for
thorough, fast cooking of
food,
M_crowave energy and convection
heat combir_e to cook foods in up
to one-hal_ the time of regular
ovens, while browning and sea_ing
in iuices.
HEAT Microwave energy. Circulating heated air. Mbrowave energy and circulating
SOURCE heated air_
HEAT Heat produced within food Heat conducted from Food heats from instant energy
CONDUCTION by instant energy outside of food to inside, from penetration and heat
penetration conducted from outside of food.
BENEFITS Fast, high efficiency Aids _nbrowning and seafs Shortened cook}ng tirne from
cooking, Oven and in flavor, Cooks some microwave energy, plus browning
surroundings do net get foods faster than regular and crisping from convection heat.
hot. Easy cIean-up, overs.
Read this guide to learn tile many different _hings your MicrowaveiConvection/Combination Oven ea_ do.
Yeu witl find a wide variety of cooking methods and programs designed to suit your lifestyle.
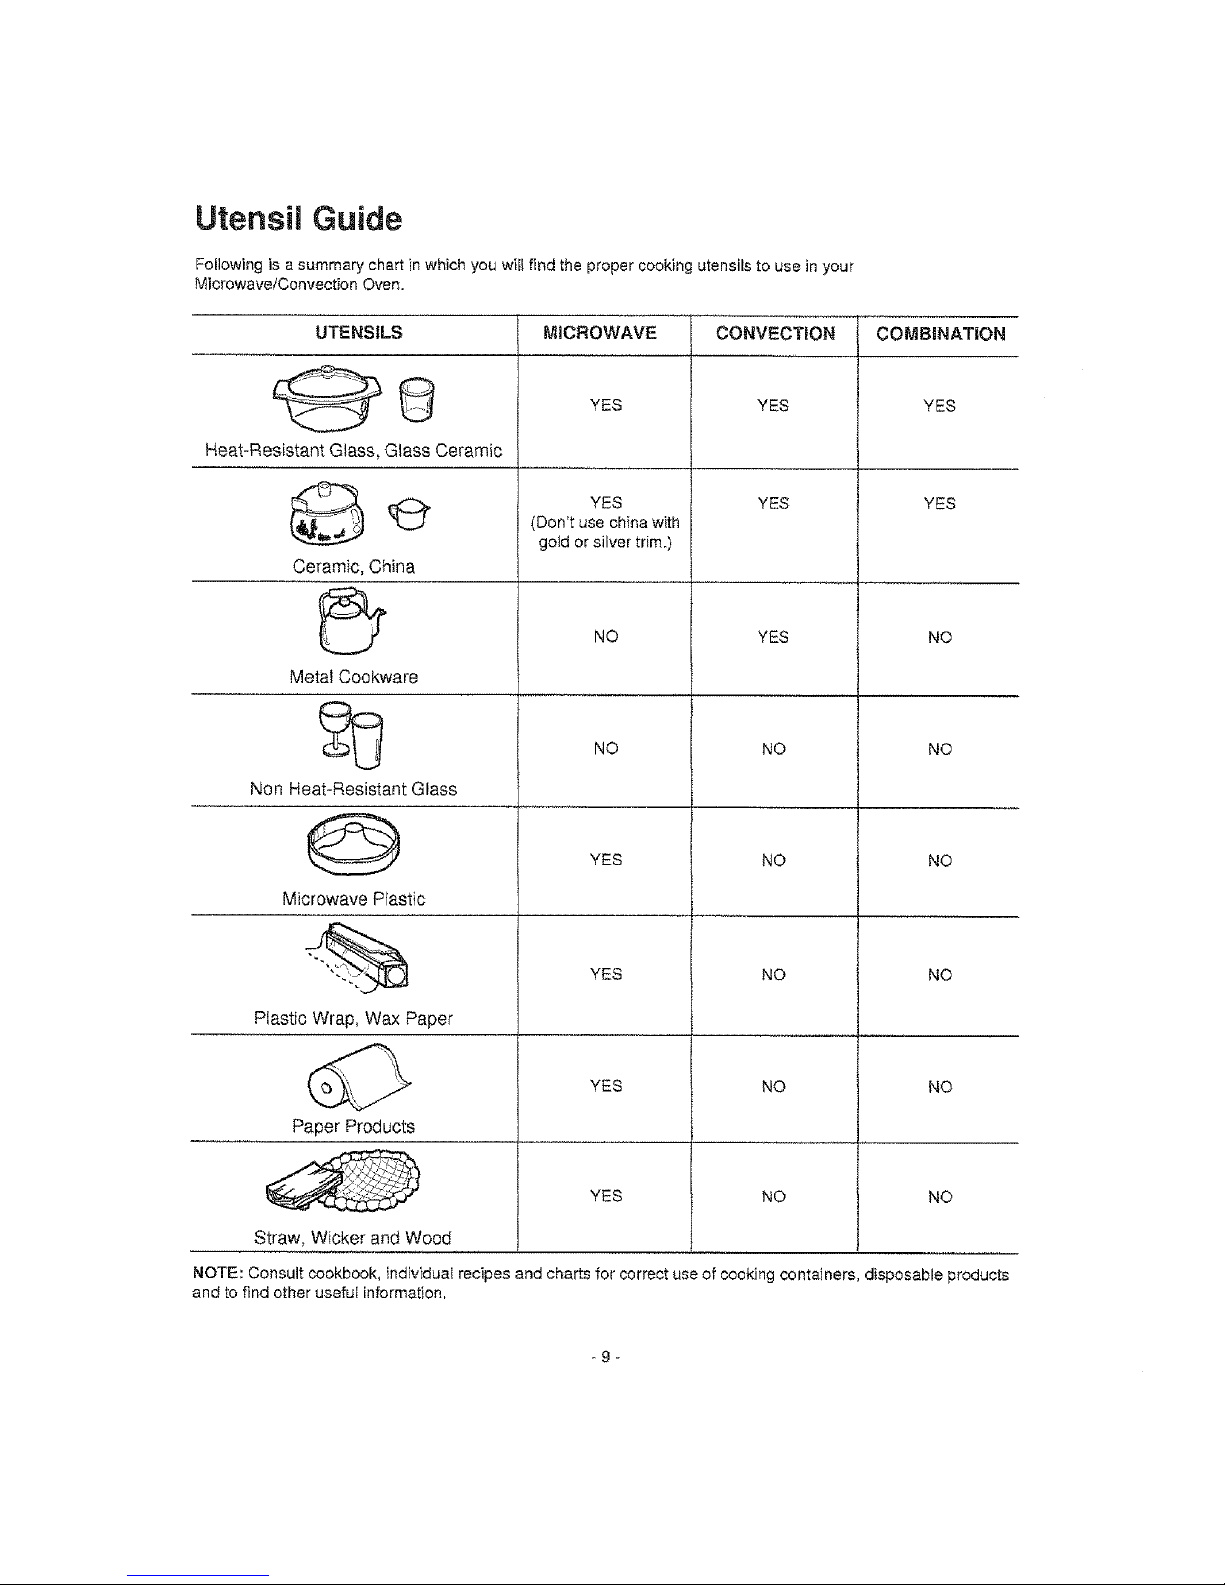
Utensil Guide
Following is a summary chart in which you will find the proper cooking utensils to use in your
Microwave/Convection Oven.
UTENSILS
g
Heat-Resistant Glass, Glass Ceramic
Ceramic, China
Metal Cookware
Non Heat-Resistant Glass
Microwave Plastic
Plastic Wrap, Wax Paper
Paper Products
Straw, Wicker and Wood
MICROWAVE
CONVECTION
YES YES
YES
(Don't use china w}th
gold or silver trim,)
NO
NO
YES
YES
YES
NO
NO
NO
NO
NO
YES
YES
YES
COMBJNAT|ON
YES
YES
NO
NO
NO
NO
NO
NO
NOTE: Consult cookbook, individual recipes and charts for correct use of cooking containers, disposable products
and to find other useful information.
Clock
This is a 12 hour clock,
For example, current time of day is 11:31.
1. Touch CLOCK.
2, Enter the correct time of day.
3. Touch CLOCK again,
Quick On
The Quick On feature allows you
to cook for up to 5 minutes at 10
POWER by touching only Quick
On pad.
Delay Start
The Delay Start feature a41ows
you to program your oven to
begin cooking at a tater time of
day - up to a 12 - hour delay.
Reminder
The Reminder feature can be
used like an alarm clock, without
starting the oven. The Reminder
time can be set up to 12 hours
later,
1. Touch 2 to cook for 2 minutes,
The oven begins to cook immediately for the number of minute(s) you set or
until you open the door or touch STOP/CLEAR.
1. Touch Delay Start.
2. Enter the time you want the oven to start.
3. Enter your desired cooking program.
4. Touch START. I START ]
The display will show the time you entered. The oven wltl automatically start at
the desired time,
1. Touch Delay Start.
2. Enter the time you want the oven to remind you.
3. Touch START.
The display will show "REM" until STOP/CLEAR is touched. The Reminder is
new set at the time you programmed, and will signal you at that time with a
beeping Sound until you open DOOR or touch the STOP/CLEAR pad. The
Reminder time may be displayed by touching the Delay Start pad.
-10-
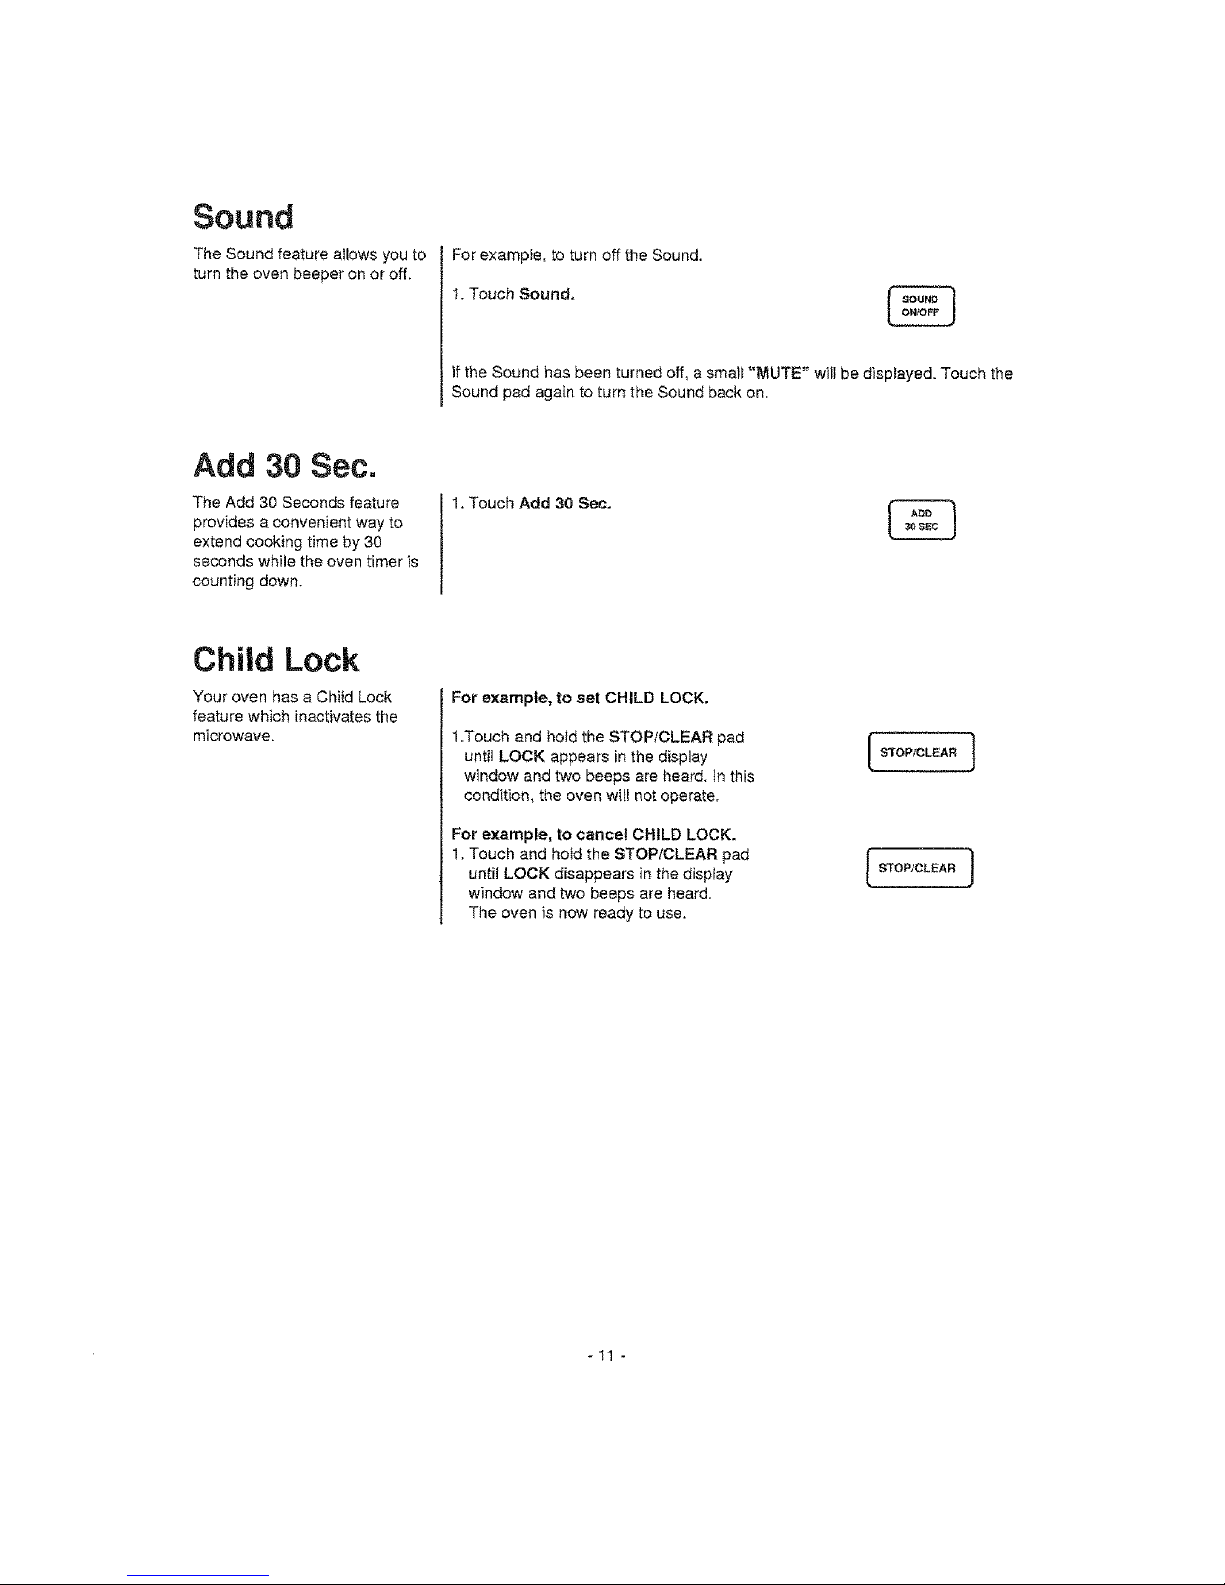
Sound
The Sound feature allows you to
turn the oven beeper on or of[
For examp}e, to turn off the Sound.
1. Touch Sound,
If the Sound has been turned off, a small MUTE wllI be d splayed. Touc the
Sound pad again to turn the Sound back on.
Add 30 Sec.
The Add 30 Seconds feature
provides a convenient way to
extend cooking time by 30
seconds while the oven timer is
counting down.
1. Touch Add 30 Sec.
Child Lock
Your oven has a Child Lock
feature which inactivates the
miorowa.ve_
For example, to set CHILD LOCK.
1.Touch and hotd the STOP1CLEAR pad
until LOCK appears in the display
window and two beeps are heard, tn this
condition, the oven wil_ not operate.
For example, to cancel CHILD LOCK.
1. Touch and ho_d the STOPICLEAR pad
until LOCK disappears in the dispiay
window and two beeps are heard.
The oven is now ready to use.
-11 -
 Loading...