

Kenmore 7121 series, 6121 series Use And Care Manual

3
TABLE OF CONTENTS
PROTECTION AGREEMENTS
WARRANTY
............................................................4
REFRIGERATOR SAFETY
............................... 3
.................................. 5-6
Proper Disposal of Your Old Refrigerator ........ 6
INSTALLATION INSTRUCTIONS .....................
Unpack the Refrigerator ......................................7
Location Requirements .........................................8
Electrical Requirements ....................................... 8
Parts and Features ................................................ 9
Water Supply Requirements ............................. 10
Connect the Water Supply ............................... 10
Connect to Refrigerator ...................................... 11
Complete the Installation ...................................12
7
REFRIGERATOR FEATURES
................................19
Refrigerator Shelves ...........................................19
Deli Drawer ..........................................................19
Crisper .................................................................20
FREEZER FEATURES
DOOR FEATURES
.............................................21
.................................................22
Door Bins .............................................................22
Dairy Compartment ..........................................22
FOOD STORAGE GUIDE
....................................23
Fresh Food Storage ...........................................23
REFRIGERATOR CARE
........................................24
Cleaning ..............................................................24
To Clean Your Refrigerator ...............................24
Front Base Grille Installation ............................13
Reverse Doors ................................................. 13-14
Handles Installation .............................................15
Adjust the Doors ..................................................16
REFRIGERATOR USE
........................................... 17
Using the Controls ............................................ 17
Icemaker ..............................................................18
Vacation and Moving Care .............................24
TROUBLESHOOTING GUIDE
SERVICE NUMBERS
.........................BACK COVER
.............................26
2

PROTECTION AGREEMENTS
Master Protection Agreements
Congratulations on making a smart purchase. Your new
Kenmore® product is designed and manufactured for
years of dependable operation. But like all products,
it may require preventive maintenance or repair from
time to time. That’s when having a Master Protection
Agreement can save you money and aggravation.
The Master Protection Agreement also helps extend the
life of your new product. Here’s what the Agreement*
includes:
• Parts and labor
help keep products operating properly
. Our coverage goes
use
warranty
excluded from coverage—
• Expert service
trusted in millions of homes every year.
• Unlimited service calls and nationwide service
often as you want us, whenever you want us.
• “No-lemon” guarantee
product after three separate product failures occur
within twelve months and a fourth repair is required.
Includes free delivery and installation, if necessary, of
replacement product.
• Product replacement
xed.
• Annual Preventive Maintenance Check
request – no extra charge.
• Fast help by phone
agent on all products to help troubleshoot problems.
Think of us as a “talking owner’s manual.”
not just for repairing defects, but to
under normal
well beyond the product
. No deductibles, no functional failure
real protection
by experienced service technicians
– replacement of your covered
if your covered product can’t be
– phone support from a service
.
at your
, as
• Power surge protection
to power uctuations.
• $300 Food Loss Protection
that is the result of mechanical failure of any covered
refrigerator or freezer.
• Service Promise: $50
covered product can’t be accomplished and product is
not usable while awaiting further repair service.
• 25% discount
repair service and related installed parts.
Once you purchase the Agreement, a simple phone call is
all that it takes for you to schedule service. You can call
anytime day or night.
The Master Protection Agreement is a risk free purchase.
If you cancel for any reason during the product warranty
period, we will provide a full refund. Or, a prorated
refund anytime after the product warranty period expires.
Purchase your Master Protection Agreement today!
Some limitations and exclusions apply. For prices and
additional information in the U.S.A. call 1-800-827-
6655.
* Coverage in Canada varies on some items. For full
details call Sears Canada at 1-800-361-6665.
Sears Installation Service
For Sears professional installation of home appliances,
garage door openers, water heaters, and other major
home items, in the U.S.A. call
Canada call
o the regular price of any non-covered
1-800-469-4663
against electrical damage due
for any food spoilage
if rst attempt repair of your
1-844-553-6667
.
, and in
PRODUCT RECORD
In the space below, record the date of purchase, model and serial number of your product. You will nd the model and
serial number printed on an identication label located on the interior liner of the refrigerator compartment. Have these
items of information available whenever you contact Sears concerning your product.
Model No.___________________ Date of Purchase ___________________
Serial No.___________________
Save these instructions and attach your sales receipt for future reference.
3
5
KENMORE LIMITED WARRANTY
REFRIGERATOR WARRANTY
KENMORE LIMITED WARRANTY
FOR ONE YEAR from the date of sale this appliance is warranted against defects in material or workmanship when
it is correctly installed, operated and maintained according to all supplied instructions.
WITH PROOF OF SALE, a defective appliance will receive free repair or replacement at option
of seller.
For warranty coverage details to obtain free repair or replacement, visit the web page: www.kenmore.com/warranty
This warranty applies for only 90 DAYS if this appliance is ever used for other than private household purposes.
This warranty covers ONLY defects in material and workmanship, and will NOT pay for:
1. Expendable items that can wear out from normal use, including but not limited to lters, belts, bags or screw-in
base light bulbs.
2. A service technician to clean or maintain this appliance, or to instruct the user in correct appliance installation,
operation and maintenance.
3. Service calls to correct appliance installation not performed by Sears authorized service agents, or to repair
problems with house fuses, circuit breakers, house wiring, and plumbing or gas supply systems resulting from such
installation.
4. Damage to or failure of this appliance resulting from installation not performed by Sears authorized service
agents, including installation that was not in accord with electrical, gas or plumbing codes.
5. Damage to or failure of this appliance, including discoloration or surface rust, if it is not correctly operated and
maintained according to all supplied instructions.
6. Damage to or failure of this appliance, including discoloration or surface rust, resulting from accident, alteration,
abuse, misuse or use for other than its intended purpose.
7. Damage to or failure of this appliance, including discoloration or surface rust, caused by the use of detergents,
cleaners, chemicals or utensils other than those recommended in all instructions supplied with the product.
8. Damage to or failure of parts or systems resulting from unauthorized modications made to this appliance.
9. Service to an appliance if the model and serial plate is missing, altered, or cannot easily be determined to have
the appropriate certication logo.
Disclaimer of implied warranties; limitation of remedies
Customer’s sole and exclusive remedy under this limited warranty shall be product repair or replacement as provided
herein. Implied warranties, including warranties of merchantability or tness for a particular purpose, are limited to
one year or the shortest period allowed by law. Seller shall not be liable for incidental or consequential damages.
Some states do not allow the exclusion or limitation of incidental or consequential damages, or limitation on the
duration of implied warranties of merchantability or tness, so these exclusions or limitations may not apply to you.
This warranty applies only while this appliance is used in the United States.
This warranty gives you specic legal rights, and you may also have other rights which vary from state to state.
Sears Brands Management Corporation, Hoffman Estates, IL 60179
4

REFRIGERATOR SAFETY
Your safety and the safety of others are very important.
We have provided many important safety messages in this manual and on your appliance. Always read and obey all
safety messages.
This is the safety alert symbol.
This symbol alerts you to potential hazards that can kill or hurt you and others.
All safety messages will tell you what the potential hazard is, tell you how to reduce the chance of injury, and tell you
what can happen if the instructions are not followed.
All safety messages will follow the safety alert symbol and either the word “DANGER” or “WARNING.”
These words mean:
You can be killed or seriously injured if you don’t immediately follow instructions.
You can be killed or seriously injured if you don’t follow instructions.
IMPORTANT SAFETY INSTRUCTIONS
WARNING:
precautions, including the following:
• Plug into a grounded 3 prong outlet.
• Do not remove ground prong.
• Do not modify plug on power cord. If plug does not
t electrical outlet, have proper outlet installed by a
qualied electrician.
• Do not use a two-prong adapter, extension cord or
power strip.
To reduce the risk of re, electric shock, or injury to persons when using the refrigerator, follow basic
• Replace worn power cords and/or loose plugs.
• Always read and follow manufacturer’s storage and
ideal environment instructions for items being stored in
refrigerator.
• Your refrigerator should not be operated in the
presence of explosive fumes.
• Remove doors from your old refrigerator.
• Do not service or replace any part of refrigerator
unless specically recommended in Use & Care Guide
or published user-repair instructions. Do not attempt
service if instructions are not under-stood or if they are
beyond personal skill level.
• Always disconnect refrigerator from electrical supply
before attempting any service.
• Disconnect power cord by grasping the plug, not the
cord.
• Install refrigerator according to Installation Instructions.
All connections for water, electrical power and
grounding must comply with local codes and be made
by licensed personnel when required.
• Keep your refrigerator in good condition. Bumping
or dropping refrigerator can damage refrigerator or
cause refrigerator to malfunction or leak. If damage
occurs, have refrigerator checked by qualied service
technician.
SAVE THESE INSTRUCTIONS
• Children should not climb, hang or stand on any part
of the refrigerator.
• Clean up spills or water leakage associated with water
installation.
• Use nonammable cleaner.
• Keep ammable materials and vapors, such as
gasoline, away from refrigerator.
• Use two or more people to move and install
refrigerator.
• Disconnect power before installing icemaker (on
icemaker kit ready models only).
5
7
SPECIFICATIONS
MODELS 7121*, 6121 *
WIDTH 32.9 in
EXTERNAL DIMENSIONS
NET WEIGHT 220.5 Lbs
SYSTEM
CARACTERISTICS
BACKGROUND 32.0 in
HIGH 66.7 in
FREEZER CAPACITY 5.8 cu ft
FRESH FOOD CAPACITY 15.0 cu ft
TOTAL CAPACITY 20.8 cu ft
COOLING SYSTEM FORCED CONVECTION
BY RESISTENCE, TYPE SHEATH
DEFROST SYSTEM
AUTOMATIC
REFRIGERANT R134a
SUPPLY VOLTAGE 115V-127V/60Hz
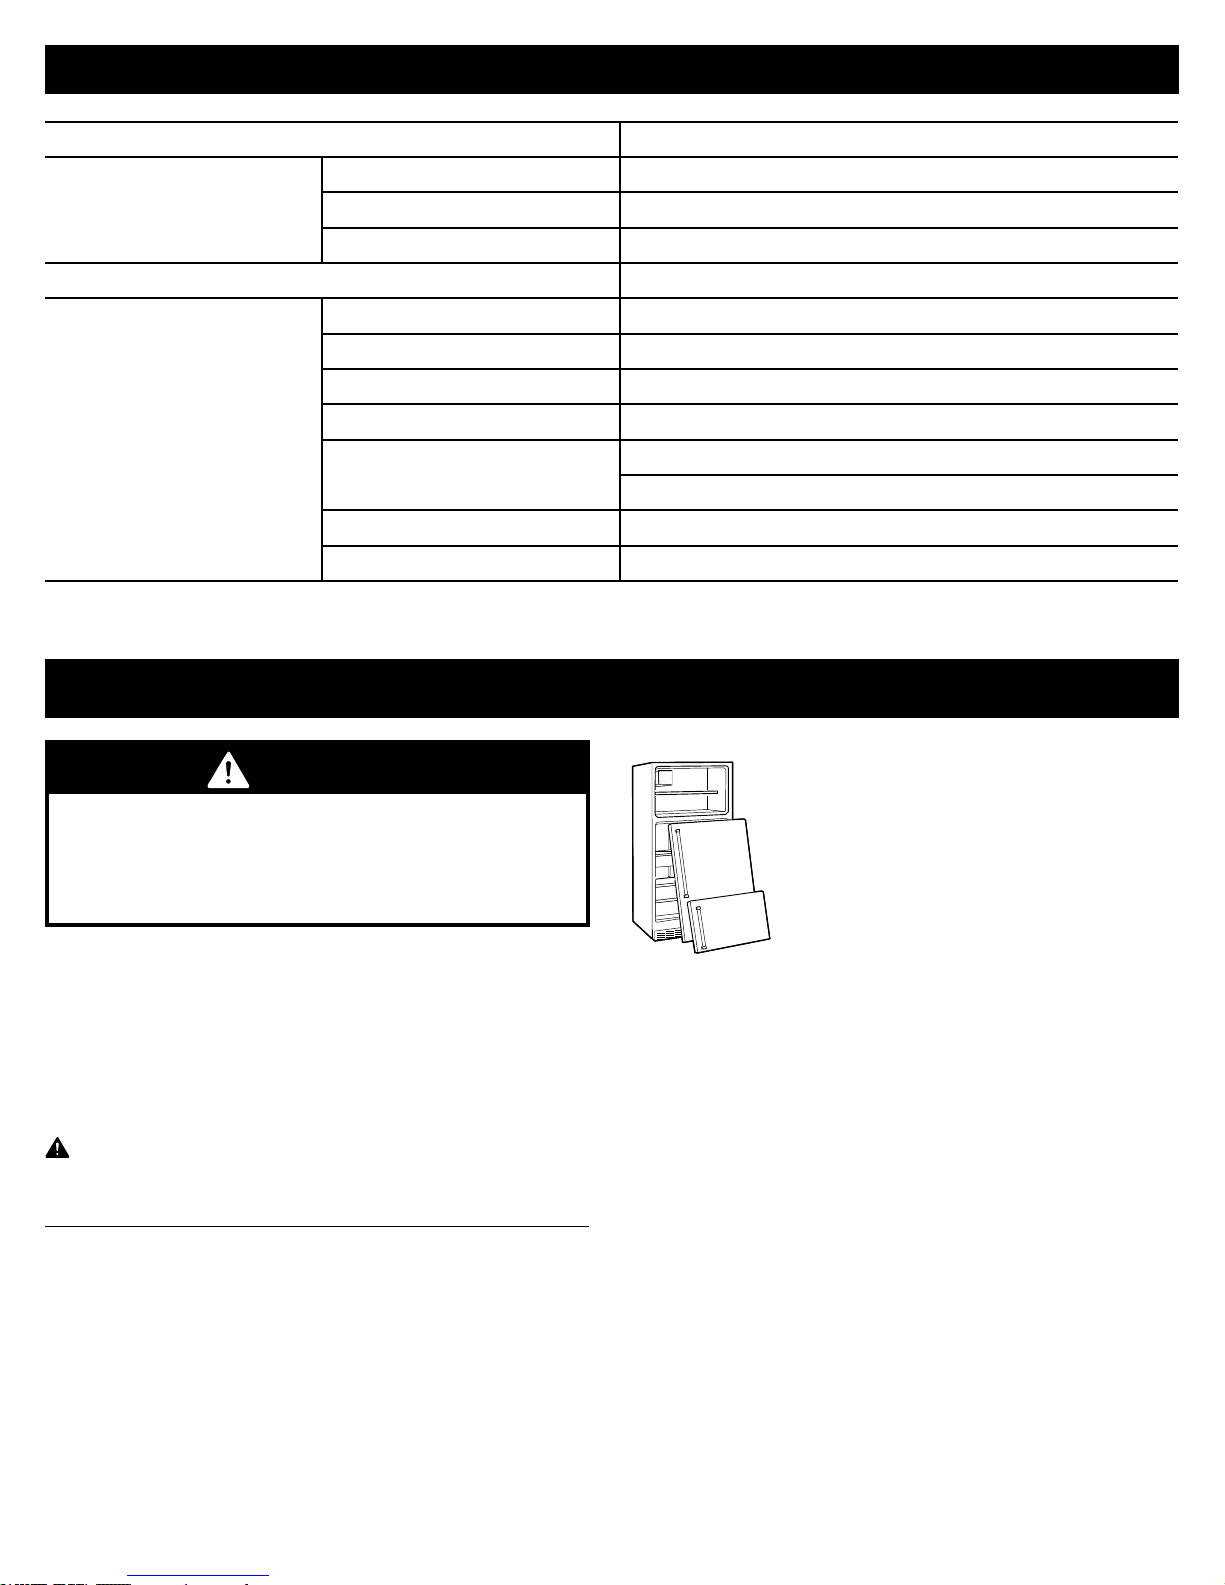
Proper Disposal of Your Old Refrigerator
DANGER
Child Entrapment and Suffocation Hazard
Remove doors from your old refrigerator.
Failure to do so can result severe injury or death.
BEFORE YOU THROW AWAY
YOUR OLD REFRIGERATOR
OR FREEZER:
• Take o the doors.
• Leave the shelves in place so that
children may not easily climb inside.
Junked or abandoned refrigerators are still dangerous –
even if they will sit for “just a few days.” If you are getting
rid of your old refrigerator, please follow these instructions
to help prevent accidents.
WARNING
STATE OF CALIFORNIA
PROPOSITION 65 WARNINGS
The California Safe Drinking Water and Toxic Enforcement
Act requires the Governor of California
to publish a list of substances known to the State of
California to cause cancer. birth defects. or other
reproductive harm, and requires businesses to warn of
potential exposure to such substances.
This product contains a chemical known to the State of
California to cause cancer. birth defects, or
other reproductive harm. This appliance can cause lowlevel exposure to some of the substances
listed, including benzene, formaldehyde. And carbon
monoxide.
Important information to know about disposal of
refrigerants:
Dispose of refrigerator in accordance with Federal
and Local regulations. Refrigerants must be evacuated
by a licensed, EPA certied refrigerant technician in
accordance with established procedures.
6

Unpack the Refrigerator
INSTALLATION INSTRUCTIONS
WARNING
Excessive Weight Hazard
Use two or more people to move and install refrigerator.
Failure to do so can result in back or other injury.
Remove the Packaging
• Remove tape and glue residue from surfaces before
turning on the refrigerator. Rub a small amount of liquid
dish soap over the adhesive with your ngers. Wipe
with warm water and dry.
NOTE:
ammable uids, or abrasive cleaners to remove tape
or glue. These products can damage the surface of your
refrigerator. For more information, see “Refrigerator
Safety.”
• Dispose of/recycle all packaging materials.
IMPORTANT:
insert that is located behind the control panel on the ceiling
of the refrigerator (on some models). The insert is part of
the refrigerator and not part of the packing material. If the
insert is removed, ice may migrate down from the freezer
and cause icicles to form.
When Moving Your Refrigerator:
Your refrigerator is heavy. When moving the refrigerator
for cleaning or service, be sure to cover the oor with
cardboard or hardboard to avoid oor damage. Always
pull the refrigerator straight out when moving it. Do not
wiggle or “walk” the refrigerator when trying to move it,
as oor damage could occur.
Do not use sharp instruments, rubbing alcohol,
Do not remove the white foam air return
Clean Before Using
• After you remove all of the package materials, clean
the inside of your refrigerator before using it. See the
cleaning instructions in “Refrigerator Care.”
Important information to know about glass shelves
and covers:
Do not clean glass shelves or covers with warm water
when they are cold. Shelves and covers may break if
exposed to sudden temperature changes or impact, such
as bumping. Tempered glass is designed to shatter into
many small, pebble-size pieces. This is normal. Glass
shelves and covers are heavy. Use both hands when
removing them to avoid dropping.
7
9
INSTALLATION INSTRUCTIONS
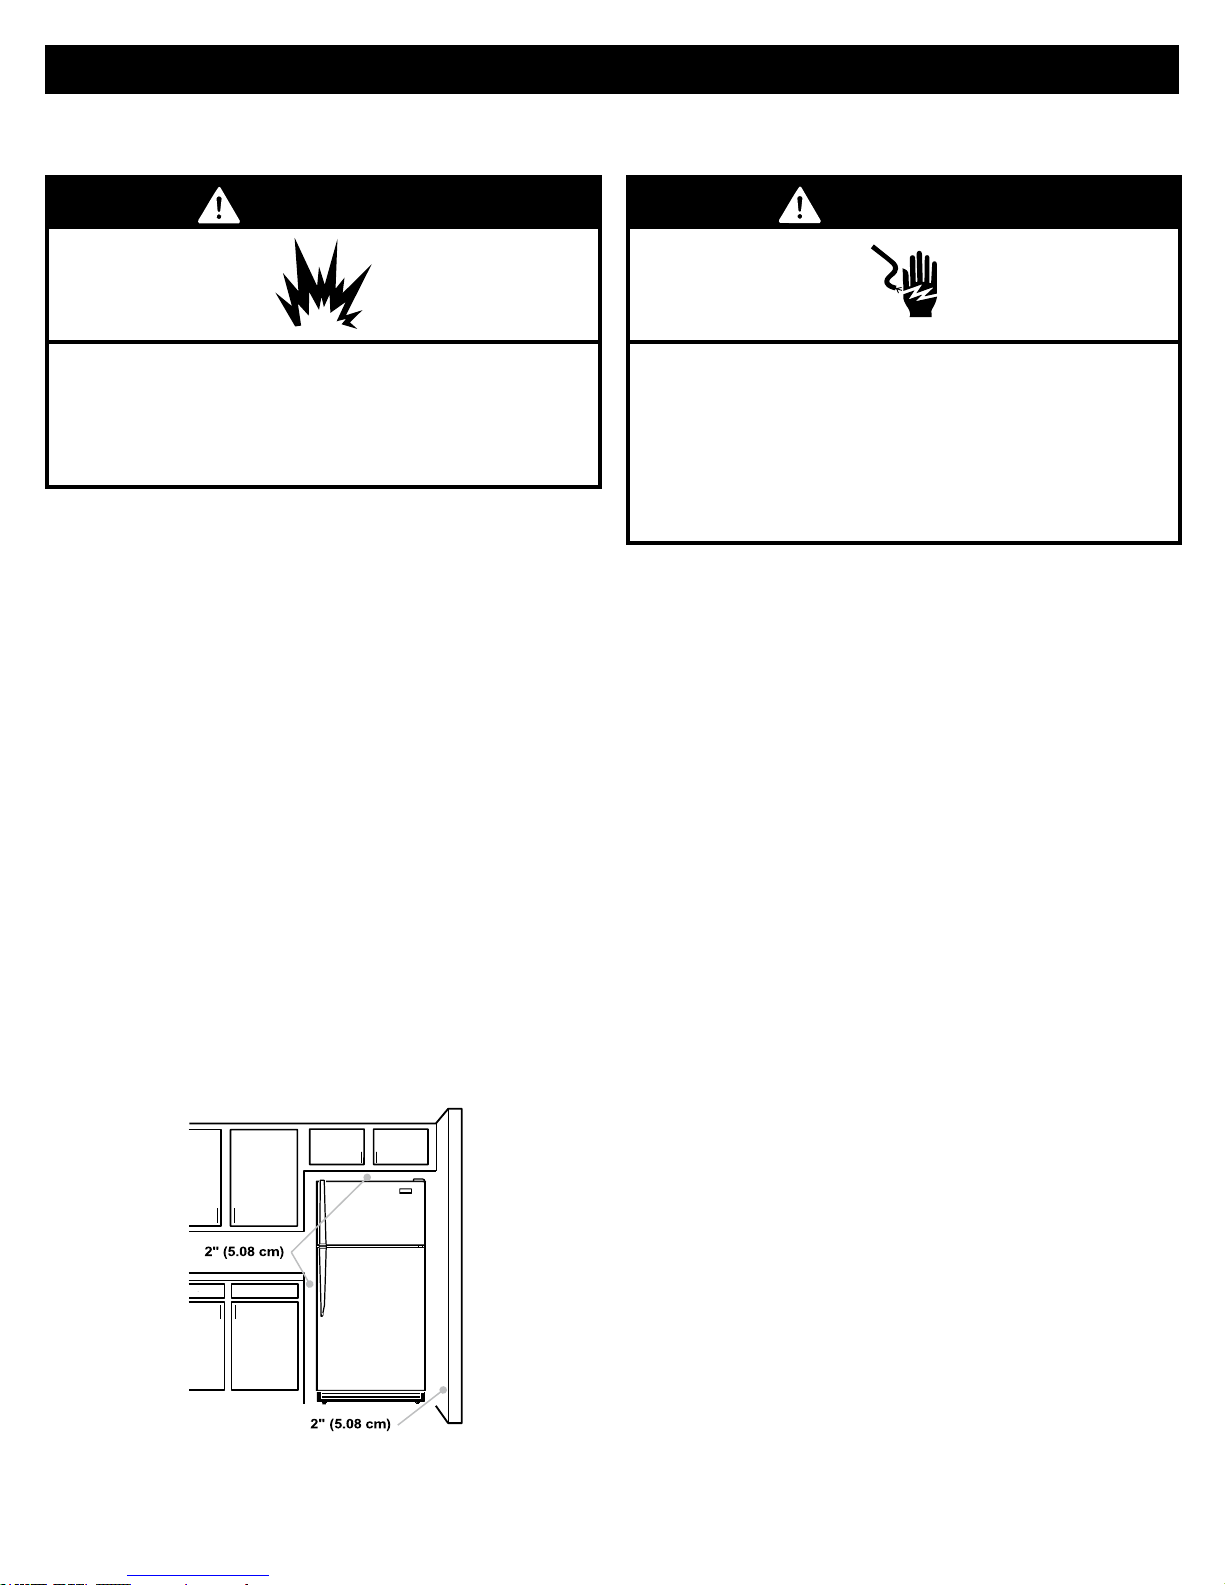
Location Requirements
WARNING
Explosion Hazard
Keep ammable materials and vapors, such as gasoline,
away from refrigerator.
Failure to do so can result in death, explosion, or re.
IMPORTANT:
household use only.
To ensure proper ventilation for your refrigerator, allow
for 2” (5.08 cm) of space on each side and at the top.
Allow for 2” (5.08 cm) of space behind the refrigerator.
If your refrigerator has an icemaker, allow extra space at
the back for the water line connections. When installing
your refrigerator next to a xed wall, leave a 2” (5.08 cm)
minimum space on the hinge side (some models require
more) to allow the door to swing open.
NOTE:
where the temperature ranges from a minimum of 39°F
(4°C) to a maximum of 110°F (43°C). The preferred room
temperature range for optimum performance, which
reduces electricity usage and provides superior cooling, is
between 60°F (15°C) and 90°F (32°C). It is recommended
that you do not install the refrigerator near a heat source,
such as an oven or radiator.
Use caution when installing the unit on vinyl or hardwood
oors so as not to mark or otherwise damage the ooring.
Apiece of plywood, a rug or other material should be used
to protect the oor while positioning the unit.
This refrigerator is intended for use in a location
This refrigerator is designed for indoor
Electrical Requirements
WARNING
Electrical Shock Hazard
Plug into a grounded 3 prong outlet.
Do not remove ground prong. Do not use an adapter.
Do not use an extension cord.
Failure to follow these instructions can result in death,
re, or electrical shock.
Before you move your refrigerator into its nal location, it
is important to make sure you have the proper electrical
connection.
Recommended Grounding Method
A 115 volt, 60 Hz, AC only, 15- or 20-amp fused, grounded
electrical supply is required. It is recommended that a
separate circuit serving only your refrigerator be provided.
Use an outlet that cannot be turned o by a switch. Do not
use an extension cord.
NOTE:
cleaning, disconnect the refrigerator from the electrical
source. When you are nished, reconnect the refrigerator
to the electrical source.
Before performing any type of installation or
8
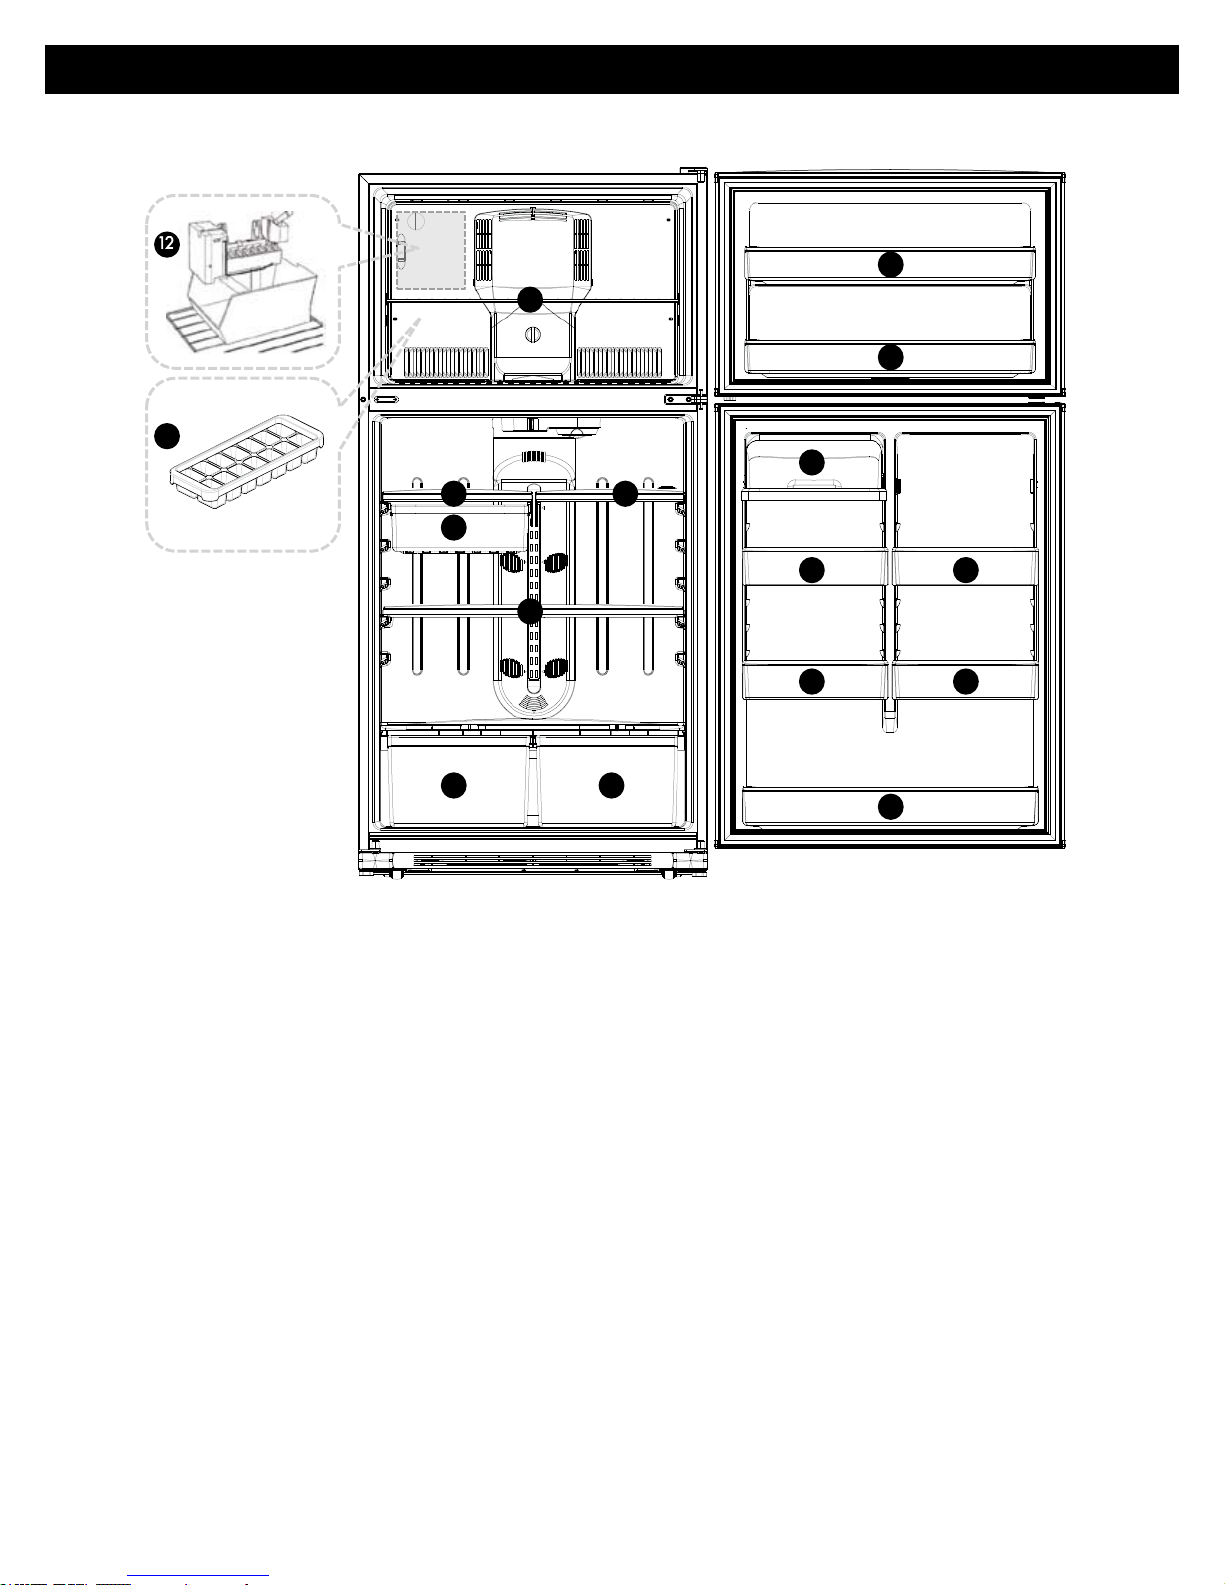
PARTS AND FEATURES
1
1
2
3
3
3
3
4
5
6
7
8
9
10
10
12
11
*This instruction manual refers to several models. Features may vary according to model.
1. Freezer door bin
2. Dairy compartment
for spreadable food items such as butter or margarine.
3. Adjustable half width door bin
4. Full width door bin
5. Adjustable wire shelf
6. Adjustable half width shelf
7. Adjustable half width shelf
with deli drawer
8. Deli drawer
9. Adjustable full width shelf
10. Humidity controlled crisper drawer
for storage of fruits and vegetables
11. Ice tray (optional)
12. Ice maker / Ice storage bin (optional)
9

11
INSTALLATION INSTRUCTIONS
Water Supply Requirements(optional)
This water line installation is not warranted by the
refrigerator or icemaker manufacturer. Follow these
instructions carefully to minimize the risk of expensive
water damage.
Gather the required tools and parts before starting
installation. Read and follow the instructions provided with
any tools listed here.
TOOLS NEEDED:
• ¼” outer diameter refrigerator copper tubing kit
• Flat-blade screwdriver
• ½” open-end wrenches or adjustable wrench
• Two ¼” outer diameter compression nuts and 2 sleeves
• Power drill and drill bit
IMPORTANT:
• If you turn the refrigerator on before the water line is
connected, turn the icemaker OFF.
• All installations must meet local plumbing code
requirements.
• Use copper tubing and check for leaks. Install copper
tubing only in areas where the household temperatures
will remain above freezing.
• To prevent burns and product damage, do not hook up
the water line to the hot water line.
• When using any electrical device (such as a power drill)
during installation, be sure the device is double insulated
or grounded in a manner to prevent the hazard of
electric shock, or is battery powered.
Water Pressure
IMPORTANT:
between 30 and 120 psi (207 and 827 kPa) is required to
operate the icemaker.
NOTE:
ice cubes could be hollow or irregular shaped.
If you have questions about your water pressure, call a
licensed, qualied plumber.
Reverse Osmosis Water Supply
If a reverse osmosis water ltration system is connected to
your cold water supply, the water pressure to the reverse
osmosis system needs to be a minimum of 40 to 60 psi (276
to 414 kPa). If the icemaker is still not operating properly:
• Check to see whether the sediment lter in the
• Allow the storage tank on the reverse osmosis system to
If the water pressure is less than what is required,
reverse osmosis system is blocked. Replace the lter if
necessary.
rell after heavy usage.
A cold water supply with water pressure
Connect the Water Supply(optional)
Read all directions before you begin.
IMPORTANT:
water line is connected, turn the icemaker OFF.
If you turn the refrigerator on before the
NOTE:
tting at the end, you will need an adapter (available at
plumbing supply stores) to connect the water line to
the refrigerator OR you can cut o the ared tting
with a tube cutter and then use a compression tting.
Shuto valve to connect to the cold water line.
The shuto valve should have a water inlet with a
minimum inside diameter of 5/32”(3.97 mm) at the point
of connection to the cold water line. Saddle-type shuto
valves are included in many water supply kits. Before
purchasing, make sure a saddle-type valve complies with
your local plumbing codes.
Install the shuto valve on the nearest frequently used
drinking water line.
If your existing copper water line has a ared
Connect to Water Line
Unplug refrigerator or disconnect power.
1.
Turn OFF main water supply. Turn ON nearest faucet
2.
long enough to clear line of water.
Locate a ½” to 1 ¼” (1.25 cm to 3.18 cm) vertical cold
3.
water pipe near the refrigerator.
IMPORTANT:
• Make sure it is a cold water pipe.
• Horizontal pipe will work, but drill on the top side of
the pipe, not the bottom. This will help keep water
away from the drill and normal sediment from
collecting in the valve.
Determine the length of copper tubing you need.
4.
Measure from the connection on the lower left rear of
refrigerator to the water pipe. Add 8 ft (2.4 m) to allow
for cleaning. Use ¼” (6.35 mm) O.D. (outside diameter)
copper tubing. Be sure both ends of copper tubing are
cut square.
10
 Loading...