

Kenmore 66544059301, 66544059300, 66544054302, 66544054300, 66544053302 Owner’s Manual
...
®
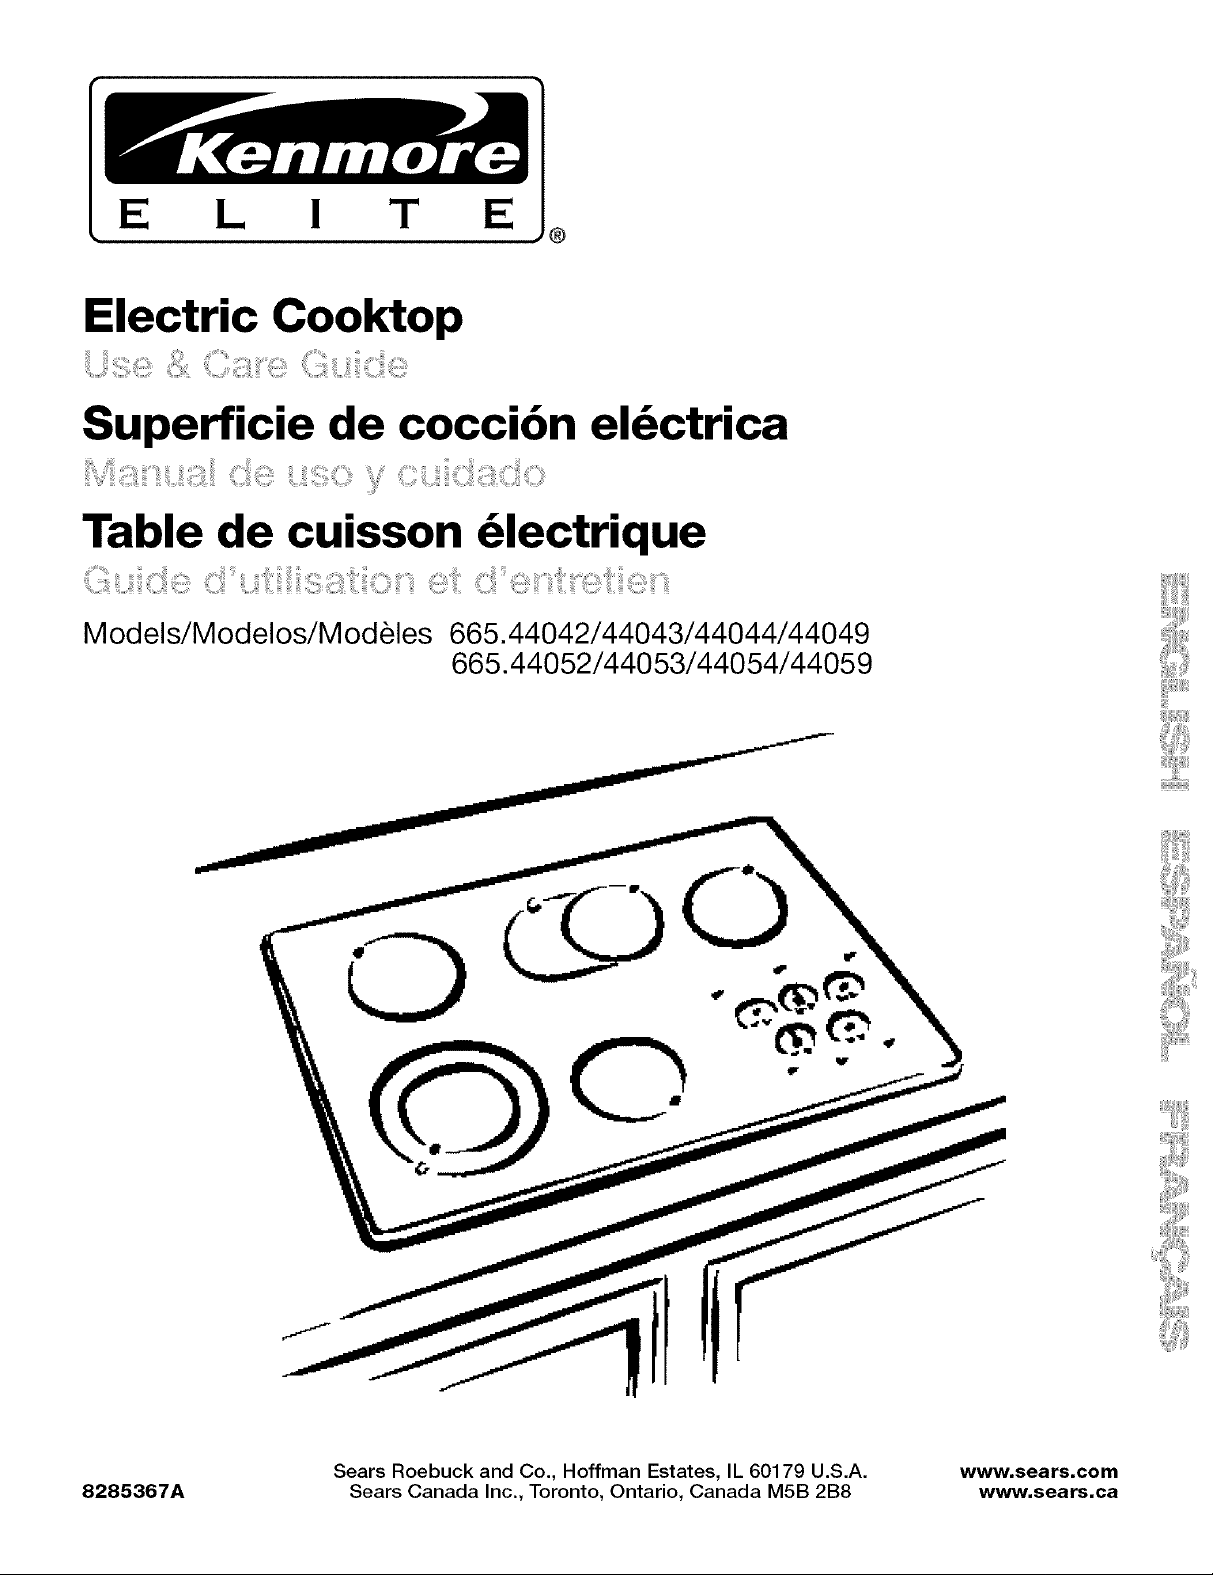
Electric Cooktop
Superficie de cocci6n eldctrica
ii"_'_',_,,,,,_'i_i!!i!liiiiii_:i,L!iiiiii!!i!i!i!! C:i!_i!!!i!i!_¸ L!iSC_,_,¸ili_i''¸C'L_iiiiiiC__i!iii!_!iii_C!!,_iiiiiiiiii_¸
Table de cuisson _lectrique
Models/Modelos/Modeles 665.44042/44043/44044/44049
665.44052/44053/44054/44059
Sears Roebuck and Co., Hoffman Estates, IL 60179 U.S.A. www.sears.com
8285367A Sears Canada Inc., Toronto, Ontario, Canada M5B 2B8 www.sears.ca
TABLEOF CONTENTS
PROTECTION AGREEMENTS ....................................................... 3
In the U.S.A................................................................................... 3
In Canada ..................................................................................... 3
WARRANTY ..................................................................................... 4
COOKTOP SAFETY ........................................................................ 4
PARTS AND FEATURES ................................................................ 6
COOKTOP USE ............................................................................... 7
Cooktop Touch Controls .............................................................. 7
ALL OFF ........................................................................................ 7
LOCKED ....................................................................................... 7
INDICE
CONTRATOS DE PROTECCION ................................................ 13
En los EE.UU ............................................................................. 13
En Canada ................................................................................. 13
GARANTIA .................................................................................... 14
SEGURIDAD DE LA SUPERFICIE DE COCCION ..................... 14
PIEZAS Y CARACTER|STICAS .................................................. 16
USO DE LA SUPERFICIE DE COCCION ................................... 17
Controles tactiles de la superficie de cocciGn .......................... 17
ALL OFF (Todo apagado) .......................................................... 18
LOCKED (Bloqueado) ................................................................ 18
Radiant Glass .............................................................................. 8
Dual Cooking Zone(s) .................................................................. 8
Melt Function ............................................................................... 9
Warm Function ............................................................................ 9
Home Canning ............................................................................. 9
Cookware ..................................................................................... 9
COOKTOP CARE ......................................................................... 10
General Cleaning ....................................................................... 10
TROUBLESHOOTING .................................................................. 11
SERVICE NUMBERS ............................................... BACK COVER
Vidrio radiante ............................................................................ 18
Zona(s) de cocciGn dual ............................................................ 18
Funci6n para derretir ................................................................. 19
Funci6n para mantener tibio ..................................................... 19
PreparaciGn de alimentos caseros enlatados ........................... 19
Utensilios de cocina .................................................................. 19
CUIDADO DE LA SUPERFICIE DE COCCION .......................... 20
Limpieza General ....................................................................... 20
SOLUCION DE PROBLEMAS ..................................................... 21
NOMEROS DE SERVICIO .............................. CONTRAPORTADA
TABLE DES MATI#RES
CONTRATS DE PROTECTION ................................................... 23
Aux 12tats-Unis ........................................................................... 23
Au Canada ................................................................................. 23
GARANTIE .................................................................................... 24
SI:!:CURIT¢:DE LA TABLE DE CUISSON .................................... 24
PIECES ET CARACTC:RISTIQUES ............................................. 26
UTILISATION DE LA TABLE DE CUlSSON ............................... 27
Commandes tactiles de latable de cuisson ............................. 27
ALL OFF (toutes commandes eteintes) .................................... 28
LOCKED (verrouillage) ............................................................... 28
Verre radiant .............................................................................. 28
Zone(s) double(s) de cuisson ..................................................... 28
Fonction Melt (fondre) ............................................................... 29
Fonction Warm (maintien au chaud) ......................................... 29
Preparation de conserves a la maison ...................................... 29
Ustensiles de cuisson ................................................................ 29
ENTRETIEN DE LA TABLE DE CUISSON .................................. 30
Nettoyage genGral ..................................................................... 30
DI_PANNAGE ................................................................................ 31
NUMC:ROS DE SERVICE ...................... COUVERTURE ARRIERE
PROTECTION AGREEMENTS
Master Protection Agreements
Congratulations on making a smart purchase. Your new
Kenmore ®product is designed and manufactured for years of
dependable operation. But like all products, it may require
preventive maintenance or repair from time to time. That's when
having a Master Protection Agreement can save you money and
aggravation.
Purchase a Master Protection Agreement now and protect
yourself from unexpected hassle and expense.
The Master Protection Agreement also helps extend the life of
your new product. Here's what's included in the Agreement:
v' Expert service by our 12,000 professional repair specialists
v' Unlimited service and no charge for parts and labor on all
covered repairs
v' "No-lemon" guarantee - replacement of your covered
product if four or more product failures occur within twelve
months
v' Product replacement if your covered product can't be fixed
v' Annual Preventive Maintenance Check at your request - no
extra charge
v' Fast help by phone - phone support from a Sears technician
on products requiring in-home repair, plus convenient repair
scheduling
v' Power surge protection against electrical damage due to
power fluctuations
v' Rental reimbursement if repair of your covered product takes
longer than promised
Once you purchase the Agreement, a simple phone call is all that
it takes for you to schedule service. You can call anytime day or
night, or schedule a service appointment online.
Sears has over 12,000 professional repair specialists, who have
access to over 4.5 million quality parts and accessories. That's
the kind of professionalism you can count on to help prolong the
life of your new purchase for years to come. Purchase your
Master Protection Agreement today?
Some limitations and exclusions apply. For prices and
additional information, call 1-800-827-6655.
Maintenance Agreements
Your purchase has added value because you can depend on
Sears HomeCentral ®for service. With over 2,400 Service
Technicians and more than a million parts and accessories, we
have the tools, parts, knowledge and skills to back our pledge:
We Service What We Sell.
Your Kenmore ®product is designed, manufactured and tested to
provide years of dependable operation. But like all products, it
may require service from time to time. The Sears Maintenance
Agreement offers you an outstanding service program, affordably
priced.
The Sears Maintenance Agreement
• Is your way to buy tomorrow's service at today's price
• Eliminates repair bills resulting from normal wear and tear
• Provides phone support from a Sears technician on products
requiring in-home repair
• Even if you don't need repairs, provides an annual Preventive
Maintenance Check, at your request, to ensure that your
product is in proper running condition.
Some limitations apply. For more information about Sears
Canada Maintenance Agreements, call 1-800-361-6665.
Sears Installation Service
For Sears professional installation of home appliances, garage
door openers, water heaters, and other major home items, in the
U.S.A. call 1-800-4-MY-HOME ®.
WARRANTY
ONE-YEAR FULL WARRANTY ON COOKTOP PARTS
For one year from the date of purchase, when installed and
operated according to the Installation Instructions and Use &
Care Guide, if any part of this cooktop fails due to a defect in
material or workmanship, Sears will repair or replace it, at our
option, free of charge.
ADDITIONAL FOUR-YEAR LIMITED WARRANTY ON
COOKTOP PARTS
For the second through the fifth year from the date of purchase,
when installed and operated according to the Installation
Instructions and Use & Care Guide, Sears will supply the
following cooktop parts free of charge if they fail for the reasons
listed below. Customer must pay labor cost of installation.
• Cooktop glass if it fails due to thermal shock.
• Cooking elements if they are defective.
What Sears will not cover:
• Failure of the product if it is abused, misused, or used for
other than the intended purpose.
• Damage to the cooktop glass caused by the use of cleaners
or utensils other than the recommended cleaning cream and
tools.
Damage to the cooktop glass caused by hardened spills of
sugary materials (including starches from vegetables or
pastas) or melted plastic that are not cleaned according to
the directions in the Use & Care Guide. - Repairs to parts or
systems resulting from unauthorized modifications made to
the appliance.
WARRANTY RESTRICTION
Ifthe product is subjected to other than private residential use, all
warranty coverage is effective for only 90 days.
WARRANTY SERVICE
WARRANTY SERVICE IS AVAILABLE BY CONTACTING THE
NEAREST SEARS SERVICE CENTER IN THE UNITED STATES
OR CANADA.
WARRANTY SERVICE IS AVAILABLE BY CONTACTING SEARS
AT 1-800-4-MY-HOM E_L
This warranty gives you specific legal rights and you may also
have other rights which vary from state to state or province to
province.
Sears, Roebuck and Co.
D/817WA, Hoffman Estates, IL 60179
Sears Canada Inc.
Toronto, Ontario Canada M5B 2B8
PRODUCT RECORD
In the space below, record your complete model number, serial
number, and purchase date. You can find this information on the
model and serial number label, located as shown in the Parts and
Features section of this book. Have this information available to
help you quickly obtain assistance or service when you contact
Sears concerning your appliance.
Model number 665.
Serial number
Purchase date
Save these instructions and your sales receipt for future
reference.
COOKTOP SAFETY
Your safety and the safety of others are very important.
We have provided many important safety messages in this manual and on your appliance. Always read and obey all
safety messages.
This symbol alerts you to potential hazards that can kill or hurt you and others.
All safety messages will follow the safety alert symbol and either the word "DANGER" or
This is the safety alert symbol.
"WARNING." These words mean:
You can be killed or seriously injured if you don't
immediately follow instructions.
You can be killed or seriously injured if you don't
follow instructions.
All safety messages will tell you what the potential hazard is, tell you how to reduce the chance of injury, and tell you
what can happen if the instructions are not followed.
4
IMPORTANT SAFETY INSTRUCTIONS
WARNING: To reduce the risk of fire, electrical shock,
injury to persons, or damage when using the cooktop, follow
basic precautions, including the following:
,= CAUTION: Do not store items of interest to children in
cabinets above a cooktop - Children climbing on the
cooktop to reach items could be seriously injured.
_, Proper Installation - Be sure your cooktop is properly
installed and grounded by a qualified technician.
_, Never Use Your Cooktop for Warming or Heating the
Room.
_, Do Not Leave Children Alone - Children should not be left
alone or unattended in area where cooktop is in use. They
should never be allowed to sit or stand on any part of the
cooktop.
_, Wear Proper Apparel - Loose-fitting or hanging garments
should never be worn while using the cooktop.
_, User Servicing - Do not repair or replace any part of the
cooktop unless specifically recommended in the manual. All
other servicing should be referred to a qualified technician.
_, Storage on Cooktop - Flammable materials should not be
stored near surface units.
_, Do Not Use Water on Grease Fires - Smother fire or flame
or use dry chemical or foam-type extinguisher.
,,, Use Only Dry Potholders - Moist or damp potholders on
hot surfaces may result in burns from steam. Do not let
potholder touch hot heating elements. Do not use a towel
or other bulky cloth.
,,, DO NOT TOUCH SURFACE UNITS OR AREAS NEAR
UNITS - Surface units may be hot even though they are
dark in color. Areas near surface units may become hot
enough to cause burns. During and after use, do not touch,
or let clothing or other flammable materials contact surface
units or areas near units until they have had sufficient time
to cool. Among those areas are the cooktop and surfaces
facing the cooktop.
_, Use Proper Pan Size - This cooktop is equipped with one
or more surface units of different size. Select utensils
having flat bottoms large enough to cover the surface unit
heating element. The use of undersized utensils will
expose a portion of the heating element to direct contact
and may result in ignition of clothing. Proper relationship of
utensil to burner will also improve efficiency.
,= Never Leave Surface Units Unattended at High Heat
Settings - Boilover causes smoking and greasy spillovers
that may ignite.
,= Glazed Cooking Utensils - Only certain types of glass,
glass/ceramic, ceramic, earthenware, or other glazed
utensils are suitable for cooktop service without breaking
due to the sudden change in temperature.
,= Utensil Handles Should Be Turned Inward and Not Extend
Over Adjacent Surface Units - To reduce the risk of burns,
ignition of flammable materials, and spillage due to
unintentional contact with the utensil, the handle of a
utensil should be positioned so that it is turned inward, and
does not extend over adjacent surface units.
,= Do Not Cook on Broken Cooktop - If cooktop should
break, cleaning solutions and spillovers may penetrate the
broken cooktop and create a risk of electric shock. Contact
a qualified technician immediately.
,= Clean Cooktop With Caution - If a wet sponge or cloth is
used to wipe spills on a hot cooking area, be careful to
avoid steam burn. Some cleaners can produce noxious
fumes if applied to a hot surface.
For units with ventilating hood -
,= Clean Ventilating Hoods Frequently - Grease should not
be allowed to accumulate on hood or filter.
,= When flaming foods under the hood, turn the fan on.
For units with coil elements -
,= Make Sure Reflector Pans or Drip Bowls Are in
Place - Absence of these pans or bowls during
cooking may subject wiring or components
underneath to damage.
,= Protective Liners - Do not use aluminum foil to line surface
unit drip bowls, except as suggested in the manual.
Improper installation of these liners may result in a risk of
electric shock, or fire.
,= Do Not Soak Removable Heating Elements - Heating
elements should never be immersed in water.
SAVE THESE INSTRUCTIONS
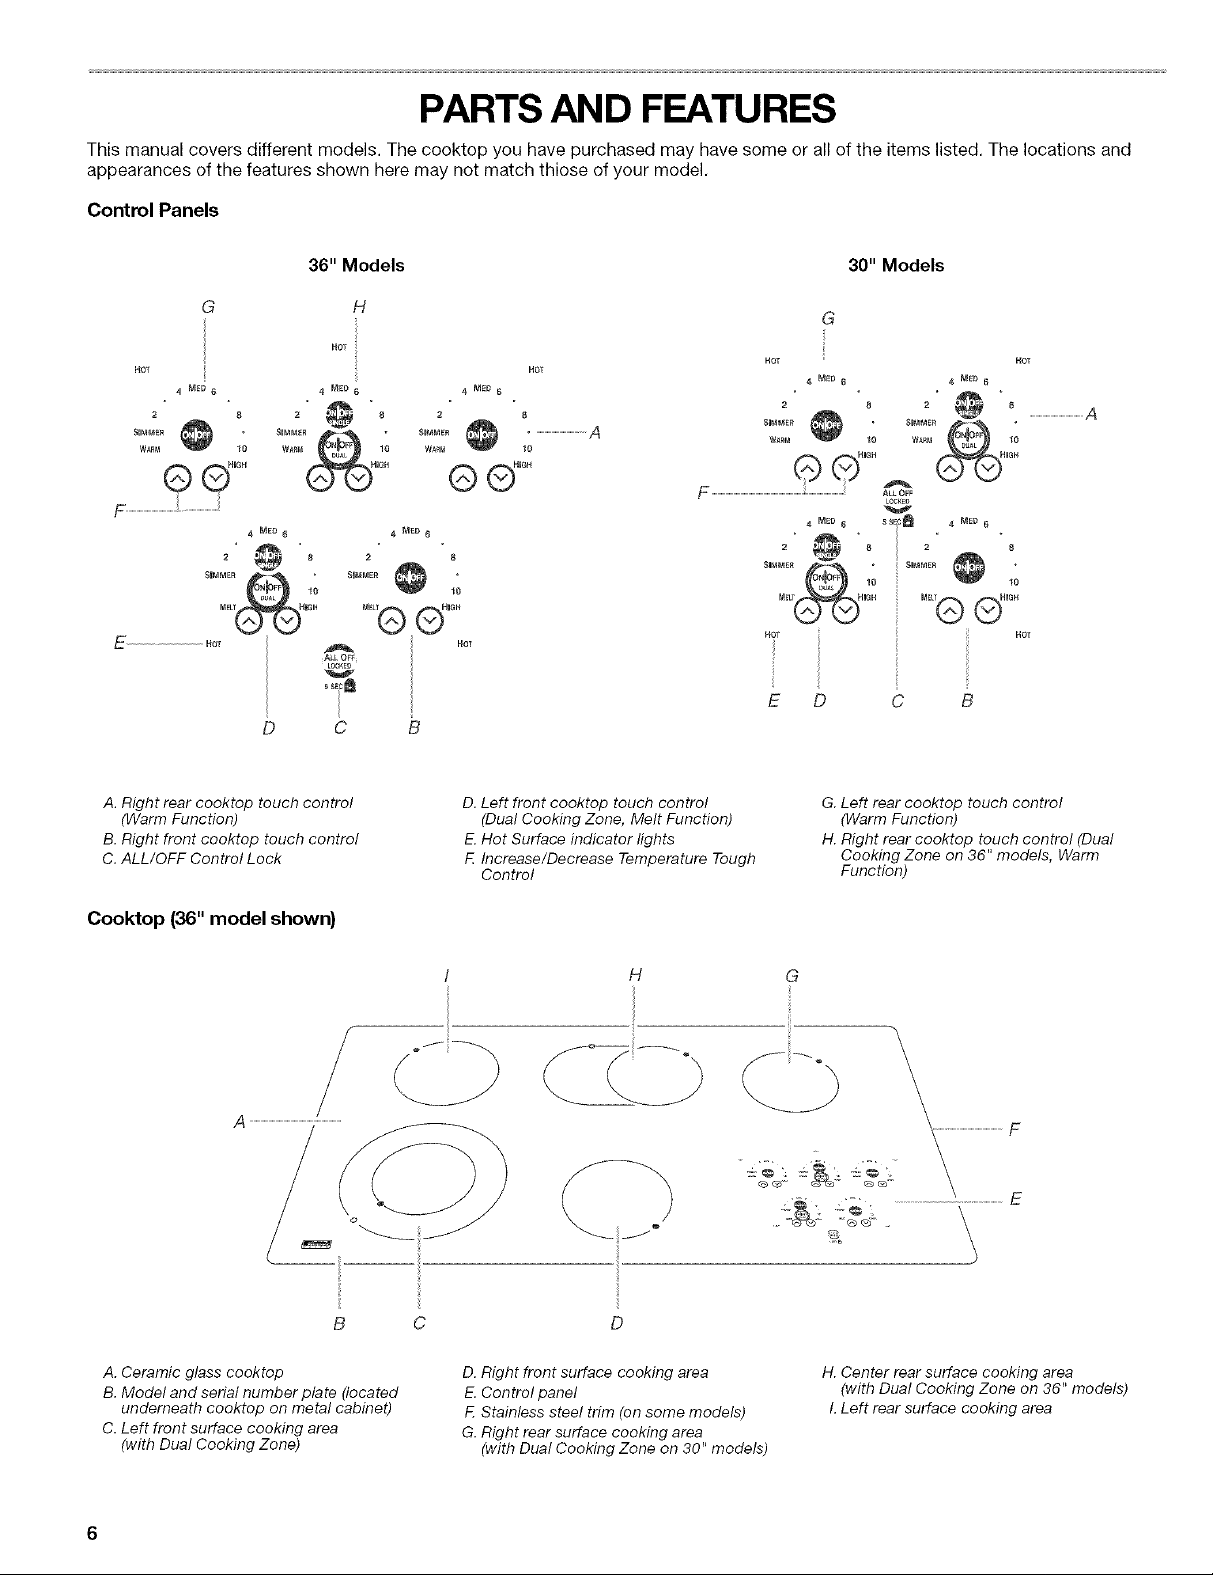
PARTS AND FEATURES
This manual covers different models. The cooktop you have purchased may have some or all of the items listed. The locations and
appearances of the features shown here may not match thiose of your model.
Control Panels
30" Models36" Models
G
HOT HOT
4 M_D 6 4 MSU 6 4 • .
SIMMER SIMMER ..........................................A
8 2 _ 8
10 W_R_ut _ON_F_UAL IO
4 IVIED 6 4 NED 6
2 8 2
@,
H
HOT
4 ME0 6
HIGH
E
C
A. Right rear cooktop touch control
(Warm Function)
B. Right front cooktop touch control
C. ALL/OFF Control Lock
D. Left front cooktop touch control
(Dual Cooking Zone, Melt Function)
E.Hot Surface indicator lights
F. Increase/Decrease Temperature Tough
Control
HOT HOT
MEO 6 4 MED 6
_ 2 @ _ ..............................................A
ALLOFF
L0CgED
4 MEO6 sS_C_ 4 MED 6
2 _ 8 = 8
MELT(_H,GH MEL1Q QH,GH
Nor HOT
v
. , o
10 10
E D
G. Left rear cooktop touch control
(Warm Function)
H. Right rear cooktop touch control (Dual
Cooking Zone on 36" models, Warm
Function)
Cooktop (36" model shown)
B C D
A. Ceramic glass cooktop
B. Model and serial number plate (located
underneath cooktep on metal cabinet)
C. Left front surface cooking area
(with Dual Cooking Zone)
H G
D. Right front surface cooking area
E.Control panel
F. Stainless steel trim (on some models)
G. Right rear surface cooking area
(with Dual Cooking Zone on 30" models)
:i_:: :'&, ................................................\ E
H. Center rear surface cooking area
(with Dual Cooking Zone on 36" models)
I. Left rear surface cooking area
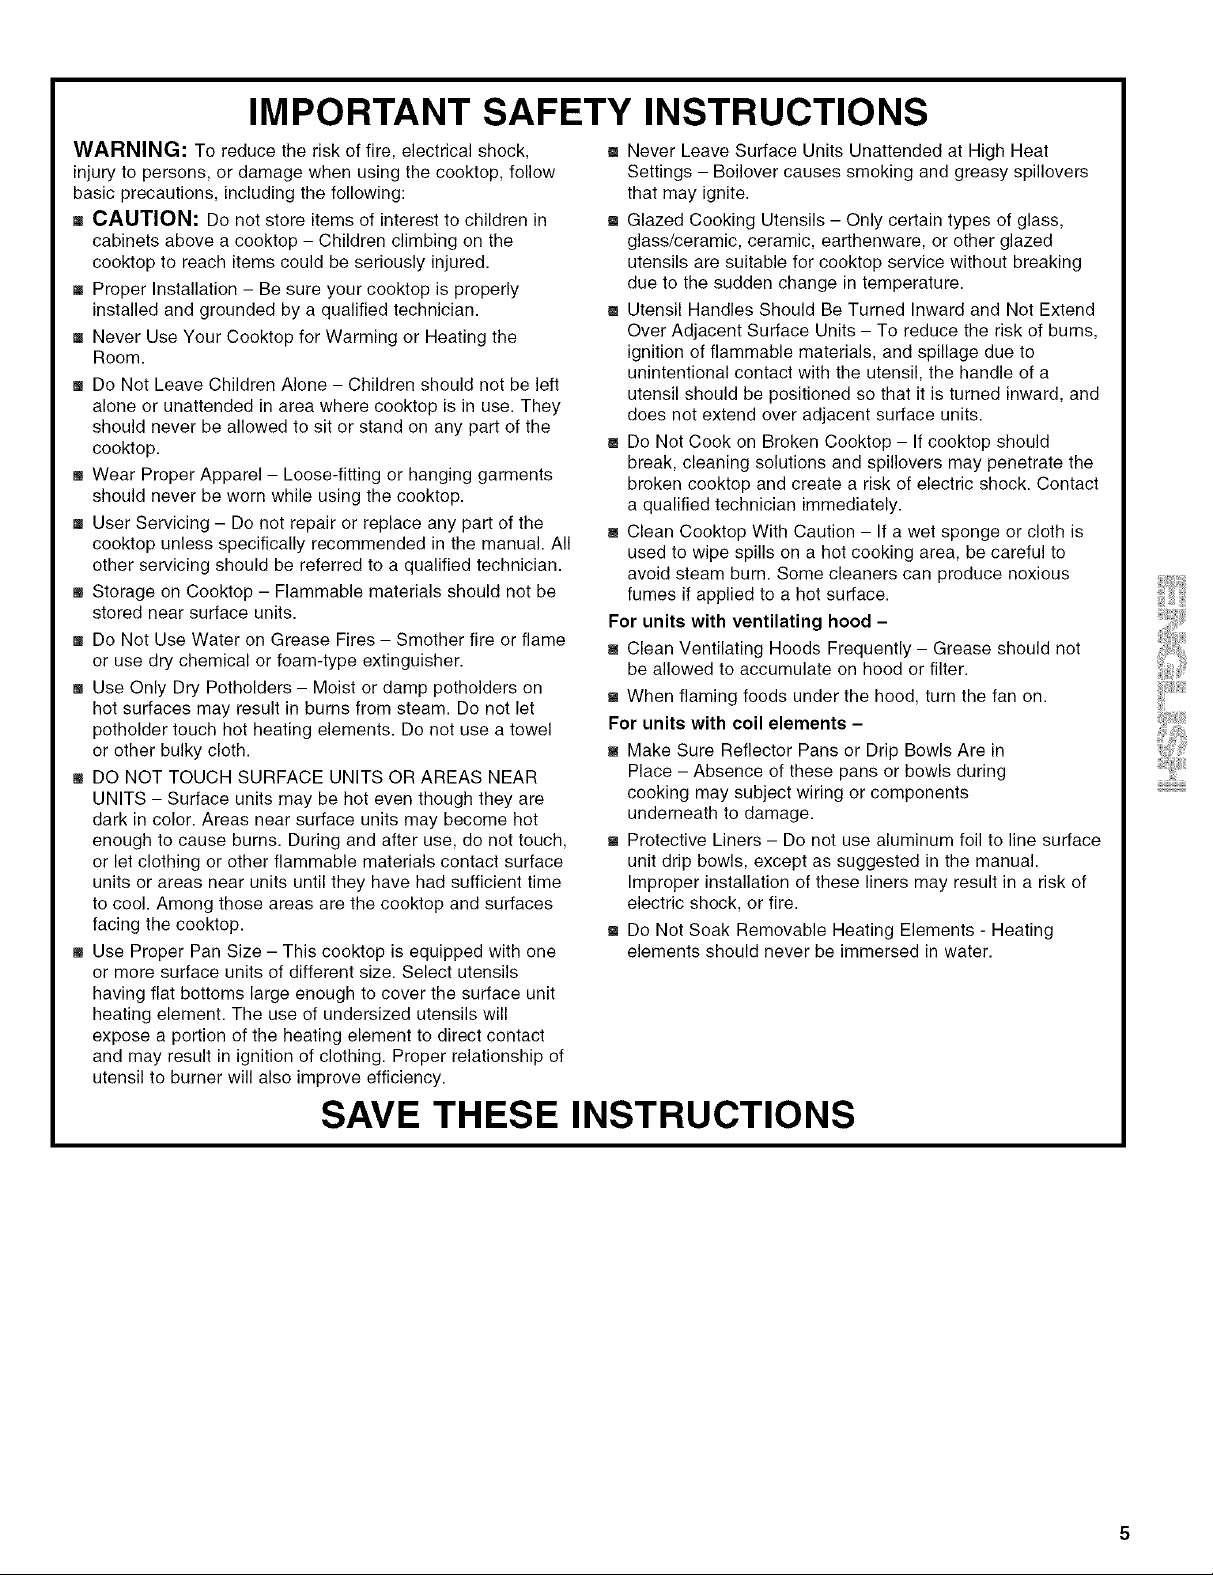
Fire Hazard
Turn off all controls when done cooking.
Failure to do so can result in death or fire.
COOKTOP USE
Use the following chart as a guide when setting heat levels.
SETTING RECOMMENDED USE
HIGH • Start food cooking.
Medium High • Hold a rapid boil.
10-6 • Quickly brown or sear food.
MED • Maintain a slow boil.
Medium • Fry or saute foods.
6-4
Medium Low • Stew or steam food.
4-2 • Simmer.
• Bring liquid to a boil.
• Cook soups, sauces and
gravies.
The cooktop touch controls offer a variety of heat settings for
optimal cooking results. For normal surface cooking element
operation, the cooktop touch controls can be set anywhere
between SIMMER and HIGH.
When melting foods such as chocolate or butter, or when
proofing bread, the right front and left front surface cooking areas
can be set to MELT for minimal element operation.
For maximum element operation, all cooktop touch controls can
be set to HIGH when bringing liquids to a fast and rapid boil.
Touch the "down" arrow to immediately reach the HIGH setting.
To Use:
1. Touch ON/OFR
2. Touch the "up" or "down" arrow to increase or decrease
power.
3. To choose a power level between HIGH and SIMMER, touch
and hold either arrow until the desired level has been
reached.
4. When finished cooking, touch ON/OFF to turn surface
cooking area(s) off individually, or touch ALL OFF to turn all
elements off at the same time.
SIMMER • Provide lowest simmer/heat
setting.
DUAL COOKING • Home canning.
ZONE(S) • Large-diameter cookware.
• Large quantities of food.
MELT FUNCTION • Melt chocolate or butter.
WARM FUNCTION • Keep cooked foods warm.
cooktop area may become hot.
I REMEMBER: When cooktop is in use, the entire I
Hot Surface Indicator Lights
The Hot Surface Indicator Lights are located next to each of the
cooktop touch controls. See "Parts and Features" section. The
Hot Surface Indicator Lights will glow as long as any surface
cooking area is too hot to touch, even after the surface cooking
area(s) is turned off.
If the cooktop is on when a power failure occurs, and if the power
failure is less than 1 hour, the Hot Surface Indicator Lights will
remain on after power is restored to the cooktop. They will remain
on until the cooktop has cooled completely.
I
I
The ALL OFF cooktop touch controls turn off all surface cooking
areas that are in use at the same time.
The LOCKED cooktop touch control prevents unintended use of
the surface cooking areas. When the cooktop is locked out, the
surface cooking areas cannot be turned on by the cooktop touch
controls.
To Lock Cooktop: Press and hold the LOCKED keypad for
5 seconds. After 5 seconds, a light will glow red above the "ALL
OFF LOCKED" indicator, indicating that the cooktop touch
controls are in the lockout position.
To Unlock Cooktop: Press and hold the LOCKED keypad for
5 seconds.
Thesurfacecookingareawillglowredwhenanelementison.It
willcycleonandoff,atallsettings,tomaintaintheselectedheat
level.
Itisnormalforthesurfaceofwhiteceramicglasstoappearto
changecolorwhensurfacecookingareasarehot.Astheglass
cools,itwillreturntoitsoriginalcolor.
Wipingoffthecooktopbeforeandaftereachusewillhelpkeepit
freefromstainsandprovidethemostevenheating.Formore
information,see"GeneralCleaning"section.
• Donotstorejarsorcansabovethecooktop.Droppinga
heavyorhardobjectontothecooktopcouldcrackit.
Donotleaveahotlidonthecooktop.Asthecooktopcools,
aircanbecometrappedbetweenthelidandthecooktop,
andtheceramicglasscouldbreakwhenthelidisremoved.
Cleanupsugaryspillsandsoilsassoonashotsurface
indicatorlightgoesoff.Ifspillsandsoilsarenotwipedup
whilewarm,surfacepittingcanoccur.
Donotslidecookwareorbakewareacrossthecooktop.
Aluminumorcopperbottomsandroughfinisheson
cookwareorbakewarecouldleavescratchesormarksonthe
cooktop.
Donotcookpopcorninprepackagedaluminumcontainers
onthecooktop.Itcouldleavealuminummarksthatcannot
beremovedcompletely.
Donotallowobjectsthatcouldmelt,suchasplasticor
aluminumfoil,totouchanypartoftheentirecooktop.
Donotusethecooktopasacuttingboard.
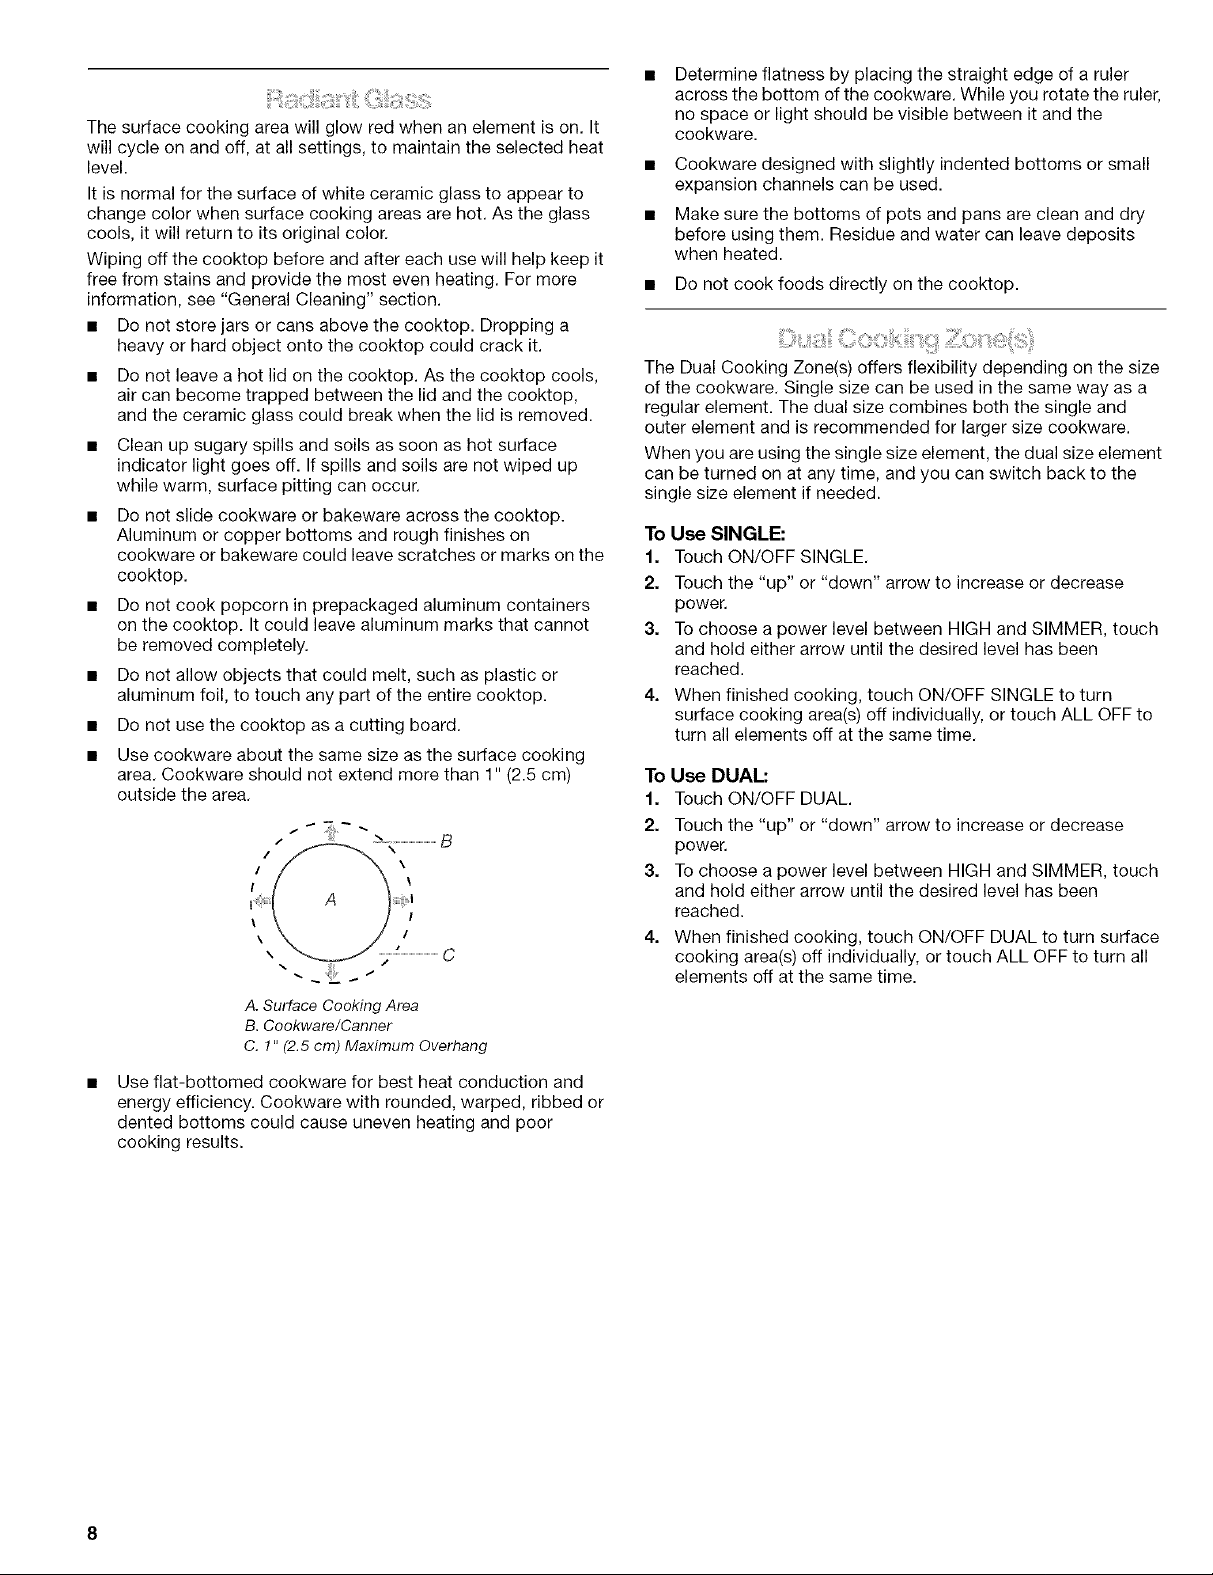
Usecookwareaboutthesamesizeasthesurfacecooking
area.Cookwareshouldnotextendmorethan1"(2.5cm)
outsidethearea.
_, " _...................................B
//
! \
\ !
\ /
A. Surface Cooking Area
B. Cookware/Canner
C. 1" (2.5 cm) Maximum Overhang
Use flat-bottomed cookware for best heat conduction and
energy efficiency. Cookware with rounded, warped, ribbed or
dented bottoms could cause uneven heating and poor
cooking results.
Determine flatness by placing the straight edge of a ruler
across the bottom of the cookware. While you rotate the ruler,
no space or light should be visible between it and the
cookware.
Cookware designed with slightly indented bottoms or small
expansion channels can be used.
Make sure the bottoms of pots and pans are clean and dry
before using them. Residue and water can leave deposits
when heated.
• Do not cook foods directly on the cooktop.
The Dual Cooking Zone(s) offers flexibility depending on the size
of the cookware. Single size can be used in the same way as a
regular element. The dual size combines both the single and
outer element and is recommended for larger size cookware.
When you are using the single size element, the dual size element
can be turned on at any time, and you can switch back to the
single size element if needed.
To Use SINGLE:
1. Touch ON/OFF SINGLE.
2. Touch the "up" or "down" arrow to increase or decrease
power.
3. To choose a power level between HIGH and SIMMER, touch
and hold either arrow until the desired level has been
reached.
4. When finished cooking, touch ON/OFF SINGLE to turn
surface cooking area(s) off individually, or touch ALL OFF to
turn all elements off at the same time.
To Use DUAL:
1. Touch ON/OFF DUAL.
2. Touch the "up" or "down" arrow to increase or decrease
power.
3. To choose a power level between HIGH and SIMMER, touch
and hold either arrow until the desired level has been
reached.
4. When finished cooking, touch ON/OFF DUAL to turn surface
cooking area(s) off individually, or touch ALL OFF to turn all
elements off at the same time.
TheMeltFunctionisavailableonboththerightfrontandleftfront
elements,andisidealformeltingchocolateorbutter.
ToUse:
1. Touch ON/OFR
2. Touch the "up" arrow once for MELT.
3. When finished cooking, touch ON/OFF to turn off surface
cooking area.
Food Poisoning Hazard
Do not let food sit in oven more than one hour
before or after cooking.
Doing so can result in food poisoning or
sickness.
The Warm Function is available on the rear elements, and can be
used to keep cooked foods warm, and may be used whether or
not the other surface cooking zones are in use.
It is not recommended for heating cold foods. When the Warm
Function is in use, it will not glow red like the cooking zones, but
the indicator light will glow on the control panel.
Use only cookware and dishes recommended for oven and
cooktop use, and that have flat bottoms to make direct contact
with the cooktop surface. Use pot holders or oven mitts to
remove cookware.
Cover all foods with a lid or aluminum foil. Do not use plastic
wrap to cover food, as it may melt onto the cooktop surface.
When warming baked goods, allow a small opening in the cover
for moisture to escape.
Food quality may deteriorate if food is kept on the Warm Function
for an extended period of time. For best results, keep food warm
for no longer than 30 to 45 minutes.
To Use:
1. Touch ON/OFR
2. Touch the "up" arrow once for WARM.
3. When finished cooking, touch ON/OFF to turn off surface
cooking area.
IMPORTANT: Do not leave empty cookware on a hot surface
cooking area, element or surface burner.
Ideal cookware should have a flat bottom, straight sides, a well-
fitting lid and the material should be of medium-to-heavy
thickness.
Rough finishes may scratch the cooktop. Aluminum and copper
may be used as a core or base in cookware. However, when used
as a base they can leave permanent marks on the cooktop.
Cookware material is a factor in how quickly and evenly heat is
transferred, which affects cooking results. A nonstick finish has
the same characteristics as its base material. For example,
aluminum cookware with a nonstick finish will take on the
properties of aluminum.
Use the following chart as a guide for cookware material
characteristics.
COOKWARE CHARACTERISTICS
Aluminum • Heats quickly and evenly.
• Suitable for all types of cooking.
• Medium or heavy thickness is best for
most cooking tasks.
Cast iron
Ceramic or
Ceramic glass
Copper • Heats very quickly and evenly.
Earthenware • Follow manufacturer's instructions.
Porcelain • See stainless steel or cast iron.
enamel-on-
steel or cast
iron
Stainless steel • Heats quickly, but unevenly.
• Heats slowly and evenly.
• Good for browning and frying.
• Maintains heat for slow cooking.
• Follow manufacturer's instructions.
• Heats slowly, but unevenly.
• Ideal results on low to medium heat
settings.
• Use on low heat settings.
• A core or base of aluminum or copper
on stainless steel provides even
heating.
When canning for long periods, alternate the use of surface
cooking areas, elements or surface burners between batches.
This allows time for the most recently used areas to cool.
• Center the canner on the grate or largest surface cooking
area or element. Canners should not extend more than
1" (2.5 cm) outside the cooking area.
• Do not place canner on two surface cooking areas, elements
or surface burners at the same time.
• Only use flat-bottomed canners.
For more information, contact your local U.S. Government
Agricultural Department Extension Office. Companies that
manufacture home canning products can also offer
assistance.
COOKTOP CARE
IMPORTANT: Before cleaning, make sure all controls are off and
the oven and cooktop are cool. Always follow label instructions
on cleaning products.
Soap, water and a soft cloth or sponge are suggested first unless
otherwise noted.
STAINLESS STEEL (on some models)
Do not use soap-filled scouring pads, abrasive cleaners, Cooktop
Polishing Creme, steel-wool pads, gritty washcloths or some
paper towels. Damage may occur.
Rub in direction of grain to avoid damaging.
• Stainless Steel Cleaner & Polish (not included): See back
cover for ordering information.
• Liquid detergent or all-purpose cleaner: Rinse with clean
water and dry with soft, lint-free cloth.
• Vinegar for hard water spots.
RADIANT GLASS
Do not use steel wool, abrasive powder cleansers, chlorine
bleach, rust remover or ammonia because damage may occur.
Always wipe with a clean, wet cloth and dry thoroughly to prevent
streaking and staining.
Cooktop Cleaning Creme supplied with your cooktop should be
used regularly to help prevent scratches, pitting and abrasions,
and to condition the cooktop. It can be purchased as a kit
along with the Cooktop Scraper. Ask for stock number
22-364-WX10Xl 17 when reordering.
A blue 3M SCOTCH-BRITE ®no scratch scrub sponge supplied
with your cooktop is also recommended for stubborn soils. This
pad is designed specifically to keep your radiant glass clean. Do
not use this pad to clean any other surfaces.
A Cooktop Scraper is also recommended for stubborn soils, and
can be ordered as an accessory. Ask for stock number
22-364-WX10X302 when ordering. The Cooktop Scraper uses
razor blades. Store razor blades out of the reach of children.
Light to moderate soil
• Paper towels or blue 3M SCOTCH-BRITE ®no scratch scrub
sponge: Clean while the cooktop is still warm. You may want
to wear oven mitts while doing so.
Sugary spills (jellies, candy, syrup)
• Blue 3M SCOTCH-BRITE ®no scratch scrub sponge: Clean
while the cooktop is still warm. You will want to wear oven
mitts while doing so.
Cooktop Scraper, Cooktop Cleaning Creme and clean damp
paper towel: Clean as soon as cooktop has cooled down.
Rub creme into surface with a damp paper towel or soft
cloth. Continue rubbing until white film disappears.
Heavy soil, dark streaks, specks and discoloration
• Cooktop Scraper, Cooktop Cleaning Creme or nonabrasive
cleanser: Rub product into soil with a damp paper towel or
soft cloth. Continue rubbing until white film disappears.
Burned-on soil
• Cooktop Cleaning Creme and blue 3M SCOTCH-BRITE ®no
scratch scrub sponge: Rub creme into soil with damp paper
towel. Repeat for stubborn spots. Polish entire cooktop with
creme and paper towel.
Metal marks from aluminum and copper
• Cooktop Cleaning Creme: Clean as soon as cooktop has
cooled down. Rub creme into surface with a damp paper
towel or soft cloth. Continue rubbing until white film
disappears. The marks will not totally disappear but after
many cleanings become less noticeable.
Tiny scratches and abrasions
• Cooktop Cleaning Creme: Rub creme into surface with a
damp paper towel or soft cloth. Continue rubbing until white
film disappears. Scratches and abrasions do not affect
cooking performance and after many cleanings become less
noticeable.
10
 Loading...