

Kenmore 665.16659, 665.16654 User Manual
®
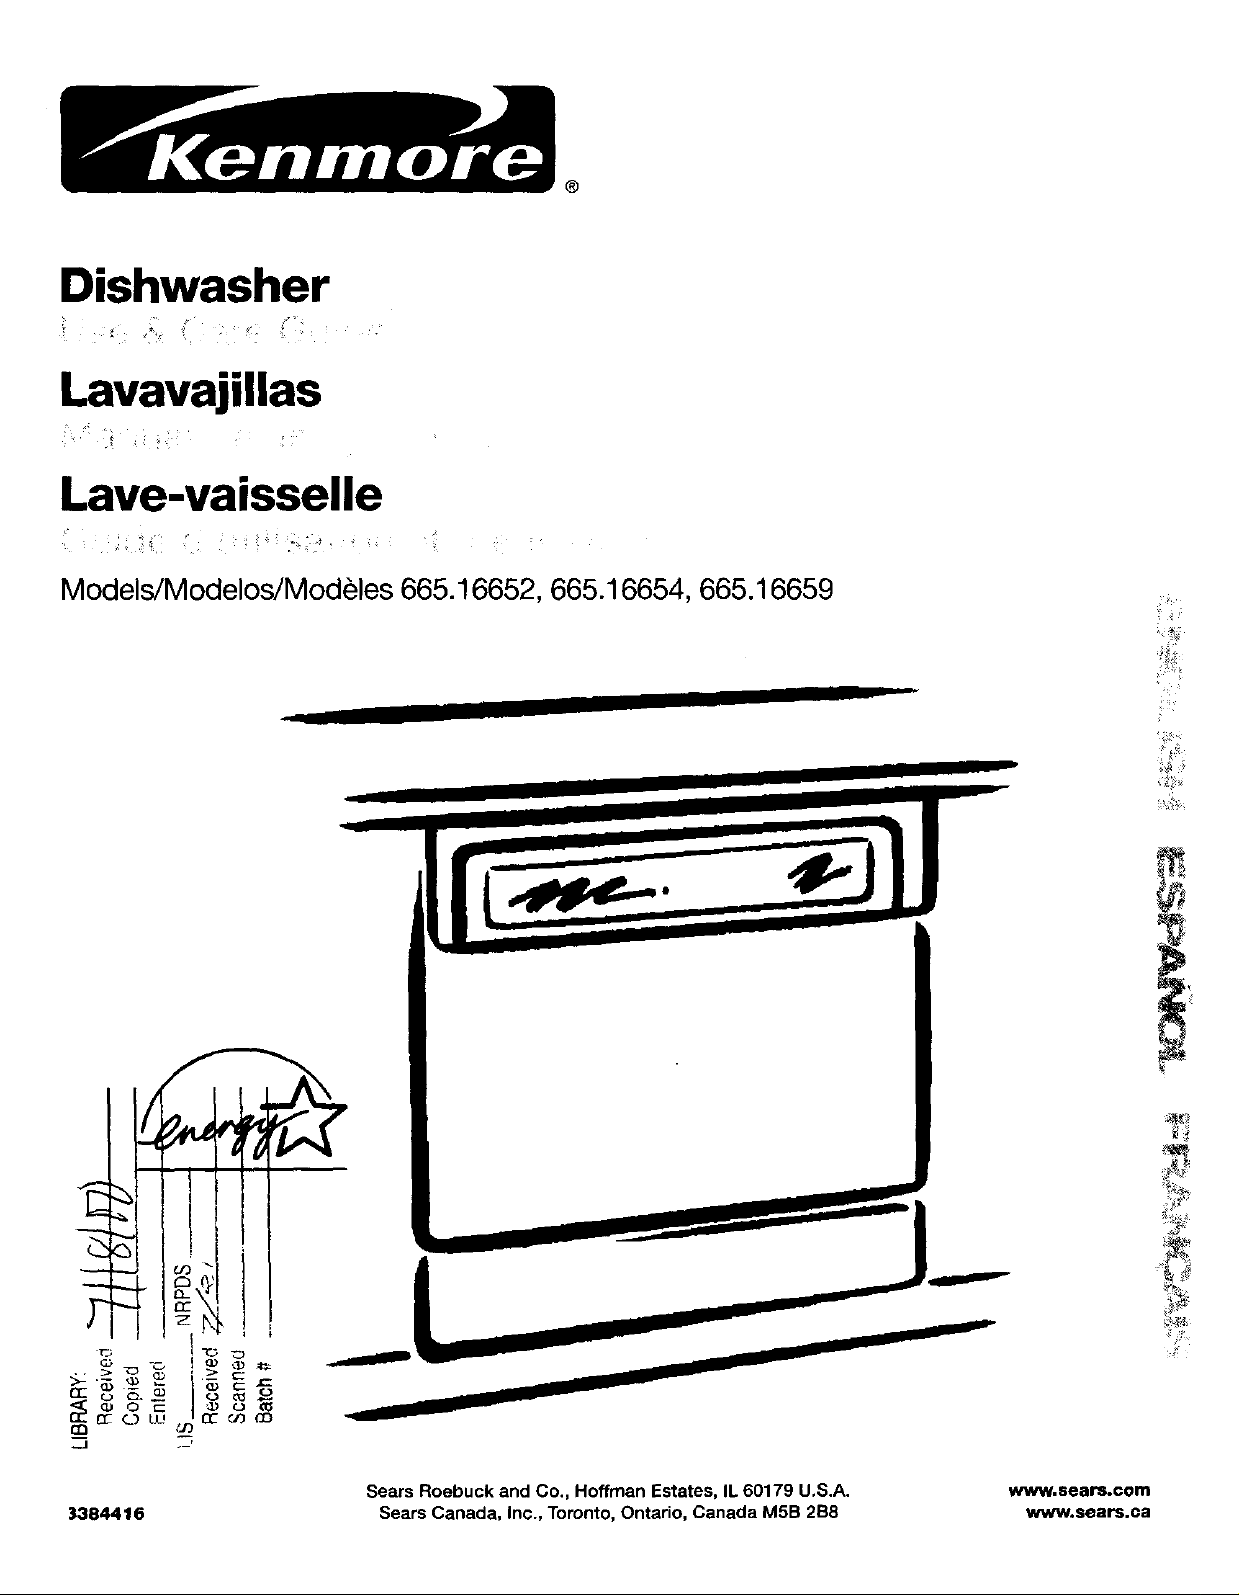
Dishwasher
Lavavajillas
Lave-vaisselle
Models/Modelos/Mod_les 665.16652, 665.16654, 665.16659
?
Sears Roebuck and Co., Hoffman Estates, IL 60179 U.S.A. www.sears.com
3384416 Sears Canada, Inc., Toronto, Ontario, Canada M5B 2B8 www.sears.ca
TABLE OF CONTENTS
WE SERVICE
WE SERVICE WHAT WE SELL .......................................... 2
WARRANTY ......................................................................... 3
DISHWASHER SAFETY ................................................... 4
Before Using "(our Dishwasher .................................................... 5
PARTS AND FEATURES .................................................... 6
Soil RemovalSystem...................................................................7
START-UP GUIDE ............................................................... 7
Using Your New Dishwasher ....................................................... 7
DISHWASHER LOADING .................................................. 8
Loading Suggestions ................................................................... 8
Loading the Top Rack .................................................................. 8
Loading the Bottom Rack ............................................................ 9
Loading the Silverware Basket .................................................... 9
DISHWASHER USE .......................................................... 10
Detergent Dispenser .................................................................. t 0
Rinse Aid Dispenser ................................................................... 11
Dishwasher EfficiencyTips ........................................................ 11
Control Panel.............................................................................. 12
Cycle Selection Chad ................................................................ 12
Canceling a Cycle ...................................................................... 13
Changing a Cycle or Setting ...................................................... 13
Adding Items During a Cycle ..................................................... 13
Option Selections ....................................................................... 13
Cycle Status Indicators .............................................................. 14
Drying System ............................................................................ 14
Overfill Protection Float .............................................................. 14
WASHING SPECIAL ITEMS ............................................. 14
DISHWASHER CARE ........................................................ 15
Cleaning Your Dishwasher ......................................................... 15
Drain Air Gap .............................................................................. 16
Storing Your Dishwasher ........................................................... 16
TROUBLESHOOTING ....................................................... 16
WHAT WE SELL
"We Service What We Sell" is our assurance that you can depenc
on Sears for service. Your dishwasher has added value when ym
consider that Sears has service units nationwide, staffed with
professional technicians specifically trained on Sears appliance_
and having the pads, tools, and equipment to ensure that we
meet our pledge to you..."We Service What We Sell."
Maintain the value of your KENMORE _'Dishwasher with a Sears
Maintenance Agreement. Sears dishwashers are designed,
manufactured, and tested for years of dependable operation. Yet
any modern appliance may require service from time to time.
The Sears Maintenance Agreement
• Isyour way to buytomorrow's service at today's prices.
• Eliminates repair bills resulting from normal use.
• Allows for as many service calls as required.
• Provides for service by professional Sears Trained
Technicians.
• Even if you don't need repairs, the Maintenance Agreement
offers an annual preventative maintenance check-up at your
request[
This Maintenance Agreement does not cover original installation
reinstallation, or damage resulting from external causes such as
acts of abuse, theft, fire, flood, wind, lightning, freezing, power
failure, power reduction, etc.
2
WARRANTY
FULL ONE-YEAR WARRANTY ON KENMORE
DISHWASHERS
For one year from the date of purchase, when this dishwasher is
installed and operated according to instructions provided inthe
Installation Instructions and Use & Care Guide, Sears will repair
this dishwasher, free of charge, if defective in material or
workmanship,
FULL WARRANTY FOR THE UFE OF THE DISI-Nt/ASHER,
ON ULTRA LIFE TMTUB MODELS, AGAINST LEAKS IN THE
TUB AND INNER DOOR PANEL
For the life of the dishwasher, if a leak should occur as a result of
failure of the polypropylene tub or inner door panel due to
cracking, chipping or peeling, Sears will replace free of charge
the tub or inner door panel.
WARRANTY RESTRICTION
If the dishwasher is subject to other than private family use, the
above warranty coverage is effective for only 90 days.
WARRANTY SERVICE
WARRANTY SERVICE IS AVAILABLE BY CONTACTING THE
NEAREST SEARS SERVICE CENTER IN THE UNITED STATES
OR CANADA. This warranty applies only while the product is in
use in the United States or Canada. This warranty gives you
specific legal rights and you may also have other rights which
vary from state to state or province to province.
Warranty terms may vary in Canada.
For Sears Warranty information inthe United States or Canada
call 1-800-469-4663.
Sears, Roebuck and Co,
D/817WA, Hoffman Estates, IL 60179
Sears Canada, Inc.
Toronto, Ontario, Canada MSB 2B8
In the space below, record your complete model number, serial
number, and purchase date. You can find this information on the
model and serial number label, located as shown in the Parts and
Features section of this book. Have this information available to
help you quickly obtain assistance orservice when you contact
Sears concerning your appliance.
Model number
Serial number
Purchase date
Save these instructions and your sales receipt for future
reference.
• DISHWASHER SAFETY
Your safety and the safety of others are very important.
We have provided many important safety messages inthis manual and on your appliance, Always read and obey all
safety messages.
This symbol alerts you to potential hazards that can kill or hurt you and others.
All safety messages will follow the safety alert symbol and either the word "DANGER" or
This is the safety alert symbol.
"WARNING," These words mean:
You can be killed or seriously injured if you don't
immediately follow instructions.
You can be killed or seriously injured if you don't
follow instructions.
All safety messages will tell you what the potential hazard is, tell you how to reduce the chance of injury, and tell you
what can happen if the instructions are not followed.
IMPORTANT SAFETY INSTRUCTIONS
WARNING: When using the dishwasher, follow basic precautions, including the following:
• Read all instructions before using the dishwasher.
• Use the dishwasher only for its intended function.
• Use only detergents or rinse agents recommended
for use in a dishwasher, and keep them out of the
reach of children,
• When loading items to be washed:
1) Locate sharp items so that they are not likely to
damage the door seal; and
2) Load sharp knives with the handles up to reduce
the risk of cut-type injuries.
• Do not wash plastic items unless they are marked
"dishwasher safe" or the equivalent. For plastic
items not so marked, check the manufacturer's
recommendations.
• Do not touch the heating element during or
immediately after use.
• Do not operate the dishwasher unless all enclosure
panels are properly in place.
• Do not tamper with controls.
• Do not abuse, sit on, or stand on the door or dish
racks of the dishwasher.
• To reduce the risk of injury, do not allow children to
play in or on the dishwasher.
Under certain conditions, hydrogen gas may be
produced in a hot water system that has not been
used for two weeks or more. HYDROGEN GAS IS
EXPLOSIVE. If the hot water system has not been
used for such a period, before using the dishwasher
turn on ell hot water faucets and let the water flow
from each for several minutes. This will release any
accumulated hydrogen gas. As the gas is flammable,
do not smoke or use an open flame during this time.
• Remove the door to the washing compartment when
removing an old dishwasher from service or
discarding it.
SAVE THESE INSTRUCTIONS
4

Before Using Your Dishwasher
Tip Over Hazard
Do not use dishwasher until completely installed.
Do not push down on open door.
Doing so can result in serious injury or cuts.
GROUNDING INSTRUCTIONS
For a grounded, cord-connected dishwasher:
The dishwasher must be grounded. In the event
of a malfunction or breakdown, grounding will
reduce the risk of electric shock by providing a
path of least resistance for electric current. The
dishwasher is equipped with a cord having an
equipment-grounding conductor and a grounding
plug. The plug must be plugged into an appro-
priate outlet that is installed and grounded in
accordance with all local codes and ordinances.
WARNING: Improper connection of the
equipment-grounding conductor can result in a
risk of electric shock. Check with a qualified
electrician or service representative if you are in
doubt whether the dishwasher is properly
grounded. Do not modify the plug provided with
the dishwasher; if it will not fit the outlet, have a
proper outlet installed by a qualified electrician.
For a permanently connected dishwasher:
The dishwasher must be connected to a
grounded metal, permanent wiring system, or an
equipment-grounding conductor must be run
with the circuit conductors and connected to the
equipment-grounding terminal or lead on the
dishwasher.
Electrical Shock Hazard
Electrically ground dishwasher.
Connect ground wire to green ground connector
in terminal box.
Do not use an extension cord.
Failure to follow these instructions can result in
death, fire, or electrical shock.
Install where dishwasher is protected from the elements.
Protect against freezing to avoid possible rupture of fill valve.
Such ruptures are not covered by the warranty. See "Storing
Your Dishwasher" in the "Dishwasher Care" section for winter
storage information.
Install and level dishwasher on a floor that will hold the
weight, and in an area suitable for its size and use.
Remove all shipping plugs from hoses and connectors (such
as the cap on the drain outlet) before installing. See
Installation Instructions for complete information.
SAVE THESE INSTRUCTIONS
5
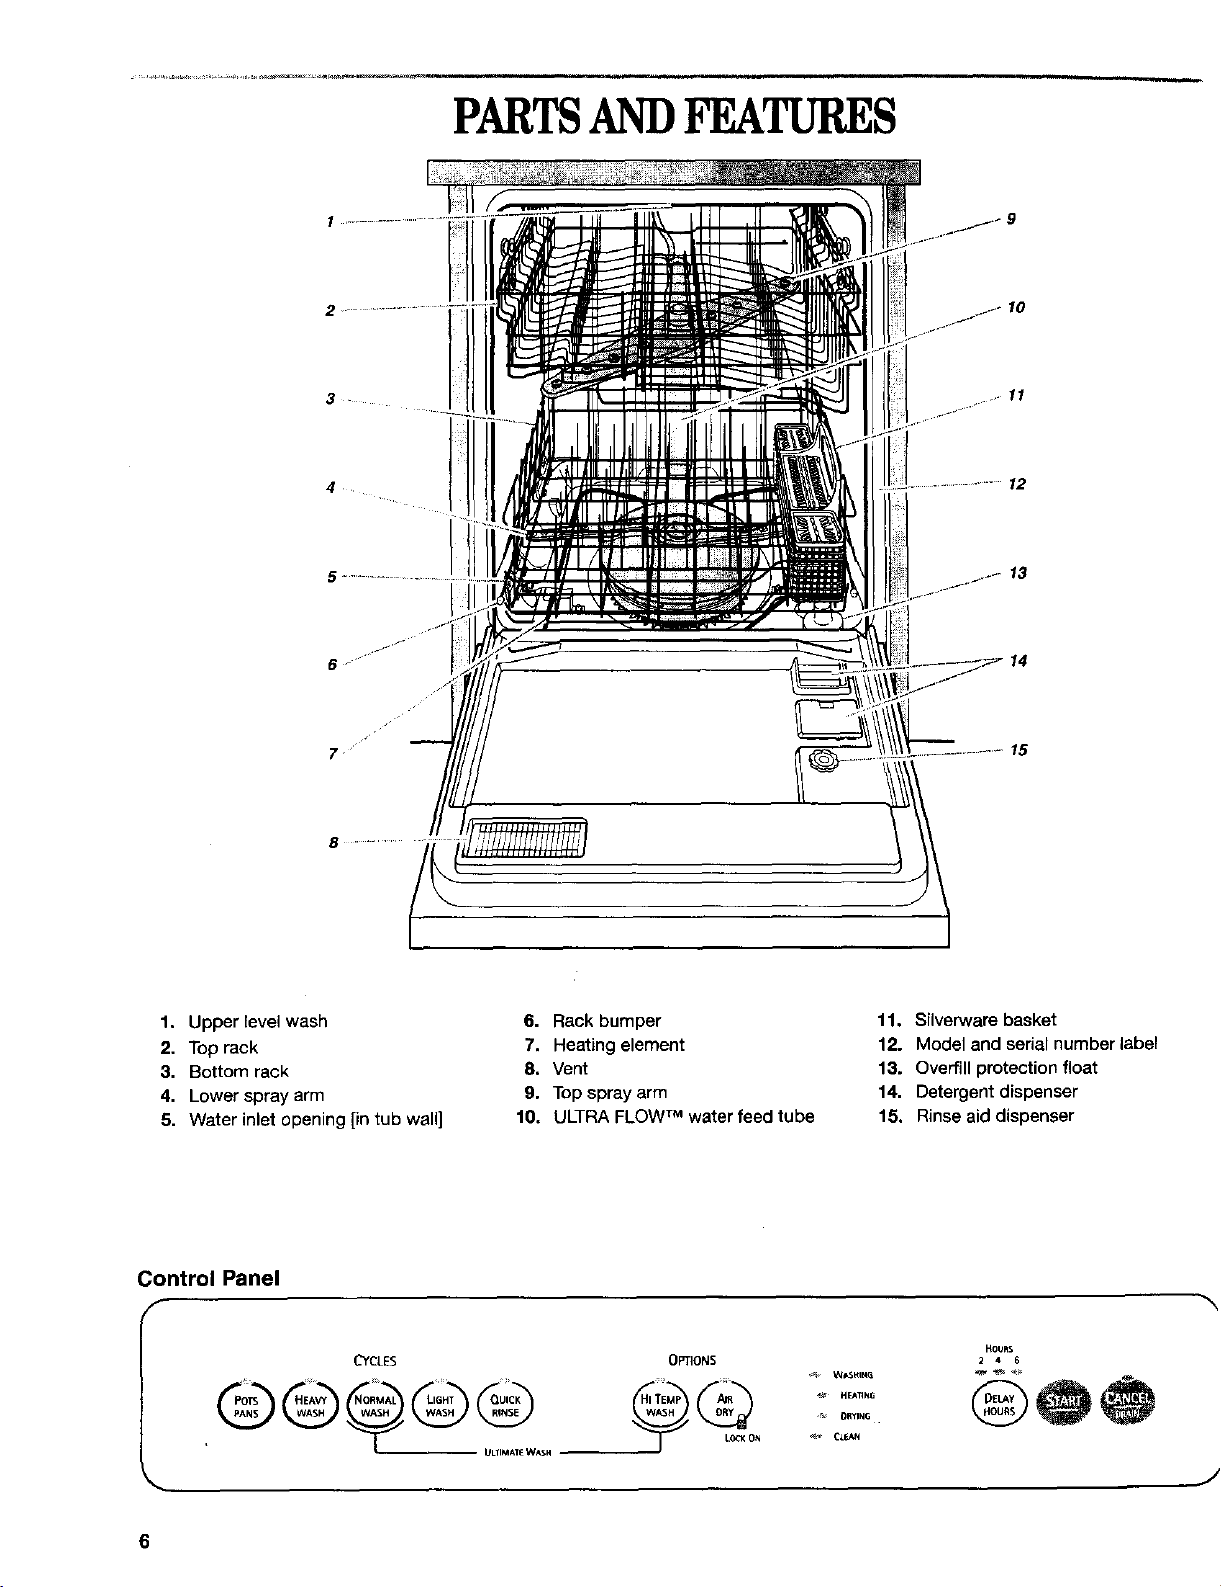
PARTSANDFEATURES
10
11
12
5
1. Upper level wash
2. Top rack
3. Bottom reck
4. Lower spray arm
5. Water inlet opening [in tub wall]
Control Panel
f
CYCLES
®®®®®o
6. Rack bumper
7. Heating element
8. Vent
9. Top spray arm
10. ULTRA FLOW TM water feed tube
OPTIONS
11. Silverware basket
12. Model and serial number label
13. Overfill protection float
14. Detergent dispenser
15. Rinse aid dispenser
HOU_
2 4 6
J
 Loading...