

Kenmore 665.1629 User Manual [en, es, fr]
ULTRA WASH® Dishwasher Lavavajillas ULTRA WASH®
Ma=îî=.,= y cuidado
Lave-vaisselle ULTRA WASH®
i i i ■ . r ^ - d i " : d v : ^ v ; - d ; i d - i
Models/Modelos/Modèles 665.1628^, 665.17285^^, 665.16295^^
>íí = color number, número de color, numéro de couleur
ENERGY STAR
8557692
Sears Roebuck and Co., Hoffman Estates, IL 60179 U.S.A.
Sears Canada Inc., Toronto, Ontario, Canada MSB 2B8
www.sears.com
www.sears.ca

TABLE OF CONTENTS
PROTECTION
PROTECTION AGREEMENTS........................................................2
In t he U.S . A. . . . .. . . . .. . . . ... . . . .. . . . .. . . . .. . . . ... . . . .. . . . .. . . . .. . . . ... . . . .. . . . .. . . . .. . . . ... . . . .. . . . .. . . . .. . . . ... . . . .. . . . 2
In C ana da. . .. . . . ... . . . .. . . . .. . . . .. . . . ... . . . .. . . . .. . . . .. . . . ... . . . .. . . . .. . . . .. . . . ... . . . .. . . . .. . . . .. . . . .. . . . ... . . . .. . . . .. . . . 3
WARRANTY
DISHWASHER SAFETY
B e for e Us ing You r D ish was her . . .. . . . ... . . . .. . . . .. . . . .. . . . ... . . . .. . . . .. . . . .. . . . ... . . . .. . . . .. . . . .. . . . ... . . . .. . . . .. . . . .. . 5
PARTS AND FEATURES.................................................................6
C o ntrol Panels . . . . .. . . .. . . .. . . ... . . .. . . .. . . .. . . ... . . .. . . .. . . .. . . ... . . .. . . .. . . ... . . .. . . .. . . .. . . ... . . .. . . .. . . .. . . ... . . .. . . . 7
U L TRA W ASH® S oil Removal Syst em. . . .. . . . . .. . . .. . . .. . . ... . . .. . . .. . . .. . . ... . . .. . . .. . . .. . . ... . . .. . . .. . . .. . . . . .. . . .. 7
START-UP GUIDE............................................................................8
U s ing Y our N ew D is hwasher . . . .. . . . . .. . . .. . . .. . . ... . . .. . . .. . . .. . . ... . . .. . . .. . . .. . . ... . . .. . . .. . . .. . . . . .. . . .. . . .. . . ... . . 8
DISHWASHER LOADING................................................................8
L o ading Su g ges ti ons . . . .. . . ... . . .. . . .. . . .. . . . . .. . . .. . . .. . . ... . . .. . . .. . . .. . . ... . . .. . . .. . . .. . . ... . . .. . . .. . . .. . . . . .. . . .. . . . 8
L o ading T o p Rack. . . .. . . .. . . .. . . . . .. . . .. . . .. . . ... . . .. . . .. . . .. . . ... . . .. . . .. . . .. . . ... . . .. . . .. . . .. . . . . .. . . .. . . .. . . ... . . .. . . 9
L o ading Bot tom Ra ck.. . . .. . . .. . . ... . . .. . . .. . . .. . . ... . . .. . . .. . . .. . . ... . . .. . . .. . . .. . . . . .. . . .. . . .. . . ... . . .. . . .. . . .. . . ... . 10
L o ading Si lverware B as ket. . . .. . . . .. . . .. . . .. . . ... . . .. . . .. . . .. . . ... . . .. . . .. . . .. . . ... . . .. . . .. . . .. . . . . .. . . .. . . .. . . ... . . . 11
DISHWASHER USE.......................................................................12
D e terg ent Dispenser . . . .. . . . .. . . .. . . .. . . ... . . .. . . .. . . .. . . ... . . .. . . .. . . .. . . ... . . .. . . .. . . ... . . .. . . .. . . .. . . ... . . .. . . .. . . .. 1 2
R i nse Aid Dispense r. . . .. . . ... . . .. . . .. . . .. . . ... . . .. . . .. . . .. . . . .. . . .. . . .. . . ... . . .. . . .. . . .. . . ... . . .. . . .. . . .. . . ... . . .. . . .. 13
D i shwasher Eff ici ency Tips. . . .. . . .. . . ... . . .. . . .. . . .. . . . .. . . .. . . .. . . ... . . .. . . .. . . .. . . ... . . .. . . .. . . .. . . ... . . .. . . .. . . .. . 14
C y cle Sel ect ion Chart s. . . ... . . .. . . .. . . .. . . ... . . .. . . .. . . .. . . ... . . .. . . .. . . .. . . . .. . . .. . . .. . . ... . . .. . . .. . . .. . . ... . . .. . . .. . 1 4
C a nceli ng a C ycl e. . . .. . . ... . . .. . . .. . . .. . . ... . . .. . . .. . . .. . . ... . . .. . . .. . . .. . . . . .. . . .. . . .. . . ... . . .. . . .. . . .. . . ... . . .. . . .. . . 1 5
C h anging a Cycl e or Set ti n g. . . .. . . .. . . ... . . .. . . .. . . .. . . . . .. . . .. . . .. . . ... . . .. . . .. . . .. . . ... . . .. . . .. . . .. . . ... . . .. . . .. . . ..15
A d ding It ems Dur ing a Cycl e. . . .. . . .. . . ... . . .. . . .. . . .. . . ... . . .. . . .. . . .. . . . .. . . .. . . .. . . ... . . .. . . .. . . .. . . ... . . .. . . .. . . .. 1 5
O p ti on Selec tions. . . .. . . .. . . . .. . . .. . . .. . . ... . . .. . . .. . . .. . . ... . . .. . . .. . . .. . . ... . . .. . . .. . . .. . . . . .. . . .. . . .. . . ... . . .. . . .. . . 1 5
C y cle Sta t us In dic ator s. . . .. . . ... . . .. . . .. . . .. . . ... . . .. . . .. . . .. . . . .. . . .. . . .. . . ... . . .. . . .. . . .. . . ... . . .. . . .. . . .. . . ... . . .. . 1 6
A c ti ve Vent. . . .. . . .. . . ... . . .. . . .. . . ... . . .. . . .. . . .. . . ... . . .. . . .. . . .. . . ... . . .. . . .. . . .. . . . .. . . .. . . .. . . ... . . .. . . .. . . .. . . ... . 1 6
O v erfi ll Protec tion Flo at. . . .. . . .. . . ... . . .. . . .. . . .. . . ... . . .. . . .. . . .. . . . .. . . .. . . .. . . ... . . .. . . .. . . .. . . ... . . .. . . .. . . .. . . .. 1 7
WASHING SPECIAL ITEMS
DISHWASHER CARE
C l eani ng. . . ... . . .. . . .. . . .. . . . . .. . . .. . . .. . . ... . . .. . . .. . . .. . . ... . . .. . . .. . . .. . . ... . . .. . . .. . . .. . . . . .. . . .. . . .. . . ... . . .. . . .. . . 18
D r ai n A ir G ap. . . .. . . .. . . ... . . .. . . .. . . .. . . ... . . .. . . .. . . .. . . ... . . .. . . .. . . .. . . . .. . . .. . . .. . . ... . . .. . . .. . . .. . . ... . . .. . . .. . . . 18
S t o ring. . . ... . . .. . . .. . . .. . . ... . . .. . . .. . . .. . . ... . . .. . . .. . . ... . . .. . . .. . . .. . . ... . . .. . . .. . . .. . . ... . . .. . . .. . . .. . . . .. . . .. . . .. . . 1 8
TROUBLESHOOTING....................................................................19
SERVICE NUMBERS
.....................................................................................
..................................................................
..........................................................
....................................................................
.................................................
BACK COVER
17
18
AGREEMENTS
3
4
Master Protection Agreements
C o ngratul ati ons on m aki ng a smart purchase. Your new
K e nm ore ® appli ance i s desi gned and m anufact ured f or year s of
d e pe n dabl e oper ati on. But l ike all product s, it m ay requir e
p r ev ent i ve main te nan ce or repai r from t i m e to time. Tha t’s whe n
h a vi ng a Master Protect ion A gre ement can sa ve you mone y a nd
a g gr ava ti on.
Purchase a Master Protection Agreement now and protect
yourself from unexpected hassle and expense.
T h e M ast er Pr ote ct ion Agr eemen t al so hel ps ext end t he li f e o f
y o ur new a ppli anc e. Her e’s wha t’s inclu ded in the A gree m ent :
✓ Expert service
✓ Unlimited service and no charge
c o ve red re pai r s
✓ “No-lemon” guarantee
p r o duc t i f four o r m ore p roduc t f ail ure s occur with in t wel ve
m on ths
✓ Product replacement
✓ Annual Preventive Maintenance Check
e x t ra charge
✓
Fast help by phone
o n pro ducts requir ing i n-hom e repai r, plus conve nie nt repai r
s c h edul i n g
✓ Power surge protection
p o wer f luct uat io n s
✓ Rental reimbursement
l o ng er than promised
O n ce y o u purchase the A g ree m ent , a si mple p h one call Is all that
i t t a k es f or y ou t o s ched u le s ervi ce. You c a n c all a nyt i m e d ay o r
n i gh t, or sched ule a ser vic e appoi ntment onli ne .
S e ar s has over 1 2, 000 profe ssional repai r spec ial ist s, who have
a c c ess to over 4.5 mil l ion qual it y p art s and a ccessor ies. That ’s
t h e ki nd of p rofessi onalism you can count on t o help prolong t he
l i f e of y o ur new purchase for years to com e. Purchase your
M a ster Pro tec tion A gr eement t oda y !
Some limitations and exclusions apply. For prices and
information, call 1-800-827-6655.
b y our 12, 000 profe ssional repair s pec ial ist s
for par ts and l a bor on all
- r epla cement o f your covered
If your cover ed pro duct can’ t be fi xed
a t your request - no
- phone s uppor t from a Sears te chni cian
a g ai nst elect ri cal d amage due to
i f r epair of y our c o ver ed product t ake s
Sears Installation Service
F o r Sea rs profess ional inst all ation of h ome appli ances, garage
d o or openers, water heaters, and o t h er major hom e items, in the
U S A . cal l
1-800-4-MY-HOME®.

Maintenance Agreements
Y o ur pur chase has added val ue because y ou can depen d o n
S e ar s HomeCent ral ® f or servi ce. With over 2, 400 Ser vic e
T e chnici ans and access to over 900,0 00 par t s and accessori es,
w e have the tools , part s, know le dge and s kill s t o back o ur
p l e dge: We Servi ce What We Sel l.
Y o ur Kenm or e® a ppli an ce I s desi gned, manufact ure d a nd tes ted
t o provid e years of depen dable ope rati on. Yet any maj or
a p pl iance m ay requir e servi ce fro m t i m e to t ime. The Sears
M a intenance A gr eem ent off ers y o u an out standi ng serv ice
p r o gra m , af fordably priced.
The Sears Maintenance Agreement
■ G uar ant ees tomor row’s ser v ic e at t oday’s pri c e.
■ Eli minate s r e pair bill s r esult ing f rom n ormal wear and t ear.
■ C overs nontechni cal a nd inst ruct ional service call s.
■ Provid es an annual Preventi ve M ain tenance C he ck, a t your
reque st, to ensure that your app lian ce is in proper running
c o ndi tion.
Some limitations apply. For information concerning Sears
HomeCentral® Maintenance Agreements, call
1-800-361-6665.
WARRANTY
FULL THREE-YEAR WARRANTY ON THIS KENMORE ELITE® DISHWASHER
F o r thre e years from t he dat e of purchase, when thi s dis hw as her
i s i nstal led and o perate d accordi ng to instr ucti ons pr o vi ded in the
Inst al lati on In str uct ions and Us e & Care Gui de, Sear s w il l repair
t h i s dis hwasher, fre e of charge, if defec tive in mater ial or
w o rkm ans hip .
WARRANTY RESTRICTION
If t he dis hwasher is subject t o o t her t han pr ivate famil y use, the
a b ove w ar ranty c overage is eff ect ive f or onl y 90 days.
WARRANTY SERVICE
W ARRAN TY S E RVICE IS AVAILABLE BY C O N TACTIN G T HE
N E A REST SEAR S SERV ICE C ENTER IN THE UNI TED STATES
O R CANADA. This w ar ranty appli e s only w hi le t he pr oduct i s i n
u s e in the U nit ed St ates or Canada.
T h is war rant y gives you speoif io legal right s and you may al so
h a ve other right s which var y f rom s tat e t o st ate or pr ovi nce t o
p r o vin ce.
W ar rant y t er m s may vary in Canada.
F o r Sea rs war rant y i nf ormat ion i n t he Unit e d Stat es or Can ada,
p l e ase r eference the servi ce numbe rs l ocated o n t he back page
o f thi s manual.
Sears, Roebuck and Co.
D/817WA, Hoffman Estates, IL 60179
Sears Canada Inc.
Toronto, Ontario, Canada MSB 2B8
PRODUCT RECORD
In t he space bel ow, record your com pl ete model num ber, s erial
n u mber , and pur cha se dat e. You can fi nd thi s i nfo rmati o n o n the
m od el a nd seri al number label , l ocated as shown i n the Parts and
F e at ures secti on o f thi s book. H ave thi s i n fo rmat io n a vail able to
h e l p you qui ckl y obt ain assist ance or servi ce w hen you cont act
S e ar s concern ing your appli an ce.
Model number 665._____________________________________________________________________________________________
Serial number_________________________________________________________________________________________________
Purchase date
Save these instructions and your sales receipt for future
reference.
FULL WARRANTY FOR THE LIFE OF THE DISHWASHER,
ON ELITE STAINLESS STEEL TUB MODELS, AGAINST
LEAKS IN THE TUB AND INNER DOOR PANEL
F o r t h e l i fe o f the d i shwash er, if a leak s h oul d o c cu r a s a r e s ult o f
rust -t hrough o f the stai nless st eel tub or inner d o or panel, S e a rs
w i ll replace free of ch ar ge t he tu b o r inner door pa n el .
LIMITED FIVE-YEAR WARRANTY ON UPPER AND
LOWER RACKS
A f t er t he t hird year an d u nti l five year s from the date of pur chase,
w h en t he dishwasher is inst alled and oper ate d in accor danc e
w i th the inst ructi ons pro vided i n th e I ns tall atio n I nst ructi ons an d
U s e & Ca re Guid e, Sears w il l rep lace p ar ts for the upper or lower
d i s hrack if the rack r ust s due t o defe cti ve m at erial s o r
w o rkm ans hip . Cus tomer as sum es any l abor cost s a sso ciat ed
w i th di shr ack r epl acement.

DISHWASHER SAFETY
Your safety and the safety of others are very important.
We have provided many important safety messages in this manual and on your appliance. Always read and obey all
safety messages.
This is the safety alert symbol.
This symbol alerts you to potential hazards that can kill or hurt you and others.
All safety messages will follow the safety alert symbol and either the word “DANGER” or
“WARNING.” These words mean:
You can be killed or seriously injured if you don't
ADANGER
AWARNING
All safety messages will tell you what the potential hazard is, tell you how to reduce the chance of injury, and tell you
what can happen if the instructions are not followed.
IMPORTANT SAFETY INSTRUCTIONS
WARNING : When using the dishwasher, follow basic precautions, including the following:
immediately follow instructions.
You can be killed or seriously injured if you don't
follow instructions.
Read all instructions before using the dishwasher.
Use the dishwasher only for its intended function.
Use only detergents or rinse agents recommended
for use in a dishwasher, and keep them out of the
reach of children.
When loading items to be washed:
1) Locate sharp items so that they are not likely to
damage the door seal; and
2) Load sharp knives with the handles up to reduce
the risk of cut-type injuries.
Do not wash plastic items unless they are marked
“dishwasher safe” or the equivalent. For plastic
items not so marked, check the manufacturer's
recommendations.
Do not touch the heating element during or
immediately after use.
SAVE THESE INSTRUCTIONS
Do not operate the dishwasher unless all enclosure
panels are properly in place.
Do not tamper with controls.
Do not abuse, sit on, or stand on the door, lid, or dish
racks of the dishwasher.
To reduce the risk of injury, do not allow children to
play in or on the dishwasher.
Under certain conditions, hydrogen gas may be
produced in a hot water system that has not been
used for two weeks or more. HYDROGEN GAS IS
EXPLOSIVE. If the hot water system has not been
used for such a period, before using the dishwasher
turn on all hot water faucets and let the water flow
from each for several minutes. This will release any
accumulated hydrogen gas. As the gas is flammatele,
do not smoke or use an open flame during this time.
Remove the door or lid to the washing compartment
when removing an old dishwasher from service or
discarding it.

^WARNING
Tip Over Hazard
Do not use dishwasher until completely installed.
Do not push down on open door.
Doing so can result in serious injury or cuts.
^WARNING
GROUNDING INSTRUCTIONS
For a grounded, cord-connected dishwasher:
The dishwasher must be grounded. In the event
of a malfunction or breakdown, grounding will
reduce the risk of electric shock by providing a
path of least resistance for electric current. The
dishwasher is equipped with a cord having an
equipment-grounding conductor and a grounding
plug. The plug must be plugged into an
appropriate outlet that is installed and grounded in
accordance with all local codes and ordinances.
WARNING: improper connection of the
equipment-grounding conductor can result in a
risk of electric shock. Check with a qualified
electrician or service representative if you are in
doubt whether the dishwasher is properly
grounded. Do not modify the plug provided with
the dishwasher; if it will not fit the outlet, have a
proper outlet installed by a qualified electrician.
For a permanently connected dishwasher:
The dishwasher must be connected to a
grounded metal, permanent wiring system, or an
equipment-grounding conductor must be run
with the circuit conductors and connected to the
equipment-grounding terminal or lead on the
dishwasher.
Electrical Shock Hazard
Electrically ground dishwasher.
Connect ground wire to green ground connector
in terminal box.
Do not use an extension cord.
Failure to follow these instructions can result in
death, fire, or electrical shock.
Inst al l where d ishwas her is pro tect ed fr om t he ele ments .
P r ot ect against f ree zi ng to avoid pos sibl e r upt ure o f f il l val ve.
S u ch ruptu res are not cove red by the w arr anty. See “Sto ring”
i n t he “Dishwas her Care” sect ion for winter sto rage
i n f ormation.
Inst al l a nd l eve l d is hwasher on a floor that wil l hol d t h e
w e ight , and in an area suit able for its siz e and use .
R e m ove all shi ppin g pl ugs fr om h ose s and connect o rs (such
a s the cap on t he dra in out let ) bef ore i nstal li ng. See
Inst al lati on In str uct ions for c omplet e i nfo rmatio n .
SA¥E THESE INSTRUCTIONS
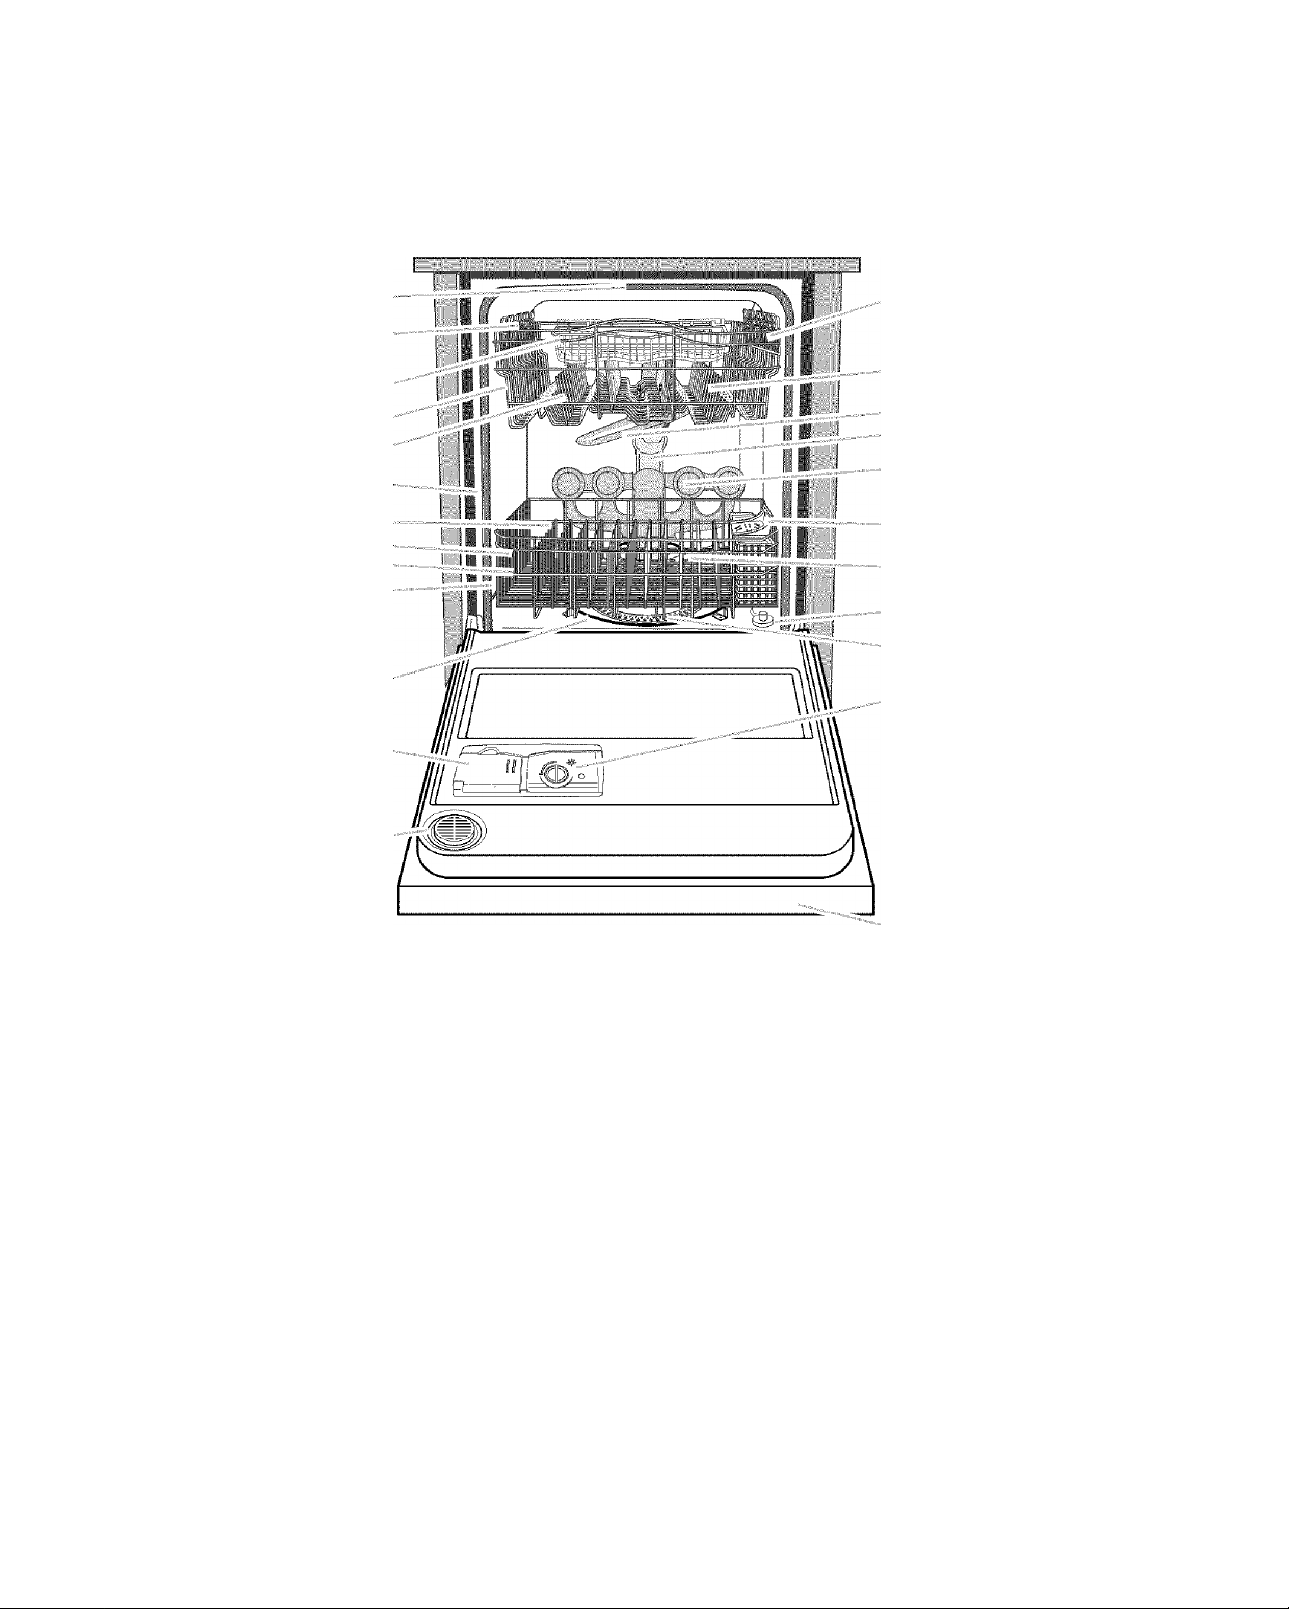
PARTS AND FEATURES
T h is manu al cove rs sev era l dif ferent m odel s. The f eatu res on your dishwasher m ay v ary f rom t hose shown bel ow .
C
o
p
Q
R
T
■ ■ ■ u
V
K
w
M
A
A . U p per l evel was h 1 . B o tt om r ack R . T U R BOZON E™ manifold
B . T o p r ack adjus ters (t w o) J . W at er inle t opening (in tub wall ) S . Si lverware basket
C . U t en sil basket K . H e at ing el em ent T . Low er s p ra y arm
D . R e m ova b le top ra ck F . D e tergen t di spe nser u . O ver fil l proteot ion f loat
E . Flexibl e t i nes M . A c ti ve v ent V. ULTR A W ASH ® modul e
F . Model and ser ial num ber label N . Cup s h el ves
G . Fol d -d ow n tines O . No-f lip cli p s X . C o ntrol panel
H . K n ife holder P . T o p spr ay arm
U L TRA FL OW ^“ w at er feed t ube
Q .
w.
R i nse aid dispenser
(S pl it contr ol models)
Y . C ont rol panel (Top contr ol
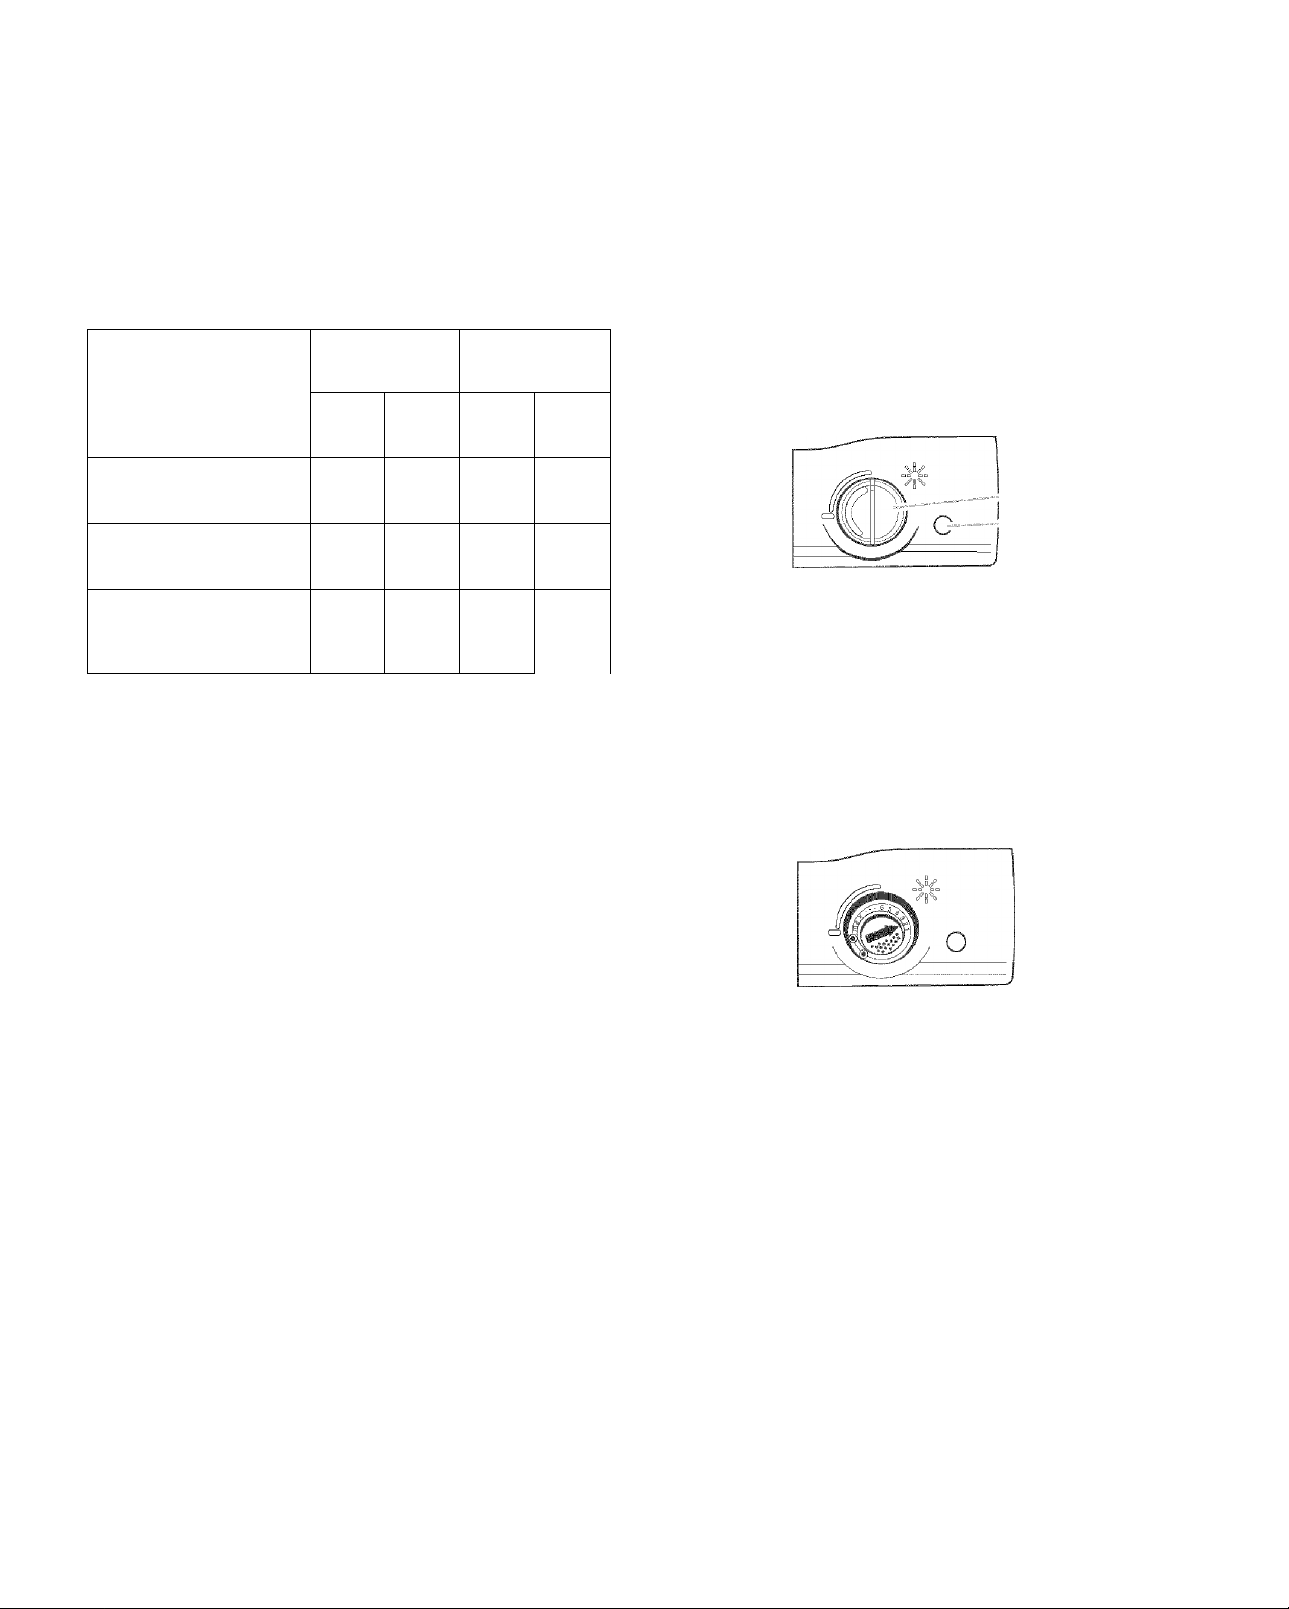
Model 665.1628^1=, 665.1728^5: (Split control models)
.. Cycles
Smart , Pots Hormai
, WASH PANS WASH HNSE
Model 665.1629=i= (Top control models)
Turbo .Kfjs.- нЕс.-.^зй. 'ощ.у'.- СисыС
ZONE : |;.йул ■ Снодаг,-' Сщтт
■ ■■ ■ ■ ■ li ■
LOJK ÜE.
Dura Wash TurboZone
SMART! ( POTS Л f NORMALA f CHINA
.WASH / V PANS J V WASH/ V6ENTLE
Sawiiized
Lock On
о
• • •
Washing^ Drying Clean
^ =
color num ber
^ S tat us in dic at or l ight lab els are not act ual ly on dis hw as her d oor t ront.
T h e U LTRA W A SH® S oi l R e m oval S y stem g i ve s y o u s p ar kli n g c l ean d i s hes, w h ile using l e s s e n er gy and tim e. T h e U L TRA W ASH® So il
R e m oval Syste m i ncludes:
A heavy-duty grin der t hat acts as a f ood dis pos er t o grin d
a n d dispose of l arge food part icle s.
A n ULTRA WASH® s ensor to monit o r soi l level and adj ust the
c y cl es a s needed.
How the smartwash’^'^ wash cycle works
W he n t he smar twas h™ c y cl e Is se lect ed, it saves energy and
w a ter by adj ust i ng the w as h cycle as needed.
■ S e nso rs detect t he si ze of the d ishlo ad , t he s oil level , and t h e
w a ter te m perat ure i n t he dis hw as her .
■ S e nso rs automati cal ly adjust t he te m perat ure an d t he
a m ount of wat er used for t he l o ad.
A n Aut omat i c T em per ature Con trol ( А ТС) th at e nsu res the
p r o per water te m perat ure for t he se lected w as h cycle, an d
s o i l level of the l oad.
A Tri ple Acti on Filt rat ion s ystem t h at i ntermit tent ly f il ters soil
from t he wash wat er.
How the TURBOZONE’^“ wash option works
W he n t he Tur b oZo ne ™ o pti on is sel ect ed, It pro v id es a
c o nc ent rat ed was h t o a sp ecif i c zone in the bac k of the lower
d i s hrack for l arge, har d-t o-c lean di shes.
■ S pra y j ets on th e TURBOZO NE™ m ani fold are p eriodi call y
a c t ivate d at t h e back of t he t ub thr ougho ut t he wash c y cl e.
■ I n t ensi fi ed c leaning i s provid ed onl y t o thi s s pec ifi c wash
a r e a, all ow ing you to gentl y clea n t h e r e st of t he di shload.
START-UP GUIDE
B e fore using your di shwash er, remov e a l l pac kag ing mater ial s.
R e ad t his enti re Use and C ar e Guide. Yo u wil l f ind important
s a f et y i nfo rm at ion a nd usef u l opera ting ti ps.
1 . R i nse aid is ESSE NT IAL for good dry in g. Be sure to fi ll t he
d i s penser bef ore you use your new di shwasher . Eac h fi l ling
w i ll last about 1 to 3 m o nt hs dependin g o n y our usa g e.
2.
S c r ape l arge f ood soil a nd hard items (t oothpic ks or bones)
from d ishes.
3.
Prope rly load t he di shw asher . (See “Dishwas her Loadi ng.” )
L o ad di shes wit h s pace in betw een s o wat er w il l reach the
s o i led surf aces . M ake s ure n o th ing p revents the spra y a rm (s )
from s pinni n g fr eel y.
4.
A d d det ergent. Alwa ys use a qual it y b rand detergent . ( See
“ D ishwasher Use. ")
5.
Run hot wat er at the s ink nea rest your dis hw as her unt i l t he
w a te r i s hot. ( See “Dishwash er E ffic iency Tips. ”) Tur n o ff
w a te r.
6 . Press t he desi red c ycl e and o pti on se lecti ons. (See
“ D ishwasher Use. ”)
7.
P r e ss START and f ir m ly close the d oor ( on top cont rol
m od els). O r fi rml y c l ose t he door and p ress STA RT (on spli t
c o nt rol m odel s). The sel ected cycle and opti on l ights w il l
flash onc e.
Y o u can als o press START t o r epeat the s am e cycle and
o p ti ons a s t he previ ous cycl e.
8.
W he n t he door i s firmly clo sed, i t l atches automat ica ll y.
DISHWASHER LOADING
■ R emove l efto v er f ood, bones, toothpicks and oth er har d
i t e ms fr om the dishes. To conser ve water, ener gy and save
t i m e It i s not necessar y t o ri nse di shes bef ore putt i ng them i n
t h e di shwash er.
NOTE:
p r er i n se d to avoid stai nin g.
T h e w a s h m o dule rem ove s f ood pa rtic les fr om the w a t er. Th e
m od ule co nt ains a ch o pping de v ice wh i ch w il l reduce t h e s i z e
o f f o od ifems,
NOTE:
e n t er the wash module , you might hear choppi ng, gr indi ng,
c r un ching, or b uz zin g so unds . These sounds ar e normal
w h en hard it ems enter the modul e. Do not let met all ic it em s
(such as pot han dle screws) get i nto t he wash modu le.
D a mag e c an o ccu r.
■ Eor best dry ing, wat er must be abl e t o d rai n fr om all surfa ces.
■ It is Im por tant for the wat er spra y to r each al l soil ed surfa ces.
■ Loa d d is hes so fhey a re not st acked o r overl appi ng if
p o ss ible.
■ Use speci al c are w hen l oading heavy pot s and pans. Hea vy
i t e ms can d am age the interi or of t he door if fhey are dr oppe d
o r bumpe d.
■ M ake s ure pot li ds and han d le s, pizz a pans, cookie sheets,
e t c ., do not i nterf ere w it h the spr ay a rm ro tati on.
■ C onser ve wat er , e ner gy and save t im e over hand ri nsing b y
runni ng a r inse cycle to kee p dis hes moi st If you do not pla n
t o was h t hem s oon. Foods such as eggs, ri ce, pasta,
s p i nach, and cooked ce rea ls may be hard to remove i f t h ey
a r e le ft to dry over a per iod of ti m e.
■ Place items so open ends face down for bes t cleani ng and
d r ai ning.
Quiet operating tips
T o a voi d t hum ping/ clatt eri ng nois es dur ing oper ati on:
■ M ake s ure l ightweight load i tems ar e secur ed I n t he racks .
■ M ake s ure pot li ds and han d le s, pizz a pans, cookie sheets,
e t c ., do not t ouch i nteri or w al ls o r i nterf ere w it h t he rot ati on of
t h e spr ay ar m .
■ Loa d d is hes so they do not touch one another.
NOTE:
d i s hw as her opera tion to p re vent noi se trans fer t hrough dr ain s.
D i shes soil ed w i th to m ato-b ased pr o duc ts sh oul d be
If har d i t ems such a s f ruit seeds , nut s, and e ggshell s
E o r built -in m odel s, k eep si nk d rai n plugs clos ed durin g
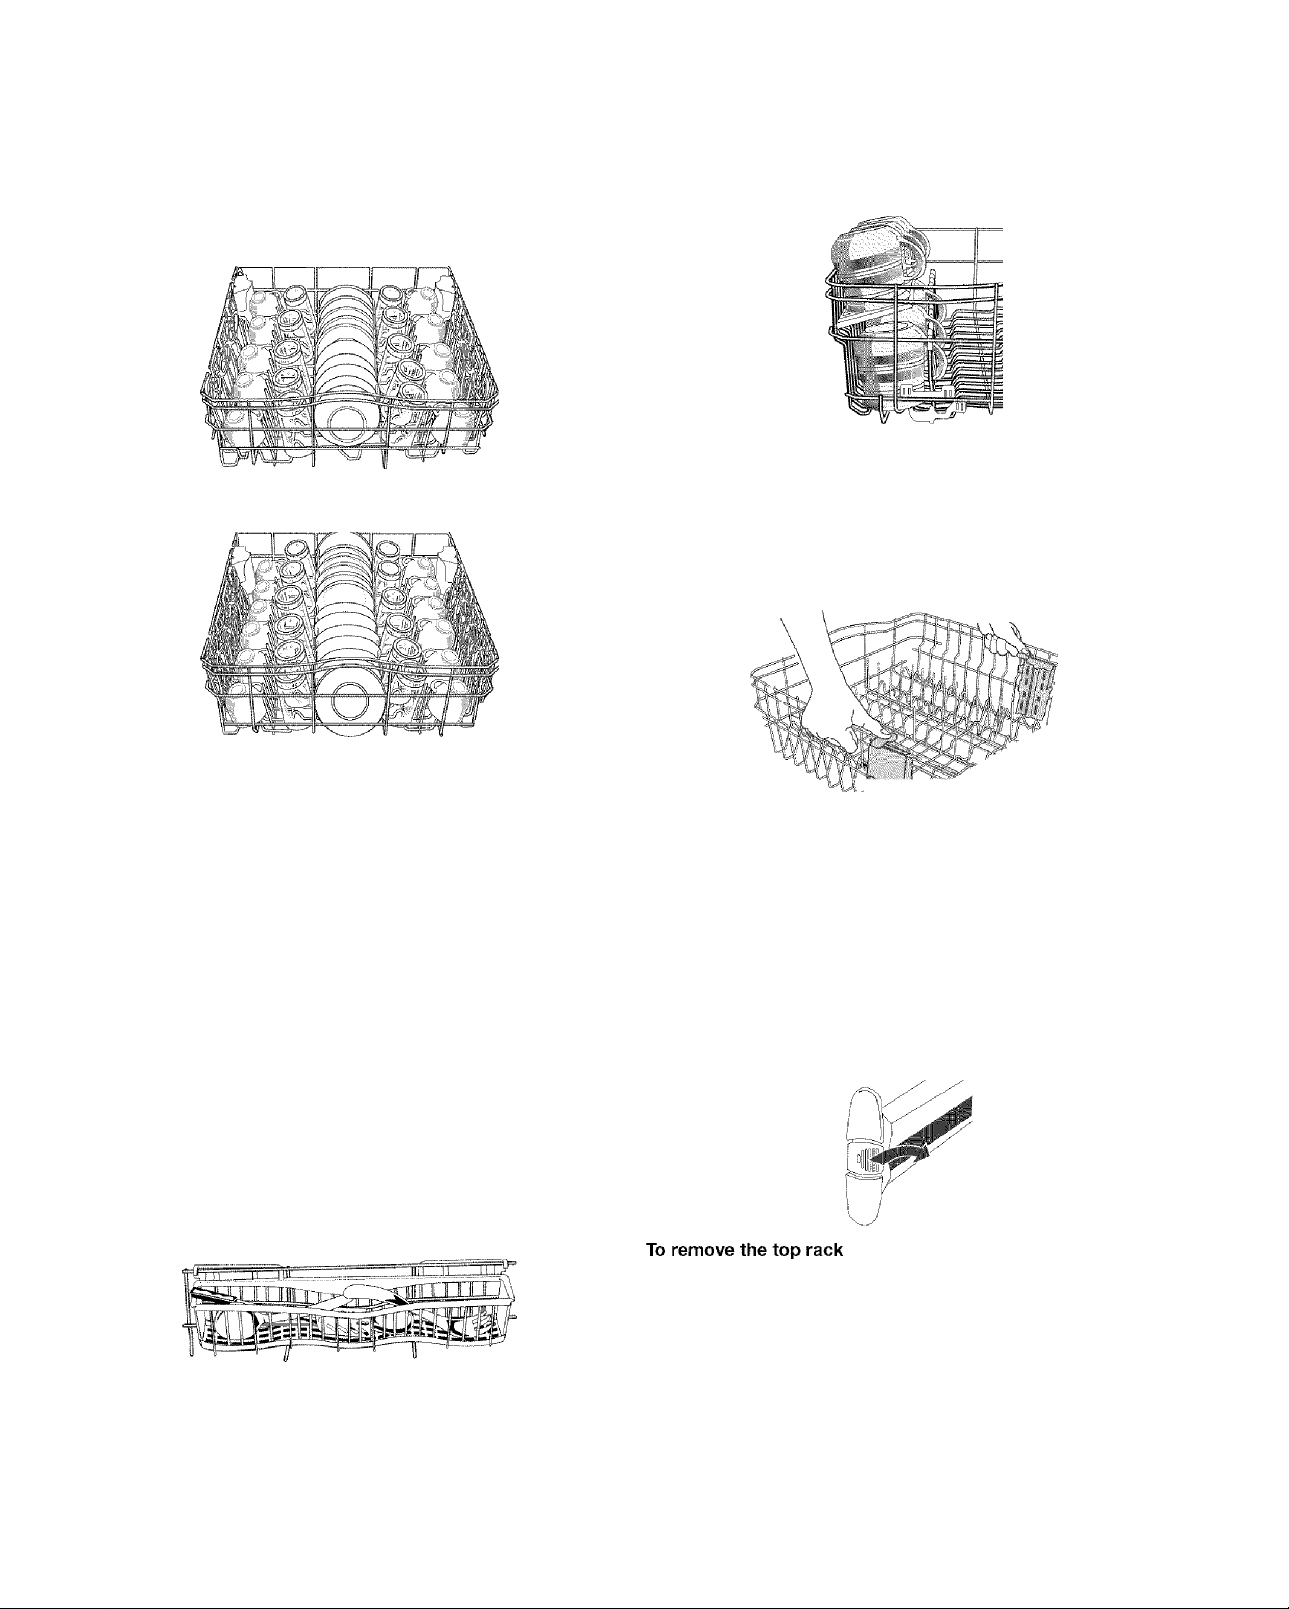
T h e top ra ck i s desi gned f or cups, gl ass es, and sm all er it em s.
M a ny it em s, up to 11" ( 28 cm), fit in t he t o p r ao k. ( See
recommen ded loadin g p att erns show n. )
NOTE:
T h e feature s on y o ur dis hwasher rac k may vary f rom t he
d r awings shown.
10 place setting
Cup shelves
F o l d d ow n the extra shel f on the l eft- hand or ri ght -hand si de of
t h e to p r ack to hold addit i onal c ups , st em w a r e or l ong it em s such
a s uten sils and spat ulas.
NOTE:
T h e feature s on your dishwasher may vary fr om t hose
s h own bel o w.
Adjustable two position top rack
Y o u can rai se or lower the t op ra ck t o f i t tall i tems i n ei ther the top
o r bott om r ack. R ai se the top r ack t o a ccommodate it em s up t o
9 " (22 cm) in t he t op rac k a nd 13" (33 cm ) in the b ott om r a ck, or
l o wer the top r ack t o accomm odat e it em s up t o 1 1" ( 28 cm) in
b o th th e t op and bott om r acks. Adj uster s ar e l ocated o n e ach
s i d e of the top rack.
12 place setting
m
Pla ce i tems s o o pen ends fa ce down f or clea nin g a n d
d r ai ning.
■ Loa d g las ses i n t op r a ck only. The bot tom r ack is not
d e s igned for glass es. Damage can occur.
■ Place cup s and gla sses in the r ow s between t ines. Placi ng
t h e m o ver the t ines can l ead t o b re aka ge a n d wat er spots.
■ C hi na, c rysta l, and other del icate it em s m us t not t ouc h e ach
o t he r dur ing di shwasher operat ion. D amage may oocur.
■ Loa d l i ghtweight plast ic ite m s in t he t op r a ck only. Onl y
p l a sti c i tems mar ked “dis hwasher s afe” ar e recommended.
■ Loa d p las tic it em s so the fo rce of the spray d oes not m ove
t h e m d uring the cy cl e.
■ To avoid c hipping, do not l et s tem ware touch ot her items.
■ S mall bowls, pans, and oth er ute nsi ls can be pl aced i n t he
t o p rack. Load bowls in t he cent er s ecti on f or best st abil i ty.
Utensil basket
U s e this extra capacit y bas k et in t h e back o f t he t op rac k t o hold
s p a tulas, woode n spoons, and simil ar i tem s.
Bfi
To raise the top rack
L i f t t he r ack on bot h s i des unt il the rack i s l evel.
NOTE:
T h e top ra ck MUST be l evel .
To lower the top rack
D e press both tabs on rack adju st ers, as show n above, a nd sl ide
t h e r ack back t o i ts ori gi nal p o si t ion.
Removable top rack
T h e rem ovabl e to p r ack allo w s you t o w ash l a rger ite m s
s u c h a s stock pots , r oas ter s, and cookie sheets in the bot t o m
raok.
1 . Pul l the rack f orw ard s light ly t o a c ces s cli ps .
2.
W hi le p r e ssi n g the r i d ges in, push b a ck on the clip until the
o u te r s i de r e leases . S l ide t h e c l ip t o t he inside o f f h e t r a ck
e d ge to remove the cli p .
3.
Aft er r em ovi ng both clip s, pul l rack o ut.
To replace the top rack
1.
P l ac e t he roll ers on each side of t he ra ck i n to the ra ck t r acks
a n d push t h e rack back.
2.
A l ig n t he open si de of the clip wit h the inside edge ot th e r a ck
t r a ck.
P u sh t he r idges and sl ide the c lip towar d t he out side rack
e d ge until I t l ocks i nto pla ce.
4.
R e peat on t he oth er si de.
5.
P u l l t he ra ck o ut all of the way to ensu re cli p s ar e f ul ly seated.
Flexible tines
T h e row o f t ines on th e l e ft -hand a nd right- hand si des of t he t op
rack can be adjust ed t o make room f or a var ie ty of dish es.
To adjust the left-hand side
1 . G ra sp th e t i p of th e t i ne t hat i s i n t he t ine h o ld er in t he f r ont of
t h e r ack.
2.
Gent ly p ush t he t ine o ut of the holder.
3.
L a y the tines dow n, t oward the cen ter of the r ack.
To adjust the right-hand side
1 . G ra sp th e t i p of th e t i ne t hat i s i n t he t ine h o ld er in t he f r ont of
fhe rack.
2.
Gent ly p ush t he t ine o ut of the ti ne h older .
3.
M ove the t in es t o t he le ft to make r oom f o r l arger dishes.
M ove the t in es t o t he ri ght t o wedge pl asti c or other
l i g htweight it em s agai nst t he s ide of the rack.
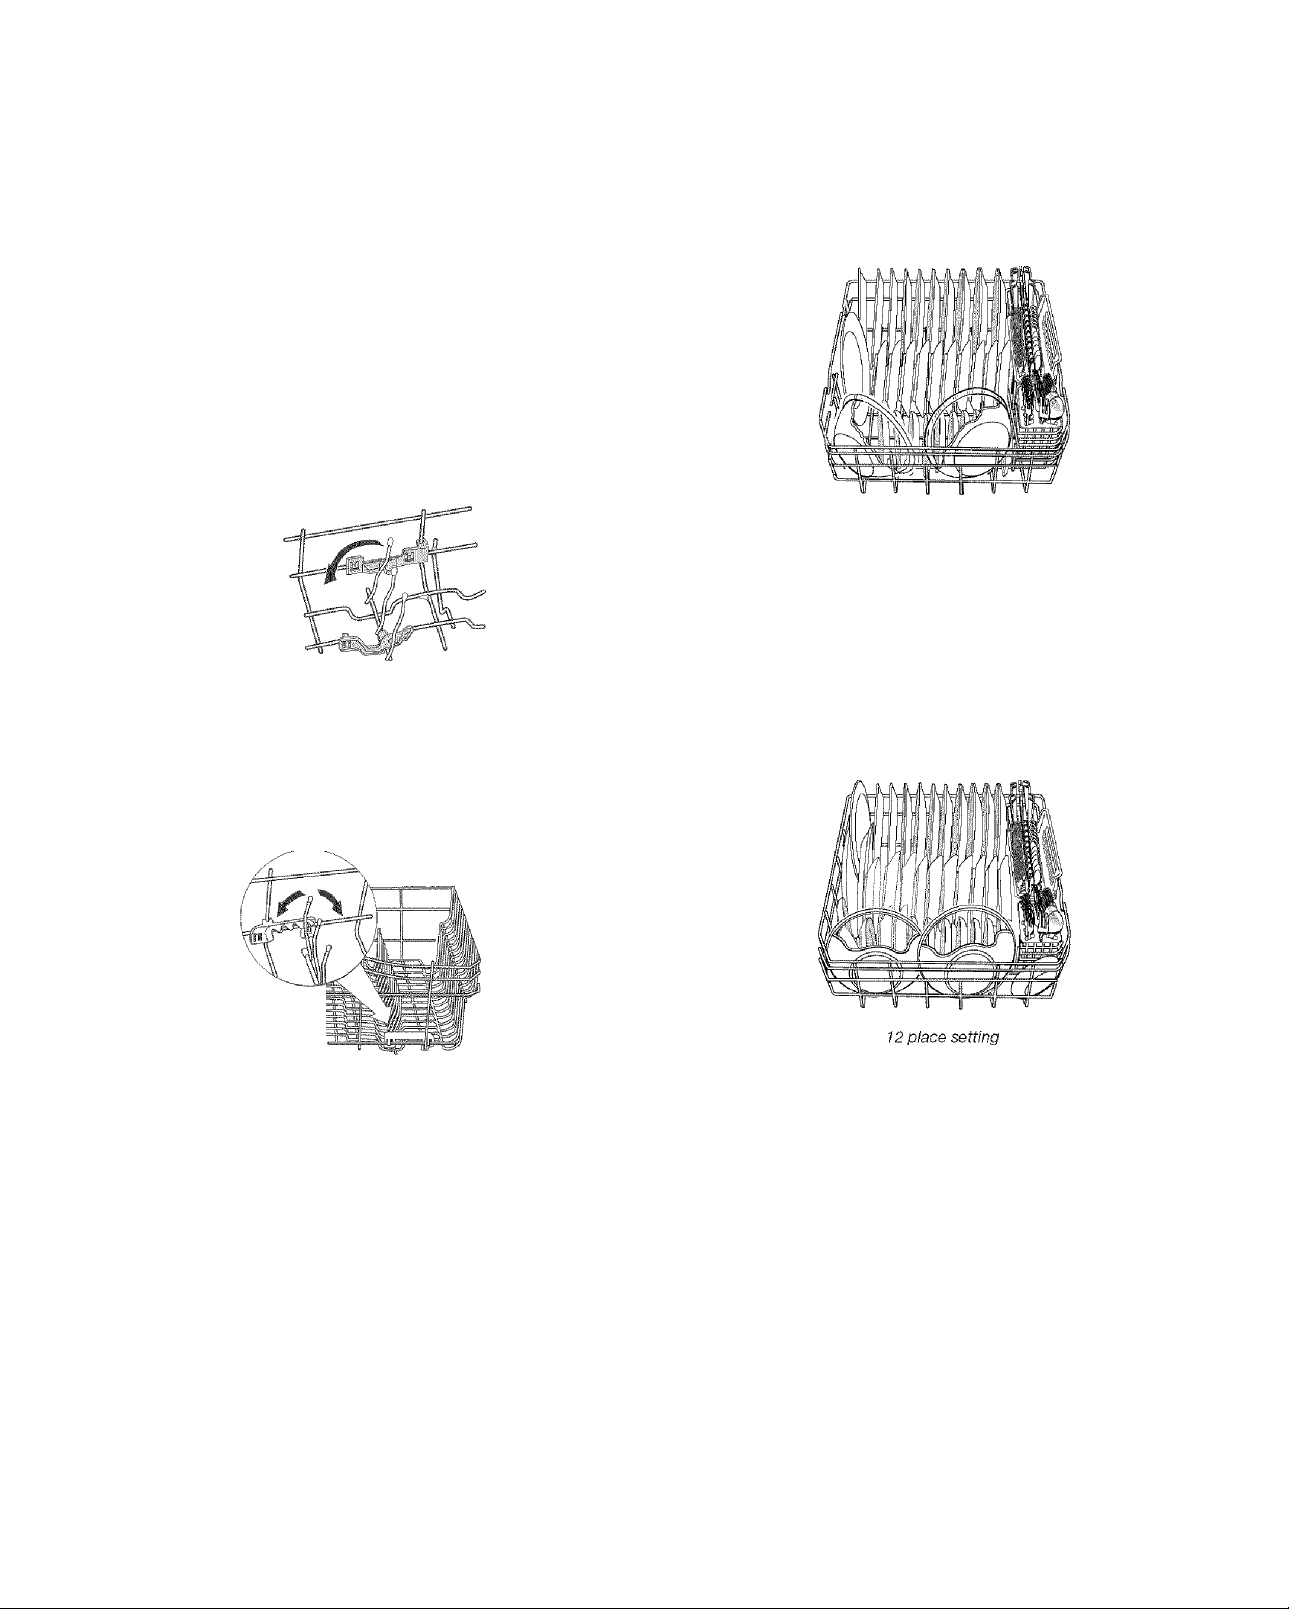
T h e bot tom rack is designed for pl ates, p ans , ca sserole s, and
u t e nsils . M any i tems, up t o 1 3" ( 33 cm) tall , fit in the b ott o m r ack.
(S ee re co mm ende d l oadi ng p at terns s hown. )
NOTE;
T h e feature s on your dishwasher r ack may vary from the
d r awings shown.
10 place setting
D o no t l oad g la sse s, c ups, o r l i ghtweight p l asti c i t ems i n t h e
b o tt om r a ck. L o ad s mal l i t e ms in t h e b o tt om r a ck o n ly i f fhey
a r e secur ed i n pl ace .
L o ad pl ates, soup bow ls, etc . , betwee n ti nes.
O v erla p t he edges o f plat es for l arge loads.
L o ad s oup, ce real, and serving bowls in the r ack i n a varie ty
o f ways depending upon the ir si ze and s hape. Load b owls
s e cu rely betw een t he r ows of t ines. Do not n est bowls
b e caus e the spray wil l not r each al l surfaces .
No-flip clips
T h e no-f li p cl i ps hol d li ghtweight p last ic i t em s s uch a s cu p s, l id s,
o r bowls in p l ace duri ng wash ing.
To move a clip
1.
P u ll the cli p u p and off the ti ne.
2.
R e posit ion t he c lip on anoth er t ine.
10
L o ad cookie sheet s, cake pans, and oth er larg e i t ems at th e
s i d es and b ack. Load ing su ch i tem s in front can kee p th e
w a te r s pr ay fr om r eachi ng t h e dete rgent d is penser .
S e cure heavil y s oi led cookware tace dow n in the r ack.
M a ke sure pot h andl es and other i tems do not st op rot ati on
o f the spray a rm (s ). The s pra y arm(s) mus t m ove treel y.
D o n ot l o ad I t e m s b e twee n t h e b ot tom r a ck a nd the s i d e o f
t h e dis hwasher tub because they m ig ht blo ck the wat er i nlet
o p enin g.
TURBOZONETM wash area
T h e TU RBOZO NE™ was h area i s l ocat ed a t t he back of t he lower
d i s hrack.
Knife holder
U s e the kni fe h ol der o n t he left si de of the bott om rack t o h old
k n iv es t hat are too l arge for the silver w are basket. Pl ace kni v es i n
t h e holder as shown.
TURBOZONE™ wash area
L o ad pots , pan s, casser ole dis hes, et c. in t he back of t he
l o wer dish rac k with the soil ed surf aces facing the
T U R BOZON E™ j ets .
T i p ite m s toward t he r ear of t h e unit bet w een the bac k t wo
rows o f t ines to maximiz e cover age.
TURBOZONE™ wash area side view
IMPORTANT:
T U R BOZON E™ j ets . Sta ckin g, overl appi ng, or nes tin g i t ems
w i ll pre vent t he TUR BOZONE™ j ets fr om r eaching a ll of t he
s u r faces.
NOTE:
t h i s w a sh f e atur e. Do not fa ce i t e m s towar d th e rear o f the u n i t if
y o u a re not usin g t hi s wash opt ion.
Y o u m us t s e l ect the T URB OZO NE ™ w as h o p ti on to u t i li ze
O n ly one row of it em s m ay face the
Fold-down tines
Y o u can f old d own one row o f t in es at th e b ack o f t he bott om
rack.
To remove the knife holder
1 . S l ide up to rel ease t he hooks ove r the r ack wir e.
2.
L i f t knif e holder out of r ack.
To install the knife holder
1 . Ali gn t h e knif e hol der wit h the bott o m r ack as show n in the
i l l u strat ion bel ow.
2.
P l a ce t he bott om s lot ted g ui de over t he vert ical wire in t he
s i d e of the rack.
3.
P l a ce t he hooks, locat ed on t he back o f t he kni fe hoi der , over
t h e cente r r ack wire and gentl y push down t o l ock Into place.
A
A. Top alignment
B. Bottom slotted guide
C. Knife holder hooks
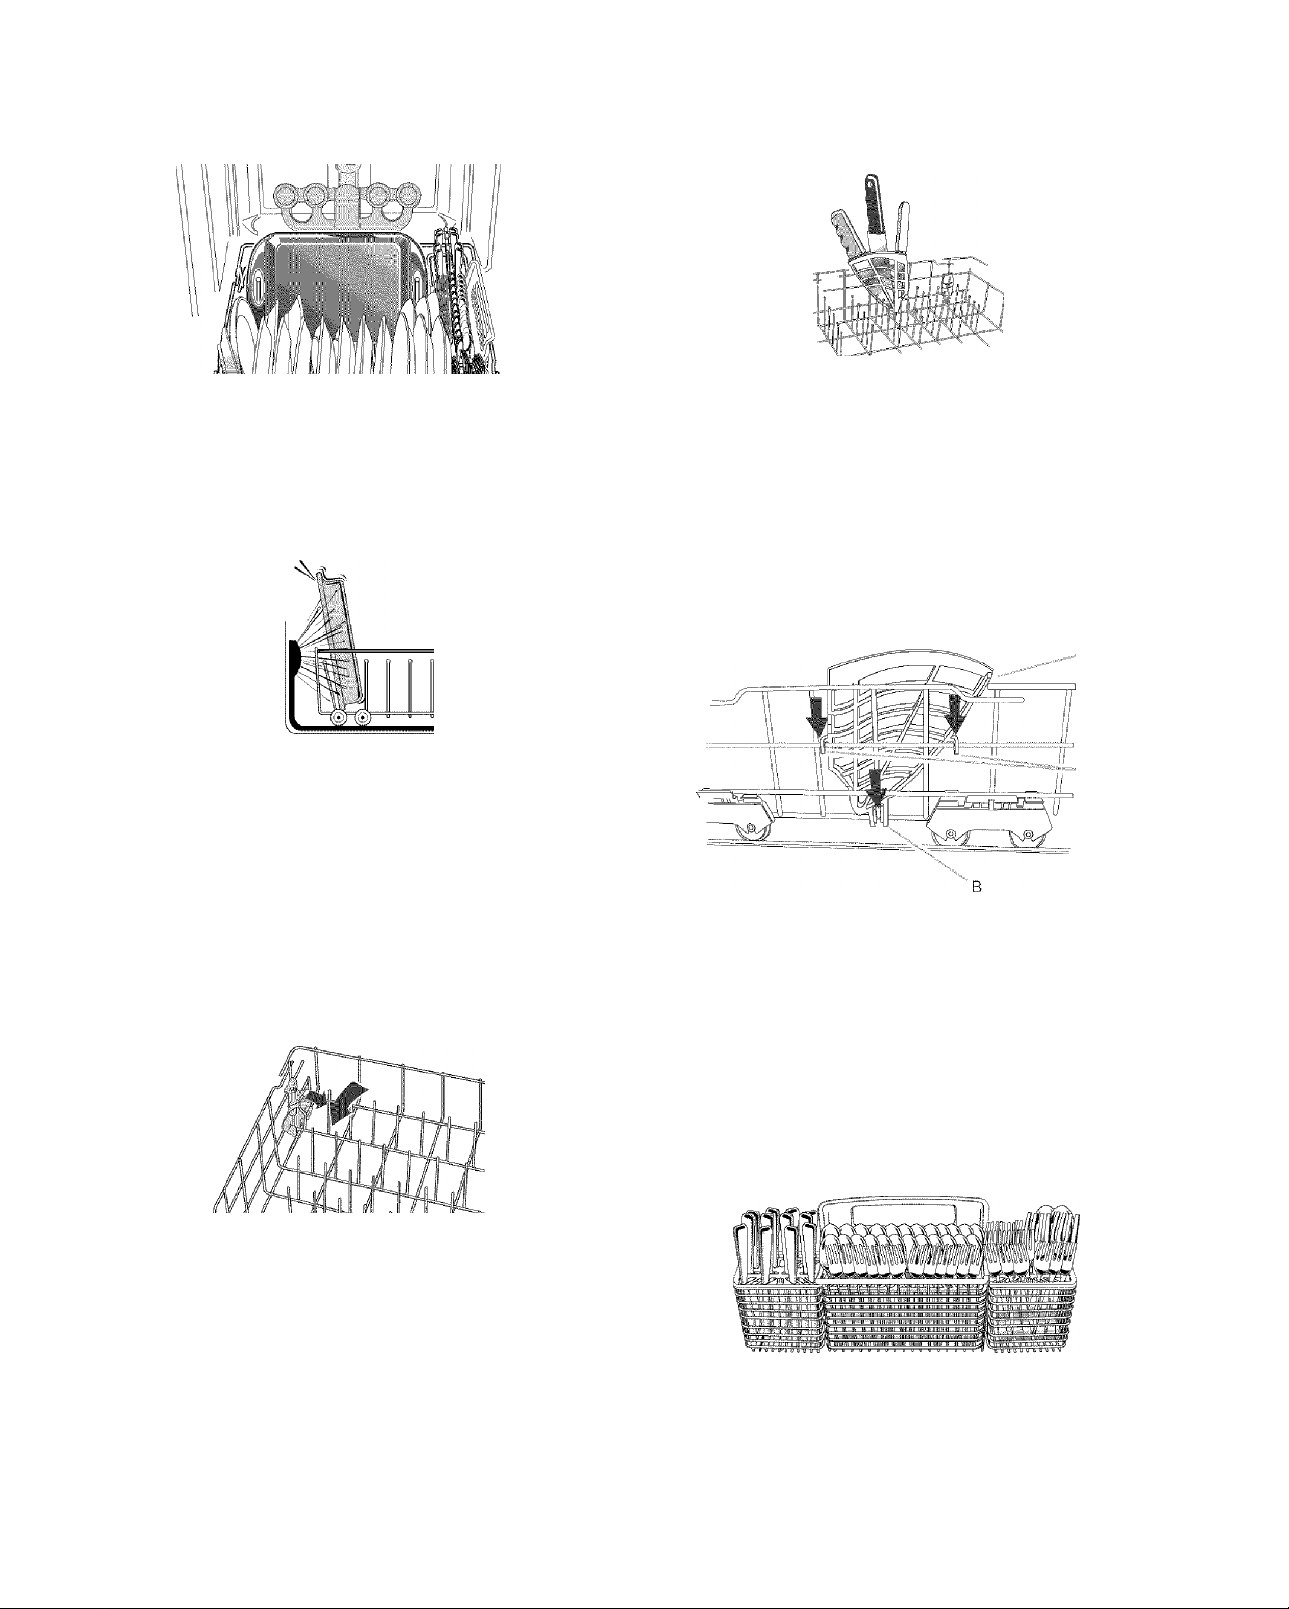
L o ad t h e s i l verware b a sket w hil e i t i s in t h e b o t tom r a ck o r take
t h e basket out for loading on a count er or table.
NOTE:
t o avoid spil ling wat er drople t s on the silver war e.
■ P lace sm al l i tems s uch as baby bott le c aps, j ar li ds, corn cob
U n load o r remove t h e basket befor e u n loadi ng the ra cks
h o ld ers , et c., in a covere d s ect ion. Close the cover to hold
s m all i tems i n place .
1 . G ra sp th e t i p of the tin e t h at i s i n t he ti ne hold er.
2.
G e ntl y pull th e ti ne out of t he t ine h old er.
3.
Lay the row o f t ines down in t he ra ck t o make room f or lar ger
d i s hes, bowls , pots, pans or r oas ter s.
11
U s e sugg ested loading pat te rns, as s hown, to incre ase
w a shabil it y o f your s ilver ware .
T h is si lverware bas ket ca n b e s eparat ed a nd pl aced i nto the
b o tt om r ack in s everal locat ions. Load si lverware in al l
s e ct io n s or just one, depending upon y our l oad.
If your sil ver ware bas ket does not have covers or w hen
c o ve rs ar e up, m ix i tems In each sec ti on of the b asket w it h
s o me poi nti ng up and some down to avoi d n esti ng. Sp ra y
c a nnot reac h n ested it em s.
DISHWASHER USE
T h e d et ergent d i spen ser h a s 2 s ect ions. T he s maller P re -W ash
s e ct ion e mptie s d etergent i nto t he d i shw ash er w hen y ou c l ose
t h e door.
IMPORTANT:
p o in ti n g down.
To remove a small basket
1 . H old the center basket and one s m al l basket . Sl ide t he small
b a s ket forwar d t o r ele ase the tabs from t he corresp ondi ng
s l o ts.
2.
P u l l t he basket s apar t.
NOTES:
■ Do not load si lver or sil ver -pl ated sil ver war e w it h sta i nless
s t e el. These m et als can b e damaged by contac t with each
o t he r d u ri ng washi ng.
■ S o me f o ods ( s uch a s s a lt , v i negar, m il k p r oduc ts, f r ui t j u ice s,
e t c .) c a n p i t o r c o rro d e s i l ve rwar e. R un a ri nse c y cl e i f you do
n o t have a ful l l oad t o w ash i m m e d iate ly.
A l ways l oad shar p i t ems (kni ves , skewer s, etc .)
A. Cover latch
B. Main Wash section
C. Pre-Wash section
D. Cover
T h e larger M ai n W ash sect ion aut omat icall y emptie s d ete rgent
i n t o the dis hw as her duri ng t he wash. (See th e “Cyc le Sel ect ion
C h art s.”)
■ Use aut o mati c di shwashi ng deter gent onl y. O the r det ergents
c a n produce ex ces sive suds t hat can overfl ow o ut of t he
d i s hw as her a n d reduce w ashi ng p er form ance .
■ Add det ergent jus t before st arti ng cycl e.
■ S t ore ti ghtl y closed deter g ent i n a cool, dry place. Fresh
a u t om at ic dis hwasher d et erg ent r esu lt s i n bett er cleani ng.
NOTE:
D o not use det ergent if you have s elect ed a r inse cycle .
Filling the dispenser
1 . I f t he dis pen ser cover is clo sed, open t he cover by rot ati n g
t h e cover lat ch.
il!:..!
12
A
2.
Fi ll the M ai n Wash secti on w ith deter g ent . See t he f oll owing
s e ct ion “How muc h det erg ent to use .”
3.
Fi ll the Pre -Was h s ec tion, if needed. (See “C ycl e Sel ect io n
C h art s.”)
4.
C l os e t h e dis pen ser cover .
T h e cove r w il l open duri ng t he cycl e to dispense the
d e t ergent.
How much detergent to use
■ Th e amount of detergen t t o use dep ends o n t he hardness of
y o ur wate r and th e t y pe of detergen t. I f you u se t oo l it tle ,
d i s hes won’t be cl ean. I f you use too m uch i n soft water ,
g l a ssware wil l et ch.
■ W ater har d nes s can change over a p eri od of t ime. Find out
y o ur wate r’ s hard n es s by asking your l oca l w at er d ep ar tment,
w a ter soft ener co m pany, or c ount y e xte nsion agent.
Detergent dispenser fill recommendations per dishload soil level and water hardness
Light soil Normal-Heavy
Main
Water Hardness
Wash
section
Pre
Wash
section
Main
Wash
section
soil
Pre
Wash
section
IMPORTANT:
Y o ur di shw as her i s desi gned to use a l iqui d rinse
a i d . The use of r inse aids gre at ly im pro ve dryin g b y al lowing
w a te r t o drain fr om t he di shes duri ng t he f inal rin se. They also
p r ev ent w at er from f orming dro p le t s t h at c an dry as s p ot s o r
s t r ea k s. Do not use a sol id or bar-t ype r inse a id.
Filling the dispenser
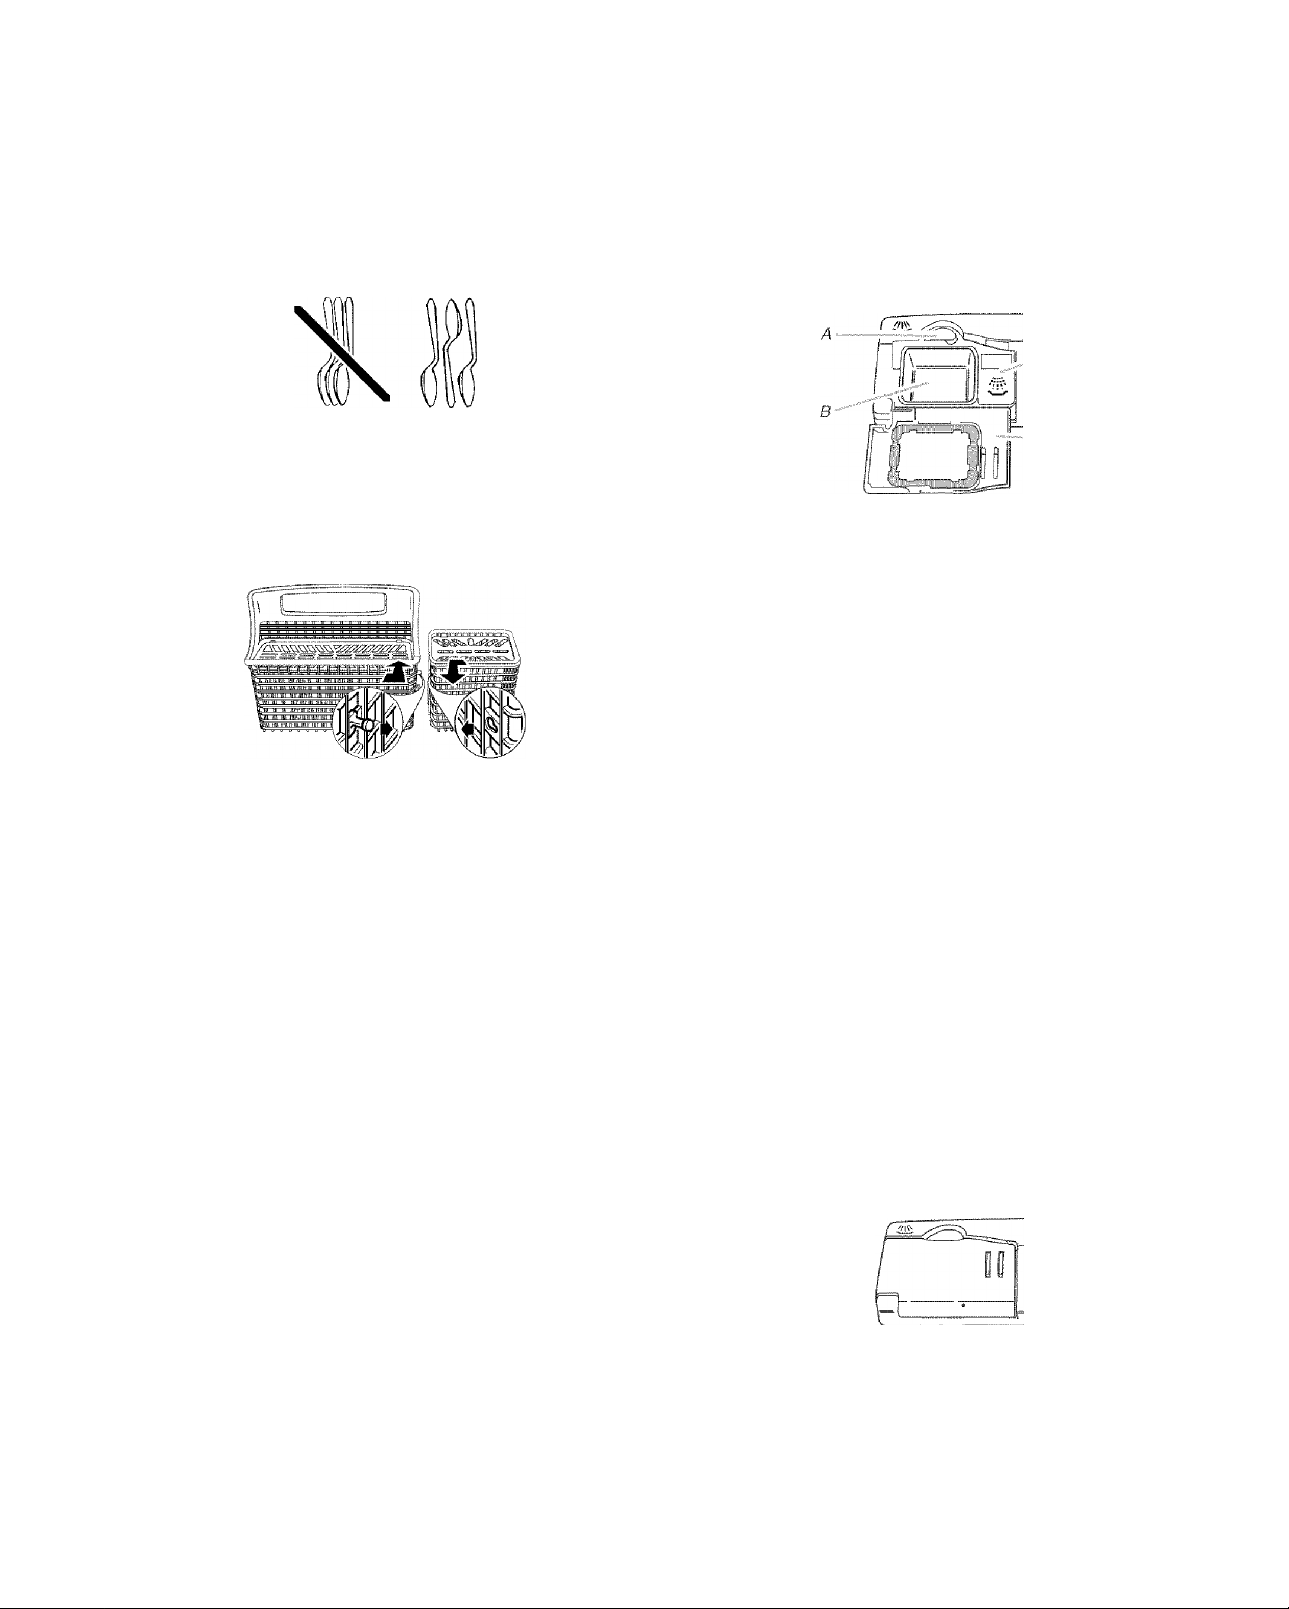
T h e rinse aid dispenser holds 4.8 oz (145 m L) of rins e ai d. Under
n o r m al condit ions, thi s wil l l ast for about 1 t o 3 mont hs. You do
n o t have t o wait until t he dis pense r is em pt y to ref ill it . Try t o keep
i t f ull, but b e s ur e n ot to ove rfi ll it .
1 . M ake su re t he dis hw asher door is full y o pen.
2.
T urn the dispenser knob to the lef t and li ft it out.
Soft
(0-2 grains per gallon)
Medium
(2-6 grains per gallon)
Hard
(7 grains per gallon
and above)^
4 tsp
(20 mL)
6 tsp
(30 mL)
8 tsp
(40 mL)
[full]
^ T urn the rinse aid d is penser to a hi gher sett ing as needed. (See
“ R inse Aid Dispenser ” sect ion. ) I t might be necess ary t o use the
H i Temp Was h opti on f or best wash per formanc e in very h ard
w a ter.
NOTE:
F i l l am ount s are for sta nda rd powde red det ergent.
A mounts may vary i f you use liqui d o r concentra ted powde red
d e t ergent. Tabl et de tergent s should be pl ace d in the m ai n w ash
s e ct ion of t he det ergent dispenser with the cove r clo sed. Foll o w
i n s tr uct ions on t he package when usi ng l iquid dis hwasher
d e t ergent, concent rated powdered deter gen t or ta ble t deter gent.
IMPORTANT:
S e e “C ycl e Sel ect io n C harts” for w hi ch det ergent
d i s penser sect ions to use w it h e ach cycl e.
Empty 6 tsp
2 tsp
(10 mL)
4 tsp
(20 mL)
[full]
(30 mL)
6 tsp
(30 mL)
8 tsp
(40 mL)
[full]
4 tsp
(20 mL)
[full]
4 tsp
(20 mL)
[full]
4 tsp
(20 mL)
[full]
A. Dispenser knob
B. indicator window
3.
A dd r inse aid unt i l t he indi cator win dow l ooks full .
4.
Cl ean up a ny spil led r inse ai d wi th a damp clot h.
5.
R epla ce t h e dis pen ser knob .
Rinse aid setting
T h e am ount o f r inse aid rel ea sed i n to t he fi nal w ash can be
a d j usted. The f actory sett ing i s at 2 . For mo st wate r oondit ions
s e t t he a dju ster to 1 or 2. If t h er e ar e r ings or cal cium ( har d wa ter)
s p ot s on dis hes, try a higher sett ing.
To adjust the setting
R e m ove t h e d ispenser k nob, t hen t ur n t h e a d j ust er i ns ide t h e
d i s penser to t he desi red set t ing.
13
H o t wat er dis solves and acti vates the dishwashing det ergent.
H o t wat er al so di ssolves grease on dish es and hel ps glasses dry
s p ot -fre e. For best dis hwashi ng re sult s , wat er shoul d be 120°F
(49° C ) as it enter s the di shw as h er . Load s may n ot was h as w el l if
t h e water tempe rat ure i s t oo lo w . W at er t hat is too hot can m ake
s o me so ils harder to rem ove and cause certai n det ergent
i n gr edie n ts n ot t o f unc ti o n. I f your wat er heater is loc ate d far f rom
t h e di shwash er, it m ay be nece ssary to ru n t he hot w at er at t he
fauce t clo sest to t h e di shwasher t o mi nimiz e the am ount o f c o ld
w a ter in the w at er line.
Smart Wash
U s e this cycle for all day-t o-d ay soi l types when was hi ng ful l t o
p a rt ia l di shloads. Duri ng the cyc le, the sensors wil l det ermi ne
w a te r t e m perat ure, was h t ime, and water am ount based o n t he
s o i l level and the dis hload si ze. Dur ing t he mai n w as h , t he wash
a c t ion w il l repeat edly paus e f or several se conds .
Use both detergent dispenser sections when
washing a full soiled dishload.
3 Use one detergent dispenser section when
washing lightly-soiled, partial dishloads.
To check water temperature
1 . R u n h ot wat er at the f aucet closest t o your dis hwasher for at
l e a st 1 minute.
2.
Pl ace a candy or m ea t t hermometer in a gl ass m easuri ng
c u p.
C h eck t he t e m per ature o n t h e t h er m om et er a s t h e w ater i s
runni ng i nto the cu p .
T o s ave w ater, en erg y and t ime, do not ri nse di shes bef ore
■ Us e a del ay f eature to run your dishwash er d uri ng o ff-pe ak
h o urs . Local ut il iti es re commen d a voidi ng heavy usage of
e n er gy at cert ain times o f day.
reduc es dayt im e heat build up in the kit chen .
U s e a ri nse ai d to impro ve d rying.
U s e cycl es or opt ions that add ext ra hea t to t he wash or rin se
p o r tion of t he cycle only w he n n eeded.
If your home is equ ipped wit h a w at er soft e ner , you may want
t o avoid star ti ng t he dis hw asher duri ng the regener ati on of
t h e sof tener, si nce t his m ay con tri bute t o poor w as h
p e rf orman ce.
S e le ct t he wash cycl e and options des ir ed. Or press STA RT t o
u s e the sam e cycl e a nd o pt ions as t he pre vio us c ycl e.
NOTE:
If t he l a st cycle you compl eted was a rinse cycle, t he
d i s hw as her wil l run t he l ast full was h cycl e a nd opti ons that you
s e l ect ed w hen you pres s Star t.
A shows t he st eps t hat are in each cyc le.
W at er usage i s sh o wn i n
T h ese m odels mee t the ENE RGY STAR ® gui del ines f o r energ y
e f f ici ency.
IMPORTANT:
h o urs depending on cycl e s el ected, wat er temperatu re, and soi l
l e v el sensed.
U.S.
gal l ons/ l it ers.
T h ese sensor-bas ed cycl es may t ake several
Dish
load
Full Heavy • • •
Par
tial
Soil
Wash Main
Level
Sensed
Light • • •
Heavy • • •
Light • • •
Wash
Rinse
or
Purge
Purge
Purge
Purge
Purge
Pots Pans
U s e this cycle for hard -t o-cle an, h eavi ly- soil ed pots, pans,
c a ss erole s, a nd r e gul ar tabl ew are .
Use both detergent dispenser sections.
Wash Main
Wash
• • •
Rinse
or
Purge
Rinse
Final
Heated
Rinse
• •
Normal Wash
U s e this cycle for loads w it h nor m al amount s of food soil. ( The
e n er gy-usage label is based on t his cycle. ) D uri ng t h e wash
c y cl e, the w as h a ct ion wil l re pea tedl y pause for se vera l
s e co nds .
Use both detergent dispenser sections.
ü
Wash Main
Wash
• • •
Rinse
or
Purge
Purge
Final
Heated
Rinse
• • 2 hrs* 5.6-6.5/
China Gentle (on some models)
U s e this cycle for chin a and crys tal. This cycle uses a li ght
w a sh and gentl e dry. Duri ng the h eat ed d ry, t he heat ing
e l e men t cycl es on and o ff .
Use main detergent dispenser section.
Wash Main
• • •
Wash
Rinse
or
Purge
Purge
Final
Heated
Rinse
• •
Final
Heated
Dry Approx
Rinse
• • 2.5 hrs* 5.6-6.5/
• • 2 hrs* 5.6/21.2
• • 2 hrs* 5.6/21.2
• • 1.5 hrs* 5.6/21.2
Dry Approx
Dry Approx
Dry Approx
cycled
imate
Time
imate
Time
2.5 hrs* 6.9-7.8/
imate
Time
imate
Time
1.5 hrs* 5.9-6.S/
Water
Usage
(gal/L)
21.2-24.5
Water
Usage
(gal/L)
26.1-29.5
Water
Usage
(gal/L)
21.2-24.6
Water
Usage
(gal/L)
22.3-25.7
14
Quick Rinse (on some models)
U s e t his r inse cy cle f or ri nsing di shes, gl asses , a nd s i lver w are
t h a t wil l not be washed ri ght aw ay.
Do not use detergent with this cycle.
Y o u can add an ite m a nyt ime bef ore t he main w ash star ts. O pen
t h e door and check t he det ergent dis penser . I f t he c ove r i s st il l
c l o sed, you can a dd it em s.
Wash Main
Wash
Rinse
or
Purge
•
Rinse
Final
Heated
Rinse
Dry Time
(min}
10 1,8-2.2/
Water
Usage
(gal/L)
6.8-8.3
* l f t he i ncomin g w ate r tempe rat ure i s i ess t han t he
recommen ded temper at u re or food soil s ar e heavy, the cycle w il l
a u t om at ical ly compen sate by adding ti m e, heat and wat er as
n e ed ed.
1 . C a refull y o p en t h e d o or sli ght l y to s t o p t h e cycl e. W ait f o r the
s p r aying a c t io n t o st op b e fo re o p e n in g the d o or to a c c ess the
c o nt rol pan el.
2 . P r ess CANCEL. The Canc el l ight glows.
3 . Clo se the door . The dis hw asher st art s a 2-m in ute dra i n ( i f
n e ed ed) . Let t he di shwash er dra in c omplet ely. The l ight turns
o f f af ter 2 minutes.
To stop the drain
Y o u can p ress CANCEL again to st op t he dra in. R emember to
d r ai n t he di shwasher befor e s t art ing a new cycle.
To clear the indicators
P r e ss CA NCEL before start ing the di shw as her t o c lear all opti ons
a n d cycles.
During the first minute of a cycle
1 . O pen the d oor . The Start li ght b egi ns fiashi ng.
2 . P r ess a new cycl e a nd/ or opt ions.
3 . C h eck the deter gen t dispenser s. They must be fi lle d pr operl y
for t he new cycle.
4.
Pre ss START and fir m ly close the d oor ( on top cont ro l
m od els). Or, fi rm ly clo se t he door and press STA RT {on spl it
c o nt rol m odel s).
To add items
1 . C a refull y open t he d oor sli ghtl y t o stop the c ycl e. W ai t for the
s p r aying ac tion to s top before opening t he door. The St art
l i g ht begins flas hing.
2 . O p en t he door. If the detergent di spens er cover is stil l closed,
a d d the it em.
3 . Press START a nd f irmly cl ose t he door (on t op contr ol
m od els). O r, fi rmly close the door and pres s STA RT (on split
c o nt rol m odel s).
Y o u can cus tomize your cycl es by pr essin g a n opt ion. If you
c h an g e your mind, press the opti on again to turn t he opt ion off ,
o r sel ect a dif fere n t opt ion i f d es ire d.
Y o u can cha nge a n opti on anytime bef ore the selecte d o pti on
b e gi ns. Eo r example , you can press an unheate d d ryi ng opti on
a n y ti m e bef ore drying b egi ns.
P r e ss START to use t he same cycl e and opt ion{s) as the p re vious
w a sh cycl e.
NOTE:
If t he la st cycle y o u com pl eted was a ri nse c ycl e, whe n
y o u p ress St art , t he di shwasher runs the last fu ll w ash cycle and
o p ti ons.
TURBOZONE^'^ wash option
Select this option to activate the TURBOZONE"^“ jets and provide
intensified water spray to the back of the lower dishrack. The
TURBOZONE™ wash option provides a concentrated wash action
to pots, pans, casseroles, etc. with tough baked-on foods.
T h is optio n may add heat and wash t ime t o t h e c ycle .
NOTE: TURBOZONE™
P o t s Pans, and Normal Was h cycl es.
IMPORTANT:
L o ad pots , pan s, casser ole dis hes, et c. faci n g the
TURBOZONE™
t o ward the rear of t he di shra ck to m aximize cove rage. Only one
row of i tems may fac e the
o v er lapping, or n est i ng it ems will preven t t he
from r eaching all of t he s urfaces.
TURBOZONE^'^
i s an option wit h the SMART WA SH™,
j e t s in t he back of t he l ower di shr ack. Tip items
j e t s. St acking,
TURBOZONE™
j e t s
After the first minute of a cycle
1 . C a refull y o p en t h e d o or sli ght l y to s t o p t h e cycl e. W ait f o r the
s p r aying a c t io n t o st op b e fo re o p e n in g the d o or to a c c ess the
c o nt rol pan el.
2 . P r ess CANCEL. The Canc el l ight glows.
3 . Clo se the door . Y our dis hwasher sta rts a 2- m inut e dr ain (i f
n e ed ed) . Let t he di shwash er dra in c omplet ely. The l ight turns
o f f af ter 2 minutes.
NOTE:
If y our d i s hwasher d oes n o t n e ed d r ain i ng, t h e l i ght
t u r ns off .
4.
O p en t he door. Select a new c ycle and/or options.
5 . C h eck the deter gen t dispenser s. They must be fi lle d pr operl y
for t he new cycle.
6 . P r ess START and f irmly c l ose t he door (on top contr ol
m od els). Or, fi rm ly clo se t he door and press STA RT (on spli t
c o nt rol m odel s).
Л?.
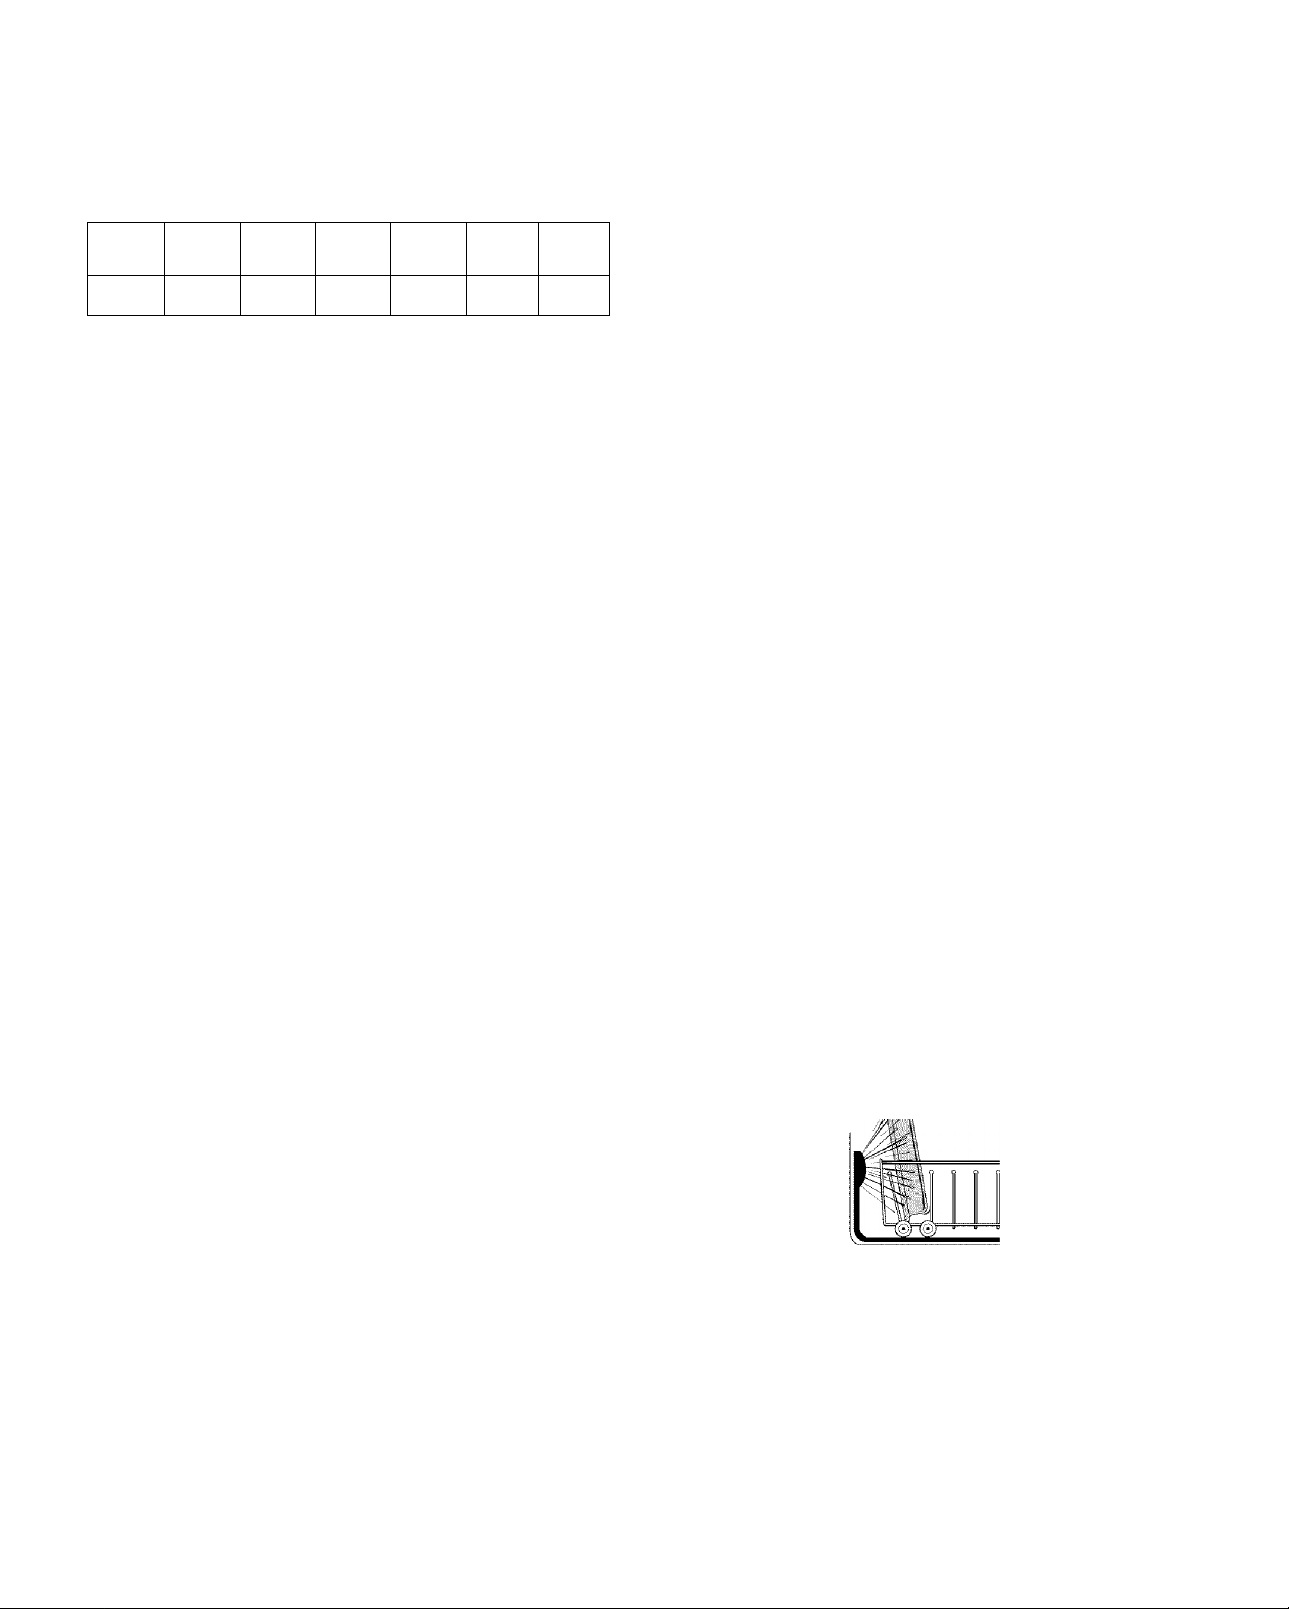
Side view of TURBOZONE™ wash area
15
Hi Temp Wash
S e le ct t his opti o n to increa se t he water temper at ure duri ng the
w a sh por tions of t he cycle . Hi Temp Was h ra ises the w at er
t e mperat ure to 145°F (63°C), in t he main wash. H ea ti ng the w at er
h e l ps i m pr o ve w as hing r esults . H i Temp W ash is u seful whe n
l o a ds c o nt ain bak ed-on fo od.
T h is optio n may add heat and wash t ime t o t h e cycle .
NOTE:
H i Temp Was h i s an opti on w it h t he SM ART W A S H"^“,
P o t s Pans, and Normal W as h cycles .
Sani Rinse
S e le ct t his opti o n to rai se t he water temper at ure i n th e f i nal rinse
t o approxi m at ely 155°F ( 68°C ). San i Ri n se adds heat and t im e t o
t h e cycle . T hi s h ig h t em pera ture rins e s ani ti zes your dishes and
g l a ssware i n a ccord ance wi th N SF/ A N S I Sta nda rd 184 f or
R e si den tiai Dishwashers. Certi fi ed r es identi al dis hwashers are
n o t i nte nded f or l icens ed food es tabl ishm ent s.
NOTE:
S a ni Rinse is an opt ion wit h SM A R T W ASH ™ , Pots Pans,
a n d Nor m al W ash cycles. Only t hese sa niti zatio n c ycl es have
b e en designed to m eet the NSF/ANSI requir em ent s.
Heated Dry
T h e H eat ed Dry opt ion i n combi nati on w it h r i nse a id wil l gi ve y ou
e x cel lent dryi ng r es ult s . The energy t o u se H ea ted Dry cos ts
p e nni es p er c ycl e. Hea ted D ry is on when the li ght i s l it on the
H e at ed Dry butt on. B e sure to load pl asti c i tem s in the uppe r rack
t o avoid dam age.
Y o u may tu rn off t he Heate d D ry opti on by p res si ng HEATE D DR Y
s o t h at t he l ight goes o ff. However, you w il l have i tems i n your
d i s hload that wil l not be dry at the end of the cycle.
NOTE:
T h e H eat ed Dry opt ion i s used in a ll cycles except Q ui ck
R i nse.
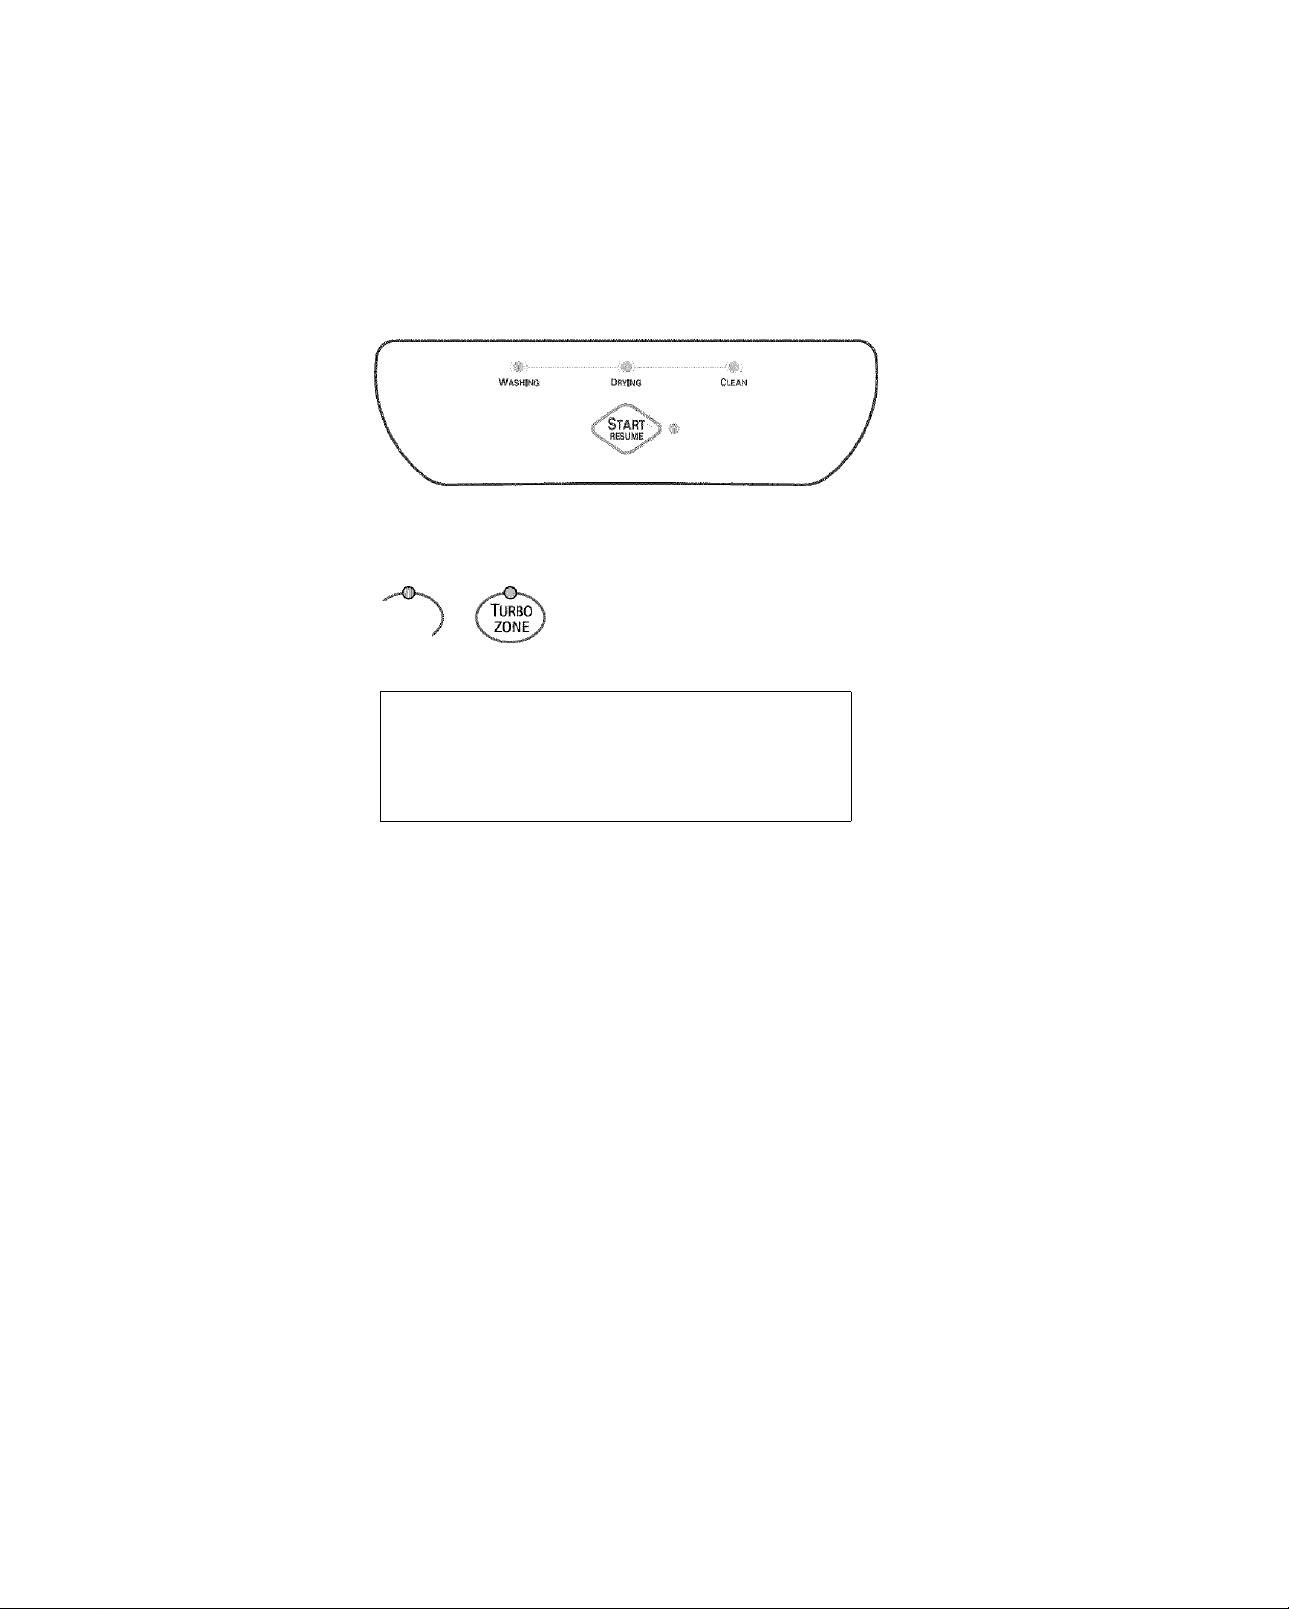
F o l low t he progress of your dish w asher w it h the Cycl e Stat us
i n di cat ors .
Washing drying clean
NOTE:
T h e feature s on your dishwasher may vary fr om t hose
s h own here .
Sanitized
If you se lect the San i R in se opt ion. San it ized gl ows w hen the
S a ni Rinse cycle i s f inis hed. I f your di shw as her did not properly
s a n iti ze your dishes, th e l i ght flas hes at the end of the cycle. This
c a n happen i f t he cycl e i s i nte r rupte d or t he inco m ing w at er
t e mperat ure is too lo w . The l ight turns off when you p ress any
b u tt on or clos e the door .
Clean
C l ean glow s when a cycle is fini shed. Th e li ght t urns off w hen you
p r es s any button or c lose the door.
{On top control models)
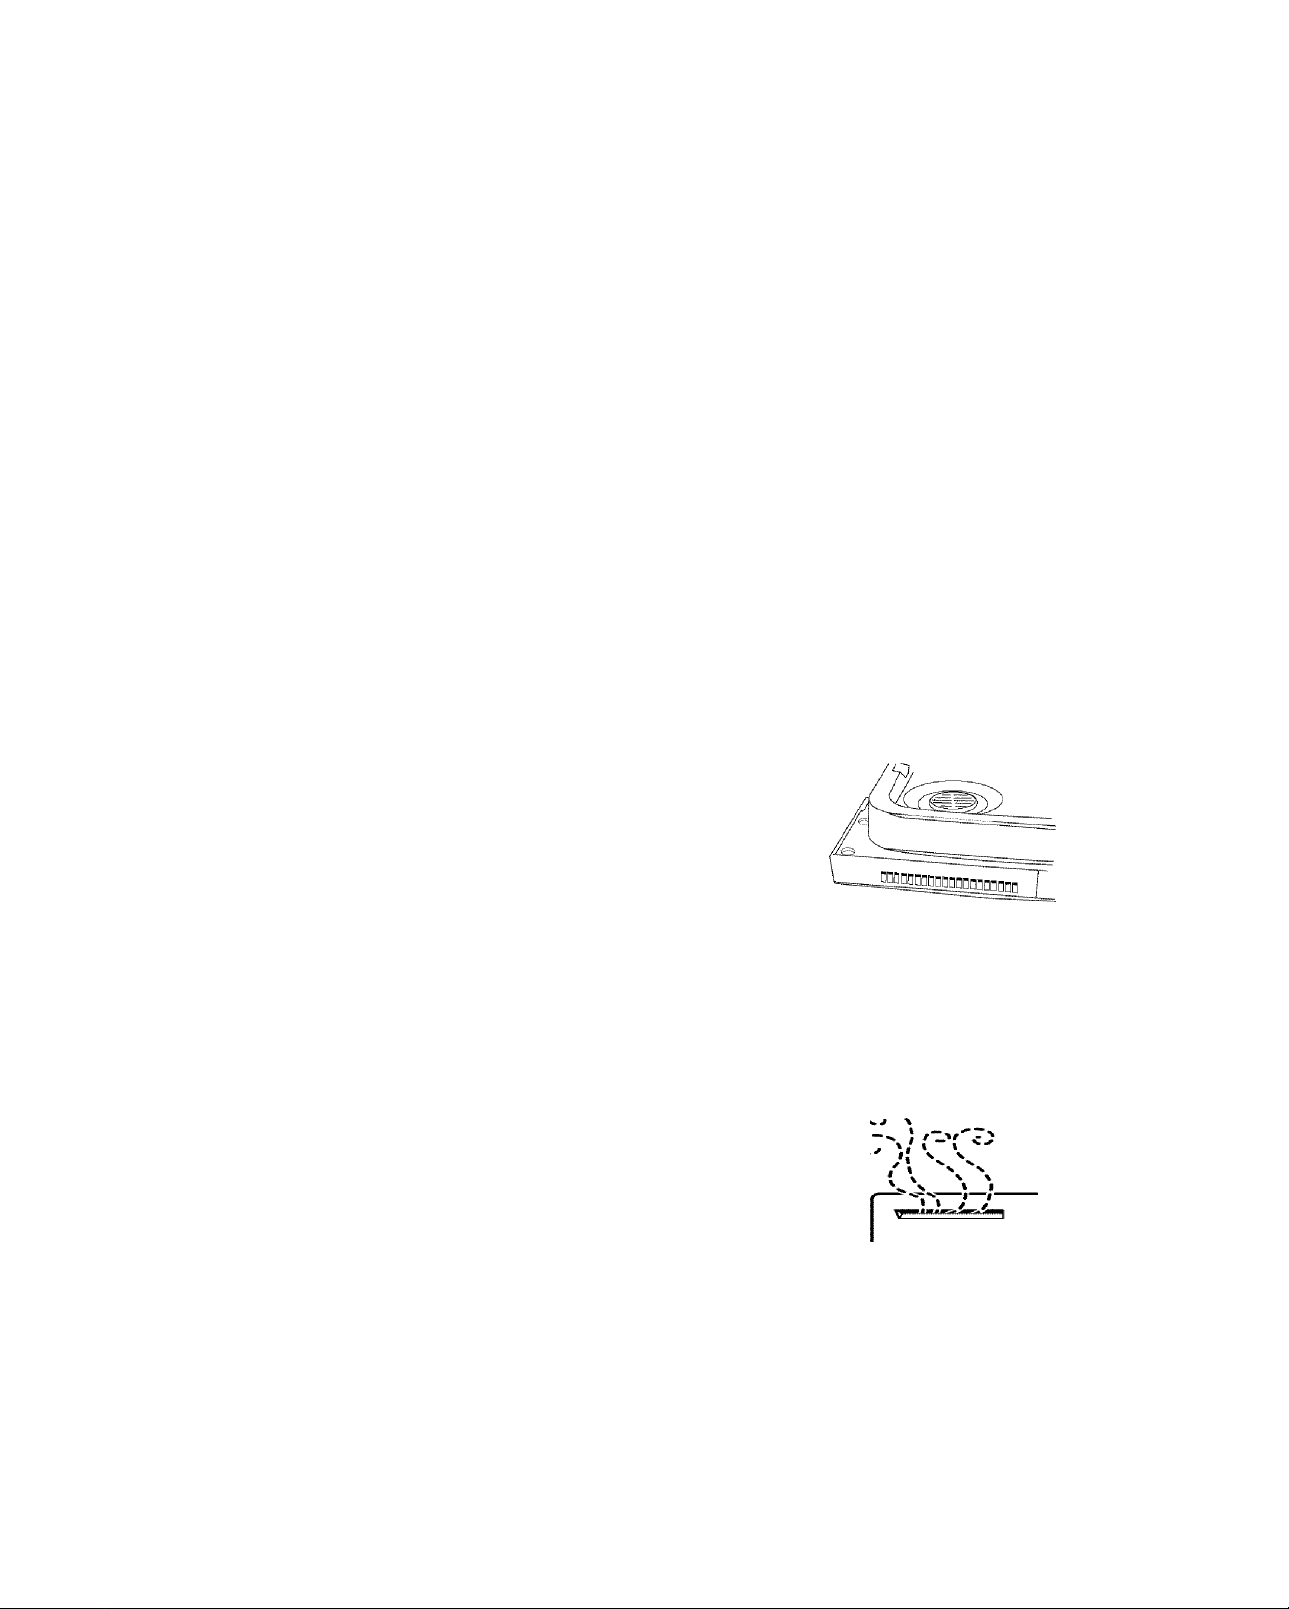
T h e acti ve vent reduces the s ounds fr om y our di shwasher . T he
v e nt cl oses , aft er t he cycl e s tarts , to l ock In sound. A ft er the
c y cl e f inishes and t he di shes co o l f or sev era l hours, th e v ent
o p ens. This prevents any water vapor from c oll ecti ng o n t he
c o unter t o p. Between cycl es, the vent st ays o pen for airf low,
reduc ing t he bui ldup of odor s.
Lock On
U s e the Lock O n t o pre ven t unin tended use of t he di shw asher .
Y o u can al so u se t he l ock fe ature to p revent u nin te n ded cycle or
o p ti on cha nge s duri ng a c ycle .
W he n L O CK ON i s l it, al l buttons are disabled .
NOTE:
T h e dis hwasher door can b e opened while the control s
a r e lo cke d.
To turn on the Lock
P r e ss a n d hold AIR DR Y fo r 4 s eco nds . LOCK ON gl ows.
If you pr ess a ny pad while your d ishwas her is locked, the light
flashes 3 t i mes.
To turn off the Lock
P r e ss a n d hold AIR DR Y fo r 4 s eco nds . The li ght turns off.
Delay Hours/4 Hour Delay
S e le ct t his opti o n to run your dishwas her at a l ater ti m e or duri ng
o f f -peak hour s. Y ou can add Items t o t he l oad anyti m e dur ing t he
d e l ay. Aft er addin g i tems, fi rm ly cl ose t he door unt i l It l at ches .
T h e del ay wil l not con tinue if the door i s not l atched.
To delay the start
1 . P r es s t he dela y b utt on t o c hoose the n umber of hours
d e l ayed.
2.
S e l ect a wash cycl e and opt ions.
3.
Pre ss START.
T h e dis hwasher s tart s t he cycl e i n t he sel ected number of hours.
NOTES:
■ T o c ance l the del ay and cycl e, pr ess C AN CEL.
■ T o c ance l the del ay and st art the cycle, pres s S TART.
NOTE:
T h er e i s a slig h t noi se when t he vent closes or ope ns. This
i s nor m al.
(On split control models)
T h e acti ve vent reduces the s ounds fr om y our di shwasher . T he
v e nt cl oses , aft er t he cycl e s tarts , to l ock In sound. T he A ct ive
V e nt opens when wash acti on ends and vapo r is v ent ed i nto
room. B et ween cycl es, the v ent stays open f or air flo w , reducing
t h e buil dup o f odors .
NOTE:
T h er e i s a slig h t noi se when t he cover closes or o p en s.
T h is is normal .
IMPORTANT:
d u r ing dryi ng.
T h e vap or i s hot . D o not touch t he vent
16

Material Dishwasher Safe?/Comments
T h e ove rfi ll protect ion f loat (in th e f r ont r ight corner of the
d i s hw as her t ub) keeps the dishwas her from o verf il ling. It must be
i n pl ace f or t he di shwasher to operate.
C h eck under the float for object s t hat m ay keep the prote cto r
from moving up or dow n.
WASHING SPECIAL
ITEMS
If you have doubts about w ashin g a partic ular it em , check wit h
t h e manufa ct u re r to see i f i t is d is hwasher s afe.
Material Dishwasher Safe?/Comments
A l umin um
D i sposabl e
A l umin um
B o tt les and C ans
C a st Ir on
C h ina/
S t o neware
Yes
H i gh w at er tem per atur e a nd d et ergents
c a n affe ct f inis h of an o di zed al um in um .
No
D o not wash th row away al umi num pans
i n t he dishwasher. These might shi ft
d u r ing was hi ng and t ransfer bla ck mar ks
t o di she s an d o ther it em s.
No
W as h b ot tles and cans by hand. Lab els
a t t ached w it h g lue can loosen a nd clog
t h e spr ay ar m s or pump a nd r educe
w a shing p erformance .
No
S e asoni ng wil l be removed and ir on wil l
rust .
Yes
A l ways ch eck man uf actur er’s
recommend ati ons before was hin g.
A n ti que , han d-p aint ed, or over- the-gl aze
p a t ter ns may f ad e. Gold leaf can di scolor
o r fade.
H o ll ow- H andle
K n ives
P e wter, Bras s,
B r onze
D i sposabl e
P l as ti cs
P l as ti cs
S t ai nl ess S te el
S t er li ng Sil ver or
S i l ver Pla te
T i n
W ooden W are
No
H a ndles of so m e kni ves a re a ttached to
t h e bl ade wit h adhes iv es which can
l o os en if washed i n t h e d i shw ash er.
No
H i gh w at er t em per atur es and det ergent
c a n dis col or or pi t the fini sh.
No
C a nnot w it hsta nd high w at er
t e mperat ures and deter gen ts .
Yes
A l ways check manufa cturer ’s
recom menda tions before was hin g. Plast ic
i t e ms may vary in t heir abil it y t o wit hst and
h i gh temperatu res a nd det ergents. It i s
recom mende d that l ight i te m s such as
l i d s and b utt er d ishes be p l aced i n t h e
u p per rack only. Sturdy i tems such as
c o ol ers a nd high-chai r trays m ay be
p l a ced in the lower r aok. W hen washing
p l a sti c i tems i n t he lower r ack, i t is
recom mende d that t he ai r dry opti on be
u s e d.
Yes
R u n a rin se cycle if not was hin g
i m med iatel y. Pro longed cont act wit h food
c o nt aining sal t, vinegar, mil k products, or
fruit jui ce ca n d am age fi nish.
Yes
R u n a rin se cycle if not was hin g
i m med iatel y. Pro longed cont act wit h food
c o nt aining sal t, acid, or sulfi de (e ggs ,
m a yonnai se, and seafood) can damag e
finish.
No
C a n r ust.
No
W as h b y ha n d. Always check
m a nufact u re r’ s i nstr uct io n s before
w a shing. Untr eat ed wood can w arp ,
c r a ck, or l ose i ts fi nis h.
C r yst al
G o ld
G l ass
Yes
C h eck man ufactur er’ s re commen dat ions
b e fo re washing. Som e types of l eaded
c r ys tal can etc h w it h rep eated w as hing.
No
G o ld-col ore d flat w ar e will dis color .
Yes
M i lk g lass yell ows w it h r epeated
d i s hw as her washing.
17

DIShHWASHER CARE
Cleaning the exterior
In most cas es, regular use of a soft , dam p cl oth or s pong e and a
m i l d d eter gent i s a ll t hat is nec essary to kee p th e o uts ide o f your
d i s hw as her l ookin g ni ce and clean. If your dis hwasher has a
s t a inl ess steel exter ior, a sta inle ss st eel c leaner is recomm ended.
Cleaning the interior
H a rd w at er miner als can caus e a w hit e film t o buil d up on the
i n s ide surfaces, esp ecial ly just beneath the door area.
D o not clean the d ishwas her inter ior unti l i t has cool ed. Wear
rubber gl ove s. Do n o t us e a ny type ot cl eanser ot her t han
d i s hw as her det ergent because it m ay cause fo am ing or s uds ing.
To clean interior
M a ke a paste wit h powder ed d is hwash er de tergent on a dam p
s p onge and c l ean.
OR
U s e liqui d a uto m ati c dis hw as her de tergent and cl ean with a
d a mp sponge.
OR
S e e the v in egar rinse procedure in “Spot ti ng and fil m ing on
d i s hes” in “Tr oub leshoot ing.”
NOTE:
R u n a normal cycle with detergen t af ter cleani ng t he
i n t eri or.
C h eck t he dr ain air gap anyti me your d is hwasher isn’t drai n in g
w e ll .
S o me sta te or l ocal plu mbi ng codes requir e th e addit ion of a
d r ai n ai r g ap b etween a buil t-i n dishwasher and t he hom e drain
s y st em. I f a house dr ain is clogged, the dr ain air gap prot ects
y o ur dishwasher f rom wa ter backing up into it .
T h e dra in air gap i s usuall y l ocated on t o p of t he si nk or
c o unter t o p near the dis hwasher . To o rder a drain air gap, p lease
1-800-4-MY-HOMP.
c a l l
NOTE:
T h e dra in air gap i s an exter nal pl um bi ng device that is
n o t part of your di shwas her. The warrant y p rovi ded wit h your
d i s hw as her does not c ove r se rvice costs dir ectl y associ ated w it h
t h e cl eaning or repai r of t he exte rnal drain air gap.
A s k fo r Part Number 300096.
To clean the drain air gap
C l ean the d rain a ir gap peri odic al ly t o ens u re pro per dr ainage o f
y o ur dishwasher. Foll ow t he cle ani ng in str uct ions pro vided by the
m a nufact u re r. W it h most types, you l ift of f t he chr ome cove r.
U n screw t he plas tic cap. The n c heck for a ny soil bui ldup. C le an
i f ne cessary.
Storing for the summer
P r ot ect your di shwas her dur ing the sum mer m onths by tu rning
o f f t he wat er supply and power s uppl y t o th e dishwasher.
Winterizing your dishwasher
P r ot ect your di shwas her a nd hom e against water dam age due t o
freezi ng wat er lin es. I f your dishwasher is left i n a seasonal
d w ell ing or could b e exposed t o near fre ezing t em pera tures, have
y o ur dishwasher wint eri zed by aut hori z ed s er vic e personnel.
18

TROUBLESHOOTING
First try the solutions suggested here and possibly avoid the cost of a service call...
Dishwasher is not operating properly Dishes are not completely clean
Dishwasher does not run or stops during a cycle
Is t he door clo se d t i ghtly and l atc hed?
W as the door o pene d d uri n g th e c ycle or w as the power
i n t err upt ed? The STAR T butt o n l i ght w il l begin flashi ng when
t h e door is ope ned d ur ing a cycle or when t h e power i s
i n t err upt ed. M ake sure the door is full y cl osed and latch ed.
P r e ss START to resume th e c ycle.
Is t he ri ght c ycle selecte d? R efer t o t he “C ycl e Sel ecti on
C h arts .”
Is t her e power to t he d i shw ash er? H as a household fuse
b l own or ci rcuit brea k er t ripped?
H a s the mot or stopped due to an overl oad? The motor
a u t om at ical ly r ese ts it self wit h in a few m inutes. If i t does not
restart , call for ser vic e.
Is t he water shutoff valve (i f i nstal led) turned o n?
It i s nor m al for cert ain cyc les to repeatedl y pause for sever al
s e co nds duri ng t h e wash c y cl e.
Dishwasher will not fill
Is t he overf ill pro tecti on f l oat able to move up and d own
freely? Press down t o re lease.
Dishwasher seems to run too long
Is t he water supplie d t o the dishwas her hot enough ? The
d i s hw as her r uns l onge r whil e h eat ing water . R ef er to t he
“ D ishwasher Eff ici enc y Tips” secti on.
A del ay a ut om ati cal ly occurs in som e was h and r inse cycles
u n ti l the w at er reaches the pr o per t em per ature.
Water remains in the dishwasher
Is t he cycl e com pl ete?
Detergent remains in the covered section of the
dispenser
Is t he cycl e com pl ete?
Is t he dete rgent lump- free? Rep lace det erge nt i f necess ary.
White residue on the front of the access panel
W as too m uch det erge n t us ed? Refer t o t he “Detergen t
D i spenser " sec tion.
Is t he brand o f det ergent m aki ng e xcess foam? Try a d i ffere nt
b r an d t o reduce foam in g and eli minate buil dup.
Odor in the dishwasher
A r e d ishes w ashed only ev ery 2 or 3 day s? Run a rins e cycle
o n ce or t w ic e a day unti l you h ave a ful l load.
D o es t he di shwash er have a new pl ast i c smel l? Run a vin egar
rinse as descri bed i n t h e s ec tion “Spot ti ng and filming o n
d i s hes.”
Condensation on the kitchen counter (built-in models)
Is t he d ishwas her a li gned w ith t h e c ounter top? M o is tur e f rom
t h e ve nt i n the di shw as h er console ca n form on the c o unte r.
R e fe r t o th e I ns tall atio n I nst ructi ons f or more i nformati on.
Food soil left on the dishes
Is t he dis hw asher loade d c orrect ly? Ref er to t he “Di shwasher
L o ading” s ect i o n.
Is t he water temper at u re t oo l ow? Fo r best dis hw ashin g
result s , w at er shoul d be 120°F ( 49° C) as it ent ers the
d i s hw as her. R ef er to the “Dishwasher E ffi c iency
T i ps ” sect ion.
D i d y ou use the co rrect amount of fres h deterg ent ? U se
recom mende d dishwasher det er gen ts only . Refer t o t he
“ D eterg ent D is pens er” sect ion. Deter gent m ust be fresh to be
e f f ect ive. Store deter gen t i n a cool, dry a rea. Hea vy soil and/
o r hard w at er gen eral ly r equir e extra dete rgent.
D o you have hard water? You m ay need t o incr ease t he
a m ount of deter gent y o u are using. Ref er to t he “Det ergent
D i spenser ” sect ion. Als o, you may n eed t o switc h to a
d e t ergent w it h a phosphorus conte nt of 8.7%.
Is d e tergent c ak ed in d i spenser ? U s e f r esh d e t ergent o n ly. D o
n o t all ow detergent to si t for s e v eral ho ur s in a w e t d i s penser .
C l ean dispenser when caked det ergent is prese nt.
Is the pump o r spra y arm clogged by la bels f rom b ott l es an d
c a ns ? If you wash bot tl es and can s in your di shw as her , check
for l abels cloggi ng the pump or spr ay a rm.
Is t he hom e wat er pressur e hi gh enough f or proper
d i s hw as her f il ling? H ome wat er press u re s houl d be 20 to
1 2 0 psi (138 to 828 kPa) for proper di shw as her fil l. A b ooste r
p u mp o n t he wat er suppl y c an be added i f pre ssure i s
t o o l ow.
A r e h igh suds slowing t he wash ar m ? N ever use soap or
l a u ndry dete rgents. Use r ecom m e n ded d is hwasher
d e t ergents only.
Spots and stains on dishes
Spotting and filming on dishes
Is your water hard o r i s t here a h igh mi ner al c onte nt i n yo ur
w a te r? C ondi ti onin g t he f i nal r i nse water with a l iq uid r inse
a i d helps el iminate sp otti ng and fil m in g. K ee p the rin se ai d
d i s penser fil led.
Is t he water temper at u re t oo l ow? Fo r best dis hw ashin g
result s , w at er shoul d be 120°F ( 49° C) as it ent ers the
d i s hw as her. R ef er to the “Dishwasher E ffi c iency
T i ps ” sect ion.
D i d y ou use the co rrect amount of effec tive det er gent? U se
recom mende d dishwasher det er gen ts only . Refer t o t he
“ D eterg ent D is pens er” sect ion. Deter gent m ust be fresh to be
e f f ect ive. Store deter gen t i n a cool, dry a rea. Hea vy soil and/
o r hard w at er gen eral ly r equir e extra dete rgent.
Is t he hom e wat er pressur e hi gh enough f or proper
d i s hw as her f il ling? H ome wat er press u re s houl d be 20 to
1 2 0 psi (138 to 828 kPa) for proper di shw as her fil l. A b ooste r
p u mp o n t he wat er suppl y c an be added i f pre ssure i s too
l o w.
19

NOTE:
T o r em ove spots and f i lm fr om dis hes, t ry a whi te
v i ne gar r inse. This procedure is inten d ed for occasi onal use
o n ly . Vinegar i s an aci d, and usi ng i t t oo o ft en coul d d amage
y o ur dishwasher,
1 . W ash and rinse dis hes . U se an ai r-dry or a n e ner gy saving
d r y opti on. Remov e a l l sil ver ware or met al it em s.
2.
Put 2 cu ps ( 500 mL) whi te vinegar in a gl ass or
d i s hw as her-safe mea suring cup o n the bot tom r ack.
3.
Run th e dis hwasher t hro ugh a complet e w ashi ng cycle
u s i ng an air - dry opt ion. Do not use d ete rgent . V in ega r w il l
m i x w it h t he wash water.
Silica film or etching {silica film is a milky, rainbowcolored deposit; etching is a cloudy film)
S o met imes t here is a water/ chemi cal r eacti on with cert ain
t y pe s of glass w ar e. Thi s i s us ual ly caused b y s ome
c o mbinat ion of soft or softe n ed w at er, al kali ne washing
s o l uti ons, insuff icie nt r insi ng, ov erl oadi ng t he dis hwasher ,
a n d the hea t of dry ing. It m ig ht n ot be possibl e t o prevent t h e
p r o ble m, e xce pt b y h and washing.
T o s low t hi s pr oce ss u se a m in imum amou nt of deter gen t per
l o a d. R ef er t o t he “Detergent Dis penser ” sect ion. Use a li qui d
rinse aid and u nde rload the d ishwas her to al low t h o ro ugh
rinsing. Sil ica fi lm a nd etc hin g a re per m anent and cannot be
rem oved. Do not u se heat ed dr y in g.
White spots on cookware with nonstick finish
H a s the dis hw as her de tergent removed cookwar e
s e as onin g? R ese ason cookwar e af ter was hin g i n th e
d i s hw as her.
Brown stains on dishes and dishwasher interior
D o es your wat er hav e hi gh i r on conte nt? R ewash d ishes
u s i ng 1 -3 t sp ( 5-15 mL) of cit ric acid cryst als added t o t he
c o ve red s ect ion of the det ergent dispenser. D o not use
d e t ergent. Foll ow wi th a No rm al wash cycl e wit h d eter gent. If
t r e at m ent is needed more often t han every other mon th, t he
i n s tal lat ion of an i ron r em oval unit is recomm ended.
Black or gray marks on dishes
A r e a lum in um i tems r ubbin g d ishes dur ing washin g?
D i sposabl e al um inum i t ems can break down i n t he
d i s hw as her a n d cause marki ng. Hand wash t hese i tems.
R e m ove aluminum marki ngs by usi ng a m il d abrasi ve cle aner .
Orange stains on plastic dishes or dishwasher interior
A r e l arge am ounts of tomato -based foods on dishes placed
i n t he dish w asher? Stai ns gra dually fade over ti me. Regular
u s e of h eate d d rying wil l slow f a d in g. Stains wil l not affe ct
d i s hw as her per formanc e. Regula r u se of a ri nse cycl e and a n
a i r -dry or e ner gy-sav ing dr y o pt ion will r educe t he l ikeli hood
o f st aining.
Dishes do not dry completely
Dishes are not dry
D i d y ou loa d y our d is hwasher to al low proper w at er
d r ai nage? Do not overl o ad . R ef er to t h e “Dishwas her
L o ading” s ect i o n. Use a l i quid r i nse ai d t o speed dry ing.
A r e t he pl asti cs wet? Plast ics often n eed t ow el dryi ng.
Is t he ri nse ai d di spenser e m pty? Ref er to the “Ri n se Aid
D i spenser ” sect ion.
D i d y ou use an air -dry opt i on? Use a heated d rying opti on fo r
d r y er dis hes.
Dishes are damaged during a cycle
Chipping of dishes
D i d y ou loa d t he dishwasher p roper l y? Load t he dis hes and
g l a sses so th ey are stabl e and do n ot str ike t ogeth er from
w a shing a cti on. Minimize chip ping by m ovi ng t h e rac k i n and
o u t slo w ly.
NOTE:
A n ti que s, feath er- edged cr ystal , and s i m il ar types of
c h i na and gla ss w are m ig ht be t oo del icate for automat ic
d i s hw as hing. Wash by hand.
Noises
Grinding, grating, crunching or buzzing sounds
A har d o bject has enter ed t he wash mod ule ( on some
m od els). W h e n t h e object i s gr ound up, t he soun d should
s t o p.
Dishwasher exterior is dirty or marked
Marks, smudges or residue on dishwasher exterior
D i d y ou clea n t he dis hwasher wit h a mil d d eter gen t a nd cl o th
o r use a st ainle ss s teel cl eane r on m odel s wit h a stai nless
s t e el exter ior? In m ost cases, r egula r use o f a soft , damp
c l o th or s pong e and a mil d det er gen t i s al l that i s necess ary
t o keep the out side of your dis hwasher looking f resh and
c l e an. If your di shw as her h as a stai nless stee l ext erior, a
s t a inl ess steel cle aner i s r ecom mende d.
20
 Loading...