

Kenmore 665.15822, 665.15824, 665.15829, 665.16822, 665.16824 Owner's Manual
...
Ultra W ash Dishwasher
Use & Care Guide
Lavavajillas Ultra W ash
Manual de uso y cuidado
Lave-vaisselle Ultra W ash
Guide d’utilisation et d’entretien
Models/Modelos/Modèles 665 .15822, 6 65.15824, 665.15829,
665.16822, 665.16 824, 665. 16829
3384535
Sears Roebuck and Co., Hoffman Estates, IL 60179 U.S.A.
Sears Canada, Inc., Toronto, Ontario, Canada M5B 2B8
www.sears.com
www.sears.ca

TABLE OF CONTENTS
WE SERVICE
WE SERVICE WHAT WE SELL ..........................................2
WARRANTY..................................................................... ....3
DISHWAS H E R S AF E T Y ...... ... .. ............ ........... ........... ...... 4
Before Using Your Dishwasher....................................................5
PARTS AND FEATURES ....................................................6
ULTRA WASH® Soil Removal System .... .....................................7
START-UP GUIDE...............................................................7
Using Your New Dishwasher .......................................................7
DISHWASHER LOADING .................................................. 8
Loading Suggestions ...................................................................8
Loading the Top Rack..................................................................8
Loading the Bottom Rack............................................................9
Loading the Silverware Basket ..................................................10
DISHWASHER USE..........................................................10
Detergent Dispenser ..................................................................10
Rinse Aid Dispenser...................................................................11
Dishwasher Efficiency Tips........................................................12
Control Panel..............................................................................13
Cycle Selection Chart ................................................................13
Canceling a Cycle ......................................................................14
Changing a Cycle or Setting ......................................................14
Adding Items During a Cycle.....................................................14
Option Selections.......................................................................14
Cycle Status Indicators..............................................................15
Drying System............................................................................15
Overfill Protection Float..............................................................16
WASHING SPECIAL ITEMS .............................................16
DISHWASHER CARE............................ ............................17
Cleaning Your Dishwasher.........................................................17
Drain Air Gap..............................................................................17
Storing Your Dishwasher ................ ...........................................17
TROUBLESHOOTING.......................................................18
WHAT WE SELL
“W e Service What We Sell” is our assuran ce that you can depend
on Sears for service. Your dishwasher has added value whe n yo u
consider that Sears has service units nationwide, staffed with
professional technicians specifically trained on Sears appliances
and having the parts, tools, and equipment to ensure that we
meet our pledge to you...“We Service What We Sell.”
Maintain the value of your KENMORE® Dishwasher with a Sears
Maintenance Agreement. Sears dishwashers are designed,
manufactur ed, and tested fo r years of de pend able ope ration. Yet,
any modern appliance may require service from time to time.
The Sears Maintenance Agreement
■ Is your way to buy tomorrow’s service at today’s prices.
■ Eliminates repair bills resulting from normal use.
■ Allows for as many service calls as required.
■ Provides for service by professional Sears Trained
Technicians.
Even if you don’t need repairs, the Maintenance Agreement
■
offers an annual preventative maintenance check-up at your
request!
This Maintenance Agreement does not cover original installation,
reinstallation, or damage resulting from external causes such as
acts of abuse, theft, fire, flood, wind, lightning, freezing, power
failure, power reduction, etc.
2

WARRANTY
WARRANTY RESTRICTION
If the dishwasher is subject to other than private family use, the
above warranty coverage is effective for only 90 days.
FULL ONE-YEAR WARRANTY ON KENMORE
ULTRA WASH
For one year from the date of purchase, when this dishwasher is
installed and operated according to instructions provided in the
Installation Instructions and Use & Care Guide, Sears will repair
this dishwasher, free of charge, if defective in material or
workmanship.
®
DISHWASHERS
FULL TWO-YEAR WARRANTY ON ELECTRONIC
CONTROL AND POWER SUPPLY BOARD
For two years from t he dat e of p ur c hase, when t his d ishwash er is
installed and operated according to instructions provided in the
Installation Instructions and Use & Care Guide, Sears will repair,
free of charge, the electronic module and power supply board if
defective in material or workmanship.
FULL WARRANTY FOR THE LIFE OF THE DISHWASHER,
ON UL TRA LIFE™ TUB MODELS, AGAINST LEAKS IN THE
TUB AND INNER DOOR PANEL
For the life of the dishwasher, if a leak should occur as a result of
failure of the polypropylene tub or inner door panel due to
cracking, chipping or peeling, Sears will replace free of charge
the tub or inner door panel.
LIMITED TWO-YEAR WARRANTY ON THE ULTRA WASH
WASH SY STE M
After the first year and until two years from the date of purchase,
when the dishwasher is installed and operated in accordance
with the instructions provided in the Installation Instructions and
Use & Care Guide, Sears will replace any part of the
ULTRA WASH wash system (motor, pump, spray arms,
ULTRAFLOW™ water feed tube, motor seals and pump gasket)
due to defective materials or workmanship. Customer assumes
any labor costs associated with replacement of these parts.
WARRANTY SERVICE
WARRANTY SERVICE IS AVAILABLE BY CONTACTING THE
NEAREST SEARS SERVICE CENTER IN THE UNITED STATES
OR CANADA. This warranty applies only while the product is in
use in the United States or Canada. This warranty gives you
specific legal rights and you may also have other rights which
vary from state to state or province to province.
Warranty terms may vary in Canada.
For Sears Warranty information in the United States or Canada
call 1-800-469-4663.
Sears, Roebuck and Co.
D/817WA, Hoffman Estates, IL 60179
Sears Canada, Inc.
Toronto, Ontario, Canada M5B 2B8
In the space below, record your complete model number, serial
number, and purchase date. You can find this information on the
model and seri al number l abel, l ocated as shown in t he Parts a nd
Features section of this book. Have this information available to
help you quickly obtain assistance or service when you contact
Sears concerning your appliance.
Model number 665.______________________________________________
Serial number___________________________________________________
Purchase date __________________________________________________
Save these instructions an d your sales receipt for future
reference.
3
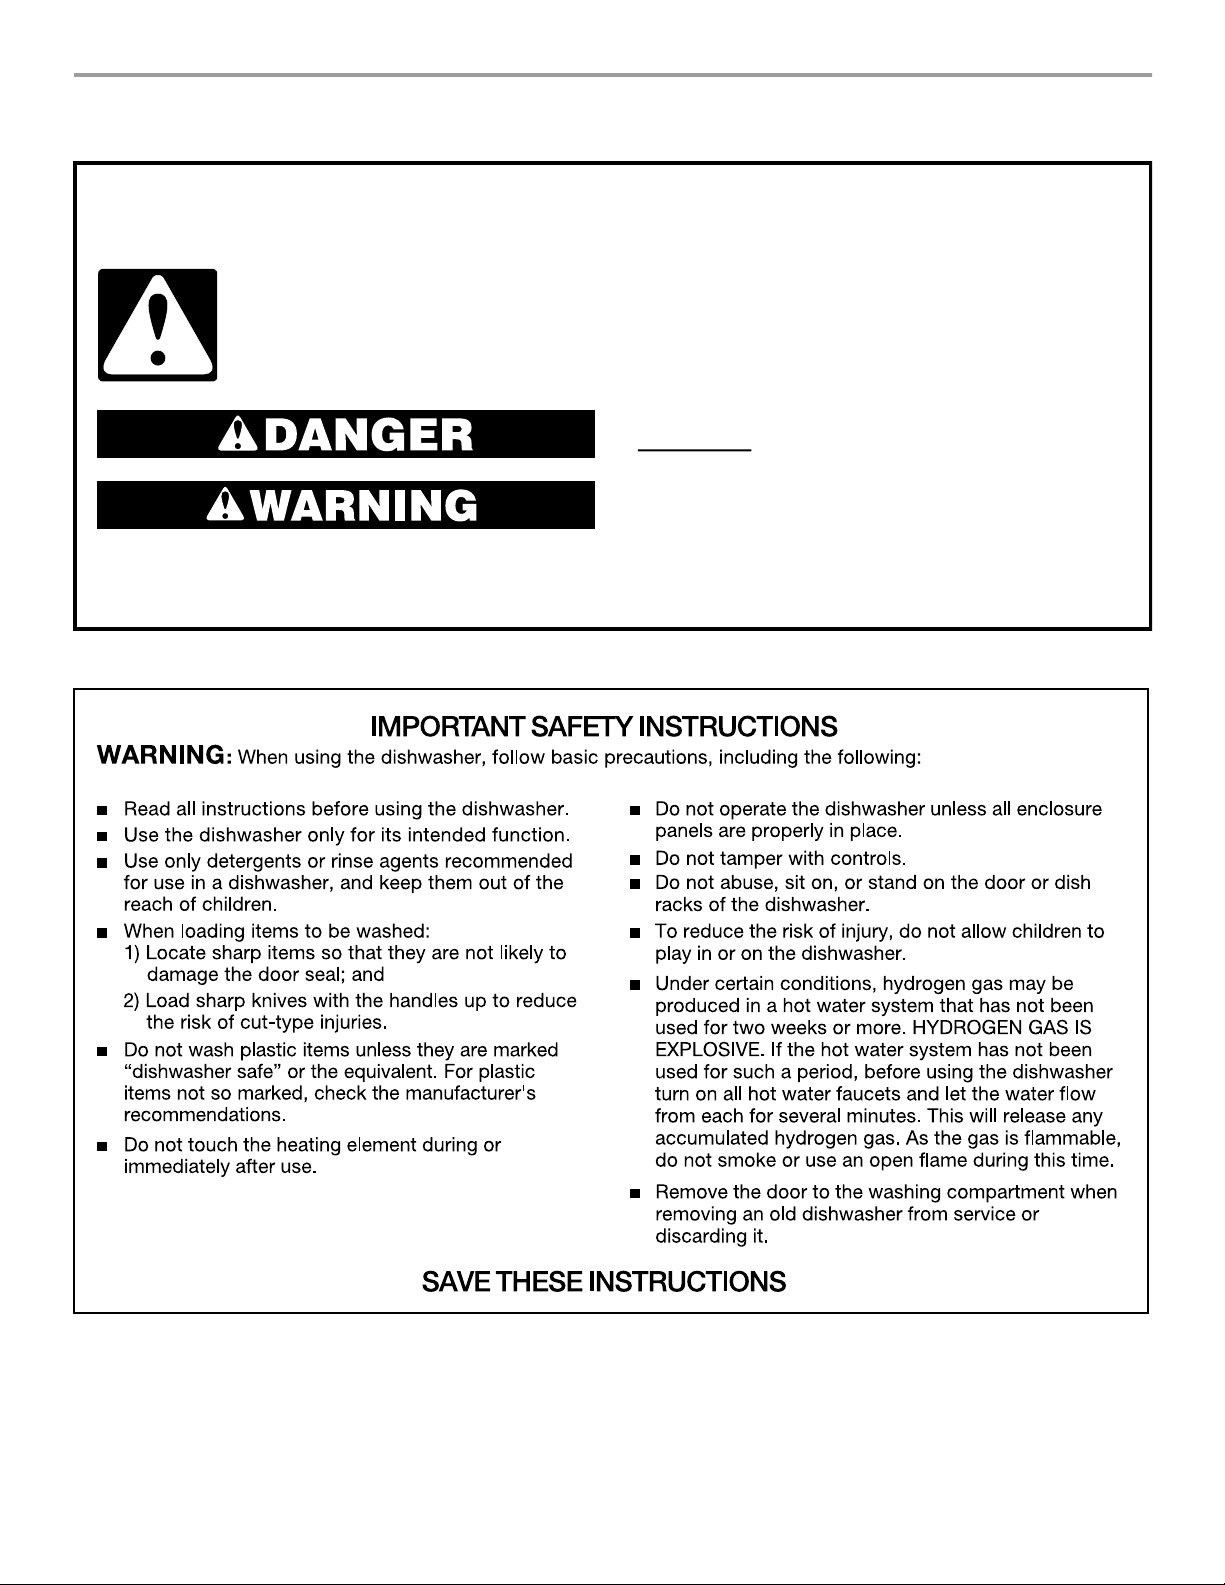
DISHWASHER SAFETY
Your safety and the safety of others are very important.
We have provided many important safety messages in this manual and on your appliance. Always read and obey all
safety messages.
This is the safety alert symbol.
This symbol alerts you to potential hazards that can kill or hurt you and others.
All safety messages will follow the safety alert symbol and either the word “DANGER” or
“WARNING.” These words mean:
You can be killed or seriously injured if you don't
immediately follow instructions.
can be killed or seriously injured if you don't
You
follow instructions.
All safety messages will tell you what the potential hazard is, tell you how to reduce the chance of injury, and tell you
what can
happen if the instructions are not followed.
4
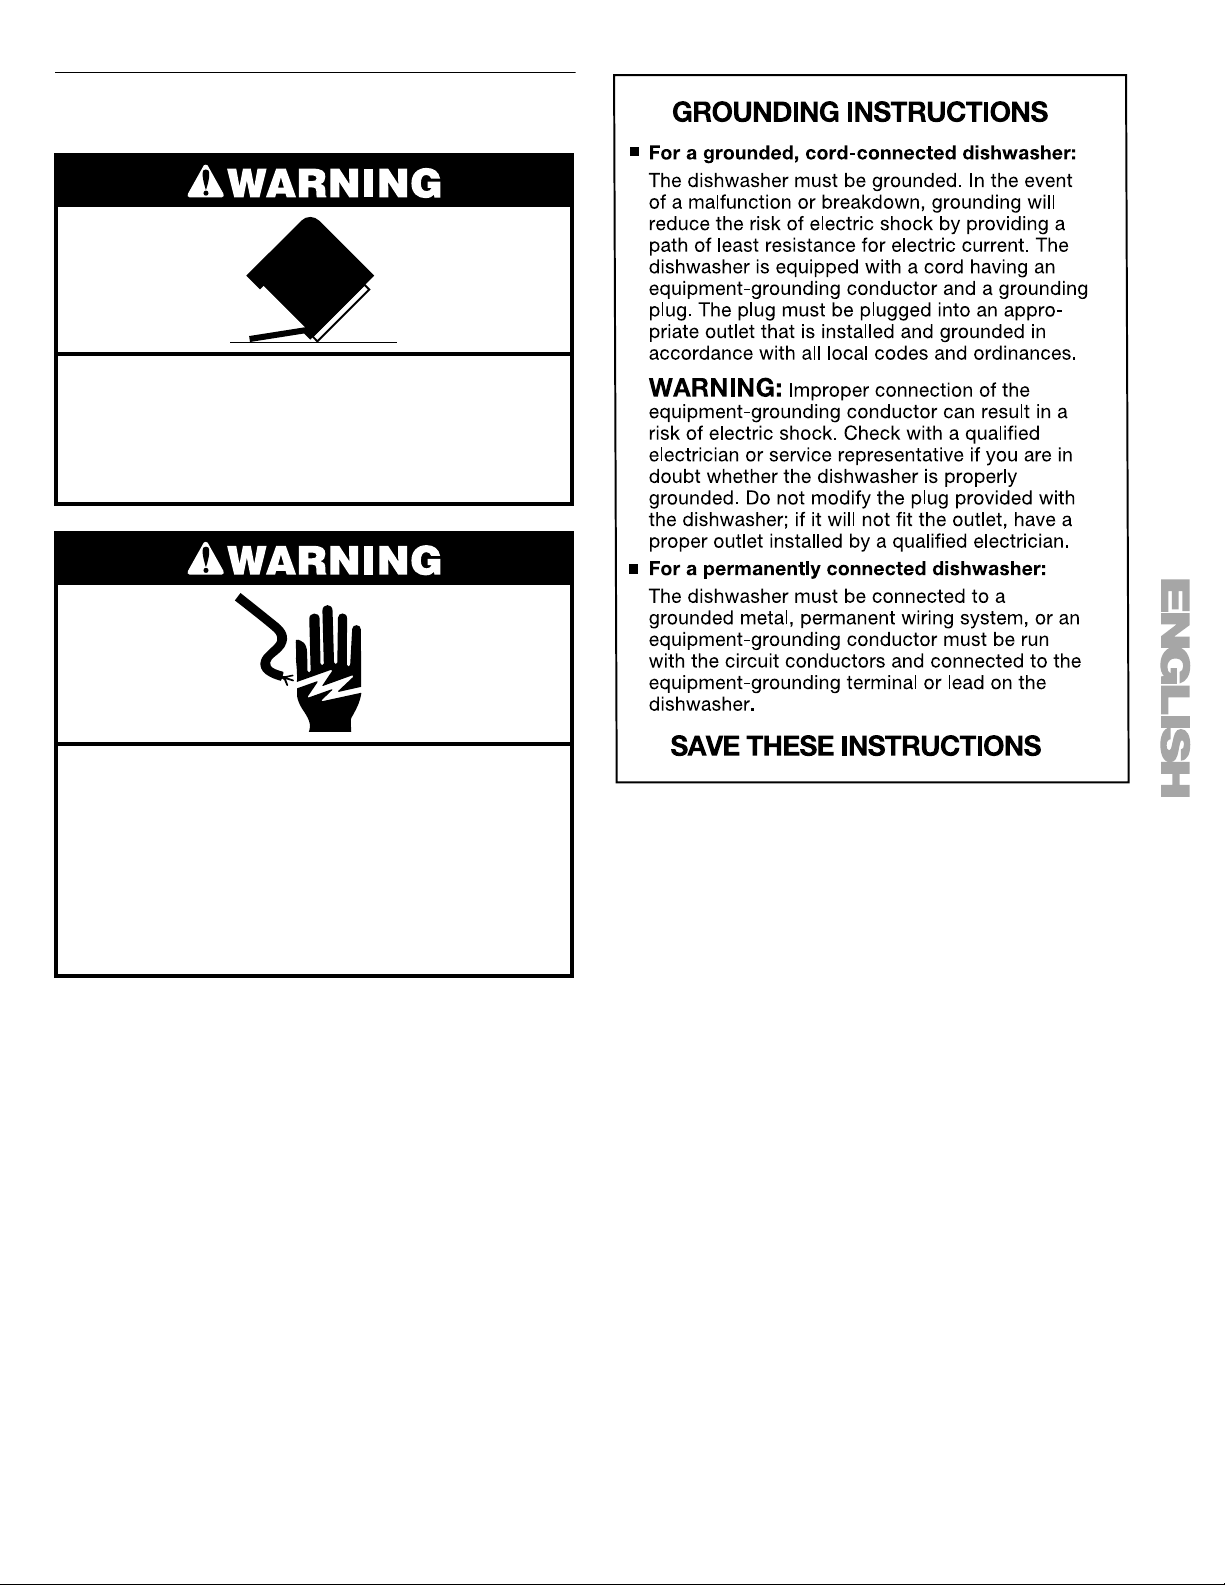
Befor e Using Y our Dishwasher
Tip Over Hazard
Do not use dishwasher until completely installed.
Do not push down on open door.
Doing so can result in serious injury or cuts.
Electrical Shock Hazard
Electrically ground dishwasher.
Connect ground wire to green ground connector
in terminal box.
Do not use an extension cord.
Failure to follow these instructions can result in
death, fire, or electrical shock.
Install where dishwasher is protected from the elements.
■
Protect against freezing to avoid possible ruptur e of fill valve.
Such ruptures are not covered by the warranty. See “Storing
Your Dishwasher” in the “Dishwasher Care” sectio n for winter
storage information.
Install and level dishwasher on a floor that will hold the
■
weight, and in an area suitable for its size and use.
Remove all shipping plugs from hoses and connectors (such
■
as the cap on the drain outlet) before installing. See
Installation Instructions for complete information.
5
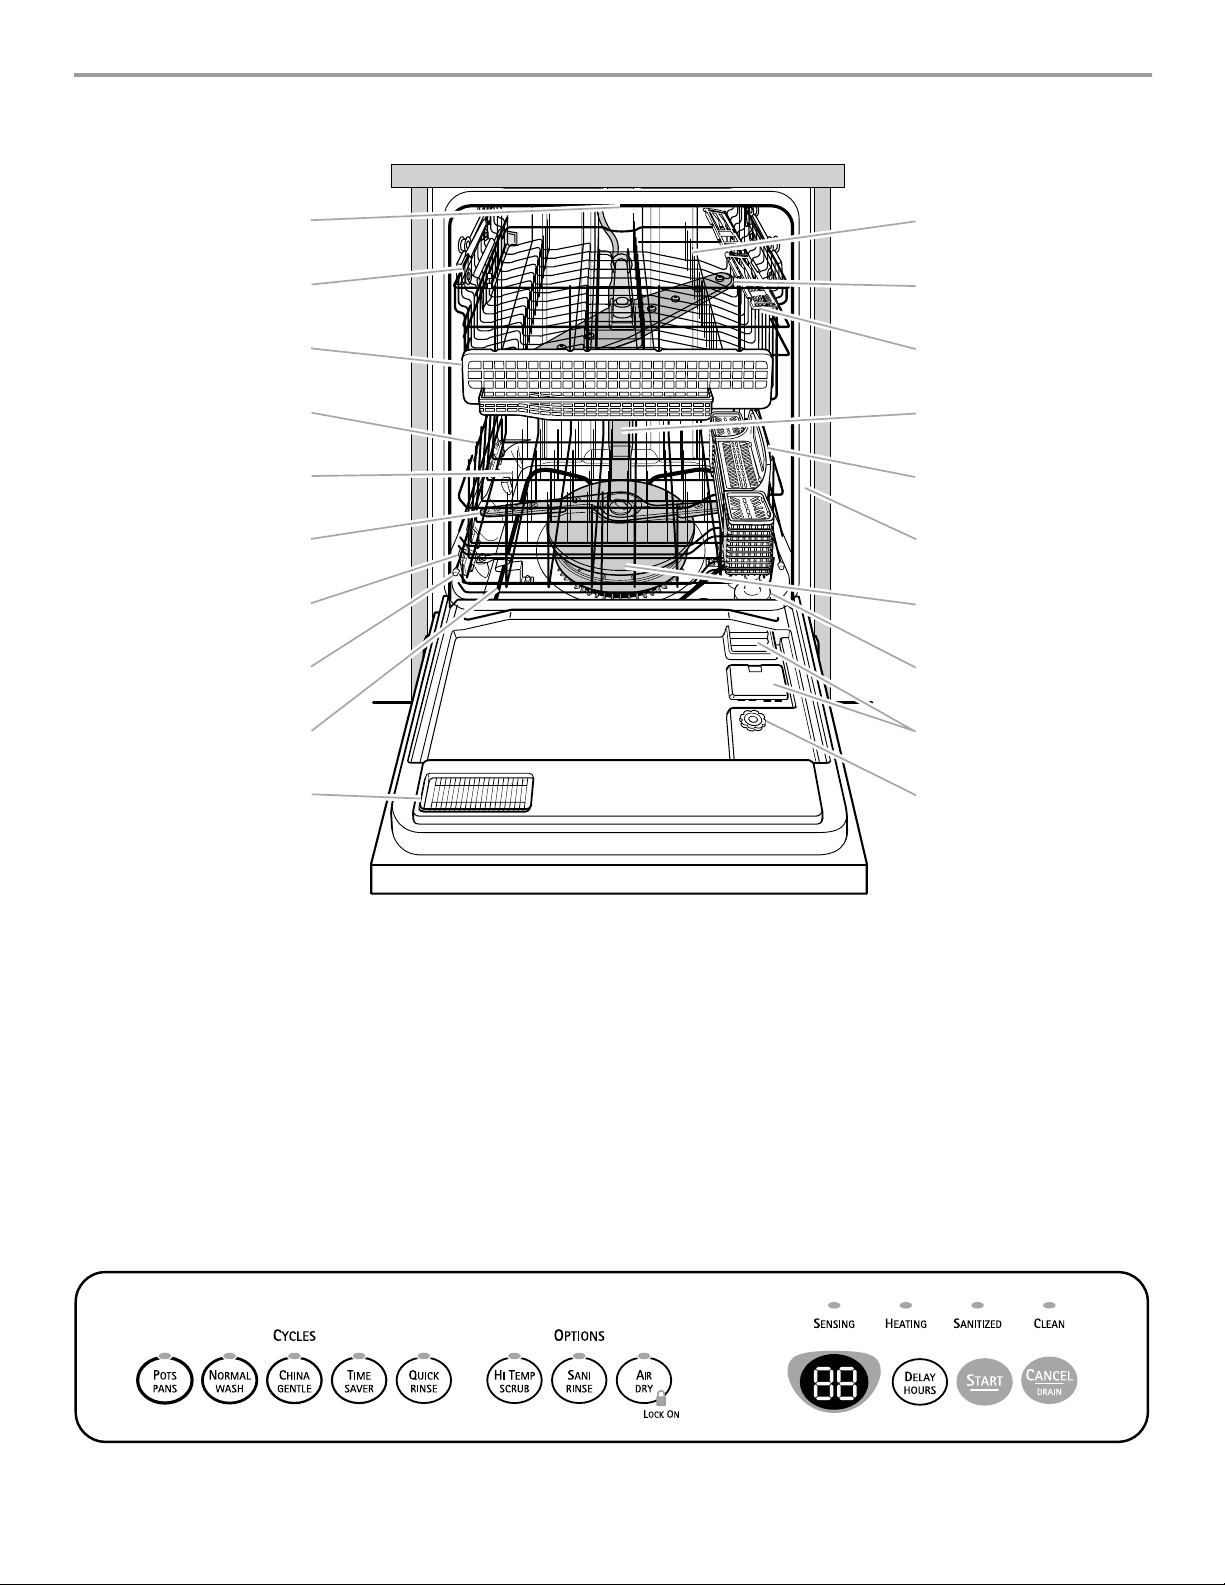
PARTS A ND FEATUR ES
2
3
4
5
6
7
8
9
0
10
1
2
3
4
5
6
7
8
9
11
1
1
1
1
1
1
1
1
2
1.
Upper level wash
2.
Top rack
3.
Utensil basket
4.
Bottom rack
5.
Fold-down tines
6.
Lower spray arm
7.
Water inlet opening [in tub wall]
Control Panel
8.
Rack bumper
9.
Heating element
10.
Vent
11.
Fold-down tines
12.
Top spray arm
13.
Combo cup shelf
14.
ULTRA FLOW™ water feed tube
15.
Silverware basket
16.
Model and serial number label
17.
ULTRA WASH® module
18.
Overfill protection float
19.
Detergent dispenser
20.
Rinse aid dispenser
Other features your dishwasher may
have
NO-FLIP™ clips
6
UL TRA WASH® Soil Removal System
The UL T RA W ASH soil re moval system gives you sparkling clean
dishes, while using less energy and time. The ULTRA WASH soil
removal system includes:
A heavy-duty grinder that acts as a food disposer to grind
■
and dispose of large food particles.
An ULTRA WASH sensor to monitor soil level and adjust the
■
cycles as needed.
■ An Automatic Temperature Control (ATC) that ensures the
proper water temperature for the selected wash cycle, and
soil level of the load.
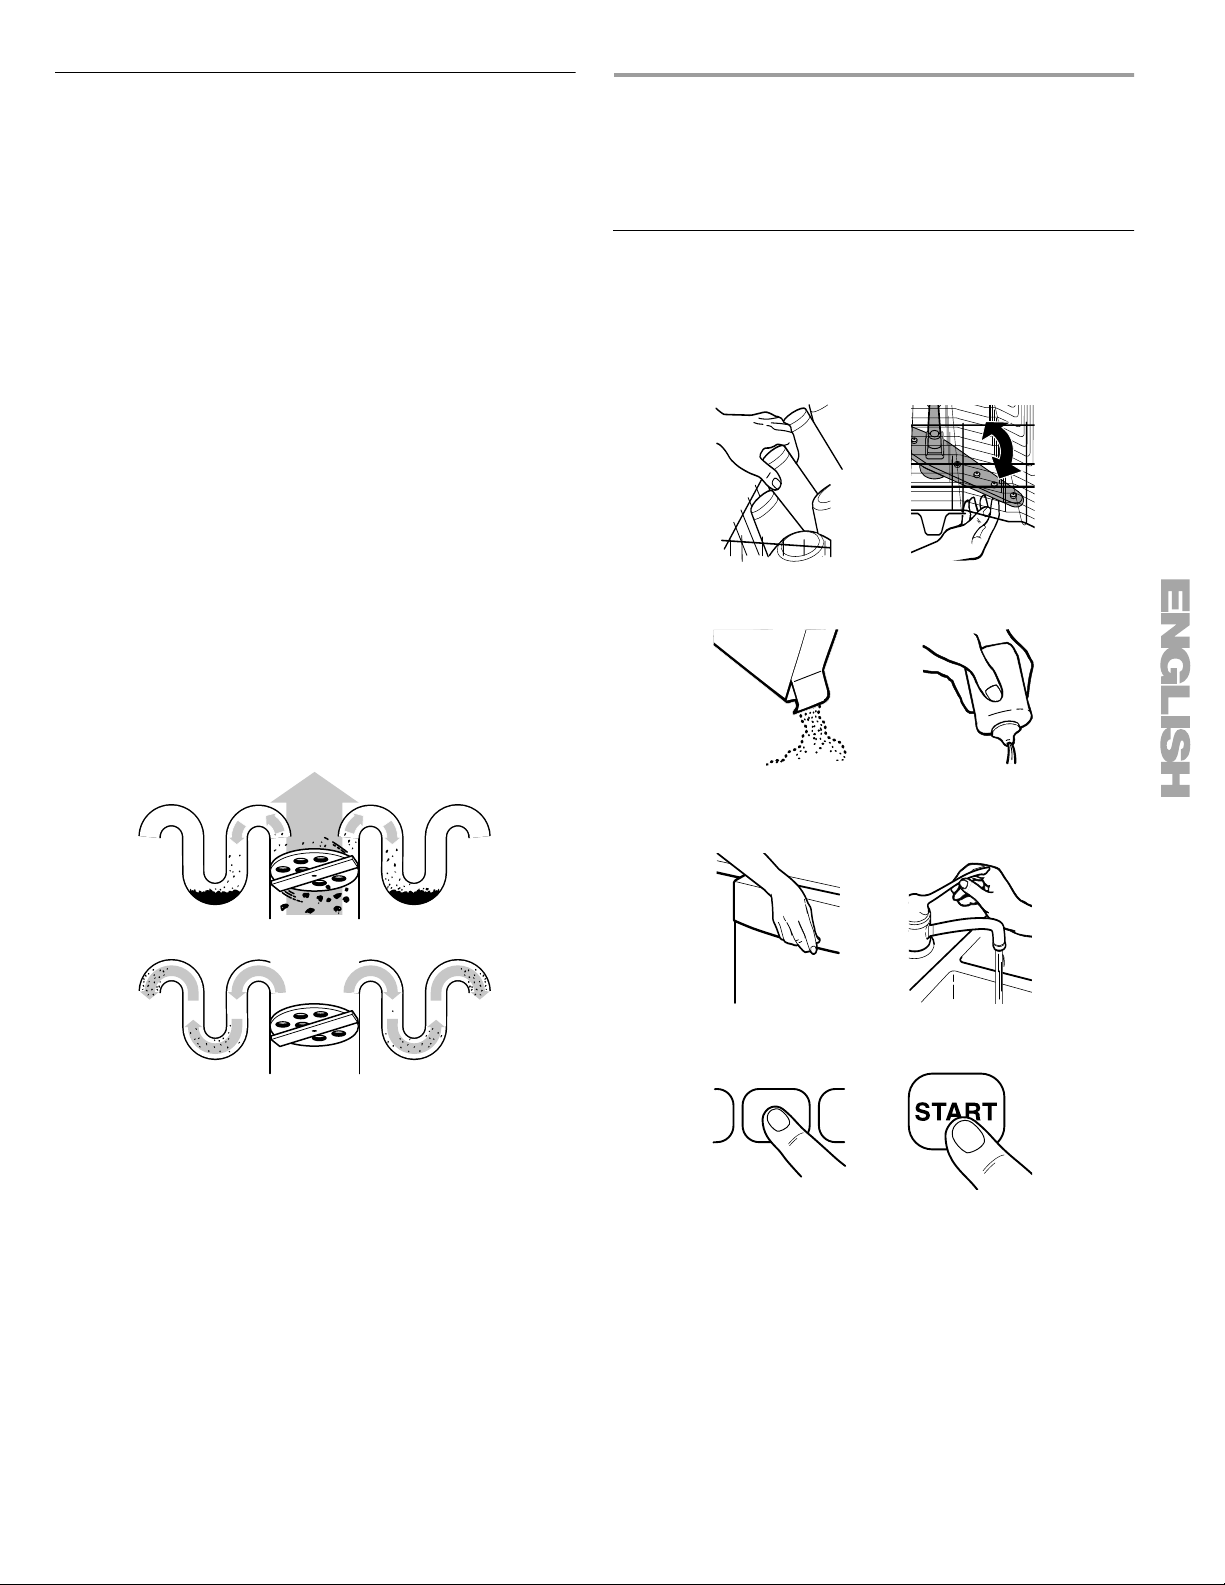
How the ULTRA WASH soil removal syste m works
1.
Load the dishwasher. Remove bones, large chunks or
burned-on food. No rinsing is necessary. Any remaining food
soil will be ground up and disposed down the drain with the
rinse water.
2.
Hot water fills the dishwasher to a level near the bottom of
the overfill protection float.
3.
The Heating indicator glows, and the countdown pauses
while the water is heated.
4.
When the water reaches the pr o per temperatu r e, the Heating
indicator turns off and the cycle countdown resumes.
5.
Detergent from the detergent dispenser is dispensed at the
correct cycle times and hot water is pumped through the
ULTRA WASH pump.
6.
Hot water and de ter gent sprays ag ainst the so iled surfaces of
the load and removes food particles.
7.
Food soil is held in an accumulating chamber.
START-UP GUIDE
Before using your dishwasher, remove all packaging materials.
Read this entire Use and Care Guide. You will find important
safety information and useful operating tips.
Using Y our New Dishwasher
1.
Scrape large food soil and hard items (toothpicks or bones)
from dishes.
2.
Properly load the dishwasher. (See “Dishwasher Loading.”)
Make sure nothing prevents the spray arm(s) from spinning
freely.
3.
Add detergent and check the rinse aid dispenser. Add rinse
aid if needed. (See “Dishwasher Use.”)
8.
Food soil is disposed down the drain with the wash water.
9.
Fresh, hot water enters the dishwasher and sprays on the
dishes. The rinse water is then pumped through the
ULTRA WASH soil removal system and remaining soil
is removed.
10.
The food soil that is held in the ULTRA WASH soil removal
system is disposed down the drain with the rinse water.
11.
The final rinse water is heated. The rinse aid is added to the
water for the final rinse to prepare the dishes for drying.
How the ULTRA WASH Sensor and the Automatic
Temperature Control (ATC) work
1.
The SENSING indicator glows when the ULTRA WASH
Sensor is measuring the amount of soil in the dishwasher.
2.
After the soil level is determined, unnece s sary p ort io ns of the
cycle are skipped. When this happens, the electronic display
pauses or skips numbers as it counts down. This is normal.
3.
The ATC adjusts the water temperature throughout the cycle
depending upon the soil level detected. Higher water
temperatures are used to improve cleaning with heavier
soiled loads.
4.
Push door firmly closed. The door latches automatically. Run
hot water at the sink nearest your dishwasher until the water
is hot. (See “Dishwasher Effic iency Tips.”) Turn off water.
5.
Press the desired cycle and option selections. (See
“Dishwasher Use.”) Press START.
7
DISHWASHER
LOADING
Loading Suggestions
Remove leftover food, bones, toothpicks and other hard
■
items from the dishes. It is not necessary to rinse the dishes
before putting them in the dishwasher. The wash module
removes food part icles from the wat er . The mo dule contains a
chopping device which will reduce the size of food items.
NOTE:
enter the wash module, you might hear chopping, grinding,
crunching, or buzzing sounds. These sounds are normal
when hard items enter the module. Do not let metallic items
(such as pot handle screws) get into the wash module.
Damage can occur.
Load dishes so soiled surfaces face the spray (down or
■
inward). It is important for the water sp ray to reach all soiled
surfaces.
■ Load dishes so they are not stacked or overlapping if
possible. For best drying, wa ter must be able to drain fr om all
surfaces.
Make sure pot lids and handles, pizza pans, cookie sheets,
■
etc., do not interfere with the spray arm rotation.
■ Run a rinse cycle to keep dishes moist if you do not plan to
wash them soon. Foods like eggs, rice, pasta, spinach, and
cooked cereals may be hard to remove if they are left to dry
over a period of time.
Quiet operating tips
To avoid thumping/clattering noises during operation:
Make sure lightweight load items are secured in the racks.
■
Make sure pot lids and handles, pizza pans, cookie sheets,
■
etc., do not touch interi or wall s or inter fere with the r otat ion of
the spray arm.
Load dishes so they do not touch one another.
■
NOTE:
dishwasher operation to prevent noise transfer through drains.
If hard items such as fruit seeds, nuts, and egg shells
For built-in models, keep sink drain plugs closed during
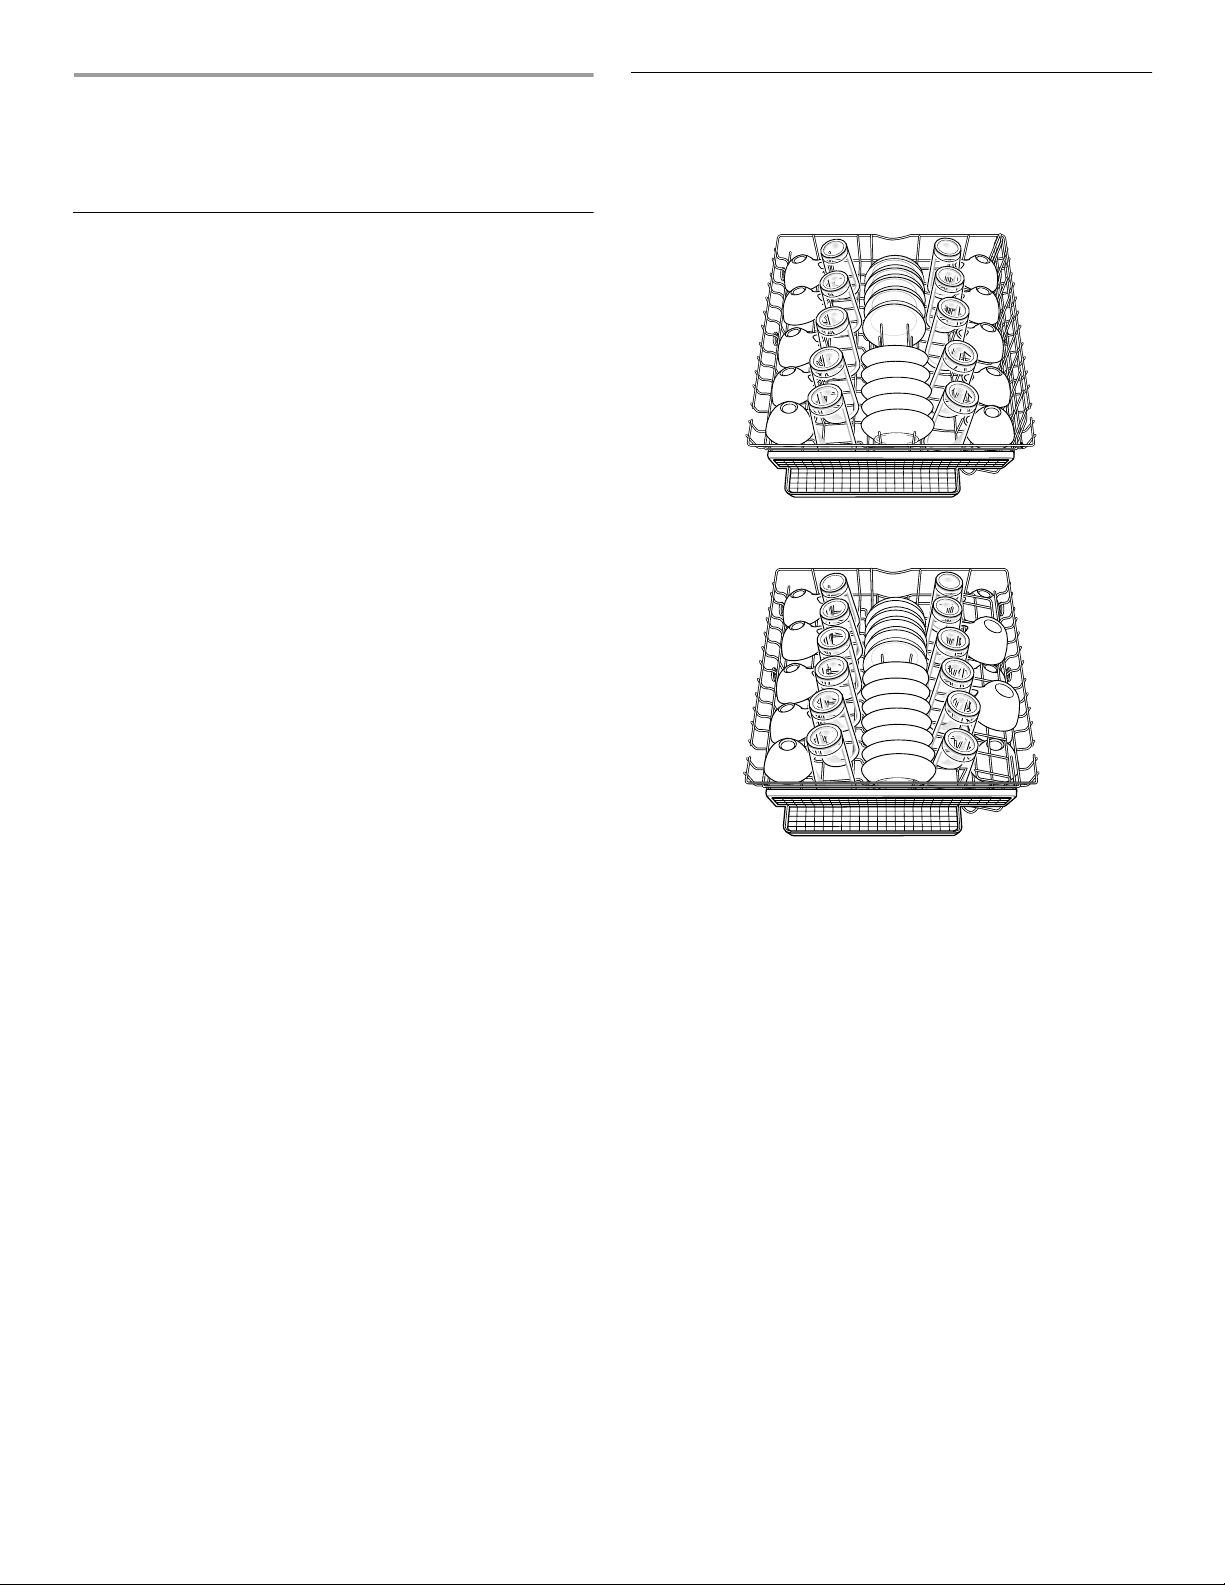
Loading the T op Rack
The top rack is designed for cups, glasses, and smaller items.
(See recommended loading patterns shown.)
NOTE:
The features on your dishwasher rack may vary from the
drawings shown .
10 place setting
12 place setting
Place items so open ends face down for cleaning and
■
draining.
Load glasses in top rack only. The bottom rack is not
■
designed for glasses. Damage can occur.
Place cups and glasses in the rows between tines. Placing
■
them over the tines can lead to breakage and water spots.
China, crystal, and other delicate items must not touch each
■
other during dishwasher operation. Damage may occur.
Load plastic items in the top rack only. Only plastic items
■
marked “dishwasher safe” are recommended.
Load plastic items so the force of the spray does not move
■
them during the cycle.
To avoid chipping, do not let stemware touch other items.
■
Small bowls, pans, and other utensils can be placed in the
■
top rack. Load bowls in the center section for best stability.
8
Utensil basket
Use this extra capacity basket on the top rack to hold spatulas,
wooden spoons, and similar items.
Combo Cup shelves
Fold down the extra shelves on the right side of th e top rack. Use
the Combo Cup shelves to hold a variety of items.
Hold additional cups and/or stemware in the Stemware
■
Rests.
■ Hold lightweight plastic lids in place in the Lid Holders. Or
you can place long items such as utensils and spatulas on
the Combo Cup shelf.
No-f lip clip s (o n som e mode ls)
The no-flip clips hold lightweight plastic items like cups, lids, or
bowls in place during washing. You can move a clip anywhere in
the rack.
Pull the clip up and off the tine.
1.
Reposition the clip on another tine.
2.
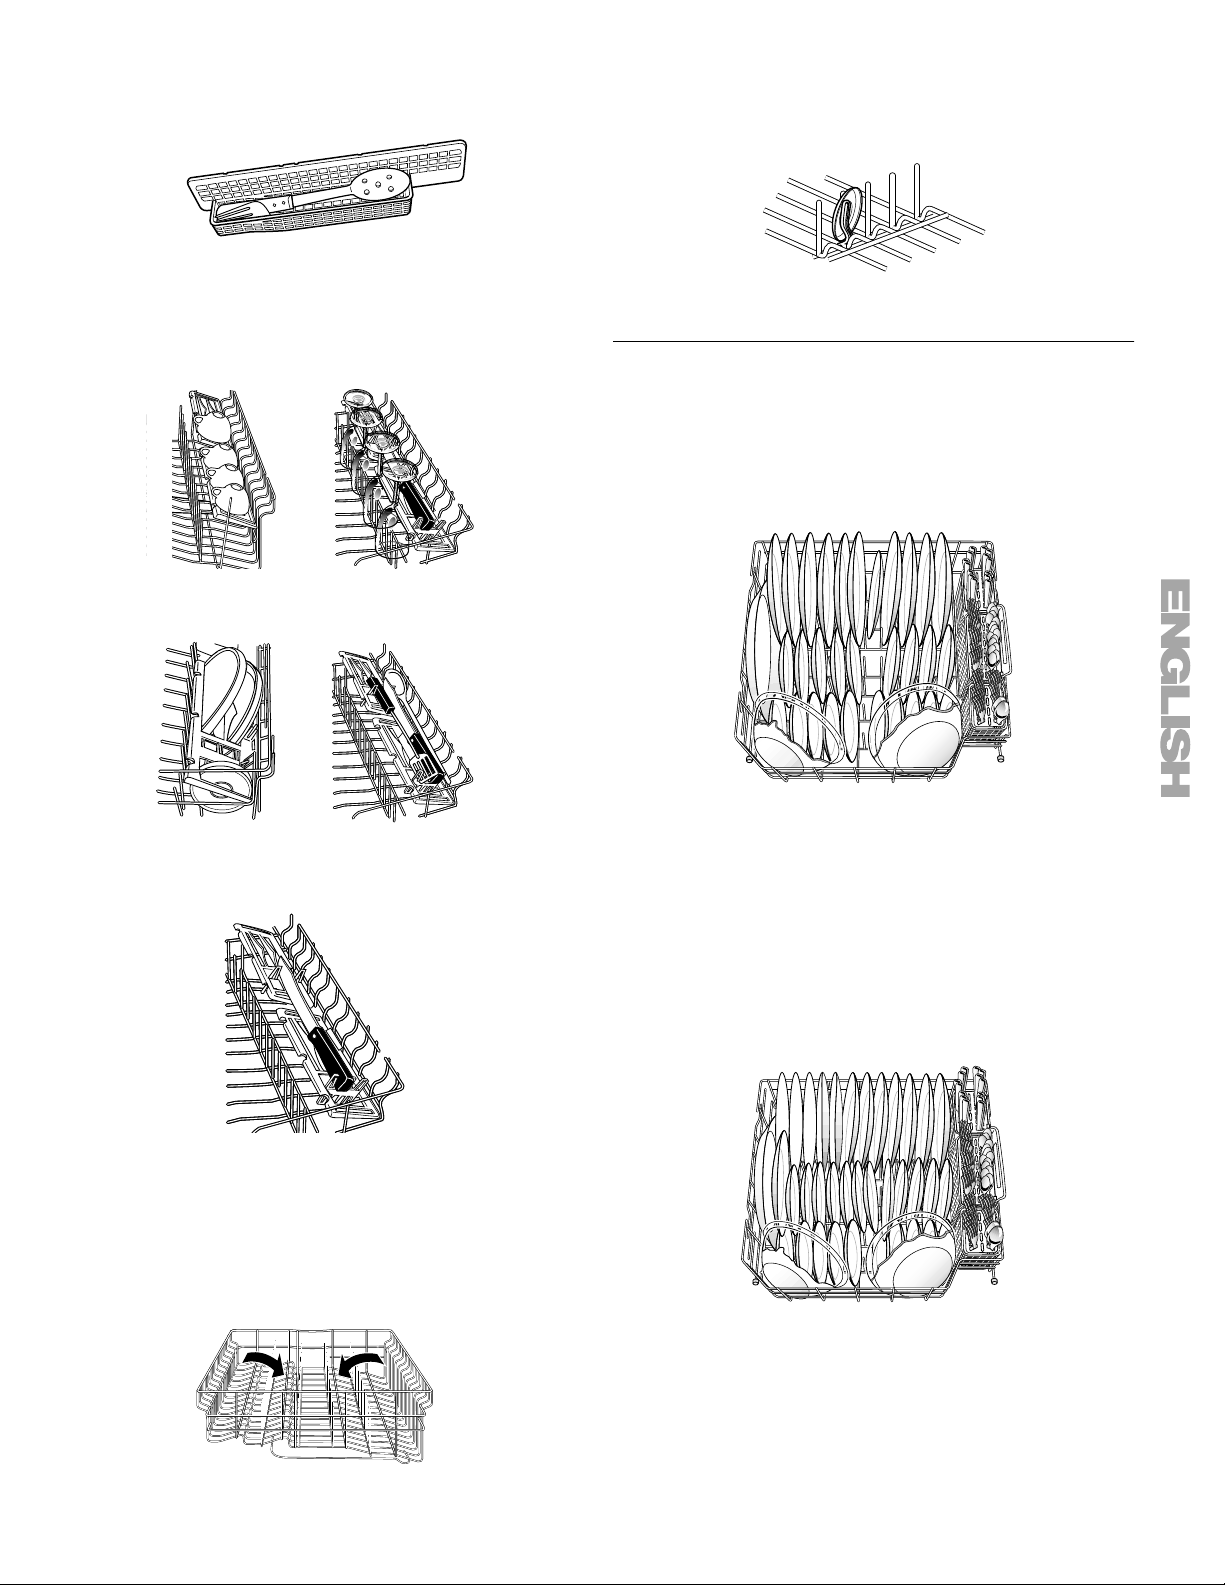
Loading the Bottom Rack
The bottom rack is designed for plates, pans, casseroles, and
utensils. Items with cooked-on or dried-on food should be load ed
with soiled surfaces facing inward to the spray. (See
recommended loading patterns shown.)
The features on your dishwasher rack may vary from the
NOTE:
drawings shown .
■ Place knives,
Flip up the front Knife Holder so the word HANDLE faces
1.
sharp-edge down
in the Knife Holder.
you.
Flip up the rear Knife Holder so the word BLADE faces
2.
you.
Place knives in the holder as shown.
3.
NOTE:
Always point the knives to the rear of the Knife Holder
with the blades down.
Fold-down tines
Fold the tines in the top rack all the way down to accommodate
larger items.
10 place setting
Do not load glasses, cups, or plastic items in the bottom
■
rack. Load small items in the bottom rack only if they are
secured in place.
Load plates, soup bowls, etc., between tines and facing
■
inward to the spray.
Overlap the edges of plates for large loads.
■
Load soup, cereal, and serving bowls in the rack in a variety
■
of ways depending upon their size and shape. Load bowls
securely between the rows of tines. Do not nest bowls
because the spray will not reach all surfaces.
12 place setting
Load cookie sheets, cake pans, and other large items at the
■
sides and back. Loading such items in front can keep the
water spray from reaching the detergent dispenser.
Secure heavily soiled cookware face down in the rack.
■
9
■ Make sure pot handles and other items do not stop rotation
of the spray arm(s). The spray arm(s) must move freely.
■ Do not load items between the bottom rack and the side of
the dishwasher tub. You can block the water inlet opening.
NOTE: If you have removed the bottom rack for unloading or
cleaning, replace it with the bumpers in front.
Fold-down tines
You can fold down one or both rows of tines at the back of the
bottom rack.
1. Grasp the tip of the tine that is in the tine holder.
2. Gently pull the tine out of the tine holder.
3. Lay the row of tines down in the rack to make room for larger
dishes, bowls, pots, pans or roasters.
To remove a small basket
1. Hold the center basket and one small basket. Slide the small
basket forward to release the tabs from the corresponding
slots.
2. Pull the baskets apart.
NOTES:
Do not load silver or silver-plated silverware with stainless
■
steel. These metals can be damaged by contact with each
other during washing.
■ Some foods (such as salt, vinegar, milk products, fruit juices,
etc.) can pit or corro de silver war e. Run a rinse cycle if yo u do
not have a full load to wash immediately.
DISHWASHER USE
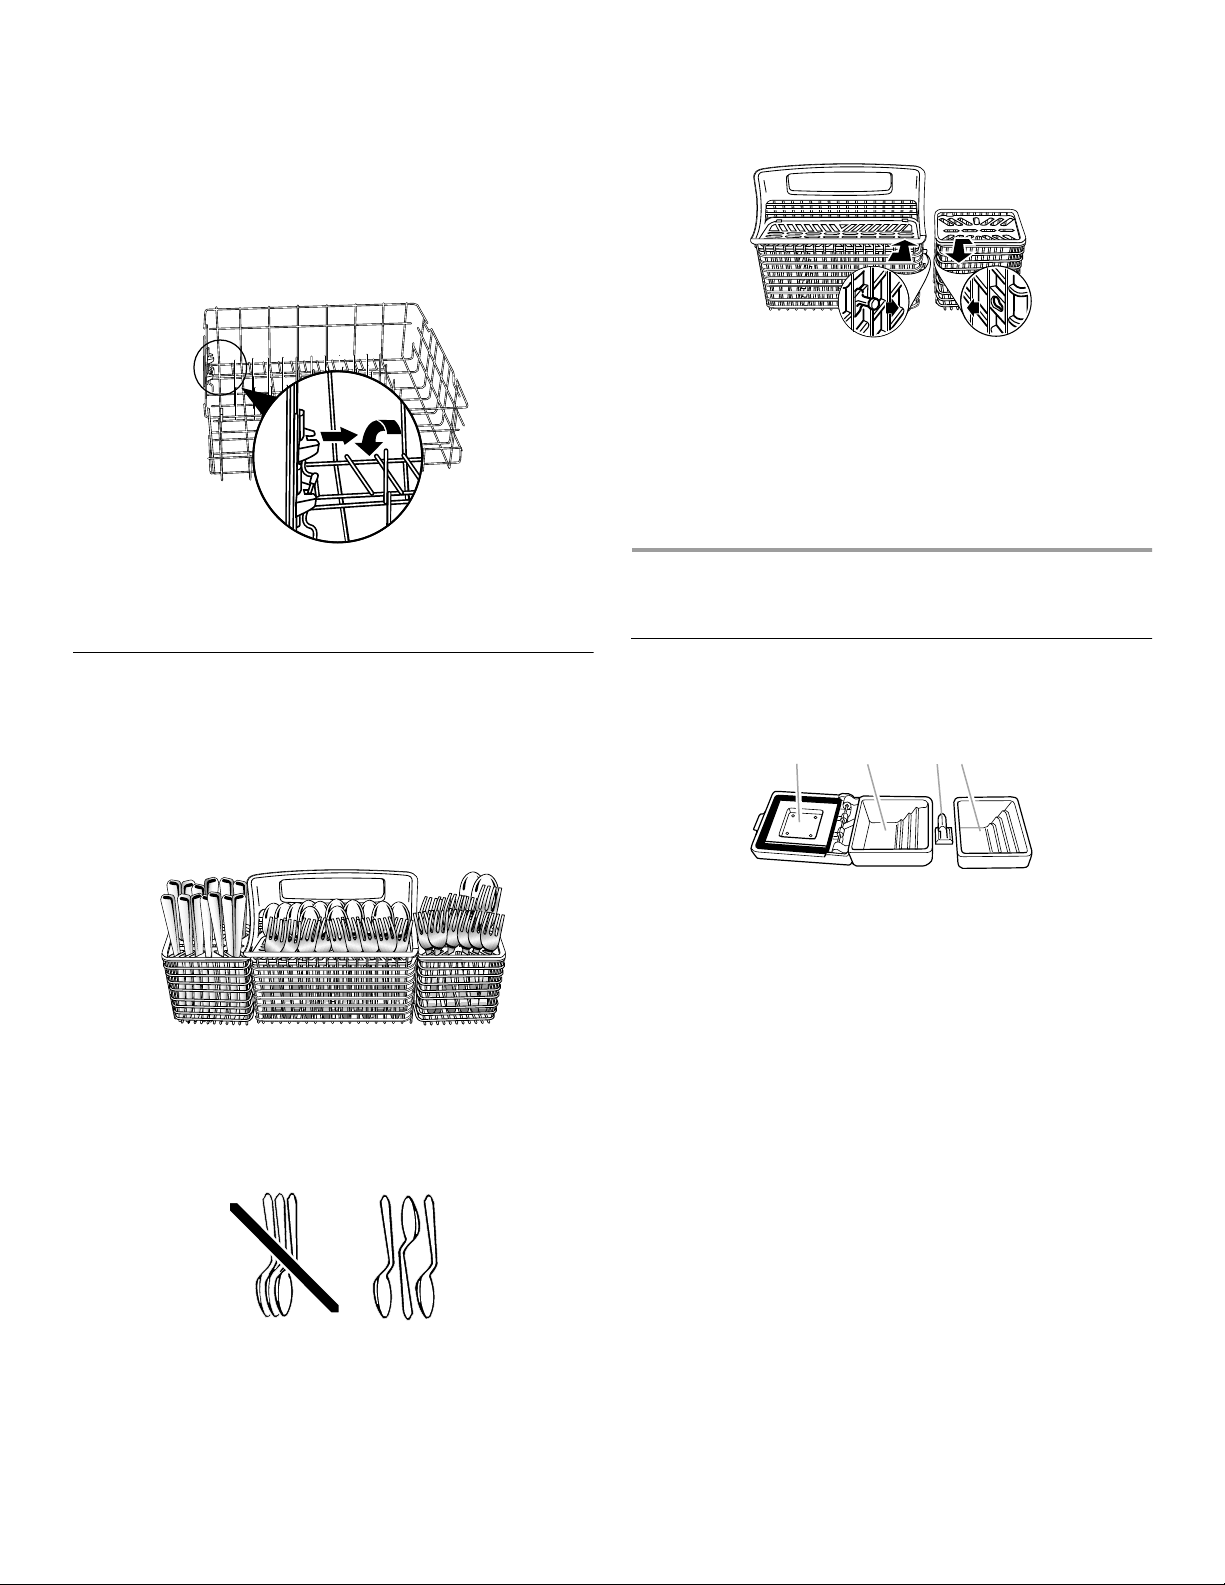
Loading the Silverware Basket
Load the silverware basket while it is in the bottom rack or take
the basket out for loading on a counter or table.
NOTE: Unload or remove the basket before unloading the racks
to avoid spilling water droplets on the silverware.
Place small items like baby bottle caps, jar lids, corn cob
■
holders, etc., in the covered section. Close the cover to hold
small items in place.
This silverware basket can be separated and placed into the
■
bottom rack in several locations. Load silverware in all
sections or just one, depending upon your load.
When covers are up, mix items in each section of the basket
■
with some pointing up and some down to avoid nesting.
Spray cannot reach nested items.
IMPORTANT: Always load sharp items (knives, skewers, etc.)
pointing down.
Detergent Dispenser
The detergent dispenser has 2 sections. The Pre-Wash section
empties detergent into the dishwasher when you close the door.
1
1. Cover
2. Main wash section
3. Cover latch
4. Pre-wash secti on
The larger Main Wash section automatically empties detergent
into the dishwasher during the main wash. (See the “Cycle
Selection Chart.”)
Use automatic dishwashing detergent only. Other detergents
■
can produce excessive suds that can overflow out of the
dishwa sher an d reduce washing performance.
Add detergent just before starting a cycle.
■
Store tightly closed detergent in a cool, dry place. Fresh
■
automatic dishwasher detergent results in better cleaning.
NOTE: Do not use detergent with a rinse cycle.
Filling the dispenser
1. If the dispenser cover is closed, open the cover by pushing
the Cover latch.
2. Fill the Main Wash section with detergent. See “How Much
Detergent to Use. ”
3. Close the Main Wash dispenser cover. Fill the Pre-Wash
section if needed.
It is normal for the cover to open partially when dispensing
detergent.
NOTE: Use both sections for cycles with 2 washes. Use only the
covered section for cyc les with 1 wash. See the “Cycle Selection
Chart” for more details.
23
4
10
How much detergent to use
The amount of detergent to use depends on the hardness of
■
your water and the type of detergent. If you use too little,
dishes won’t be clean. If you use too much in soft water,
glassware will etch.
■ Water hardness can change over a period of time. Find out
your water’s hardness by asking your local water department,
water softener company, or county extension agent.
Different brands of dishwasher detergent have different
■
amounts of phosphorous for softe ning water. If you have hard
water and use a detergent with a phosphorous content of
less than 8.7%, yo u might need t o use m ore det er gent, o r use
a detergent with a phosphorous content higher than 8.7%.
Where to fill
Rinse Aid Dispenser
Rinse aids prevent water from forming droplets that can dry as
spots or streaks. They also improve drying by allowing water to
drain off of the dishes during the final rinse by releasing a small
amount of the rinse aid into the rinse water. Your dishwasher is
designed to use a liquid rinse aid. Do not use a solid or bar-type.
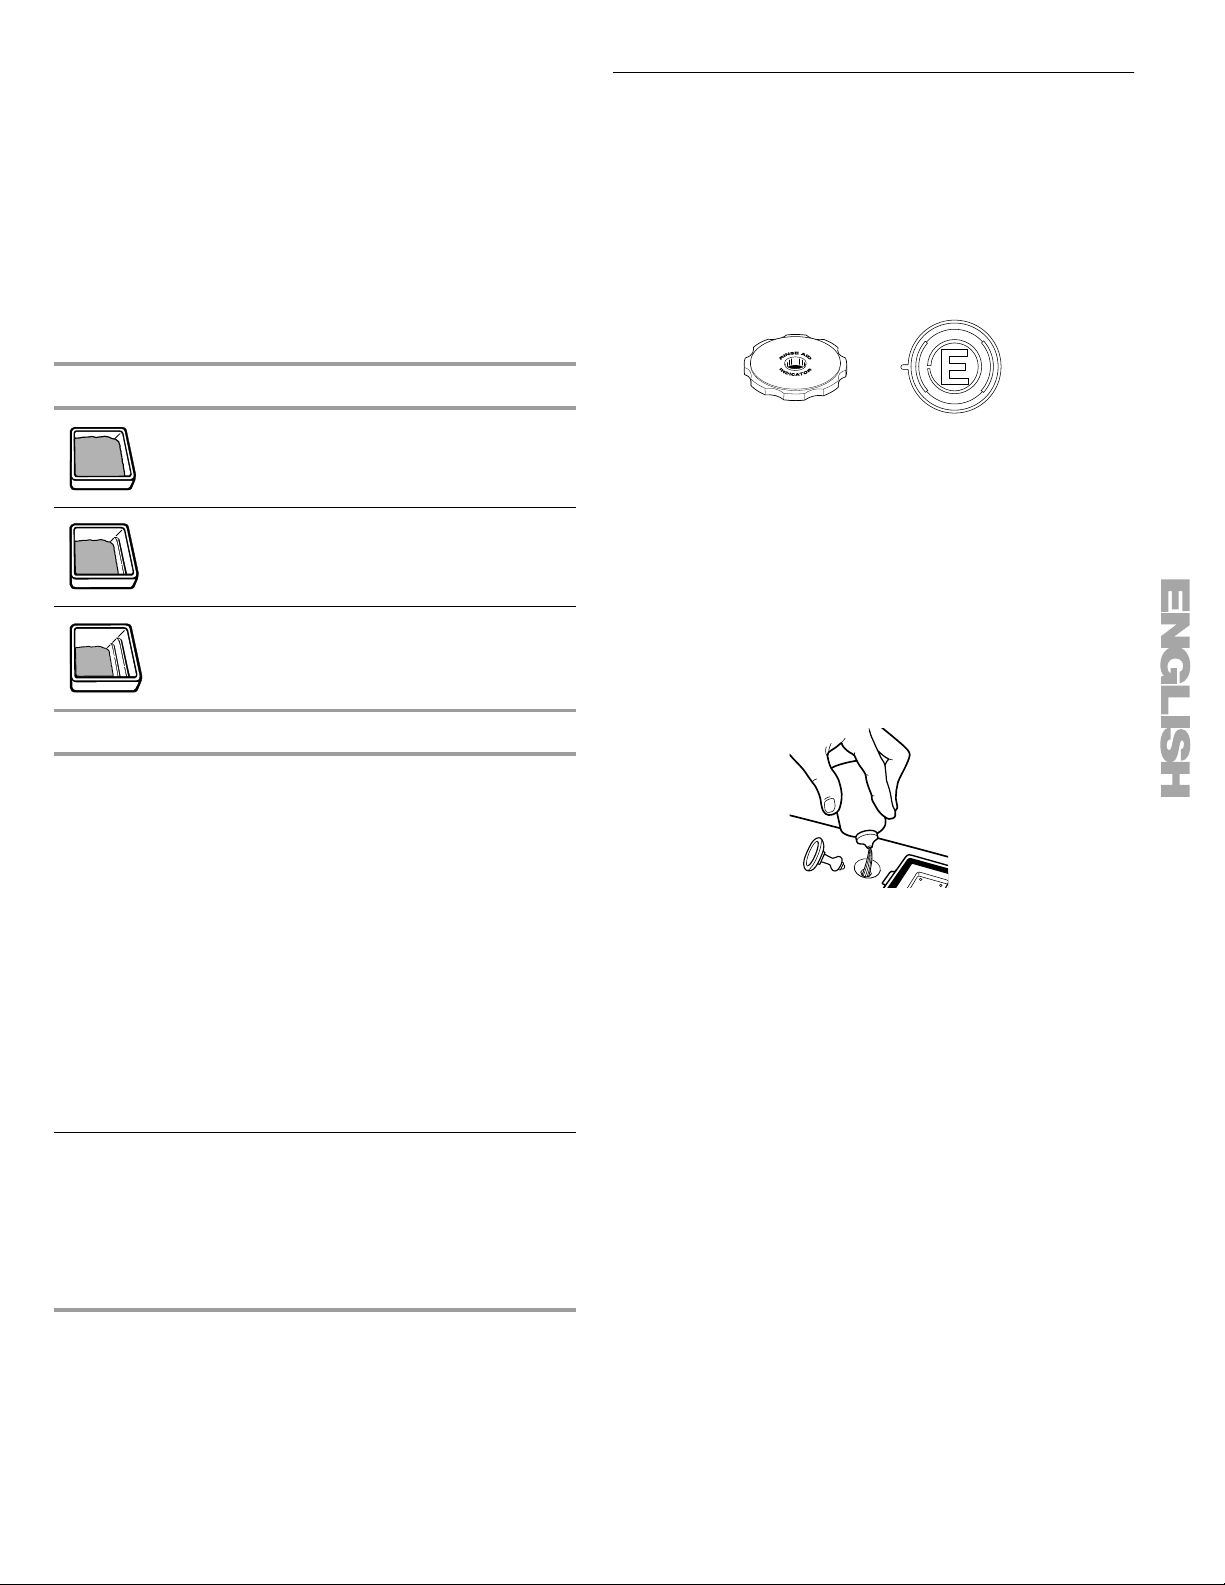
Checking the dispenser
Check the center of the Fill Indicator cap. Clear means it needs
filling.
OR
Top of 3rd step (3 tbs or 45 g)
Top of 2nd step (2 tbs or 30 g)
Top of 1st step (1 tb or 15 g)
Water Hardness Amount of Detergent
Soft to Medium
Hard Water
0 to 6 grains per
gallon
For normally soiled loads
Fill the Main Wash section to the
■
top of the 2nd step (2 tbs or 30 g)
Fill the Pre-Wash section to the
■
top of the 2nd step (2 tbs or 30 g)
if needed
Add only 1 tb or 15 g of
NOTE:
detergent to both sections if dishes
are pre-rinsed or the water is very
soft (0 to 2 grains per gallon).
For heavily soiled loads
Fill the Main Wash section to the
■
top of the 3rd step (3 tbs or 45 g)
Fill the Pre-Wash section to the
■
top of the 2nd step (2 tbs or 30 g)
Or you can remove the Fill Indicator cap. If an “E” is visible, the
dispenser is empty.
Filling the dispenser
The rinse aid dispenser holds 6 oz (175 mL) of rinse aid. Under
normal conditions, this will last for about three months. You do
not have to wait until the dispenser is empty to refill it. Try to keep
it full, but be careful not to overfill it.
Make sure the dishwasher door is completely open.
1.
Remove the Fill Indicator cap.
2.
Add rinse aid. Fill to the smallest opening in the lower part of
3.
the dispenser. Overfilling can cause the rinse aid to leak out,
and could cause oversudsing.
Clean up any spilled rinse aid with a damp cloth.
4.
Replace the Fill Indicator cap. Close tightly.
5.
Medium to Hard
Water
7 to 12 grains per
gallon
For normally soiled and
heavily soiled loads
Fill the Main Wash section to the
■
top of the 3rd step (3 tbs or 45 g)
Fill the Pre-Wash section to the
■
top of the 2nd step (2 tbs or 30 g)
if needed
Fill amounts shown are for standar d powder e d detergent.
NOTE:
Amounts may vary if you use liquid or concentrated powdered
detergent. Follow instructions on the package when using liquid
dishwasher detergent or concentrated powdered detergent.
11
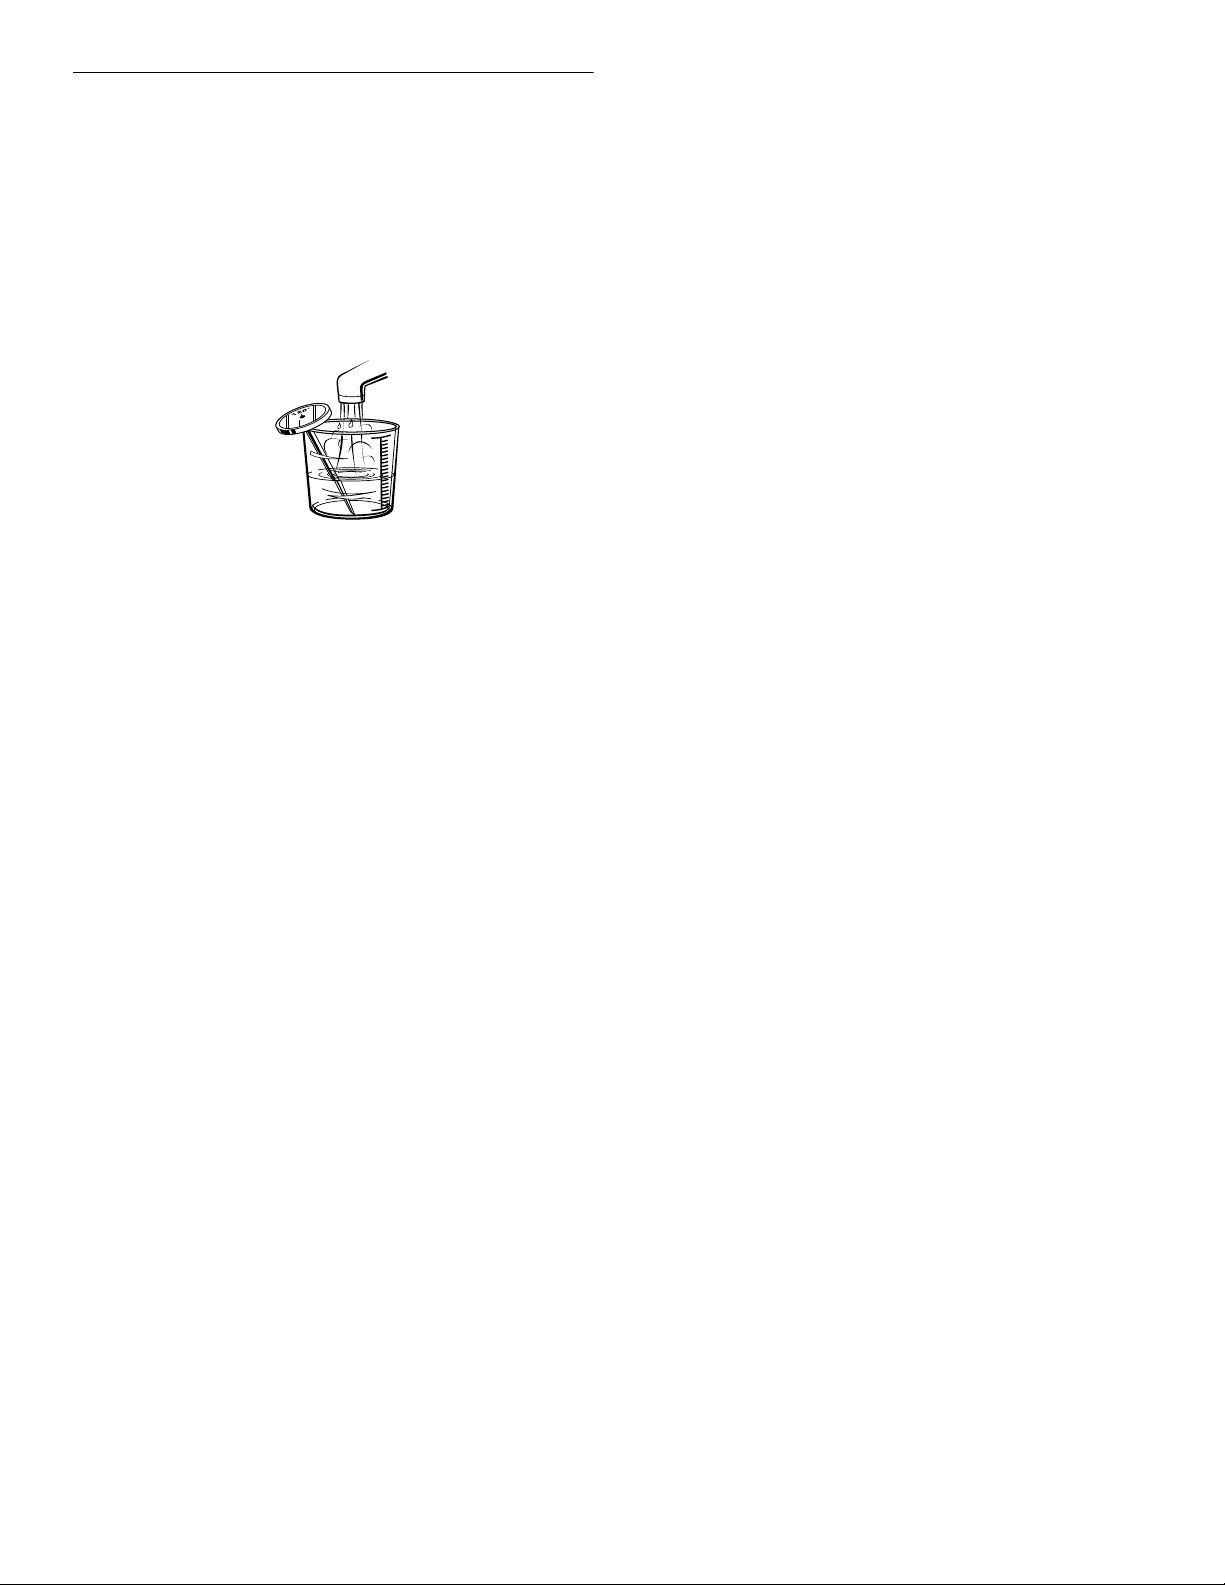
Dishwasher Efficiency Tips
Hot water dissolves and activates the dishwashing detergent.
Hot water also dissolves grease on dishes and helps glasses dry
spot-free. For best dishwashing results, water must be at least
120°F (49°C) as it enters the di shwashe r. Loads may not wash as
well if the water temperature is too low.
To check water temperature
1.
Run hot water at the faucet closest to your dishwasher for at
least 1 minute.
2.
Place a candy or meat thermometer in a glass measuring
cup.
3.
Check the temperature on the thermometer as the water is
running into the cup.
4.
If the water temperature at the faucet is below 120°F (49°C),
have a qualified person raise the water heater’s thermostat
setting.
■ To save water and energy, do not rinse dishes before putting
them into the dishwasher.
Use a low energy, quick, or short cycle whenever possible.
■
These cycles use less hot water and energy than the Normal
cycle.
Use a delay featur e (on som e mode ls) to run your dish washe r
■
during off-peak hours. Local utilities recommend avoiding
heavy usage of energy at certain times of day.
■ During the summer, run your dishwasher at night. This
reduces daytime heat buildup in the kitchen.
Use an air dry, or an energy-saving dry option whenever
■
possible. Allow longer drying times (overnight) when using
these options. Use a rinse aid to improve drying.
Use cycles or options that add extr a heat to the wash o r rinse
■
portion of the cycle only when needed.
Run your dishwasher with full loads. Run a rinse cycle after
■
meals until the dishwasher is full.
12
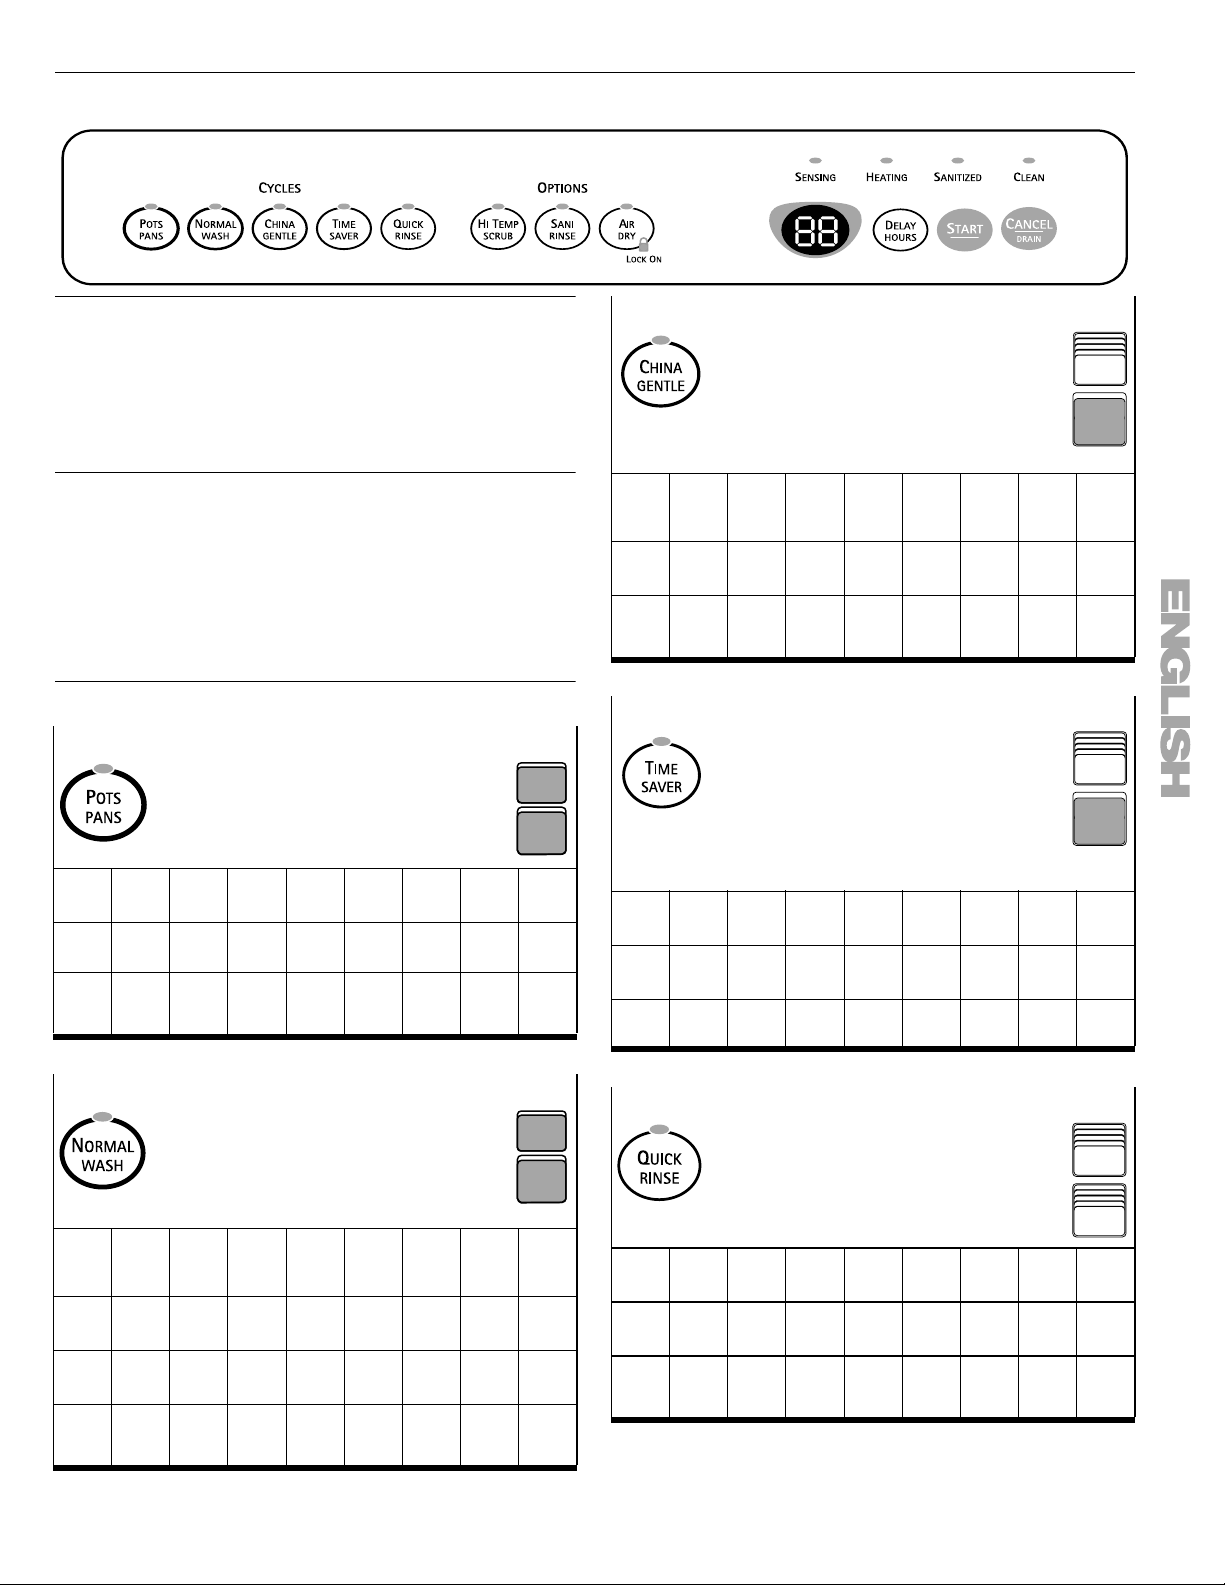
Control Panel
Cycle Selection Chart
Select the wash cycle and options desired. Or press START to
use the same cycle and options as the previous cycle.
NOTE:
If the last cycle you completed was a rinse cycle, the
dishwasher will run the last full wash cycle and options that you
selected when you press Start.
A “●” shows what steps are in each cycle.
Temperatures indicate where extra heat is added.
Water usage is shown in U.S. gallons/liters.
Cycle time includes dry time. An asterisk ( * ) by the cycle time
indicates the cycle time might be longer than the times shown
depending on the temperature of the water entering the
dishwasher. The cooler the water, the longer the cycle time. If the
water is already hot enough, the cycle time will be as shown.
Soil
Level
Sensed
Heavy
Light
Use this cycle for china
and crystal. This cycle
uses a light wash and
gentle dry. During the
heated dry, the heating
element cycles on and off.
Initial display time: 68 min
Wash Rinse Main
● ● ● ●
Rinse
Wash
Purge
● ● ●
Use
covered
detergent
dispenser
section.
Final
or
Heated
Rinse
130°F
(54°C)
130°F
(54°C)
Dry Cycle
●
cycled
●
cycled
Water
Time
Usage
(min)
(gal/L)
72* 8.6/32.7
58* 4.8/18.2
Use this cycle for hard-toclean, heavily-soiled pots,
pans, casseroles, and
regular table war e.
Initial display time: 80 min
Soil
Wash Rinse Main
Level
Sensed
●
Light
135°F
(57°C)
●
135°F
(57°C)
Heavy
Use this cycle for loads
with normal amounts of
food soil. (The energyusage label is based on
this cycle.)
Initial display time: 78 min
Wash Rinse Main
● ● ●
● ●
● ● ● ●
Soil
Level
Sensed
Heavy
Medium
Light
Wash
● ●
140°F
(60°C)
140°F
(60°C)
Wash
140°F
(60°C)
140°F
(60°C)
●
Rinse Final
Heated
Rinse
● ●
140°F
(60°C)
● ●
140°F
(60°C)
Rinse
Purge
Final
or
Heated
Rinse
● ●
140°F
(60°C)
● ●
140°F
(60°C)
140°F
(60°C)
Use both
detergent
dispenser
sections.
Dry Cycle
Time
(min)
●
●
Use both
detergent
dispenser
sections.
Dry Cycle
Time
(min)
●
●
●
Water
Usage
(gal/L)
97* 10.8/
40.9
87* 8.6/32.7
Water
Usage
(gal/L)
90* 10.8/
40.9
86* 8.6/32.7
71* 6.9/26.1
Use this cycle for prerinsed or lightly-soiled
loads. The sensor adds
water and time, if needed,
for maximum cleaning.
No drying options are
Use
covered
detergent
dispenser
section.
available for this cycle.
Initial display time: 26 min
Soil
Level
Sensed
Heavy
Light
Wash Rinse Main
● ● ● ●
Purge Final
Wash
● ● ●
Heated
Rinse
140°F
(60°C)
140°F
(60°C)
Dry Cycle
Time
(min)
30* 6.9/26.1
26* 4.8/18.2
Water
Usage
(gal/L)
Use this rinse cycle for
rinsing dishes, glasses,
and silverware that will
not be washed right awa y.
Do not use
detergent
with this
cycle.
Initial display time: 10 min
Soil
Wash Rinse Main
Level
Sensed
Heavy
Light
NOTE:
The sensor in your dishwasher monitors the soil level.
●
Wash
Rinse Final
Heated
Rinse
●
●
Dry Cycle
Time
(min)
14 4.3/16.4
10 2.2/8.2
Water
Usage
(gal/L)
Cycle time and/or wat er usa ge ca n vary f r om the nu mbe rs ab ove
as the sensor adjusts the cycle for the best wash performance.
13
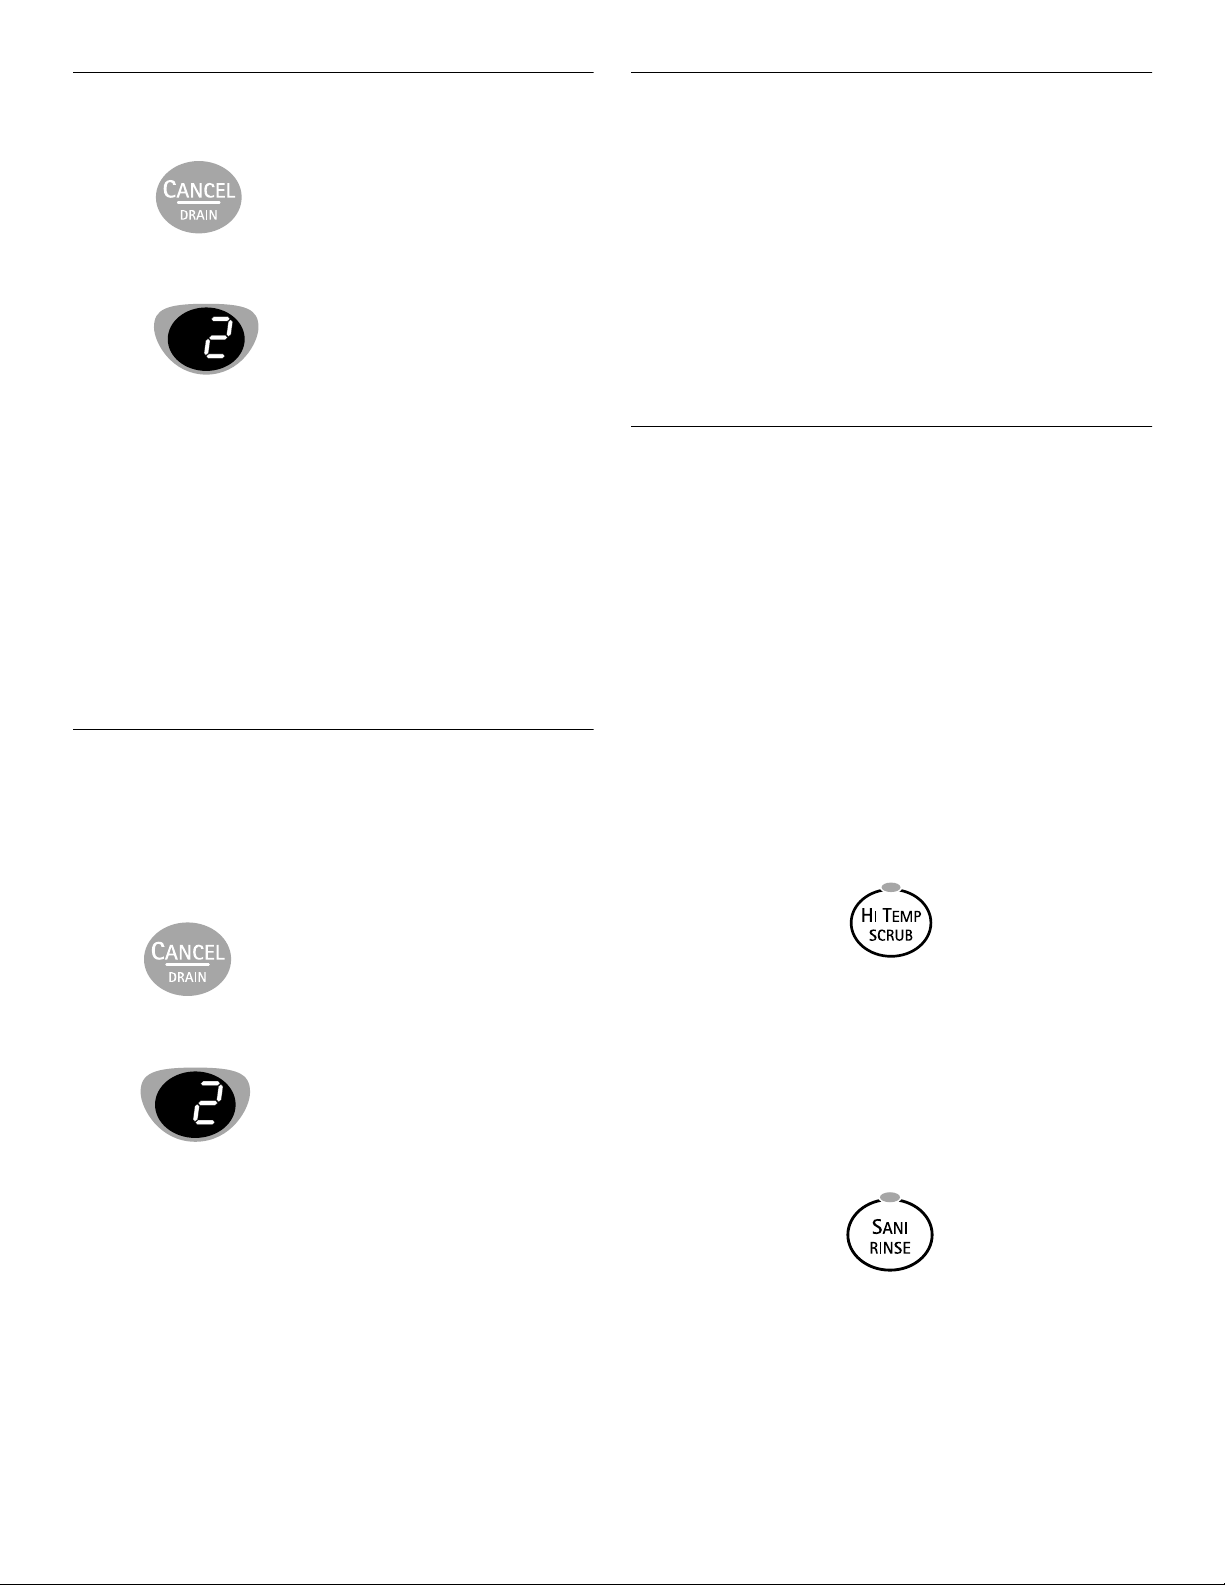
Canceling a Cycle
Anytime during a cycle, press
The dishwasher pauses for about 5 seconds. Then the
display shows
Your dishwasher starts a 2 minute drain (if needed). Let the
dishwasher drain completely. The light turns off after 2
minutes.
NOTE:
If your dishwasher does not need draining, the light turns
off. Select a new cycle and options.
To stop the drain
You can press Cancel/Drain again to stop the drain immediately.
Remember to drain the dishwasher before starting a new cycle.
NOTE:
A small amount of water remains in the dishwasher. This
is normal.
To clear the indicators
Press Cancel/Drain before starting the dishwasher to clear all
options and cycles.
Adding Items During a Cycle
You can add an item anytime before the main wash starts. Open
the door and check the detergent dispenser. If the main wash
section is still closed, you can add items.
To add items
1.
Lift up the door latch to stop the cycle. Wait for the spraying
action to stop before opening the door.
2.
Open the door. If the main wash detergent dispenser is still
closed, add the item.
3.
Close the door, but do not latc h i t. Wait 30 seconds for the air
in the dishwasher to warm up. This reduces the amount of
moisture escaping from the vent when restarting a cycle.
4.
Close the door firmly until it latches. The dishwasher resumes
the cycle after about a 5 second pause.
Option Selections
You can customize your cycles by pressing an option. If you
change your mind, press the option again to turn the option off.
Select a different option if desired.
You can change an option anytime before the selected option
begins. For example, you can press an unheated drying option
any time before drying begins.
Press START to use the same cycle and opt ion(s) as the previous
wash cycle.
NOTE:
If the last cycle you completed was a rinse cycle, when
you press Start, the dishwasher runs the last full wash cycle and
options.
Changing a Cycle or Setting
During the first 2 minutes of a cycle
Press a new cycle and/or options.
After the first 2 minutes of a cycle
1.
Press
The dishwasher pauses for about 5 seconds. Then the
display shows
Your dishwasher starts a 2 minute drain (if needed). Let the
dishwasher drain completely. The light turns off after 2
minutes.
NOTE:
If your dishwasher does not need draining, the light
turns off. Select a new cycle and options.
2.
Check the detergent dispensers. If the main wash cup has
opened and the detergent washed away, refill the cups as
needed.
3.
Close the door.
4.
Press a new cycle and/or options.
5.
Press START.
Hi Temp Scrub
Select this option to heat the water during parts of the cycle. Hi
Temp Scrub heats the water to 145ºF (63ºC) in the main wash.
Heating the water helps improve washing results. Hi Temp Scrub
is useful when loads contain baked-on food.
This option adds heat, water and wash time to the cycle.
NOTE:
Hi Temp Scrub is an option with Pots Pans and Normal
Wash.
Sani Rinse
Select this option to raise the water temperature in the final rinse
to approximately 155 F (68°C) for 10 minutes. Sani Rinse adds
heat and time to the cycle. In the Normal cycle this hightemperature rinse sanitizes your dishes and glassware in
accordance with the NSF International requirements
(#95/480/05/2480).
NOTE:
Sani Rinse is an opt ion wit h P ots Pa ns, No rmal Wash and
China Gentle.
14
Air Dry
Select this energy-saving option to dry without heat. Air drying is
useful when loads contain plastic dinnerware that may be
sensitive to high temperatures.
The dishes take longer to dry and some spotting can occur. For
best drying, use a liquid rinse aid. Some items (such as plastics)
may need towel drying.
Time Saver and Quick Rinse automatically use this
NOTE:
option. Air Dry is an option with all other cycles.
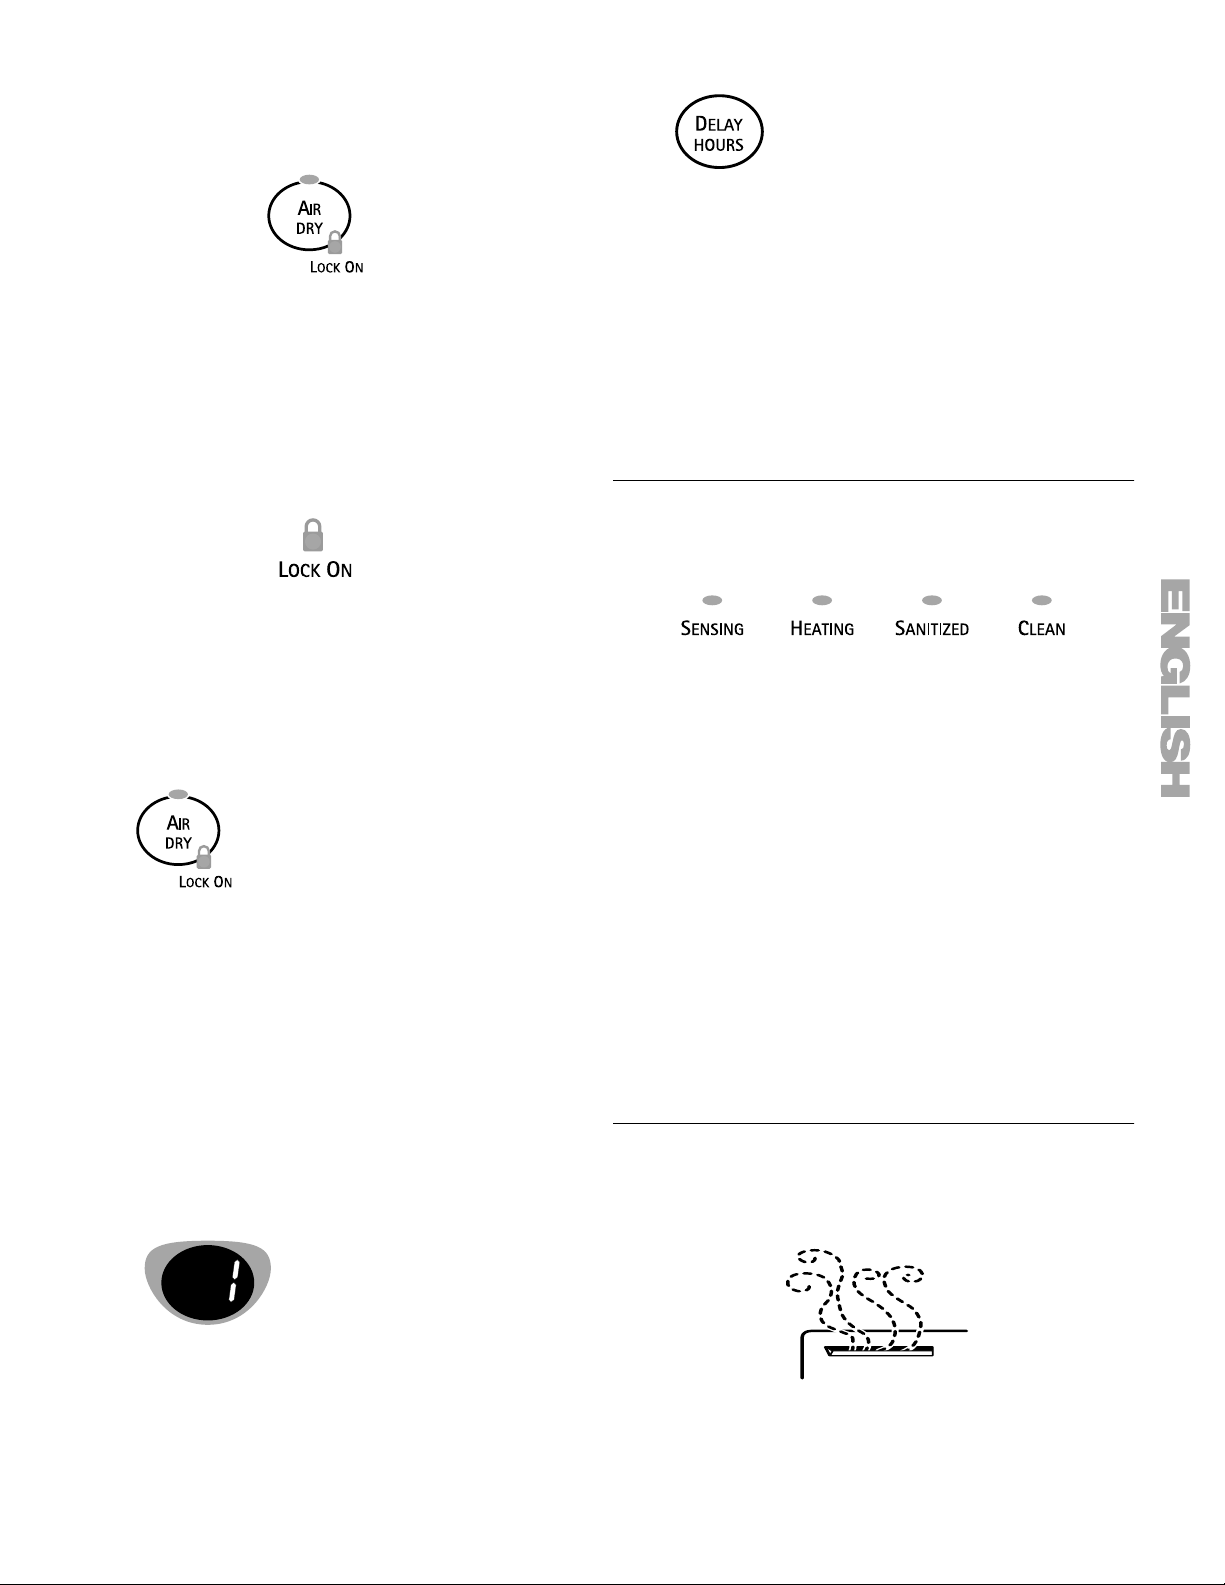
Lock On
Use the Lock to prevent your dishwasher from accidentally being
turned on. Use the Lock, also, to prevent accidental cycle or
option changes during a cycle.
When LOCK ON is lit, all buttons are disabled.
NOTES:
■
■ You can turn on the Lock while the dishwasher is running.
To turn on the Lock
Press and hold
The dishwasher door can be opened while the controls are
locked.
Repeatedly press
3.
until you see the desired hours of delay in the display.
When the delay reaches 12 hours, the delay turns off. Press
DELAY HOURS again to select a new number of delay hours.
Press START.
4.
NOTE:
Hours lights are off.
IMPORTANT:
■ Operate your dishwasher only when you are at home.
■ If your home is equipped with a water softener, do not start
To cancel the delay, press CANCEL/DRAIN until all Delay
the dishwasher during the regeneration of the softener.
Cycle Stat us Indicators
Follow the progress of your dishwasher with the Cycle Status
indicators.
Sensing
Your dishwasher senses the soil level on the dishes. Soil level
determines the length of some cycles, the amou nt of heat added
to the wash or rinse, an d the cycle needed fo r the loa d. SENSING
glows during the soil sensing parts of the cycle. Wash action
continues while sensing occurs.
for 4 seconds. LOCK ON glows.
If you press any pad while your dishwasher is locked, the light
flashes 3 times.
To tur n off the Lock
Press and hold AIR DRY for 4 seconds. The light turns off.
Delay Hours
Select this option to run yo ur dish washer at a later time o r dur ing
off-peak hour s. You can add items to t he lo ad a nytime dur ing t he
delay countdown. A ft er add ing items, close th e d oor fir mly u ntil it
latches. The delay countdown will not continue if the door is not
latched.
You can delay the start of a cycle up to 12 hours.
■
The first time you use Delay Hours, you will see
■
showing a 1 hour delay.
To delay the start
Close the door.
1.
Select a wash cycle and options.
2.
Heating
HEATING glows, and the cycle progression pauses, whenever
water is heated during a cycle. Wash o r r inse act ion co ntinu es as
the water heats.
Sanitized
If you select the Sani Rinse option, SANITIZED glows when the
Sani Rinse cycle is finished. If your dishwasher did not properly
sanitize your dishes, the light flash es at t he end of t he cycle . This
can happen if the cycle is interrupted. The light goes off when
you open the door.
Clean
CLEAN glows when a cycle is finished. The light turns off when
you open the door or press Cancel/Drain.
Drying System
During drying, you can see steam escaping through the vent at
the upper left corner of the door. This is normal as the heat dries
your dishes.
IMPORTANT:
during drying.
The vapor is hot. Do not touch the vent
15
Overfill Protection Float
The overfill protection float (in the front right corner of the
dishwasher tub) keeps the dishw asher fro m o verf illing. It mu st be
in place for the dishwasher to operate.
Material Dishwasher Safe?/Comments
Pewter, Brass,
Bronze
No
High water temperatures and detergent
can discolor or pit the finish.
Check under the float for objects that may keep the protector
from moving up or down.
W ASHING SPECIAL
ITEMS
If you have doubts about washing a particular item, check with
the manufacturer to see if it is dishwasher safe.
Material Dishwasher Safe?/Comments
Aluminum
Disposable
Aluminum
Bottles and Cans
Yes
High water temperature and detergents
can affect finish of anodized aluminum.
No
Do not wash throwaway aluminum pans
in the dishwasher. These might shift
during washing and transfer black marks
to dishes and other items.
No
Wash bottles and cans by hand. Labels
attached with glue can loosen and clog
the spray arms or pump and reduce
washing performance.
Disposable
Plastics
Plastics
Stainless Steel
Sterling Silver or
Silver Plate
Tin
Wooden Ware
No
Cannot withstand high water
temperatures and detergents.
Yes
Always check manufacturer’s
recommenda tions befo r e was hing.
Plastics vary in their capa city to withstand
high temperatures and detergents. Load
plastics in top rack only.
Yes
Run a rinse cycle if not washing
immediately. Prolo nged co ntac t w i th foo d
containing salt, vinegar, milk products , or
fruit juice can damage finish.
Yes
Run a rinse cycle if not washing
immediately. Prolo nged co ntac t w i th foo d
containing salt, acid, or sulfide (eggs,
mayonnaise, and seafood) can damage
finish.
No
Can rust.
No
Wash by hand. Always check
manufacturer’s instructions before
washing. Untreated wood can warp,
crack, or lose its finish.
Cast Iron
China/
Stoneware
Crystal
Gold
Glass
Hollow-Handle
Knives
No
Seasoning will be removed and iron will
rust.
Yes
Always check manufacturer’s
recommendations before washing.
Antique, hand-painted, or over-the-glaze
patterns may fade. Gold leaf can discolor
or fade.
Yes
Check manufacturer’s recommendations
before washing. Some types of leaded
crystal can etch with repeated washing.
No
Gold-colored flatware will discolor.
Yes
Milk glass yellows with repeated
dishwasher washing.
No
Handles of some knives are attached to
the blade with adhesives which can
loosen if washed in the dishwasher.
16

DISHWASHER CARE
Cleaning Y our Dishwasher
Cleaning the exterior
In most cases, regular use of a soft, damp cloth or sponge and a
mild detergent is all that is necessary to keep the outside of your
dishwasher looking nice and clean.
Drain Air Gap
Check the drain air gap anytime your dishwasher isn’t
draining well.
Some state or local plumbing codes require the addition of a
drain air gap between a built-in dishwasher and the home drain
system. If a drain is clogged, the drain air gap protects your
dishwasher from water backing up into it.
Cleaning the interior
Hard water minerals can cause a white film to build up on the
inside surfaces, especially just beneath the door area.
Do not
clean the dishwasher interior until it has cooled. Wear
rubber gloves.
dishwasher detergent because it may cause foaming or sudsing.
To clean interior
Make a paste with powdered dishwasher detergent on a damp
sponge and clean.
OR
Use liquid automatic dishwasher detergent and clean with a
damp sponge.
OR
See the vinegar rinse procedure in “Spotting and filmin g on
dishes” in “Troubleshooting.”
NOTE:
Run a Normal cycle with detergent after cleaning the
interior .
Do not
use any type of cleanser other than
The drain air gap is usually located on top of the sink or
countertop near the dishwasher. To order a drain air gap call
1-800-366-7278 and ask for Part Number 300096.
NOTE:
not part of your dishwasher. The warranty provided with your
dishwasher does not cover ser vice c osts dir ec tly associated wit h
the cleaning or repair of the external drain air gap.
The drain air gap is an external plumbing device that is
To clean the drain air gap
Clean the drain air gap periodically to ensure proper drainage of
your dishwasher. Follow the cleaning instructions provided by the
manufacturer. With most types, you lift off the chrome cover.
Unscrew the plastic cap. Then check for any soil buildup. Clean
if necessary.
Storing Y our Dishwasher
Storing for the summer
Protect your dishwasher during the summer months by turning
off the water supply and power supply to the dishwasher.
Winterizing your dishwasher
Protect your dishwasher and home against water damage due to
freezing water lines. If your dishwasher is left in a seasonal
dwelling or could be exposed to near freezing temperatures, have
your dishwasher winterized by authorized service personnel.
17

TROUBLESHOOTING
First try the solutions suggested here and possibly avoid
the cost of a service call...
Dishwasher is not operating properly
Dishwasher does not run or stops during a cycle
■
Is the door closed tightly and latched?
Is the right cycle selected? Refer to the “Cycle Selection
Chart.”
Is there power to the dishwasher? Has a household fuse
blown or circuit breaker tripped?
Has the motor stopped due to an overload? The motor
automatically resets itself within a few minutes. If it does not
restart, call for service.
Is the water shut-off valve (if installed) turned on?
Dishwasher will not fill
■
Is the overfill protection float able to move up and down
freely? Press down to release.
Dishwasher seems to run too long
■
Is the water supplied to the dishwasher hot enough? The
dishwasher runs longer while heating water. Refer to the
“Water Temperature Tips” section.
A delay automatically occurs in some wash and rinse cycles
until the water reaches the proper temperature.
Water remains in the dishwasher
■
Is the cycle complete?
Detergent remains in the covered section of the
■
dispenser
Is the cycle complete?
Is the detergent lump-free? Replace detergent if necessary.
Is the bottom rack installed properly with the bumpers in the
front? Refer to t he “Pa rts an d Fe atures” section. Reinstall the
rack if necessary.
White residue on the front of the access panel
■
Was too much detergent used? Refer to the “Detergent
Dispenser” section.
Is the brand of deterg ent making excess foam? Try a different
brand to reduce foaming and eliminate buildup.
Odor in the dishwasher
■
Are dishes washed only every 2 or 3 days? Run a rinse cycle
once or twice a day until you have a full load.
Does the dishwasher h ave a new p lastic smell? Run a vinegar
rinse as described in “Spo tti ng and film in g on d ishes ” later i n
this Troubleshooting guide.
Condensation on the kitchen counter (built-in models)
■
Is the dishwasher aligned with the counter top? Moisture
from the vent in the dishwasher console can form on the
counter. Refer to the Installation Instructions for more
information.
Dishes are not completely clean
Food soil left on the dishes
■
Is the dishwasher lo aded co rr ec tly? R efe r to th e “Dishwasher
Loading” section.
Is the water temperature too low? If needed, turn home
water heater up to ensure water entering dishwasher is at
least 120°F (49°C). Refer to the “Dishwasher Efficiency
Tips” section.
Did you use the correct amount of fresh detergent? Use
recomme nded dishwasher detergents only. Refer to the
“Detergent Dispenser” section. Never use less than 1 tb
(15 g) per load. Det ergent must be fr esh t o b e ef fe ctive. S tor e
detergent in a cool, dry area. Heavy soil and/or hard water
generally require extra detergent.
Is detergent caked in dispenser? Use fresh deter gent only . Do
not allow deter ge nt t o sit fo r se veral hours in a wet dispenser.
Clean dispenser when caked detergent is present.
Is the pump or spray arm clogged by labels from bottles and
cans? Remove labels before washing bottles and cans or
wash by hand.
Is the home water pressure high enough fo r proper
dishwasher filling? Home water pressure should be
20 to 120 psi (138 to 828 kPa) for proper dishwasher fill. A
booster pump on the water supply can be added if pressure
is too low.
Are high suds slowing the wash arm? Never use soap or
laundry detergents. Use recommended dishwasher
detergents only.
Spots and stains on dishes
Spotting and filming on dishes
■
Is your water hard or is there a high mineral content in your
water? Conditioning the final rinse water with a liquid rinse
aid helps eliminate spotting and filming. Keep the rinse aid
dispenser filled.
Is the water temperature too low? If needed, turn home
water heater up to ensure water entering dishwasher is at
least 120°F (49°C). Refer to the “Dishwasher Efficiency
Tips” section.
Did you use the correct amount of effective detergent? Use
recomme nded dishwasher detergents only. Refer to the
“Detergent Dispenser” section. Never use less than 1 tb (15 g)
per load. Detergent must be fresh to be effective. Store
detergent in a cool, dry area. Heavy soil and/or hard water
generally require extra detergent.
Is the home water pressure high enough fo r proper
dishwasher filling? Home water pressure sho uld be 20 to 120
psi (138 to 828 kPa) for proper dishwasher fill. A booster
pump on the water supply can be added if pressure is too
low.
NOTE:
To remove spots and film from dishes, try a white
vinegar rinse. This procedure is intended for occasional use
only. Vinegar is an acid and using it too often could damage
your dishwasher.
18
 Loading...