How it Works
Log In / Sign Up
Buy Points
How it Works
FAQ
Contact Us
Questions and Suggestions
Users
Kenmore
Loading...
#
665
66222
66227
66229
66292
2
66293
2
66299
2
66462
2
66463
2
66464
2
66469
664.4278*
2
664.7511*
664.7512*
664.9512*
665.1241*
665.1272*
665.1276
2
665.1277*
665.1278*
665.1279
2
665.1280*
665.1301
665.1304
665.1307
3
665.1309*
665.1310*
665.1312*
2
66213032K112
2
66213033K112
2
66213039K112
2
66213042K112
2
66213043K112
2
66213044K112
2
66213049K112
2
66213272K112
2
66213273K112
2
66213279K112
2
66213282K112
2
66213283K112
2
66213289K112
2
66213292K112
2
66213293K112
2
66213299K112
2
66229 - 1.1 cu. ft. 1100 Watts Countertop Microwave
6631 - 1.6 cu. Ft. Countertop Microwave
6633 - 1.2 cu. Ft. TrueCookPlus Countertop Microwave
664.4278 Series
664.4279 series
6646 - Elite 2.0 cu. Ft. Countertop Microwave
664.9511 series
664.9512 Series
664.C9511 series
664.C9512*
664.C9512 Series
665.1241 Series
665.1272 Series
665.1277 series
665.1278 series
665.1281 Series
665.1281x
665.1283 Series
665.1283x
665.1303 Series
2
665.1311x
665.12769
665.12774
665.12783
665.13042K115
3
665.13042K116
3
665.13044K116
3
665.13049K115
3
665.13122K700
665.13123K700
665.13124K700
665.13129K700
2
665 13739
665 1584991
66475113610
2
66475113611
2
66475123610
2
66475272502
66495113610
2
66495113611
2
66495113612
66495123610
66495123611
66495123612
665.11072912
665.11072913
665.11072914
665.11072922
665.11072929
665.11073322
665.11073412
665.11073912
665.11073913
665.11073914
665.11073919
665 15595792
3
Loading...
Loading...
Nothing found
66495123612
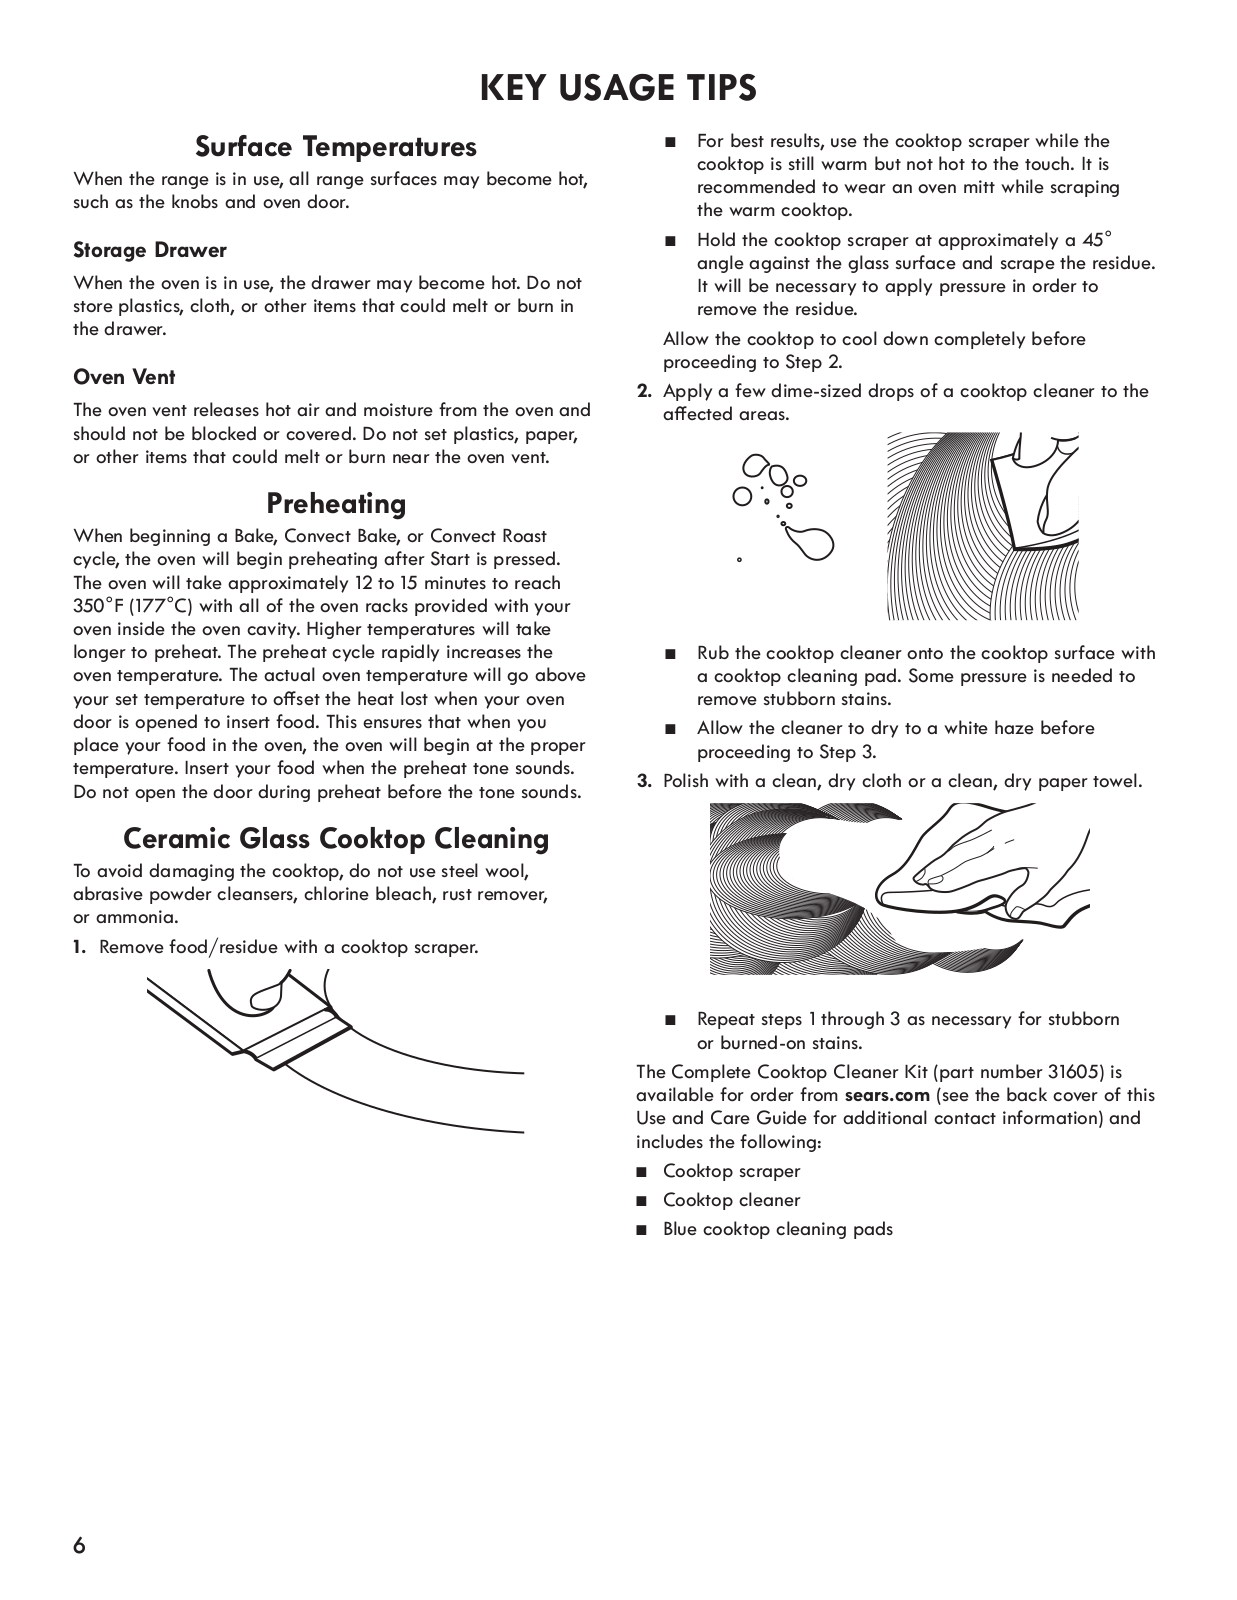
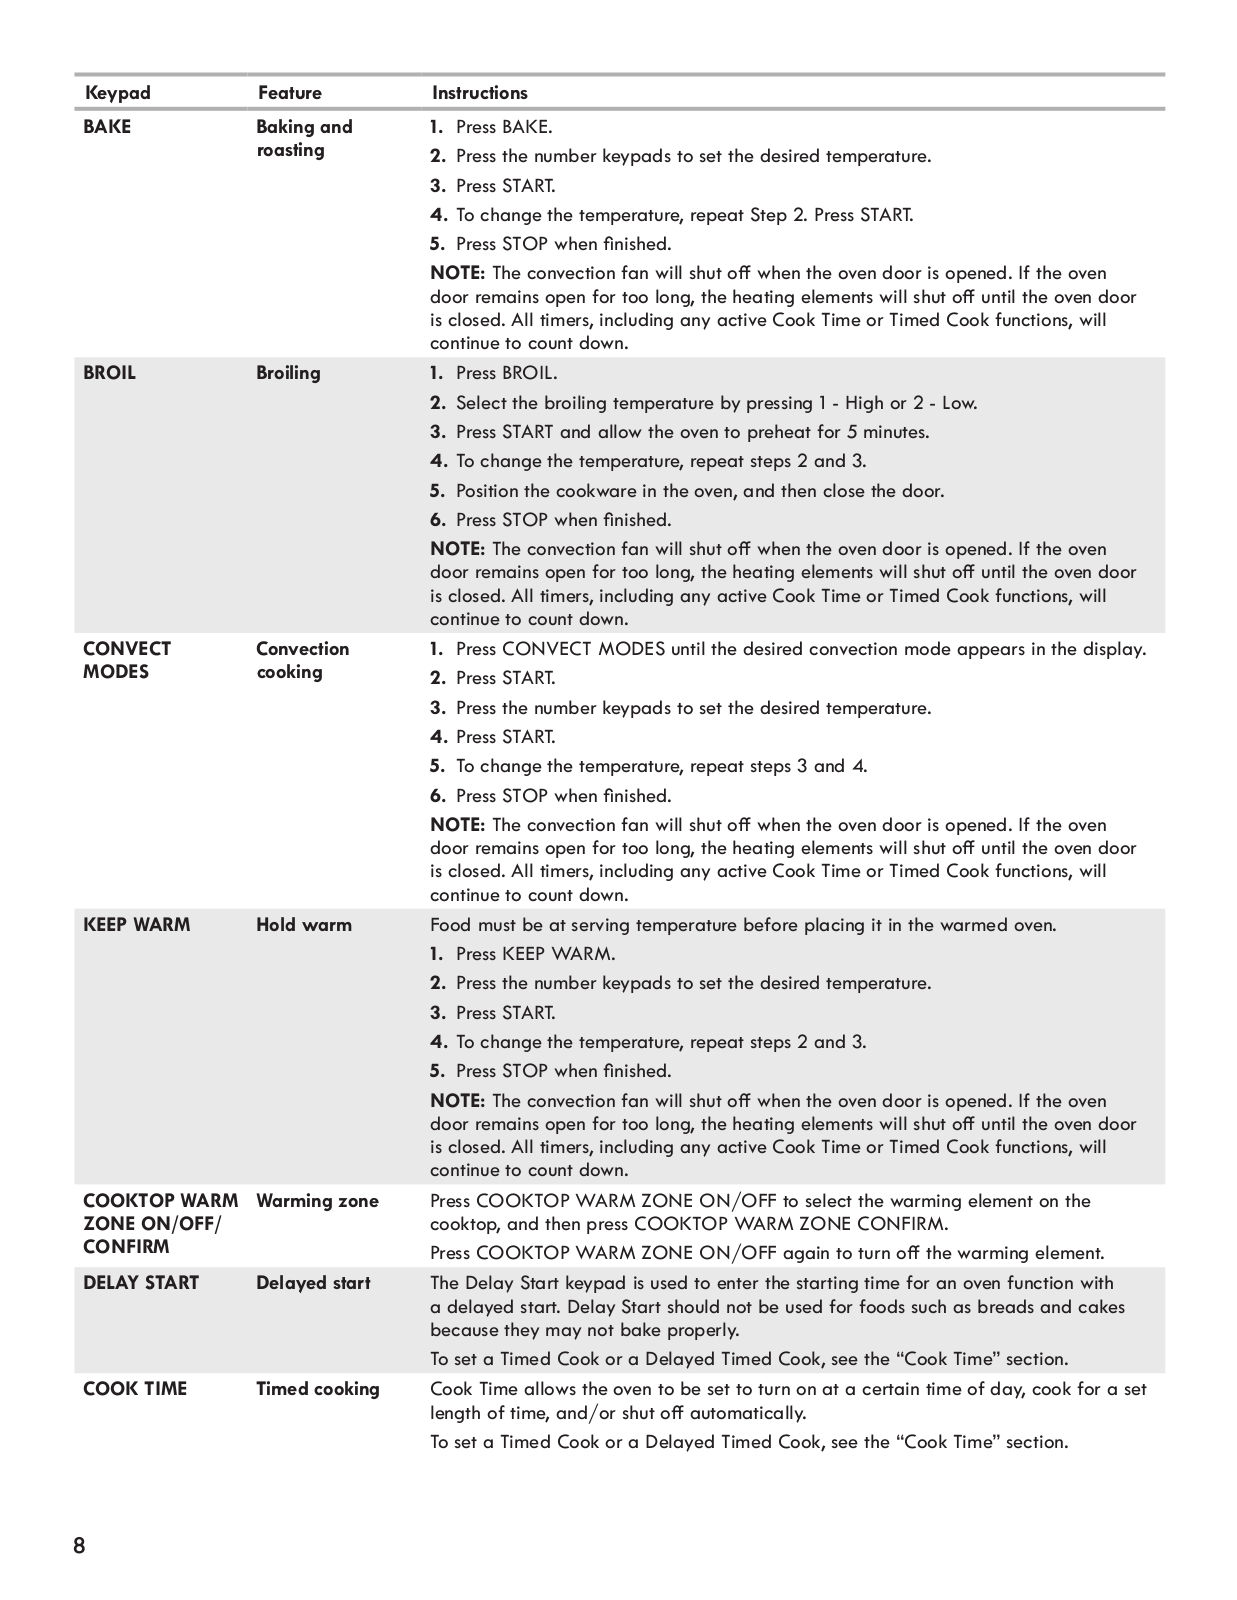
Owner’s Manual
25 pgs
2.6 Mb
0
Table of contents
Loading...
Kenmore 66495123612, 66495123611, 66495123610 Owner’s Manual
...
Kenmore Owner’s Manual
Download
Specifications and Main Features
Frequently Asked Questions
User Manual
Download
Loading...
+
17
hidden pages
Unhide
You need points to download manuals.
1 point = 1 manual.
You can buy points or you can get point for every manual you upload.
Buy points
Upload your manuals
 Loading...