How it Works
Log In / Sign Up
Buy Points
How it Works
FAQ
Contact Us
Questions and Suggestions
Users
Kenmore
Loading...
#
664.C9512*
66022
66029
66101
66102
66222
66227
66229
66292
2
66293
2
66299
2
66462
2
66463
2
66464
2
66469
664.4278*
2
664.7511*
664.7512*
664.9512*
665.1241*
665.1272*
665.1276*
665.1277*
665.1278*
665.1279*
665.1280*
665.1301
665.1307*
665.1309*
665.1310*
665.1312*
2
665.1313*
665.1315*
665.1316*
665.1317*
665.1321*
665.1322*
66117006
66213012K112
2
66213013K112
2
66213014K112
2
66213019K112
2
66213023K112
2
66213032K112
2
66213033K112
2
66213039K112
2
66213042K112
2
66213043K112
2
66213044K112
2
66213049K112
2
66213272K112
2
66213273K112
2
66213279K112
2
66213282K112
2
66213283K112
2
66213289K112
2
66213292K112
2
66213293K112
2
66213299K112
2
665.12769
665.12774
665.12783
665.13122K700
665.13129K700
665.13229
661623920
661624420
661624530
661624630
661624670
661.624921
661.626020
661.626920
655.15632000
655.15634000
655.15637000
655.16632000
655.16634000
655.16637000
655.16639000
66475113610
2
66475113611
2
66475123610
2
66475272502
66495113610
2
66495113611
2
66495113612
66495123610
66495123611
66495123612
665.11072912
665.11072913
665.11072914
665.11072922
665.11072929
665.11073322
665.11073912
665.11073913
665.11073914
665.11073919
Loading...
Loading...
Nothing found
664.9512*
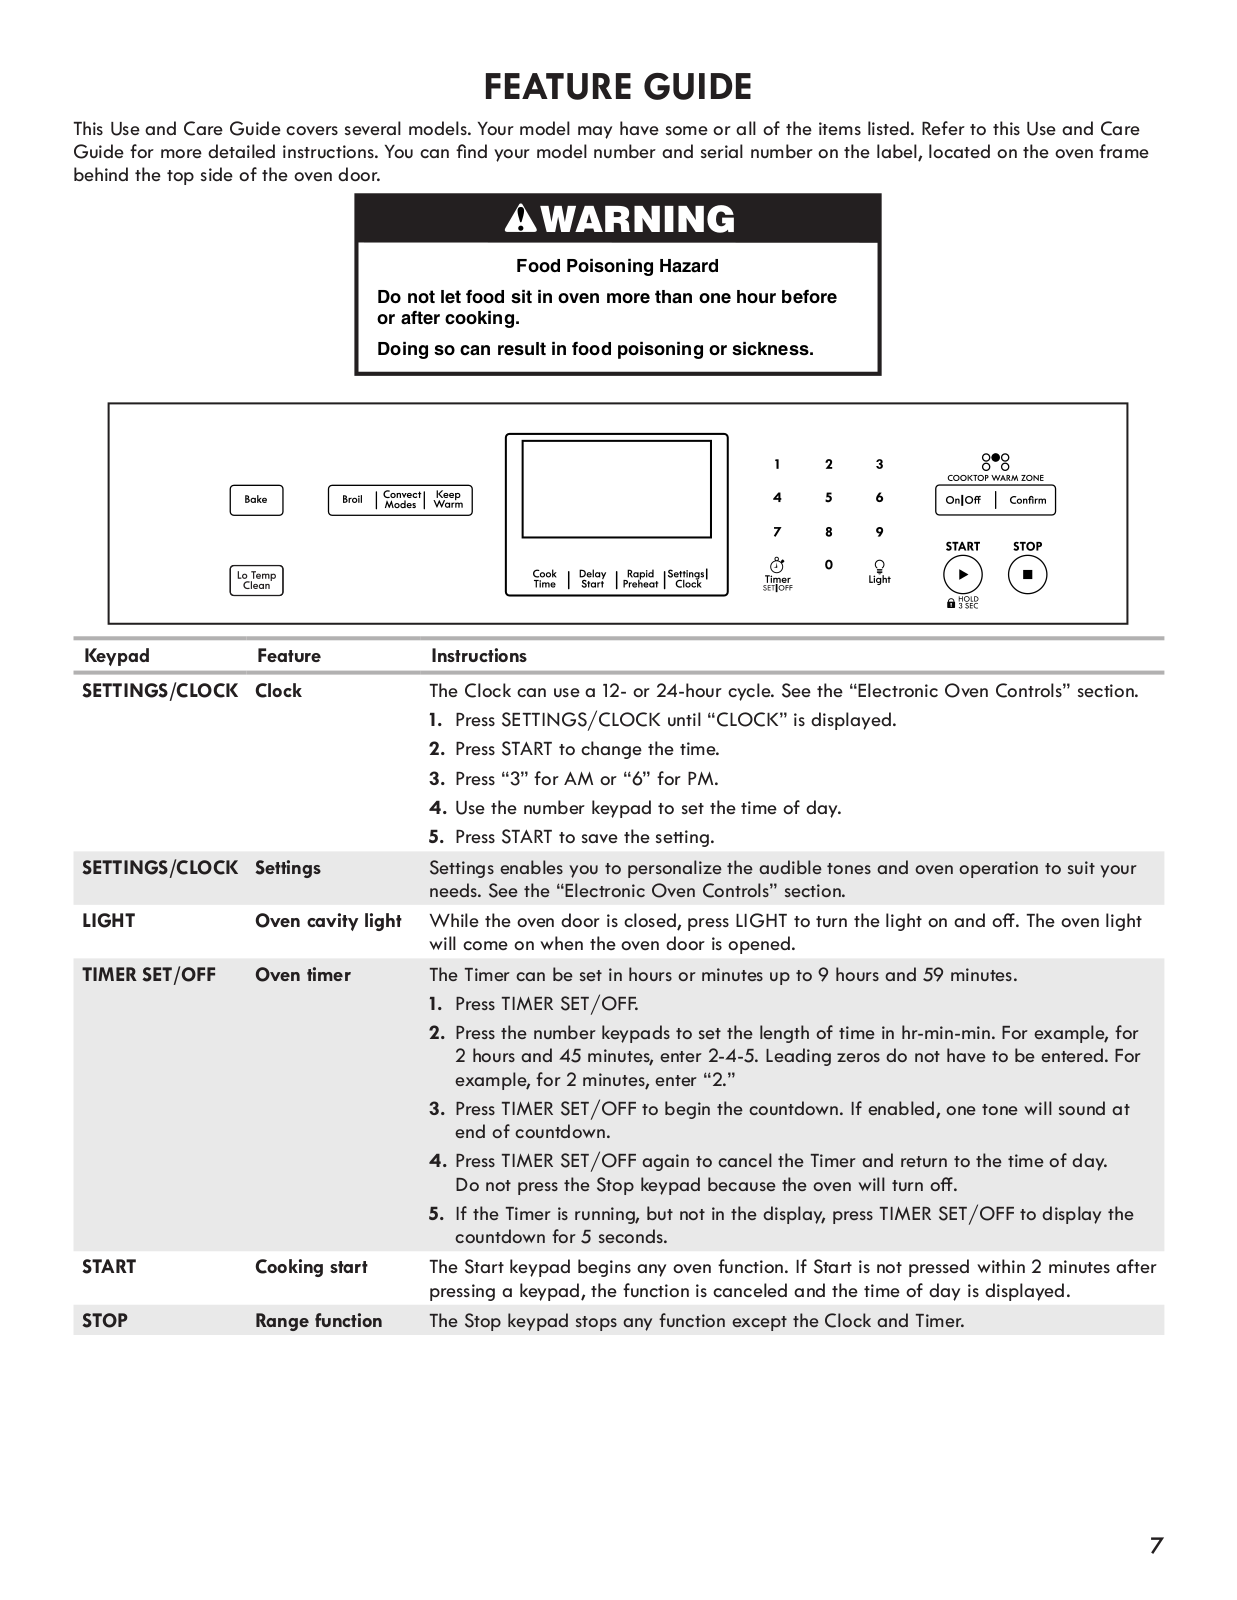
Use & Care Guide
80 pgs
7.96 Mb
0
Table of contents
Loading...
Kenmore 664.9512*, 664.C9512* Use & Care Guide
...
Kenmore Use & Care Guide
Download
Specifications and Main Features
Frequently Asked Questions
User Manual
Download
Loading...
+
56
hidden pages
Unhide
You need points to download manuals.
1 point = 1 manual.
You can buy points or you can get point for every manual you upload.
Buy points
Upload your manuals
 Loading...