

Kenmore 661624630, 661624530, 661624420, 661623920, 661624670 Owner’s Manual
MODEL NO
661.623920
661.624420
661.624530
661.624630
661.624670
!iiiiii!ii_ili_:_!
AND
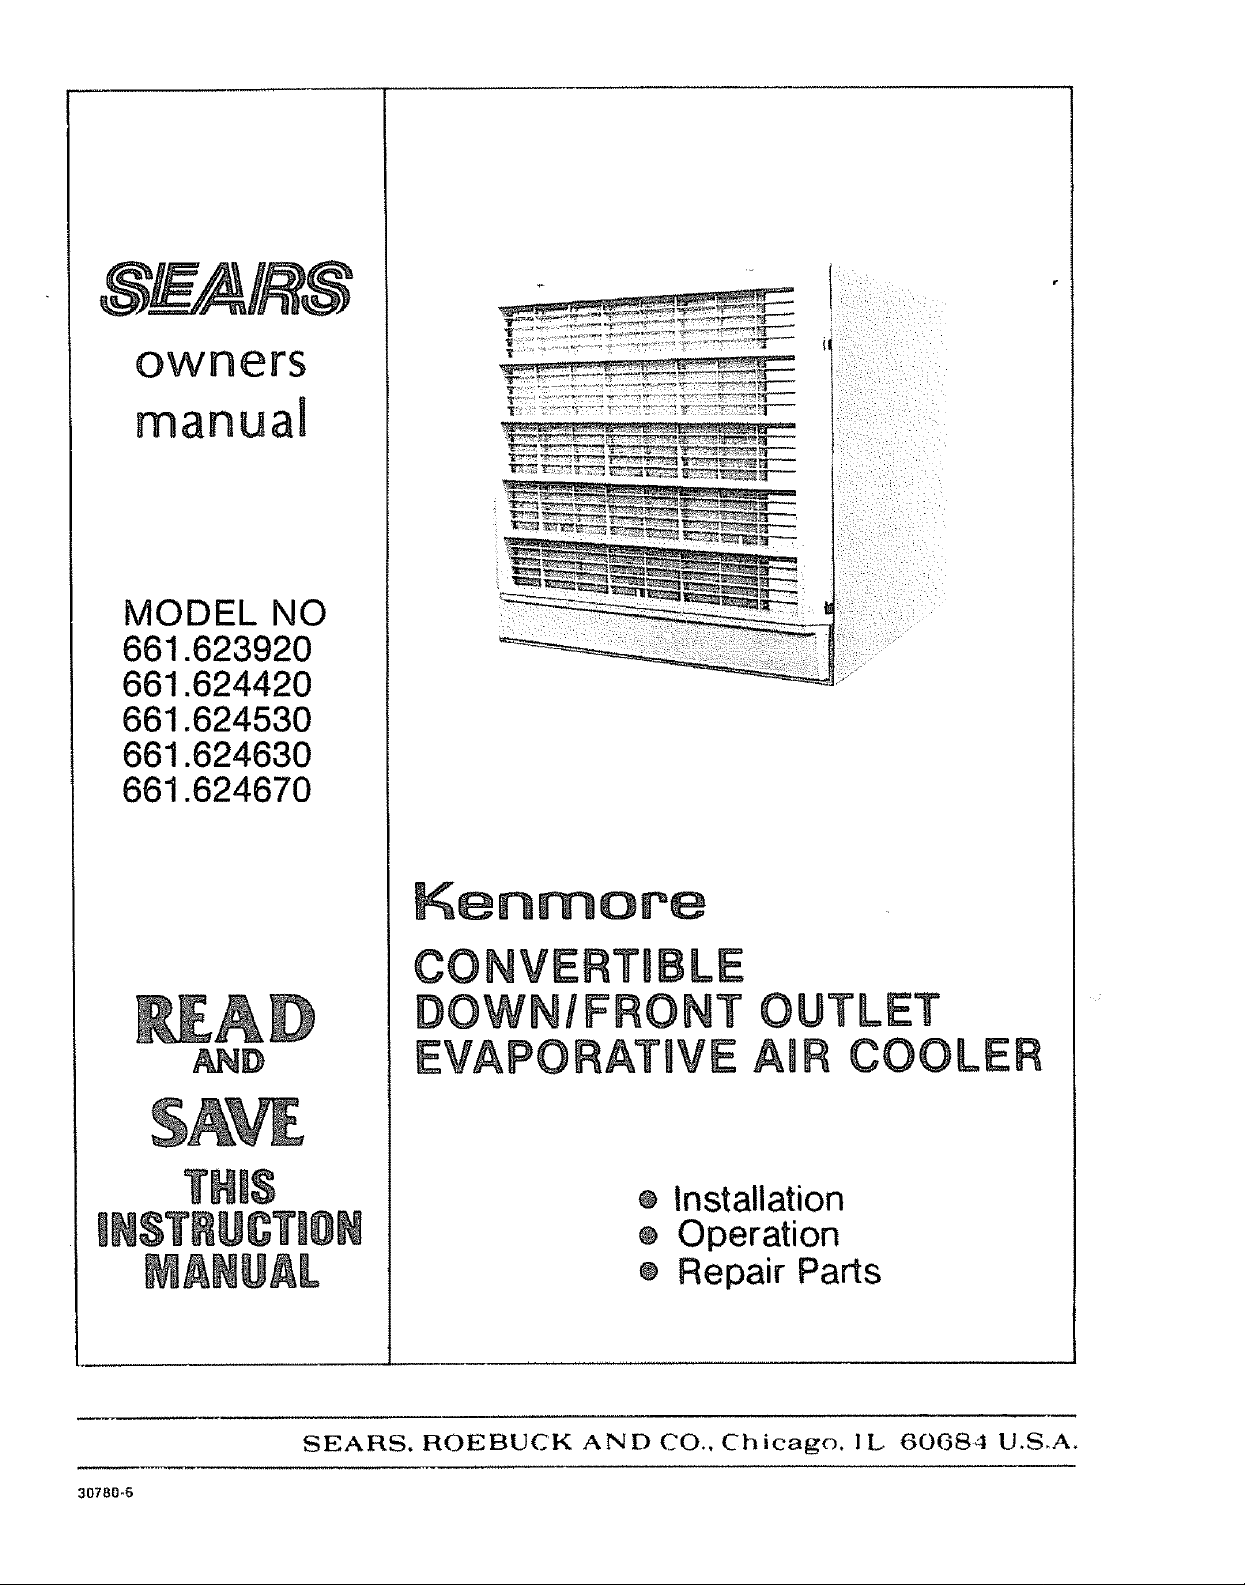
Kenmore
CONV TIBLE
DOWNIFRONT OUTLET
EVAPORATIVE AmRCOOLER
o Installation
o Operation
e Repair Parts
SEARS. ROEBUCK AND CO., Chicago. 1L 60684 U.S.A.
30780-6
CONTENTS
INSTALLATION
Tools and Supplies You Need ................ 3
Safety Rules ............ 3
Data ................................... 3
Locating Your Cooler ...................... 4
Converting to Side Outlet ................... 5
Mounting Cooler-, ............ 6
Electrical Connections .......................... 7
Final Assembly and Adjustment .......... 8
Startup Check List ......................... 9
NEED ADVICE? MISSING PARTS? * CALL MANUFACTURER FIRST:
Just dial this toil free number' 1-800-643-2742 to get facts fast:
Call Monday through Friday 8:00 A.M. to 5:00 P,M. - Central Time
Our experienced Hotline Service Representative can:
= Answer installation questions.
= Provide prompt shipment of missing parts.
YOUR SATISFACTION IS OUR NUMBER ONE PRIORITY
Reminder: The person you will be talking to is Not a SEARS store employee
and cannot handle exchanges, arrange service calls etc._ This must be handled
through you r Sears Store or Catalog Order Depar'tmer_t Th{s toll-free number
is for technical assistance only.
COOLER USE
Cooling Your Home ................... 10
Cooler Care
Spring, Summer and Fall Care ............... 11
Taking Off and Putting On Grills ............... 11
Taking Off Pad ............... 12
Cleaning .......................... 12
Putting on Pad ................. t3
Oiling ................ 13
Blower Bett Adjustment ....................... 13
REPAIR PARTS ....................... 14
FULL ONE YEAR WARRANTY ON SEARS EVAPORATIVE COOLER
One year from the date of purchase when this Kenmore Roto-Bett evaporative air cooler is installed and
maintained according to our instructions Sears will repair defects in material or workmanship free of charge
FIVE YEAR LIMITED WARRANTY
All Sears Kenmore Roto-Belt cooler cabinets and blower housings are warranted against rusting out and
becoming inoperative after one year and through five (5) yeats from the date of purchase Sears Roto-Belt cooler
water reservoirs and louvers are warranted also against leaking and deterioration due to water corrosion for the
same period of time You pay for labor
WARRANTY SERVICE IS AVAILABLE BY SIMPLY CONTACTING THE NEAREST SEARS SERVICE CENTER
THROUGHOUT THE UNITED STATES
This warranty gives you specific legal rights, and you may also have other rights which vary from state to state
SEARS, ROEBUCK AND CO., DEPT. 698/731A, SEARS TOWER, CHICAGO, IL.. 60684
Note: Replacement of filter pads is normal maintenance and is not covered in the warranty
SEARS INSTALLATION POLICY
All installation labor arranged by Sears shall be per-
formed in a ne_' workmanship manner in accordance
with generally accedpted trade practices, Further, all
ir'_staltations shall comply with all local laws, codes,
regulations and ordinances The customer shalt also be
protected, during installation, by insurance relating to
property damage, Workmen's Compensation and Pub-
lic Liability
................... i i ill i iiii, ,,ll,,i
SEARS INSTALLATION WARRANTY
In addition to arty warranty extended to you on the
Sears merchandise involved which warranty becomes
effective the date the merchandise is installed, should
the workmanship of any Sears arranged installation
prove faulty within one year, Sears w{lf, upon notice
from you, cause such faults to be corrected at no atti=
tional cost to you
BNSTALLATgON
TOOLS AND SUPPLIES YOU WiLL
NEED
e Duct, As Required (a local sheetmetal shopcan
• Pliers
o Screwdrivers
o Adjustable Wrenches
o Tubing Cutter
e 5/32 Hex Key Wrench
e Electric Drill
o Drill Bits
o Hammer
o Duct Caulking
e 10 Sheet Metal Screws
o Wiring Supplies, as Required by Local
Electrical Code
e Level
supply ducting)
o Equipment Suitable for Installing Duct Through
House Wal! or Roof
o Water Connection, Use Kit # 62527, #62528 or
#62522 Saddle Valve See page 8 (Connect
Water line) for further information explaining
the different water hook ups
o Roof Stand Kit (if cooler is roof mounted)
Cooler 66t ,623920 use 32-6256 kit
Cooler 661 624420 use 32-6256 kit
Cooler 661 624530 use 32-6257 kit
o Cooler 661 624630 use 32-6258 kit
• Cooler 66to624670 use 32-6258 kit
' o 32-6251 (5 position) Wall Switch for Either New
RULES FOR YOUR SAFETY or Existing Pump Type Cooler Wiring.
1°
TO AVOID FIRE, SHOCK, AND SERIOUS
i WARNING
PERSONAL INJURY FOLLOW THESE INSTRUCTIONS
5, Never install or service a cooler during a stor m
or high wind conditions,You could be injured o;r
lose or damage parts
6_ Never wear shoes with slick soles when you
2. The installation must conform to local codes
and utility standards,, Use the National Electric
work on a roof You may slip when you least
expect it
Code if a local code does not exisL
7. Never drain water onto a roof Water residue
3, Disconnect the electric power EVERY TIME you
work on your cooler When your hands are
inside the cooler you risk injury if the cooler is
may cause you to slip or may stain your roof
Use a drain hose to run the drain water to a rain
gutter or to a drain,
accidently turned on from inside the home
8. To avoid injury never use the cooler without
4. If you mount the cooler on your home roof
remember these safety tips:
connecting it to a house duct system or without
a sturdy mesh guard over the outlet,
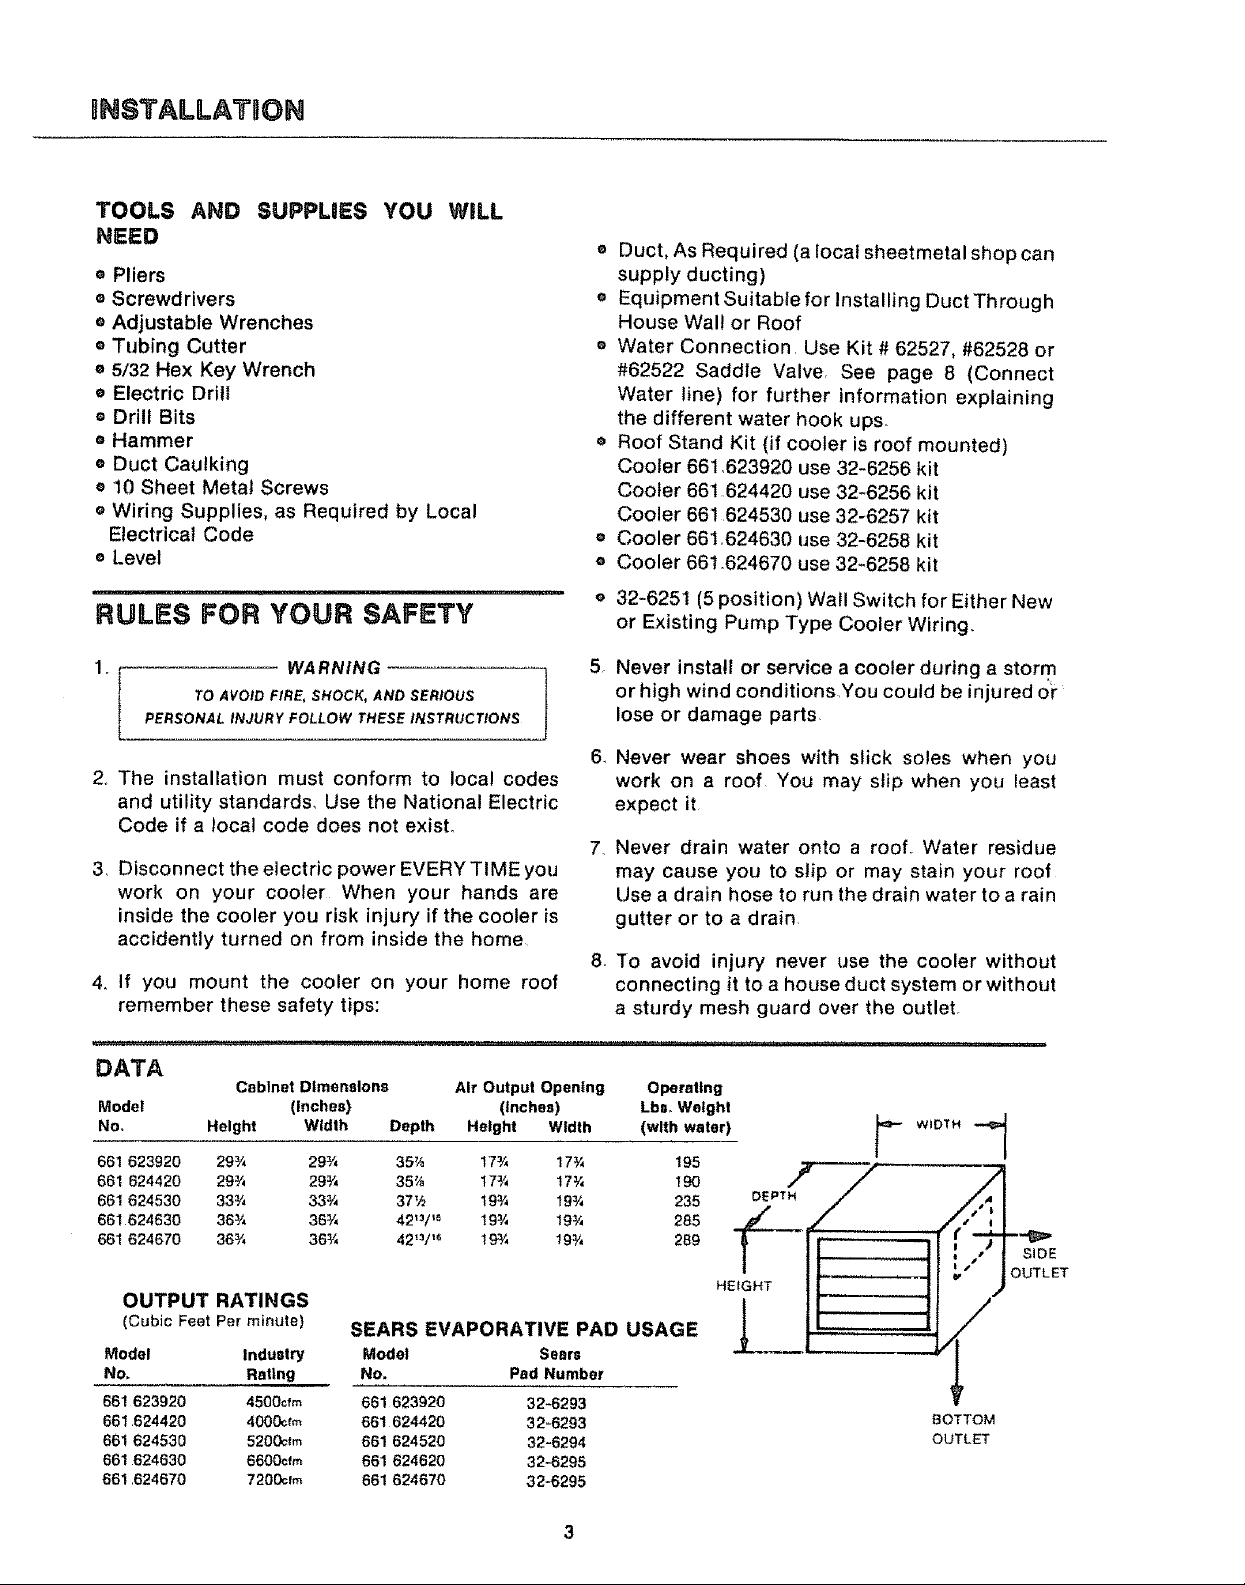
DATA
Cabinet Dimensions Air Output Opening Operating
Model (inches) (inches) LbB_Weight
No, Height Width Depth Height Width (with water)
661 623920 29¾ 29¾ 35_ 173/, 17_ 195
661 624420 29¾ 29¾ 35_ 17¾ 17¾ 190
661 624530 33¾ 33¾ 37½ t9¾ t9¾ 235
661624630 36¾ 36¾ 42_/'_ I93/, 19=,_ 285
661 624670 36¾ 363/, 42_1 _ t9_ 19¾ 289
OUTPUT RATINGS
(Cubic Feet Per minute)
Model Industry Model Sears
No, Rating No. Pad Number
661 623920 4500cf_ 661 623920 32-6293
661 624420 4000crm 661 624420 32-6293
661 624530 5200clm 661 624520 32-6294
661 624630 6600cfm 661 624620 32-6295
661 624670 7200cfm 661 624670 32-6295
SEARS EVAPORATIVE PAD USAGE
-- WIDTH
-.-_>
SIDE
OUTLET
BOTTOM
OUTLET
INSTALLATHON
LOCATING YOUR COOLER
Your cooler has been shipped ready for installa-
tion in a down discharge position. It can easily
be changed to side discharge, The cooler must
be securely fastened to a frame or pad mounL A
roof kit is available from Sears°
A duct must be attached to the cooler outlet° The
duct must be the same size as the cooler outlet°
Sudden duct size changes will decrease the out-
put of your cooler,
ROOF KIT MOUNT
SIDE DISCHARGE INTO HALL
The cooler installation must comply with local
codes, If you are not fully qualified to install a
cooler, get professional help.
Figure 1 shows locations for your cooler. Be
sure the intake louvers are clear of obstructions
and are accessable for removal. Do not locate
the cooler near vent pipes, chimneys, or exhaust
where odors or fumes may be drawn into the
house.The two drain holes on the cooler bottom
must be clear to allow overflow or drain access.
I::l::l
PH
m
l
m
ROOF KIT MOUNT
DOWN DISCHARGE INTO HALL
SiDE DISCHARGE
CONNECT TO HOUSE DUCTING
CONNECT TO HOUSE DUCTING
WIRIHG BOX (FIGURE 2)
The wiring box is inside the cooler cabinet. The
electrical supply must be connected to the
cooler power leads inside the box after the
cooler in installed. The wiring box is factory
installed for coolers used in the down air outlet
position.
AIR DISCHARGE POSITION THEWIRING BOX
IF YOU INSTALL THE COOLER IN THE SIDE
MUST BE MOVED. SEE PAGE 5.
i s.uT0FFPOWERA'rTHE'ELE€ ICA= =7
SERVICE BOX BEFORE STARTING
DOWN DISCHARGE
aNSTALLATnON
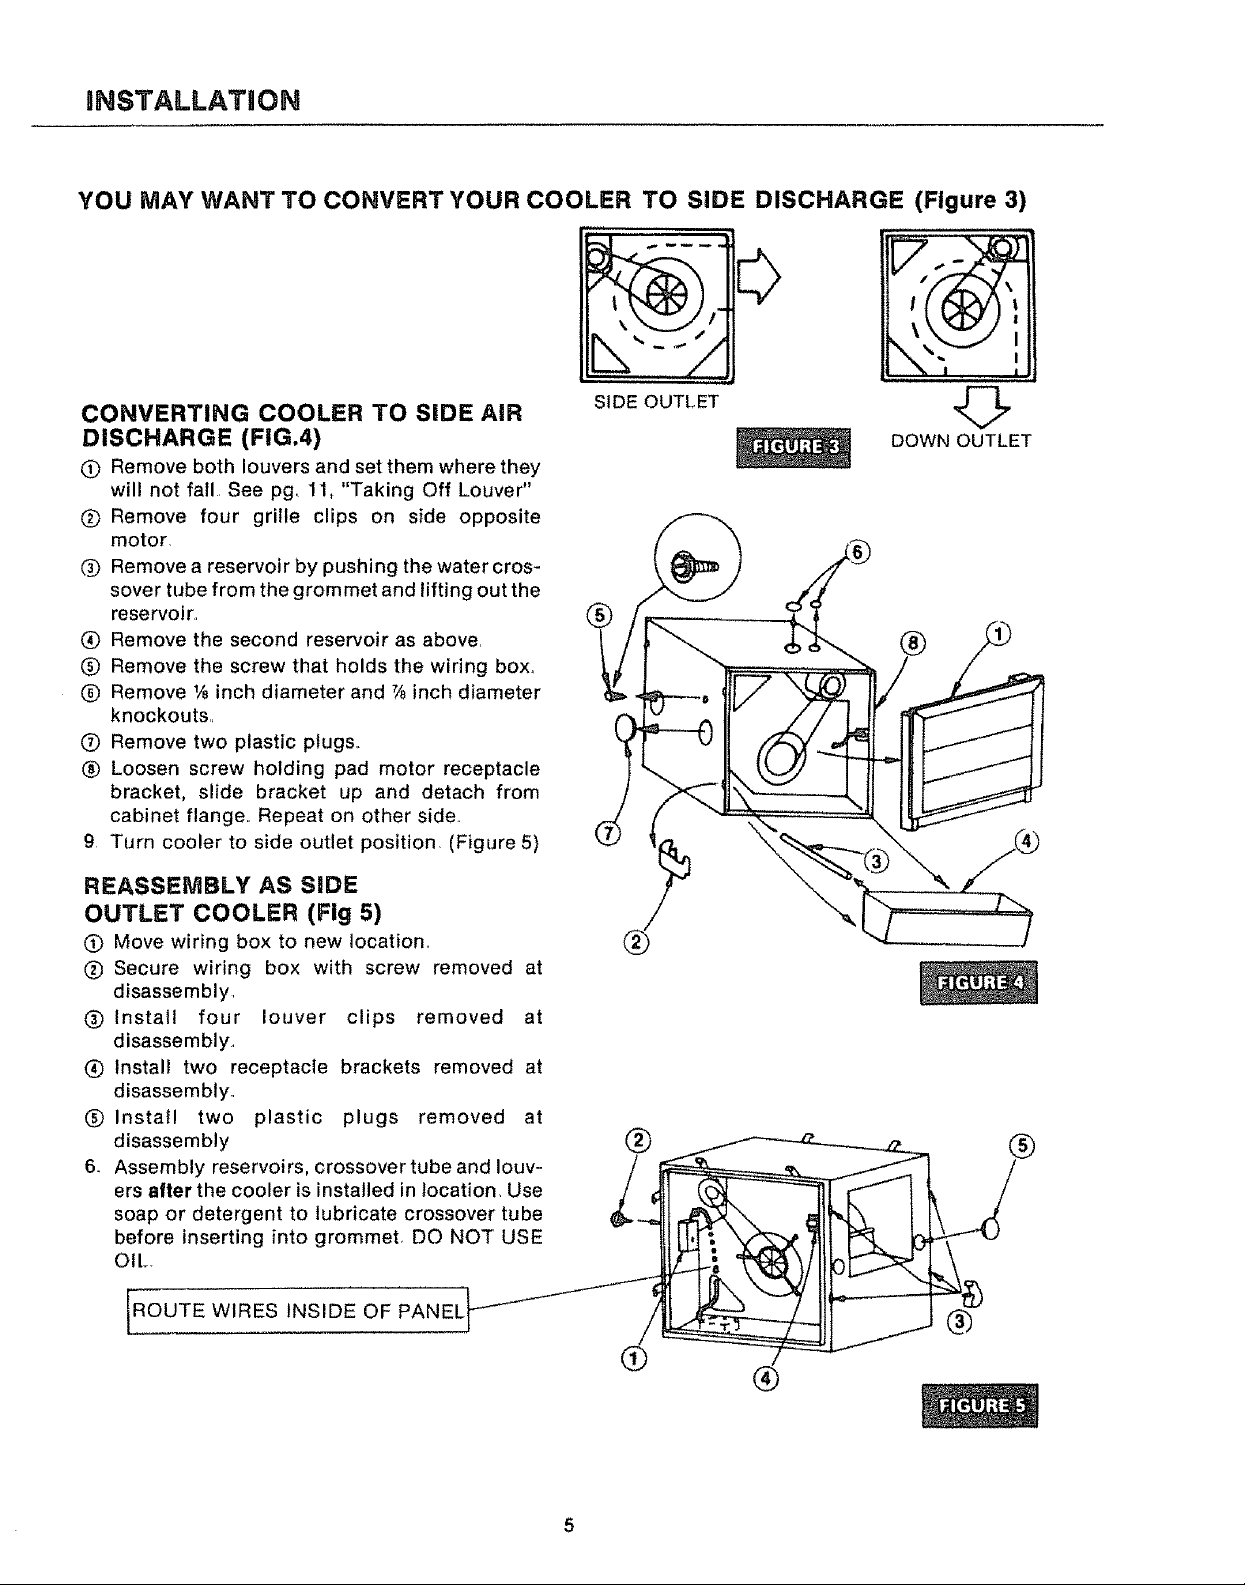
YOU MAY WANT TO CONVERT YOUR COOLER TO SIDE DISCHARGE (Figure 3)
H.n
CONVERTING COOLER TO SiDE AIR SIDEOUTLET ,_
DISCHARGE (F|G.4) DOWNOUTLET
O Remove both louvers and set them where they
will not fall See pg_ 11, "Taking Off Louver"
Q Remove four grille clips on side opposite
motor
(_ Remove a reservoir by pushing the water cros-
sover tube from the grommet and lifting out the
reservoir,, (_
(_) Remove the second reservoir as above.
Q Remove the screw that holds the wiring box,
O Remove 1,_inch diameter and _ inch diameter
knockouts,,
O Remove two plastic plugs..
® Loosen screw holding pad motor receptacle
bracket, slide bracket up and detach from
cabinet flange,. Repeat on other side,.
9 Turn cooler to side outlet position (Figure 5)
REASSEMBLY AS SIDE
OUTLET COOLER (Fig 5)
(_) Move wiring box to new location,,
O Secure wiring box with screw removed at
disassembly,
(_) Install four louver
disassembly,,
(_) Install two receptacle
disassembly°
(_ Install two plastic
disassembly
6. Assembly reservoirs, crossover tube and louv-
ers after the cooler is installed in location, Use
soap or detergent to lubricate crossover tube
before inserting into grommet, DO NOT USE
OIL.
ROUTE WIRES INSIDE OF PANEL
clips removed at
brackets removed at
plugs removed at
®
®
 Loading...