

Kenmore 58719149403, 58719149402, 58719142403, 58719142402, 58716149405 Owner’s Manual
...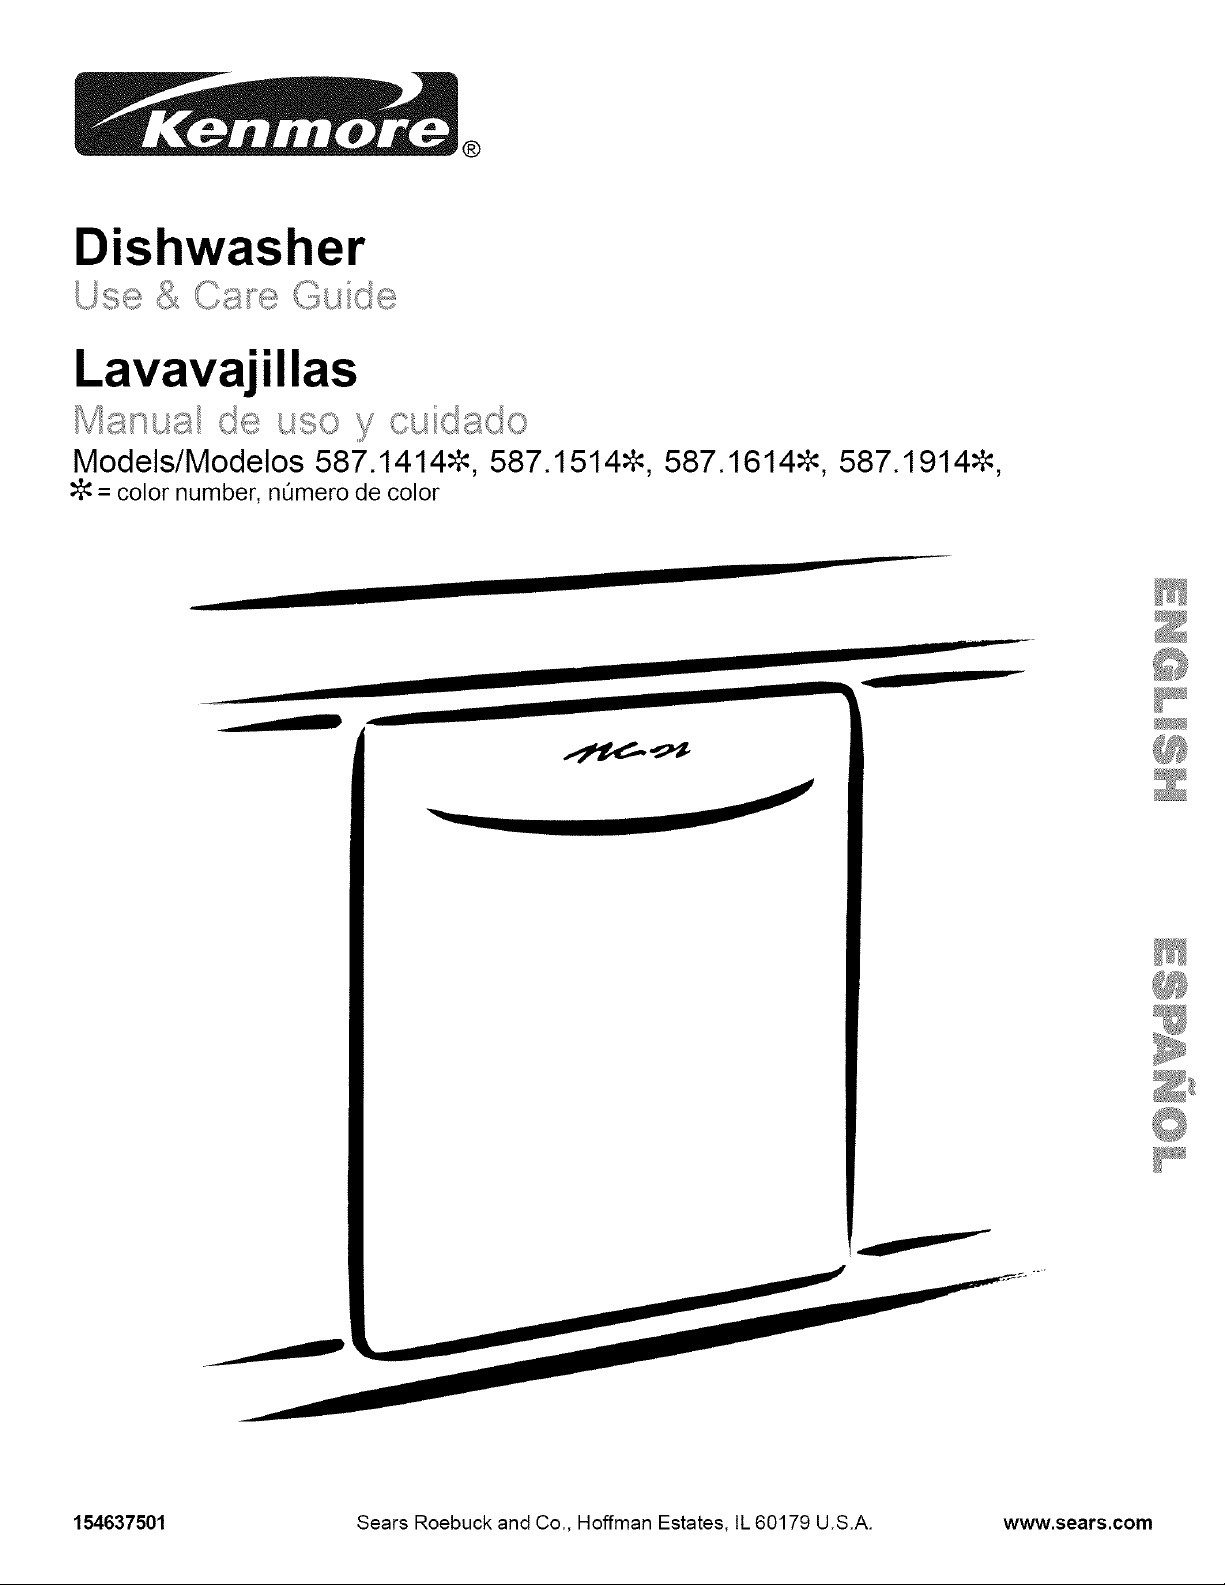
Dishwasher
Lavavajillas
®
Models/Modelos 587.1414_, 587.1514_, 587.1614_,
= color number, nOmero de color
587.1914_,
154637501 Sears Roebuck and Co., Hoffman Estates, IL 60179 U.S.A. www.sears.com
Table of Contents
Master Protection
Agreements
Warranty ....................................................................... 3
Safety Instructions ...................................................... 4
Operating Instructions ................................................ 5
Preparing and Loading Dishes .......................... 6-7
Dishwasher Dispenser and Detergents ................... 8-9
Factors Affecting Performance ................................... 9
Care and Cleaning ..................................................... 10
Solutions to Common
Dishwashing Problems ................................. 11-12
Service ........................................................ Back Cover
Congratulations on making a smart purchase. Your new
Kenmore ° product is designed and manufactured for years
of dependable operation. But like all products, it may
require preventive maintenance or repair from time to time.
That's when having a Master Protection Agreement can
save you money and aggravation.
The Master Protection Agreement also helps extend the life
of your new appliance. Here's what the Agreement*
includes:
[] Parts and labor needed to help keep products
operating properly under normal use, not just defects.
Our coverages goes well beyond the product war-
ranty. No deductibles, no functional failure excluded
from coverage - real protection.
[] Expert service by a force of more than 10,000 autho-
rized Sears service techinicians, which means
someone you can trust will be working on your product.
[] Unlimited service and nationwide service, as often as
you want us, whenever you want us.
[] "No-lemon" guarantee - replacement of your covered
product if Four or more product failures occur within
twelve months
[] Product replacement if your covered product can't be
fixed
[] Annual Preventive Maintenance Check at your
request - no extra charge
[] Fast help by phone-we call it Rapid Resolution -
phone support from a Sears representative on all
products. Think of us as a "talking owner's manual"
[] Power surge protection against electrical
damage due to power fluctuations
[] $250 Food Loss Protection annually for any food
spoilage that is the result of mechanical failure of any
covered refrigerator or freezer.
[] Rental reimbursement if repair of your covered
product takes longer than promised
[] 10% discount off the regular price of any non-covered
repair service and related installed parts.
Once you purchase the Agreement, a simple phone call is
all that it takes for you to schedule service. You can call
anytime day or night, or schedule a service
appointment online.
The Master Protection Agreement is a risk free purchase. If
you cancel for any reason during the product warranty
period, we will provide a full refund. Or, a prorated refund
anytime after the product warranty period expires. Pur-
chase your Master Protection Agreement today!
Some limitations and exclusions apply. For prices and
additional information call 1-800-827-6655.
*Coverage in Canada varies on some items. For full
details call Sears Canada at 1-800-361-6665.
Sears Installation Service
For Sears professional installation of home appliances,
garage door openers, water heaters, and major home
items, in the U.S.A. call 1-800-4-MY-HOME ®.
Kenmore Appliance Warranty
One Year Limited Warranty
When installed, operated and maintained according to
all instructions supplied with the product, if this
appliance fails due to adefect in material or
workmanship within one year from the date of purchase,
call 1-800-4-MY-HOM E® to arrange for free repair, tf
this appliance is used for other than private family
purposes, this warranty applies for only 90 days from the
date of purchase.
This warranty covers only defects in material and
workmanship. Sears will NOT pay for:
1. Expendable items that can wear out from normal use,
including but not limited to filters, belts, light bulbs, and
bags.
2. A service technician to instruct the user in correct
product installation, operation or maintenance.
3. A service technician to clean or maintain this product.
4. Damage to or failure of this product if it is not
installed, operated or maintained according to all
instructions supplied with the product.
5. Damage to or failure of this product resulting from
accident, abuse, misuse or use for other than its
intended purpose.
6. Damage to or failure of this product caused by the
use of detergents, cleaners, chemicals or utensils other
than those recommended in all instructions supplied
with the product.
7. Damage to or failure of parts or systems resulting
from unauthorized modifications made to this product.
This warranty applies only while this appliance is used in
the United States and Canada.
This warranty gives you specific legal rights, and you may
also have other rights which vary from state to state.
Sears, Roebuck and Co.,
Dept. 817WA, Hoffman Estates, IL 60179
Sears Canada Inc.
Toronto, Ontario, Canada M5B 2B8
In the space below, record your complete model number,
serial number and purchase date. You can find this
information on the model and serial number label,
located as shown in the Dishwasher Features section of
this book. Have this information available to help you
quickly obtain assistance or service when you contact
Sears concerning your appliance.
Model Number: 587.
Serial Number:
Purchase Date:
Save these instructions and your sales receipt for
future reference.
_PJ_
Disclaimer of implied warranties; limitations of
remedies
Customer's sole and exclusive remedy under this limited
warranty shall be product repair as provided
herein. Implied warranties, including warranties of
merchantability or fitness for a particular purpose, are
limited to one year or the shortest period allowed by law.
Sears shall not be liable for incidental or
consequential damages. Some states and provinces do
not allow the exclusion or limitation of incidental
or consequential damages, or limitations on the duration
of implied warranties of merchantability or fitness, so
these exclusions or limitations may not apply to you.

Important Safety Instructions
Store dishwasher detergent and rinse agents
out of the reach of children.
This symbol will help alert you to such
dangers as personal injury, burns, fire, and
electrical shock,
To reduce the risk of fire, electrical shock,
or injury when using your dishwasher,
follow basic precautions including the
following:
Read all instructions before using your
dishwasher.
Use your dishwasher only as instructed in this
Use and Care Guide,
Instructions appearing in this Use and Care
Guide are not meant to cover every possible
condition and situation that may occur. Practice
common sense and caution when installing,
operating and maintaining any appliance.
DISHWASHER MUST BE ELECTRICALLY
GROUNDED. Read the Installation Instructions
for details.
This dishwasher is designed to operate on
regular house current (120 V, 60 Hz). Use a
circuit equipped with a 15 ampere fuse or circuit
breaker. Use a 20 ampere fuse if dishwasher is
connected with a food waste disposer.
Do not operate dishwasher unless all enclosure
panels are in their proper place.
To avoid entrapment and/or suffocation, remove
door or door latch mechanism from any
dishwasher that is discarded or not in use.
Keep young children and infants away from
dishwasher when it is operating.
Do not let children abuse, sit, stand or play on
door or racks of a dishwasher.
Do not wash plastic items unless marked
"dishwasher safe" or the equivalent. Check with
manufacturer for recommendations, if not
marked. Items that are not dishwasher safe
may melt and create a potential fire hazard.
If the dishwasher drains into a food disposer,
make sure disposer is completely empty before
running dishwasher.
Disconnect electrical power to dishwasher
before servicing.
Repairs should be done by a qualified
technician.
• Do not tamper with controls.
• Do not touch the heating element during or
immediately after use.
• When loading items to be washed:
- Locate sharp items and knives so that they
are not likely to damage the door seal or
tub.
- Load sharp items and knives with the
handles up to reduce the risk of cut-type
injuries.
Under certain conditions, hydrogen gas may be
produced in a hot water system that has not
been used for 2 weeks or more. HYDROGEN
GAS IS EXPLOSIVE. If hot water system has
not been used for such a period, before using
dishwasher, turn on all hot water faucets and let
water flow from each for several minutes. This
wilt release any accumulated hydrogen gas.
HYDROGEN GAS IS FLAMMABLE. Do not
smoke or use an open flame during this time.
Do not store or use combustible materials,
gasoline or other flammable vapors and liquids
in the vicinity of this or any other appliance.
Use only detergents and rinse agents
recommended for use in a dishwasher.
SAVE THESE
INSTRUCTIONS
Printed in U.S.A.
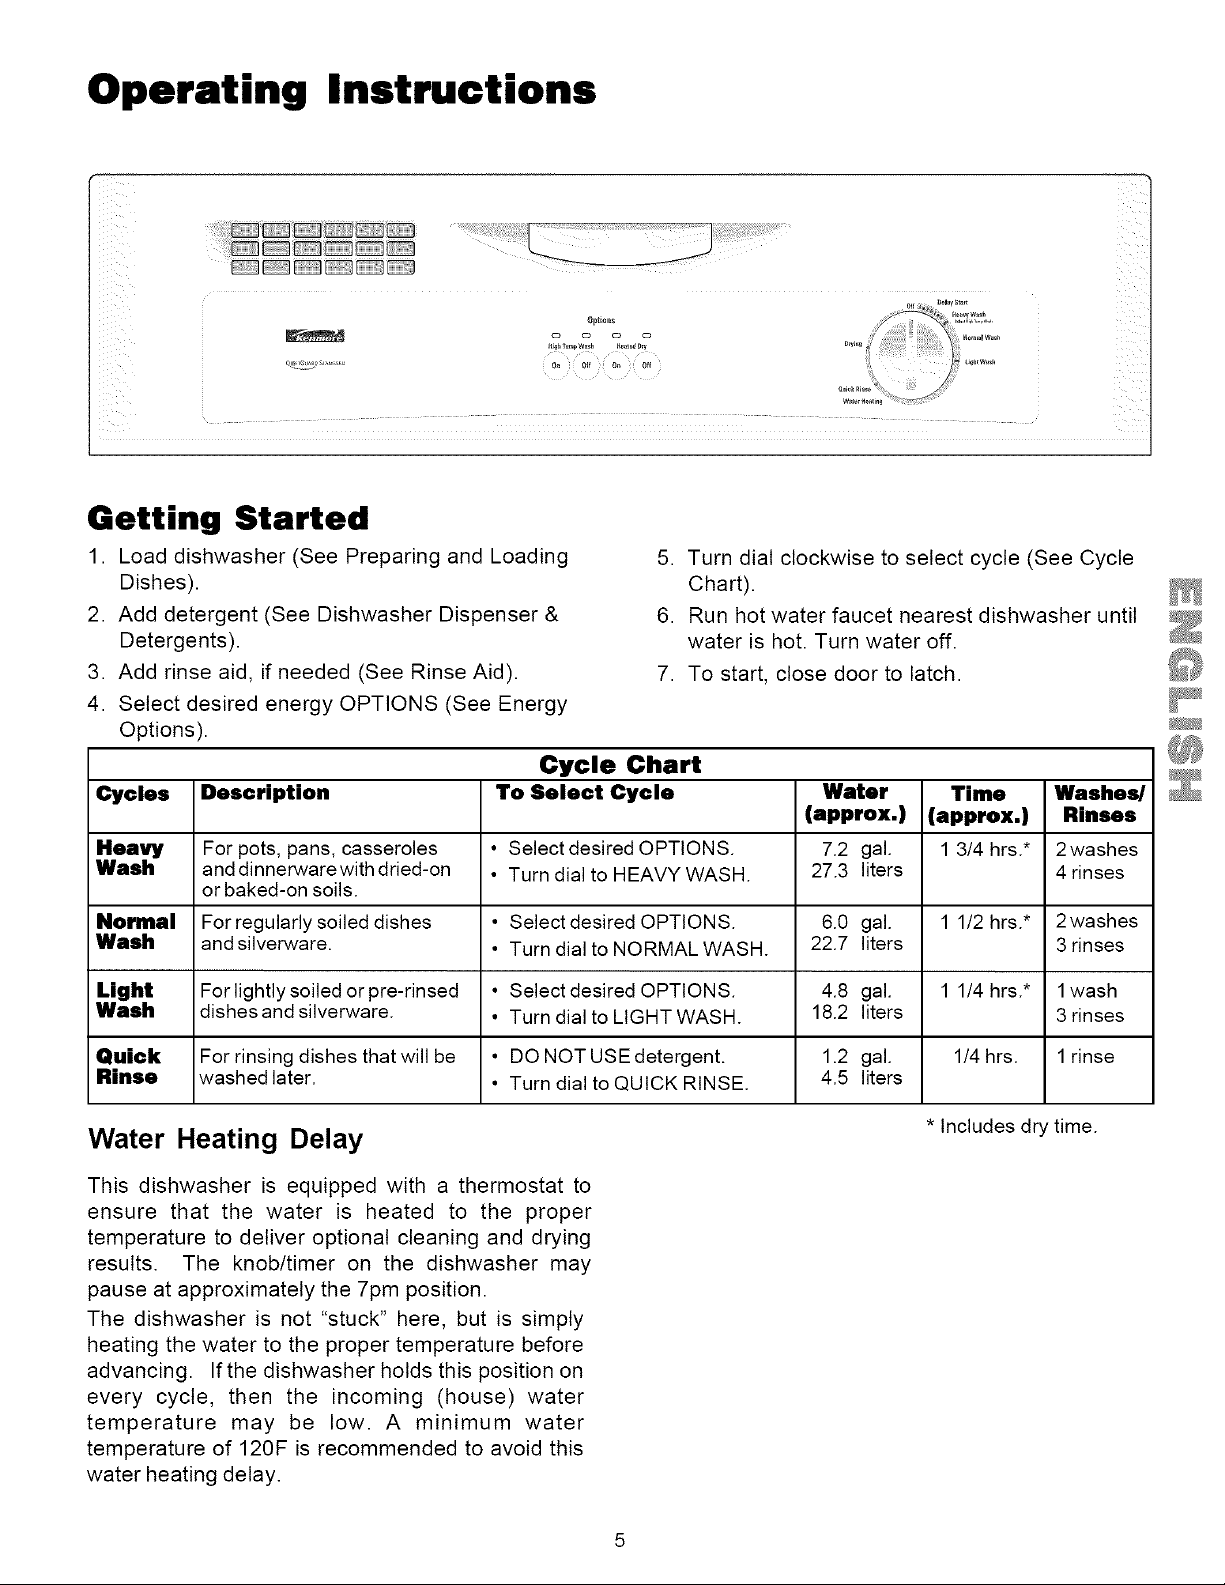
Operating Instructions
" 7
Getting Started
1 Load dishwasher (See Preparing and Loading
Dishes)
2. Add detergent (See Dishwasher Dispenser &
Detergents).
3. Add rinse aid, if needed (See Rinse Aid).
4. Select desired energy OPTIONS (See Energy
Options).
5. Turn dial clockwise to select cycle (See Cycle
Chart).
6. Run hot water faucet nearest dishwasher until
water is hot. Turn water off.
7. To start, close door to latch.
Cycle Chart
Cycles Description To Select Cycle Water Time Washes/
(approx.) (approx.) Rinses
Heavy For pots, pans, casseroles • Select desired OPTIONS. 7.2 gal. 1 3/4 hrs.* 2washes
Wash and dinnerwarewith dried-on • Turn dial to HEAVY WASH. 27.3 liters 4 rinses
Nornlal For regularly soiled dishes • Select desired OPTIONS. 6.0 gal. 1 1/2 hrs.* 2washes
Wash and silverware. • Turn dial to NORMAL WASH. 22.7 liters 3 rinses
Light For lightly soiled orpre-rinsed • Select desired OPTIONS. 4.8 gal. 1 1/4 hrs.* 1wash
Wash dishes and silverware. • Turn dial to LIGHT WASH. 18.2 liters 3 rinses
Quick For rinsing dishes that will be • DO NOT USE detergent. 1.2 gal. 1/4hrs. 1rinse
Rinse washed later. • Turn dial to QUICK RINSE. 4.5 liters
or baked-on soils.
Water Heating Delay * Includes dry time.
This dishwasher is equipped with a thermostat to
ensure that the water is heated to the proper
temperature to deliver optional cleaning and drying
results. The knob/timer on the dishwasher may
pause at approximately the 7pm position.
The dishwasher is not "stuck" here, but is simply
heating the water to the proper temperature before
advancing. If the dishwasher holds this position on
every cycle, then the incoming (house) water
temperature may be low. A minimum water
temperature of 120F is recommended to avoid this
water heating delay.
Preparing and Loading Dishes
Energy Options
Heated Dry Option
The Heated Dry option in combination with rinse aid
will give you excellent drying results. The energy to
use Heated Dry cost pennies per cycle. You may
turn offthe Heated Dry option, however you will have
items in your dishload that will not by dry at the end
of the cycle.
With either option, you may see water vapor
coming from vent during drying portion of cycle.
The drying option may be changed at any time
during the cycle and affects only the drying period.
High Temp Wash Option
When HIGH TEMP WASH ON option is selected,
the dishwasher heats the water in the main wash
to approximately 140°F (60°C). Wash action will
continue but timer will not advance until proper
temperature is reached. The hotter water provided
by this option helps activate dishwasher detergent
to clean food grease and soil from dishes. HIGH
TEMP WASH ON option can be used with any
cycle except QUICK RINSE.
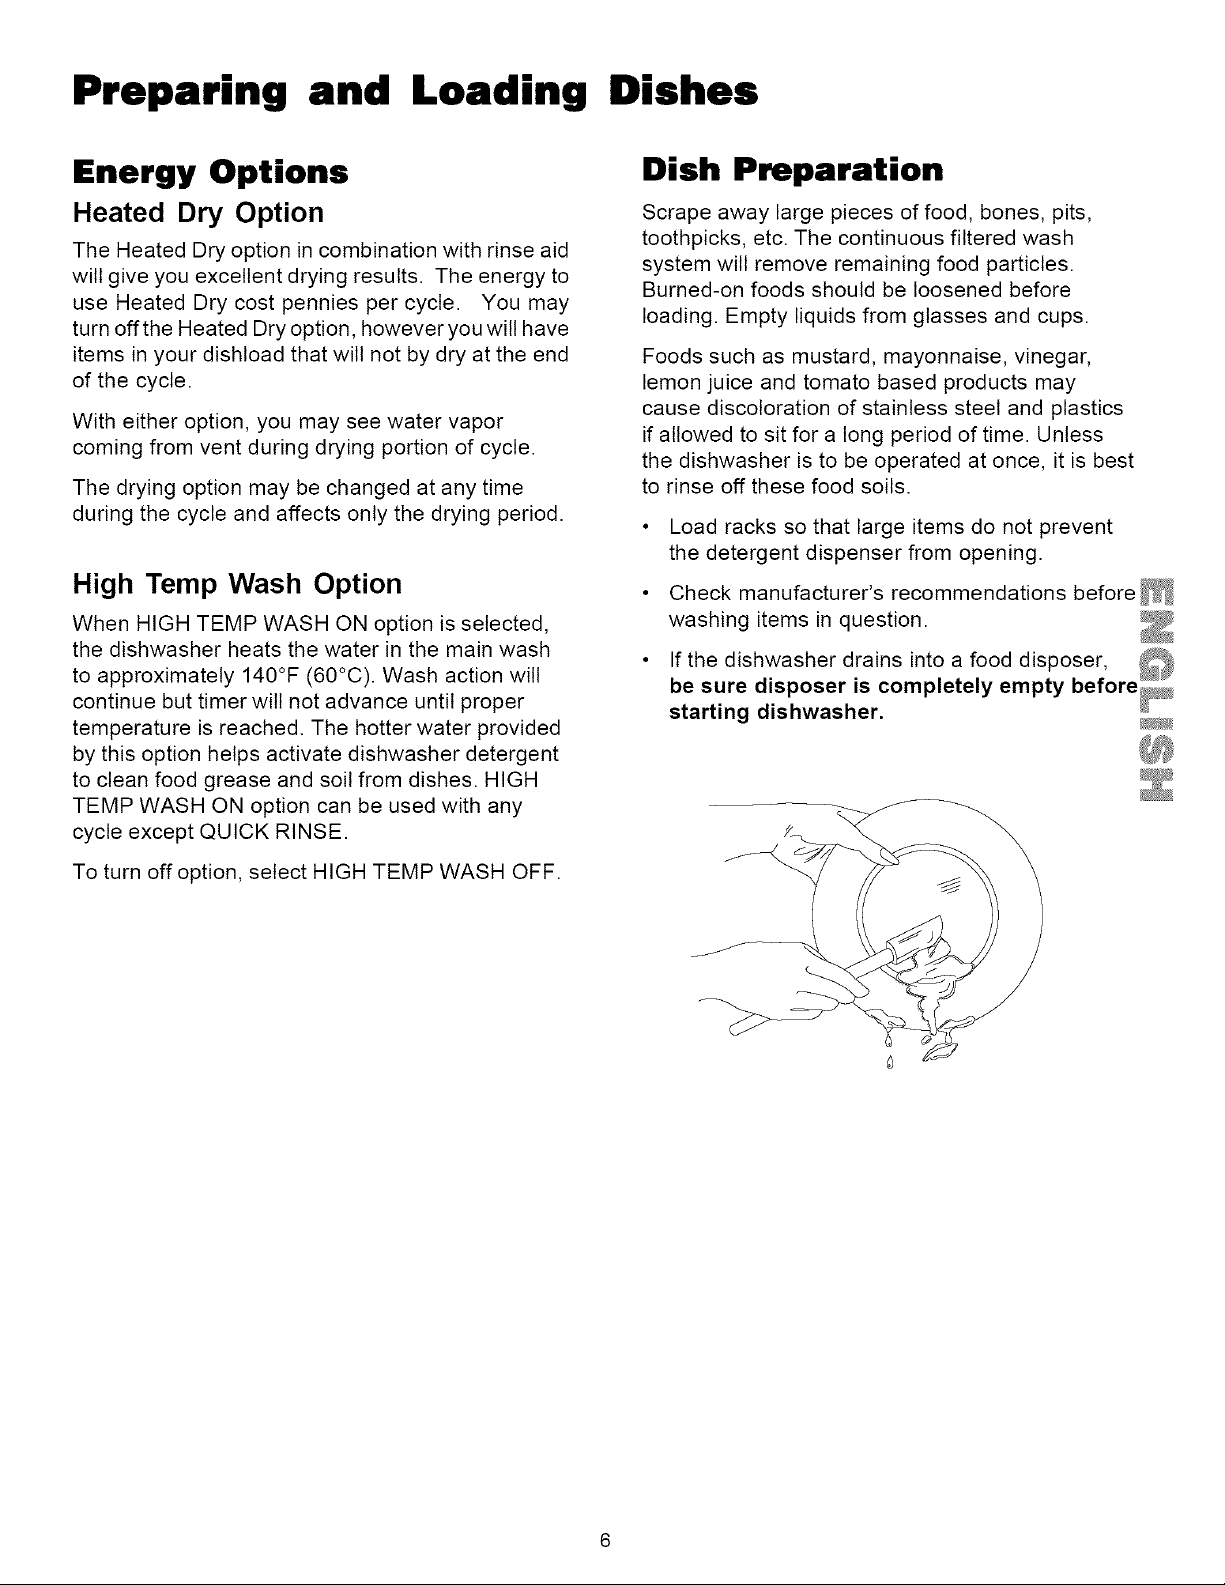
Dish Preparation
Scrape away large pieces of food, bones, pits,
toothpicks, etc. The continuous filtered wash
system will remove remaining food particles.
Burned-on foods should be loosened before
loading. Empty liquids from glasses and cups.
Foods such as mustard, mayonnaise, vinegar,
lemon juice and tomato based products may
cause discoloration of stainless steel and plastics
if allowed to sit for a tong period of time. Unless
the dishwasher is to be operated at once, it is best
to rinse off these food soils.
• Load racks so that large items do not prevent
the detergent dispenser from opening.
• Check manufacturer's recommendations before
washing items in question.
starting dishwasher.
_#24
To turn off option, select HIGH TEMP WASH OFF.
Preparing and Loading Dishes (continued)
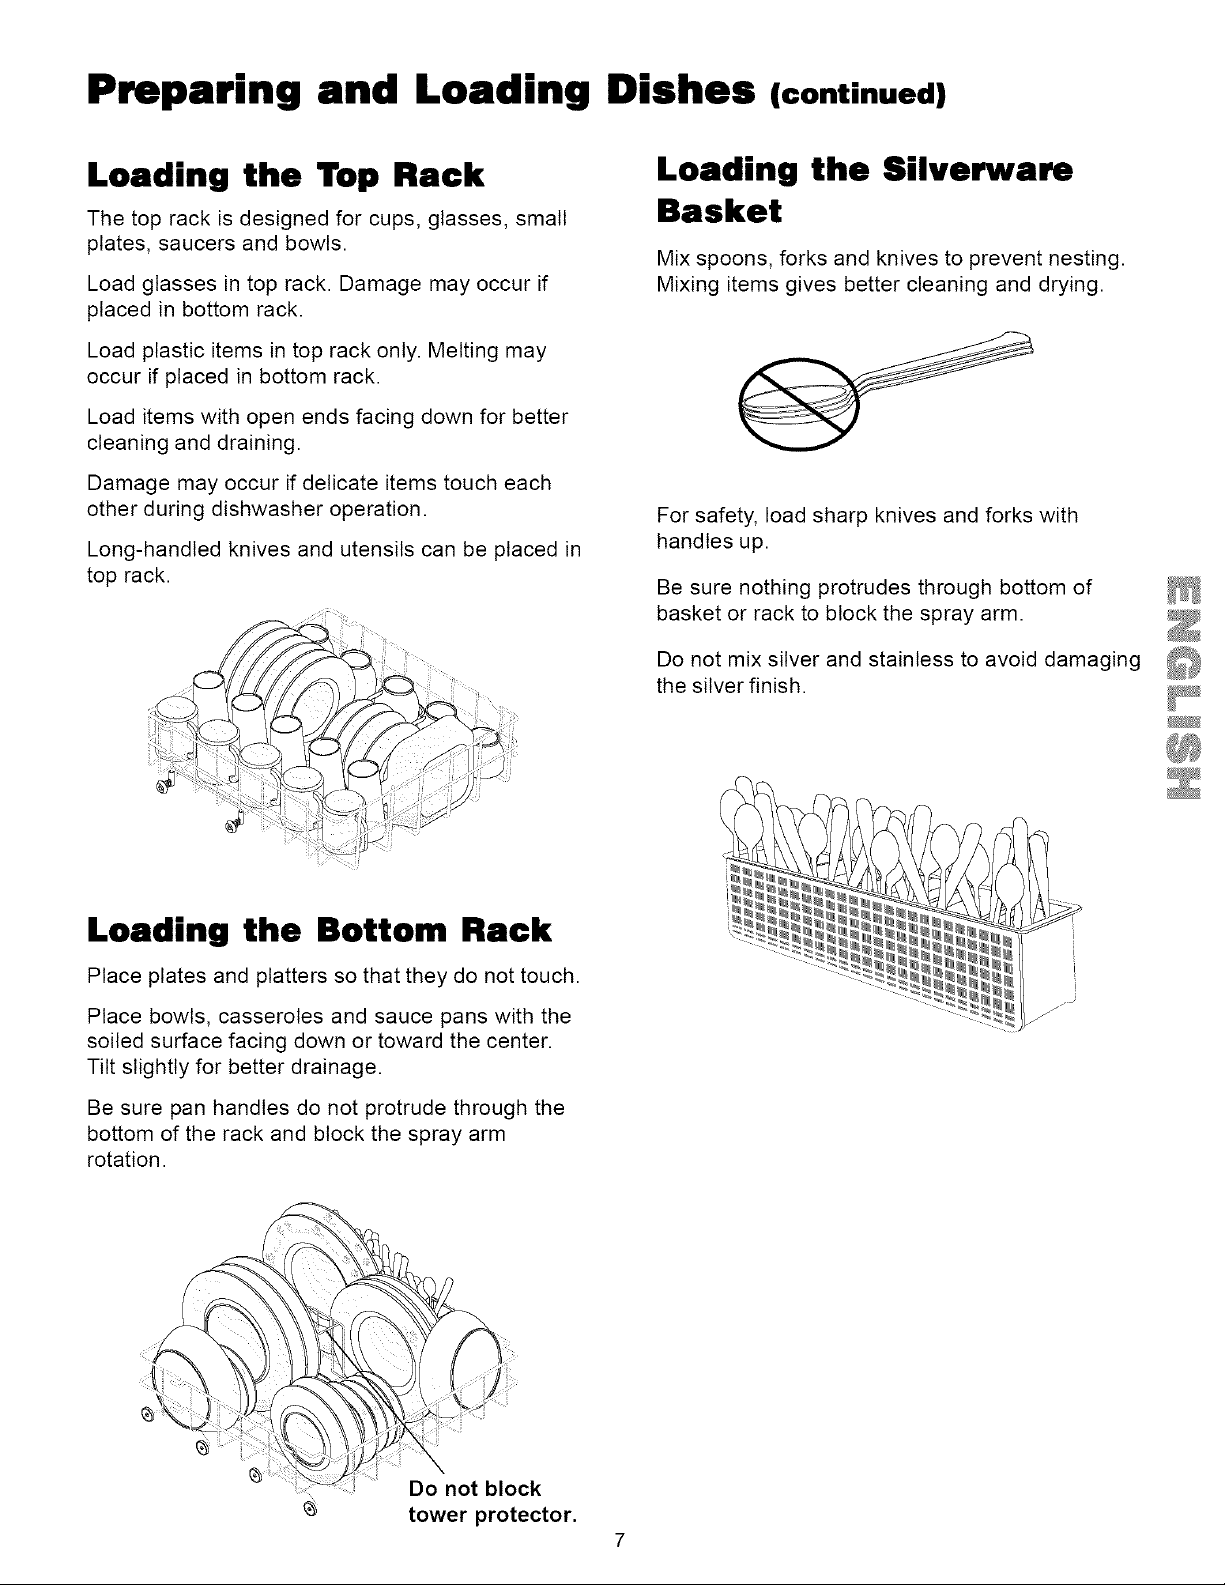
Loading the Top Rack
The top rack is designed for cups, glasses, small
plates, saucers and bowls.
Load glasses in top rack. Damage may occur if
placed in bottom rack.
Load plastic items in top rack only. Melting may
occur if placed in bottom rack.
Load items with open ends facing down for better
cleaning and draining.
Damage may occur if delicate items touch each
other during dishwasher operation.
Long-handled knives and utensils can be placed in
top rack.
Loading the Silverware
Basket
Mix spoons, forks and knives to prevent nesting.
Mixing items gives better cleaning and drying.
For safety, load sharp knives and forks with
handles up.
Be sure nothing protrudes through bottom of
basket or rack to block the spray arm.
Do not mix silver and stainless to avoid damaging
the silver finish.
Loading the Bottom Rack
Place plates and platters so that they do not touch.
Place bowls, casseroles and sauce pans with the
soiled surface facing down or toward the center.
Tilt slightly for better drainage.
Be sure pan handles do not protrude through the
bottom of the rack and block the spray arm
rotation.
Do not block
tower protector.
i
t
[
Dishwasher Dispenser & Detergents
Filling the Detergent
Dispenser
The detergent dispenser has one covered and one
uncovered cup. Detergent in the uncovered cup
falls into the dishwasher when the door is closed.
The covered cup opens automatically to release
detergent.
• Use only fresh automatic dishwashing
detergent. Other detergents will cause
oversudsing.
• When using automatic dishwashing detergent
tabs, place one tab in main wash cup and close.
• Add detergent just before starting cycle.
• Store detergent in a cool, dry location. Moist or
caked detergent will not dissolve properly.
The use of industrial grade detergent can
damage the heating coil and other parts of
the dishwasher leading to damage to the
unit and surrounding property. Use only
household grade automatic dishwasher
detergents.
How much Detergent to use
The amount of detergent to use depends on the
water hardness. Water hardness is measured in
grains per gallon. Using too little detergent can
result in poor cleaning and hard water filming or
spotting. Using too much detergent in soft water
can cause a permanent film called etching. Your
local water company, water softener company or
county extension agent can tell you the water
hardness in your area.
Cover
Main
Cup
Latch
Pre Wash
Cup
Note: If the cover is closed on the Main Wash
Cup, open by pressing the cover latch.
Detergent Usage Guide
Cycle Soft Water Medium Hard Water Hard Water
(0-3 grains) (4-8 grains) (9-12 grains)
Heavy Wash
or
Normal Wash
Light Wash
Quick Rinse
*Note: For very hard water, detergent alone may not be enough. A water softener is recommended to improve water
quality and dishwashing performance. Try adding more detergent at the beginning of the main wash portion of the cycle.
As a rule, use 1 teaspoon for each grain above 12. Unlatch the door, open slowly and add detergent to the bottom of the
tub. Close the door to latch and the dishwasher will continue through the cycle.
2 teaspoons
(each cup-
1/4 full)
2 teaspoons
(Main Wash cup-
1/4 full)
No Detergent
5 teaspoons
(each cup-fill to line
above "Regular")
5 teaspoons
(Main Wash cup-fill to
line above "Regular")
No Detergent
8
8 teaspoons
(each cup-
completely full)
8 teaspoons
(Main Wash cup-
completely full)
No Detergent
Very Hard Water*
(over 12 grains)
Each Cup-
Complete.Iv Full
(water so_ener
recommended)
Main Wash Cup-
Completely Full
(water softener
recommended)
No Detergent
(water softener
recommended)
 Loading...