

Kenmore 58717345790, 58717345691, 5871734569, 5871434969 Owner’s Manual

Product Registration ................................................ Cover
Safety Instructions ......................................... ,......... 2
Features...,. ....... ..:.... .... . .... .. ...... , ..... _,._........ .. ................ 3,
Operating Instructions .................................... ;............. 4-5
Preparing and Loading Dishes ......................... .,..... ..... 5-7
Dishwasher Dispenser and Detergents ........................... 8
Factors Affecting Performance ........................................ 9
Care and Cleaning ....................................................... 9- I 0
Connecting Portable Dishwasher .................................. I I
Changing Color Panels ................................................... 12
Common Dishwasher Problems and Solutions ........ 13-14
Troubleshooting ....................................................... .. ..... i4
Warranty ........................................................................ t5
Sears Service .................................................................. 16
?: _._":;:_!587.17345'. ILI_I,:_....._
.... -..... " "_!_=_''-_e--','_--- _ ............. ................ ='_--'n',_--- '!!!'!!if_ " '_'
Read and Save These Instructions
This Owner's Guide provides specific operating instructions for your model. Use the dishwasher only as instructed
in this guide. These instructions are not meant to cover every possible condition and situation that may occur°
Common sense and caution must be practiced when installing, operating and maintaining any appliance°
Record Your Model and Serial Numbers
Record in t:he space provided below the model and serial numbers found on the serial label on the right: side of t:ub.
Model Number:
Serial Number:
Purchase Date:
Sears, Roebuck and Co., Hoffman Estates, IL 60179 U.S.A.
i
P/N 154233401 (9512)
Irn Instructions
portant Safety
Please read all instructions before using your
dishwasher. Use your dishwasher only as
instructed in this guide. Installaldon and
grounding instructions are included with your
new dishwasher for the instaIier's reference.
!_'__ " Ti_dge situat}0"ns rnaT caug_
I serious bodily harm,
This dishwasher is designed to operate on
regular house current (120 V, 60 Hz). Use a
circuit equipped with a 15 ampere fuse or
circuit breaker, Use a 20 ampere fuse if the
dishwasher' is connected with a food waste
disposer
Do not operate dishwasher unless all
enclosure panels are in their proper place,
Shock may occur from exposed wires or
electrical components_
. Dispose of discarded appliance and shipping
or' packing material properly.
To avoid entrapment and!or suffocation,
remove the door or door latch mechanism
from any dishwasher that is discarded or
otherwise not in user
Keep young children and infants away frorn
the dishwasher when it is operating.
To reduce the risk of
injury, do not let children
abuse, sit, stand or play
on door or' racks of a
dishwasher_
Do riot wash plastic
items unless marked
"dishwasher safe" or
the equivalent. Check with the
manufacturer for recommendations, if not
marked, Items that are not dishwasher safe
may melt and create a potential fire hazard.
To avoid accidental poisoning, store
dishwasher' detergents and iinse agents out
of the reach of children_
death or
property damage,
Always disconnect electrical power to the
dishwasher before servicing.
Repairs made by an untrained perso n can
result in shock, or risk of injury, due to
improper assembly or, adjustment, or electrical
hazards may develop.
Under certain conditions, hydrogen gas may
be produced in a hot water system that has
not been used for 2 weeks or more.
HYDROGEN GAS IS EXPLOSWE. If' the hot
water system has not been used for such a
period, before using the dishwasher, rum on
all hot water faucets and let the water flow
from each for several minutes. This will
release any accumulated hydrogen gas.
HYDROGEN GAS IS FLaadMABLE. Do not
smoke or use an open flame during this time.
These Situations may cause bodil
injury or property.daanage.
• Do not tamper with the controls. Any
improper adjustments may subject the user to
risk of injury or' electrical shock.
Load sharp knives with the handles up to
reduce the risk of cut-type injuries.
If the washing or drying cycle is interPdpted,
during or' at the end of fine cycle, the heating
element may still be hot enough to cause a
burn ff it is touched.
To prevent children from opening the
dishwasher door, close and Iatch the door
whennot loading or unloading.
Do not use this dishwasher for any purpose
other than its intended use.
SAVE THESE INSTRUCTIONS
The instructions appearing in this guide are not
meant to cover every possible condition and
situation that may occur. Practice common sense
and caution when installing, operating and
maintaining any appliance°
Printed in U S,A
2
Dishwasher Features
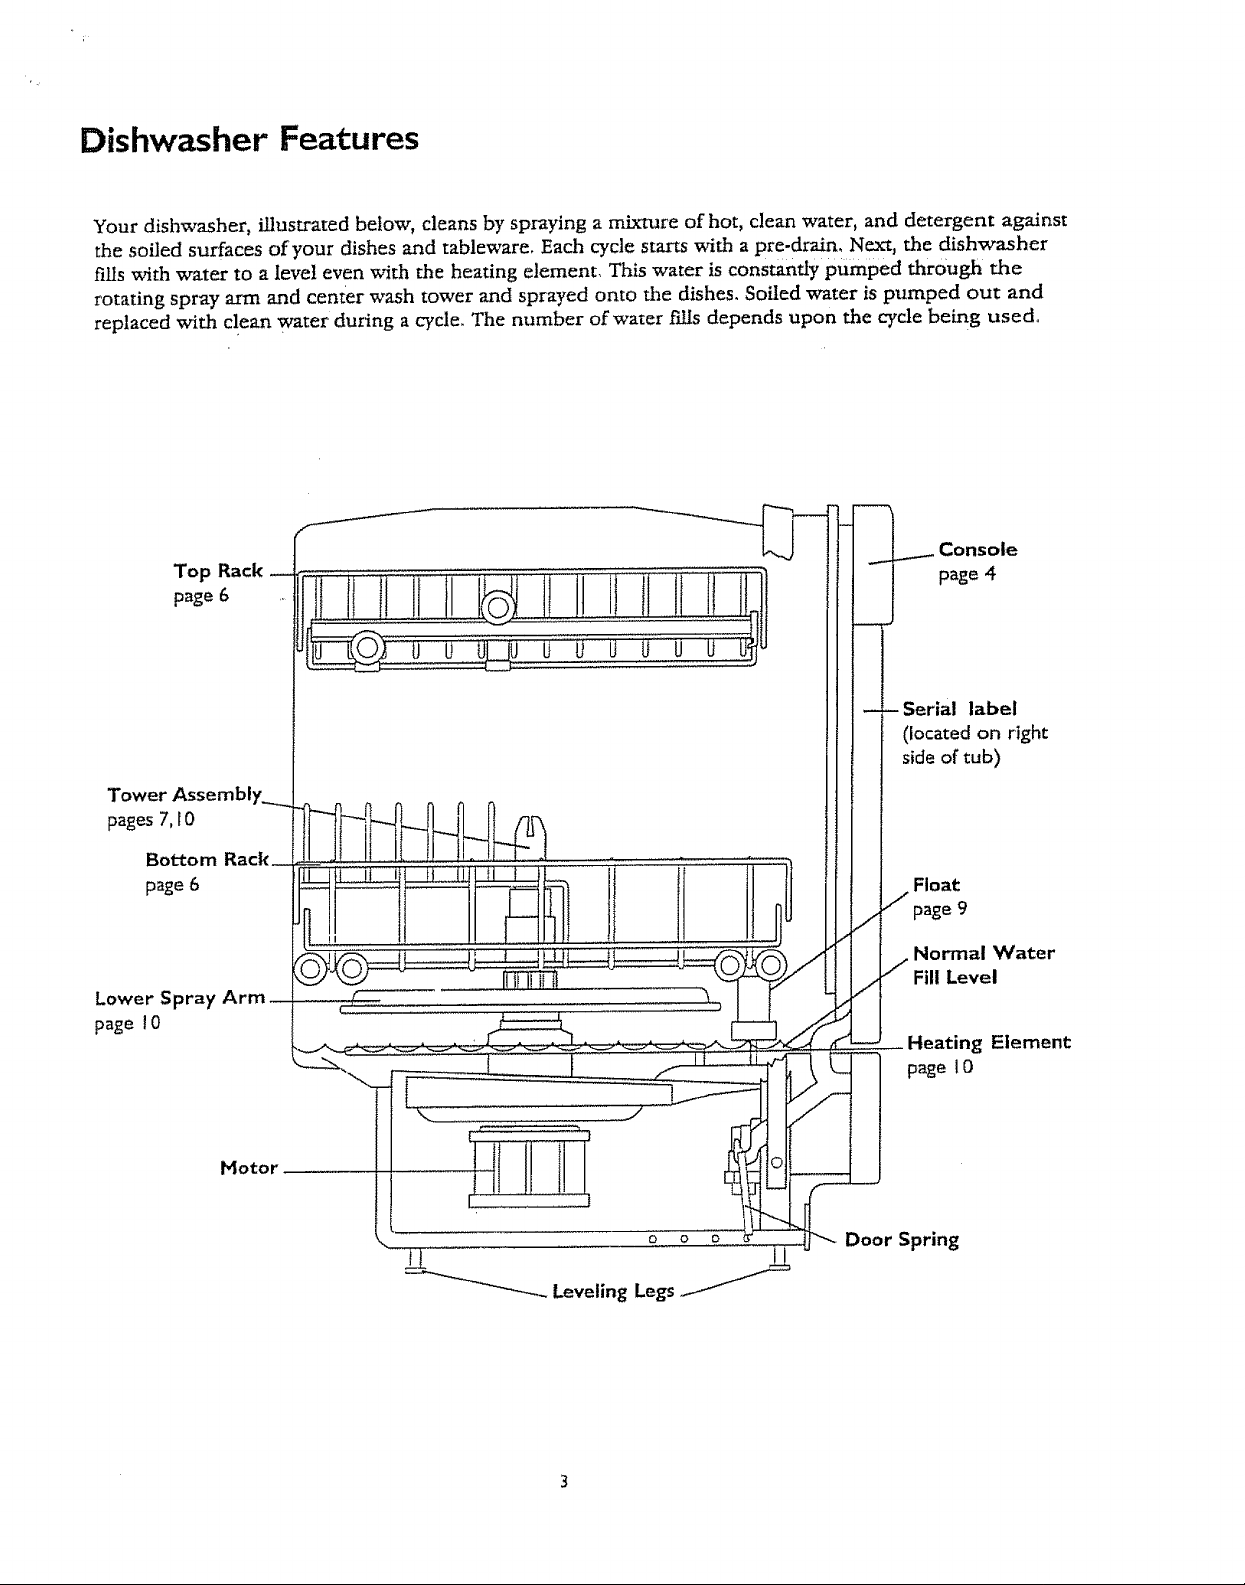
Your dishwasher, illustrated below, cleans by sp_aying a mixture of hot, clean water, and detergent against
the soiled surfaces of your dishes and tableware. Each cycle starts with a pre-drain_ Next, the dishwasher
fills with water to a level even with the heating element. This water is constantly pumped through the
rotating spray arm and center wash tower and sprayed onto the dishes. Soiled water is pumped out and
replaced with clean water du_ing a cycle. The number of water Nls depends upon the cycle being used°
Console
Top Rack
page 6 ,.
i_lIll.....lii......._ ....l.................Jf ll t_ll
page 4
!
- Serial label
(located on right
side of tub)
Lower Spray Arm
page !0
page 9
,Normal Water
Fill Level
Heating Element
page 10
Door Spring

Operating instructions
ou 0
NQRMAL
WASH
1. Load dishwasher' following all dizections on
pages 5-7_
2_
Before adding detergent, make sure dispenser
cups are dry. Do not add detergent until you
are ready to operate the dishwasher'. Use only
fresh automatic dishwasher detergent and a
rinse aid for the best results. Detergent
amounts may vary due to local water
conditions_ Refer' to detergent chart on page 8
for details.
• Add detergent
• Close lid to detergent cup.
° 'The dispenser automatically releases
detergent at the correct time during wash
cycle.
3,
Select WASH CYCLES for desired wash or' rinse
cycle, (See WASH CYCLE SELECTIONS0
.
Push OPTIONS buttons desired. See ENERGY
OPTIONS on page 5o
,
Tuin dial clock_¢ise to selected cycle.
6,
See page ! t for' inswuccions on connecting the
portable dishwasher.
74
Open hot water faucet nearest dishwasher to
clear coo! water from water' pipe_ Turn off
faucet.
8_
-To start, firmly close dishwasher door until it
latches. The ON indicator light will glow
throughout the wash, rinse and dry portions
of cycle.
Cycle Selections
Pots/Pans
(91 minutes) (8,8 gallons) (2 washes, 3 rinses, dUO
For' pots, pans, casseroles and dinnerware with
dried-on or baked-on soils:
1. Add detergent to both cups. Turn lid to cover
lar'ger cup_ ' '
2_ Press POTS/PANS button.
3. Select desi_'ed energy Options_
4. Turn dial to POTS/PANS.
5. To star_, firmly close door'.
Heavy Wash
(82 minutes) (7°6 gallons) (2 washes, 2 rinses, dry)
For heavily soiled dishes and silverware:
i, Add detergent to both cups, Turn lid to covet'
larger cup.
2, Piess POTS/PANS button_
3_ Select desired energy Options.
4_ Turn dial to HFM,VY WASH,
5. To start, firmly close door.
Normal Wash
(73 minutes) (5.3 gallons) (2 washes, I rinse, dry)
For regularly soiled dishes and silverware:
1o Add detergent to both cups. Turn lid to covet'
larger cup,
2_ Press NORMAL WASH button
3, Select desired energy Options,
4_ Turn dial to NORMAL WASH,
5,. To start, firmly close door,
Water Hiser
(64 minutes) (35 gallons) (1 wash, 1 rinse, dry)
For lightly soiled or pre-rinsed dishes and
silverware:
!. Add detergent to larger detergent cup and turn
lid to cover.
4
Operating instructions
continued
2, Press NORMAL WASH button
3_ Select desired energy Options.
4. Turn dial to WATER MISER.
5. To start, firmly close door.
Preparing and, Loading
Dishes
Rinse/Hold
_l@_nimates)" (1 6 gallons) (I rinse)
7or rinsing dishes that wi!l be washed later:
1, DO NOT USE detergent.
2o Press NORMAE. WASH button.
3_ Select COOL DRY Option,
4 Turn dial to RINSEiHOt.D.
5- To start, firmly close doorr
Energy Options
Water Heat Option
When WATER HEAT Option is selected, the
heating element in bottom of tub will raise the
main wash water temperature to approximately
140°F., Wash action wil! continue but timer will
not advance until this water temperature has been
reached The hotter water provided by this option
helps activate dishwasher detergent to clean food
grease and soil from dishes WATER HEAT Option
can be used with any cycle except RINSE/HOLD
The Water Heater light will glow until the water
temperature reaches 140°F To turn off option
press RESET OPTIONS
Cool Dry Option
COOl.-DRY Option saves electrici_,. The heating
element stays off during drTing portion of cycle.
Additional dwing time may be required, with door'
open, to completely air dry dishes. Some water
droplets may remain on door and in areas where
dishes touch dishwasher basket or rack.
I
1
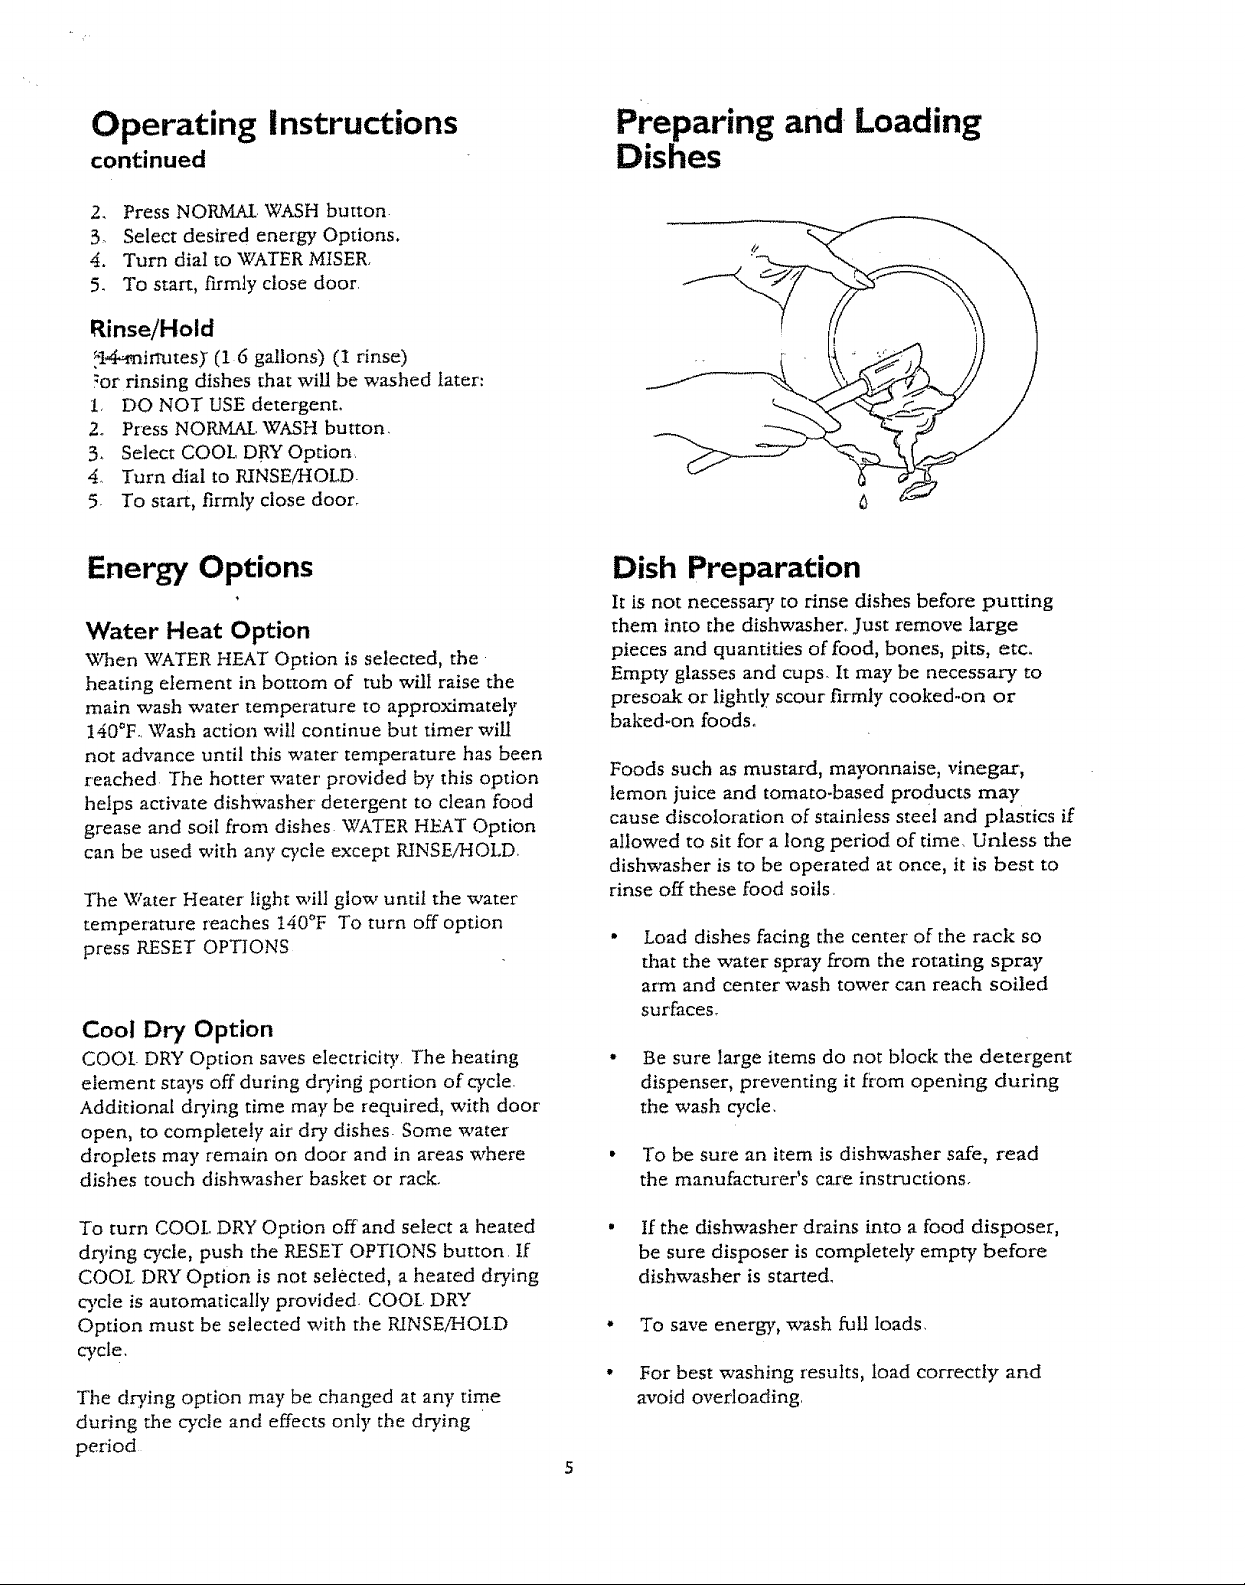
Dish Preparation
It is not necessary to rinse dishes before putting
them into the dishwasher. Just remove large
pieces and quantities of food, bones, pits, etc.
Empty glasses and cups. It may be necessary to
presoak or lightly scour firmly cooked..on or
baked-on foods.
Foods such as mustard, mayonnaise, vinegar,
lemon juice and tomato-based products may
cause discoloration of stainless steel and plastics if
allowed to sit for a long period of time. Unless the
dishwasher is to be operated at once, it is best to
rinse off these food soils.
Load dishes facing the center of the rack so
that the water spray from the rotating spray
arm and center wash tower can reach soiled
surfaces_
• Be sure large items do not block the detergent
dispenser, preventing it from opening during
the wash cycle.
• To be sure an item is dishwasher safe, read
the manufacturer's care instructions.
To turn COOt, DRY Option off and select a heated
do, ing cycle, push the RESET OPTIONS button. If
COOL DRY Option is not selected, a heated drying
cycle is automatically provided COOt. DRY
Option must be selected with the RINSE/HOLD
cyct e ,
The drying option may be changed at any time
during the cycle and effects only the drying
period
• If the dishwasher drains into a food disposer,
be sure disposer is completely empty before
dishwasher is started.
. To save energy, wash full loads,
• For best washing results, load correctly and
avoid overloading.
Preparing and Loading Dishes continued
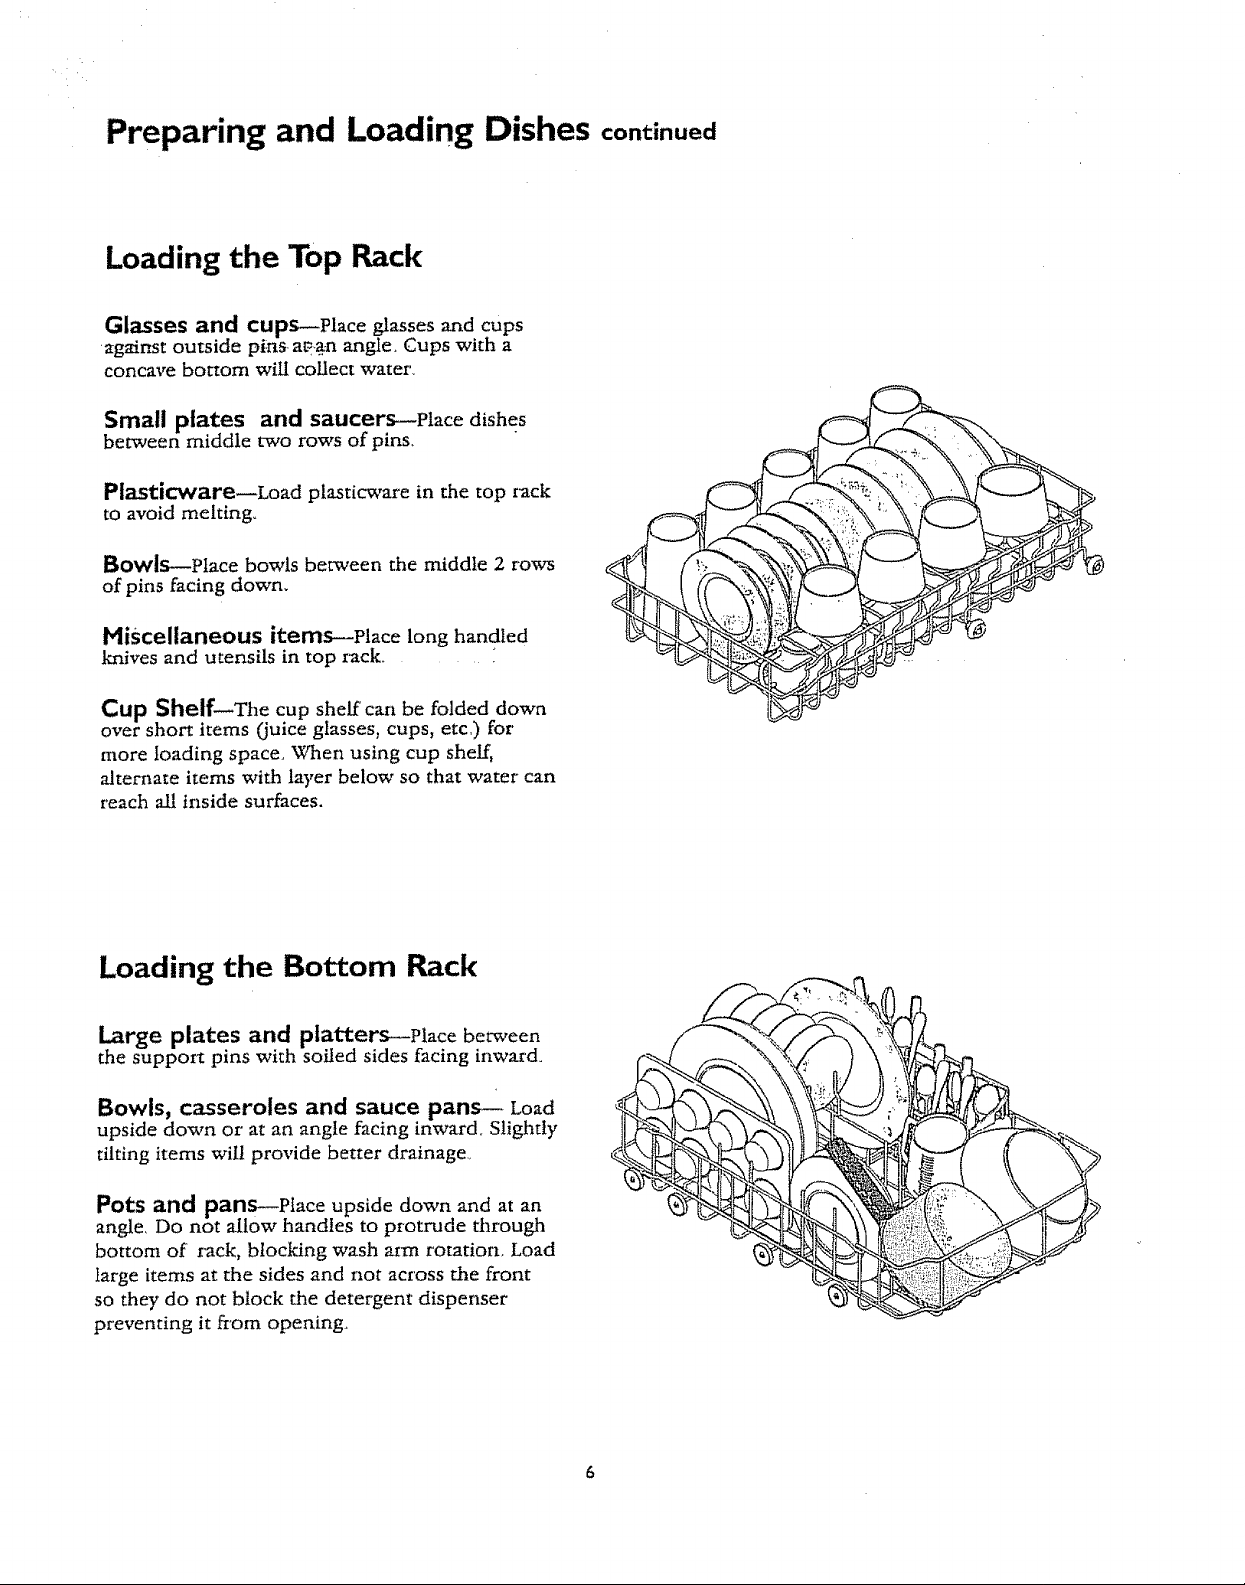
Loading the Top Rack
Glasses and cups--Place glasses and cups
zgaSnst outside pi:ns at_n angle, Cups with a
concavebottom willcollectwater'.
Small plates and saucers--Place dishes
between middle two rows of pins,
Plastic'ware--Load plasticware in the top rack
to avoid melting°
Bowls--Place bowls between the middle 2 rows
of pins facing down.
Miscellaneous items--Place long handled
knives and utensils in top zack.....
Cup Shelf--The cup shelf can be folded down
over short items (juice glasses, cups, etc.) for
more loading space. When using cup shelf,
alternate items with layer below so that water can
reach all inside surfaces.
Loading the Bottom Rack
Large plates and platters--place between
the support pins with soiled sides facing inwar'do
Bowls, casseroles and sauce pans--. Load
upside down or at an angle facing inward_ Slightly
tilting items wilt provide better drainage.,
Pots and pans--Place upside down and at an
angle, Do not allow handles to protrude through
bottom of rack, blocking wash arm rotation. Load
large items at the sides and not across the front
so they do not block the detergent dispenser
preventing it from opening.
Preparing and Loading Dishes continued
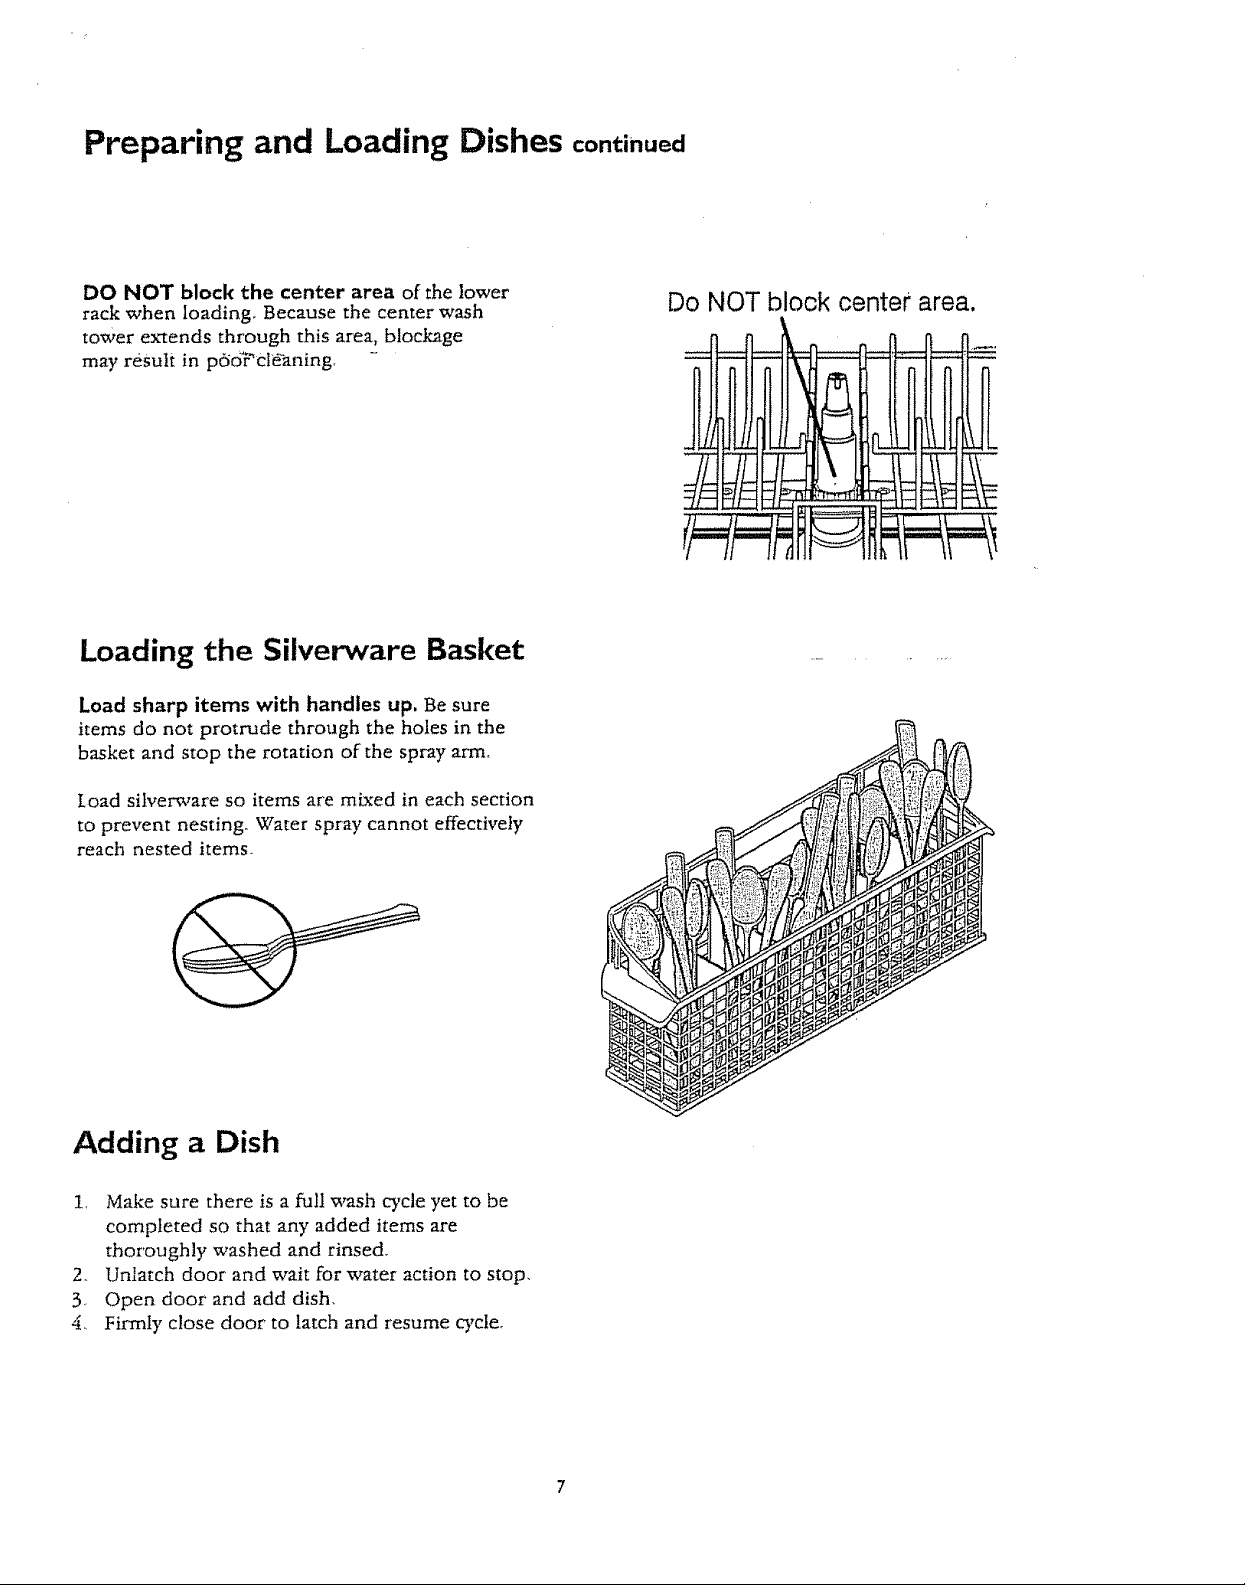
DO NOT block the center area of the lower
rack when loading. Because the center wash
tower extends through this area, blockage
may result in p6c_Pcl_aning. -
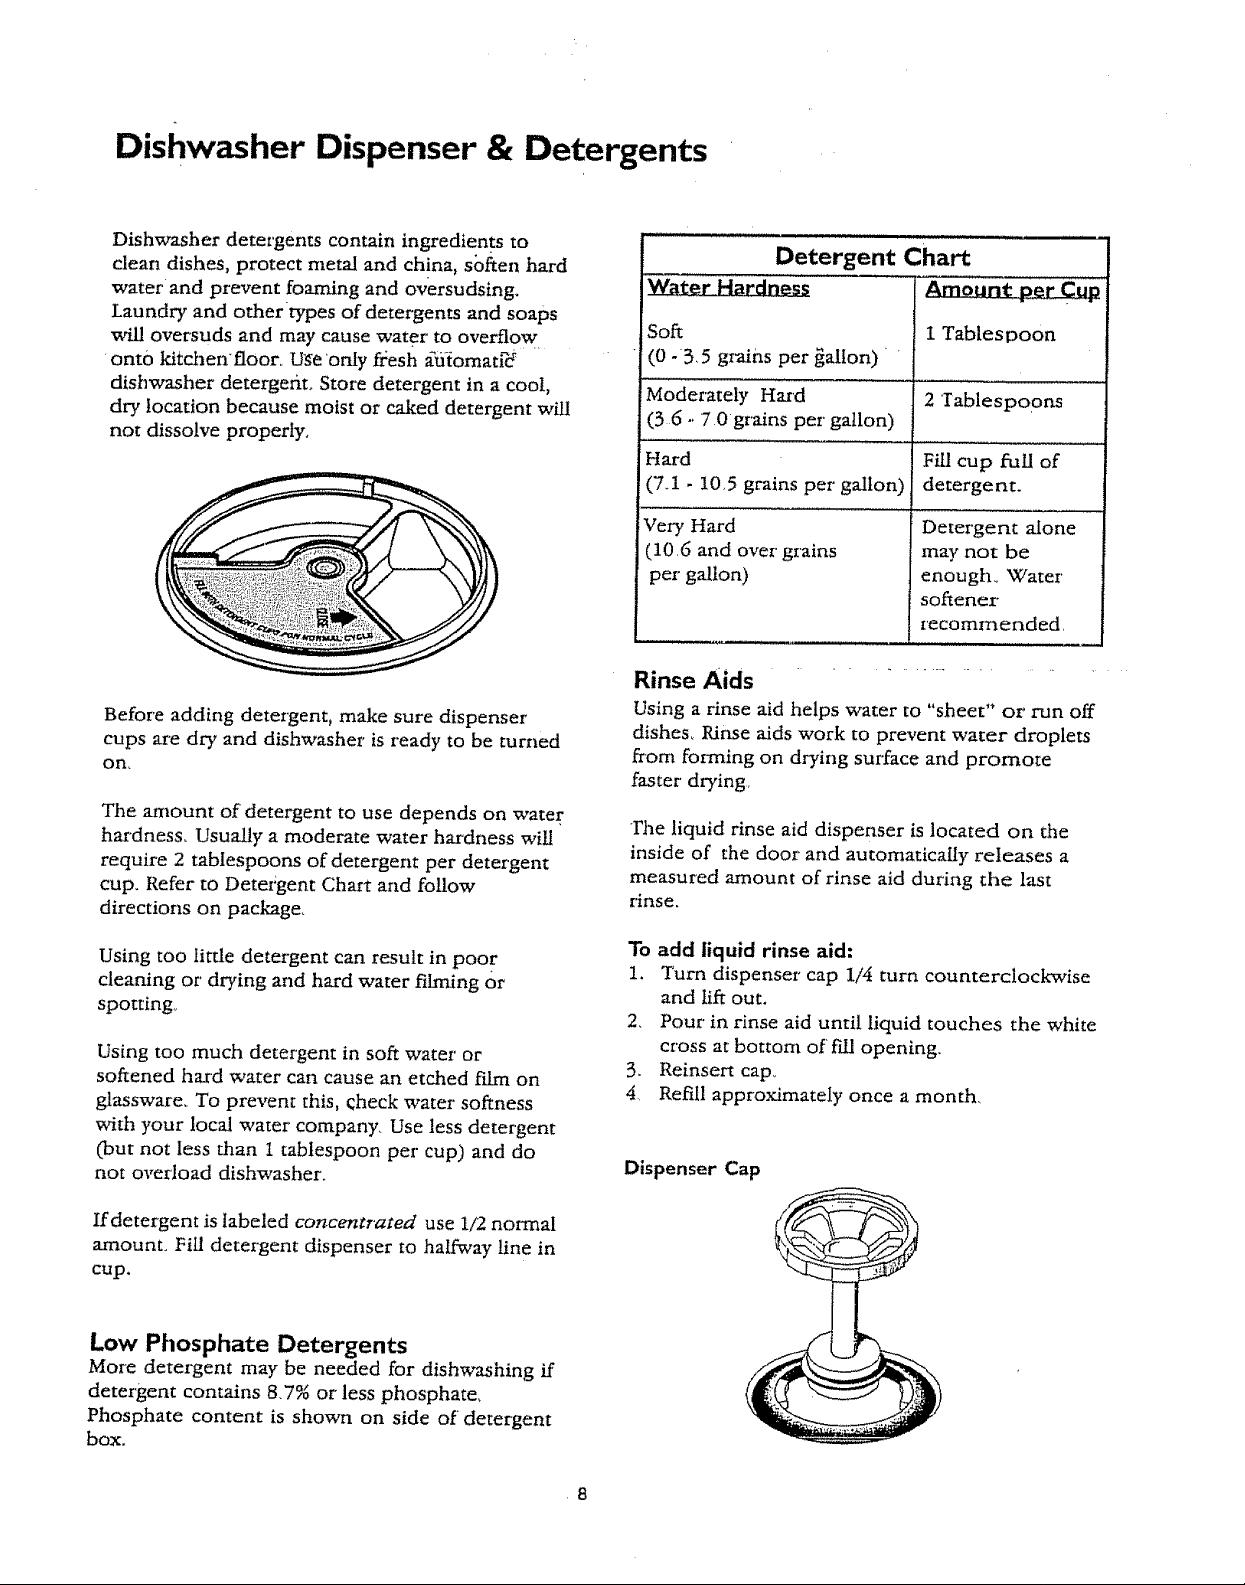
Loading the Silverware Basket
Load sharp items with handles up. Be sure
items do not protrude through the holes in the
basket and stop the rotation of the spray arm,
Load silverware so items are mixed in each section
to prevent nesting_ Water spray cannot effectively
reach nested items.
Do NOT block center area.
m
_:zzt
Adding a Dish
1, Make sure there is a full wash cycle yet to be
completed so that any added items are
thoroughly washed and rinsed,
2_ Unlatch door' and wait for water action to stop,
3. Open door and add dish,
4, Firmly close door to latch and resume wcle_
Dishwasher Dispenser & Detergents
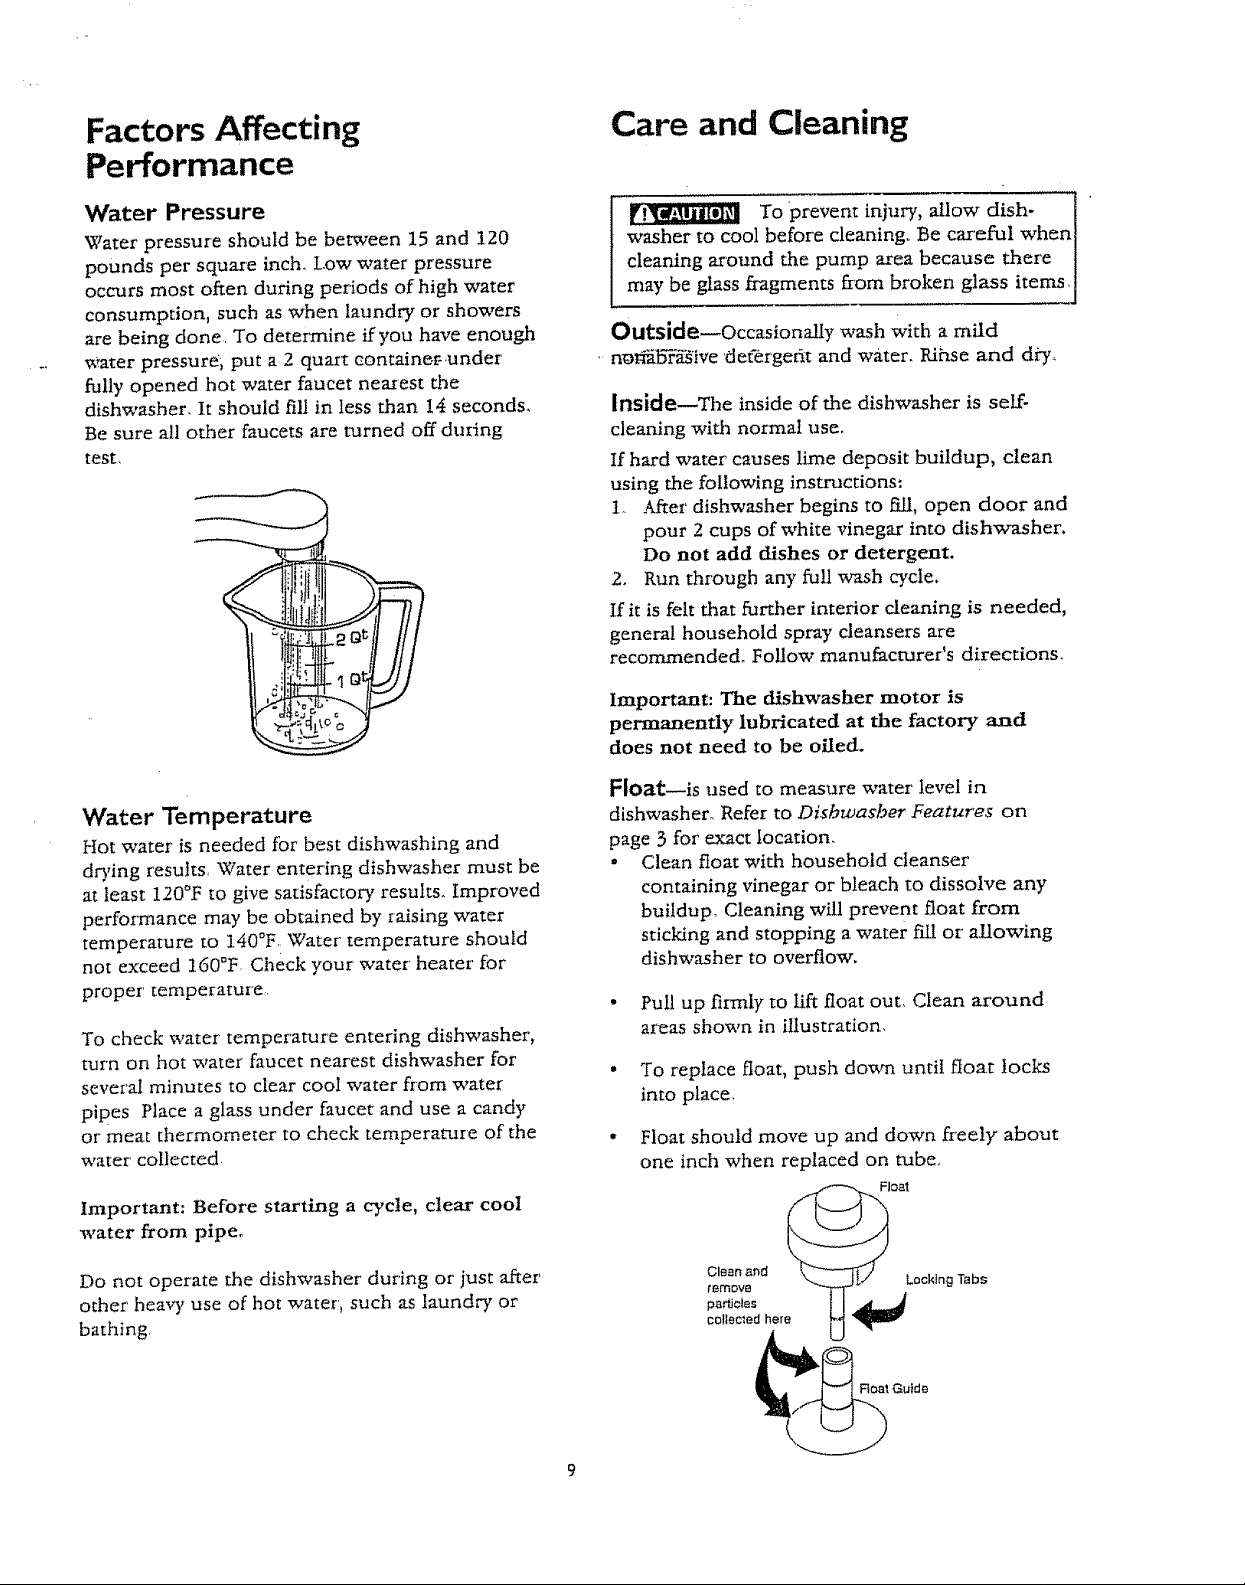
Dishwasher detergents contain ingredients to
clean dishes, protect metal and ch!na, soften hard
water' and prevent foaming and oversudsing.
Laundry and othertypes of detergents and soaps
will over-suds and may cause water to overflow
onto kitchenfloor. U_e only flesh fffiiomatPc r
dishwasher detergerko Store detergent in a coot,
dry location because moist or caked detergent will
not dissolve properly.
Before adding detergent, make sure dispenser'
cups are dry and dishwasher is ready to be turned
On,
The amount of' detergent to use depends on water
hardness. Usually a moderate water hardness will
require 2 tablespoons of detergent per detergent
cup. Refer to Detergent Chart arid follow
directions on package.
LI,,,,,, , ,,,,,,,..... ,, ,, , ,, ,
Detergent Chart
Soft I Tablespoon
(0 -3,5 grains per _allon)
Moderately Hard 2 Tablespoons
(3 6., 7 0grains per' gallon)
Hard Fill cup fiallof
(7_1 - 105 grains per gallon), detergent.
Very Hard Detergent alone
(10 6 and over grains may not be
per" gallon) enough_ Water
softener
recommended,
Rinse Aids
Using a rinse aid helps water to "sheet" or run off
dishes° Rinse aids work to prevent water droplets
from forming on drying surface and promote
faster' drying,
the liquid rinse aid dispenser is located on the
inside of the door and automatically releases a
measured amount of rinse aid during the last
rinse.
Using too little detergent can result in poor
cleaning or' drying and hard water filming or
spotting°
Using too much detergent in soft water' or
softened hard water can cause an etched fdm on
glassware, To prevent this, check water" softness
with your local water' company. Use less detergent
(but not less than 1 tablespoon per cup) and do
not overload dishwasher°
If detergent is labeled concentrated use 1/2 normal
amounL Fill detergent dispenser to haLfi_,ay line in
cup.
Low Phosphate Detergents
More detergent may be needed for dishwashing ff
detergent contains 87% or' less phosphate_
Phosphate content is shown on side of detergent
box.
To add liquid rinse aid:
1, Turn dispenser cap 1/4 turn counterclockwise
and lift out.
2. Pout' in rinse aid until liquid touches the white
cross at bottom of fill opening.
3. Reinsert cap_
4 Refill approximately once a month,
Dispenser Cap
8
Factors Affecting
Performance
Care and Cleaning
Water Pressure
Water pressure should be between 15 and !20
pounds per square inch Low water pressure
occurs most often during periods of high water
consumption, such as when laundry or showers
are being done To determine ffyou have enough
water pressure, put a 2 quart containe_ under
fully opened hot water faucet nearest the
dishwasher It should fill in less than 14 seconds,
Be sure all other faucets are turned off during
test.
Water Temperature
Hot water is needed for best dishwashing and
drying results, Water entering dishwasher must be
at least 120°F to give satisfactory results. Improved
performance may be obtained by raising water
temperature to 140°F., Water temperature should
not exceed 160°F. Check your water heater for
proper temperature.
To check water temperature entering dishwasher,
turn on hot water faucet nearest dishwasher for
several minutes to clear cool water from water
pipes Place a glass under faucet and use a candy
or meat thermometer to check temperature of the
water collected.
To prevent injury, allow dish-
washer to cool before cleaning, Be careful when I
cleaning around the pump area because there ]
may be glass fragments from broken glass items,j
Outsicle--Occasionally wash with a mild
n_ri_b'F_ive defergerit and w_tter. Pdhse and di3,,
Inside--The inside of the dishwasher is self-
cleaning with normal use.
If hard water causes lime deposit buildup, clean
using the following instructions:
Io M'ter dishwasher begins to Ftil, open door and
pour 2 cups of white vinegar into dishwasher.
Do not add dishes or detergent.
2. Run through any t:aLlwash cycle.
If it is felt that further interior cleaning is needed,
general household spray cleansers are
recommended. Follow manufacturer's directions.
Important: The dishwasher motor is
permanently lubricated at the factory and
does not need to be oiled.
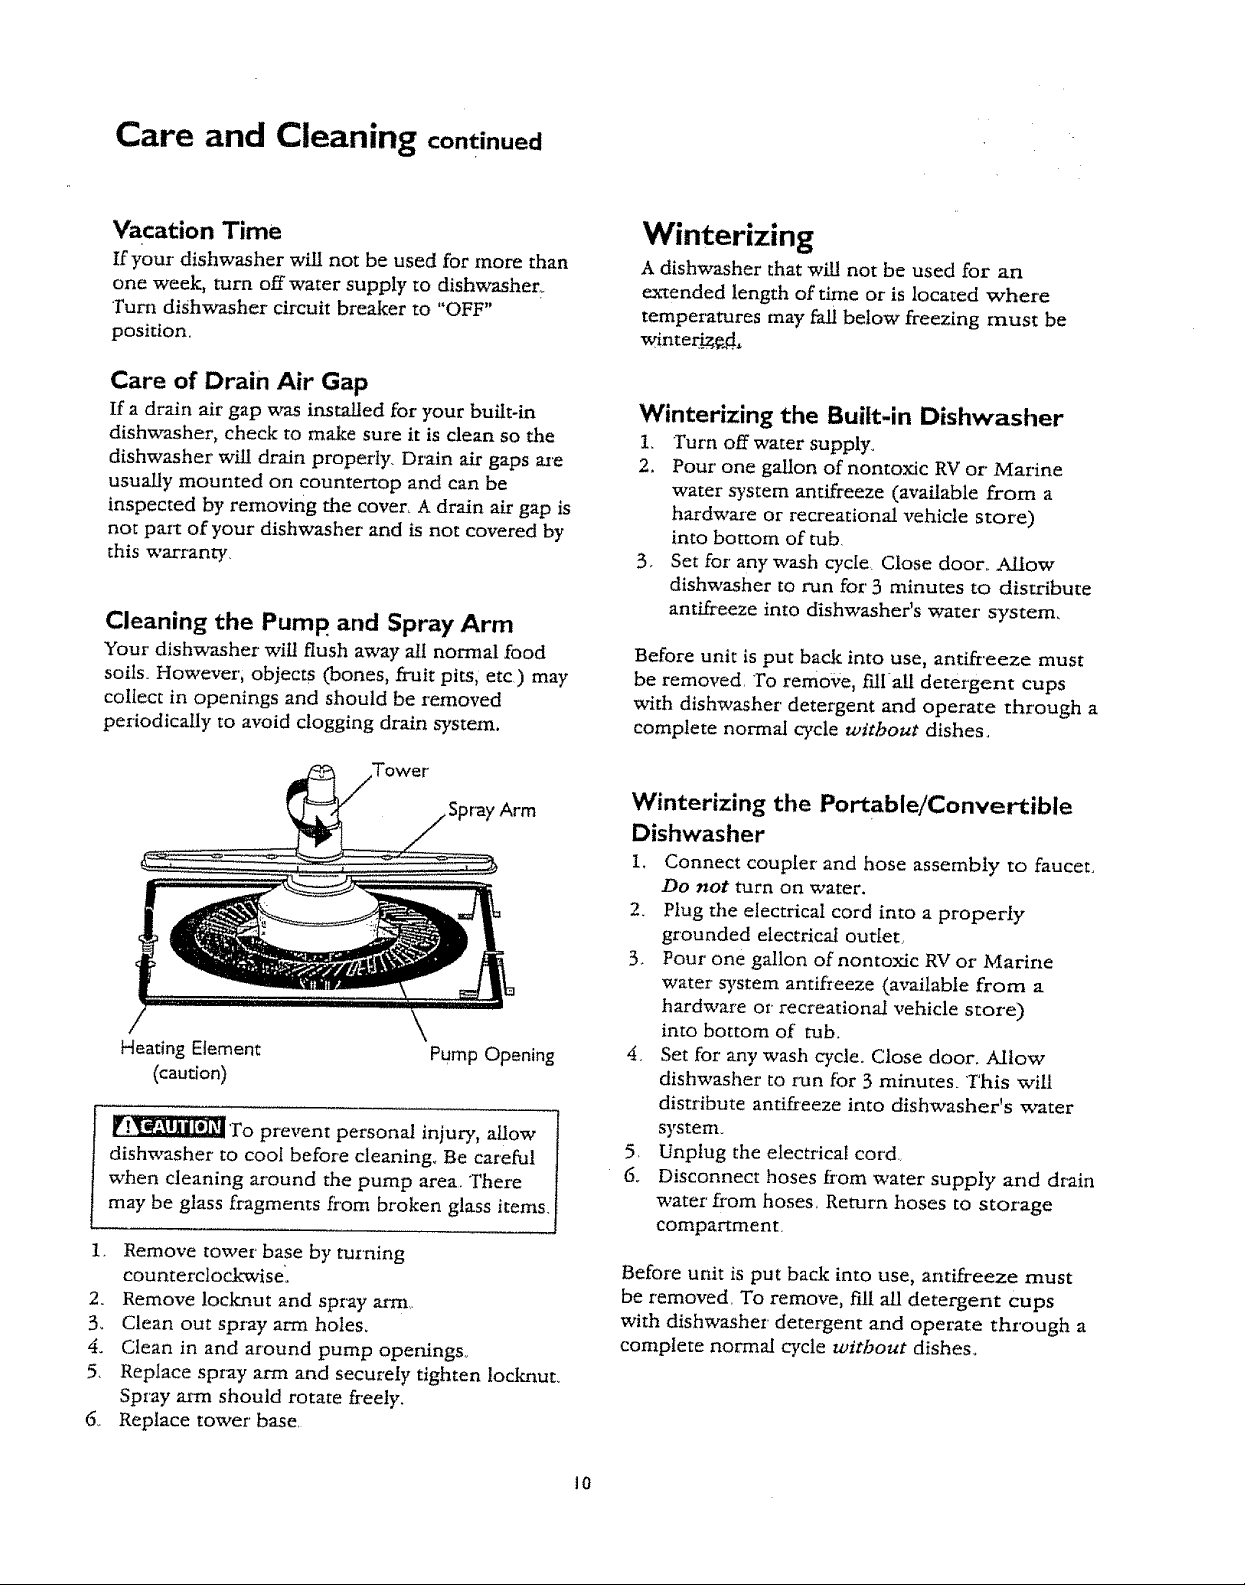
Float_is used to measure water level in
dishwasher_ Refer to Dishwasher Features on
page 3 for exact location,
* Clean float with household cleanser
containing vinegar or bleach to dissolve any
buildup, Cleaning will prevent float from
sticking and stopping a water fill or a/towing
dishwasher to overflow.
• Pull up firmly to lift float out Clean around
areas shown in illustration
• To replace float, push down until float locks
into place,
• Float should move up and down freely about
one inch when replaced on tube,
important: Before starting a cycle, clear cool
water from pipe.
Do not operate the dishwasher during or just after
other heavy use of hot water, such as laundry or
bathing
Care and Cleaning continued
Vacation Time
If your dishwasher wiU not be used for more than
one week, turn off water supply to dishwasher,.
Turn dishwasher circuit breaker to "OFF"
position.
Care of Drain Air Gap
If a drain air gap was installed for your built-in
dishwasher, check to make sure it is clean so the
dishwasher will drain properly, Drain air gaps ase
usually mounted on countertop and can be
inspected by removing the coven A drain air gap is
not part of your dishwasher and is not covered by
this warranty
Cleaning the Pump. and Spray Arm
Your' dishwasher will flush away all normal food
soils. However'; objects (bones, fruit pits, etc) may
collect in openings and should be removed
periodically to avoid clogging drain system.
, Arm
\
Heating Element
(caution)
To prevent personal injury, allow
dishwasher to cool before cleaning. Be careful
when cleaning around the pump area. There
may be glass fragments from broken glass items.
1. Remove tower* base by turning
counterclockwise'.
2. Remove locknut and spray arm.
3. Clean out spray arm holes.
4. Clean in and around pump openings°
5. Replace spray arm and securely tighten !ocknut_
Spray arm should rotate freely.
6... Replace tower' base.
Pump Opening
Winterizing
A dishwasher that will not be used for an
extended length of time or is located where
temperatures may Pall below freezing must be
winter_¢_,
Winterizing the Built-in Dishwasher
1, Turn off water supply_
2, Pour' one gallon of nontoxic RV or" Marine
water s/stem antifreeze (available from a
hardware or recreational vehicle store)
into bottom of tub.
3, Sex for any wash cycle Close door,. _AIow
dishwasher to run for3 minutes to distribute
antifreeze into dishwasher's water system,
Before unit is put back into use, antifreeze must
be removed, To remo;¢e, t'dlall detergent cups
with dishwasher detergent and operate through a
complete normal cycle without dishes.
Winterizing the Portable/Convertible
Dishwasher
1, Connect coupler" and hose assembly to faucet
Do not turn on water,
2. Plug the electrical cord into a properly
grounded electrical outlet,
3. Pour one gallon of nontoxic RV or Marine
water system antif*eeze (available from a
hardware or recreational vehicle store)
into bottom of tub.
4. Set for any wash cycle. Close door. Allow
dishwasher to run fbr 3 minutes_ This will
distribute antifreeze into dishwasher's water
system.
5_ Unplug the electrical cord
6. Disconnect hoses horn water supply and drain
water' from hoses, Return hoses to storage
compartment.
Before unit is put back into use, antifreeze must
be removed. To remove, fill all detergent Cups
with dishwasher detergent and operate through a
complete normal cycle without dishes.
10
 Loading...