

Kenmore 58714019416B, 58714019415B, 58714019414B, 58714013417B, 58714013416B Owner’s Manual
...
Use & Care Guide
Guía de uso y cuidada
English / Español
Models/Modèles: 587.1401*
Kenmore
®
Dishwasher
Lavavajillas
* = Color number, le numéro de couleur
P/N 808375901Rev.E
Artwork:808375901Rev.005
Sears Brands Management Corporation
Hoff man Estates, IL 60179 U.S.A.
www.kenmore.com
www.sears.com
Sears Canada Inc.
Toronto, Ontario, Canada M5B 2C3
www.sears.ca
®
Record Model/Serial
Numbers
Important Safety
Instructions
Please read and save these
instructions
This Use & Care Guide provides specifi c
operating instructions for your model.
Use your unit only as instructed in this
guide. These instructions are not meant
to cover every possible condition and
situation that may occur. Common sense
and caution must be practiced when
installing, operating, and maintaining any
appliance.
Please record your model and serial
numbers below for future reference. This
information is found on the serial plate
located inside the Dishwasher.
Model Number:
Serial Number:
Purchase Date:
587.
Table of Contents
Record Model/Serial Numbers ..........2
Important Safety Instructions ............2-3
Warranty Information ......................4
Master Protection Agreements ..........5
Sears Service ..................................6
Operating Instructions .....................7-9
Preparing and Loading Dishes ...........10-11
Dishwasher Dispenser & Detergents ...11-12
Factors Affecting Performance ...........12-13
Care & Cleaning ..............................13-14
Solutions to Common Dishwashing
Problems .......................................15-17
Service Numbers ......................Back Cover
Safety Precautions
Do not attempt to install or operate
your unit until you have read the safety
precautions in this manual. Safety items
throughout this manual are labeled with
a Danger, Warning, or Caution based on
the risk type.
Defi nitions
This is the safety alert symbol. It is
used to alert you to potential personal
injury hazards. Obey all safety messages
that follow this symbol to avoid possible
injury or death.
DANGER
DANGER indicates an imminently
hazardous situation which, if not
avoided, will result in death or serious
injury.
WARNING
WARNING indicates a potentially
hazardous situation which, if not avoided,
could result in death or serious injury.
CAUTION
CAUTION indicates a potentially
hazardous situation which, if not avoided,
may result in minor or moderate injury.
IMPORTANT
Indicates installation, operation, or
maintenance information which is
important but not hazard-related.
2
Important Safety Instructions
WARNING
Please read all safety instructions
before using your new appliance.
For Your Safety
• Use your dishwasher only as instructed
in this Use and Care Guide.
• Use only detergents or rinse agent
recommended for use in a dishwasher,
and keep them out of reach of children.
• When loading items to be washed:
• Locate sharp items and knives
so that they are not likely to
damage the door seal or tub.
• Load sharp items and knives with
the handles up to reduce the risk
of cut-type injuries.
• Do not wash plastic items unless
marked “dishwasher safe” or the
equivalent. Check with manufacturer
for recommendations, if not marked.
Plastic Items that are not dishwasher
safe may melt and create a potential
fi re hazard.
• Do not touch the heating element
during or immediately after use.
• Do not operate your dishwasher unless
all enclosure panels are properly in
place.
WARNING
These guidelines must be followed to
ensure that safety mechanisms in this
unit will operate properly.
• If the dishwasher drains into a food disposer,
maker sure disposer is completely empty
before running dishwasher.
• Disconnect electrical power to dishwasher
before servicing.
• Do not tamper with controls.
• Do not let children abuse, sit, stand or play on
door or racks of a dishwasher.
• Keep young children and infants away from
dishwasher when it is operating.
• Under certain conditions, hydrogen gas may
be produced in a hot water system that
has not been used for two weeks or more.
HYDROGEN GAS IS EXPLOSIVE. If the hot
water system has not been used for such a
period, before using the dishwasher turn on
all the hot water faucets and let the water
fl ow from each for several minutes. This will
release any accumulated hydrogen gas. As
the gas is fl ammable, do not smoke or use an
open fl ame during this time.
• Remove the door to the washing
compartment when removing an old
dishwasher from service or discarding it.
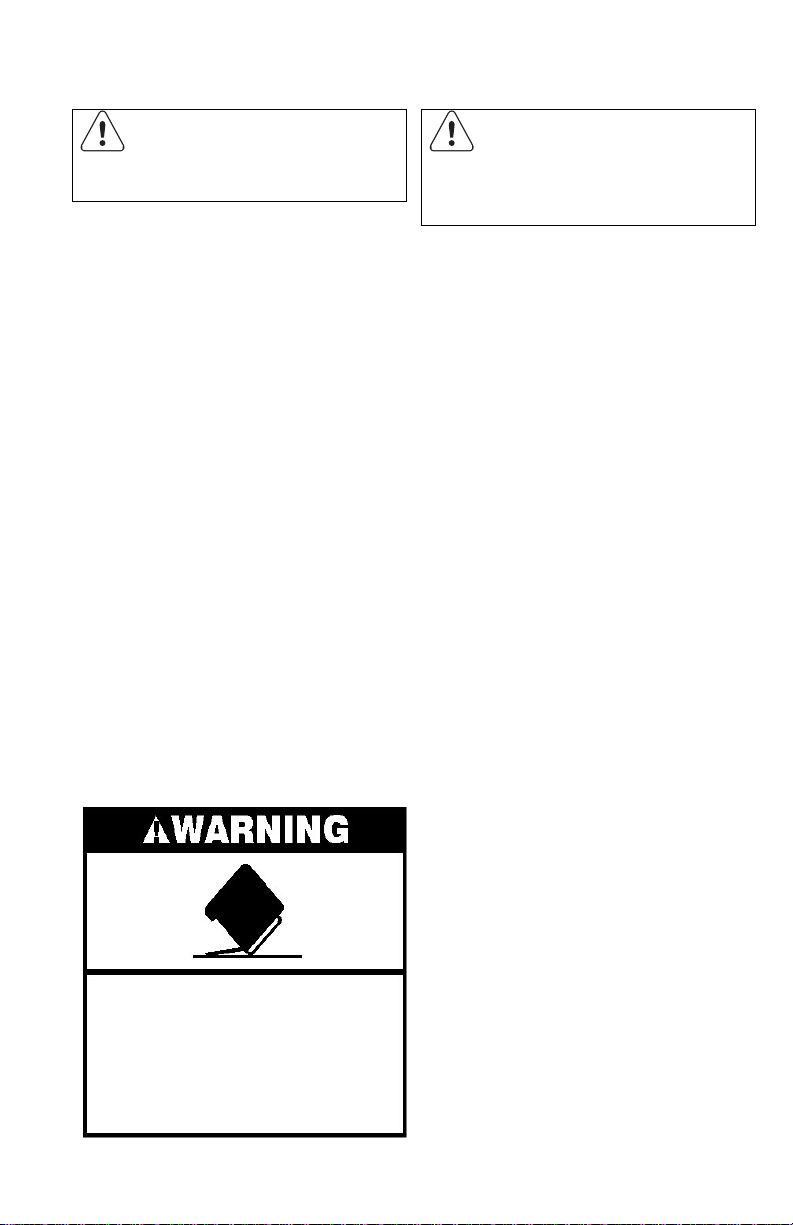
Tip Over Hazard
Do not use dishwasher until
completely installed.
Do not push down on open door.
Doing so can result in serious injury or
cut.
3

Warranty Information
KENMORE APPLIANCE WARRANTY
One Year Limited Warranty
When installed, operated and maintained according to all instructions supplied with
the product, if this appliance fails due to a defect in material or workmanship within
one year from the date of purchase, call 1-800-4-MY-HOME® to arrange for free
repair.
If this appliance is used for other than private family purposes, this warranty applies
for only 90 days from the date of purchase.
This warranty covers only defects in material and workmanship. Sears will
NOT pay for:
1. Expendable items that can wear out from normal use, including but not limited to
fi lters, belts, light bulbs and bags.
2. A service technician to instruct the user in correct product installation, operation
or maintenance.
3. A service technician to clean or maintain this product.
4. Damage to or failure of this product if it is not installed, operated or maintained
according to all instructions supplied with the product.
5. Damage to or failure of this product resulting from accident, abuse, misuse or use
for other than its intended purpose.
6. Damage to or failure of this product caused by the use of detergents, cleaners,
chemicals or utensils other than those recommended in all instructions supplied
with the product.
7. Damage to or failure of parts or systems resulting from unauthorized
modifi cations made to this product.
Disclaimer of implied warranties; limitation of remedies
Customer’s sole and exclusive remedy under this limited warranty shall be product
repair as provided herein. Implied warranties, including warranties of merchantability
or fi tness for a particular purpose, are limited to one year or the shortest period
allowed by law. Sears shall not be liable for incidental or consequential damages.
Some states and provinces do not allow the exclusion or limitation of incidental
or consequential damages, or limitations on the duration of implied warranties of
merchantability or fi tness, so these exclusions or limitations may not apply to you.
This warranty applies only while this appliance is used in the United States and
Canada*.
*In Canada, in-home repair service is not available in all areas, nor will this warranty
cover user or servicer travel and transportation expenses if this product is located in
a remote area (as defi ned by Sears Canada Inc.) where an authorized servicer is not
available.
This warranty gives you specifi c legal rights, and you may also have other rights which
vary from state to state.
Sears Brands Management Corporation, Hoff man Estates, IL 60179
Sears Canada Inc., Toronto, Ontario, Canada M5B 2C3
4

Master Protection Agreements
Congratulations on making a smart purchase. Your new Kenmore® product is
designed and manufactured for years of dependable operation. But like all products,
it may require preventive maintenance or repair from time to time. That’s when
having a Master Protection Agreement can save you money and aggravation.
The Master Protection Agreement also helps extend the life of your new product.
Here’s what the Agreement* includes:
• Parts and labor needed to help keep products operating properly under normal
use, not just defects. Our coverage goes well beyond the product warranty. No
deductibles, no functional failure excluded from coverage – real protection.
• Expert service by a force of more than 10,000 authorized Sears service technicians,
which means someone you can trust will be working on your product.
• Unlimited service calls and nationwide service, as often as you want us, whenever
you want us.
• “No-lemon” guarantee – replacement of your covered product if four or more
product failures occur within twelve months.
• Product replacement if your covered product can not be fi xed.
• Annual Preventive Maintenance Check at your request – no extra charge.
• Fast help by phone – we call it Rapid Resolution – phone support from a Sears
representative on all products. Think of us as a “talking owner’s manual”.
• Power surge protection against electrical damage due to power fl uctuations.
• $250 Food Loss Protection annually for any food spoilage that is the result of
mechanical failure of any covered refrigerator or freezer.
• Rental reimbursement if repair of your covered product takes longer than promised.
• 25% discount off the regular price of any non-covered repair service and related
installed parts.
Once you purchase the Agreement, a simple phone call is all that it takes for
you to schedule service. You can call anytime day or night, or schedule a service
appointment online.
The Master Protection Agreement is a risk free purchase. If you cancel for any
reason during the product warranty period, we will provide a full refund. Or, a
prorated refund anytime after the product warranty period expires. Purchase your
Master Protection Agreement today!
Some limitations and exclusions apply. For prices and additional information in the
U.S.A. call 1-800-827-6655.
* Coverage in Canada varies on some items. For full details call Sears Canada at
1-800-361-6665.
Sears Installation Service
For Sears professional installation of home appliances, garage door openers, water
heaters, and other major home items, in the U.S.A. or Canada call 1-800-4-MY-
®
HOME
.
5

Sears Service
Sears Parts and Repair Services
I
To purchase replacement parts and product accessories, call 1.800.4.MY.HOME
WE’RE THERE FOR YOU LONG AFTER THE SALE
TM
(1.800.469.4663), visit Sears.ca/parts, or visit your nearest Sears Parts and Repair store.
Delivery to your home is available.
*Select product assortment sold online; for full product availability please call the number provided.
We recommend the following accessories to help extend the life of your product while saving you time and money.
MAJOR APPLIANCES:
REFRIGERATORS
Water & Air Filters
Ice Maker Stainless Steel Water Line
Thermometers
Environmentally Friendly Appliance Cleaners
DISHWASHERS
Stainless Steel Hoses
Clamps & Dishwasher Fittings
Dishwasher Installation Kits
VACUUMS:
Bags
Belts
Hoses
Wands, Brushes & Nozzles
Filters
STOVES
Range Hood Filters
Elements
Bulbs
Smooth Top Cleaning Kits
LAUNDRY
Rubber & Stainless Steel Hoses
Ducts, Clamps, Vent Kits & Dryer Vent Cleaning
Brushes
Filters & Heating Elements
LAWN & GARDEN:
Tune-up Kits, Oil & Fuel Stabilizers
Filters
Blades
Belts
Spark Plugs, Shear Bolts & Shear Pins
HEATING & COOLING:
Furnace & Air Conditioning Filters Humidifier Media Pads
Thermostats Durasept Humidifier Cleaner
And a whole lot more! We have access to over 1 million parts and accessories!
In-home or in-shop service is available for all major brands.
Call 1.800.4.MY.HOME
TM
Sears.ca/parts_
6
Operating Instructions
NOTE
Your Tower Wash System® dishwasher uses a proven single, rotating arm with a
telescoping set of wash jets for targeting the upper rack.
Cycles begin with a drain to remove liquid that may have been added during
loading. Following that, you may hear a series of wash segments for washing and
later rinsing. These wash segments start with the addition of water, then follow
by the spraying of dishes and then end by draining the wash or rinse fl uid. Other
actions will take place during the cycle that you will not be able to hear. these
include addition of detergent, heating of the fl uid, dispensing of rinse agent, and
pulsed heating of the dishware after the fi nal drain to improve drying.
GETTING STARTED
1. Load dishwasher (See Preparing and Loading Dishes).
2. Add detergent (See Dishwasher Dispenser & Detergents).
3. Add rinse aid (See Rinse Aid).
4. Turn dial clockwise to select cycle (See Wash Cycle Selection).
5. Select desired OPTION (See Energy Option).
6. Run hot water faucet nearest dishwasher until water is hot. Turn water off .
7. To start, Close the door to latch.
CAUTION
Before starting dishwasher be sure tht the water is connected and turned on. Failure
to do so may cause damage to the pump seal and result in water leakage.
7

Operating Instructions
Recommended Cycle for typical
use:
The Normal cycle along with the heated
dry option together provide the best all
around performance. This cycle selection
is recommended for everyday use and is
suitable for a large range of both dish load
sizes and food quantities remaining on those
dishes.
Option Selection
Heavy Wash
For heavily soiled dishware, pots, pans,
casseroles and dinnerware with dried-on or
baked-on soils:
• Turn dial to HEAVY WASH
• Select desired heating option (heat
dry/air dry).
Normal Wash
For daily, regular use to completely wash
and dry up to a full load of dishes and
silverware:
• Turn dial to NORMAL WASH
• Select desired heating option (heat
dry/air dry).
Drying
For adding an additional dry period to a
cycle to obtain warm, dry dishes:
• Ensure the heat dry option is still
selected.
• Within 15 mins after cycle completion,
open the door slightly, rotate the knob
clockwise to “DRYING”, and close the
door.
• For the best drying: While the door is
open briefl y to re-set the timer gently
move the racks in and out an inch or
two to spill out some of the water that
may be trapped in recessed areas of
dishware.
Water Heating Delay
This dishwasher is equipped with a thermostat
to ensure that the water is heated to the
proper temperature for optimal cleaning
and drying results. The knob/timer on the
dishwasher may pause at the position labeled
“water heating”. The dishwasher is not stuck
here, but is simply heating the water to the
proper temperature before advancing. A
minimum water temperature of 120oF is
recommended to minimize this water heating
delay.
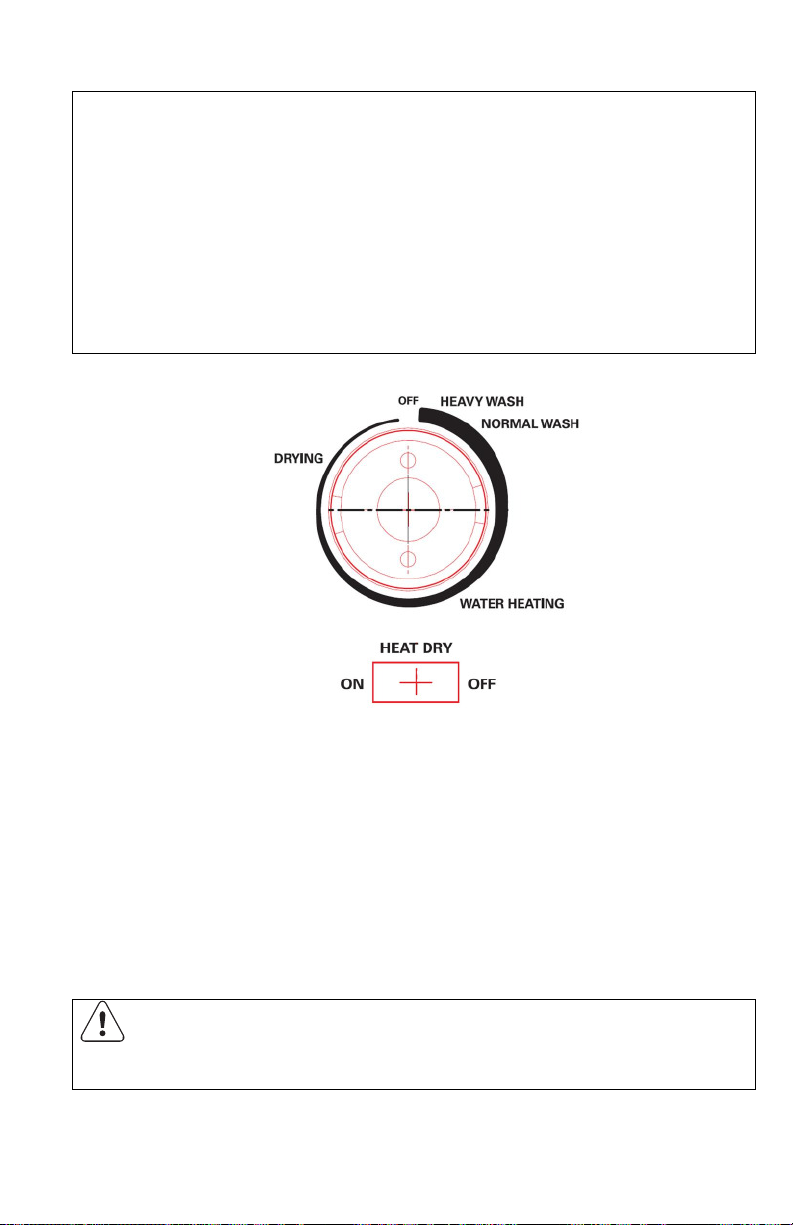
Using the Timer
The timer advances to complete the portion
of the cycle between the dial position and
OFF. Started at Heavy Wash it will run
through Heavy, Normal and Dry. Set at
Normal Wash it will run Normal and Dry,
and so on.
• It is best to have the door unlatched
while setting the timer.
• The timer dial should always be
advanced in the clockwise direction.
• 4 positions are available for use, the
OFF position and the start positions for
Heavy Wash, Normal Wash and Drying.
• Other stops on the dial path are to
allow the unit functions to be quickly
checked during production but are of
no practical use for washing or drying
dishes in the home.
• The “Water Heating” text is to mark the
position where the dial may pause while
temperature is increased to make the
wash eff ective - it is not a location for
starting any cycle.
• The Heavy and Normal cycles start with
a drain, then a fi ll, then spraying - you
may not be able to hear that it has
started at fi rst.
Energy Option
The toggle switch provided to choose
between heat dry and air dry aff ects heater
operation but only during the drying portion
of the cycle. The selection may be made
at any time prior to or during the cycle. It
aff ects only the portion of the cycle’s drying
that follows the selection. With either
option, you may see water vapor coming
from the vent near the top of the door - this
is normal.
8

Operating Instructions
Heat Dry Option
Selecting the Heat Dry option will cause
the heating element to be on during the
drying portion of the cycle.
The Heat Dry option in combination with
rinse aid will improve drying results. The
energy to use Heat Dry is greater than if
Air Dry is selected but costs just pennies
per cycle. Turning off the Heat Dry option,
will result in more of the dish load being
wet a the end of the cycle.
Cycle Chart
Cycle
Heavy Wash
Normal Wash
Drying/Plate Warmer
Water (Approx.)
5.2 gal.
4.4 imp.
19.8 Liters.
4.4 gal.
3.6 imp.gal.
16.5 liters
Air Dry Option
Selecting the Air Dry option reduces energy
use and lowers costs by preventing the
heating element from coming on during the
drying portion of the cycle.
With this option drying may be improved
by using rinse aid and opening the door
slightly immediately after the cycle is
complete.
Time (Approx.)
68 mins*
64 mins*
14 mins*
Washes/Rinses
4 Washes 2 Rinses
3 Washes 2 Rinses
* Includes dry time.
Preparing and Loading Dishes
Prior to loading dishware into the dishwasher:
Scrape away large pieces of food, bones, pits,
toothpicks, etc. Loosen burned - on foods.
Empty liquids from glasses and cups.
Foods such as mustard, mayonnaise, vinegar,
lemon juice and tomato - based products
may cause discoloration of stainless steel and
plastics if allowed to sit for a long period of
time. Unless the dishwasher is to be operated
at once, it is best to rinse off these food soils
before loading the dishwasher.
This unit uses very little water. Generally,
running the cycle - even with half of a load
is more economical than rinsing by hand and
waiting to run the unit when a full load is
ready to wash.
• If the dishwasher drains into a Food
9
Disposer, be sure disposer is completely
empty before starting dishwasher.
Preparing and Loading Dishes
Loading the Dishwasher
• Load racks so that large items do not
prevent the detergent dispenser from
opening.
• Check manufacturer’s recommendations
before washing items in question.
Loading the Top Rack
Features and appearance of racks and
silverware basket may vary from your model.
The top rack is designed for cups, glasses,
small plates, saucers and bowls.
Load glasses in top rack only. Damage may
occur if placed in bottom rack.
Load plastic items in top rack only. Melting
may occur if placed in bottom rack.
Load items with open ends facing down for
better cleaning and draining.
Damage may occur if delicate items touch
each other during dishwasher operation.
Long-handled knives and utensils can be
placed in top rack.
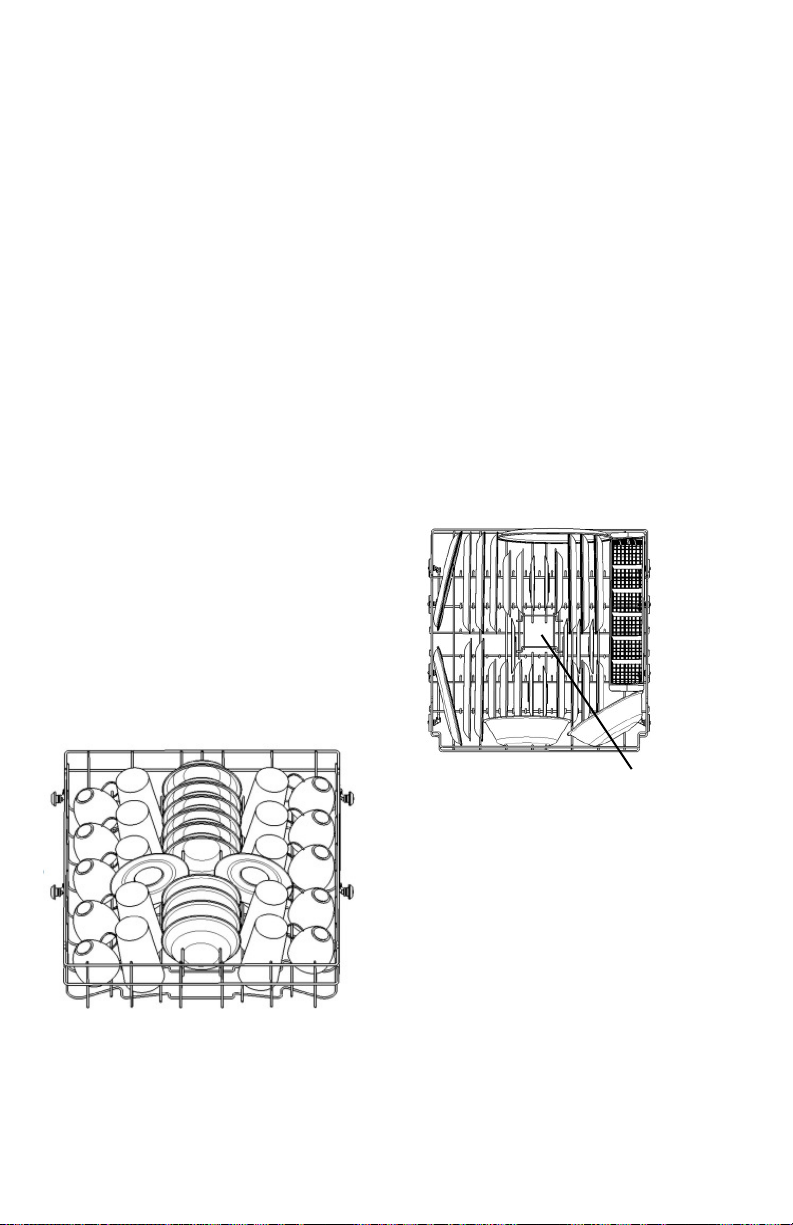
Loading the Bottom Rack
Features and appearance of racks and
silverware basket may vary from your model.
The lower rack is best for plates, saucers,
bowls, and cookware. Large items should be
placed along the edge so they do not block
the spray arm extension. For the best results,
place bowls, casseroles, and sauce pans with
soiled surface facing down and toward the
center. Tilt items slightly for better drainage.
Make sure tall items will not block the
detergent dispenser’s door.
Be sure pan handles do not protrude through
the bottom of the rack and block the spray
arm rotation.
10
Do not
block tower
protector
 Loading...