

Kenmore 36314451690, 3631435598, 3631435597, 3631435198 Owner’s Manual
Model Nos.
14351
i4355
Caution:
Read and Follow
MODEL AND SERIAL
NUMBER PLATE
All Safety Rules and
Operating instructions
Before First Use of
This Appliance.
KenrnoPe
AUTORATnC DJISHWASHE
Safety Instructions
Operation
Care and Maintenance
Troubleshooting
Fill in these spaces:
Model No_
Serial No.
Purchase Date:
165D3592P049
SR5548
Printed in USA,
485 CG
IMPORTANT SAFE INSTROQTION$
READ ALL nNSTRUCTliONS BEFORE USING THgS APPLRANCE.
WARNtlNG-_When using this appliance,
always exercise basic safety precautions,
including the following:
Use this appliance only for its intended purpose, as you
will find described in this guide.
Use only powder Or liquid detergents or wetting agents
recommended for use in a dishwasher. Keep all washing
detergents and wetting agents OUT OF REACH OF
CHmLDREN, preferably in a locked cabinet. Observe all
warnings on container labels to avoid personal injury.
When loading items to be washed:
Locate sharp items so that they are not likely to damage
the door seal. Load sharp lmives with the handles up to
reduce the risk of cut-type injuries.
DO NOT wash plastic items unless marked "dishwasher
safe" or the equivalent° For plastic items not so marked,
check the manufacturer's recommendations.
DO NOT touch the heating element during or immedi-
ately after use.
DO NOT operate your dishwasher unless all enclosure
panels are properly in place.
DO NOT tamper with controls.
DO NOT abuse, sit on, or stand on the door or dish
rack of the dishwasher.
Close supervision is necessary if this appliance is used by
or near children. DO NOT allow children to play
inside, on or with this appliance or any discarded appli-
ance. Dispose of discarded appliances and shipping or
pacldng material properly, Before discarding a dishwasher,
remove the door of the washing compartment.
DO NOT store or use combustible materials,
gasoline or other vapors
in the vicini_! of this or any other appliance.
Load light plastic items so they will not become dislodged
and &op to bottom of the dishwasher--they might come
into contact with the heating element and be damaged.
flammable and liquids
Do not attempt to repair or replace any part of your dish-
washer unless it is specific_ly recommended in this
guide. All other servicing should be referred to a qualified
technician.
GROUNDBNG _NSTRUCTI]ONS
and located in accordance with the
This dishwasher must be properly installed
Installation Instructions before it is used. If
you did not receive an Installation Instructions sheet
with your dishwasher, you can obtain one by contact-
ing your Sears Service Center.
This appliance must be connected to a grounded
metal, permanent wiring system; or an equipment-
grounding conductor must be run "with the circuit
conductors and connected to the equipment-ground-
ing terminal or lead of the appliance.
A_ WARNffqG--Improper connection of the
electrician or service representative if you are in doubt
whether the appliance is properly grounded_
A_ WARIN_NG_HYDROGEN GAS is pro-
heater andtor water pipes if hot water has not been used
for a period of two weeks or longei_ HYDROGEN
GAS IS EXPLOSIVE. To prevent the possibility of
darnage or injury, if you have not used hot water for two
weet_ or mole, or moved into a residence in which the
hot water system may not have been used for some time,
turn on all hot water faucets and allow them to run for
several minutes before using any electrical appliance
which is connected to the hot water system. This will
allow any hydrogen gas to escape.._Jso, since the gas is
flammable, DO NOT smoke or use an open flame or
appliance during this process.
equipment-grounding conductor can result in
a risk of electric shock. Check with a qualified
duced by the chemical action within your
water heater_ It can accumulate in the water
To minimize the possibility of electric shock, disconnect
this appliance from the power supply before attempting
any maintenance.. NOTE: Turning the dishwasher off
does not disconnect the appliance from the power supply.
We recommend having a qualified technician service your
appliance.
INSTRUCTIONS
Contents
5,6
7,8
10
10
2
Rinse Agent Dispenser
3
4
Door Panels
User Maintenance Instructions
Care and Cleaning
6
Air Gap
Problems and Solutions
9
Model and Serial Numbers
Sears Serdce
Warranty
Safety Instructions
Important Parts of Your Dishwasher
What Your Dishwasher Needs
Operating Instructions
Energy-Saving Tips
Proper Loading
Special Tips
Detergent Dispenser
Detergent Guide
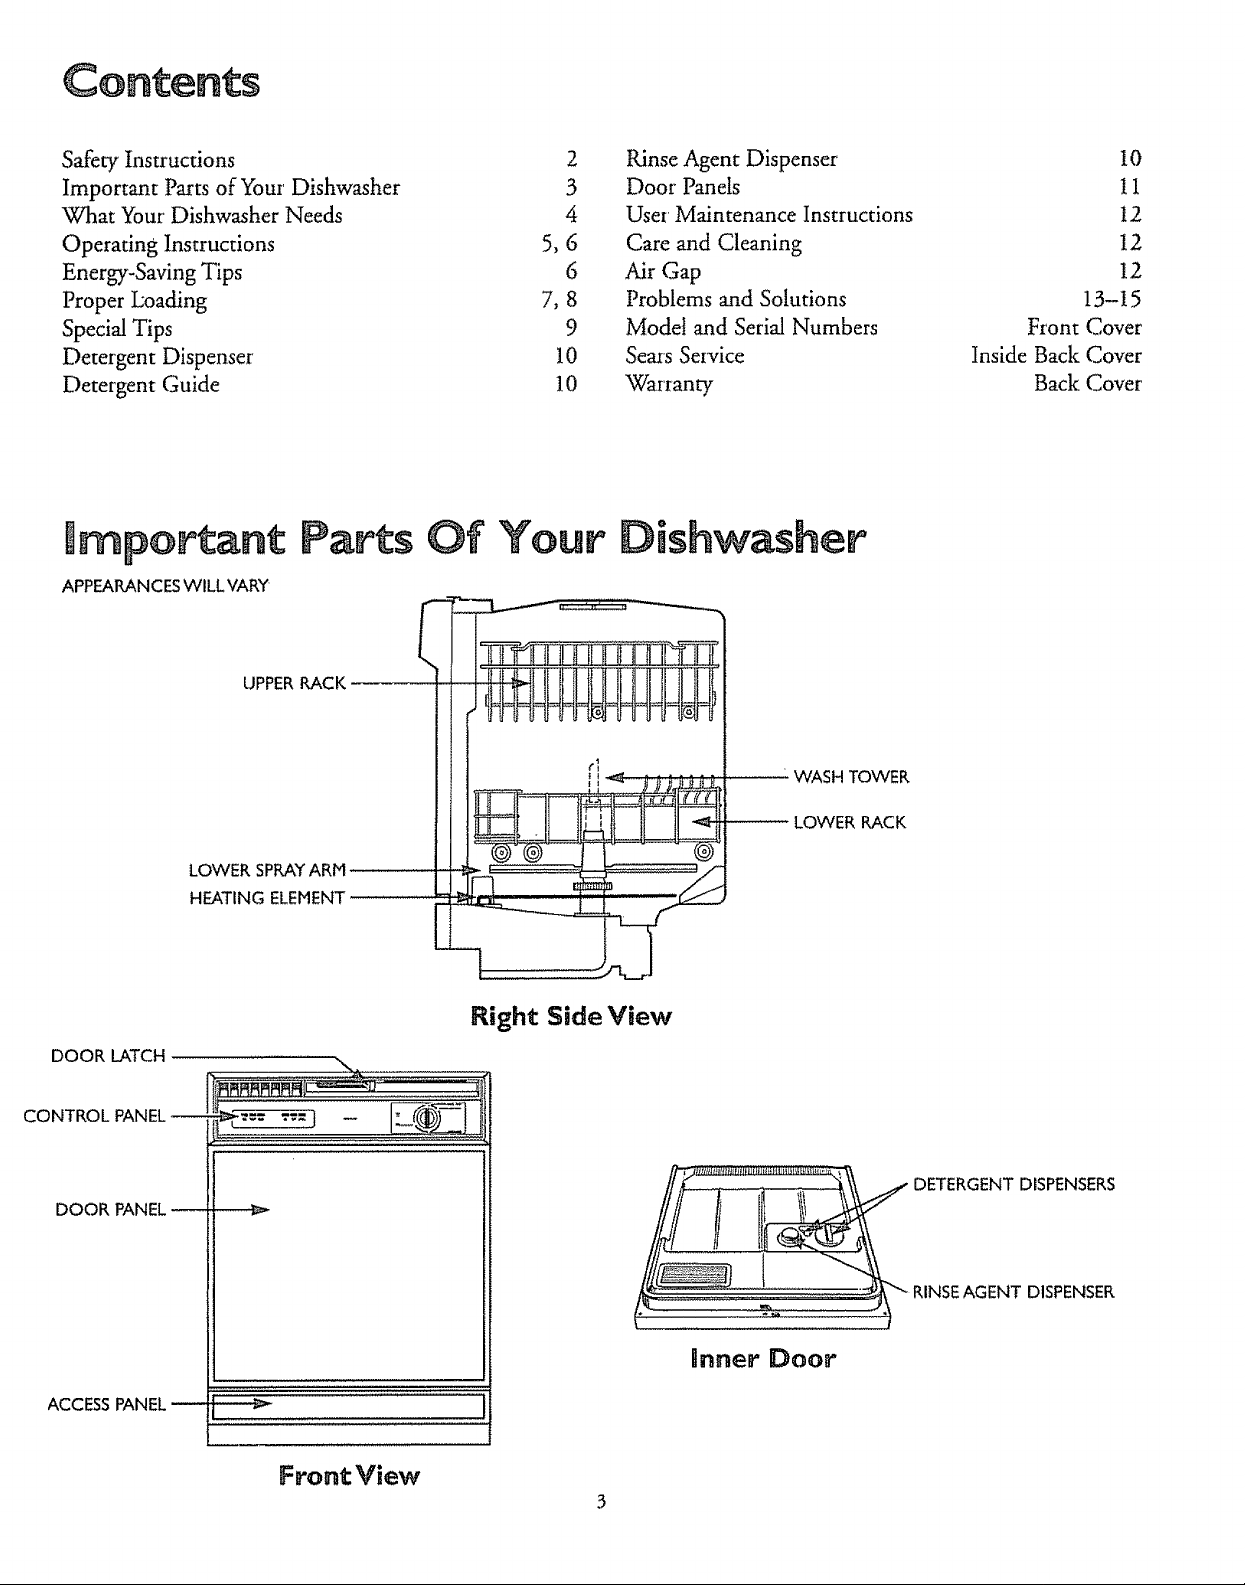
l mportant Parts Of Your Dishwasher
APPEARANCESWILL VARY
UPPERRACK
10
tl
12
12
12
13-15
Front Cover
Inside Back Cover
Back Cover
DOOR LATCH
CONTROL PANEL
DOOR PANEL -
PACK
LOWER SPR.i_YARM
HEATING ELEMENT
Right Side View
[[[Z[[[ [_
DETERGENT DISPENSERS
RINSE AGENT DISPENSER
Inner Door
ACCESSPANEL
FrontView
Hot Water
Water Conditions
To get dishes clean and dry you need hot water; To
help you get water of the proper temperature, your
dishwasher automatically heats the water in the wash
cycle. Higher water temperature is needed to dissolve
grease and activate powder detergents. For good wash-
ing and drying, the entering water must be at least
120°E To prevent dish damage, inlet water should not
exceed 150°E
° Check your water temperature with a candy or meat
thermometer,
Turn on the hot water faucet nearest the dishwasher.
Put the thermometer in a glass and let the water run
continuously into the glass until the temperature
stops rising. If the water temperature is below 120°E,
adjust your water heater°
o Do not operate the dishwasher during or right after
other heavy use of hot water, such as for laundry or
bathing.
In areas where water is very hald (12 grains or more),
it may be necessary to install a water softener to assure
proper performance from
your dishwasher° If you do
not know the hardness of
your water supply, contact
your local water department
or bring a sample into your
Sears store for testing.
Detergents
Only use detergents labeled for use in automatic dish-
washers. NEVER use laundry detergents, liquid soaps
or other household cleaners in your dishwasher. Some
detergents will be more effective -with your water
conditions than others. Store
detergent in a cool, dry placeo
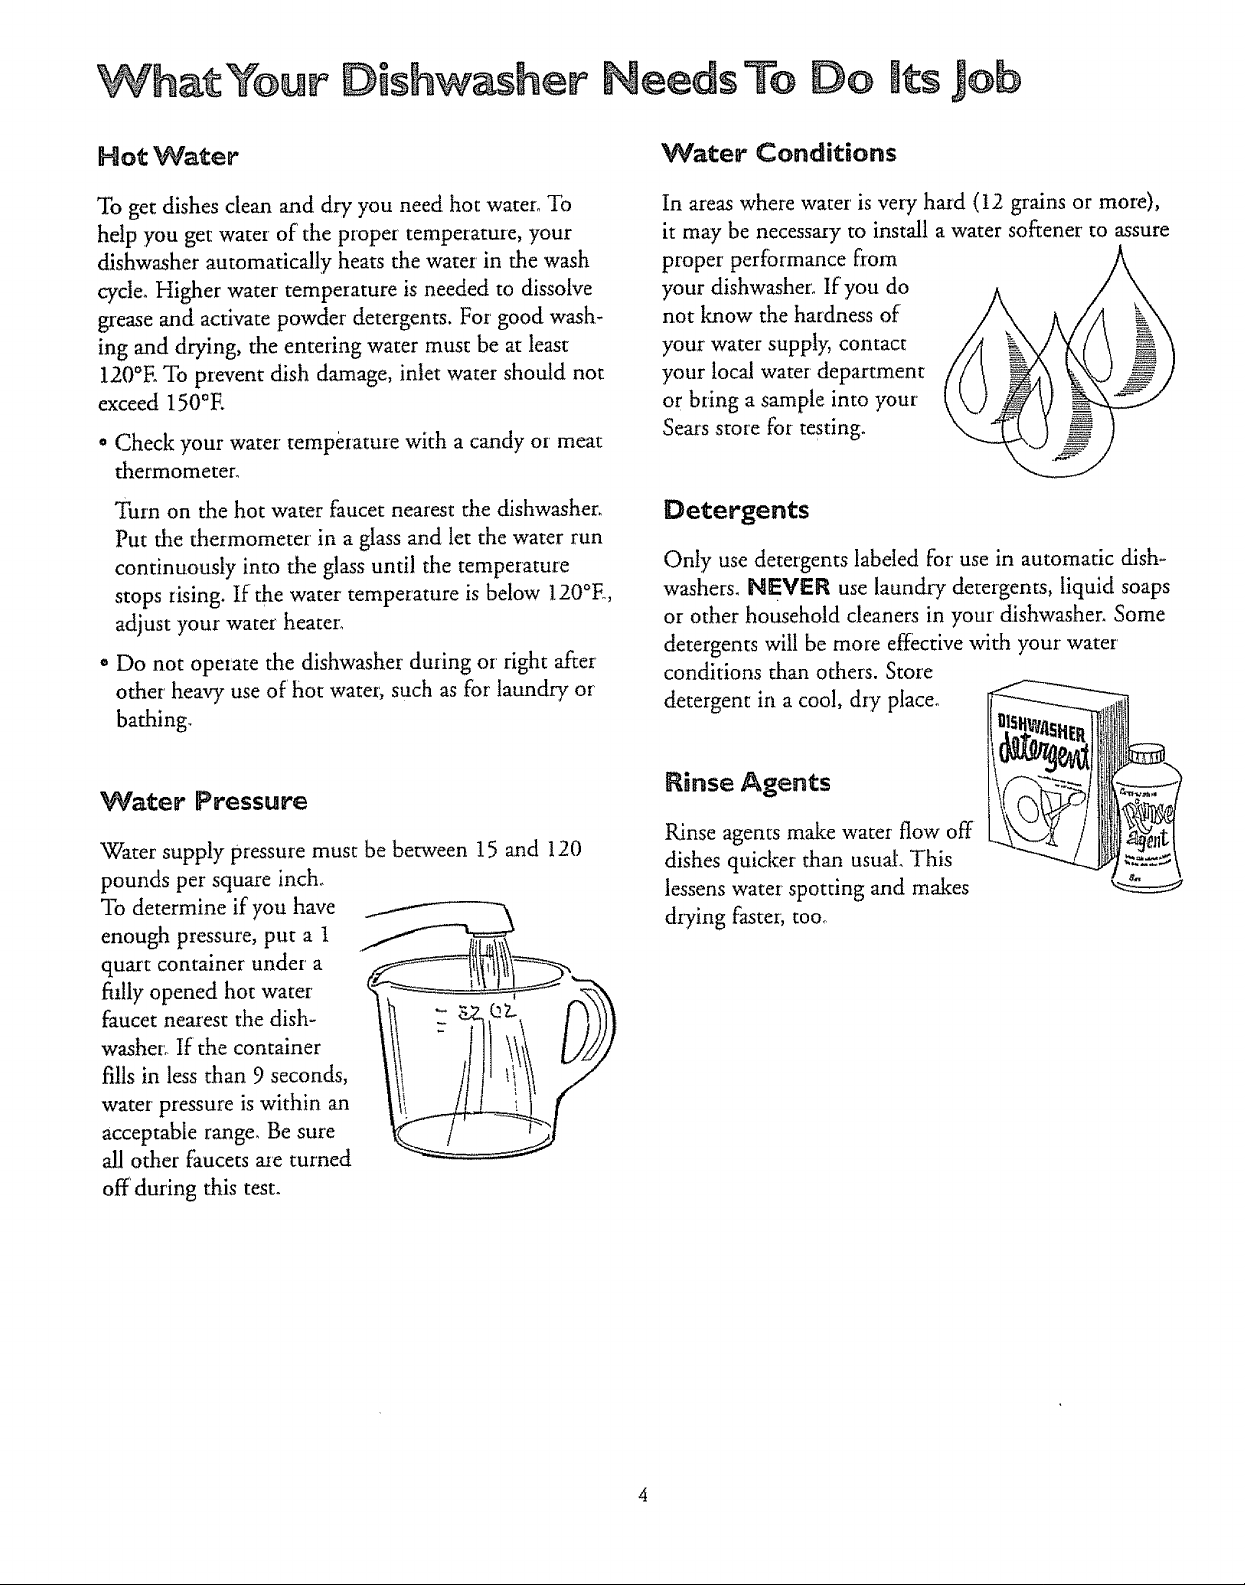
Water Pressure
Water supply pressure must be between 15 and 120
pounds per square inch°
To determine if you have
enough pressure, put a t
quart container under a
fiflly opened hot water
faucet nearest the dish-
washer.. If the container
fills in less than 9 seconds,
water pressure is within an
acceptable range. Be sure
all other faucets are turned
off during this test.
Rinse Agents
Rinse agents malce water flow off
dishes quicker than usual. This
lessens water spotting and makes
drying faster; too°
Operating
........................ , ............ : ........................::....... ., __
nstructions
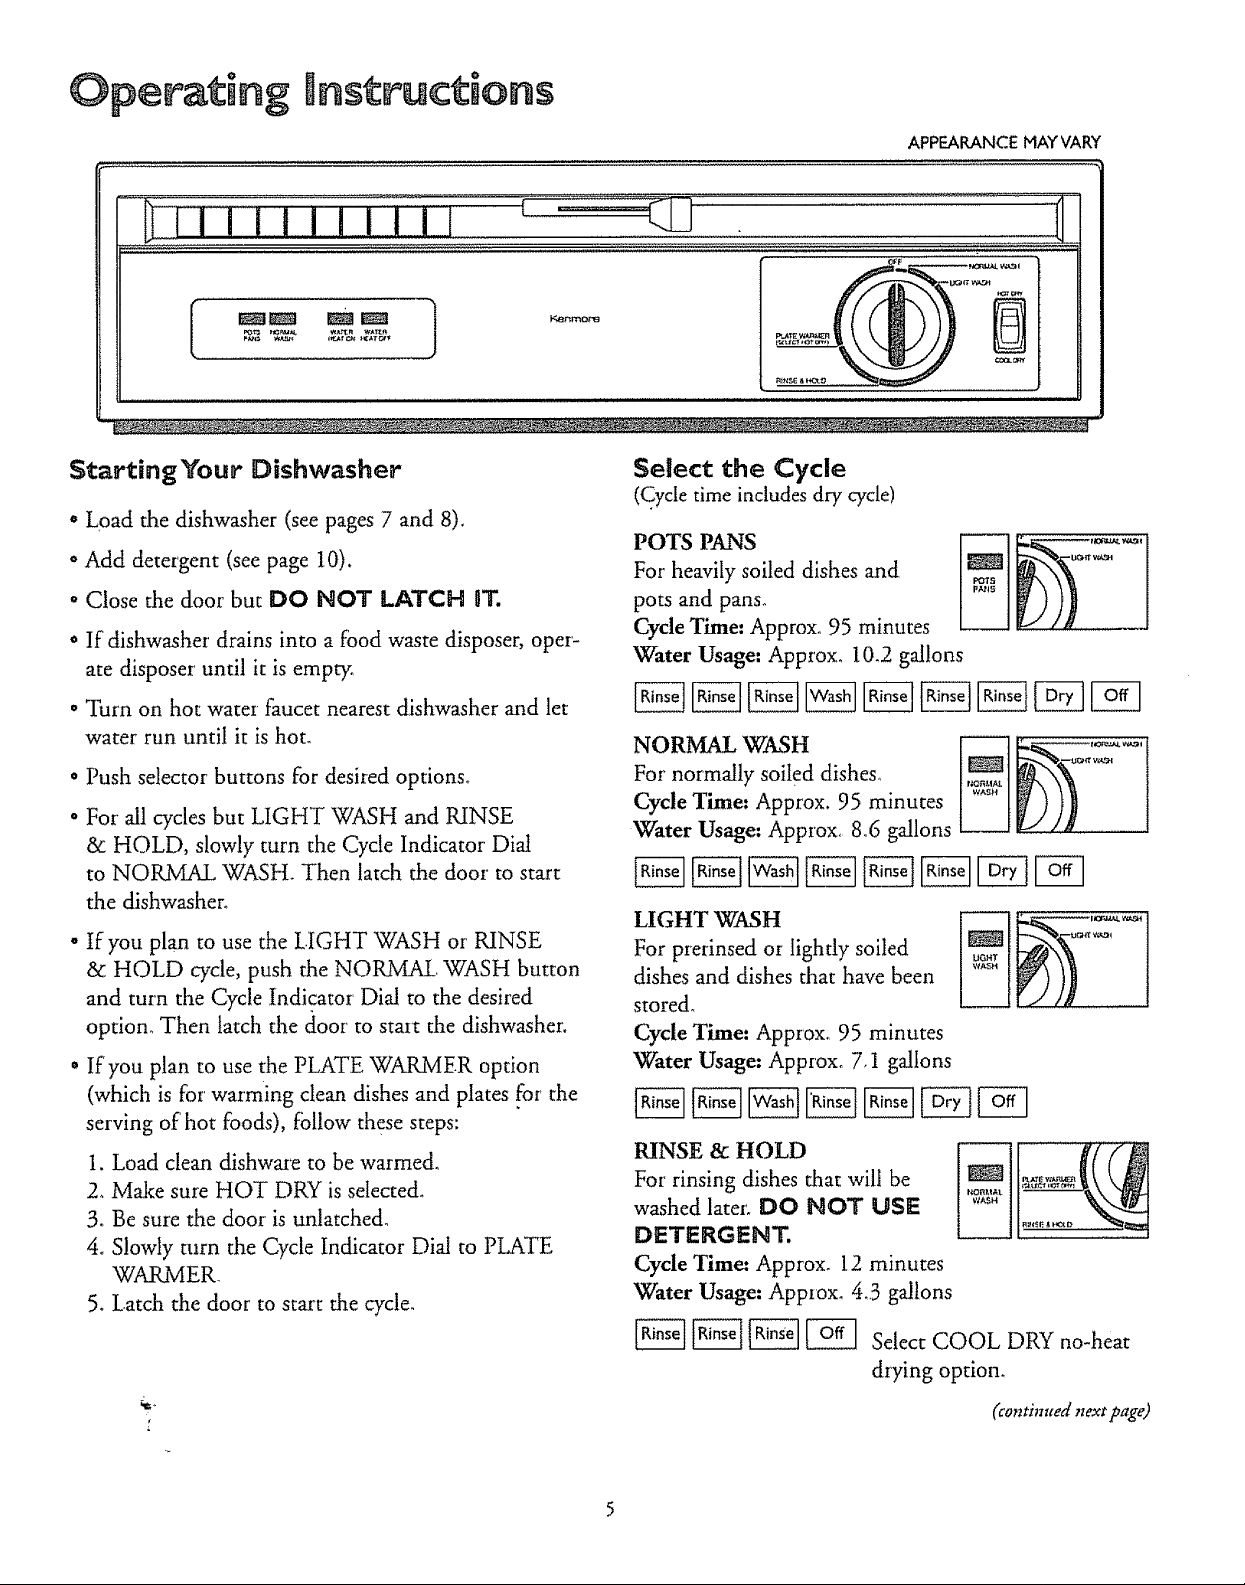
APPEARANCE MAYVARY
K_t_mor'_
StartingYour Dishwasher
. Load the dishwasher (see pages 7 and 8).
o Add detergent (see page 10).
• Close the door but DO NOT LATCH W.
o If dishwasher drains into a food waste disposer, oper-
ate disposer until it is empty
• Turn on hot water faucet nearest dishwasher and let
water run until it is hot_
o Push selector buttons for desired options,
o For all c_-cles but LIGHT WASH and RINSE
& HOLD, slowly turn the Cycle Indicator Dial
to NORMAL WASH. Then hatch the door to start
the dishwasher°
• tf you plan to use the LIGHT WASH or' RINSE
& HOLD cycle, push the NOPd'-dAL WASH button
and turn the Cycle Indicator' Dial to the desired
option° Then latch the door to start the dishwasher,
° If you plan to use the PLATE WMq.MER option
(which is for warming clean dishes and plates for the
serving of hot foods), follow these steps:
1. Load clean dishware to be warmed,
2. Make sure HOT DRY is selected+
3. Be sure the door is unlatched_
4o Slowly turn the Cycle Indicator Dial to PLATE
WARMER.
5. Latch the door to start the cycle.
Select the Cycle
(Cycle time includes dry cycle)
For heavily soiled dishes and '_'
POTS PANS _ _'_'_'
pots and pans_
Cycle Time: Approxo 95 minutes
Water Usage. Approx, 10.2 gallons
NORMAL WASH
For normally soiled dishes_
Cycle Time: Approx, 95 minutes
Water Usage. Approx, 86 gallons
HGHT "WASH
For prerinsed or lightly soiled
dishes and dishes that have been
stored.
Cycle Time: Approxo 95 minutes
Water Usage: Approxo 7.1 gallons
RINSE & HOLD
For rinsing dishes that will be
washed later. DO NOT USE
DETERGENT.
Cycle Time: Approx. 12 minutes
Water Usage: Approx. 4,,3gallons
_ _ [_ Select COOL DRY no-heat
drying option,
(continued next page)
Select Options
How to Add a Dish During a Cycle
WATER HEAT ON Option
Select this option to add extra heat to the
main wash for good washing and drying°
WATER HEAT OFF Option
This option turns off' the "WATERHEAT
ON option.
HOT DRY Option
Turns drying heater on for fast drying.
COOL DRY Option
Turns heater off for entire drying period. To
shorten drying time, open dishwasher door
slightly.
Normal Sights and Sounds
* You'll see water' vapor coming through the vents by
the door latch during drying and when water is being
pumped out°
" You'll hear occasional sounds while your dishwasher
is running:
o Soft food disposer shredding action.
o Drain valve opening to pump water out.
- Timer control as cycle progresses_
* Detergent cup opening.
. Pump motor starting,
o The motor stops during drying.
"Add dishes any time during RINSE & HOLD cycle.
° With other wash cycles, you can add dishes at any
time BEFORE main detergent "wash portion of cycle.
Here's how to add a forgotten dish:
1. Push door latch to the left. "Washing will stop.
2. Vgait a few seconds until the water calms_ Then
open the door.
3. Add dishes you've forgotten,
Preparing Dishes for Washing
* Prerinsing of normal food soil is not necessary.
* Scrape off bones, seeds, sldns, toothpicks and other
hard soils.
Remove hard shelled vegetables, meat trimmings, leafy
vegetables, and excessive amounts of oil or grease,
Remove foods with high acid content--they can dis-
color stainless steel.
°
Remove large quantities of any food,
°
When using the POTS PANS cycle, less preparation
is required. This cycle can wash heavily-soiled dishes
and remove dried-on and baked-on soils from pots,
pans and casseroles. However, items with burned-on
soils may not come clean.
Energy and Water Saving Tips
. Wash full loads.
° Use your dishwasher during off-peak hours.
" Use the HGHT WASH cycle whenever possible.
* Select COOL DRY drying option when you don't
need dry dishes in a hurry.
o Don't prerinse normally soiled dishes.
° Load correctly to ensure good washing action.
6

Proper Loading---uppo Rack (appearance will vary)
The upper rack is best for glasses, cups and saucers_
Cups and glasses fit best along the sides. This is also
the place for dishwasher safe plastics. Make sure
small plastic items are lodged in tightly so they can't
fall onto the heating unit, Arrange stemware so that
it cannot move easily. Don't let the glasses touch
each other.
The upper rack is handy for all ldnds of odd shapes,
Saucepans, mixing bowls and other items should be
placed face down, When loading dishwasher safe
plastics mal¢e sure each plastic item is secured over
two fingers° This will insure good washing results_
(c_ontimced next page)
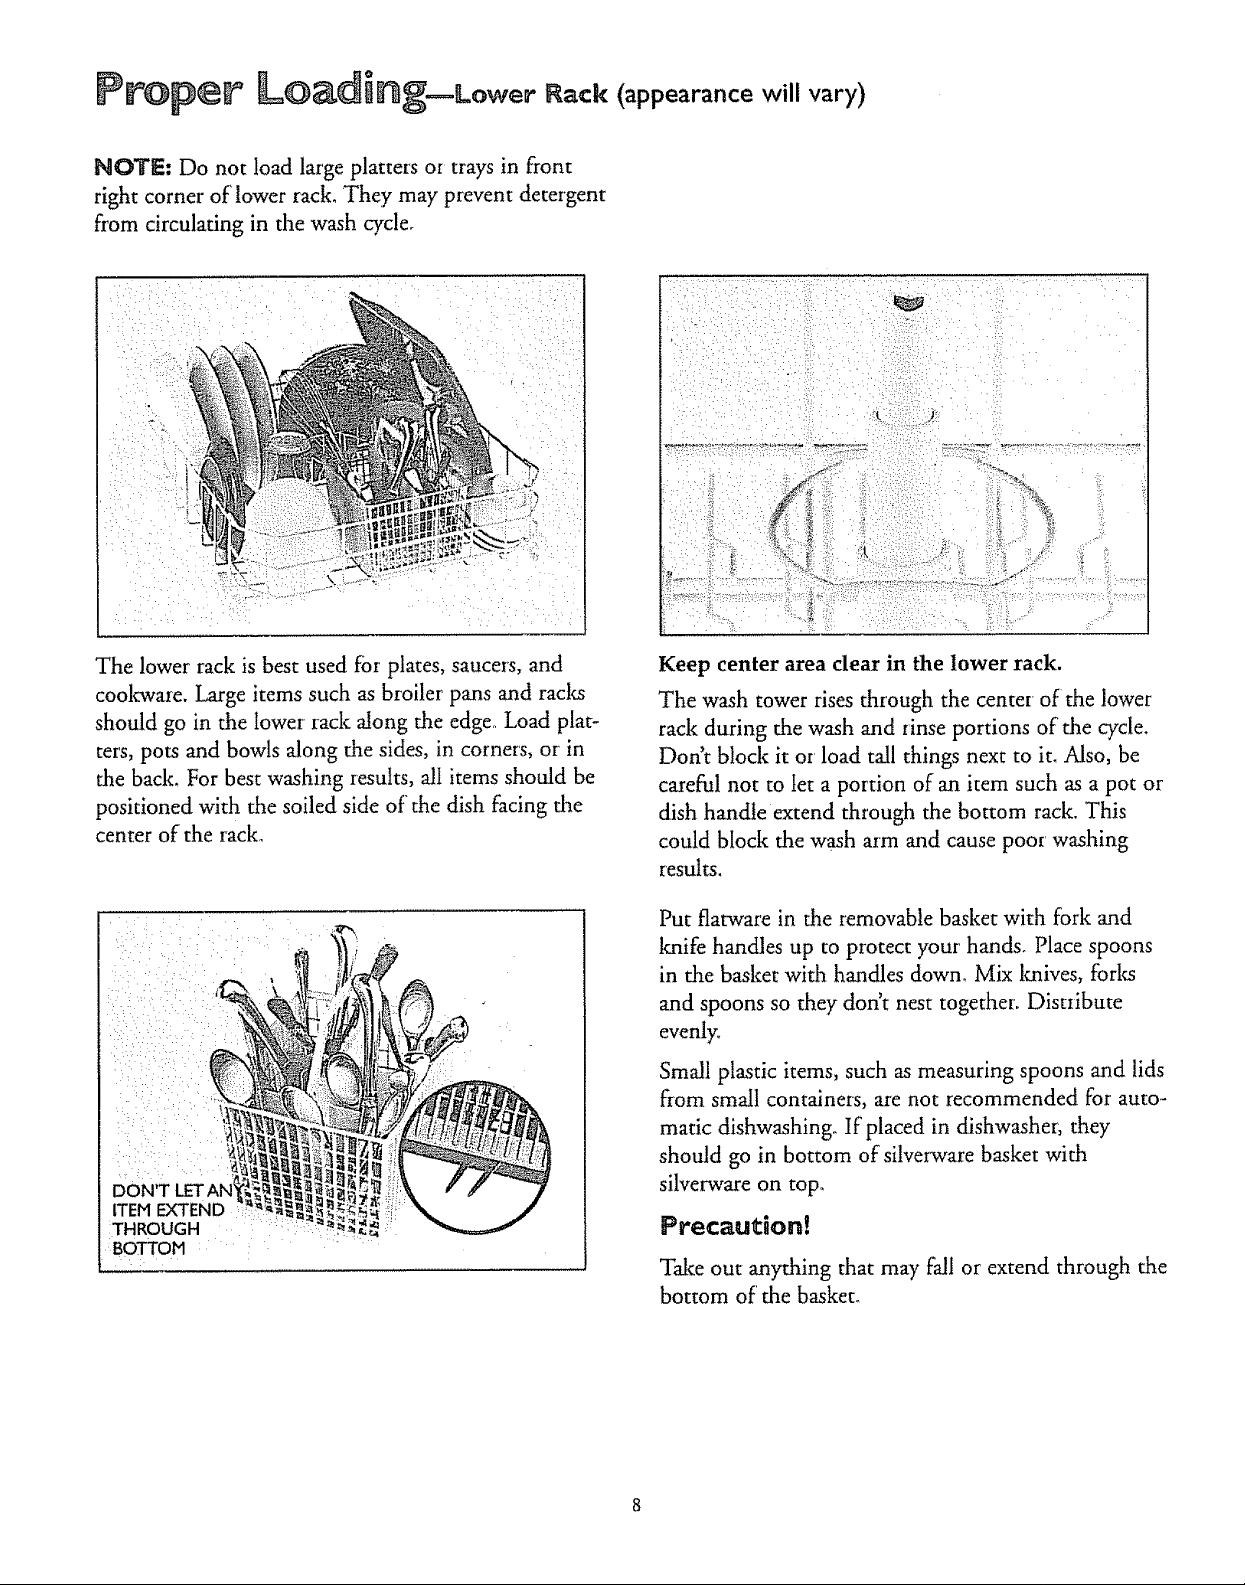
NO'rE: Do not load large platters o_ trays in front
right corner of lower rack. They may prevent detergent
from circulating in the wash cycler
The lower rack is best used for plates, saucers, and
coolcware. Large items such as broiler pans and raclcs
should go in the lower rack along the edge. Load plat-
ters, pots and bowls along the sides, in corners, or in
the back. For best washing results, all items should be
positioned with the soiled side of the dish facing the
center of the rack.
ITEM EXTEND
THROUGH
:BOTTOM
Keep center area clear in the lower rack.
The wash tower rises through the center of the lower
rack during the wash and rinse portions of the cycle.
Don't b!ock it or load tall things next to it. Mso, be
careful not to let a portion of an item such as a pot or
dish handle extend through the bottom rack. This
could block the wash arm and cause poor washing
results.
Put flatware in the removable basket with fork and
lmife handles up to protect your hands. Place spoons
in the basket with handles down° Mix knives, forlcs
and spoons so they don't nest together. Distribute
evenly.
Small plastic items, such as measuring spoons and lids
from small containers, are not recommended for auto-
matic dish,washing. If placed in dishwasher, they
should go in bottom of silverware basket with
silverware on top.
Precaution!
Talce out anything that may fall or extend through the
bottom of' the basket.
peciaB|ips on Dishwasher Use
Most utensils and dishware can be safely washed in
your dishwasher. Hovceve_; some materials may require
special handling,
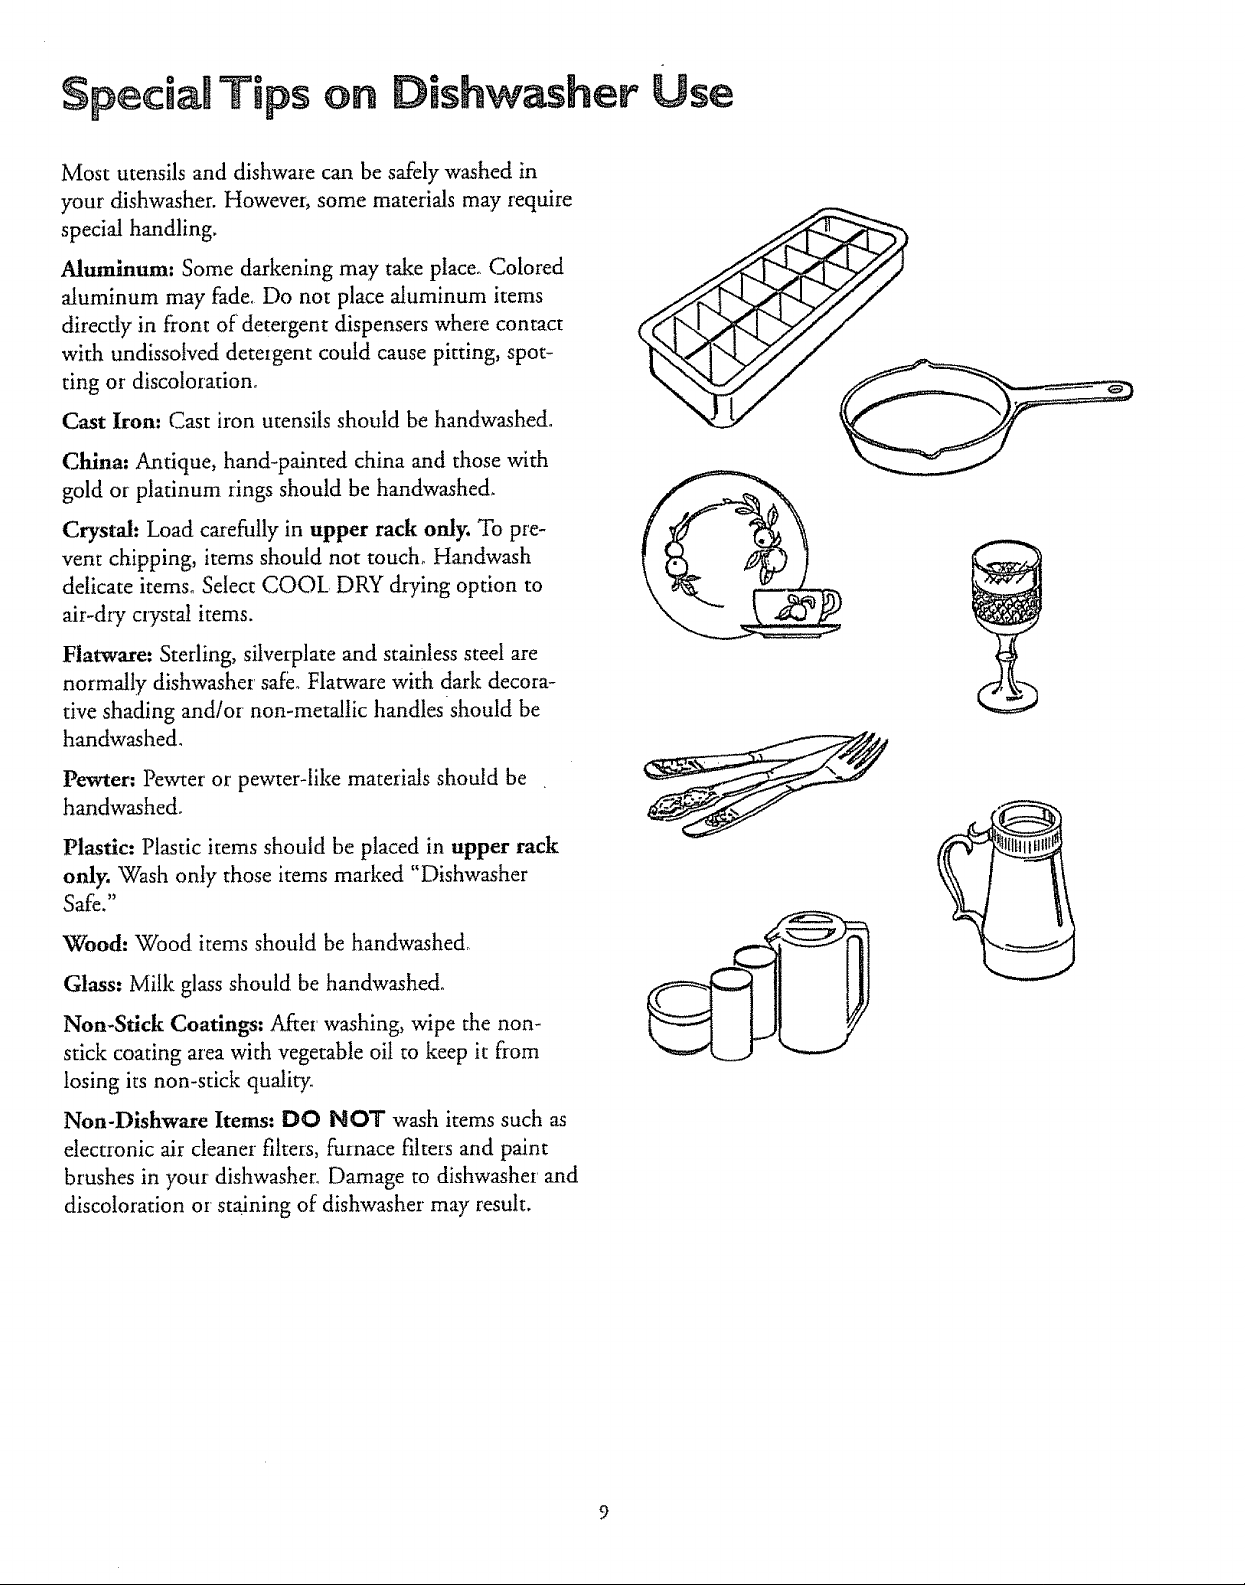
Aluminum: Some darkening may take placer Colored
aluminum may fade, Do not place aluminum items
directly in front of detergent dispensers where contact
with undissoived deteIgent could cause pitting, spot-
ting or discoloration°
Cast Iron: Cast iron utensils should be handwashedo
China: Antique, hand-painted china and those with
gold or platinum rings should be handwashed.
Crystal: Load carefidly in upper rack only, To pre-
vent chipping, items should not touch_ Handwash
delicate items° Select COOL DRY drying option to
air-dry crystal items.
Flatware: Sterling, silverplate and stainless steel are
normally dishwasher safeo Flatware with dark decora-
tive shading and/or non-metallic handlesshould be
handwashed.
Pewter: Pewter or pewter-like materials should be
handwashed.
Plastic: Plastic items should be placed in upper rack
only. Wash only those items marked "Dishwasher
Safe."
Wood: Wood items should be handwashed,
Glass: Milk glass should be handwashed,
Non-Stick Coatings: After washing, wipe the non-
stick coating area with vegetable oil to keep it from
losing its non-stick quality.
Non-Dishware Items: DO NOT wash items such as
electronic air cleaner filters, furnace filters and paint
brushes in your dishwasher. Damage to dishwasher and
discoloration or staining of dishwasher may result.
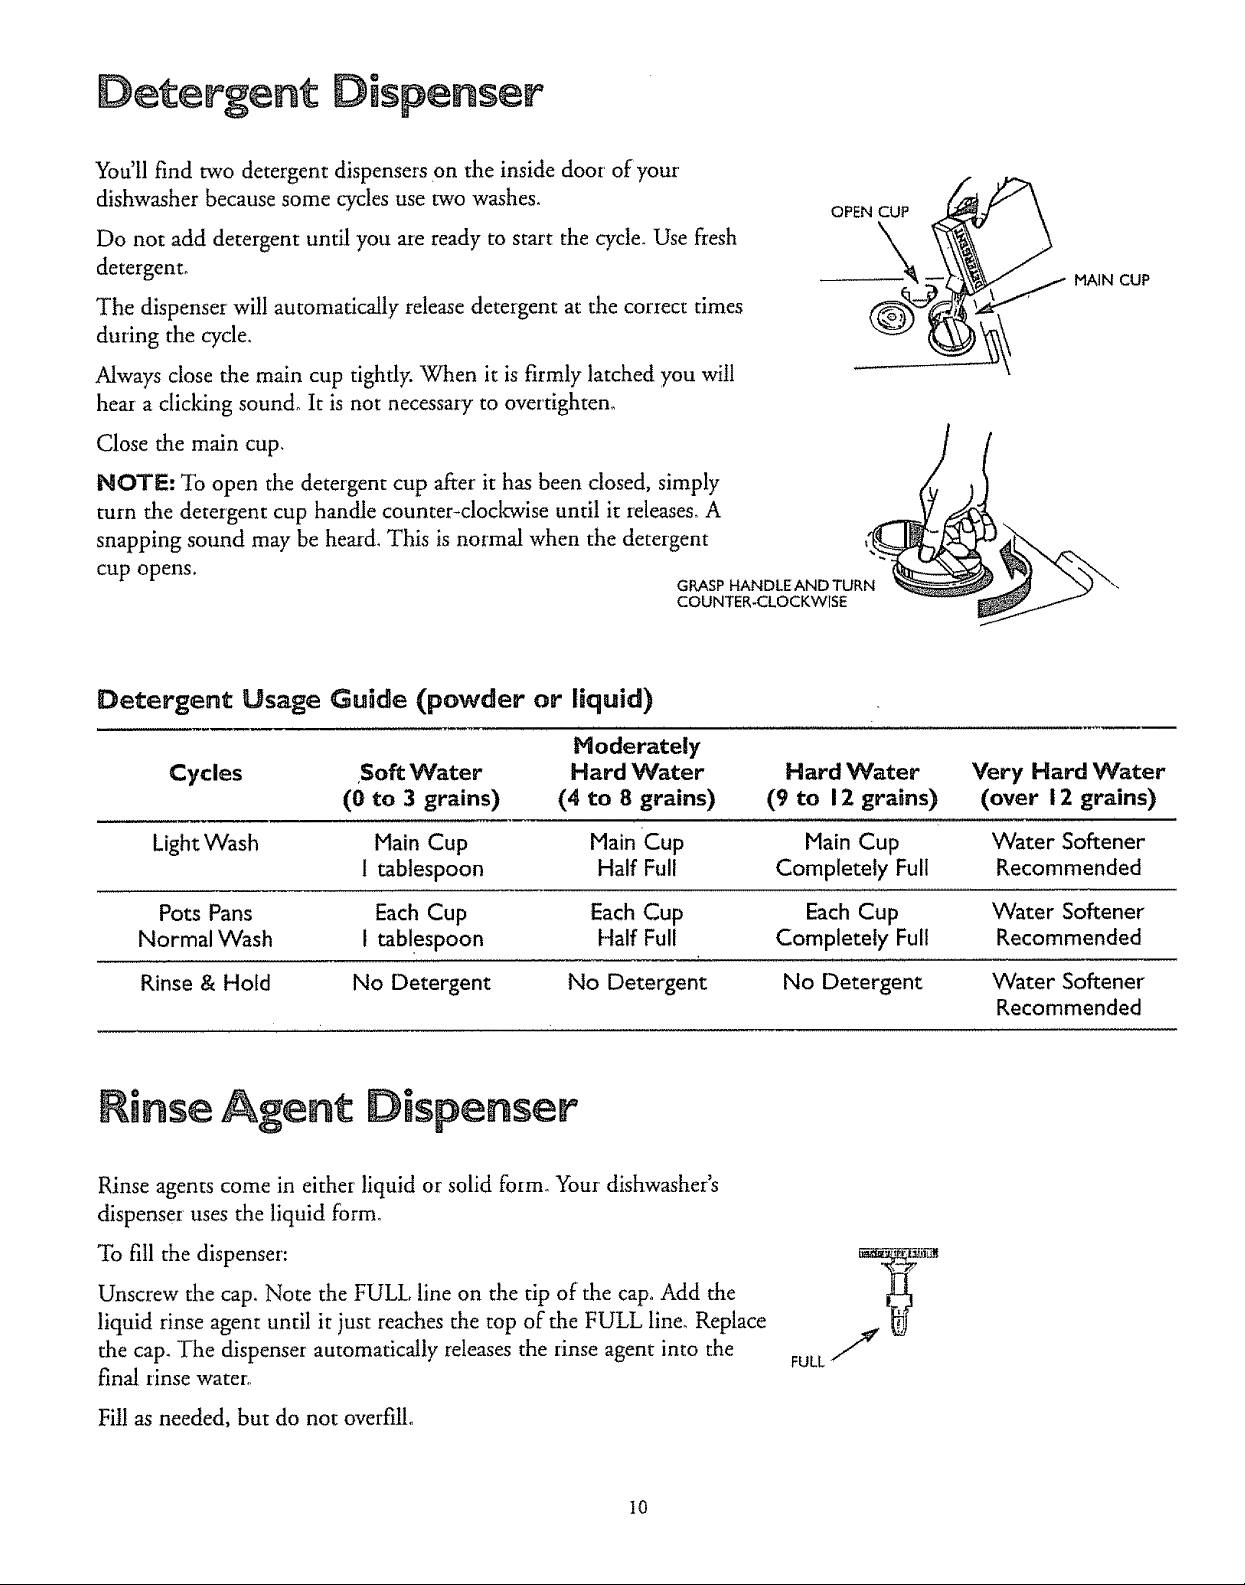
Detergent Dispenser
You'll find two detergent dispensers on the inside door of your
dishwasher because some cycles use two washes.
Do not add detergent until you are ready to start the cycle. Use fresh
detergent.
The dispenser will automatically release detergent at the correct times
during the cycle,
Always close the main cup tightly. Vc_hen it is firmly latched you will
hear a clic!dng sound° It is not necessary to overtighten_
OPEN CUP
MAIN CUP
Close the main cup, / €
/
NOTE: To open the detergent cup after it has been closed, simply _:v_ _1 !
turn
the detergent cup handle counter-clockwise until it releases° A \7 _.
snapping sound may be heard. This is normal when the detergent ,.__.a'Igg__ }
COUNTER-CLOCKWISE _
Detergent Usage Guide (powder or liquid)
Hoderately
Cycles Soft Water Hard Water
(0 to 3 grains) (9 to 12 grains)
Light Wash Hain Cup Main Cup Main Cup Water Softener
1 tablespoon Half Full Completely Full Recommended
Pots Pans Each Cup Each Cup Each Cup Water Softener
Normal Wash i tablespoon Half Full Completely Full Recommended
Rinse & Hold No Detergent No Detergent No Detergent Water Softener
Hard Water
(4 to 8 grains)
Very Hard Water
(over 12 grains)
Recommended
Rinse Agent Dispenser
Rinse agents come in either liquid or solid form. Your dishwasher's
dispenser uses the liquid form°
To fill the dispenser:
Unscrew the cap. Note the FULl_,line on the tip of the cap, Add the
liquid rinse agent until it just reaches the top of the FULL lineo Replace
the cap. The dispenser automatically releases the rinse agent into the
fin!l rinse water_,
Fill as needed, but do not overfill.
I0
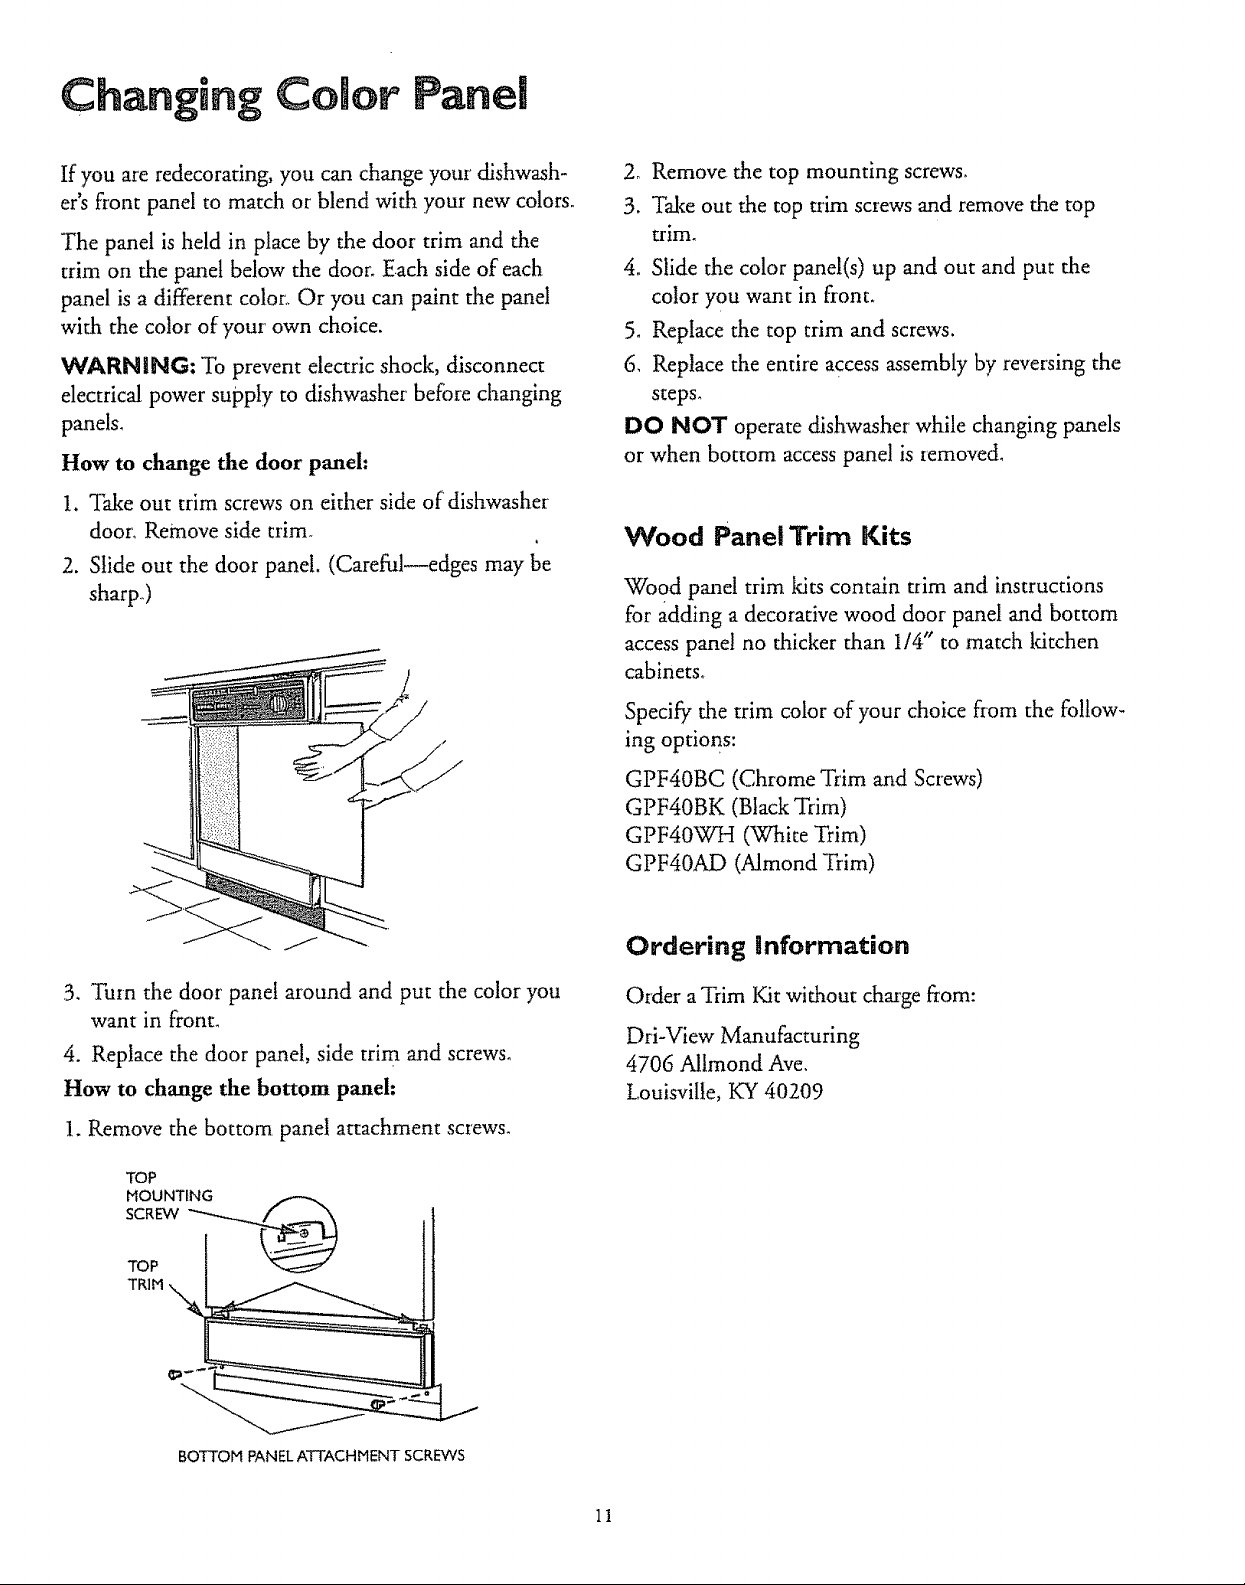
than "ng Color Panel
If you are redecorating, you can change your dishwash-
er's front panel to match or blend with ?/our new colors_
The panel is held in place by the door trim and the
trim on the panel below the door. Each side of each
panel is a different color'° Or you can paint the panel
with the color of your own choice.
_4ARNING: To prevent electric shock, disconnect
electrical power supply to dishwasher before changing
panels_
How to change the door panel:
1. Take out trim screws on either side of dishwasher
door_ Remove side trim_
2. Slide out the door panel. (Careful--edges may be
sharp°)
2_ Remove the top mounting screws.
3. Take out the top trim screws and remove the top
trim.
4° Slide the color panel(s) up and out and put the
color you want in front.
5. Replace the top trim and screws.
6. Replace the entire access assembly by reversing the
steps.
DO NOT operate dishwasher while changing panels
or when bottom access panel is removed.
Wood Panel Trim Kits
Wood panel trim ldts contain trim and instructions
for adding a decorative wood door panel and bottom
access panel no thicker than 1/4" to match tdtchen
cabinets.
Specify the trim color of your choice from the follow-
ing options:
3, Turn the door panel around and put the color you
want in front.
4. Replace the door panel, side trim and screws.
How to change the bottom panel:
1. Remove the bottom panel attachment screws.
TOP
MOUNTING
GPF40BC (Chrome Trim and Screws)
GPF40BK (Black Trim)
GPF40'gr¢_-I (White Trim)
GPF40AD (Almond Trim)
Ordering Information
Order a Trim Kit "without charge from:
Dri-View Manufacturing
4706 Allmond Ave.
Louisville, IZ-'_r40209
/
BOTTOMPANELATTACHMENTSCREWS
11
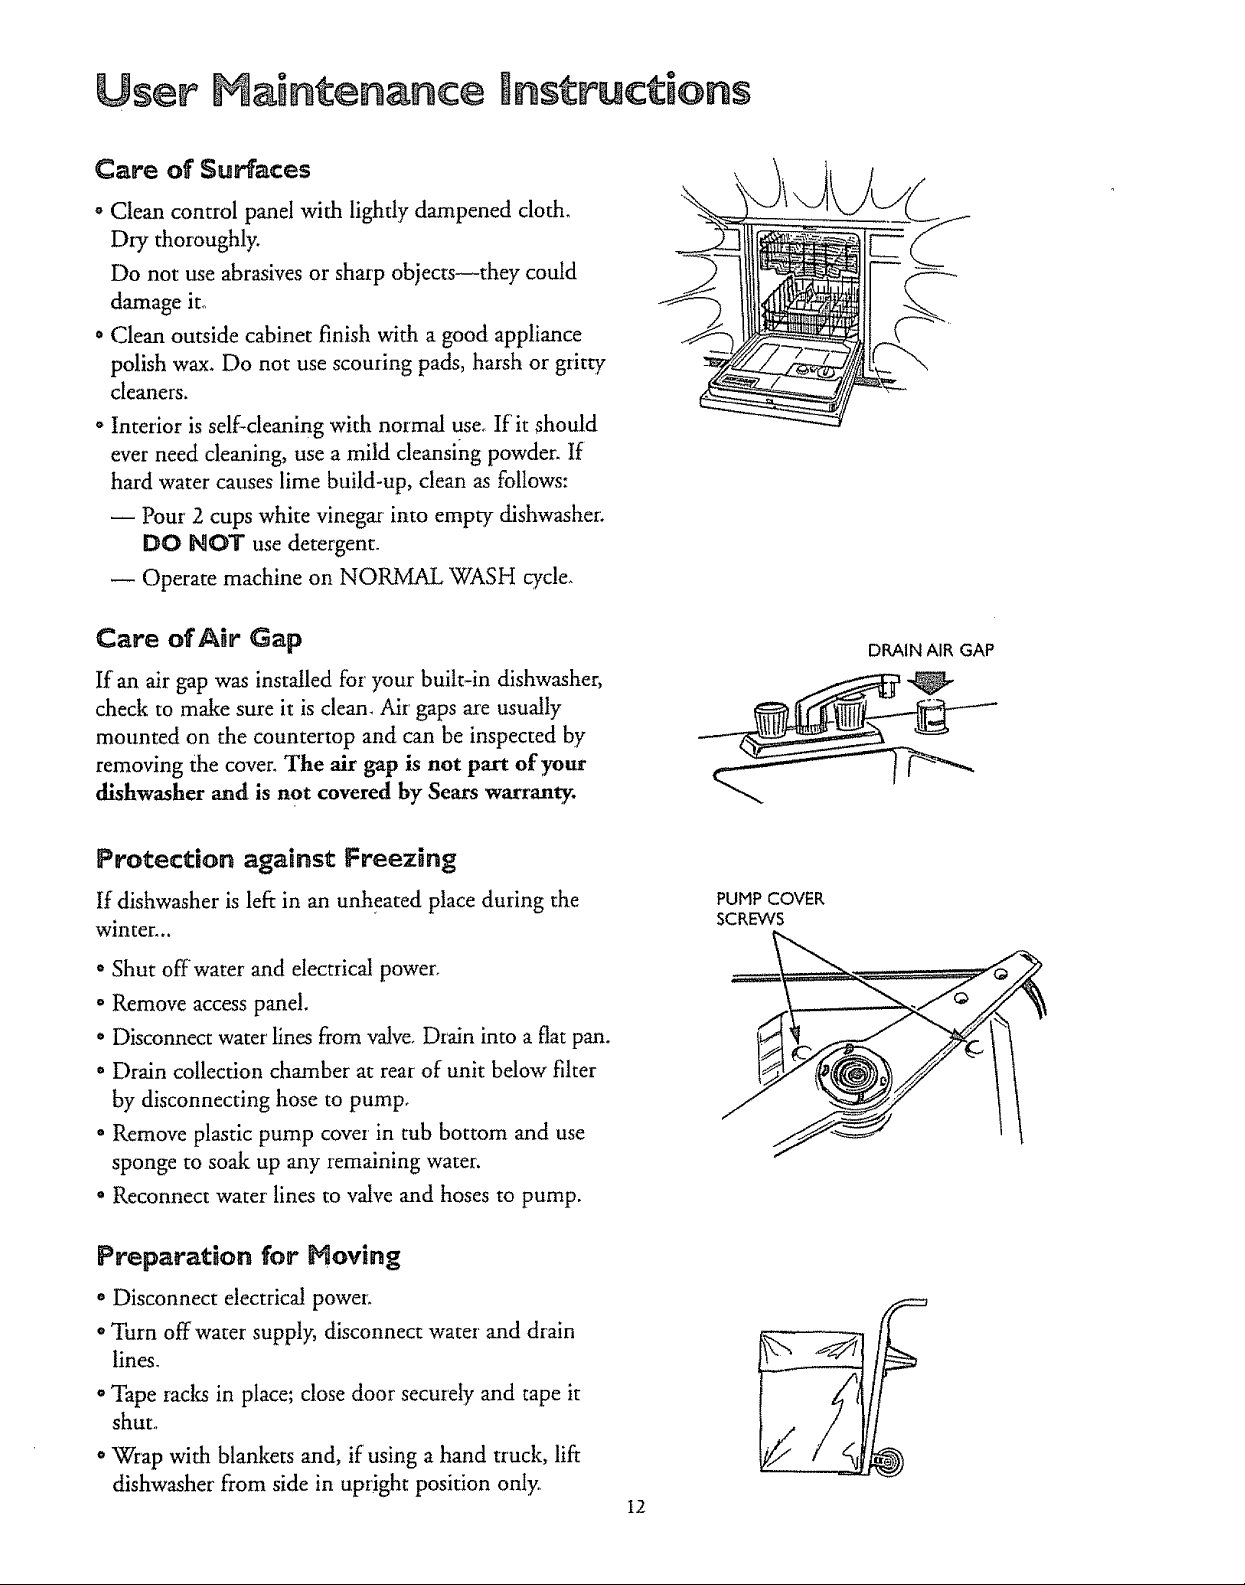
Care of Surfaces
o Clean control panel with lightly dampened cloth.
Diy thoroughly.
Do not use abrasives or sharp objects--they could
damage ito
• Clean outside cabinet finish with a good appliance
polish wax. Do not use scouring pads, harsh or gritty
cleaners.
- Interior is sell-cleaning with normal user If it should
ever need cleaning, use a mild cleansing powder. If
hard water causes lime build-up, clean as follows:
Pour 2 cups white vinegar into empty dishwasher.
DO NOT use detergent.
Operate machine on NORMAL WASH _cle,
Care of Air Gap
If an air gap was installed for your built-in dishwasher,
check to make sure it is cleam Air gaps are usually
mounted on the countertop and can be inspected by
removing She cover. The air gap is not part of your
dishwasher and is not covered by Sears warran T .
Protection against Freezing
If dishwasheris left in an unheated place during the
winter...
o Shut off water and electrical power°
o Remove accesspanel.
* Disconnect water'lines from valve.Drain into a flat pan.
o Drain collection chamber at rear of unit below filter
by disconnecting hose to pump.
o Remove plastic pump cover in tub bottom and use
sponge to soak up any remaining water.
o Reconnect water'lines to valve and hoses to pump.
DI_AIN AIR GAP
PUMP COVER
SCREWS
Preparation for Moving
o Disconnect electrical power.
° Turn off watersupply, disconnect waterand drain
lines.
° Tape raclcsin place; close door securely and tape it
shut°
° Wrap with blankets and, if using a hand truck, lift
dishwasher from side in upright position oniyo
I2
 Loading...