

Kenmore 3.1 cu. ft. Compact Refrigerator Owner's Manual
255.99763
®
2
4
1
5
3
7
6
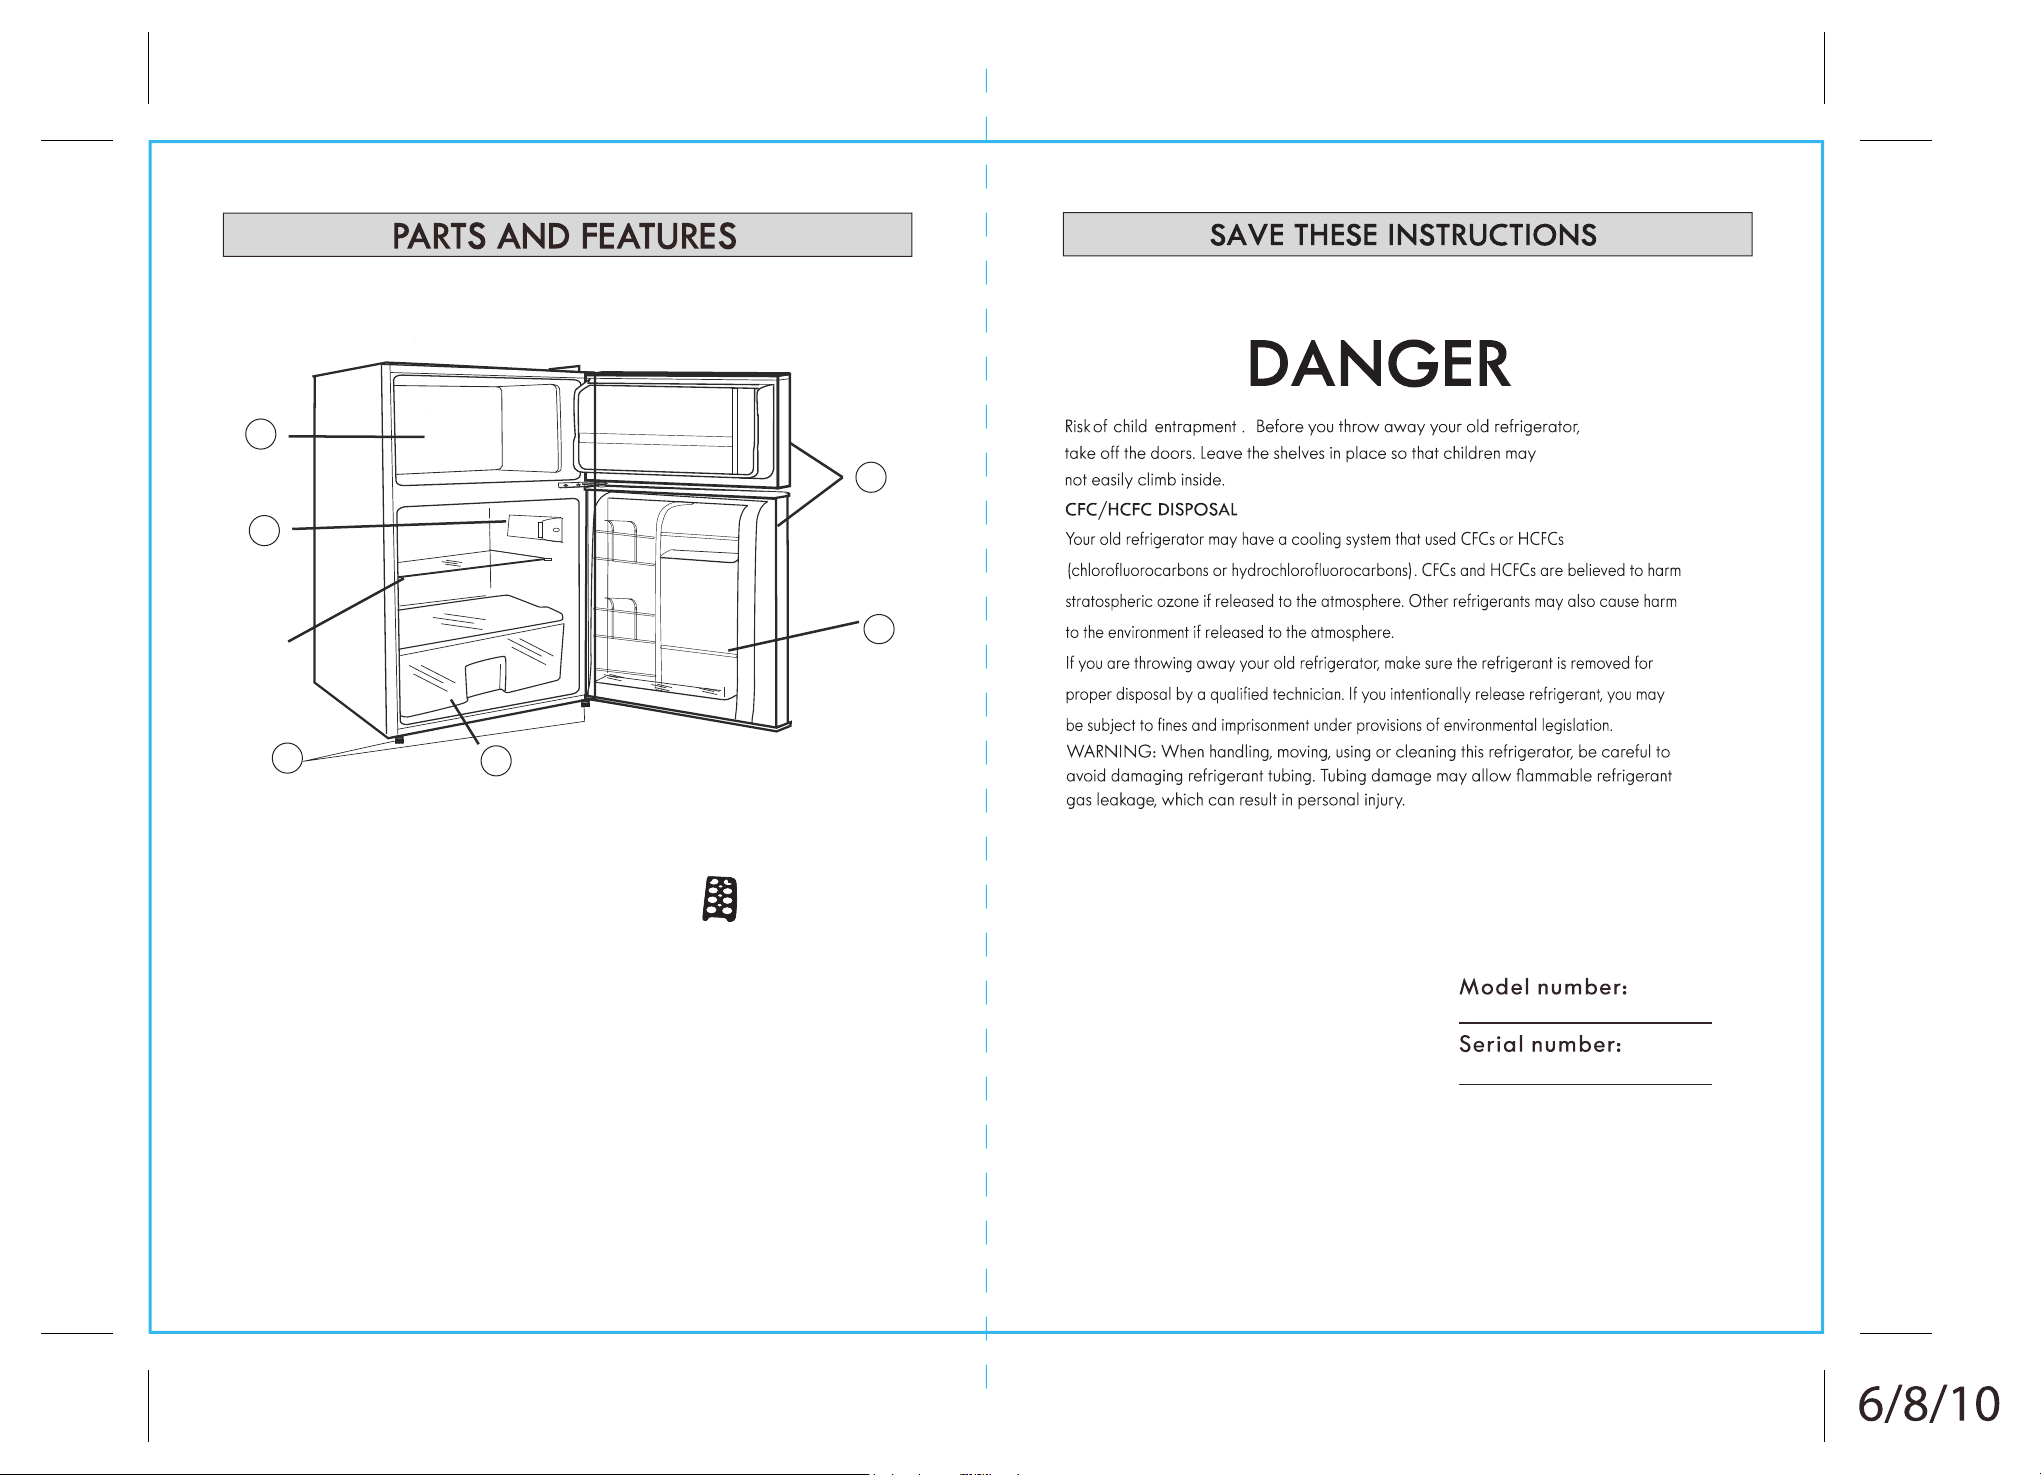
1. Temperature control
2. Freezer compartment
3. Slide-out glass shelves
4. Reversible door
5. 2 Liter bottle rack
6. Vegetable and fruit crisper drawer
7. Leveling Feet
PRODUCT RECORD
Write the model and serial number of your product in the spaces provided
ICE CUBE TRAY
1 2
below. Both are found printed on an identification label attached to the unit
interior.
255.99763
listed
3/4 inches (19mm)
2 inches (50mm)
2 inches (50mm)
refrigerator.
page.
(recommended)
24
Leveling Feet
There are two leveling feet on the bottom of the unit near the unit front. Turn the leveling
feet knobs to the left to raise the cabinet, and to the right to lower the cabinet.
And do not plug another appliance into the same outlet as the
See the WARNING in Electrical Requirements on the previous
3 4
DOOR REVERSAL
WARNING: Unplug the refrigerator before performing door reversal process. Failure to unplug
may result in serious injury or death from electrical shock.
CAUTION: To avoid personal injury and property damage, obtain assistance from another person
to perform the door reversal process.
1, Remove leveling foot from front of cabinet base (Fig. A).
2, Remove screws securing lower hinge bracket to base of cabinet.
Remove bracket. (Fig. A)
3, Remove lower door from middle hinge post (open door and
pull down).
4, Remove screws from middle hinge bracket and remove bracket.
Remove upper door from top hinge post (open door and pull down).
5, With flat blade tool, carefully remove cover from top hinge
bracket. Remove screws securing bracket to top of cabinet and
remove bracket (Fig. C).
NOTE: Be careful to retain all washers and gaskets in position
when removing and replacing hinges.
6, Remove the hole plugs on each door. The upper door has plugs
on the top and bottom.
7, Attach top hinge bracket to opposite side of cabinet. Replace
bracket cover. Re-fit the hole plugs on the opposite sides of both
doors.
8, Remove the middle hinge hole plugs from the divider panel
between the upper and lower compartment (Fig. B). Re-fit plugs
on opposite side of panel. Install middle hinge bracket using holes
exposed from removal of plugs.
9, Install upper door. To install, loosen and remove screw nearest to
middle hinge post. Lower middle hinge slightly to insert top hinge post
into door. Rotate middle hinge up to insert middle hinge post into door.
Replace and secure screw.
10, Install lower door. To install, insert middle hinge post into top hole in door.
Close door. Insert post of lower hinge into bottom of door. Secure lower hinge
bracket to base of cabinet with previously removed screws.
11, Install leveling foot to opposite side of cabinet base.
CAUTION: If the refrigerator has been placed in a horizontal or tilted position for ease of door
reversal, wait 24 hours before plugging it in. Plugging in sooner may result in permanent damage
to cooling system.
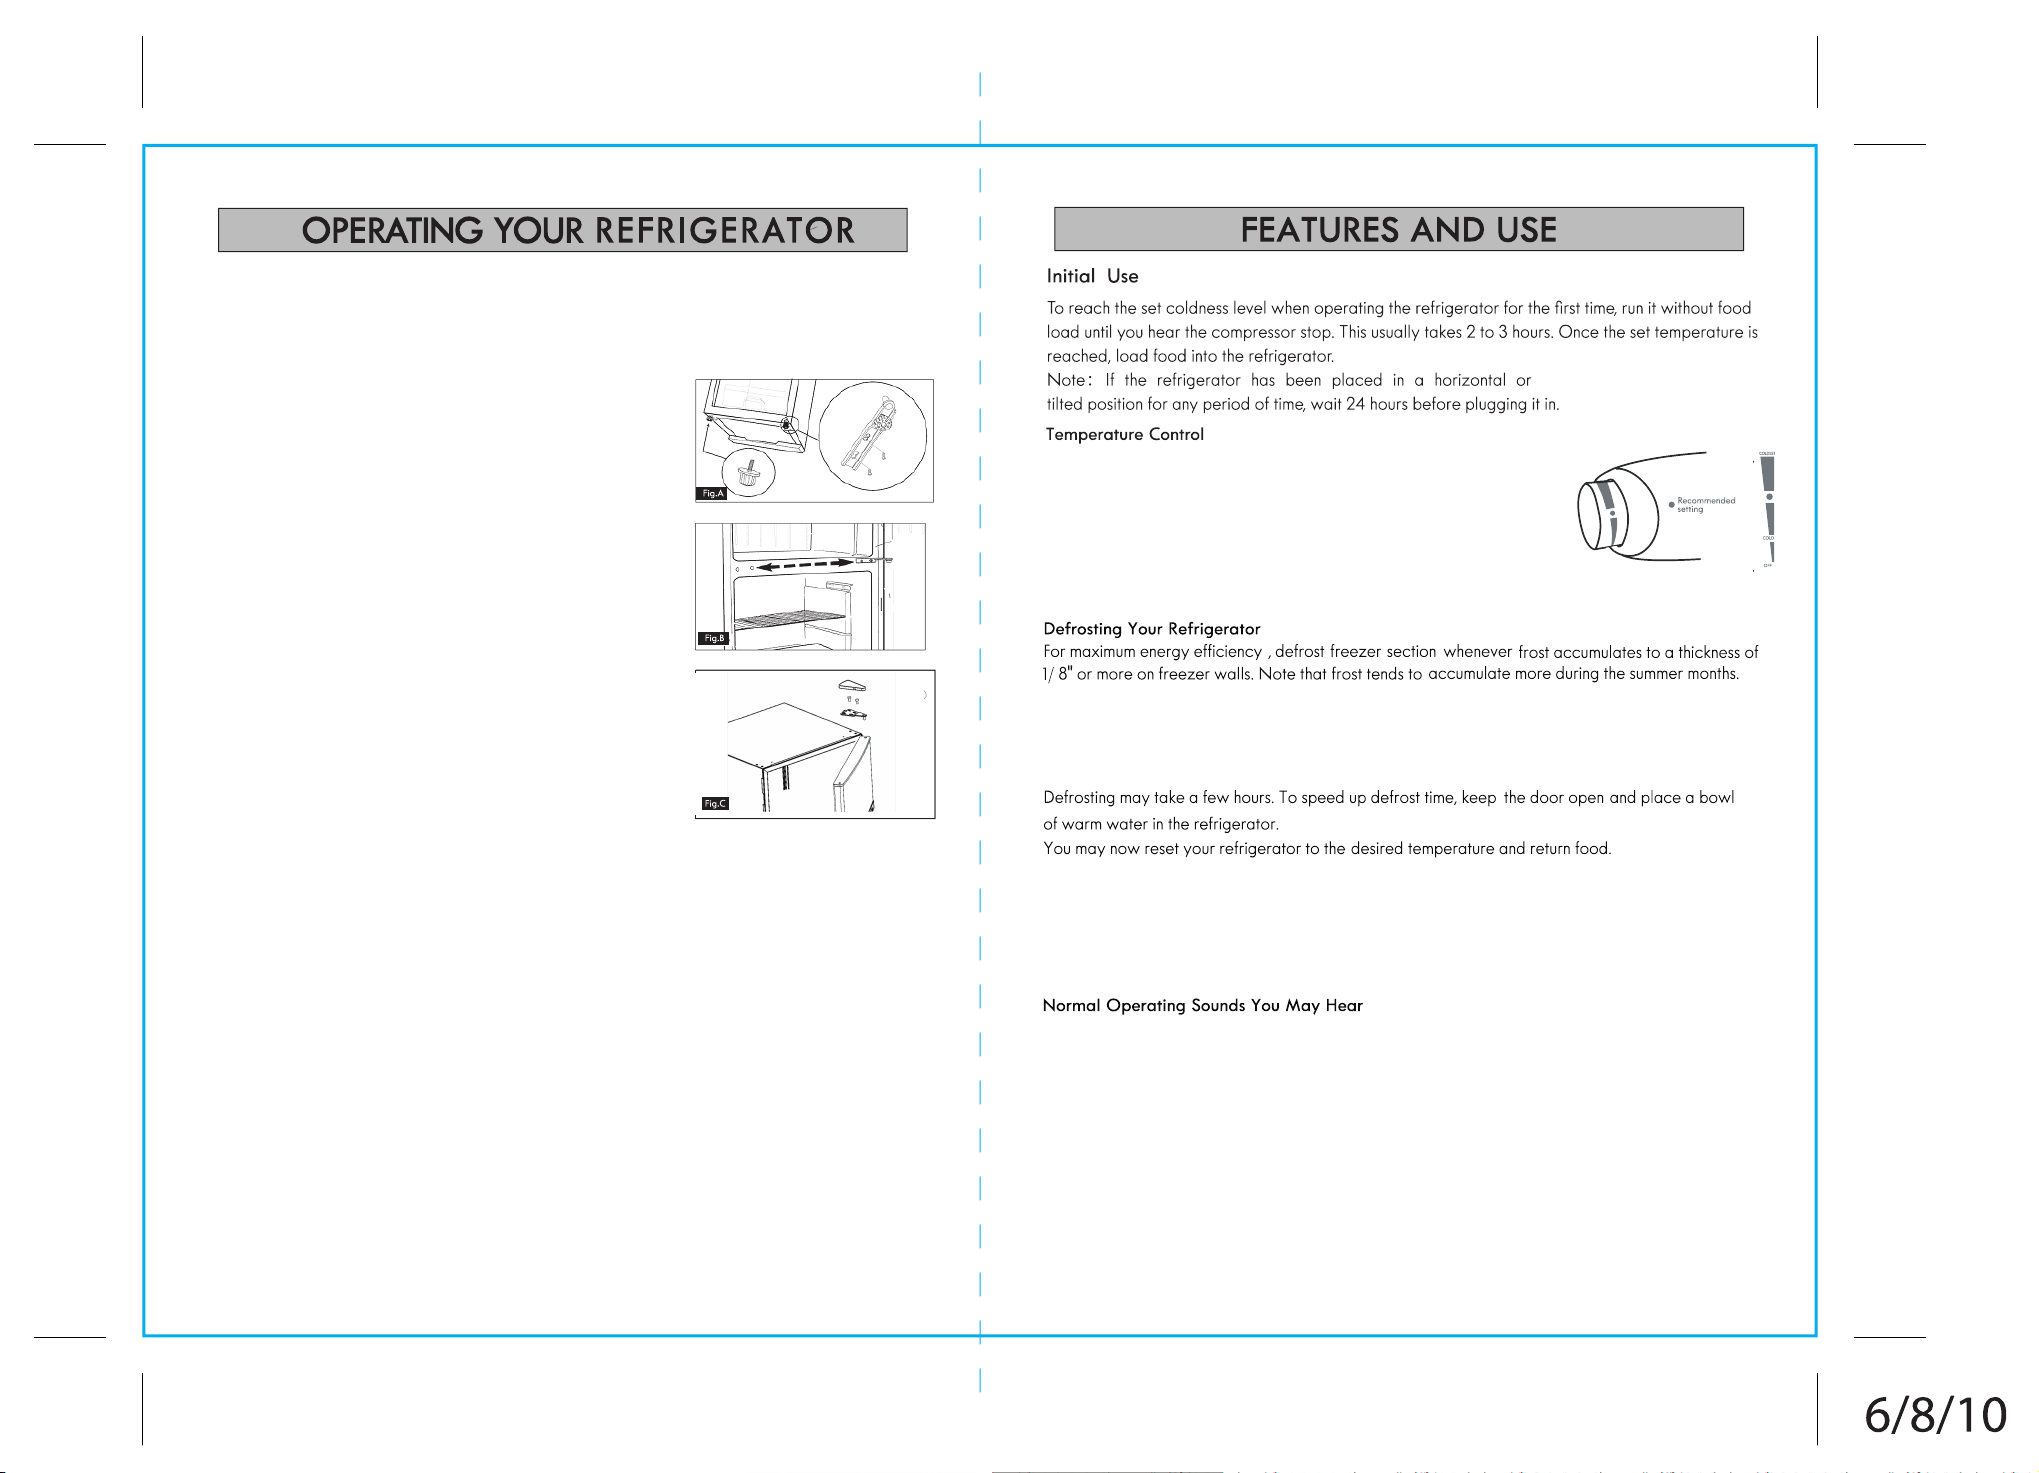
The first time you turn the unit on, adjust the temperature control knob
to Recommended setting and give your refrigerator time to cool down
completely before adding food. After it is fully cooled, test it and adjust
towards COLD to make less cool or towards COLDEST to cool more to
best suit your needs.
Note: Turning the temperature control knob to the OFF position will stop the
cooling cycle but does not shut off power to the unit.
To defrost freezer, turn the temperature control dial to OFF. Open both freezer and refrigerator door
and remove ice cube tray, crisper drawer and all food items from both compartments. Defrosting will
take several hours,so store the food in another refrigerator in the meantime. Once defrosting is complete,
replace ice cube tray and food in both compartments.
CAUTION: DO NOT use boiling water to melt frost accumulation on freezer walls, as it may
damage plastic parts.
WARNING: DO NOT use a sharp or metallic instrument to remove frost from the refrigerator
interior, as damage to refrigerant tubing may occur. Tubing damage may allow flammable
refrigerant gas leakage, which can result in personal injury.
Boiling water, gurgling sounds or slight vibrations that are the result of the
refrigerant circulating through the cooling coils
The thermostat control will click when it cycles on and off.
5 6
 Loading...