


KenmorG
Full One-Year Warranty on Freezer
For one year from date of purchase, when this freezer is
operated and maintained according to instnjctions attached to
or furnished with the product. Sears will repair this freezer, free
of charge, if defective in material or workmanship.
Upright Freezer
Model No. 29701
7.5 cu. ft. Capacity
Caution:
Before using your freezer, carefully read this manual and the use and care information inside the freezer door.
Read This Manual!
It will tell you how to operate and care for your frezzer.
It also offers tips on how to get the best and lowest cost
performance.
If you prefer installing your own parts, use the parts list
to find the part number, do not use the illustration
number.
In the space below record the model and serial number
of your freezer. Each is printed on the model number
plate located in the upper corner of the refrigerator
back. Use these numbers when calling for service.
Model No.
Date Purchased
Manual Contents:
• Warranty
• Installation
• Operation
• Maintenance
• Troubleshooting
• Parts
Serial No.
Full Five-Year Warranty on Sealed Refrigeration Sysytem
For five years from the date of purchase, when this freezer is
operated and maintained according to instmctions attached to
or furnished with the product, Sears will repair the sealed
system (consisting of refrigerant, connecting tubing, and
compressor motor) free of charge, if defecbve in material or
workmanship.
The above warranty coverage applies only to freezers which
are used for storage of food for private household purposes.
WARRANTY SERVICE IS AVAILABLE BY CONTACTING
THE NEAREST SB<)RS SERVICE CENTER/DEPARTMENT
IN THE UNITED St>JES.
Installation
Inspection
When your new freezer is delivered, check thoroughly for
shipping damage and missing parts, if you find either, please
notify Sears at once.
Location is Important
Your new freezer will work best in a dry, ventilated place,
where the temperature falls between 65 and 110 F. Extreme
temperatures can shorten the freezer’s life. Very high tempera
tures (such as in an unventilated garage in summer) also will
make your freezer run more, increasing its operating cost.
Your freezer must be allowed enough space for proper air
circulation, this freezer is designed for FREESTANDING
INSTALLATION ONLY and should not be recessed or built-in,
Allow 3 inches of space on each side and rear and 4 inches
on the top of the cabinet. This is particularly important in hotter
climates.
Pick a spot where the floor will support the weight of the
freezer fully loaded. It is best to keep your freezer away from
an oven or other heat source. Pick a safe place, indoors, away
from flammables such as gasoline.
Sears, Roebuck and Co., Hoffman Estates, IL 60179 U.S.A.
Part No, 8336460155200 B
Sears, Roebuck and Co., U.S.A.
302669
Leveling the Freezer
To ensure proper door seal and optimum performance,
level freezer using the leveling leg located on its bottom
front corner.
• Once your freezer is in the desired location, use a
carpenter's level and adjust the leveling leg as
necessary to make sure the cabinet is level side-toside.
• Adjust the leg to achieve a 1/4 inch slope from
front-to-back (1/2 bubble on a carpenter's level) to
provide easy door closure and proper door seal.
• If the rear corners need to be raised, use shims
made of wood or other hard material. Cardboard
and other soft materials will not work.
Electrical Requirements
• 120 Volts, 60 Hz (60 cycles AC). 15 amps
• DO NOT use an extension cord.
• Select an electric wall outlet that cannot be turned
off by a switch or pull chain. Be sure that the elec
tric outlet you select does not need a ceiling drop
cord.
• Use a fuse or circuit-breaker protected circuit that
will not become overloaded when the freezer is
installed.
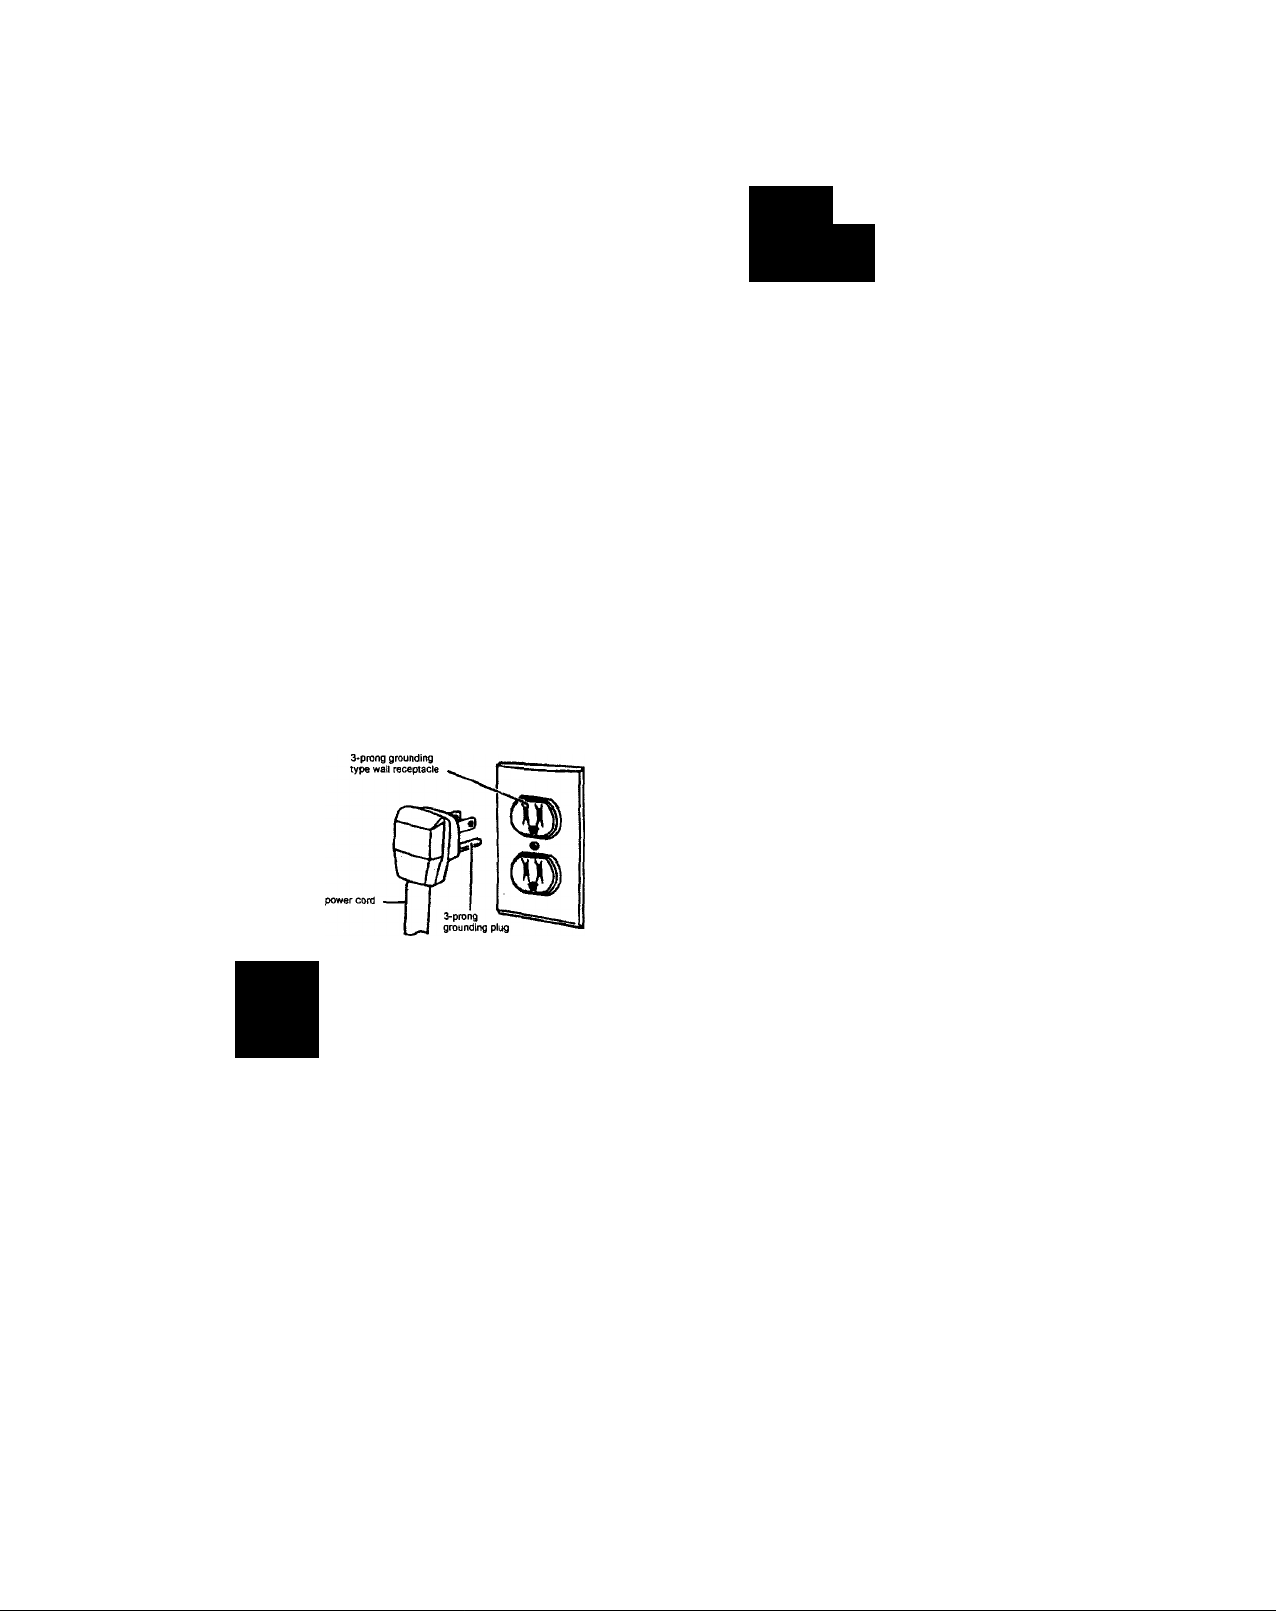
Electrical Grounding
Your freezer comes with a three-prong plug and must
be inserted into a three-prong, grounded wail outlet.
WARNING: Unless the grounding method
described above is followed, you are not
protected against severe or lethal shock in
A
the event of the short circuit of the freezer's
wiring or electrical components.
Operation
starting
The freezer temperature is preset to maintain the
ideal temperature for food storage. The evaporator
forms the storage shelves of the unit which provides
even freezing temperatures throughout the freezer.
Freezer temperature will vary depending on the quan
tity of food stored and on the frequency of door open
ings.
Wait 4 hours before loading the freezer. It takes time to
reach storage temperature. During this time the freezer
may run constantly.
Maintenance
Defrosting
DANGER: Electrical Shock Hazard. Discon
nect power before defrosting.
A
You should defrost your freezer when the frost be
comes 1/4 inch thick. Further accumulation will reduce
operating efficiency. How often you have to defrost
depends on the type and amount of food you freeze,
the temperature and humidity and the number of times
you open and close the freezer. The period between
defrosting can be extended by scraping frost every so
often with a plastic scraper.
Defrosting Steps
1. Unplug power supply cord.
2. Remove all food and place it in cardboard boxes or
wrap it in several thicknesses of newspaper. This
action will keep food safely frozen while you defrost
and clean your freezer.
3. Leave door open and wait for frost to soften. Place
pans of hot water on the shelves or use an electric
fan blowing into the freezer to speed defrosting. Do
not use electric defrost devices as they can damage
the plastic parts of your freezer.
4. Remove softened frost with a plastic or wooden
scraper, or a cloth or sponge. CAUTION: NEVER
USE SHARP OBJECTS TO REMOVE FROST. They
could puncture freezing coils and severely damage
the refrigeration system.
5. Defrost water will accumulate at the bottom of the
interior cabinet which can be absorbed with a
sponge or towel.
6. Clean the inside of the freezer. Cleaning instruct
ions are described below and on the permanent
use and care label on the inside of the freezer door.
7. Plug freezer in and replace frozen foods..
Cleaning
• Use only mild soapy water to clean door gaskets.
• Turn off the freezer and remove foods. Wash interior
liner with a solution of warm water and two table
spoons bakimg soda per one quart of water. Rinse
and wipe clean. DO NOT use soaps, detergents,
scouring powder, spray cleaner or the like for the
liner. They may create unwanted odors in the freezer.
• Use a vacuum cleaner to clean the condenser (tube
and wire attachment) on the back of the freezer.
• Wash the exterior with detergent or soap and water.
Rinse well and wipe dry.
• DO NOD use scouring powders or pads. Never use
acids, chemical thinner, gasoline, benzene, or the like
for cleaning any part of the freezer. Boiling water and
benzine may deform and damage plastic parts.
 Loading...