

Kenmore 2539239711, 2539235711 Owner’s Manual

Kenmore
FROSTLESS
FREEZER OWNER'S MANUAL
Safety First
Unused or abandoned freezers are still dangerous ... even
if they__"just sit in the g__zge a few days" If you are getting
rid of your old freezer, do it safely. Please read the included
_ instructions from the Association of Home Appliance
Manufacturers.
HELP PREVENT ACCIDENTS
,iii,,i ",
CONTENTS
SafetyFirst..................................FrontCover
IfDoor Must Be Removed ........................,...2
InstallIt...........................................2
LevelIt............................................2
Ground It............................................2
Adjust It......................................
StartIt .........................................3
Featuxes .................................................. 3-1..5.6
BeforeCallingforService...........................................6
DefrostIt!QuickDefrost..................................7
Clean It...........................................................7
Energy Savings Tips ................................... 7
Vacation and Moving Care......................7
Warranty ...........................................Back Cover
\
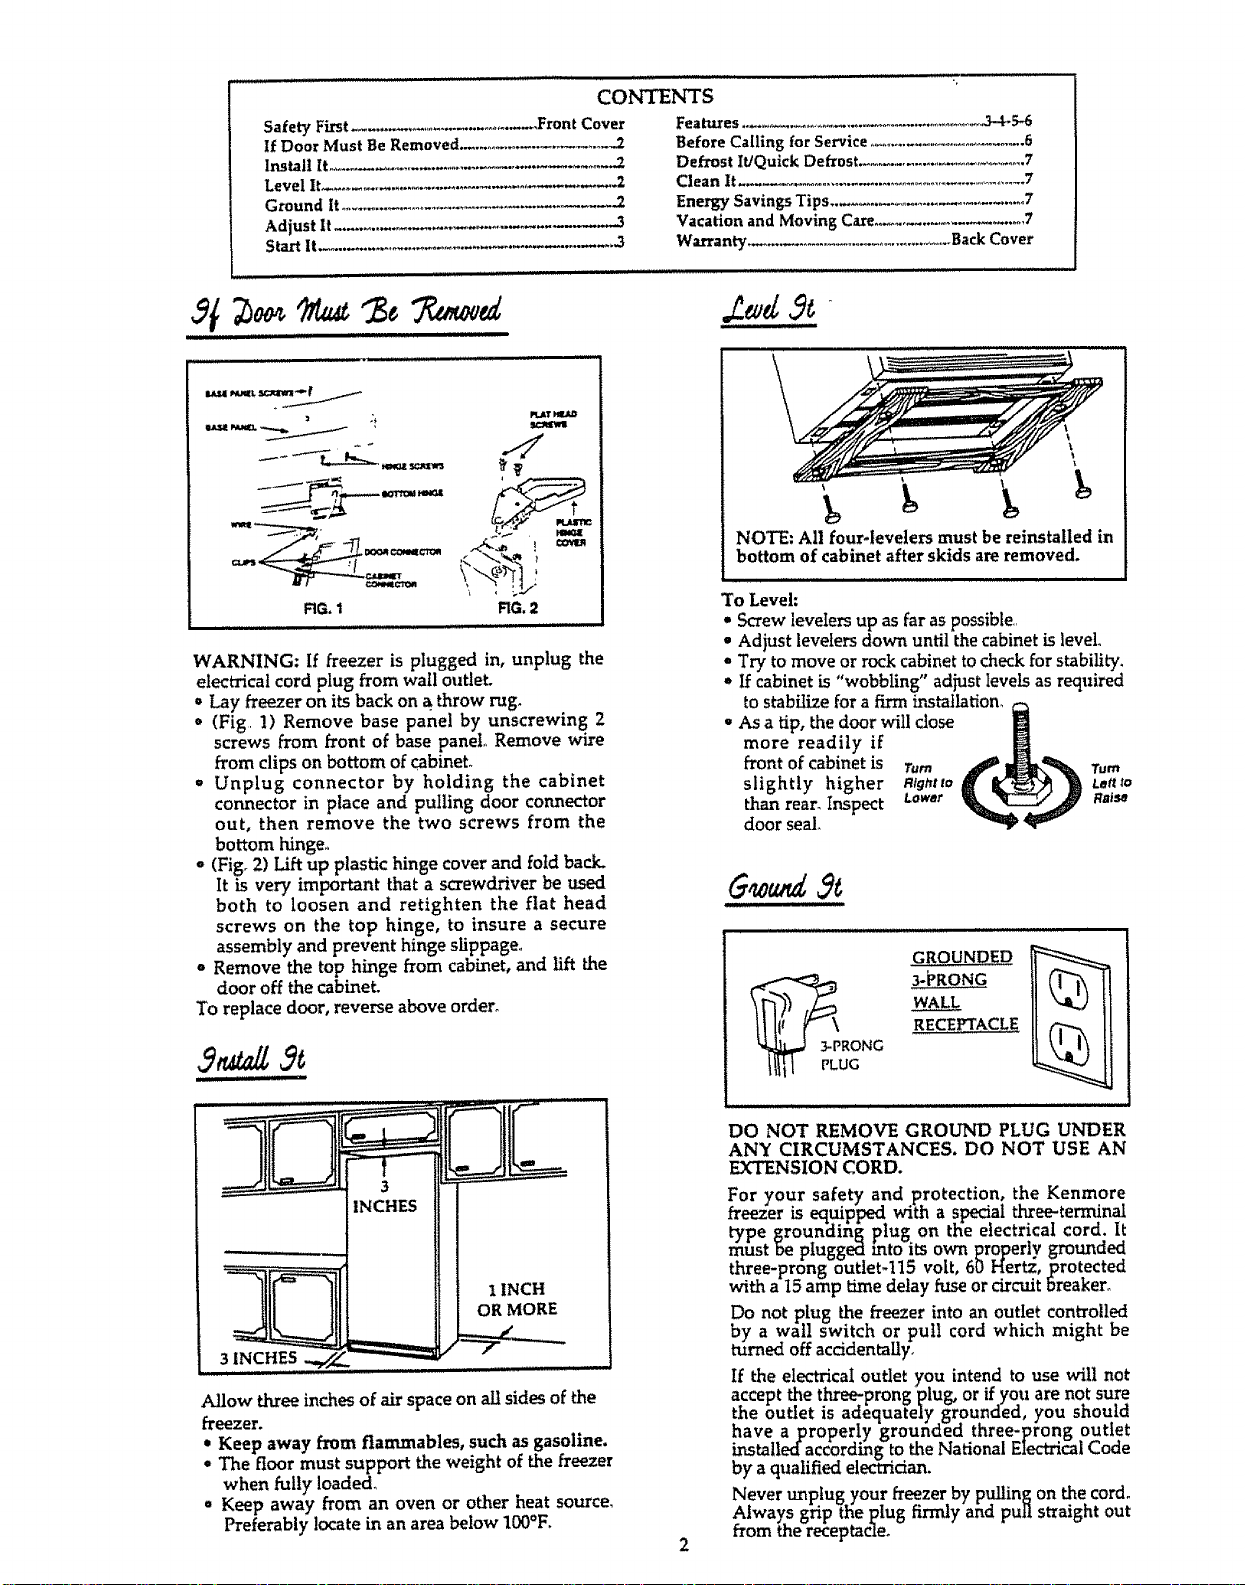
NOTE: All four-levelers must be reinstalled in
bottom of cabinet after skids are removed.
RG. I RG. 2
WARNING: If freezer is plugged in, unplug the
electrical cord plug from wall outlet.
o Lay freezer on its back on a throw rug.
(Fig 1) Remove base panel by unscrewing. 2
screws from front of base panel° Remove wire
from clips on bottom of cabinet.
o Unplug connector by holding the cabinet
connector in place and pulling door connector
out, then remove the two screws from the
bottom hinge.,
,, (Fig° 2) Lift up plastic hinge cover and fold back.
It is very important that a screwdriver be used
both to loosen and retighten the flat head
screws on the top hinge, to insure a secure
assembly and prevent hinge slippage°
o Remove the top hinge from cabinet, and lift the
door off the cabinet.
To replace door, reverse above order°
5. dL
, ,i i
......... i i1,1
3
INCHES
3 INCHES -./__.
i
Allow three inches of air space on all sides of the
freezer.
• Keep away from flammables, such as gasoline.
- The floor must support the weight of the freezer
when fully loaded,
° Keep away from an oven or other heat source_
Preferably locate in an area below 100°F,
To Level:
• Screw levelersup as faraspossible
• Adiust levelersdown untilthecabinetislevel.
• Try tomove or rockcabinettocheckforstability,
o Ifcabinetis"wobbling"adjustlevelsasrequired
to stabile for a firm installation,
• As a tip, the door will dose
more readily if
front of cabinet is Turn Turn
slightly higher atghtto Lento
than rear. Inspect Lowar Ra_sa
door seal
GROUNDED
WALL
_p 3"_RONG
_,, RECEPTACLE
RONG
I_III ['LUG
DO NOT REMOVE GROUND PLUG UNDER
ANY CIRCUMSTANCES. DO NOT USE AN
EXTENSION CORD.
For your safety and protection, the Kenmore
freezer is equipped with a spedal three:termi'nal
type grounciing plug on the electrical cord. It
must be ptuggea into its own properly grounded
three-prong outletql5 volt, 60 Hertz, protected
with a I5 amp time delay fuse or circuit breaker°
Do not plug the freezer into an outlet controlled
by a wall switch or pull cord which might be
turned off accidentally,
If the electrical outlet you intend to use will not
accept the tbxee-prong plug, or if you are not sure
the outlet is adequately grounded, you should
have a properly grounded three-prong outlet
installed according to the National Electrical Code
by a qualified electridan.
Never unplug your freezer by pulling on the cord_
Alway_s grip the plug firmly and pull straight out
from the receptacle.
2
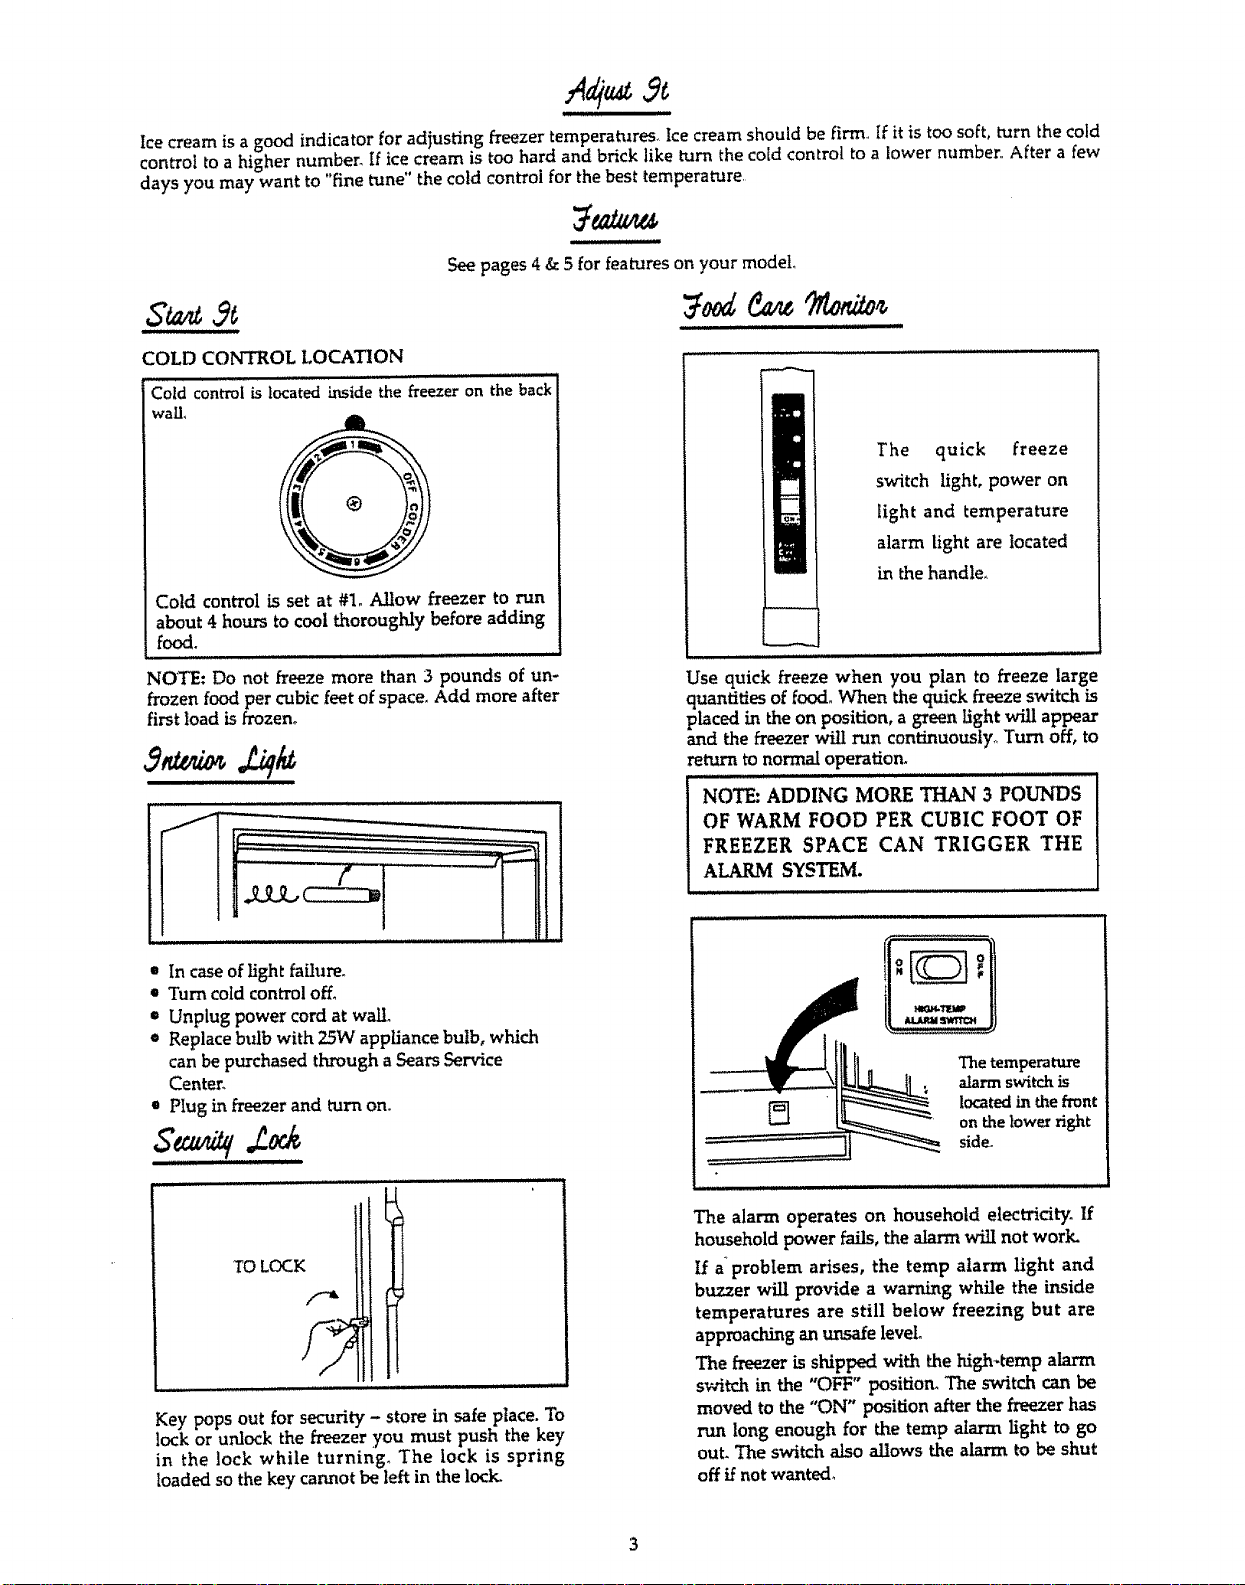
Ice cream is a good indicator for adjusting freezer temperatures_ Ice cream should be firm.. If it is too soft, turn the cold
control to a higher number. If ice cream is too hard and brick like turn the cold control to a lower number.. After a few
days you may want to "fine tune" the cold control for the best temperature,
See pages 4 & 5 for features on your model.
COLD CONTROL LOCATION
Cold controlis located inside the freezeron the back
wall.
The quick freeze
switch light, power on
light and temperature
alarm light are located
in the handle.
Cold control is set at #1oAllow freezer to run
about 4 hours to cool thoroughly before adding
food.
NOTE: Do not freeze more than 3 pounds of un-
frozen food per cubic feet of space,, Add more after
first Ioad is frozen°
J.iq/¢
'_ i ,,, , ii |
,, ,,.... , ,,,,,,,,,,,,,,,,,
......
• In case of light failure°
• Turn cold control off,
" Unplug power cord at wall.
• Replace bulb with 25W appliance bulb, which
can be purchased through aSears Service
Center.
• Plug in freezer and turn on.
,,, ,,m,
TO LOCK
Key pops out for security - store in safe place. To
lock or unlock the freezer you must push the key
in the lock while turning. The lock is spring
loaded so the key cannot be left in the lock-
Use quick freeze when you plan to freeze large
quantities of food. When the quick freeze switch is
placed in the on position, a green light will appear
and the freezer will run continuously° Turn off, to
return tonormaloperation.
NOTE: ADDING MORE THAN 3 POUNDS
OF WARM FOOD PER CUBIC FOOT OF
FREEZER SPACE CAN TRIGGER THE
ALARM SYSTEM.
d
The temperature
alarm switch is
located in the front
on the lower right
side°
The alarm operates on household electricity. If
household power fails, the alarm will not work.
If a"problem arises, the tamp alarm light and
buzzer will provide a warning wldle the inside
temperatures are still below freezing but are
approaching an unsafe level.
The freezeris shippedwith the high-temp alarm
switch in the "OFF" position_ The switch can be
moved to the "ON" position after the freezer has
run long enough for the tamp alarm light to go
out.The switchalsoallowsthe alarm to be shut
off if not wanted_
 Loading...