

Kenmore 2539239183, 2539239180 Owner’s Manual
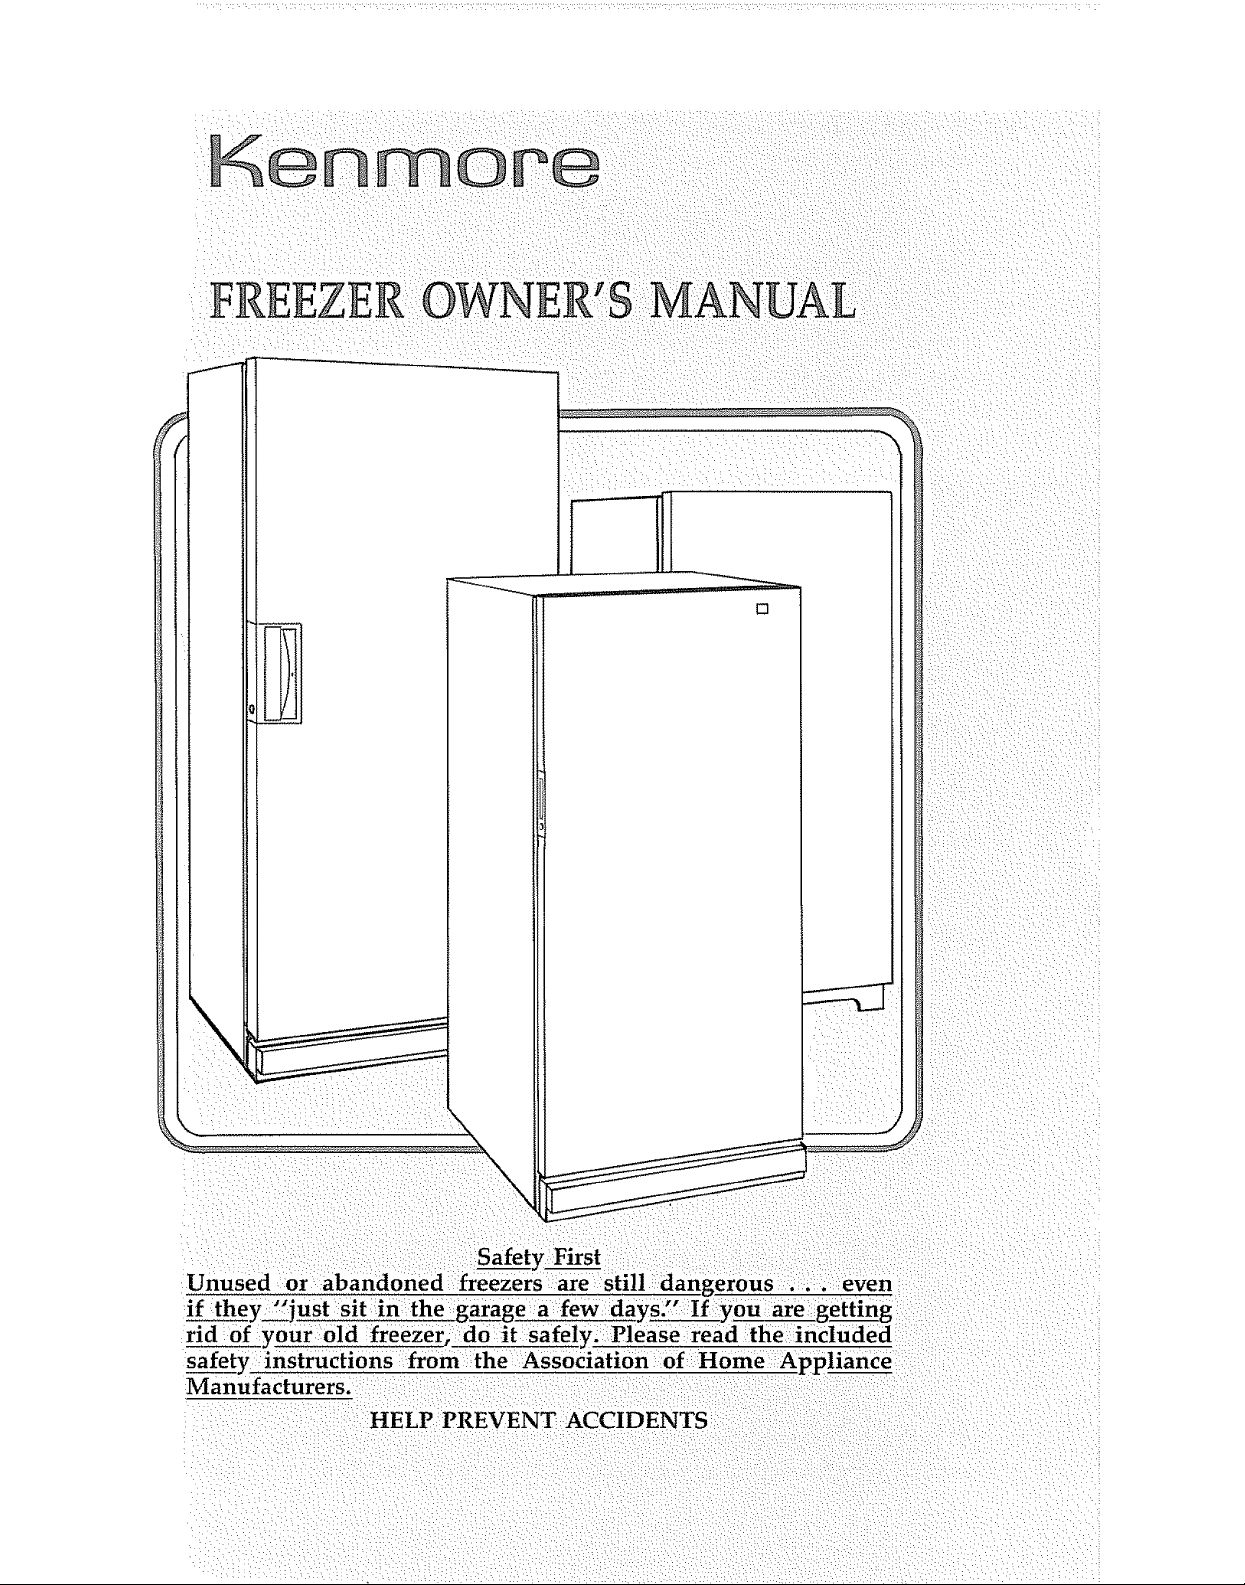
FREEZER OWNER'S MANLIAL
[]
Safety First
Unused or abandoned freezers are still:dangerous, .... even
if :they "just sit in the garage a few days." If__ you are getting
rid of your old :freezer_; dolt safely. Please read the included
safety instructions from the Association: of Home _Appliance
Manufacturers.
HELP PREVENT ACCIDENTS
Safety First., .................... .,,..;_ ............ ;.........Front Cover
If Door Must Be Removed ................................................ 2
Instal| It ................................................................... 2
Level It ............................................................................. 2
Ground It ............................. .......................................... 2
Adjust It ........................................................................ 3
Start It ................................................................................. 3
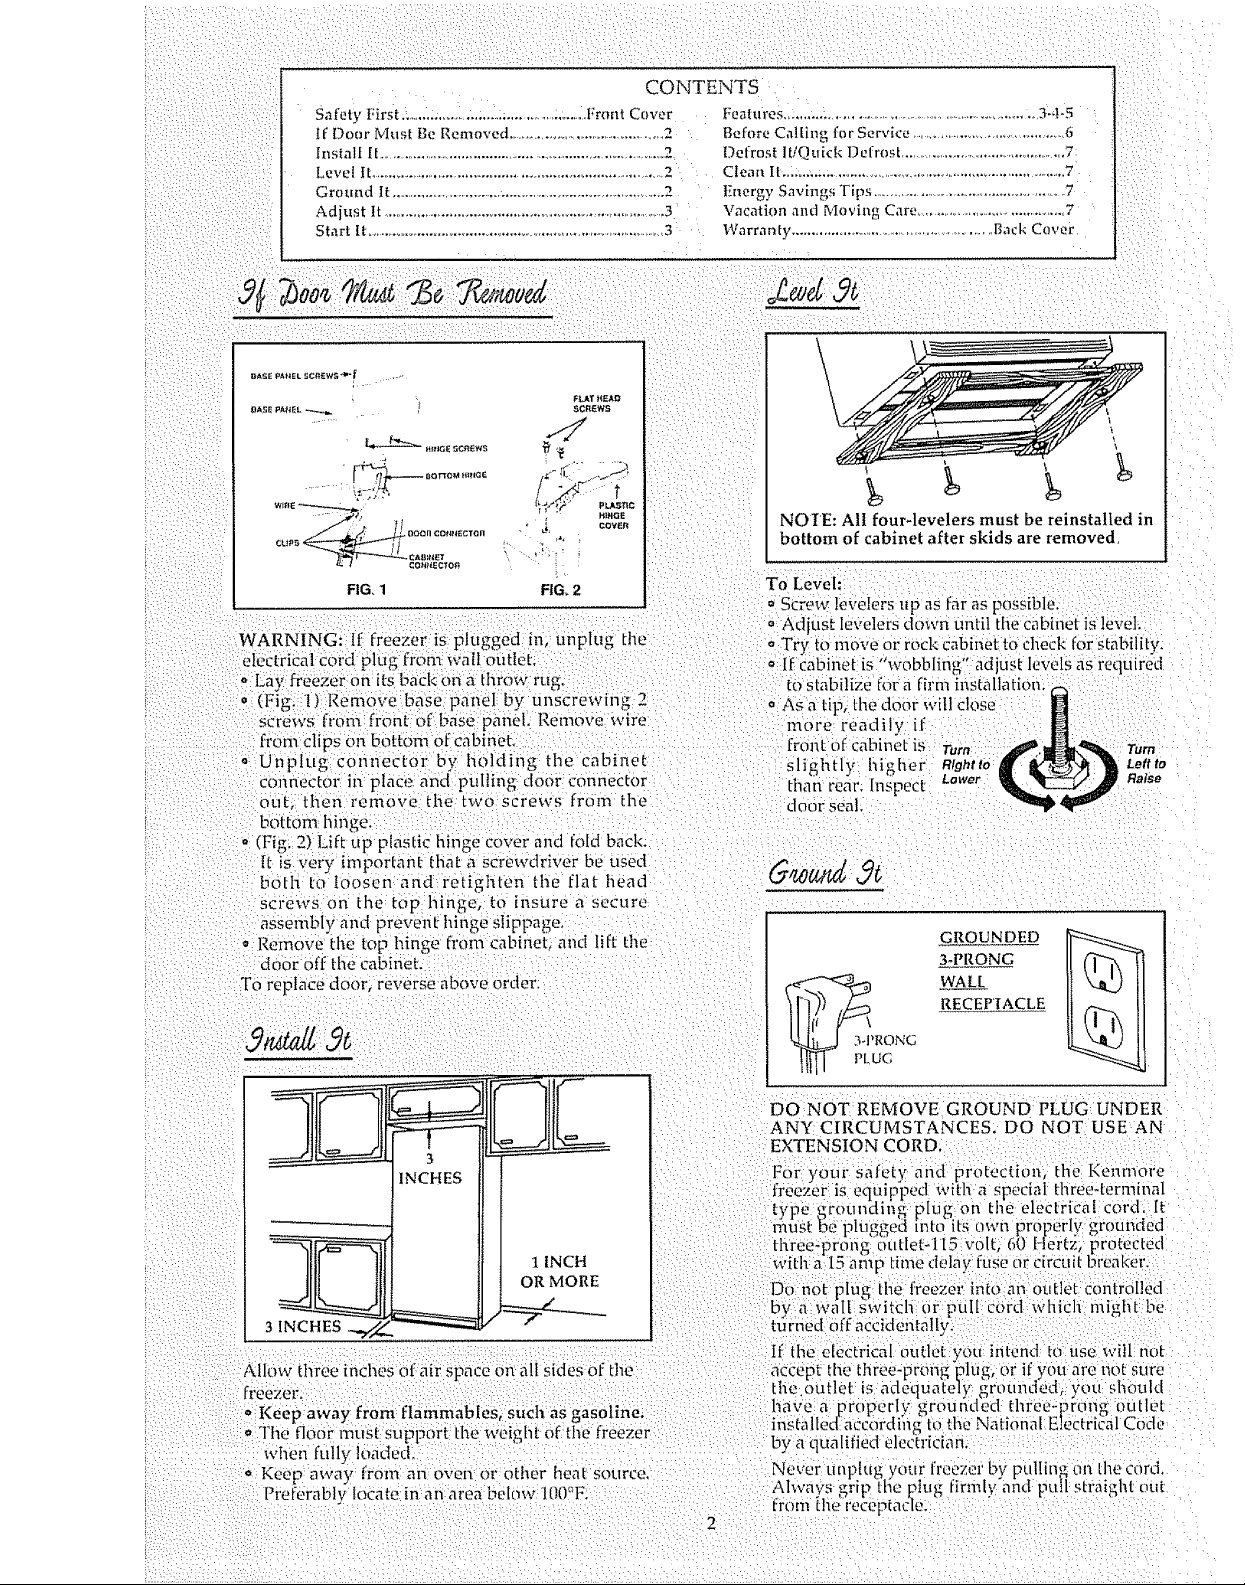
O_SE laM_E L ._C_EWS _" _ --
t_ .,)mE_cn_ws
FL_,T )(£AO
SCR_EWE_
CONTENTS
Features ........... _.................................................. 3-,!-5
Before Ca![hlg for Servk'e ................................. 6
Defrost It/Quid< Defrost ............................................. 7
Clean It.,: ...... : ..............................................................
Energy Savings Tips ................................................. 7
Vacation and Moving Care ........................................ 7
Warranty ............................................. Back Cover
£evd
H_NGE
COV£ff
_gg'dggo,
FIG. 1
FIG, 2
WARNING: If freezer is plugged in, Unplug tim
eiefftriealeord lug fro n wall mitief: .....: :
...... :P ....... .,
o Lay freezer on its back ona throw rug.: :
,; (Fi ;_ :t) Re n0ve:base ;,ariel by UnscreWfng "_
.... g ...... F ..... ..... - .... -
screws fr0m: front Ofbase panel. Remove wire
i from clips On bottom of cabinet i :
o:Unplug €0nneCt0r by: i-m!ding: the cabfne t
connector: in place and pulling door Connector
0:uL Hlen remove the tx.V0screws from the
b0t [0in liinge.
, (Fi_=.2) Lift uv plastic binge cover and fold back:
o )
{t is Verx important tidal a screi,_dri, er be used
both to loosen and retighten the flat bead
screws on the top binge, to insure a secure
assembly and preve:fit hinge siippage.
• Remm, e tile top binge from cabinet; and lift ti_e
do0r off the cabinet.
T0 replace door, reverse above Order:
NOIE: All four-levelers must be reinstalled in
bottom of cabinet after skids are removed
To Level:
=Screw ]e,,;elersup as faras possible. ......
oAdjust levelers down tintil tf_ecabinet is level.
', Try to move or rock Cabivie_t0 Check for stability.
• :if cabinet is "wobblin_" adjust levds as reqUired
tOstabilize for a firm installation.
oAS a tip; ttie d00r will close
more readily if
front 0f cabinet is Turn
slightly higher R/rjhtto _ Leftto
than rear; Inspect _ Raise
door seal
¸
GROUNDED
3-PRONG
WALL
RECEP'IACLE
_RONG
UG
1 INCH
OR MORE
3 INCHES
Allow three iiicbes of airspace On all sides of the
freezer,
,i Keep away from flanimables, such as gasoline,
_Tbe floor mtist supp0rt the weigl_[ 0f:tIm freezer
_Vhenfully i0aded.
o Keep away from: an Oven or other heat source.
Preferably kicate in an are_ibelow 100°F:
DO NOT REMOVE GROUND PLUG UNDER
ANY CIRCUMSTANCES, DO NOT USEAN
EXTENSION CORD,
For,,our Safe{_ and protection, the Kem_mre
freezer: is equip'ped witl_ a Special ttU'ee-terminal
type grounding OlUg on the electrical cord. It
nlust _d pluggecl u_to its own pr0perlv grounded
tlireeaprofig'oUtlet-l[5 volt; 60 [7{er{:z; t rotected
W[th:a I5 amp time delay fuse or circuit breaker.
Donor plug the freezer into an 0t_tl_et:c0ntr6Ilect
1_v:a: _:V,all ._witcli 0r pull c6rd X._,hicl_ mightik,, _e
t!ir0ed 6ff accidentaI!3;! i::: : :
I_ the dect:rica[ 0hfle[you., hitena, t6 use:will:, iiot
accept the three-prong'plug; or if v0u are not sure
tlie.outlet is adequate'ly g,'ound_ed, You:sl_0uld
Nave a Dr0perlv grounded three:t'ff'o_g:outlet
inS{:alledacc0rdi_ig t0 the Nati0nal Electri_:alCode
by a qualified electriciaft.
Never unp{ug your freeze,' by pullin,gon the cord.
AlwaVs giqp ttie ptt_g firmbiand pull straight out
from {he receptacle:: " ....
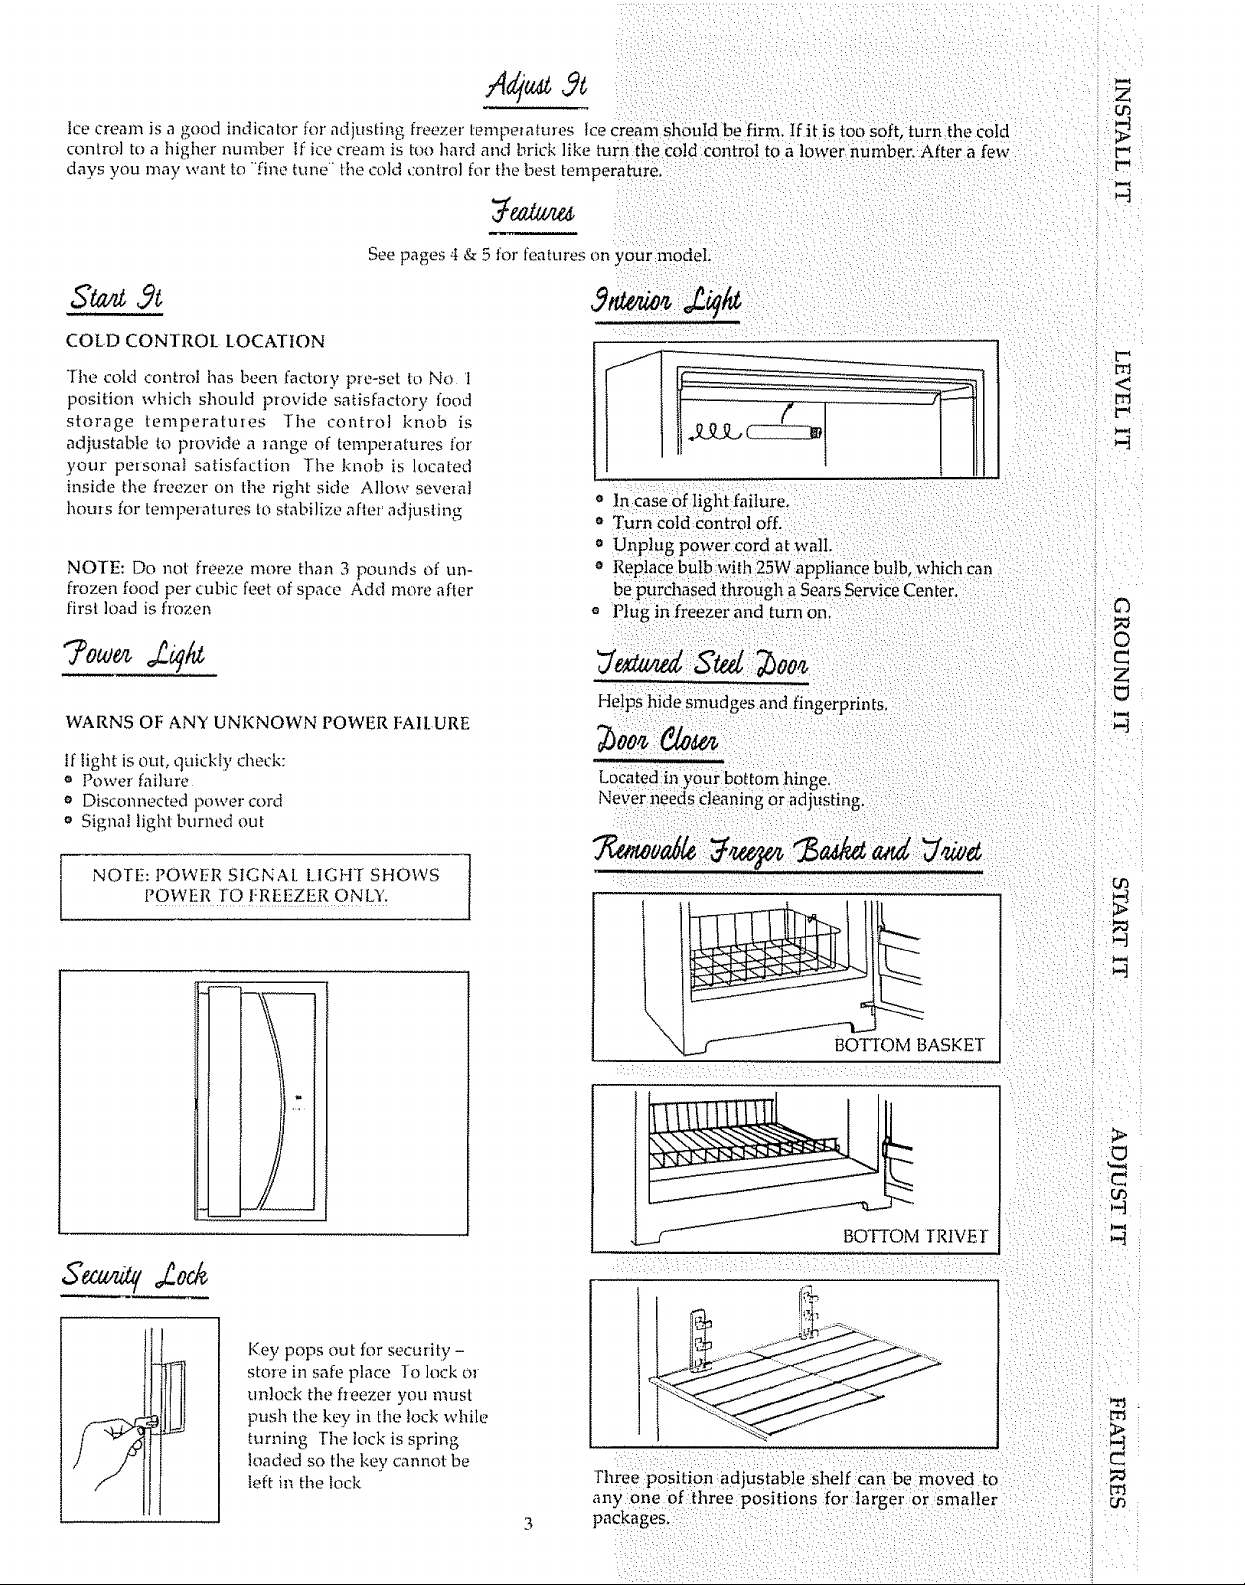
Ice cream is a good indicator for adjusting freezer tempeEatu_es tce cream should be firm. If it is too soft, turn the Cold
control to a higher number If ice cream is too hard and brick like turn the cold control to a lower number.:After a few
days you may want to-fine tune" the cold control for the best temperature.
See pages 4 & 5 for features on your model.
Z
t_
t"'
_q
COLD CONTROL LOCATION
The cold control has been factory pre-set to No '1
position which should provide satisfactory food
storage temperatures The control knob is
adjustable to provide a ]ange of temperatures for
your pmsonal satisfaction The knob is located
inside the freezer on the right side Allow sevmat
houis for temperatures to stabilize after adjusting
NOTE: Do not freeze more than 3 pounds of un-
frozen food per cubic feet of space Add more after
first load is frozen
WARNS OF ANY UNKNOWN POWER I:AII.URE
If tight is out, quickly check:
Power failure
o Disconnected power cord
o Signa! light burned out
NOTE: t'OWt_R SIGNAl, I.IGH'[ SEtOWS
[ 1
1,0W!_RT0!:REEzER0 NL_I:
In case of Iight faiture.
o Turn Cold Control off.
Unplug power cord at wall.
o Replace bulb with 25w appliance bulb, which can
be purchased :tiir0ugh a Sears service center.
a Plug in freezer and turn on.
V'eca, : ;boo
Helps Md e smudges and fingerprints
;boo
Located in your bottom hinge.
Never neecis Cleaning or adjusting,
t-"
["rl
r..*
C3
Z
# I
tt i
# I
_.iL____d
Key pops out for security -
store in safe place To lock ol
unlock the fieezer you must
push the key in the !ock while
turning The lock is spring
loaded so the key cannot be
left in the loci<
BOTTOM BASKET
_A
J
I'hree position adjustable shelf can be moved to
any One of three positions for targer0r Smaller
package s,
BOTTOM TRIVET
>
_q
 Loading...