

Kenmore 253.44123800 Use & Care Manual
TM
Refrigerator
Use & Care Guide
Refrigerador
Guía para su uso y cuidado
Réfrigérateur
Guide d’utilisation et d’entretien
44123
Sears, Roebuck and Co., Hoffman Estates, IL 60179 U.S.A.
Sears Canada, Inc., Toronto, Ontario, Canada M5B 2B8
ENGLISH
FRANÇAISESPAÑOL
www.sears.com
297226300 (Jan 2008)
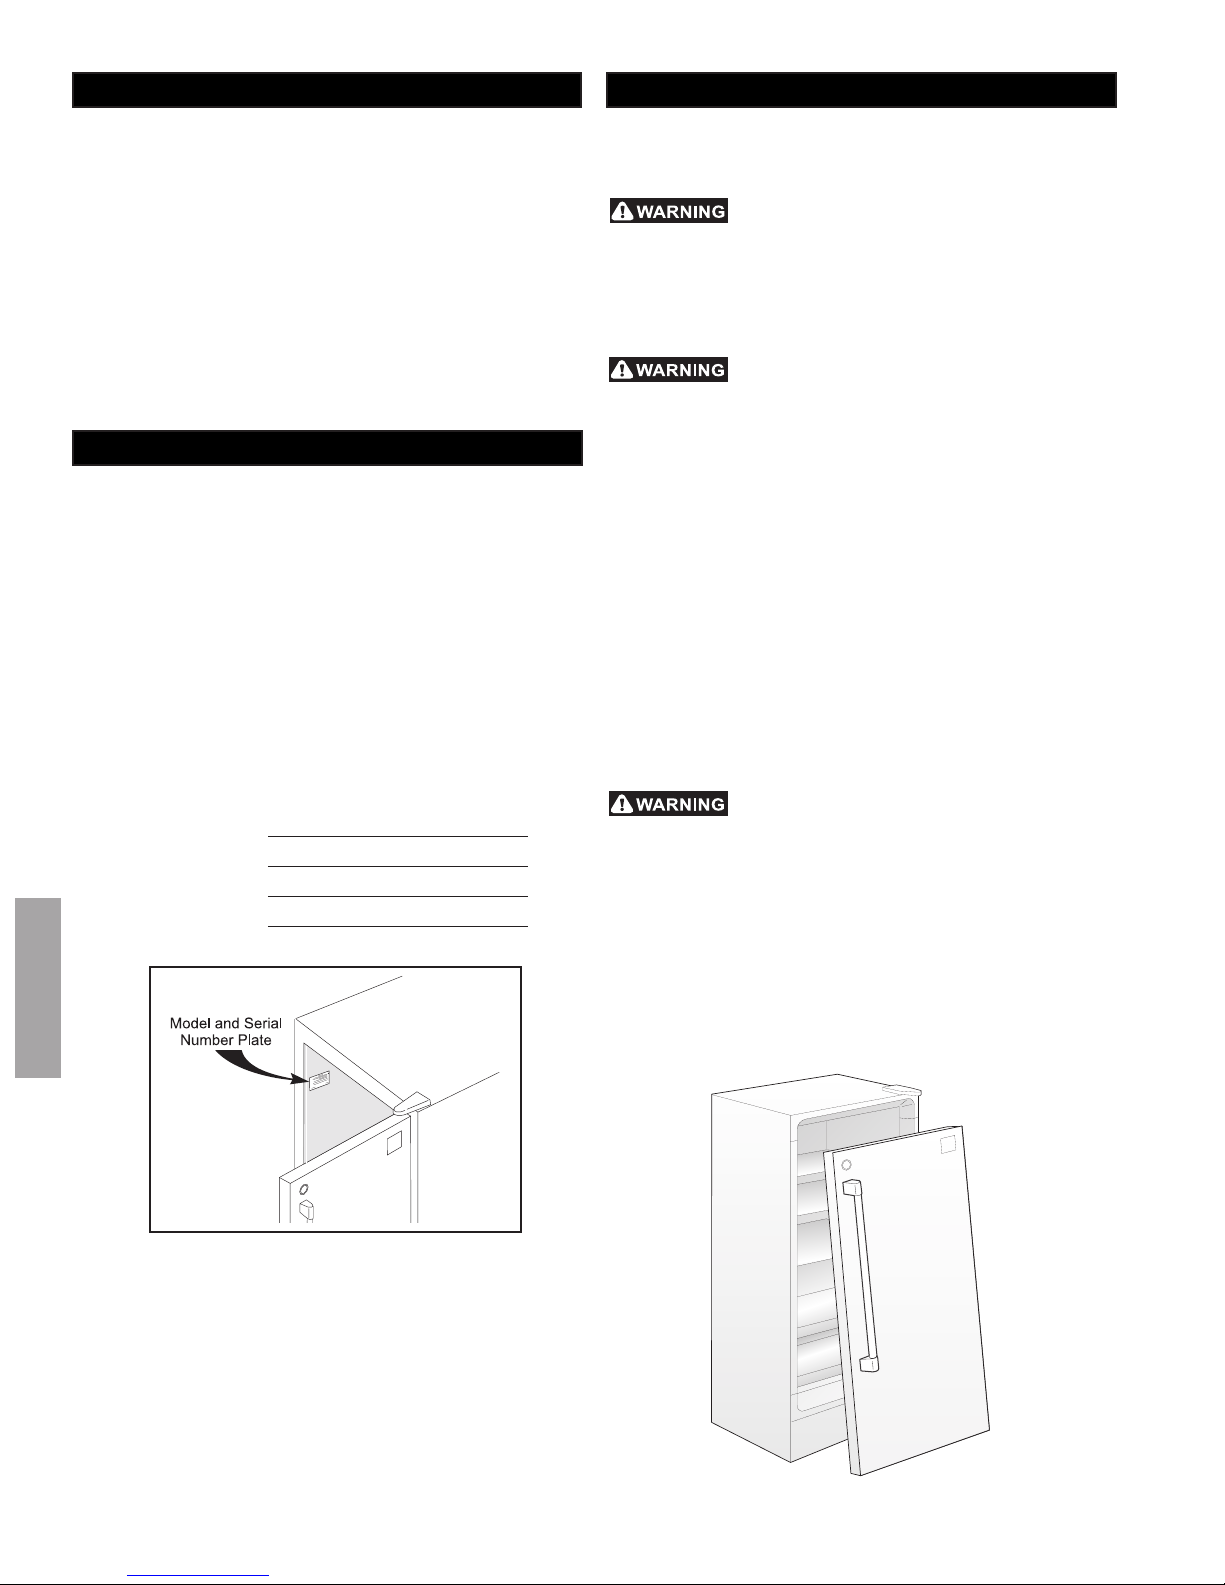
TABLE OF CONTENTS
IMPORTANT SAFETY INSTRUCTIONS
Serial/Model Numbers ...........................2
Important Safety Instructions ..................2-3
Kenmore PRO Appliance Warranty ....... 3
Protection Agreements ..........................4
Features at a Glance ..............................5
First Steps...............................................6-7
Setting the Temperature Control ............7
Refrigerator Features .............................7-9
Food Storage and Energy Saving Tips ..10
Care and Cleaning ................................10
Troubleshooting Guide ..........................11-12
Sears Service .........................................13
Sears Canada Customers .....................13
SERIAL / MODEL NUMBERS
READ AND SAVE THESE INSTRUCTIONS
This Owner's Guide provides specific operating instructions for
your model. Use your refrigerator only as instructed in this guide.
These instructions are not meant to cover every possible condition
and situation that may occur. Common sense and caution must
be practiced when installing, operating, and maintaining any
appliance.
RECORD YOUR MODEL AND SERIAL NUMBERS
READ ALL INSTRUCTIONS BEFORE USING THIS
REFRIGERATOR.
FOR YOUR SAFETY
• Do not store or use gasoline or other flammable vapors and
liquids in the vicinity of this unit or any other appliance. Read
product labels for flammability and other warnings.
• Do not operate this product in the presence of explosive fumes.
CHILD SAFETY
• Destroy carton, plastic bags, and any exterior wrapping
material immediately after the refrigerator is unpacked.
Children should never use these items to play. Cartons covered
with rugs, bedspreads, plastic sheets or stretch wrap may
become airtight chambers and can quickly cause suffocation.
• Remove all staples from the carton. Staples can cause severe
cuts, and destroy finishes if they come in contact with other
appliances or furniture.
• An empty, discarded ice box, refrigerator or freezer is a very
dangerous attraction to children.
• Remove or discard any spacers used to secure the shelves
during shipping. Small objects are a choke hazard to children.
• Remove the door(s) of any appliance that is not in use, even if
it is being discarded.
Record the model number and serial numbers in the space
provided below. The serial plate is located on the left wall inside
the refrigerator.
Model Number:
Serial Number:
Purchase Date:
or
253.
970.
ENGLISH
PROPER DISPOSAL OF YOUR REFRIGERATOR OR
FREEZER
RISK OF CHILD ENTRAPMENT
Child entrapment and suffocation are not problems of the past.
Junked or abandoned refrigerators or freezers are still
dangerous - even if they will sit for "just a few days". If you are
getting rid of your old refrigerator or freezer, please follow the
instructions below to help prevent accidents:
• Remove the door(s).
• Leave shelves in place so children may not easily climb inside.
• Have the refrigerant removed by a qualified technician.
2
ELECTRICAL INFORMATION
KENMORE PRO APPLIANCE WARRANTY
These guidelines must be followed to ensure that safety
mechanisms in the design of this refrigerator will operate
properly.
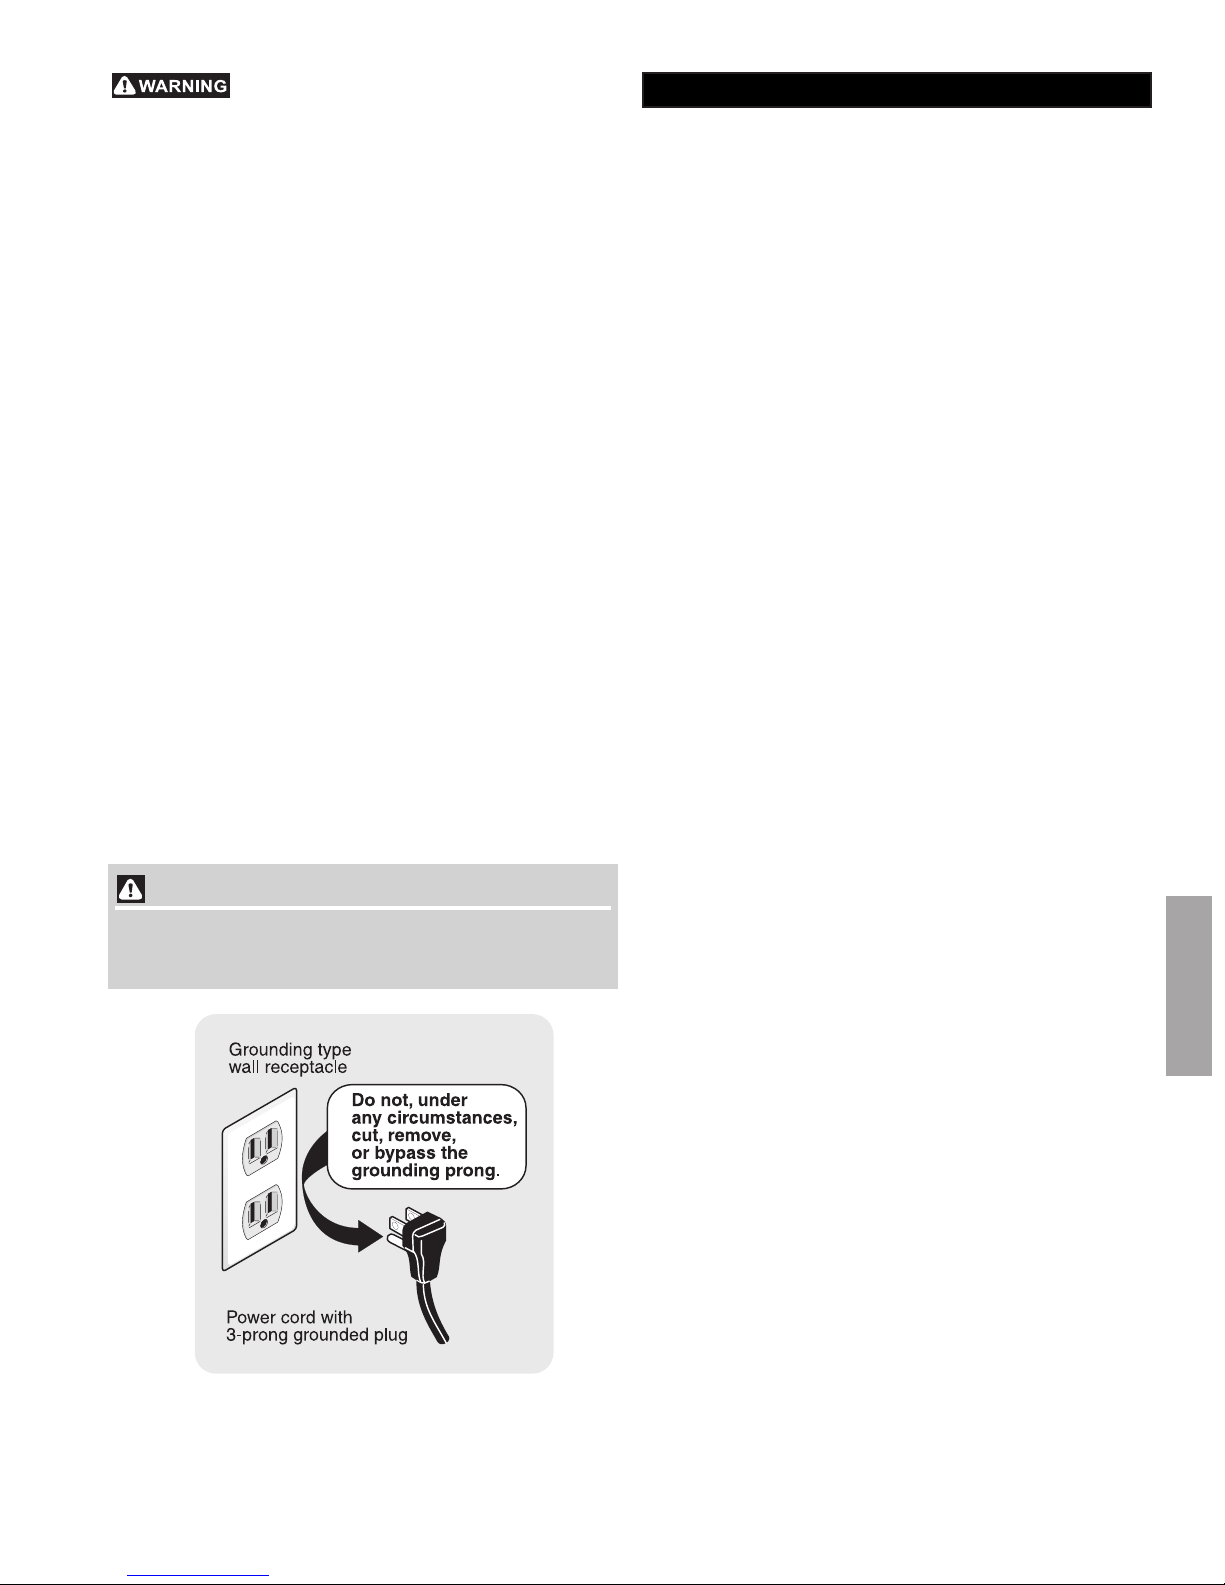
• Refer to the serial plate for correct electrical rating. The
power cord of the refrigerator is equipped with a three-prong
grounding plug for protection against shock hazards. It must
be plugged directly into its own properly grounded three-prong
receptacle, protected with a 15 amp time delay fuse or circuit
breaker. The power supply circuit must be installed in
accordance with current edition of the National Electrical Code
(NFPA 70) and local codes and ordinances. Consult a qualified
electrician. Receptacles protected by Ground Fault Circuit
Interrupters (GFCI) are NOT RECOMMENDED. DO NOT USE
AN EXTENSION CORD OR AN ADAPTER PLUG.
• If the voltage varies by 10 percent or more, refrigerator
performance may be affected. Operating the refrigerator with
insufficient power can damage the motor. Such damage is not
covered under the warranty. If you suspect your household
voltage is high or low, consult your power company for testing.
• To prevent the refrigerator from being turned off accidentally,
do not plug the unit into an outlet controlled by a wall switch or
pull cord.
• Do not pinch, knot, or bend the power cord in any manner.
OTHER PRECAUTIONS
• Never unplug the refrigerator by pulling on the power cord.
Always grip the plug firmly and pull straight out from the
receptacle.
• Turning the control to "OFF" turns off the compressor but does
not disconnect power to the light bulb or other electrical
components.
WARNING
Avoid fire hazard or electric shock. Do not use an extension
cord or an adapter plug. Do not remove any prong from the
power cord.
ONE YEAR LIMITED WARRANTY
When installed, operated and maintained according to all instructions supplied with the product, if this appliance fails due to
a defect in material or workmanship within one year from the
date of purchase, call 1-800-4-MY-HOME® to arrange for free
repair.
LIMITED FIVE YEAR WARRANTY ON SEALED
REFRIGERATION SYSTEM
For five years from the date of purchase, when this
appliance is installed,operated, and maintained according
to the instructions supplied with it, Sears will repair the
sealed system (consisting of refrigerant, connecting tubing,
and compressor), free of charge, if defective in material or
workmanship.
If this appliance is used for other than private family purposes,
this warranty applies for only 90 days from the date of purchase.
This warranty covers only defects in material and workmanship. Sears will NOT pay for:
1. Expendable items that can wear out from normal use,
including but not limited to filters, belts, light bulbs and
bags.
2. A service technician to instruct the user in correct product
installation, operation or maintenance.
3. A service technician to clean or maintain this product.
4. Damage to or failure of this product if it is not installed,
operated or maintained according to all instructions
supplied with the product.
5. Damage to or failure of this product resulting from accident,
abuse, misuse or use for other than its intended purpose.
6. Damage to or failure of this product caused by the use of
detergents, cleaners, chemicals or utensils other than
those recommended in all instructions supplied with the
product.
7. Damage to or failure of parts or systems resulting from
unauthorized modifications made to this product.
Disclaimer of implied warranties; limitation of remedies
Customer’s sole and exclusive remedy under this limited warranty shall be product repair as provided
herein. Implied warranties, including warranties of merchantability
or fitness for a particular purpose, are limited to one year or the
shortest period allowed by law. Sears shall not be liable for incidental or consequential damages. Some states and provinces
do not allow the exclusion or limitation of incidental or consequential damages, or limitations on the duration of implied warranties of merchantability or fitness, so these exclusions or limitations may not apply to you.
This warranty applies only while this appliance is used in the
United States and Canada.
This warranty gives you specific legal rights, and you may also
have other rights which vary from state to state.
Sears, Roebuck and Co., Dept. 817WA, Hoffman Estates, IL
60179
ENGLISH
Sears Canada Inc., Toronto, Ontario, Canada M5B 2B8
3

PROTECTION AGREEMENTS
y
r
In the U.S.A.
Master Protection Agreements
Congratulations on making a smart purchase. Your new
Kenmore Pro
years of dependable operation. But like all products, it may
require preventive maintenance or repair from time to time.
That’s when having a Master Protection Agreement can save
you money and aggravation.
Purchase a Master Protection Agreement now and protect
ourself from unexpected hassle and expense.
The Master Protection Agreement also helps extend the life
of your new appliance. Here’s what’s included in the
Agreement:
D Expert service by our 12,000 professional repair
D Unlimited service and no charge for parts and labor
D “No-lemon” guarantee – replacement of your covered
D Product replacement if your covered product can’t be
D Annual Preventive Maintenance Check at your
D Fast help by phone – phone support from a Sears
D Power surge protection against electrical damage due
D Rental reimbursement if repair of your covered product
Once you purchase the Agreement, a simple phone call is all
that it takes for you to schedule service. You can call anytime
day or night, or schedule a service appointment online.
Sears has over 12,000 professional repair specialists, who
have access to over 4.5 million quality parts and
accessories. That’s the kind of professionalism you can
count on to help prolong the life of your new purchase for
ENGLISH
years to come. Purchase your Master Protection Agreement
today!
Some limitations and exclusions apply. For prices and
additional information, call 1-800-827-6655.
Sears Installation Service
For Sears professional installation
items like garage door openers, water heaters, and other
major home items, in the U.S.A. call 1-800-4MY-HOME
®
product is designed and manufactured for
specialists
on all covered repairs
product if four or more product failures occur within
twelve months
fixed
request – no extra charge
technician on products requiring in-home repair, plus
convenient repair scheduling
to power fluctuations
takes longer than promised
of home appliances and
®
.
In Canada
Maintenance Agreements
Your purchase has added value because you can depend on
Sears HomeCentral
Technicians and more than a million parts and accessories,
we have the tools, parts, knowledge and skills to back ou
pledge:
We Service What We Sell.
Your Kenmore Pro
tested to provide years of dependable operation. But like all
products, it may require service from time to time. The Sears
Maintenance Agreement offers you an outstanding service
program, affordably priced.
The Sears Maintenance Agreement
• Is your way to buy tomorrow’s service at today’s price.
• Eliminates repair bills resulting from normal wear and
tear.
• Provides phone support from a Sears technician on
products requiring in-home repair.
• Even if you don’t need repairs, provides an annual
Preventive Maintenance Check, at your request, to
ensure that your product is in proper running condition.
Some limitations apply. For more information about
concerning Sears Canada Maintenance Agreements, call
1-800-361-6665.
®
for service. With over 2400 Service
®
product is designed, manufactured and
4

FEATURES AT A GLANCE
ENGLISH
1 WATER FILTER CARTRIDGE 9 ELECTRONIC CONTROLS
2 SPILL PROOF SLIDE OUT GLASS SHELVES 10 AIR DIFFUSER
3 MID LEVEL LIGHTING (BACK OF CRISPER) 11 AIR FILTER
4 HUMIDITY CONTROL 12 DAIRY DOOR
5 SAVE FRESH CRISPER (UPPER) 13 ADJUSTABLE DOOR BINS
6 ADJUSTABLE CRISPER DIVIDERS 14 TALL BOTTLE RETAINER
7 GOURMET PANTRY (LOWER) 15 FIXED GALLON DOOR BIN
8 WINE RACK (INSIDE GOURMET PANTRY) 16 BIN SNUGGER
5
FIRST STEPS
1”
(25mm)
3/8”
(10mm)
This Owner's Guide provides specific operating instructions for
your model. Use the refrigerator only as instructed in this Owner's
Guide. Before starting the refrigerator, follow these important
first steps.
INSTALLATION
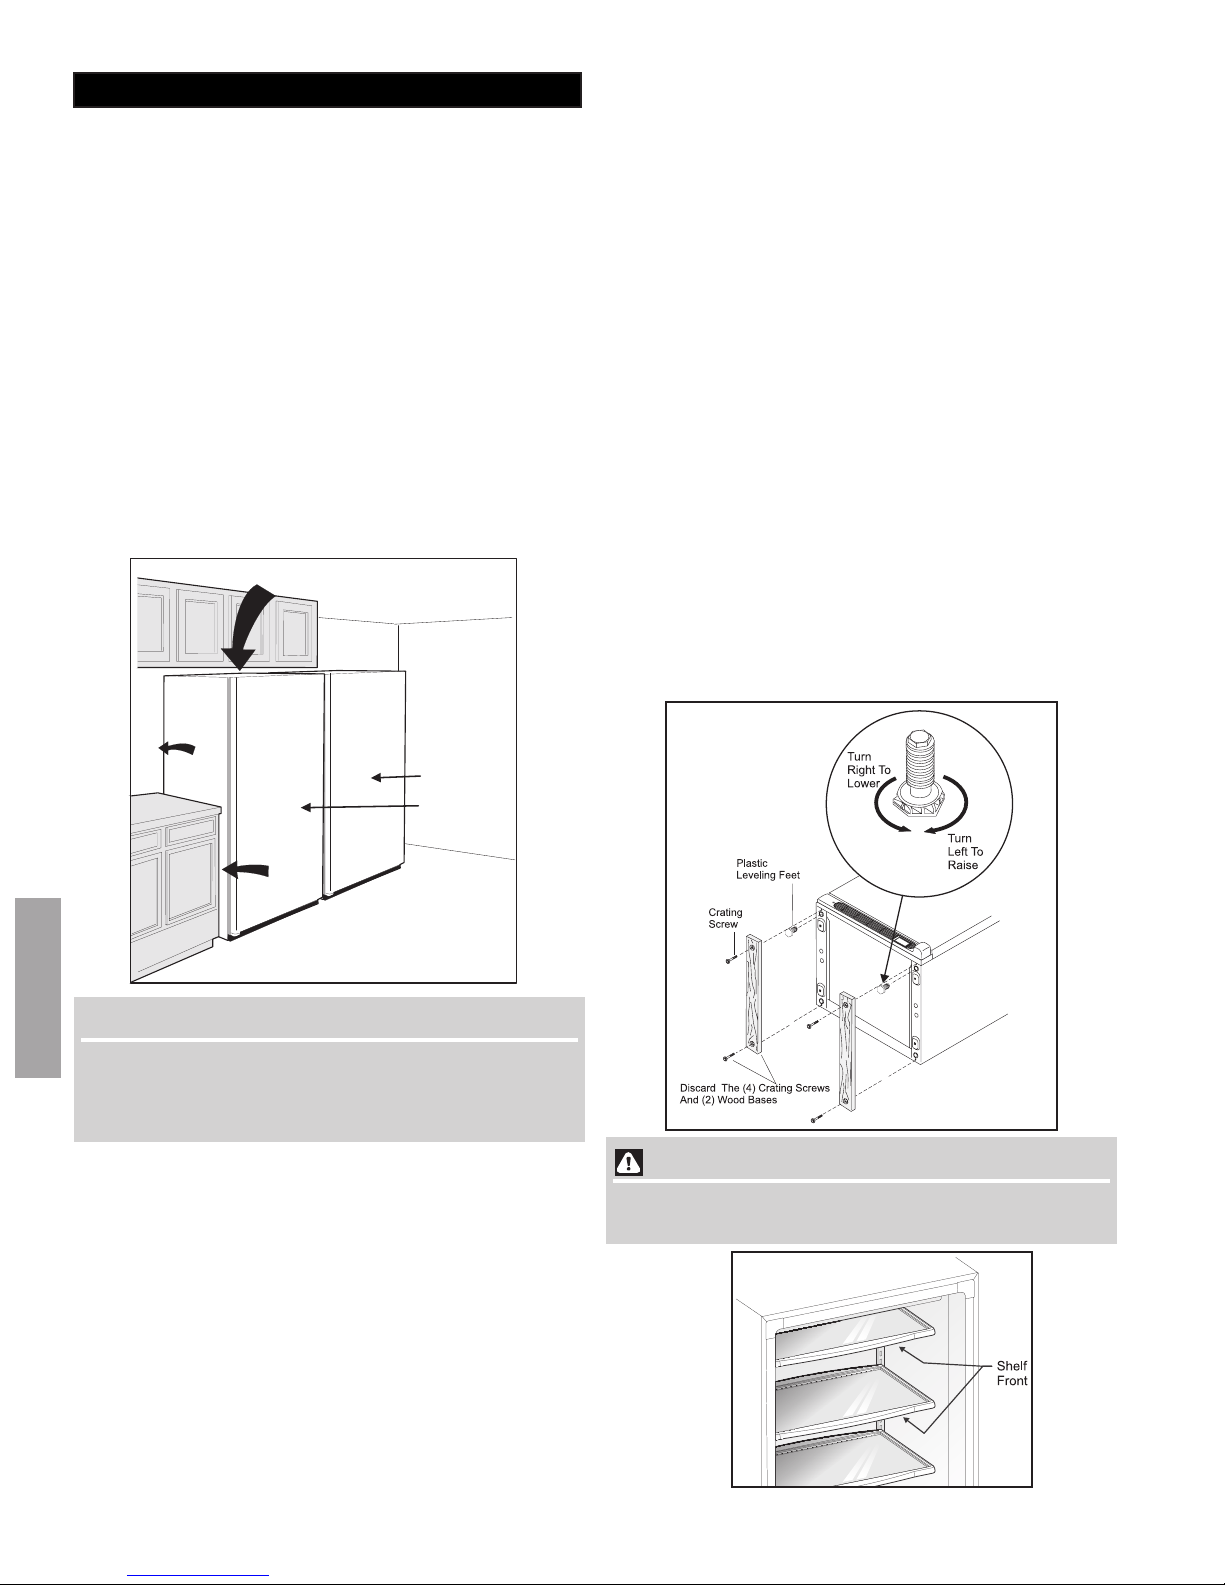
TO LEVEL REFRIGERATOR:
After discarding crating screws and wood base, use a carpenter's
level to level the refrigerator from front to back. Adjust the plastic
leveling feet in front, 1/2 bubble higher, so that the door closes
easily when left halfway open.
LEVELING INSTRUCTIONS FOR ALL REFRIGERATOR /
FREEZER PAIR:
• Choose a place that is near a grounded electrical outlet. DO
NOT use an extension cord or an adapter plug.
• For most efficient operation, the refrigerator should be located
where surrounding temperatures will not drop below 40ºF (5ºC)
or exceed 110ºF (43ºC).
• Allow the following clearances for ease of installation, proper
air circulation, and electrical connections:
Sides 3/8 inch
Back & Top 1 inch
• Do not block the toe grille on the lower front of your refrigerator.
Sufficient air circulation is essential for the proper operation of
your refrigerator.
1” (25mm)
1”
(25mm)
3/8”
(10mm)
Refrigerator
Freezer
• Remove two leg levelers provided in literature bag. While unit
is lying on its back for wood skid removal, install both leg
levelers in rear of unit.
• Level door of first unit using all four levelers and slide unit into
place. Recheck for levelness and adjust if necessary.
• Measure distance from floor to bottom of door on first unit.
Adjust and level second unit so door height matches.
• Leg Level Adjustments:
• One full turn of all four leg levelers will raise door 5/32".
• One full turn of both front leg levelers will raise door 3/16" and
tilt top of door back 7/16".
• One full turn of both rear leg levelers will lower door 1/32" and
tilt top of door forward 7/16".
• One full turn of both side leg levelers will raise door 3/16" and
tilt top of door 3/8".
• Slide second unit into place leaving a minimum gap of 3/16"
between units for door swing clearance.
• This last step may require at least one extraction of the second
unit to properly align units in a "built-in" application.
NOTE
The exterior walls of the refrigerator may become quite warm
ENGLISH
as the compressor works to transfer heat from the inside.
Temperatures as much as 30ºF warmer than room temperature
can be expected.
DOOR OPENING
NOTE: If your refrigerator is placed with the door hinge side
against a wall, you may have to allow additional space so the
door can be opened wider.
LEVELING
The refrigerator must have all bottom corners resting firmly on a
solid floor. The floor must be strong enough to support a fully
loaded refrigerator. It is VERY IMPORTANT for your refrigerator
to be level in order to function properly. If the refrigerator is not
leveled during installation, the door may be misaligned and not
close or seal properly, causing cooling, frost or moisture
problems.
CAUTION
To allow door to close and seal properly, do not let food
packages extend past the front of the shelves.
6
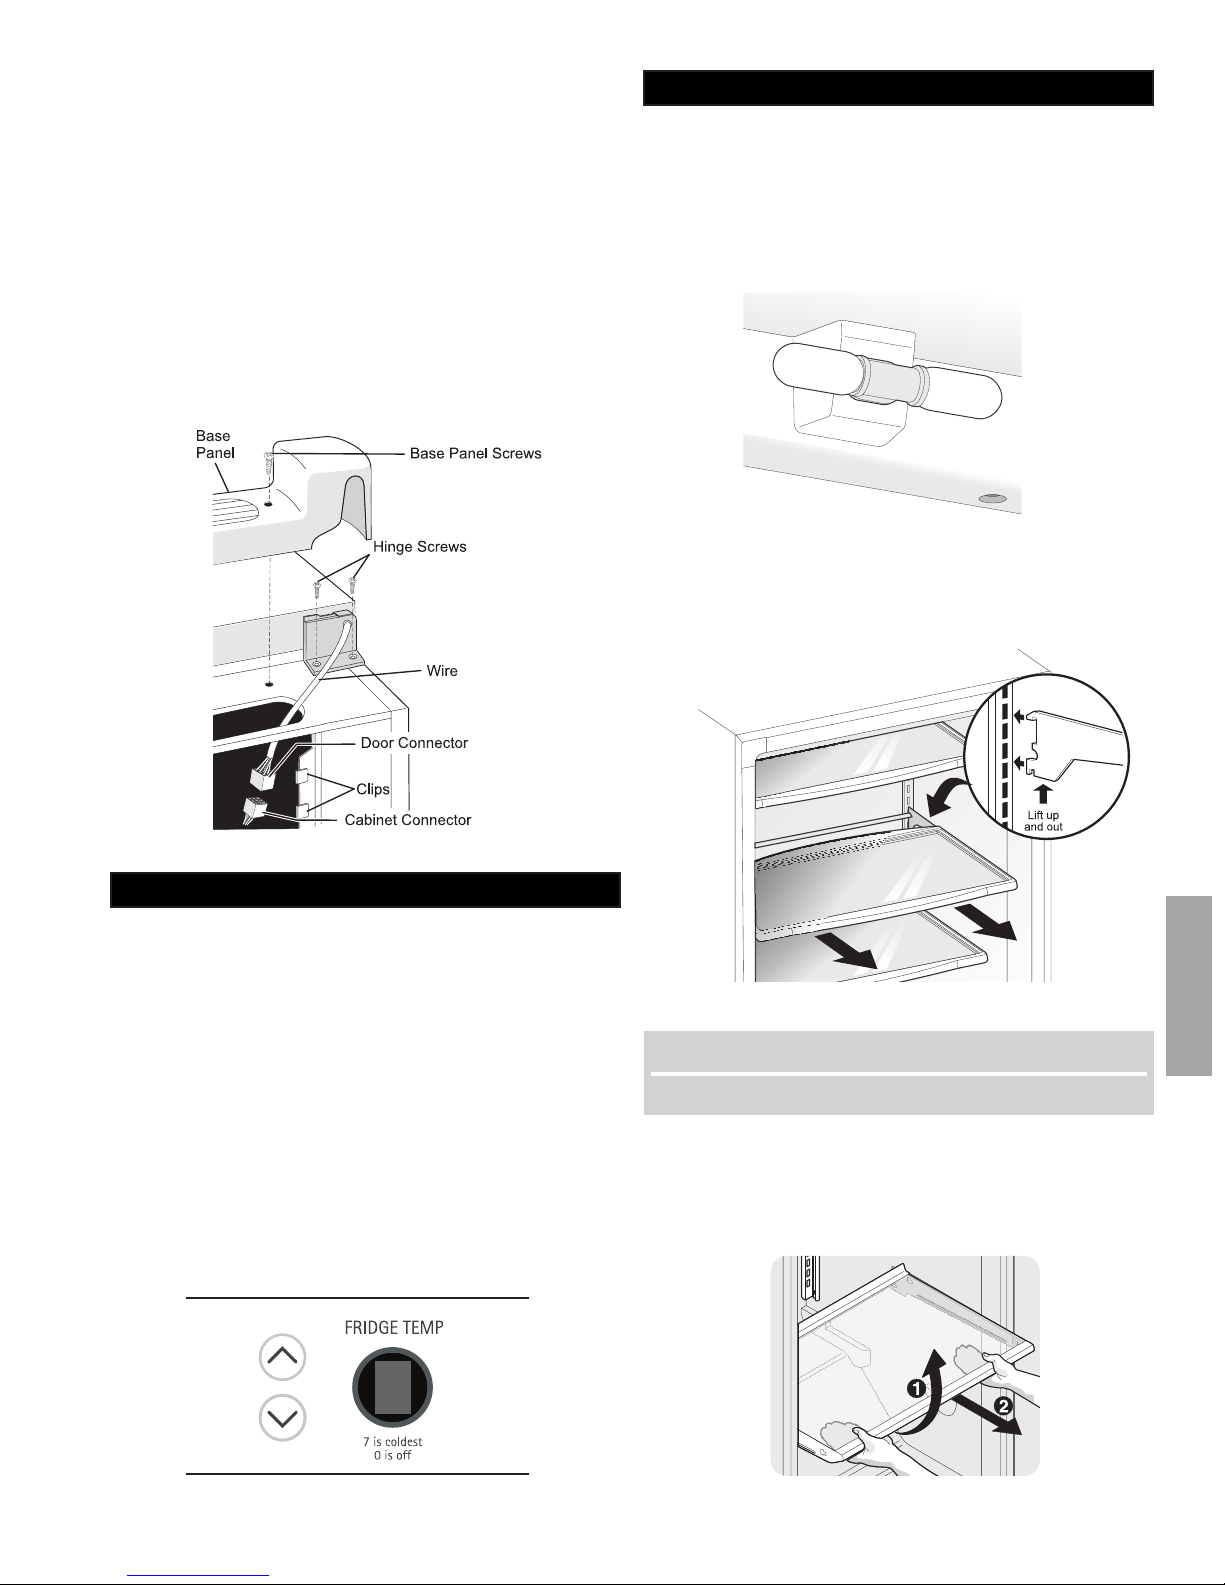
DOOR REMOVAL
If door must be removed:
• Unplug the unit
• Gently lay refrigerator on its back, on a rug or blanket.
• Remove two base screws and base panel. Remove wire from
clips on bottom of cabinet, if required.
• Unplug connector, if required, by holding the cabinet connector
in place and pulling the door connector out.
• Remove the bottom hinge screws.
• Remove the plastic top hinge cover.
• Remove the screws from the top hinge.
• Remove the top hinge from the cabinet.
• Remove the door and bottom hinge from the cabinet.
• To replace door, reverse the above procedures and securely
tighten all screws to prevent hinge slippage.
REFRIGERATOR FEATURES
INTERIOR LIGHTING
The light comes on automatically when the door is opened. The
light bulb assembly is located on the back of the refrigerator
control box. To replace the light bulb, turn the temperature control
to "OFF" and unplug the electrical cord. Replace the old bulb
with a bulb of the same type and wattage.
SPILL PROOF SLIDE-OUT GLASS SHELVING
Multi-position adjustable slide out glass shelves can be moved
to any position for larger or smaller packages. The shipping
spacers that stabilize the shelves for shipping may be removed
and discarded.
SETTING THE TEMPERATURE CONTROL
COOL DOWN PERIOD
For safe food storage, allow four (4) hours for refrigerator to cool
down completely. The refrigerator will run continuously for the
first several hours.
ELECTRONIC TEMPERATURE CONTROL
The electronic temperature control is located inside the
refrigerator. Temperature is factory preset to provide satisfactory
food storage temperatures. However, the temperature control is
adjustable to provide a range of temperatures for your personal
satisfaction. To adjust the temperature setting, move the UP ()
button for warmer temperature and DOWN () button for colder
temperature on the control panel. Allow several hours for the
temperature to stabilize between adjustments.
ENGLISH
TO ADJUST THE SHELVES
NOTE
Cantilever shelves are supported at the back of the refrigerator.
• Lift front edge up.
• Pull shelf out
• Replace the shelf by inserting the hooks at rear of the shelf into
the wall bracket. Lower the shelf into the desired slots and lock
into position.
7
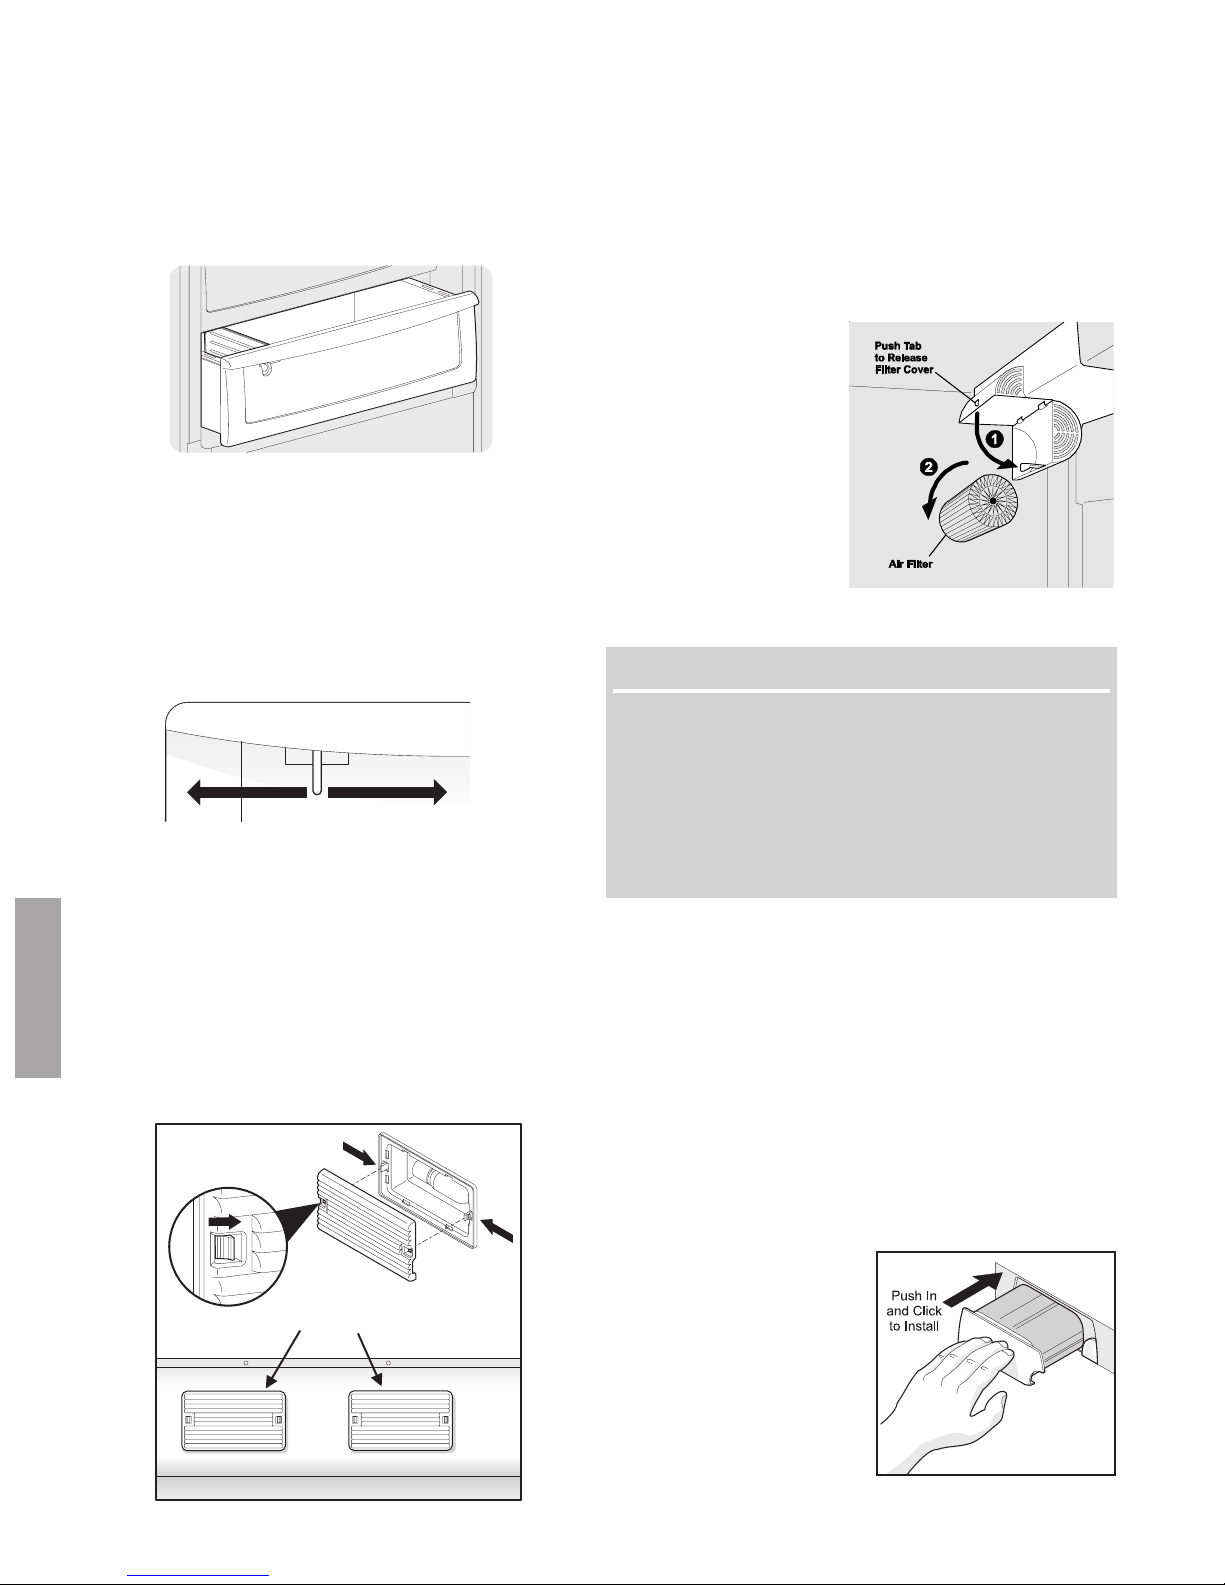
CRISPERS WITH ADJUSTABLE DIVIDERS
AIR FILTER
The crispers, located under the bottom refrigerator shelf, are
designed for storing fruits, vegetables, and other fresh produce.
Wash items in clear water and remove excess water before
placing them in the crispers. Items with strong odors or high
moisture content should be wrapped before storing. Dividers
may be adjusted for different size items within the crisper.
HUMIDITY CONTROL
The humidity control allows you to adjust the humidity within the
crisper. This can extend the life of fresh vegetables that keep best
in high humidity.
NOTE: Leafy vegetables keep best when stored with the humidity
control set on HIGH HUMIDITY, or in a drawer without a humidity
control. This keeps incoming air to a minimum and maintains
maximum moisture content.
Higher Humidity
Lower Humidity
MID LEVEL LIGHTING
The air filter is located on the back of the control box. In general,
you should change the air filter every six months to ensure optimal
filtering of refrigerator odors. You may want to adjust this time
period depending on the types and amounts of food you typically
store in your refrigerator.
TO REPLACE THE AIR FILTER:
• Push the plastic bubble tab at the back of the control box
housing. This releases
the hinged bottom half
to drop open.
• Remove the old filter
and discard it.
• Unpackage the new
filter and place it inside
the hinged bottom half
of the housing.
• Push the hinged bottom
half upward until the tab
snaps into closed
position.
PureSource2TM WATER FILTER
IMPORTANT NOTE
The water filter system in this product is designed to work only
when connected to the ice maker in the matching Kenmore
PRO freezer. Do not attempt to connect this filter to a water
source without first connecting it to the mating ice maker as
described in the "CONNECTING ICE MAKER TO WATER
SUPPLY" (P/N 297114600) included with the Kenmore PRO
Model #44833 freezer; connecting the filter in any other manner
risks severe water damage to both your refrigerator and
surrounding furnishings.
The mid level lighting is located at the back of the crispers. The
lights come on automatically when the door is opened. To replace
the light bulb, turn the temperature control to OFF and unplug the
electrical cord. Remove the lens from the lamp housing by
unsnapping it from the lamp housing using your fingers or a
screwdriver. Be careful not to break the locking tabs on the lamp
housing. Replace the old bulb with a bulb of the same type and
ENGLISH
wattage. To replace the lens, snap one side of the lens opening
to the tab on the lamp housing. Then carefully attach the other
side.
To Remove Light Lens
Press Tabs
in Direction Shown.
Mid Level Lighting
The water filter is located on the upper left front corner of the
refrigerator. Water conditions vary throughout the world, but
changing the water filter every 6 – 9 months normally will ensure
the highest possible water quality.
TO INSTALL WATER FILTER:
• The water filter cartridge comes separate inside the unit.
Before installing the water filter, be sure to remove the filter
from the packaging and two plastic caps that protect the
inlet and outlet ports of the water filter. The water supply
does not need to be turned off.
• Insert the water filter cartridge into the filter housing. When
the cartridge is almost in, you will feel it stop against the
clip assembly in the back of
the housing. The clip
assembly holds the filter
cartridge firmly in place.
• At this point, you will need to
push firmly until the cartridge
snaps fully in place. When
completely in place, the
front of the filter cartridge
will be flush with the front of
the housing.”
8
 Loading...