

Kenmore 25323725100, 25323724100, 25323714101, 25323429100, 25323424102 Owner’s Manual
...
®
Freezer
Use & Care Guide
Congelador
Gufa para su uso y cuidado
Cong_lateur
Guide d'utilisation et d'entretien
r
Sears, Roebuck and Co., Hoffman Estates, IL 60179 U.S.A.
Sears Canada, Inc., Toronto, Ontario, Canada M5B 2B8 www.sears.com
216902400 (0212)
i
Record Serial/Model Numbers ............ 2
Safety .................................................. 2-3
Warranty .............................................. 3
Canada - Limited Warranty ................. 4
First Steps ........................................... 5-6
Energy Saving Tips ............................. 6
Setting the Temperature Control ......... 6
Freezer Optional Features .................. 7-8
Care and Cleaning .............................. 9-10
Power Failure / Freezer Failure ........... 10
Troubleshooting Guide ......................... 11-12
Sears Service ...................................... 13
Sears Canada Customers ................... 13
READ AND SAVE THESE INSTRUCTIONS
This Owner's Guideprovides specific operatinginstructions
for your model. Useyourfreezer onlyas instructedinthis
guide.These instructionsare notmeanttocover every
possibleconditionand situationthat mayoccur.Common
sense and cautionmustbe practicedwhen installing,
operating,andmaintainingany appliance.
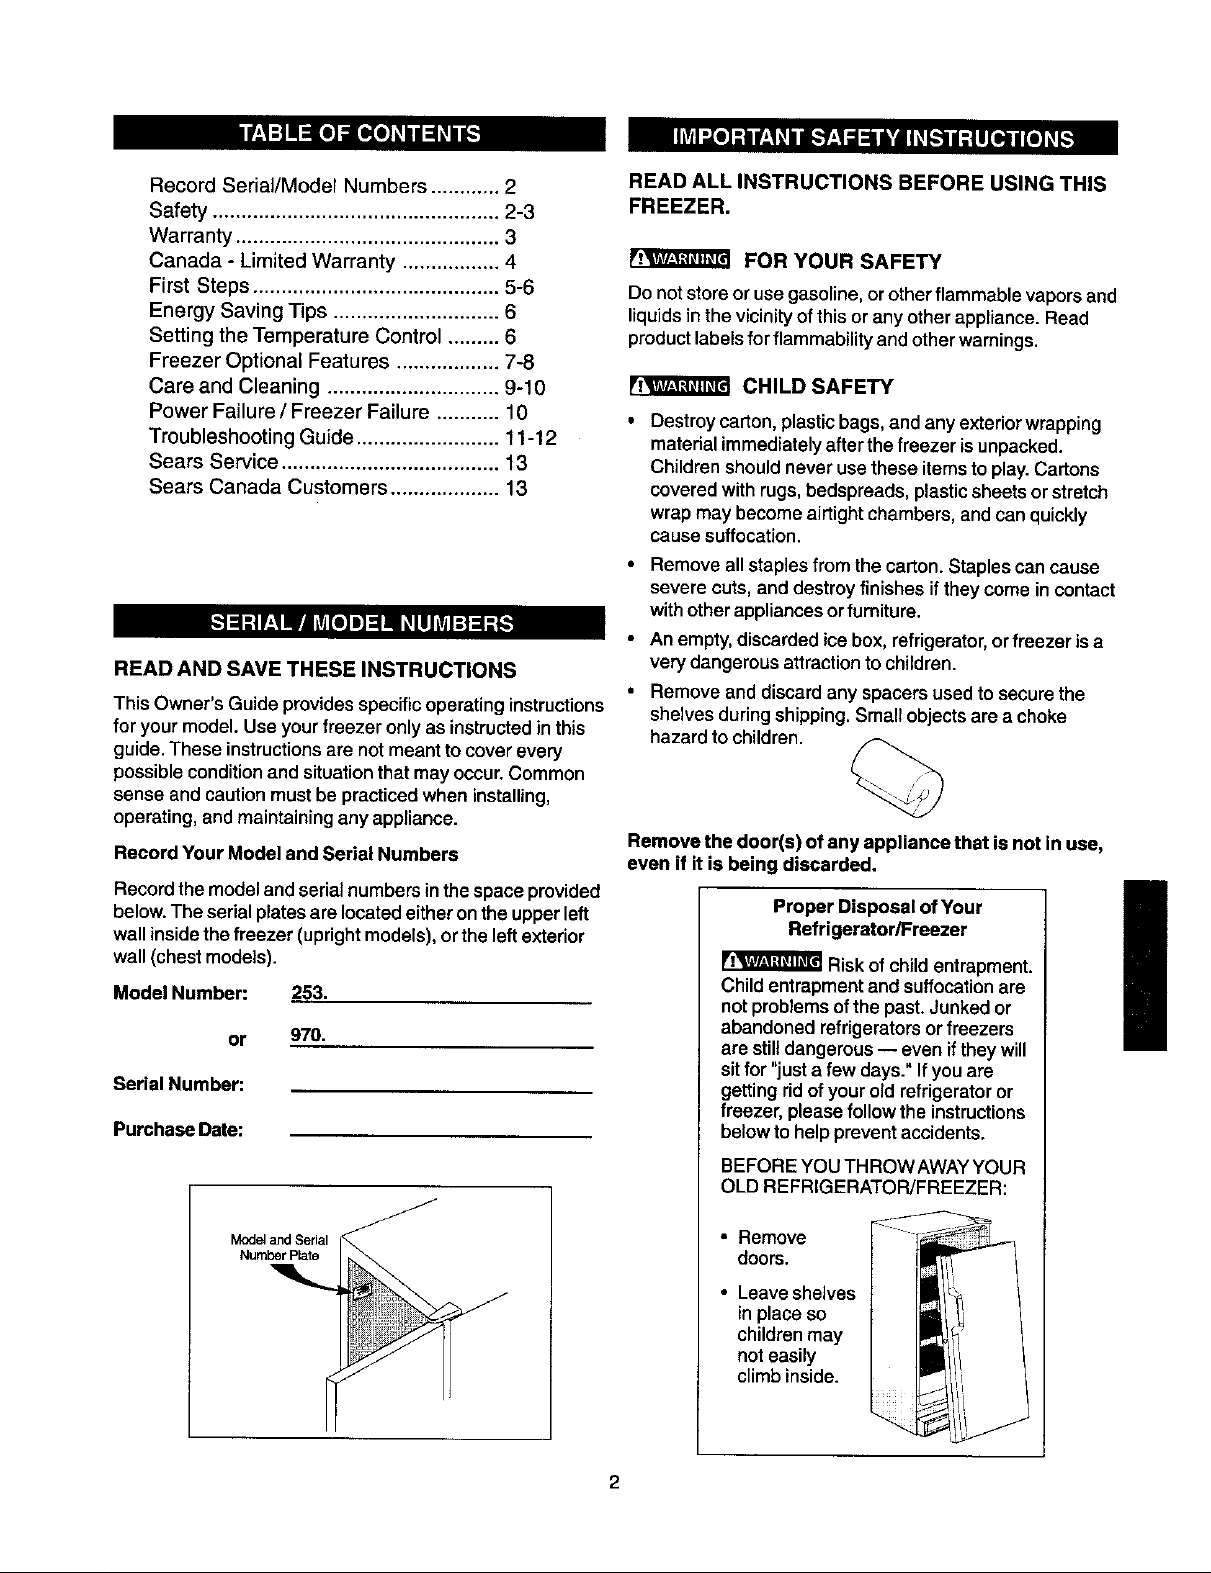
Record Your Model and Serial Numbers
Record the model and serial numbers inthespaceprovided
below.The serialplatesare locatedeither ontheupperleft
wall insidethe freezer (uprightmodels),orthe leftexterior
wall (chestmodels).
Model Number: 253.
or 970.
Serial Number:
Purchase Date:
READ ALL INSTRUCTIONS BEFORE USING THIS
FREEZER.
FOR YOUR SAFETY
Do not store or use gasoline, orother flammable vapors and
liquids in the vicinity of this or any other appliance. Read
product labels for flammability and other warnings.
CHILD SAFETY
Destroy carton,plasticbags, and any exterior wrapping
material immediately after the freezer is unpacked.
Children should never use these items to play. Cartons
covered with rugs, bedspreads, plastic sheets or stretch
wrap may become airtight chambers, and can quickly
cause suffocation.
Remove all staples from the carton. Staples can cause
severe cuts, and destroy finishes if they come in contact
with other appliances orfurniture.
An empty, discarded icebox, refrigerator, or freezer is a
very dangerous attraction to children.
Remove and discard any spacers used to secure the
shelves during shipping. Small objects are a choke
hazard to children.
Remove the door(s) of any appliance that is not in use,
even if it is being discarded.
Proper Disposal of Your
Refrigerator/Freezer
Riskof childentrapment.
Child entrapmentand suffocationare
not problems of the past. Junked or
abandoned refrigerators or freezers
are still dangerous -- even if they will
sit for "just a few days." If you are
getting ridof your old refrigerator or
freezer, please follow the instructions
below to help preventaccidents.
BEFORE YOU THROWAWAY YOUR
OLD REFRIGERATOR/FREEZER:
!
Model and Serial
Number Rate
• Remove ---
doors.
• Leave shelves
inplace so
childrenmay
not easily
climbinside.
2
ELECTRICAL INFORMATION
These guidelines must be followed to ensure that
safety mechanisms in the design of this freezer will
operate properly.
• Refer to the serial plate for correct electrical rating.
The power cordof the appliance is equipped with a
three-pronggrounding plug for your protection against
shock hazards. It must be plugged directly into a
properly grounded three-preng receptacle, protected with
a 15amp time delay fuse or circuit breaker. The
receptacle must be installed in accordance with lOcal
codes and ordinances. Consult a qualified electrician.
Receptacles protected by Ground Fault Circuit
Interrupters (GFIC) are NOT RECOMMENDED. Donot
use an extension cord or adapter plug.
• Ifvoltage varies by 10% or more, freezer performance
may be affected. Operating freezer with insufficient
power can damage the motor. Such damage is not
covered under the warranty. If you suspect your house
hold voltage is highor low, consult your power company
for testing.
• To prevent the freezer from being turned off
accidentically, do not plug unit into an outlet controlled
by a wall switch or pull cord.
• Do not pinch, knot, orbend the cord in any manner.
OTHERPRECAUTIONS
FULL ONE-YEAR WARRANTY ON FREEZER
For one year from the date of purchase, when this freezer
is operated and maintained according to the instructions
providedin this Owner's Guide, Searswill repairthis freezer,
free of charge, if defective in materialor workmanship.
FULL FIVE-YEAR WARRANTY ON SEALED
REFRIGERATION SYSTEM
For fiveyears from the date ofpurchase, when this freezer
isoperated and maintained according to the instructions
provided in this Owner's Guide, Sears will repair the sealed
system (consisting of refrigerant,connecting tube, and
compressor), free of charge, if defective in material or
workmanship.
The above freezer warranty applies only to freezers which
are used forstorage of foodfor private householdpurposes.
FOOD LOSS COVERAGE LIMITATION
If promptly reported to your nearestSears store orService
Center, Sears willreimburse youupto a total of $100.00
for the value offood, as verifiedby Seam, lostwhilestored
inthe freezer when usedfor private householdpurposes
as a result of:
• Never unplug the freezer by pulling on the cord.
Always grip the plug firmly, and pull straight out from
the receptacle.
NOTE: Turning the temperature control to OFF turns off the
compressor, but does not disconnect the power to the light
bulb or other electrical components.
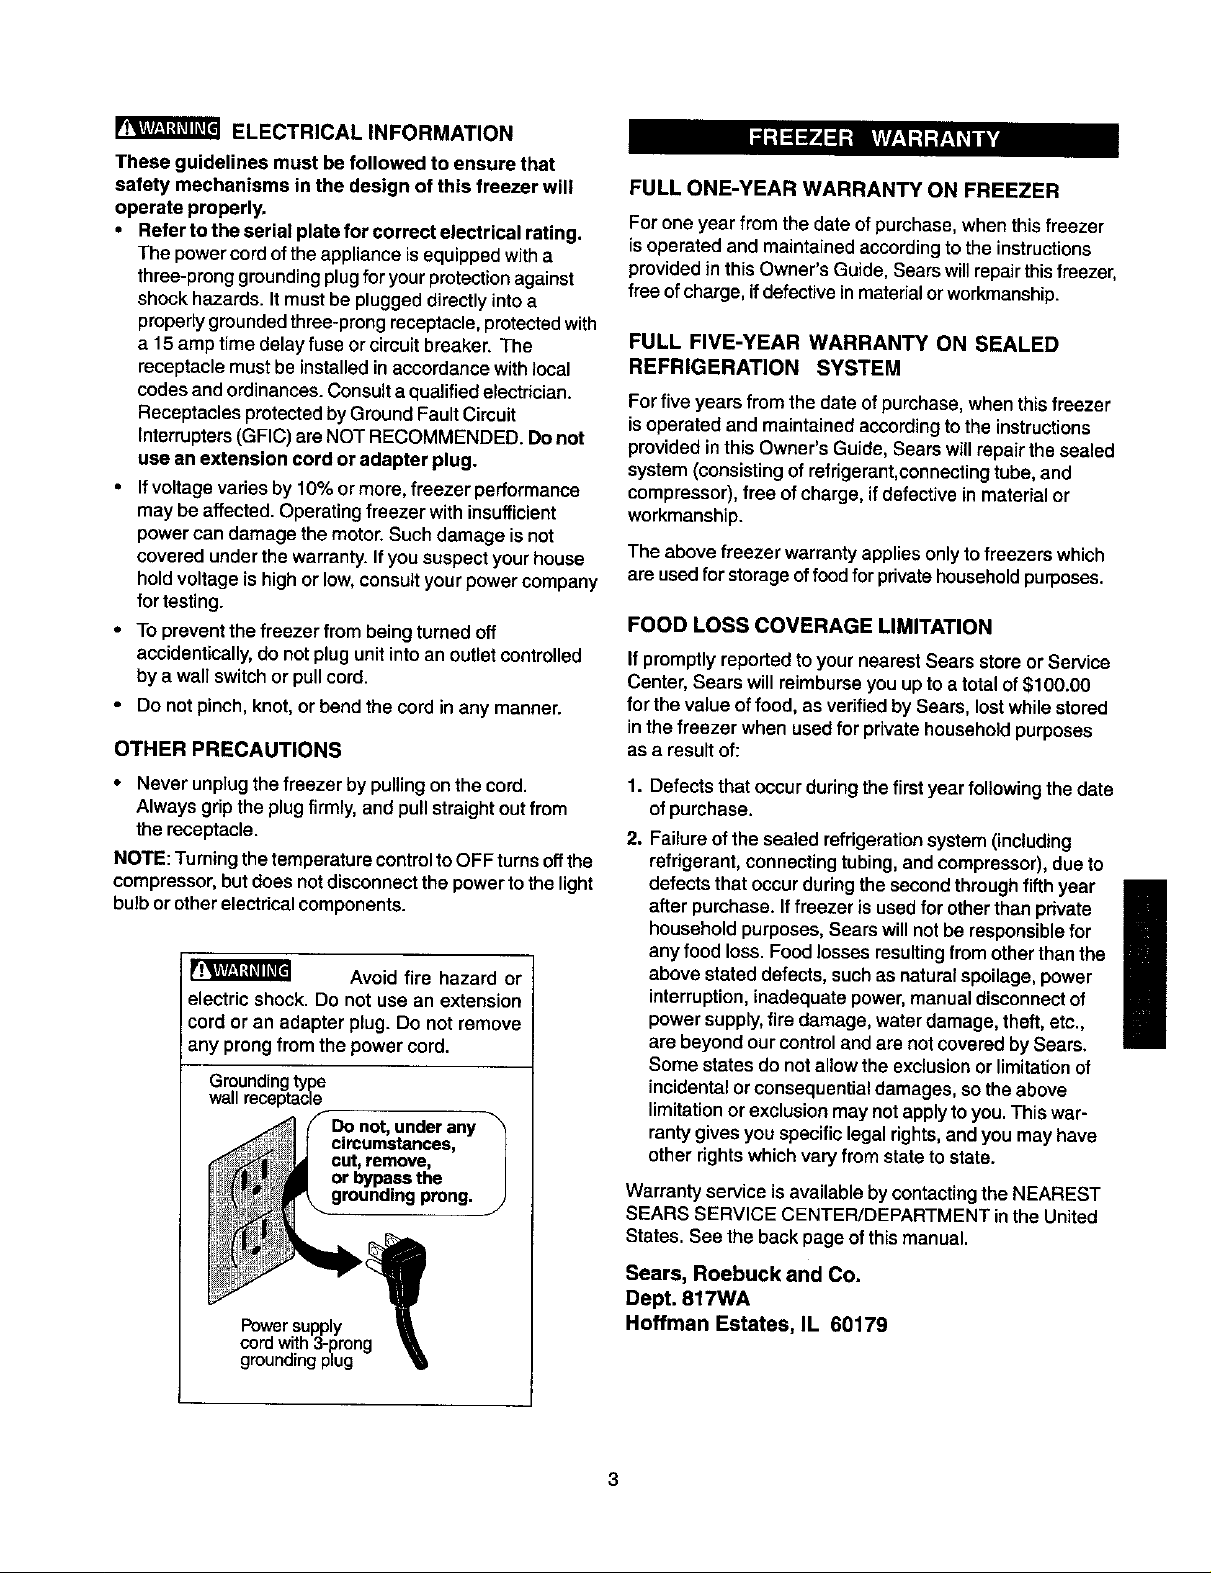
Avoid fire hazard or
electric shock. Do not use an extension
cord or an adapter plug. Do not remove
any prong from the power cord.
Groundingtype
wall receptacle
Power supply
cord with 3-prong
grounding plug
1. Defects that occur during the first year following the date
of purchase.
2. Failure of the sealed refrigeration system (including
refrigerant, connecting tubing, and compressor), due to
defects that occur during the second through fifth year
after purchase. Iffreezer is used for other than pdvate
household purposes, Sears will not be responsible for
any food loss. Food losses resulting from other than the
above stated defects, such as natural spoilage, power
interruption, inadequate power, manual disconnect of
power supply, fire damage,water damage, theft, etc.,
are beyond our control and are not covered by Sears.
Some states do not allow the exclusion or limitation of
incidental orconsequential damages, so the above
limitation or exclusion may not apply to you. This war-
ranty gives you specific legal rights, and you may have
other rights which vary from state to state.
Warranty service is availableby contactingthe NEAREST
SEARS SERVICE CENTER/DEPARTMENT inthe United
States. See the back page of this manual.
Sears, Roebuck and Co.
Dept. 817WA
Hoffman Estates, IL 60179
!
3
CANADA- LIMITED WARRANTY
®
Freezers
Sears Canada Inc., warrants every new Kenmorefreezer to be free fromdefects inmaterial or workmanship.What Sears
will do, free of charge, incase of defect:
The Compressor
The Sealed System
(consisting of refrigerant,
evaporator, and condenser)
Allother parts or
adjustments
The following items, sincethey are not manufacturingdefects,are not includedinthewarranty,but are the responsibilityof
the customer:
1) Damage to finish after delivery.
2) Improper power supply, low voltage, or any defects in the house wiring system or appliance notconnected
to electdc outlet.
3) Replacement of light bulbs.
4) Damage caused by moving the product from its original installation.
5) Service required as a result of alteration, abuse, fire, floods, or acts of God.
6) Providing adequate air circulation to the refrigerating system.
7) Proper use and care of product as listedinthe customer's manual; proper setting of the controls.
TEN (10) YEARS
FIVE (5) YEARS
ONE (1) YEAR
Normal Responsibility of the Customer
TEN (10) YEARS
FIVE (5) YEARS
ONE (1) YEAR
FIVE (5) YEARS
FIVE (5) YEARS
ONE (1) YEAR
!
Ifany service is requiredunderthiswarranty,simplycall 1-800-4-MY-HOMEsm(1-800-469-4663).
Thiswarrantyis inadditiontoany statutorywarranty.The abovewarrantycoversKenmoreFreezers soldandoperatedin
Canada onlyand shall notapplyifthefreezer is usedfor otherthan domesticpurposes.
Sears Maintenance Agreement
Maintain the value of your Kenmore freezer with a Sears Maintenance Agreement.
SEARS CANADAINC. • Toronto, Canada ° M5B 2B8
PRINTEDINU.S.A.
4
This Owner's Guide provides specific operating instructions
for your model. Use the freezer only as instructed in this
Owner's Guide. Before starting the freezer, follow these
important first steps.
INSTALLATION
• Choose a place that is near a grounded electrical outlet.
Do Not use an extension cord or an adapter plug.
• Forthe most efficient operation, the freezer should be
located where surrounding temperatures will not exceed
110°F(43°C). Temperatures of 32°F (0°C) and below will
NOT affect freezer operation. Additional compressor
heaters are not recommended.
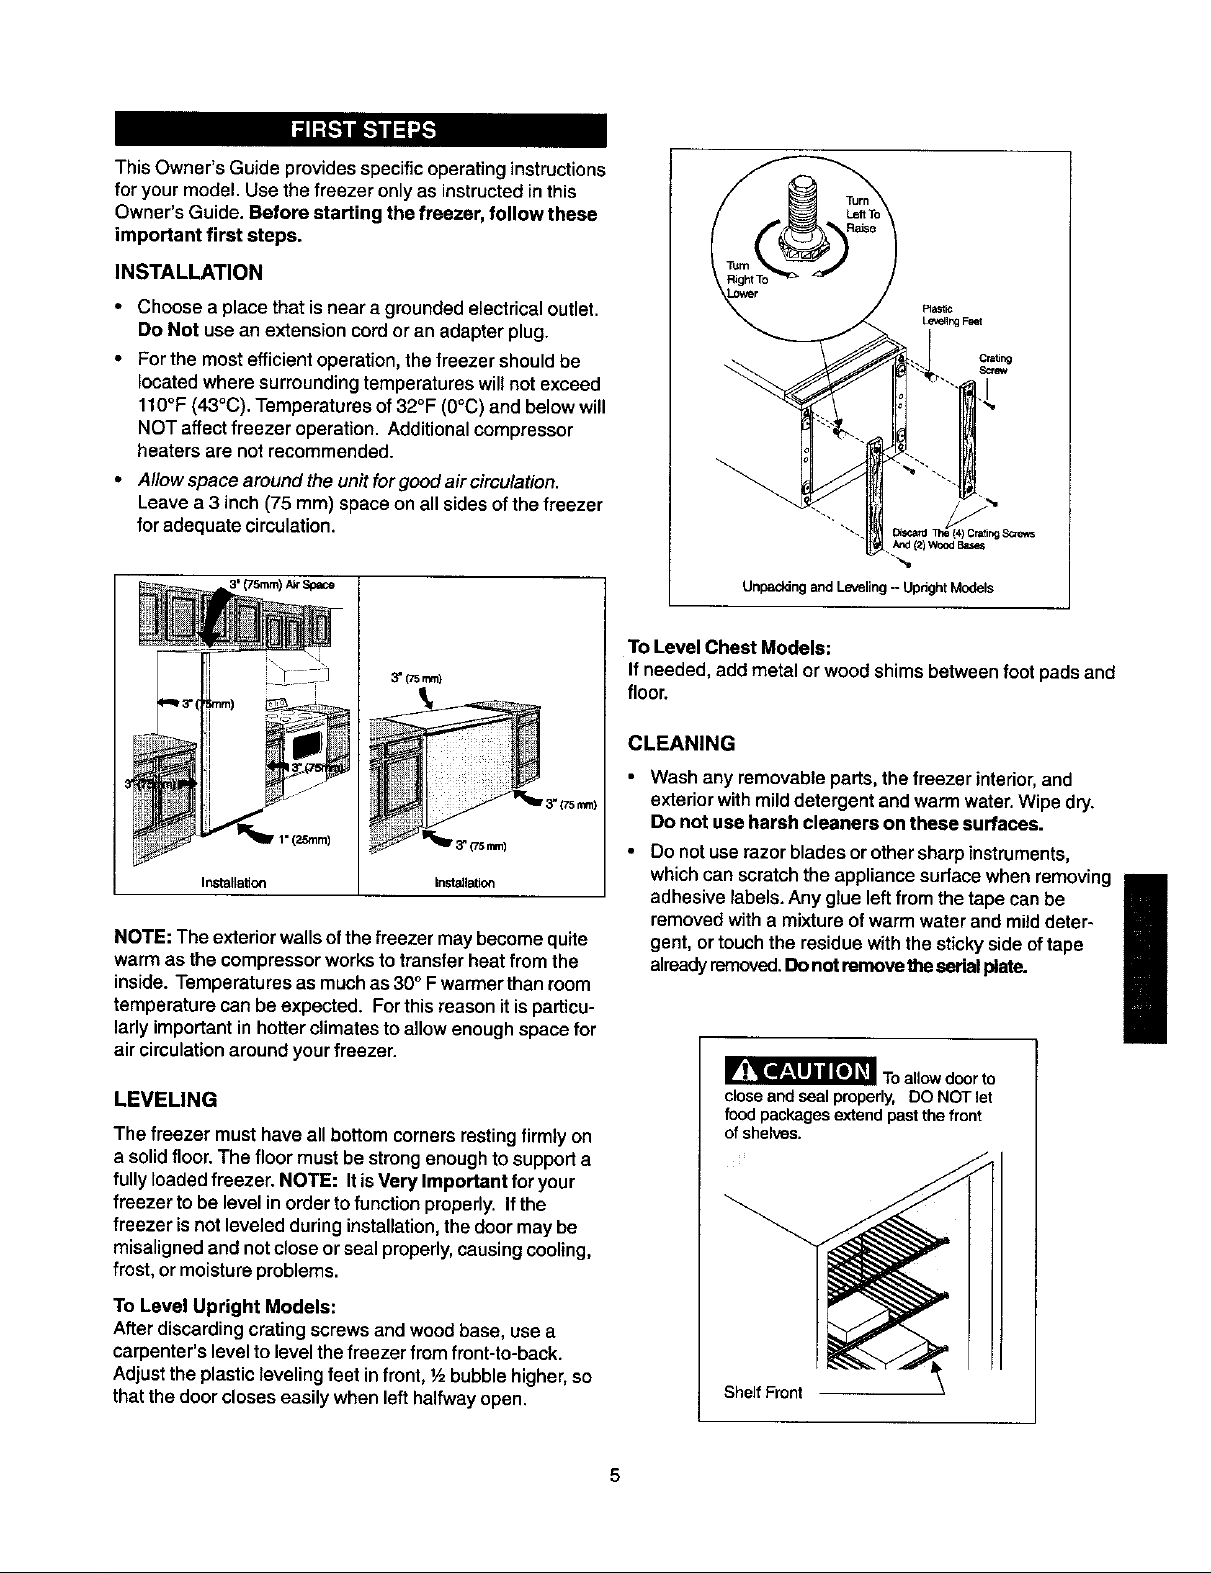
• AIIowepacearoundtheunitforgoodaircirculation.
Leave a 3 inch (75 ram) space on all sides of the freezer
for adequate circulation.
3" (7errs)
"_-. ) Cra_ir_ Soews
Unpactdng and Leveling - Upnght Models
To Level Chest Models:
Ifneeded, add metal orwood shimsbetweenfootpadsand
floor.
CLEANING
(75 ram)
InstallaUoa
NOTE: The exterior wallsof the freezer may become quite
warm as the compressorworkstotransferheatfrom the
inside.Temperaturesas muchas 30° Fwarmerthanroom
temperature can be expected. Forthis reason itis particu-
larlyimportantinhotterclimatestoallowenough space for
air circulationaroundyourfreezer.
LEVELING
The freezer must have all bottom corners resting firmly on
a solid floor. The floor must be strong enough to support a
fully loaded freezer. NOTE: It is Very Important foryour
freezer to be level inorder tofunction properly. If the
freezer isnot leveled during installation, the door may be
misaligned and not close or seal properly, causing cooling,
frost, or moisture problems.
To Level Upright Models:
After discarding cratingscrews and woodbase, usea
carpenter'slevelto levelthefreezerfromfront-to-back.
Adjust the plasticleveling feet infront,½ bubblehigher,so
thatthedoorcloses easily when lefthalfwayopen.
• Wash any removable parts, the freezer interior, and
exterior with mild detergent and warm water. Wipe dry.
Do not use harsh cleaners on these surfaces.
Do notuse razor blades or othersharpinstruments,
which can scratch the appliance surface when removing
adhesive labels.Any glue left from the tape can be
removed with a mixture of warm water and mild deter-
gent, or touch the residue with the sticky side of tape
alreadyremoved.Donotremove theserialplate.
!
I_=1_ To allow door to
close and seal properly, DO NOT let
food packages extend past the front
of shel,,_s.
Shelf Front
5
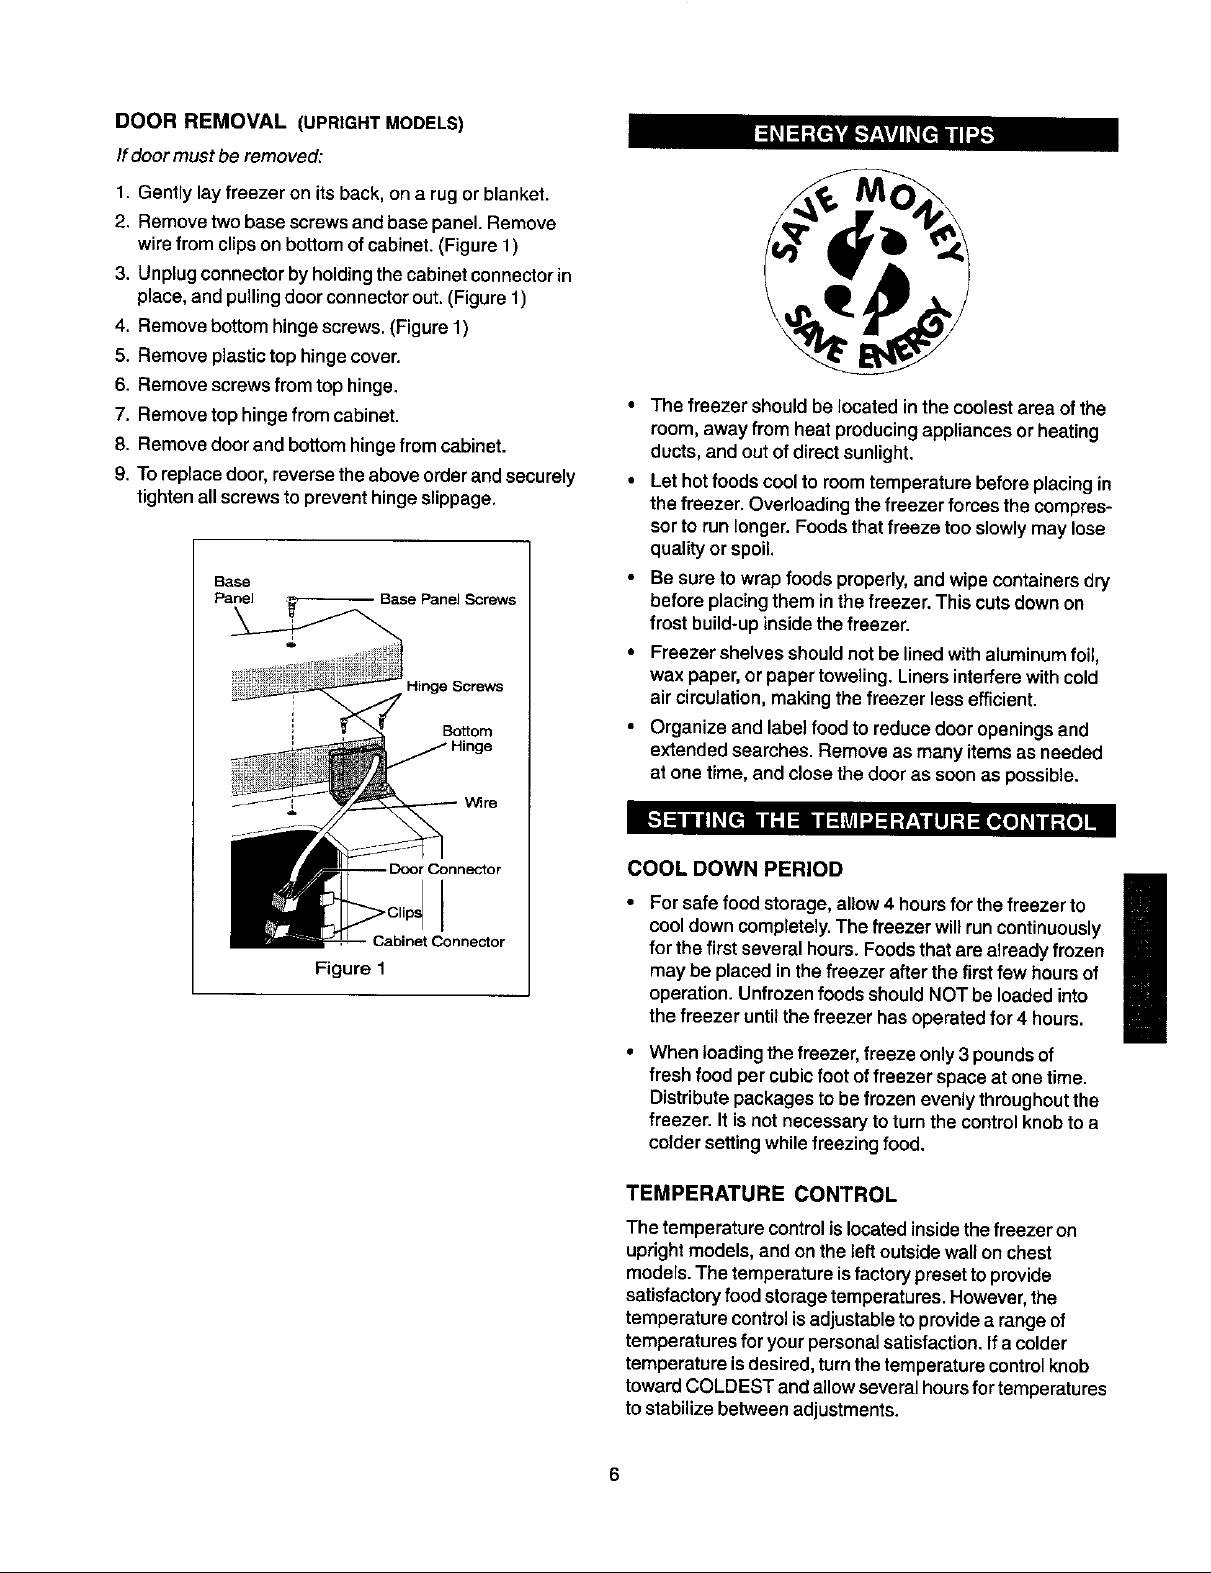
DOOR REMOVAL (UPRIGHTMODELS)
/fdoormUStbe removed:
1. Gently layfreezer on its back,on a rug or blanket.
2, Removetwo base screwsand basepanel. Remove
wire fromclips on bottom of cabinet. (Figure 1)
3. Unplug connector byholding the cabinet connector in
place, and pulling door connector out.(Figure 1)
4. Remove bottom hinge screws. (Figure 1)
5. Remove plastic top hinge cover.
6. Remove screws from top hinge.
7. Remove top hingefrom cabinet.
8. Remove door and bottom hinge from cabinet.
9. To replace door, reverse the above order and securely
tighten all screws to prevent hinge slippage.
Base
Bottom
• The freezer should be located inthe coolest area of the
room, away from heat producing appliances or heating
ducts, and out of direct sunlight.
• Let hotfoods cool to room temperature before placing in
the freezer. Overloadingthefreezer forces thecompres-
sor to run longer.Foodsthatfreeze too slowlymay lose
quality or spoil.
• Be sureto wrap foodsproperly,and wipecontainers dry
before placing them inthefreezer. This cuts downon
frost build-up inside the freezer.
• Freezer shelves shouldnot be linedwithaluminumfoil,
wax paper,or papertoweling.Linersinterferewithcold
air circulation,makingthe freezer less efficient.
• Organize and label food to reduce door openings and
extended searches. Remove as many items as needed
at one time, and close the door as soon as possible.
Figure 1
I
_tConnector
COOL DOWN PERIOD
COOldown completely.The freezer will runcontinuously
for the first severalhours. Foods that are already frozen
may be placed in the freezer afterthe first few hours of
• For safe foodstorage, allow 4 hoursfor the freezer to n
operation. Unfrozenfoods shouldNOT be loaded into
the freezer until the freezer has operated for 4 hours.
When loading the freezer, freeze only 3 pounds of
fresh food per cubic foot of freezer space at one time.
Distribute packages to be frozen evenlythroughout the
freezer. It is not necessary to turn the control knob to a
colder setting while freezing food.
TEMPERATURE CONTROL
The temperaturecontrolis locatedinside the freezer on
uprightmodels,and onthe leftoutsidewallon chest
models.The temperatureisfactory presetto provide
satisfactoryfood storagetemperatures.However,the
temperature control is adjustableto provide a rangeof
temperatures for your personal satisfaction. Ifa colder
temperature is desired, turn the temperature control knob
toward COLDEST and allow several hours for temperatures
to stabilize between adjustments.
6
Alarm Function Table
NOTE: Your freezer may have some, or all ofthe
features listed below. Become familiar with these
features, and their use and care.
SECURITY LOCK WITH POP-OUT KEY
This security lock fastens the door snugly, ensuring stored
food issecure. To lock or unlock the freezer, push the key
into the lock and turn. The key pops out of the lock after it
has been turned.
POWER ON LIGHT
The yellow Power On indicatorlight indicates that the freezer is
properly connected to electrical power. The light glows even
when the temperature control isturned to OFF. If the light goes
out, refer to Freezer Does Not Run Section in the Trouble-
shooting Guide. If the freezer appears to be operating, the
lightelement may be burned out. Call an authorized servicer
for replacement.
TEMP ALARM (ELECTRONIC MODELS)
This feature is designed to provide a warning if the inside
temperatures reach an unsafe level. The Temp. Alarm Feature
operates on household electricity. It will not function if house-
hold electricity is interrupted. (Bstte_ backup models only: A
battery backup feature will take over the alarm system if the
household electricity is interrupted.)
Chest Models
Indicator Condition Function ReSponse
Yellow LED Steady on Non_al OperaUon Nc_e
Rashlng Low / No battery Replace wth new 9 volt batte_j
(Battery Models
Red LED Off No almTn ccndition JNon¢
Green LED Off Qmck fr¢_¢ OW No_e
Audible Off Normal Operation N_n
Ouly)
Hashm_ Interior tcmpcratuxe too Pressua8 and hold alarm
Flashing every 5 Power Icst to the unit _d When pow:r is restored, red
seconds intell or tern pcrature too LED flashes ua_l ,menor
(SIttery Medeb warm tempelature drops
Oily)
On Quick free=e ON N_e
One t:htrp eve_, 4 Interior temperature too MomeJLtardy pressing a]mm off
seconds warm button shuts oft _adible alarm
Two chi_s every TOs_p chinp press and hold alarm
10 seconds Low !No batter3' off button for 3 seconds¸ Replace
0Sauery Mode_ with new 9 volt bmt¢13'
Only)
Two short chLrps Power lost to the trait and Mom_tt afily pressing al_ off
eve_ 5 s_conds interior temperature too button shuts off audible al_uan
[Banery Medels wn
o_
warn off but_n tmol red
LED stops fleshm_
HIGH-TEMP ALARM SWITCH (SOME MODELS)
An audible alarm will sound if the freezer temperature reaches
unsafe levels. The alarm operates on householdelectricity.If
the power fails, the alarm will not perform.
An ON/OFF switch allows the high temperature alarm to be
deactivated if desired. NOTE: You must open the freezer door to
view the alarm switch. The freezer isshipped withthe switch in
the OFF position.After the freezer has run longenough to
lower the temperature, you may set the switchtothe ON
position.
• To activate the alarm, set the switchto the ON position.
• To deactivate the alarm, set the switchto the OFF position.
UprightModels _
When the freezer is initially plugged in, the redTemp. Alarm
Indicator Light blinks. The indicatorlightwill continue to blink
untilthe freezer has reached a safe freezing temperature. If a
malfunction causes an unsafe temperature inside the freezer,
the red light will blink and the buzzer will sound. To silence the
buzzer, press the ALARM OFF button. The Indicator Light will
continue to blink until a safe freezing temperature is again
reached, if the problem is not resolvedwithin 12 hours, the
buzzer will turn on again.
If the ALARM OFF button isnot pressed, the buzzer willturn
itselfoff automatically after 48 hours, butthe redTemp Alarm
Light will continue to blink.
High-Temp Alarm Switch
BLUE DEFROST BUTTON (SOME CREST MODELS)
IMPORTANT:It is time to defrostand clean the freezer when the
blue defrost button is completely covered withfrost.
QUICK FREEZE (SOME MODELS)
Toactivate the Quick Freeze feature, push the switchto the ON
position. The green light will appear, and the freezer will run
continuously(except when in Flash Defrost), drivingfreezer
temperature to the coldest possibletemperatures. The switch
automaticallyturns offafter 72 hours. Use this feature just prior
to adding large quantities of unfrozen foods (not to exceed 3
poundsper cubic foot of freezer space).
7
SLIDE-OUTBASKETORTRIVET(UPRIGHTMODELS)
A Slide-Out Basket (some models) orTrivet (some models),
located atthe bottom of the freezer, provides separate
storage space for items that are difficult to store on freezer
shelves. To remove the basket or trivet, pullout and lift up.
SlkJe-OutBasket
SECURITY LOCK WITH POP-OUT KEY
This security lock fastensthe door snugly, ensuring stored
food is secure. To lock or unlock the freezer, push the key
into the lock and turn. The key pops out of the lock after it
has been turned.
INTERIOR LIGHT
The light comes on automatically whenthe dooris opened.
Toreplace the light bulb, turn the temperature control to
OFF and unplug the electrical cord. Replace the old bulb
with a bulb of the same wattage.
TILT-OUT SHELF
This shelf is located inside on the freezer door and provides
additional storage space. To access an item, tilt top of
"basket" shelf down.
i ill
I iII
_l II
I
I
SLIDE-ASIDE BASKET (SOME CHEST MODELS)
Thisbasket helpsorganizeodd-shaped items, Toreach other
packages in the freezer, slidethe basket aside, or liftout.
Slide-Aside Basket
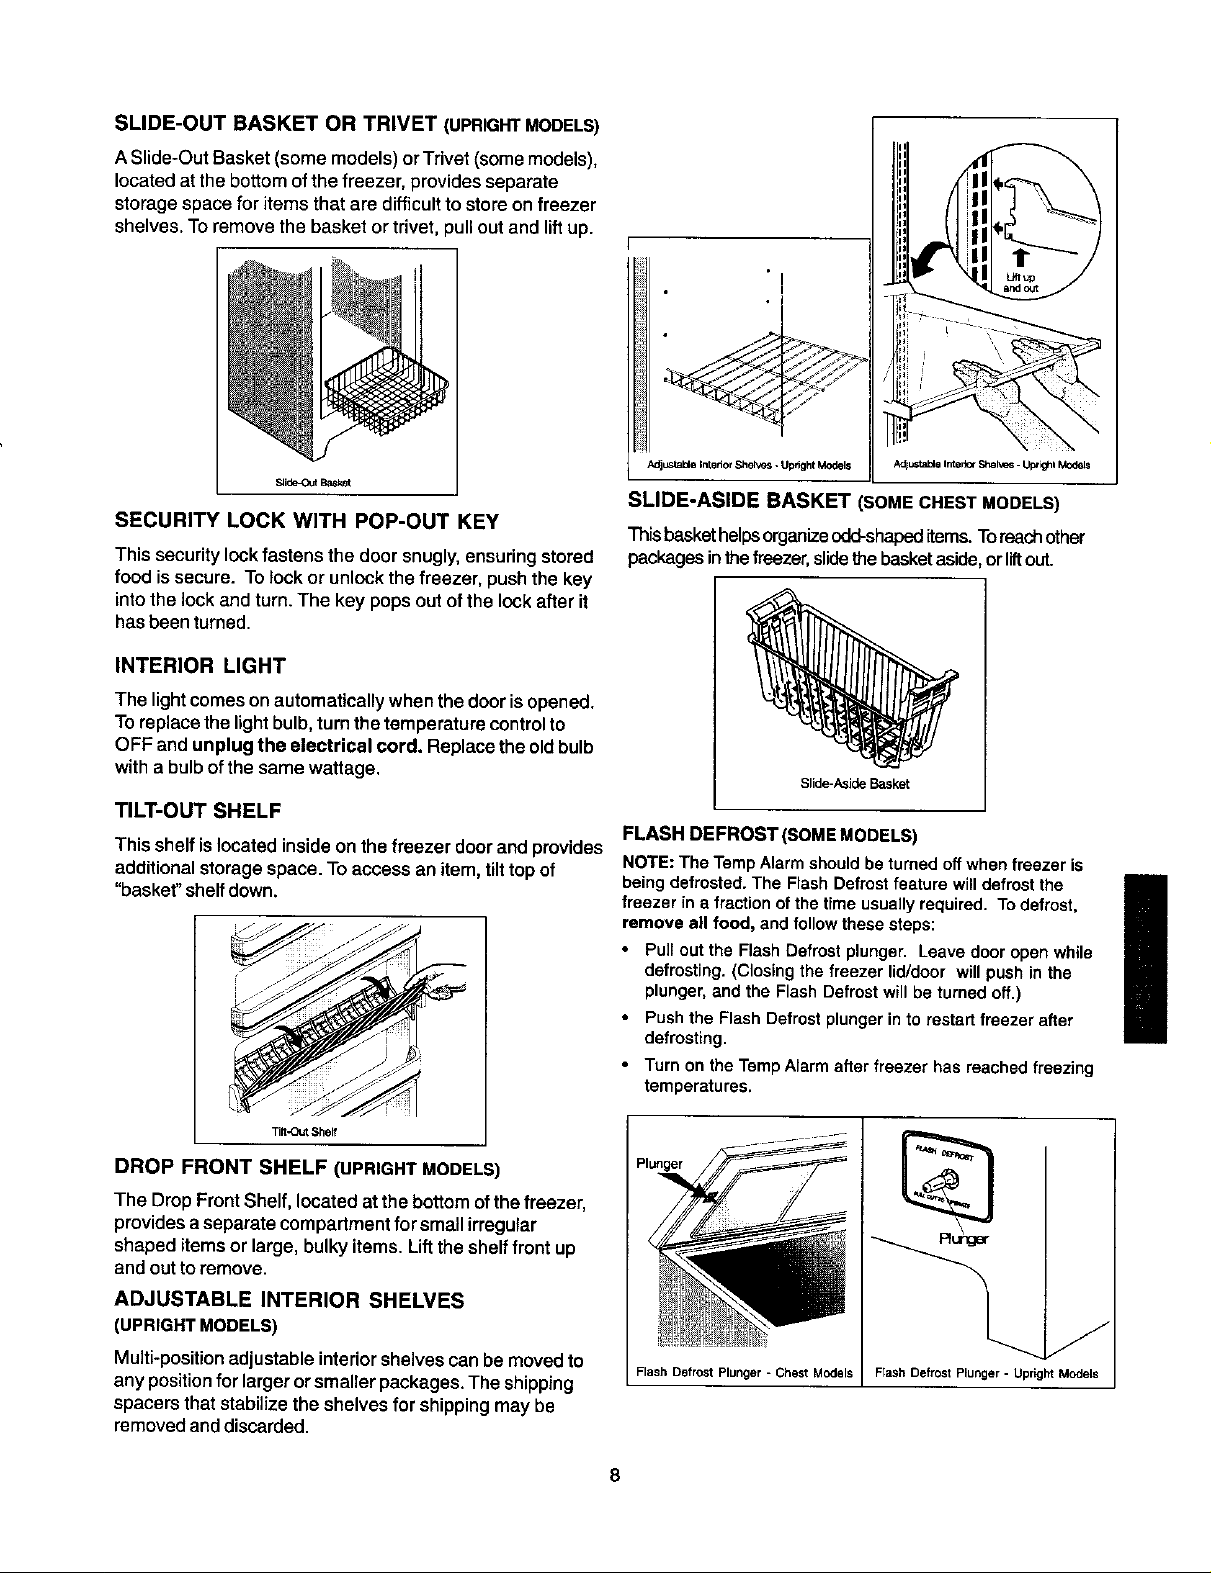
FLASH DEFROST (SOMEMODELS)
NOTE:TheTempAlarmshouldbeturnedoffwhenfreezeris
beingdefrosted.The FlashDefrostfeaturewilldefrostthe
freezer in a fractionof the timeusuallyrequired. Todefrost,
removeall food, and followthese steps:
Pull out the FlashDefrost plunger. Leavedoor openwhile
defrosting.(Closingthe freezer lid/door will push in the
plunger,and the FlashDefrostwill be turnedoff.)
Pushthe Flash Defrostplungerin to restartfreezer after
defrosting.
• Turn on the TempAlarmafter freezer has reachedfreezing
temperatures.
XII
!
Tin-Out Shelf
DROP FRONT SHELF (UPRIGHTMODELS)
The Drop Front Shelf, located atthe bottom ofthe freezer,
provides a separate compartment for small irregular
shaped items or large, bulky items. Lift the shelffront up
and out to remove.
ADJUSTABLE INTERIOR SHELVES
(UPRIGHTMODELS)
Multi-position adjustable interiorshelves can be moved to
any position for larger orsmaller packages. The shipping
spacers that stabilize the shelves for shipping may be
removed and discarded.
Flash Defrost Plunger - Chest Models Flash Defrost Plunger - Upright Models
8
_Damp objects stick to
cold metal surfaces. Do not touch
interior metal surfaces with wet or
damp hands.
Some upright freezers are frost-free and defrost automati-
cally, but should be cleaned occasionally.
BETWEEN DEFROSTINGS
To avoid frequent defrosting, occasionally usea plastic
scraper to remove frost. Scrape with a pulling motion.
Never use a metal instrument to remove frost.
DEFROSTING
It is importantto defrost and clean the freezer when ¼to Y2
inch of frost has accumulated. Frost may tend to accumu-
late faster on the upper part of the freezer due to warm,
moist air entering the freezer when the door is opened.
Remove food and leave the door open when defrosting the
freezer.
• On upright models with a defrost drain (Figure 1),
remove the drain plugonthe insidefloor ofthe freezer
by pullingstraightout.Toaccessthe external draintube
on models witha basepanel, first remove the two
screwsfrom the base panel. Locatethe draintube near
the leftcenterunderthe freezer. Placea shallowpan
underthe draintube. Defrostwater willdrainout. Check
pan occasionallyso water does notoverflow.A1/2inch
garden hose adaptercan be usedto drainthe freezer
directlyintoa floor drain.If yourmodel is not equipped
withan adapter, one can be purchasedat mosthard-
ware stores.Replacethedrain plugwhen defrostingand
cleaningare completed.Ifthe drainis leftopen, warm air
may enter thefreezer.
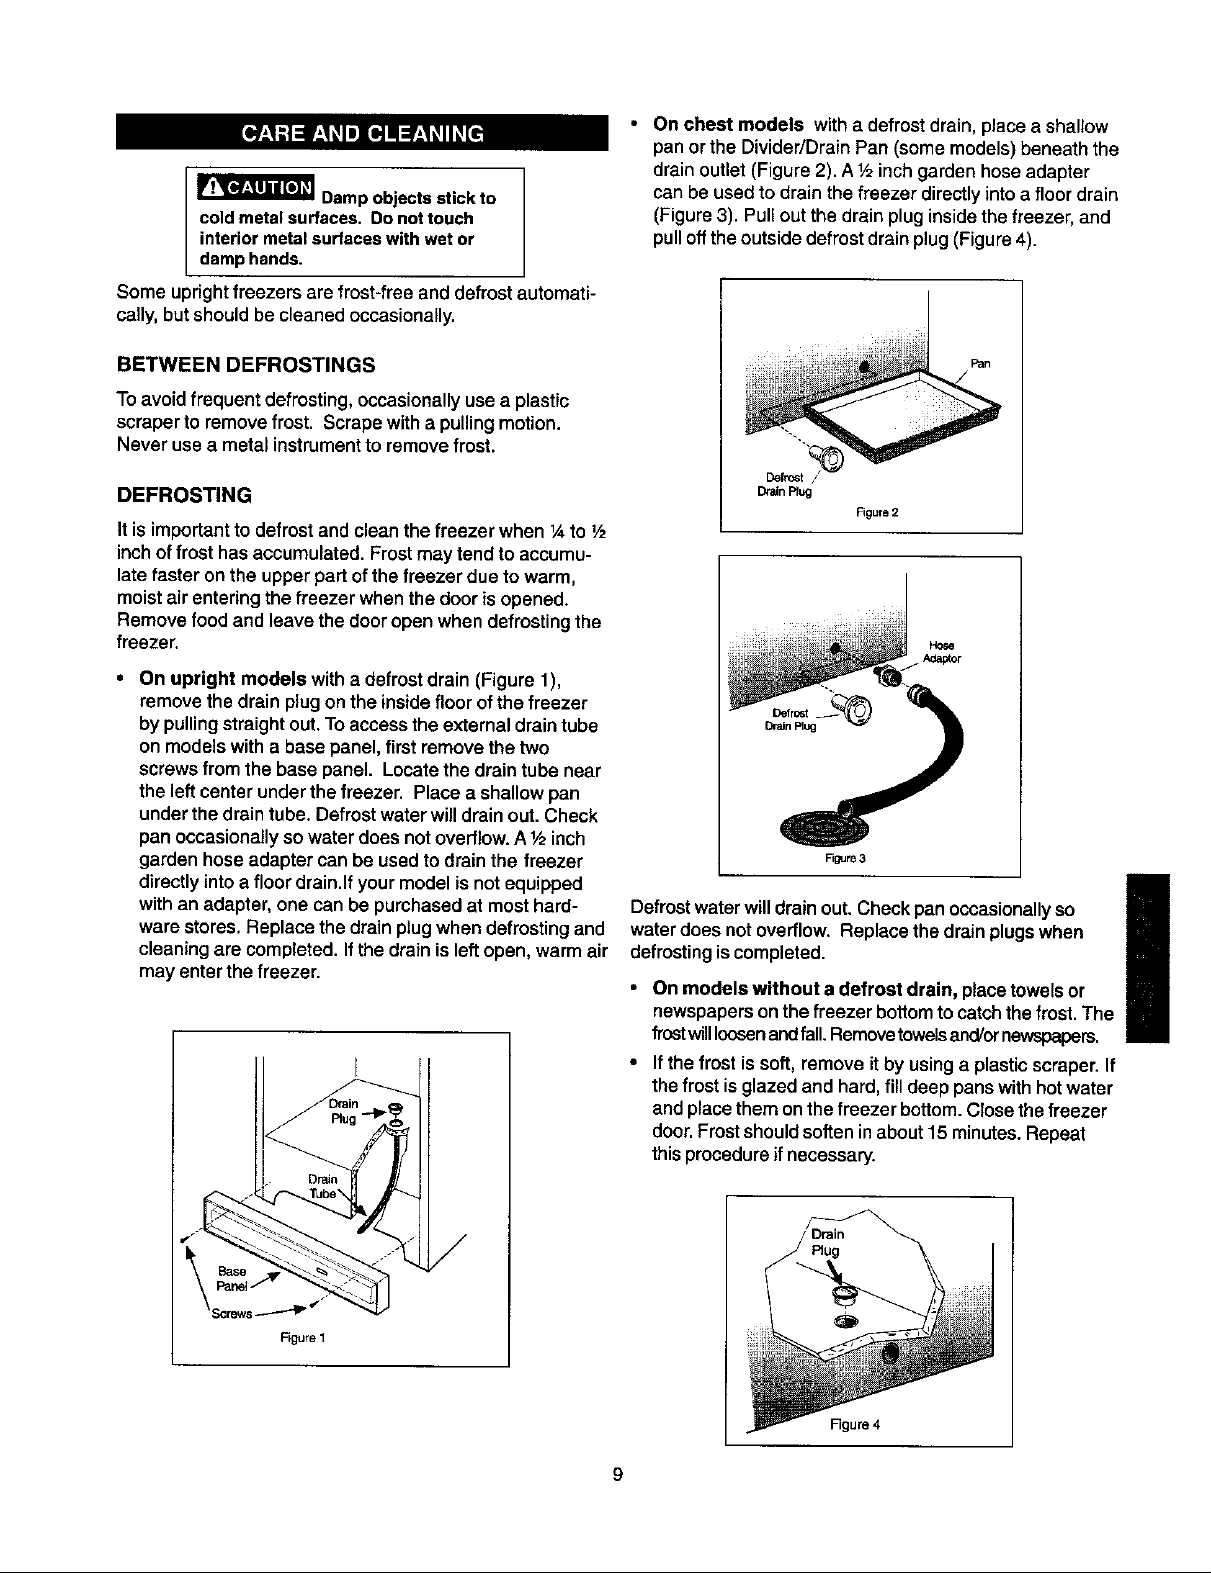
• On chest models witha defrost drain, place a shallow
pan orthe Divider/DrainPan (some models)beneath the
drain outlet (Figure2). A 1/2inchgarden hoseadapter
can beused todrain the freezer directlyinto a floor drain
(Figure3). Pullout the drain pluginsidethefreezer, and
pulloffthe outsidedefrostdrainplug(Figure4).
Defrost /
Drain Rug
Figure 2
Hose
Figure 3
Defrostwaterwilldrain out.Check pan occasionallyso
waterdoes not overflow. Replacethe drainplugswhen
defrostingiscompleted.
On models without a defrost drain, placetowelsor
newspapersonthe freezer bottomtocatchthefrost. The
frostwillloosenandfall.Removetowelsand/ornewspapers.
Ifthe frost is soft, remove itby usinga plasticscraper.If
thefrost is glazed and hard,fill deep panswith hotwater
andplacethem on thefreezer bottom.Closethe freezer
door.Frostshouldsofteninabout15 minutes.Repeat
thisprocedureif necessary.
I
Figure1
Drain
Figure 4
 Loading...