

Page 1
Ken more
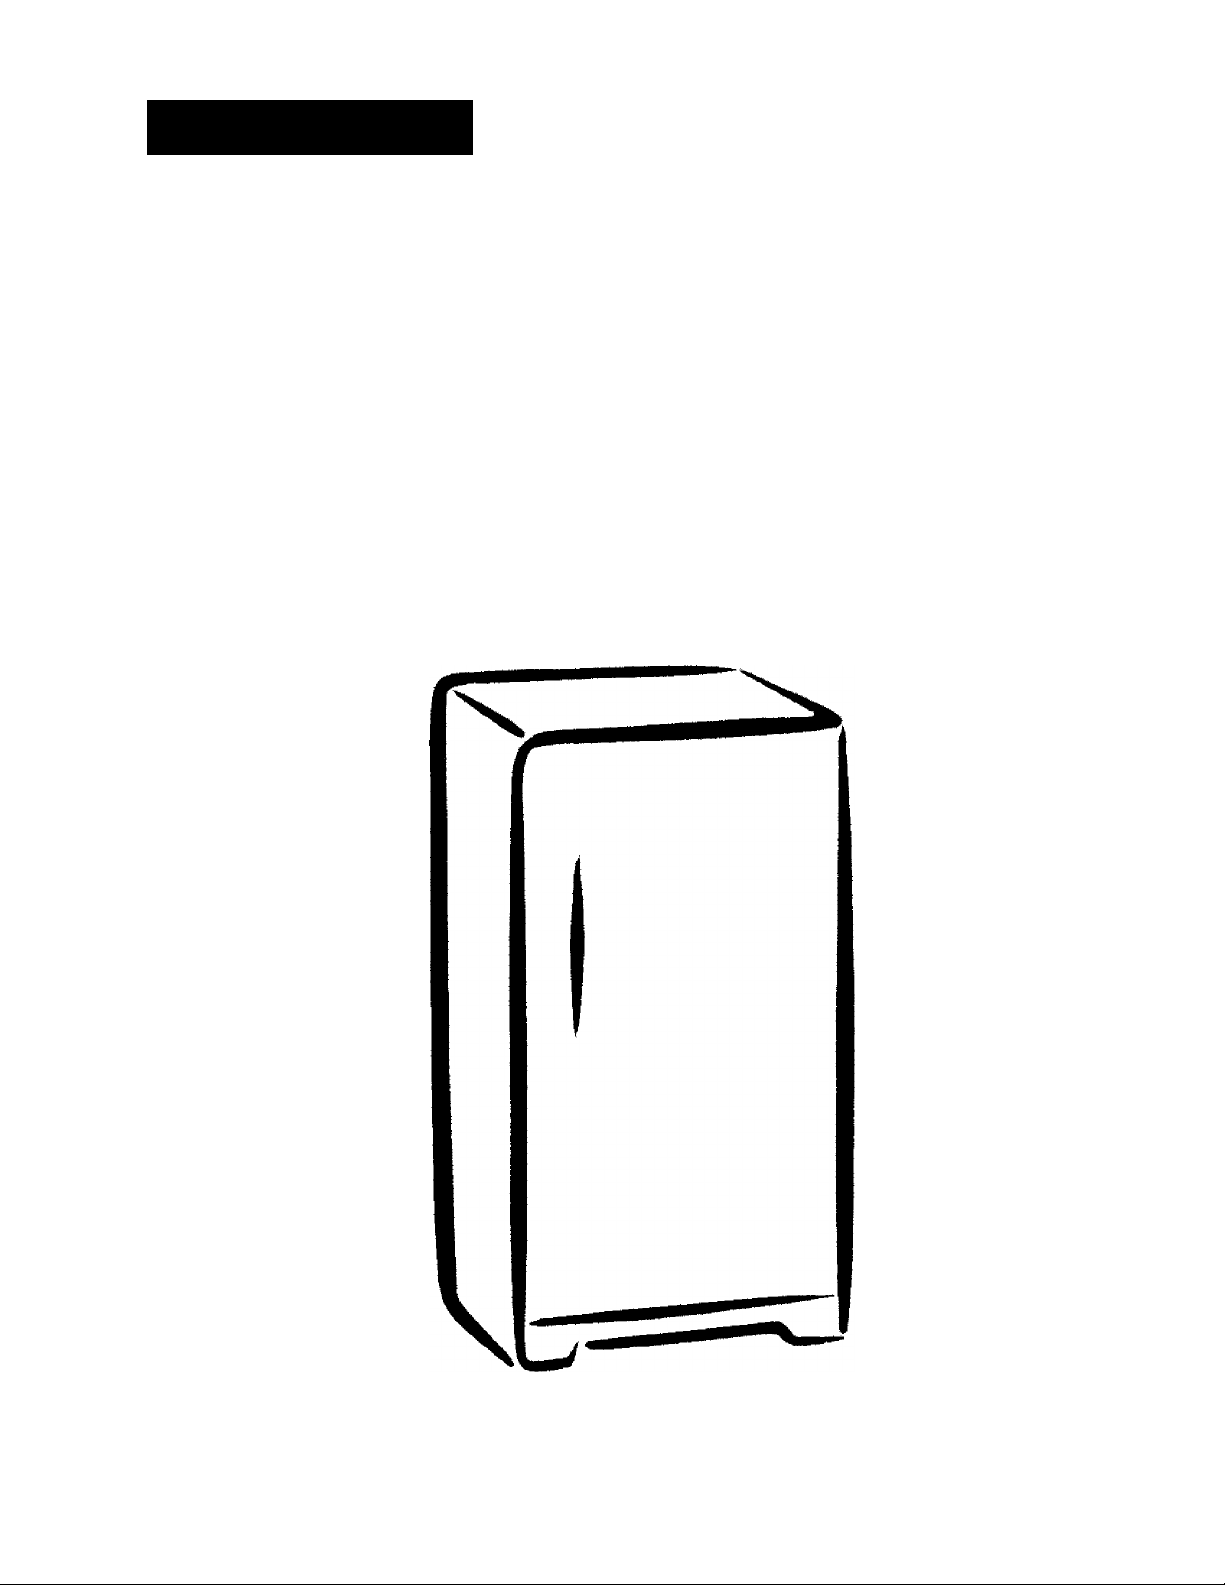
Refrigerator
With Automatic Freeze Control
Use & Care Guide
Refrigerador
con control automático de congelación
Guía para su uso y cuidado
Réfrigérateur
à régulateur de gel automatique
Guide d’utilisation et d’entretien
Sears, Roebuck and Co., Hoffman Estates, IL 60179 U.S.A.
Sears Canada, Inc., Toronto, Ontario, Canada MSB 2B8
m
Z
O
n
O)
m
0)
U
>
Zi
O
1“
w
70
m.
www.sears.com
216769500(0009)
Page 2
jzr 1^1 “*1^11^ 11^ *T“?i
IMPORTANT SAFETY INSTRUCTIONS
Record Serial/Model Numbers
Safety
..................................................
............
1
1-2
Warranty..............................................2
Canada - Limited Warranty
First Steps
Energy Saving Tips
...........................................
.............................
Setting the Temperature Control
Refrigerator Features
Care and Cleaning
..............................
Troubleshooting Guide
Sears Service
......................................
Sears Canada Customers
.................
.........
..........................
........................
...................
3
4-5
5
5
5
6
7-8
9
9
SERIAL / MODEL NUMBERS
READ AND SAVE THESE INSTRUCTIONS
This Owner’s Guide provides specific operating instructions
for your model. Use your refrigerator only as instructed in
this guide. These instructions are not meant to cover every
possible condition and situation that may occur. Common
sense and caution must be practiced when instaiiing,
operating, and maintaining any appliance.
READ ALL INSTRUCTIONS BEFORE USING
THIS REFRIGERATOR.
O WARNING
Do not store or use gasoline, or other flammable vapors and
liquids in the vicinity of this or any other appliance. Read
product labels for flammability and other warnings.
O WARNING
Destroy carton, plastic bags, and any exterior wrapping
material immediately after the refrigerator is unpacked.
Children should never use these items to play. Cartons
covered with rugs, bedspreads, plastic sheets or
stretch wrap may become airtight chambers, and can
quickly cause suffocation.
Remove all staples from the carton. Staples can cause
severe cuts, and destroy finishes if they come in
contact with other appliances or furniture.
An empty, discarded ice box, refrigerator, or freezer is a
very dangerous attraction to children.
Remove and discard any spacers used to secure the
shelves during shipping. Small objects are a choke
hazard to children.
FOR YOUR SAFETY
CHILD SAFETY
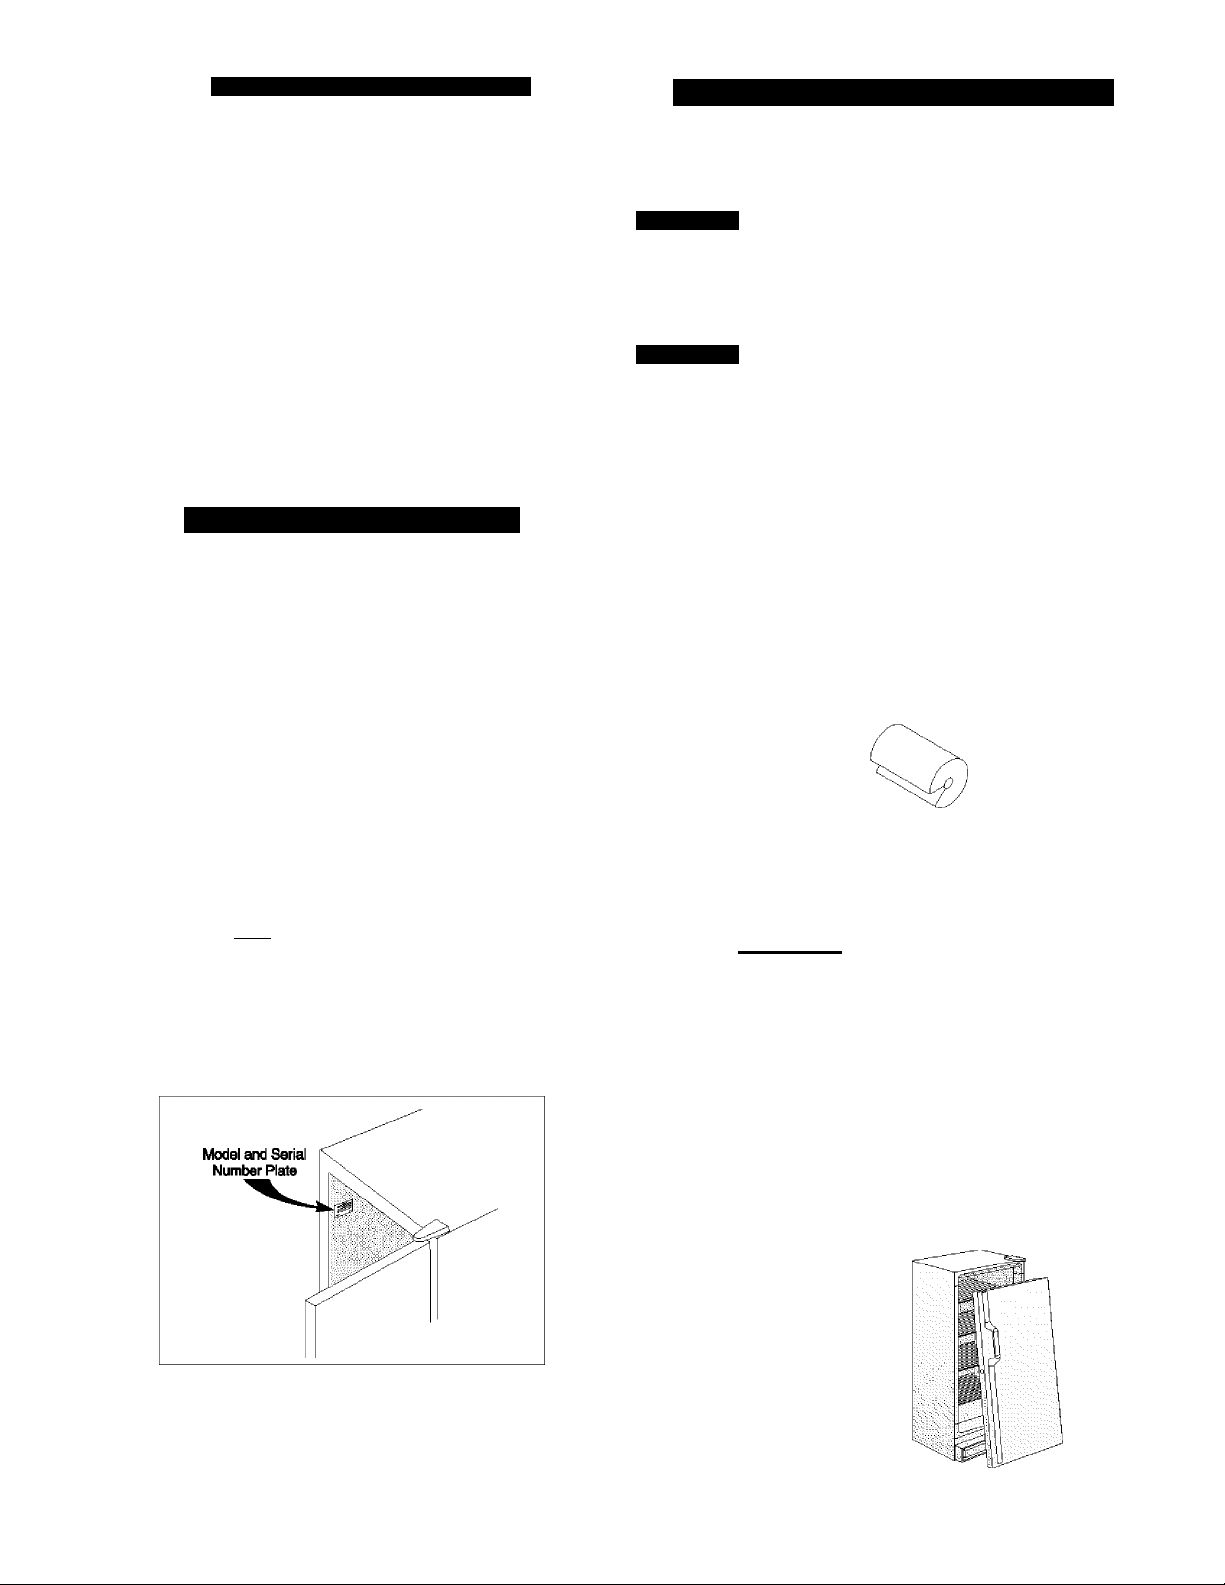
Record Your Model and Serial Numbers
Record the model and serial numbers in the space provided
below. The serial plate is located on the upper left wall
inside the refrigerator.
Model Number:
or 970.
Serial Number:
Purchase Date:
253.
____
Remove the door(s) of any appliance that is not in use,
even if it is being discarded.
Proper Disposal of Your
Refrige rator/Freeze r
WARNING
entrapment. Child entrapment and
suffocation are not problems of the
past. Junked or abandoned
refrigerators or freezers are still
dangerous — even if they will sit for
"just a few days." If you are getting
rid of your old refrigerator or freezer,
please follow the instructions below to
help prevent accidents.
BEFORE YOU THROW AWAY YOUR
OLD REFRIGERATOR/FREEZER:
Remove
doors.
Leave shelves in
place so children
may not easily
climb inside.
Risk of child
m
z
o
n
0>
Page 3
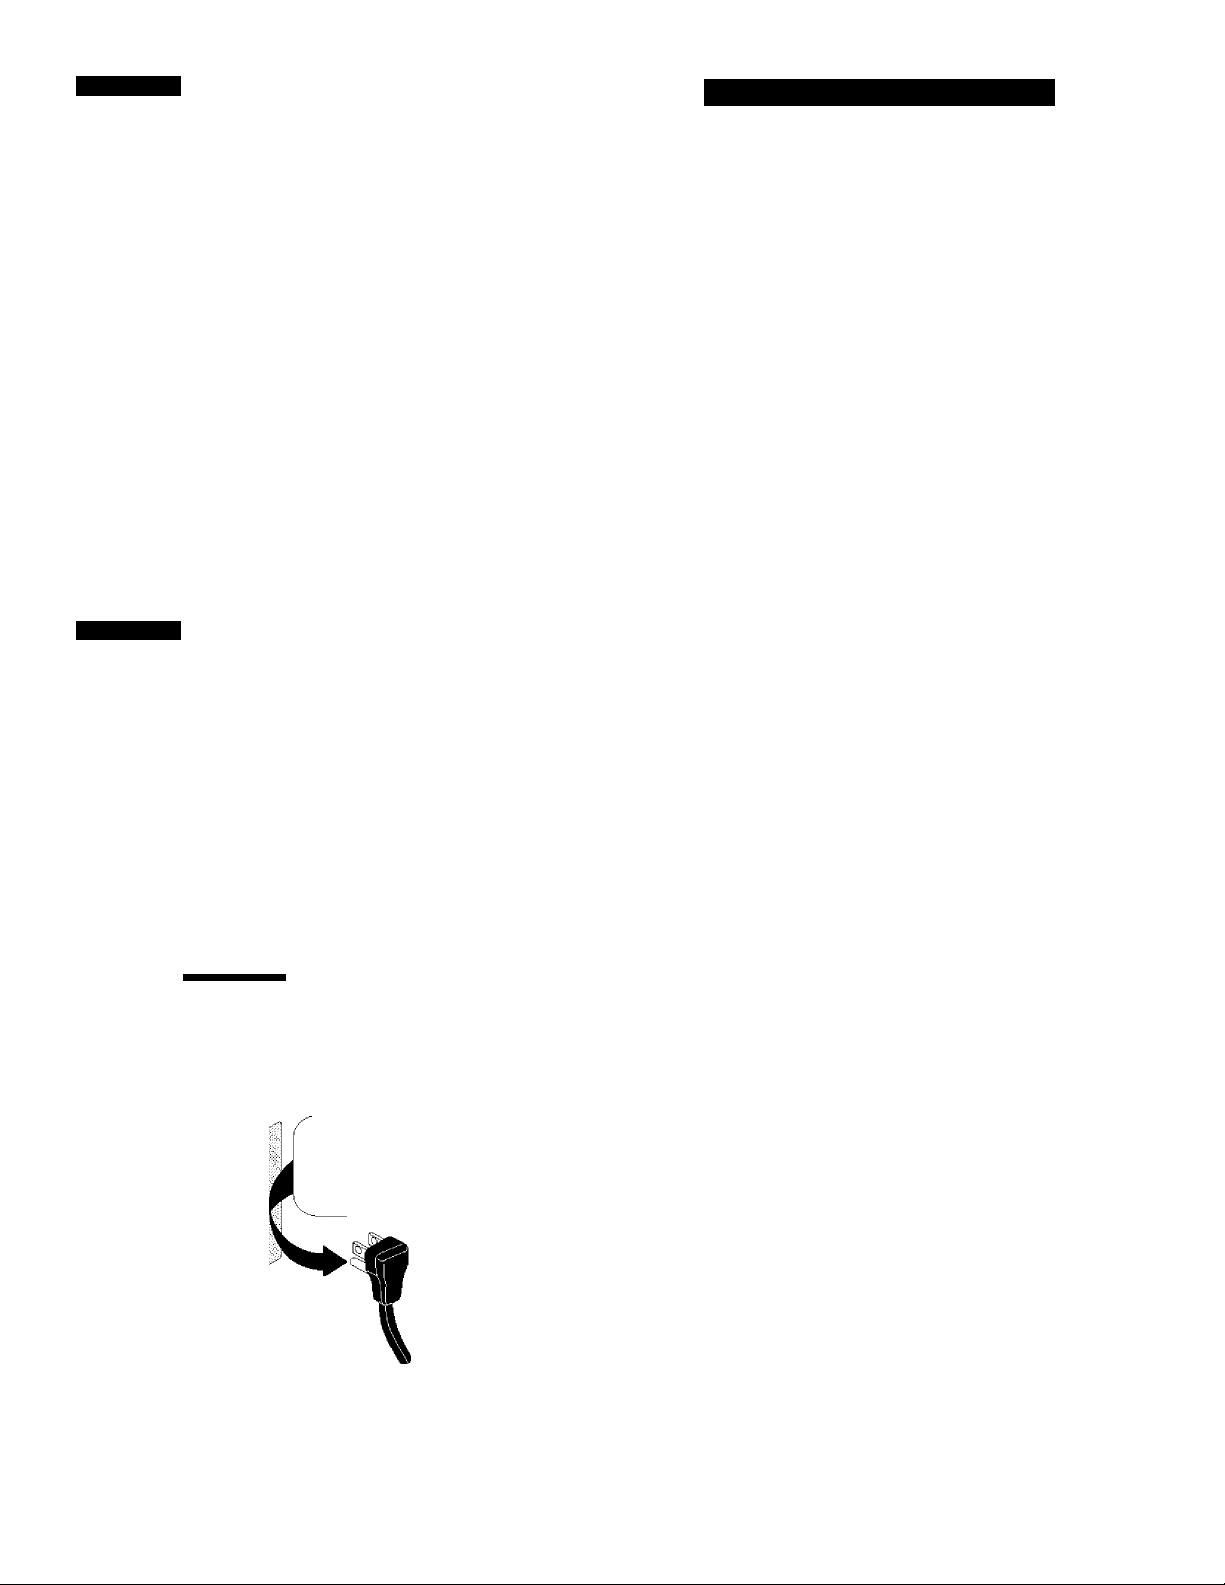
A WARNING
ELECTRICAL INFORMATION
These guidelines must be followed to ensure that safety
mechanisms in the design of this refrigerator will
operate properly.
• Refrigerator must be plugged into its own 115 Volt,
60 Hz., AC only electric outlet. The power cord of the
appliance is equipped with a three-prong grounding
plug for your protection against shock hazards, it must
be plugged directly into a properly grounded threeprong receptacle. The receptacle must be installed in
accordance with local codes and ordinances. Consults
qualified electrician. Do not use an extension cord or
adapter plug.
• If voltage varies by 10% or more, performance of your
refrigerator may be affected. Operating refrigerator with
insufficient power can damage the compressor.
• To prevent the refrigerator from being turned off
accidenticaiiy, do not plug unit into an outlet controlled
by a wall switch or pull cord.
• Do not pinch, knot, or bend the cord in any manner.
A WARNING
OTHER PRECAUTIONS
• Never unplug the refrigerator by pulling on the cord.
Always grip the plug firmly, and pull straight out from
the receptacle.
• T0 avoid electrical shock, unplug the refrigerator before
cleaning and before replacing a light bulb.
NOTE: Turning the temperature control to OFF turns off the
compressor, but does not disconnect the power to the light
bulb or other electrical components.
• Do not operate refrigerator in the presence of explosive
T
fumes.
CO
REFRIGERATOR WARRANTY
FULL ONE-YEAR WARRANTY ON
REFRIGERATOR
For one year from the date of purchase, when this
refrigerator is operated and maintained according to the
instructions provided in this Owner’s Guide, Sears will repair
this refrigerator, free of charge, if defective in material or
workmanship.
FULL FIVE-YEAR WARRANTY ON SEALED
REFRIGERATION SYSTEM
For five years from the date of purchase, when this
refrigerator is operated and maintained according to the
instructions provided in this Owner’s Guide, Sears will repair
the sealed system (consisting of refrigerant, connecting
tube, and compressor motor), free of charge, if defective in
material or workmanship.
The above warranty coverage applies only to refrigerators
which are used for storage of food for private household
purposes.
This warranty gives you specific legal rights and you may
also have other rights which vary from state to state.
Warranty service is available by contacting the NEAREST
SEARS SERVICE CENTER/DEPARTMENT in the United
States. See the back page of this manual.
For warranty questions please contact the following address:
Sears, Roebuck and Co.
Dept. 81 TWA
Hoffman Estates, IL 60179
O
Z
UJ
WARNING
electric shock. Do not use an extension
cord or an adapter plug. Do not remove
any prong from the power cord.
Grounding type
wall receptacle
V
Avoid fire hazard or
Do not, under any
circumstances,
cut, remove,
or bypass the
grounding prong.
\}
Power sumly
cord with 3-prong
grounding plug
Page 4

CANADA — LIMITED WARRANTY
KGnmorG
Refrigerators
Sears Canada Inc., warrants every new Kenmore refrigerator to be free from defects in material or workmanship. What
Sears wil! do. free of charge, in case of defect:
Labor:
Install repaired or
replacement part for:
The Compressor TEN (10) YEARS
The Sealed System
(consisting of refrigerant,
evaporator, and condenser)
All other parts or
adjustments
The following items, since they are not manufacturing defects, are not included in the warranty, but are the responsibility of
the customer: Z
1) Damage to finish after delivery. n
2) Improper power supply, low voltage, or any defects in the house wiring system or appliance not connected ^
to electric outlet.
3) Replacement of light bulbs.
4) Damage caused by moving the product from its original installation.
5) Service required as a result of alteration, abuse, fire, floods, or acts of God.
6) Providing adequate air circulation to the refrigerating system.
7) Proper use and care of product as listed in the customer's manual; proper setting of the controls.
FIVE (5) YEARS FIVE (5) YEARS FIVE (5) YEARS
ONE (1) YEAR ONE (1) YEAR ONE (1) YEAR
Normai Responsibility of the Customer
TEN (10) YEARS
FIVE (5) YEARS
O
If any service is required underthis warranty, simply call 1-800-4-MY-HOME®“ (1-800-469-4663).
This warranty is in addition to any statutory warranty. The above warranty covers Kenmore refrigerators sold and operated
in Canada only and shall not apply if the refrigerator is used for other than domestic purposes.
Sears Maintenance Agreement
Maintain the value of your Kenmore refrigerator with a Sears Maintenance Agreement.
SEARS CANADAINC. * Toronto, Canada • MSB2B8
PRINTED IN U.S.A.
Page 5

FIRST STEPS
This Owner’s Guide provides specific operating instructions
for your modei. Use the refrigerator oniy as instructed in this
Owner’s Guide. Before starting the refrigerator, follow
these important first steps.
INSTALLATION
• Choose a place that is near a grounded eiectricai outlet.
Do Not use an extension cord or an adapter plug.
• For the most efficient operation, the refrigerator should
be located where surrounding temperatures will not drop
below 10° F (-12" C) or exceed 110° F (43° C). The
Freeze Control Feature is designed to automatically
maintain the selected interior refrigerator temperature
within these boundaries.
• Allow space around the unit for good air circulation.
Leave a 3 inch (75 mm) space on all sides of the
refrigerator for adequate circulation.
To Level Your Refrigerator:
After discarding crating screws and wood base, use a
carpenter’s level to level the refrigerator from front-to-back.
Adjust the plastic leveling feet in front, bubble higher, so
that the door closes easily when left halfway open.
NOTE; The exterior walls of the refrigerator may become
quite warm as the compressor works to transfer heat from
the inside. Temperatures as much as 30° F warmer than
room temperature can be expected. For this reason it is
particularly important in hotter climates to allow enough
space for air circulation around your refrigerator.
LEVELING
CLEANING
• Wash any removable parts of the refrigerator interior, and
exterior with mild detergent and warm water. Wipe dry.
Do not use harsh cleaners on these surfaces.
• Do not use razor blades or other sharp instruments,
which can scratch the appliance surface when removing
adhesive labels. Any glue left from the tape can be
removed with a mixture of warm water and mild deter
gent, or touch the residue with the sticky side of tape
already removed. Do not remove the serial plate.
A CAUTION
close and seal properly, DO NOT let
food packages extend past the front
of shelves.
I
To allow door to
The refrigerator must have ail bottom corners resting firmly
on a solid floor. The floor must be strong enough to support
a fully loaded refrigerator. NOTE: It is Very Important for
your refrigerator to be level in order to function properly. If
the refrigerator is not leveled during installation, the door
may be misaligned and not close or seal properly, causing
cooling, frost, or moisture problems.
Shelf Front
Page 6

DOOR REMOVAL
If door must be removed to fit through narrow doorways:
1. Gently fay refrigerator on its back, on a throw rug or
blanket.
2. Remove the base panel by unscrewing two screws
from front of base panel.
3. At the top of the cabinet, lift up plastic hinge cover, and
fold back. (Figure 1)
4. Use a Phillips® screwdriver to loosen and retighten
the screws on the top hinge to ensure a secure
assembly, and prevent hinge slippage.
5. Remove the top hinge from cabinet, and lift door off
lower hinge pin.
6. After door is removed, remove the two screws from the
bottom hinge.
7. To replace door, reverse above order.
interfere with cold air circulation, making the refrigerator
less efficient, which could cause food spoilage.
Cover foods and wipe containers dry before placing
them in the refrigerator. This cuts down on moisture
build-up inside the unit.
Organize the refrigerator to reduce door openings.
Remove as many items as needed at one time and
close the door as soon as possible.
CONTROL
COOL DOWN PERIOD
For safe food storage, allow 4 hours for the refrigerator to
cool down completely. The refrigerator will run continuously
for the first several hours.
TEMPERATURE CONTROL
The temperature control is located inside the refrigerator
compartment. The temperature is factory preset to provide
satisfactory food storage temperatures. However, the
temperature control is adjustable to provide a range of
temperatures for your personal satisfaction, if a colder
temperature is desired, turn the temperature control knob
toward COLDEST and allow several hours for temperatures
to stabilize between adjustments.
ENERGY SAVING TIPS
Install the refrigerator in the coolest part of the room,
out of direct sunlight and away from heating ducts or
registers. Do not place the refrigerator next to heatproducing appliances such as a range, oven or
dishwasher.
Level the refrigerator so the doors close tightly.
Do not overcrowd the refrigerator or block cold air
vents. Doing so causes the refrigerator to run longer
and use more energy. Shelves should not be lined with
aluminum foil, wax paper or paper toweling. Liners
INTERIOR LIGHT
The light comes on automatically when the door is opened.
To replace the light bulb, turn the temperature control to
OFF and unplug the electrical cord. Replace the old bulb [Jj
with a bulb of the same wattage. q
ADJUSTABLE INTERIOR SHELVES
Multi-position
adjustable interior
shelves can be
moved to any
position for larger or
smaller packages.
The shipping
spacers that
stabilize the shelves
for shipping should
be removed and
discarded.
AUTOMATIC FREEZE CONTROL
The Freeze Control Feature will maintain proper interior
refrigerator temperature even when the refrigerator is
placed in an area where the surrounding temperature drops
down to 10° F (-12" C).
(A
Page 7

CARE AND CLEANING
CLEANING THE INSIDE
Wash inside surfaces of the refrigerator with a solution of
two tablespoons of baking soda in one quart {1.136 litres)
warm water. Rinse and dry. Wring excess water out of the
sponge or cloth when cleaning in the area of the controls, or
any electrical parts.
Wash the removable parts with the baking soda solution
mentioned above, or mild detergent and warm water. Rinse
and dry.
abrasive cleaners, or alkaline solutions on any surface. Do
not wash removable parts in a dishwasher.
Never use metallic scouring pads, brushes,
CLEANING THE OUTSIDE
Wash the cabinet with warm water and mild liquid deter
gent. Rinse well and wipe dry with a clean soft cloth.
Replace parts and food.
^WARNING
door open while on vacation, make
certain that children cannot get into the
refrigerator and become entrapped.
If leaving the refrigerator
VACATION AND MOVING TIPS
Vacations:
If the refrigerator will not be used for several months:
• Remove all food and unplug the power cord.
• Clean and dry the interior thoroughly.
• Leave the refrigerator door open slightly, blocking it open
if necessary, to prevent odor and mold growth.
Moving: When moving the refrigerator, follow these guide
lines to prevent damage:
• Disconnect the power cord plug from the wall outlet.
• Remove foods and clean the refrigerator.
• Secure all loose items by taping them securely in place
to prevent damage.
• In the moving vehicle, secure refrigerator in an upright
position to prevent movement. Also protect outside of
refrigerator with a blanket, or similar item.
T
_i
o
z
UJ
Page 8

TROUBLESHOOTING
GUIDE
PROBLEM CAUSE CORRECTION
REFRIGERATOR OPERATION
Before calling for service, review this list, it may save you time and expense. This list
includes common occurences that are not the resuit of defective workmanship or
materials in this appliance.
Refrigerator does not run.
Refrigerator runs too much or
too iong.
• Refrigerator is plugged into a
circuit that has a ground fault
interrupt,
• Temperature control is in the
OFF position,
• Refrigerator may not be plugged
in. or plug may be loose.
• House fuse blown or tripped
circuit breaker.
• Power outage.
• Room or outside weather is hot.
• Refrigerator has recently been
disconnected for a period of
time.
• Large amounts of warm or hot
food have been stored recently.
• Doors are opened too frequently
or too long.
• Refrigerator door may be slightly
op©n.
• Temperature Control is set too
low.
• Refrigerator gasket is dirty,
worn, crad<ed, or poorly fitted.
• Use another circuit. If you are unsure about the outlet,have
it checked by a certified technician.
• See Setting the Temperature Control Section.
• Ensure plug is tightly pushed into outlet.
• Check/replace fuse with a 15 amp time-delay fuse. Reset
circuit breaker.
• Check house lights. Call local Electric Company.
• It's normal for the refrigerator to work harder under these
conditions.
• It takes 4 hours for the refrigerator to cool down
completely
• Vl/arm food will cause refrigerator to run more until the
desired temperature is reached.
• vyarm air entering the refrigerator causes it to run more.
Open doors less often.
• See "DOOR PROBLEMS” Section.
• Turn control knob to a warmer setting. Allow several hours
for the temperature to stabilize.
• Clean or change gasket. Leaks in the door seal will cause
refrigerator to run longer in order to maintain desired
temperature.
interior refrigerator temperature
is too cold.
interior refrigerator temperature
is too wann.
Refrigerator external surface
temperature is warm.
SOUND AND NOISE
Louder sound levels whenever
refrigerator is on.
Longer sound levels when
compressor comes on.
• Temperature Control is set too
low.
• Temperature Control is set too
warm.
• Door is kept open too long or is
opened too frequently
• Door may not be seating
properly.
• Large amounts of warm or hot
food may have been stored
recently
• Refrigerator has recently been
disconnected for a period of
time.
• The external refrigerator walls
can be as much as 30°F warmer
than room temperature.
• Modern refrigerators have
increased storage capacity and
more stable temperatures. They
require a high efficiency
compressor.
• Refrigerator operates at higher
pressures during the start of the
ON cycle.
• Turn the control to a warmer setting. Allow several hours
for the temperature to stabilize.
• Turn control to a colder setting. Allow several hours for the
temperature to stabilize.
• V\/arm air enters the refrigerator every time the door is
opened. Open the door less often.
• See "DOOR PROBLEMS" Section.
• V\/ait until the refrigerator has had a chance to reach its
selected temperature.
• Refrigerator requires 4 hours to cool down completely
• This is normal while the compressor works to transfer
heat from inside the refrigerator cabinet.
• This is normal. When the surrounding noise level is low,
you might hear the compressor running while it cools the
interior.
• This is normal. Sound will level off or disappear as
refrigerator continues to run.
m
z
o
n
0>
Page 9

PROBLEM CAUSE CORRECTION
SOUND AND NOISE (Coni)
Fan (tins whan room
temperature is below 45°F.
Popping or cracking sound
when compressor comes on.
• Exterior thermostat has
activated the heater and fan.
• Metal parts undergo expansion
and contraction, as in hot water
pipes.
Bubbling or gurgling sound,
like water boiling.
• Refrigerant (used to cool
refrigerator) is circulating
throughout the system.
N^brating or rattling noise.
• Refrigerator is not level. It rocks
on the floor when it is moved
slightly.
• Refrigerator is touching the wall.
Snapping Sound.
• Cold Control turning the
refrigerator on and off.
WATER/MOISTURBFROST INSIDE REFRIGERATOR
Moisture forms on inside of
refrigerator walls.
• Weather is hot and humid.
• Door may not be seating
properly.
• Door is kept open too long, or is
opened too frequently.
WATER/MOISTURE/FROST OUTSIDE REFRIGERATOR
• This is normal.
• This is normal. Sound will level off or disappear as
refrigerator continues to run.
• This is normal.
• Level the unit. Refer to "Leveling" in the First Steps
Section.
• Relevei the refrigerator or move refrigerator slightly. Refer
to "Leveling" in the First Steps Section.
• This is normal.
• This is normal.
• See "DOOR PROBLEMS" Section.
• Open the door less often.
Moisture forms on outside of
refrigerator.
• Door may not be seating
properly causing the cold air
from inside the refrigerator to
meet warm moist air from
outside.
T
ODOR IN REFRIGERATOR
_i
Odors in refrigerator. • interior needs to be cleaned.
o
z
UJ
* Foods with strong odors are in
the refrigerator.
DOOR PROBLEMS
Door will not close.
• Refrigerator is not level. It rocks
on the floor when it is moved
slightly.
LIGHT BULB IS NOT ON
Light bulb is not on.
• Light bulb is burned out.
• No electric current is reaching
the refrigerator.
• See "DOOR PROBLEMS" Section.
• Clean interior with sponge, warm water, and baking soda,
• Cover the food tightly.
• This condition can force the cabinet out of square and
misalign the door. Refer to "Leveling" in the First Steps
Section.
• Follow directions under "Interior Light" in the Refrigerator
Features Section.
• See "REFRIGERATOR OPERATION" Section.
Page 10

SEARS SERVICE
SEARS CANADA CUSTOMERS
"We Service What We Sel!" is our assurance you can
depend on Sears for service ...and Sears service is
nationw/ide. Your refrigerator has added value when you
consider that Sears has service units nationwide, staffed
with professional technicians specifically trained on Sears
appliances and having parts, tools and equipment to
ensure that we meet our pledge to you..."We Service What
We Sell."
SEARS MAINTENANCE AGREEMENT
Maintain the value of your Kenmore® refrigerator with a
Sears Maintenance Agreement. Sears refrigerators are
designed, manufactured, and tested for years of depend
able operation. Yet, any modern appliance may require
service from time to time.
The Sears Maintenance Agreement
• Is your way to buy tomorrow's service at today's price.
• Eliminates repair bills resulting from normal use.
• Allows for as many service calls as required.
• Provides for service by professional Sears-trained
technicians.
• Offers an annual preventive maintenance check-up at
your request.
This maintenance agreement does not cover original
installation, reinstallation, or damage resulting from
external causes such as acts of God, abuse, theft, fire,
flood, wind, lightning, freezing, power failure, power
reduction, etc. Please ask a salesperson to see the
agreement for all of the terms and conditions.
Dear Customer:
In manufacturing this product, many steps have been taken
to provide you with the highest quality. Unfortunately, errors
or omissions occasionaly occur. In the event you find a
missing or defective part, please contact your nearest
Sears store. {See the back cover for phone numbers.)
If you have any suggestions that would help us to improve
ourassembly/operation instructions or this prouct, please
write them down, including the information listed below and
mail to:
Sears Canada, Inc. Attn; Buyer Dept. 646
222 Jarvis Street
Toronto, Ontario
MSB2B8
Purchased by:
Name:
_______
Address:
City:
___
Postal Code:
Mode! No.:
Serial No.:
Date of Purchase
Location of Purchase
Comments:
____
______
___/___
_____________
_____
Prov.;
Phone:-
/„
m
z
o
n
(A
Page 11

ENGLISH
Page 12

LITERATURE - LIS COVERSHEET
Workflow-LITERATURE
Received
1 - fe
BATCH
NUMBER:
Title:
Chassis;
Prod Type:
Doc Type;
Doc Class Code:
Date Received:
Batched
L0403117
О ( io'l [ OO)
SERVM
WARM
u OWNM REFER □
Scanned
FIGURE PROPERTIES
HOT □
Total Pages:
Total Models:
# Notes:
Initial and Date each section below as it Is completed:
ТА
Index
Supercede
Paper doc:
Pdf doc:
ОАЛЕ
______________________
- £-e,-fac
TECHM □
INSTL □
Exported
DBQA
□
Date Published:
Publication #:
Pricing - Div:
Pricing - Source:
MODEL
NUMBERS:
Type:
Mfr. Class:
Status:
Brand #;
Comments:
_2.-' / - о о
N/A
N/A
STD □ SBP
ACTIVE NPA □
7C ?ГО Q
MODEL INFORMATION
C Я- /
REG □
STD □ SBP □
АСБУЕ □ NPA □
^
RevO
47101-HOF
 Loading...