

Page 1
Owner's Manual
Manual del Propietario
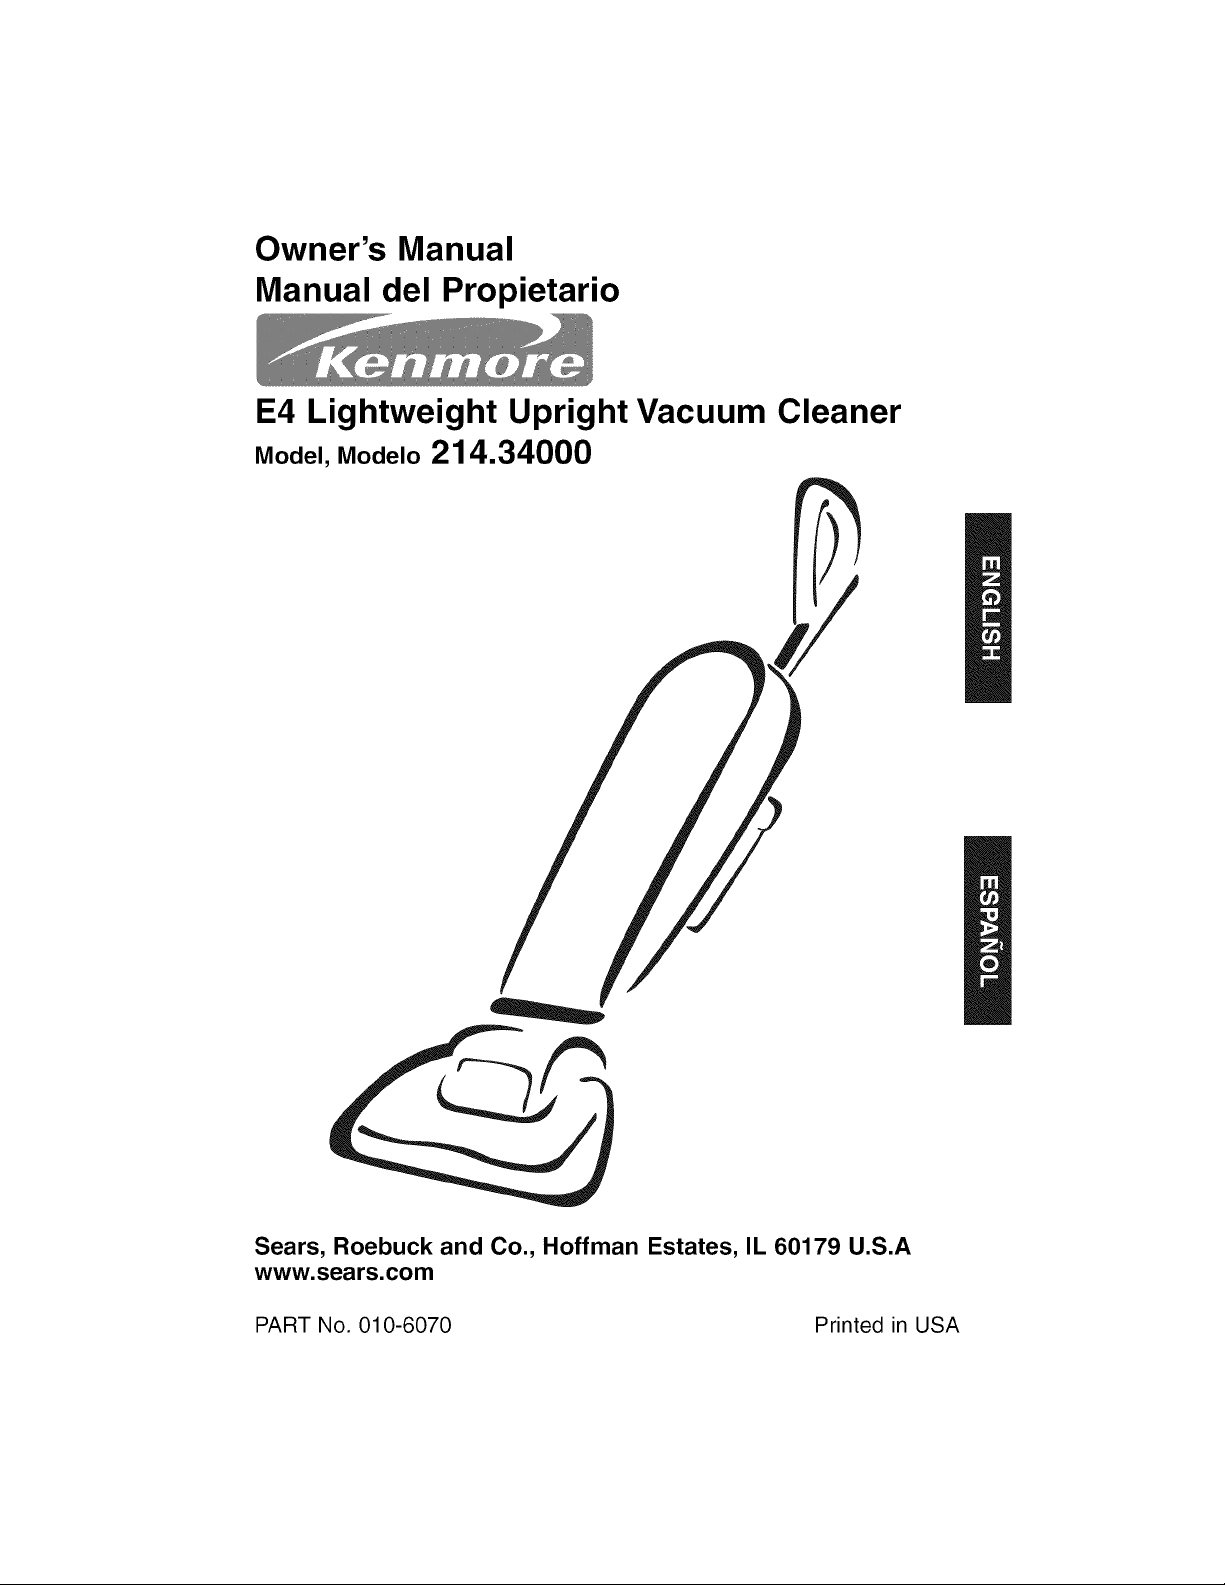
E4 Lightweight Upright Vacuum Cleaner
Model, Modelo 214.34000
Sears, Roebuck and Co., Hoffman Estates, IL 60179 U.S.A
www.sears.com
PART No. 010-6070 Printed in USA
Page 2
Warranty ............................................................ 2
Safety Instructions ............................................ 3
Product Features .............................................. 4
How to Assemble Your Vacuum Cleaner .......... 5
How to Use Your Vacuum Cleaner .................... 6
Emptying Dust Caddy ........................................ 7
Replacing the Dust Bag .................................... 7
Please read this guide. It will help you assemble and operate your new Kenmore vacuum in the
safest and most effective way.
For more information about vacuum care and operation, call your nearest Sears stores.
You will need the complete model and serial numbers when requesting information.
Your vacuum's model and serial numbers are located on the Model and Serial Number Plate.
Use the space below to record the model number and serial number of your new Kenmore vacuum.
Model No.
Serial No.
Date of Purchase
Keep this book and your sales check (receipt) in a safe place for future reference.
Cleaning the Dust Tube .................................... 8
Replacing the Filter .......................................... 8
Replacing the Light Bulb .................................. 9
Replacing the Drive Belt .................................. 10
Replacement Parts .......................................... 10
Troubleshooting .............................................. 11
Service Numbers .............................. Back Cover
This warranty is for one year from the date of purchase, and includes only private household
vacuum cleaner use. During the warranty year, when this vacuum cleaner is operated and
maintained according to the owner's manual instructions, Sears will repair any defects in material or
workmanship free of charge.
This warranty excludes vacuum bags, belts, light bulbs, and filters, which are expendable parts and
become worn during normal use.
For warranty service, return this vacuum cleaner to the nearest Sears Service Center in the
United States.
This warranty applies only while this product is used in the United States. This warranty gives you
specific legal rights, and you may also have other rights which vary from state to state.
Sears, Roebuck and Co., D/817WA, Hoffman Estates, IL 60179
Page 3
When using an electrical appliance, basic precautions
should be observed, including the following:
READ ALL INSTRUCTIONS BEFORE USING
KENMORE E4.
WARNING:Toreduce the risk of fire, electric
shock
Always connect to a polarized outlet (left
slot is wider than right). Do not modify the
polarized plug to fit a non-polarized outlet or
extension cord.
Do not leave vacuum cleaner when it is
plugged in. Unplug from outlet when not
in use and before servicing.
Do not use outdoors or on wet surfaces.
Do not allow to be used as a toy. Close atten-
tion is necessary when used by or near chil-
dren.
Do not use for any purpose other than
described in this User's Guide. Use only
attachments available from Sears.
Do not use with damaged cord or plug. If
appliance is not working as it should, has been
dropped, damaged, left outdoors, or dropped into
water, discontinue use until you have it repaired
at a Sears service center.
Do not pull or carry by cord, use cord as a
handle, close a door on cord, or pull cord
around sharp edges or corners. Do not run
appliance over cord. Keep cord away from
heated surfaces.
Do not unplug by pulling on cord. To unplug,
grasp the plug, not the cord.
Do not handle plug or vacuum cleaner with
wet hands.
Do not put any object into openings. Do not
use with any opening blocked; keep openings
free of dust, lint, hair, and anything that may
or injury:
reduce air flow.
Keep hair, loose clothing, fingers, and all parts of
body away from openings and moving parts.
Turn off all controls before plugging or
unplugging vacuum cleaner.
Use extra care when cleaning on stairs.
Do not use to pick up flammable or
combustible materials (lighter fluid,
gasoline, kerosine, etc.) or use in areas
where they may be present.
Do not use vacuum cleaner in an enclosed
space filled with vapors given off by oil base
paint, paint thinner, some moth-proofing
substances, flammable dust, or other explo-
sive or toxic vapors.
Do not use to pick up toxic material (chlorine
bleach, ammonia, drain cleaner, etc.).
Do not pick up anything that is burning or
smoking, such as cigarettes, matches, or hot
ashes.
Do not use without dust bag and/or filters in
place.
Do not pick up hard or sharp objects such as
glass, nails, screws, coins, etc.
Use only on dry, indoor surfaces.
Keep appliance on a level surface.
Do not carry the vacuum cleaner while
it is running.
SAVE THESE INSTRUCTIONS
THIS MODEL IS FOR HOUSEHOLD USE ONLY.
THIS APPLIANCE HAS A POLARIZED PLUG.
To reduce the risk of electric shock, this appliance has a polarized plug (one blade is wider than
the other). This plug will fit in a polarized outlet only one way. If the plug does not fit fully in the
outlet, reverse the plug. If it still does not fit, contact a qualified electrician to install a proper
outlet. Do not change the plug in any way.
Page 4
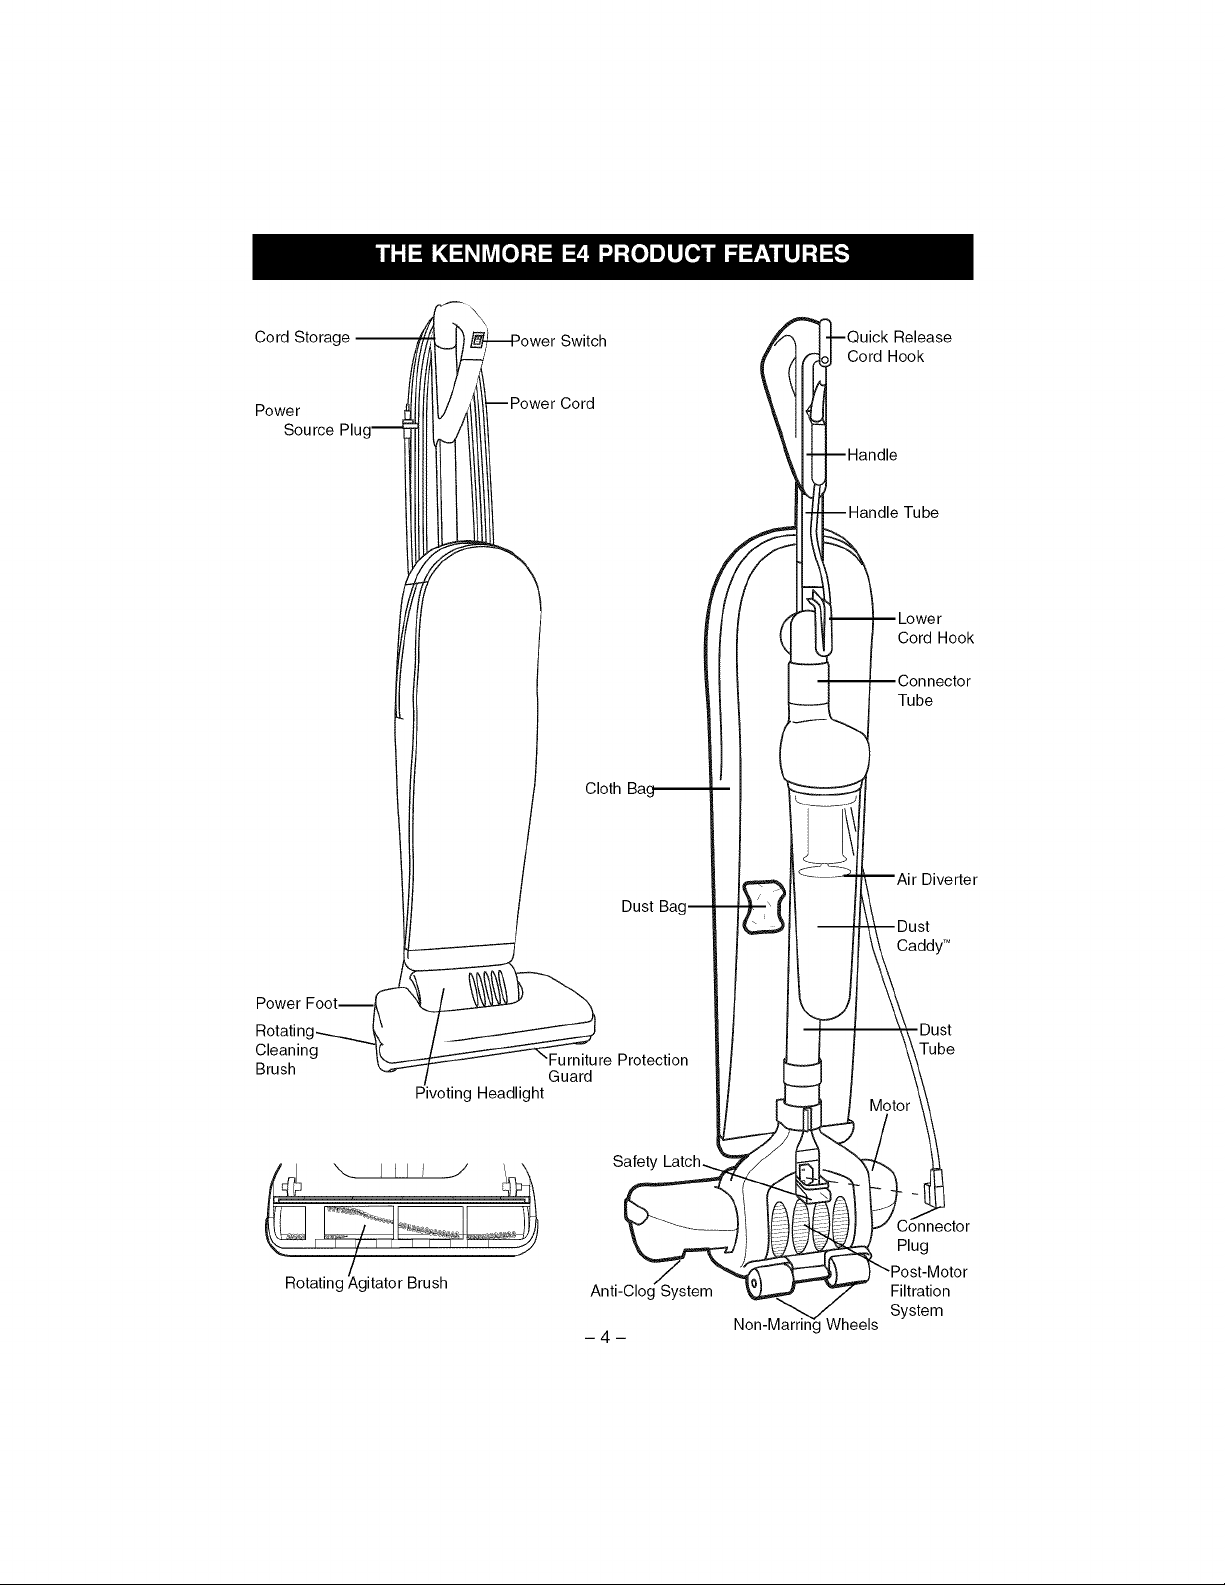
CordStoragei
\
Switch
Power
SourcePluc
-- Qu irdkHRe/kase
-Halddlll Tube
i Lowe r
...----- Tube
Cloth
IAir Diverter
Dust
iDust
Rotatinc
Cleaning
Brush
Rotating/Agitator Brush
Pivoting Headlight
'Furniture Protection
Guard
Safety
Anti-Clog System
-4-
/
Non-Mamng Wheels
addy TM
Dust
be
7to /
_C_n_nector
Plug
"_Post-Motor
Filtration
System
Page 5

The Kenmore E4 is packaged for conven-
ience and easy handling. It can be easily
assembled using a Phillips head
screwdriver.
Parts include:
• Hex Nut (1)
• Set Screw (1)
• Retainer Screw (1)
• Spacer (1)
1. Slide the Handle Tube into the
Connector Tube. Align the hole in the
Handle Tube with the molded hole at
the top of the Connector Tube. Make
sure the tube is also aligned with the
hole at the base of the Connector Tube
(just above the Dust CaddytM).
2. Place the Hex Nut in the hex-shaped
cavity in the Handle Tube (closest to the
bag). Hold it in place with your finger
while you insert the Set Screw from the
opposite side. While still holding the
Hex Nut in place, tighten the Set Screw
by hand. After a few turns, tighten
further with a Phillips head screw-
driver.
3.
Unzip the Cloth Bag and unsnap the
Collar Retainer by pressing in on the
collar tabs. Slide the Retainer Screw
through the hole at the top of retainer.
Slide the Spacer over the Retainer
Screw and align with the hole in the
Handle Tube. Tighten with a Phillips
head screwdriver. Snap the Collar
Retainer back into place and close the
Cloth Bag.
5. Insert the Connector Plug into the back
of the unit at the rear of the Power Foot.
It should slide under the Safety latch.
Your vacuum cleaner is now ready
to use.
Page 6

PowerSupply
The Power Cord isstored at the
back of the vacuum cleaner and
looped around the upper Quick
Release and lower cord hooks.
The Power Source Plug is
notched for safe, convenient
attachment to the Power Cord
during storage. Before using your
vacuum, make sure the
Connector Plug is securely
attached atthe back of the Power
Foot and that the Power Source
Plug is plugged into a polarized
(three-hole) outlet.
Power Switch
The Power Switch is located at the top front
of the Handle. To turn on your vacuum push
down on the switch marked (I). To turn off
your vacuum push up on (0).
become visible and turn on.
For best results when vacuuming, use a
constant, steady back and forth motion. This
allows the Rotating Brush and Anti-Clog
system to work at optimum efficiency.
Power Cord Storage
When you are finished using your E4,
return it to the upright position. Make sure
the machine is turned off (0). Always dis-
connect the unit from the wall outlet by
grasping the Power Plug (NEVER pull on
the cord). Store the Power Cord by winding
the cord in a continuous loop around the
Quick Release and lower cord hooks at the
back of the machine. Use the notch in the
Power Plug to secure the plug to the Power
Cord.
Operation
The E4 is suitable for all types of basic
household floor cleaning. It works on all
types of carpeting. It effectively and safely
cleans wood, linoleum, and vinyl floors. Its
wide Power Foot makes cleaning quick and
easy.
To place the E4 in proper cleaning position,
lightly press your foot on the Power Foot
and tip back the handle. When the unit is in
this position, the headlight will automatically
-6-
Page 7

YourE4vacuumcleanerisdesignedfor
manyyearsofusefulservice.Youcan
extenditsusefullifebyperformingafew
basicmaintenancechecks.
Emptying the Dust Caddy TM
While the Dust Caddy provides clear visual
reference of collected dirt and dust, it is still
recommended that it be emptied after every
vacuuming. If there is an excessive amount
of dirt, you may want to place the vacuum
over some newspapers before you empty
the Dust Caddy TM.
1. Unplug vacuum.
2. Grasp the Dust Caddy TM near the top and
turn clockwise. Pull down, slowly, to
remove. Dispose of dust and dirt. If
desired, the Dust CaddyTM can be cleaned
out with a soft brush. It can also be hand
washed, but be sure it is completely dry
before reattaching to the vacuum.
3. Reattach Dust CaddyTM by aligning with
its base and pushing up. Turn counter-
clockwise until you feel it lock into place.
Air Diverter
Occasionally it will be necessary to clean the
Air Diverter inthe unit. The Air Diverter is
contained in the Dust Caddy. Remove the
Dust Caddy. Pull the Air Diverter straight
down. Wi 3e clean with a cloth. Reinstall Air
Diverter. Re31aceDust Caddy.
Replacing the Dust Bag
The Dust Bag acts as a secondary filter to
capture excess dirt and dust. It should be
checked periodically and replaced when near
full or when cleaning suction diminishes.
Never reuse a Dust Bag.
1. Unplug vacuum.
2.
Unzip the Cloth Bag. Open the Collar
Retainer by pressing inward on the two
collar tabs and pulling the top towards
you. Slide the Dust Bag up and out of the
retainer, exerting gentle pressure on the
backing, as necessary, to remove the
bag. Dispose of Dust Bag.
3. Slide collar of new Dust Bag completely
into Collar Retainer.
4. Push the Collar Retainer back into
position. It should click into place
between the collar tabs.
Page 8

4.PushtheCollarRetainerbackintoposition.It 4.Useawirebrushtocleantheinsideof
shouldclickintoplacebetweenthecollartabs. theDustTubeandatthetopsectionof
thePowerFootwherethetubeconnects.
5.
After cleaning, reconnect the Dust Tube to
the Power Foot by snapping it into place.
5.TucktheDustBagcompletelyinsidethe
ClothBag.Makesureitlaysflat,toptobot-
tom,withoutbunching.ZipupClothBag.
CleaningtheDustTube
TheE4featuresawidediameterDustTube
thatcreatesawidecoverageareaandopti-
mizescleaningefficiency.Forbestperform-
anceitshouldroutinelybecheckedand
clearedofdustanddebris.
Note:Itisrecommendedthetubebecleaned
ona barefloor,orwithsomenewspaperto
coverthefloor,tocatchanyloosematerialor
dustremovedduringcleaning.
1. Release the Cloth Bag by lifting up on the
tension spring at the bottom of the bag.
2. Unplug the Connector Plug.
6.
Plug the Connector Plug back into the
base of the vacuum.
Replacing the Filter
The 3M FiltreteTM Filter is located in the back of
the Power Foot of your vacuum. It is designed
to promote cleaning efficiency as well as the
removal of dust and allergens. It should be
checked regularly, and changed when the filter
becomes clogged and dirty. Filters should be
changed at least every six months, sooner if
excessive dust and dirt are evident.
It is easiest to check and change the filter with
the vacuum laying face down on the floor.
1. Remove the Filter Frame screw at the
back of the Power Foot. It is located at
the bottom of the Filter Frame, between
the rear wheels of your vacuum.
3. Locate the Tube Release Button atthe top
of the Power Foot. It is protected by a
Rubber Collar and can be pressed through
the collar to release the Dust Tube. Lift off
the Dust Tube while pressing on the collar.
2. Use the tab at the bottom of the Filter
Frame to lift off the frame.
-8-
Page 9

3.Removeanddisposeofusedfilter.
4.Replacewithnewfilter(3MFiltreteTM
Style 6).
5. Replace Filter Frame by sliding it back
into place, making sure the two tabs at
the top of the frame are tucked under and
that the hole at the bottom of the frame is
centered over the screw hole.
Checking the Rotating Brush and
Drive Belt
The brush and drive belt should both be
checked regularly for wear or damage. The
brush and brush ends should also be kept
free of string, hair, and carpet fibers as
these could become entangled in the brush
and reduce its cleaning effectiveness.
Cleaning the Rotating Agitation Brush
Note:TheRotatingBrushcanmostoftenbe
cleanedwithoutremovingitfromthevacuum.If
thereisanexcessiveamountof hairanddebris,
however,it shouldheremovedandcleaned.
6. Replace and tighten screw.
Replacing the Light Bulb
1. Unplug vacuum. Press gently with your
foot on the Power Foot and lean the unit
back so that the Headlight is revealed.
2. Insert the tip of a blade-type screwdriver
at either of the connector tabs at the
bottom of the headlight lens. Pry gently to
remove the lens.
3. Remove used bulb from socket.
4. Insert new bulb (Part #010-1177). It
should snap into place.
5. Reinstall lens, inserting the top section
first and snapping the bottom section into
place.
1. Unplug the vacuum. Tip it over, face
down, on a flat surface.
2. Using a Phillips head screwdriver,
remove all 3 screws from the bottom of
the Power Foot.
3. Holding onto both the top cover and
base, turn the vacuum back over. Lift off
the top cover and the Furniture
Protection Guard.
t t
-'; t. ]2 ]-_TJ
4. Slide the Drive Belt off the motor shaft.
(You can also check the Drive Belt for
wear or damage at this time and replace
as necessary.)
Page 10

5.SlowlylifttheRotatingBrush,pullingup
ontherightsidefirst(thesideattached
tothebelt).Next,pullthebrushoutfrom
theleftsideandliftout.Removeandset
asidebelt.
10.Turnvacuumbackfacedown.
11.Replacethe3screws.Itiseasiestto
beginwiththecenterscrew.Tighten
untilthetopcoverisfirmlyattached.Do
notovertightenasthiscoulddamage
thePowerFoot.
Replacing the Drive Belt
6.Cleanoffbrushasnecessary.
7.WiththeDriveBeltinplace,loopedover
thebrushrollpulleyneartherightend
ofthebrush,reinstalltheRotatingBrush.
Inserttheleftendofthebrushfirst,making
sureitslidesintothelockingslot.
8. Reinsert the Furniture Protection
Guard by sliding it over the front of the
Power Foot.
9. Replace the top cover of the Power Foot.
Press down gently until the top cover
snaps into place. Make sure the Furniture
Protection Guide is on the outside.
1. Follow Steps 1 through 3 for Cleaning
the Rotating Brush.
2. Check the belt. If it is broken or
damaged, it needs to be replaced.
3. Slide the Drive Belt off the motor shaft.
Lift up the right end of the brush and
remove the belt from the brush. Discard
used belt.
4.
With the right section of the brush still
detached, slide the new belt over the
brush roll pulley. Loop the belt back over
the motor guide. Lower the right end of
the brush into the open slot at the right
(there will be a small bit of resistance
with the belt attached), and click it
into place.
5.
Follow Steps 8 through 11 for Cleaning
the Rotating Brush.
item Part No.
1. 54000
2. 84000
3. 010-0196
4. 010-1177
Part Name
Drive Belt
Micro Filtration Bags
Filtrete TM Filter
Replacement Light Bulb (not shown)
-10-
1.
3.
Page 11

PROBLEMS POSSIBLE CAUSE POSSIBLE SOLUTION
Vacuum cleaner
won't run.
Vacuum cleaner
won't pick up dirt
Dust accumulates
inside Cloth Bag
1. Vacuum is not plugged in
2. Household fuse/circuit
breaker tripped
1. Dust Caddy TM is full or
clogged
2. Dust Bag is full
3. Rotating Brush Drive Belt
4. Rotating Floor Brush
5. Dust Tube
1. Dust Bag is clogged or dirty
2. Dust Bag retainer not
closed
3. Clog at inlet to Dust Bag
1. Check electrical plug to make
sure it is properly inserted.
Check electrical cord
connection on back of
vacuum; make sure vacuum
Connector Plug is properly
inserted in back of machine.
2. Check/replace fuse - reset
breaker.
1. Remove and empty; see
Emptying the Dust Caddy TM,
page 7.
2. Replace bag; see Replacing
the Dust Bag,page 7.
3. Realign belt if it has moved or
slipped off; if belt is broken,
replace; see Replacing the
Drive Belt, page 10.
4. Brush may be jammed
with debris;
remove debris from brush ends
If debris is excessive, remove
and clean brush; see
Cleaning the Rotating Brush,
pages 9-10
Bristles may be worn; replace
brush.
5. Tube and/or air passageway
to tube may be clogged; see
Cleaning the Dust Tube,
page 8.
1. Replace Dust Bag; see
Replacing the Dust Bag,
page 7.
2. Unzip Cloth Bag; make sure
collar is closed and locked
into place with tabs.
3. Shake dust down to bottom
of bag.
-11 -
Page 12

Your Home
For repair - in your home - ofall major brand appliances,
lawn and garden equipment, or heatingand cooling systems,
no matter who made it, no matter who sold it!
For the replacement parts, accessories and
owner's manuals that you need to do-it-yourself.
For Sears professional installation of home appliances
and items like garage door openers and water heaters.
1-800-4-MY-HOME ® Anytime, day or night
(1-800-469-4663) (U.S.A. and Canada)
www.sears.com www.sears.ca
Our Home
For repair of carry-in products like vacuums, lawn equipment,
and electronics, call or go on-line for the nearest
SEARS
© Sears,Roebuck and Co,
® Registered Trademark / TMTrademark / su Service Mark of Sears, Roebuck and Co,
® Marca Registrada / TMMarca de F_brica /SMMarca de Servicio de Sears, Roebuck and Co,
MCMarque de commerce / MDMarque d_pos6e de Sears, Roebuck and Co.
 Loading...