

Kenmore 1163481290 Owner’s Manual

Vacuum Cleaner
OWNER'SMANUAL
READTHISMANUAL for important safety,
assembly and operating instructions.
WARRANTY ................................................................ I
SERVICE........ ............................................................. I
IMPORTANT SAFETYINSTRUCTIONS ......................... 2
PARTSAND FEATURES............................................... 3
ASSEMBLY.................................................................. 4
USE
How to Staff ..........................................................
Pile Height Selection and Setting .......................
Bare Floor Setting (Optional) ..............................
Releasing the Handle ..........................................
On/Off and Power Level Selection ...................
Using Attachments ........................................... 7-8
Vacuuming Tips .................................................... 9
Performance Features ....................................... 10
AND OPTIONAL
FEATURES
Usersof upright vacuum cleaners have a variety!of
5
6
6
6
7
cleaning needs.
Thisvacuum cleaner comes with optior ._atures
which offer the customer the opportuni _select
features which best meet their needs.
This manual provides instructions which
features in addition to those found on t
model. Optional features include:
Pre-assembly
Jde those
Iandard
NTSAFETYINSTRUCTIONS
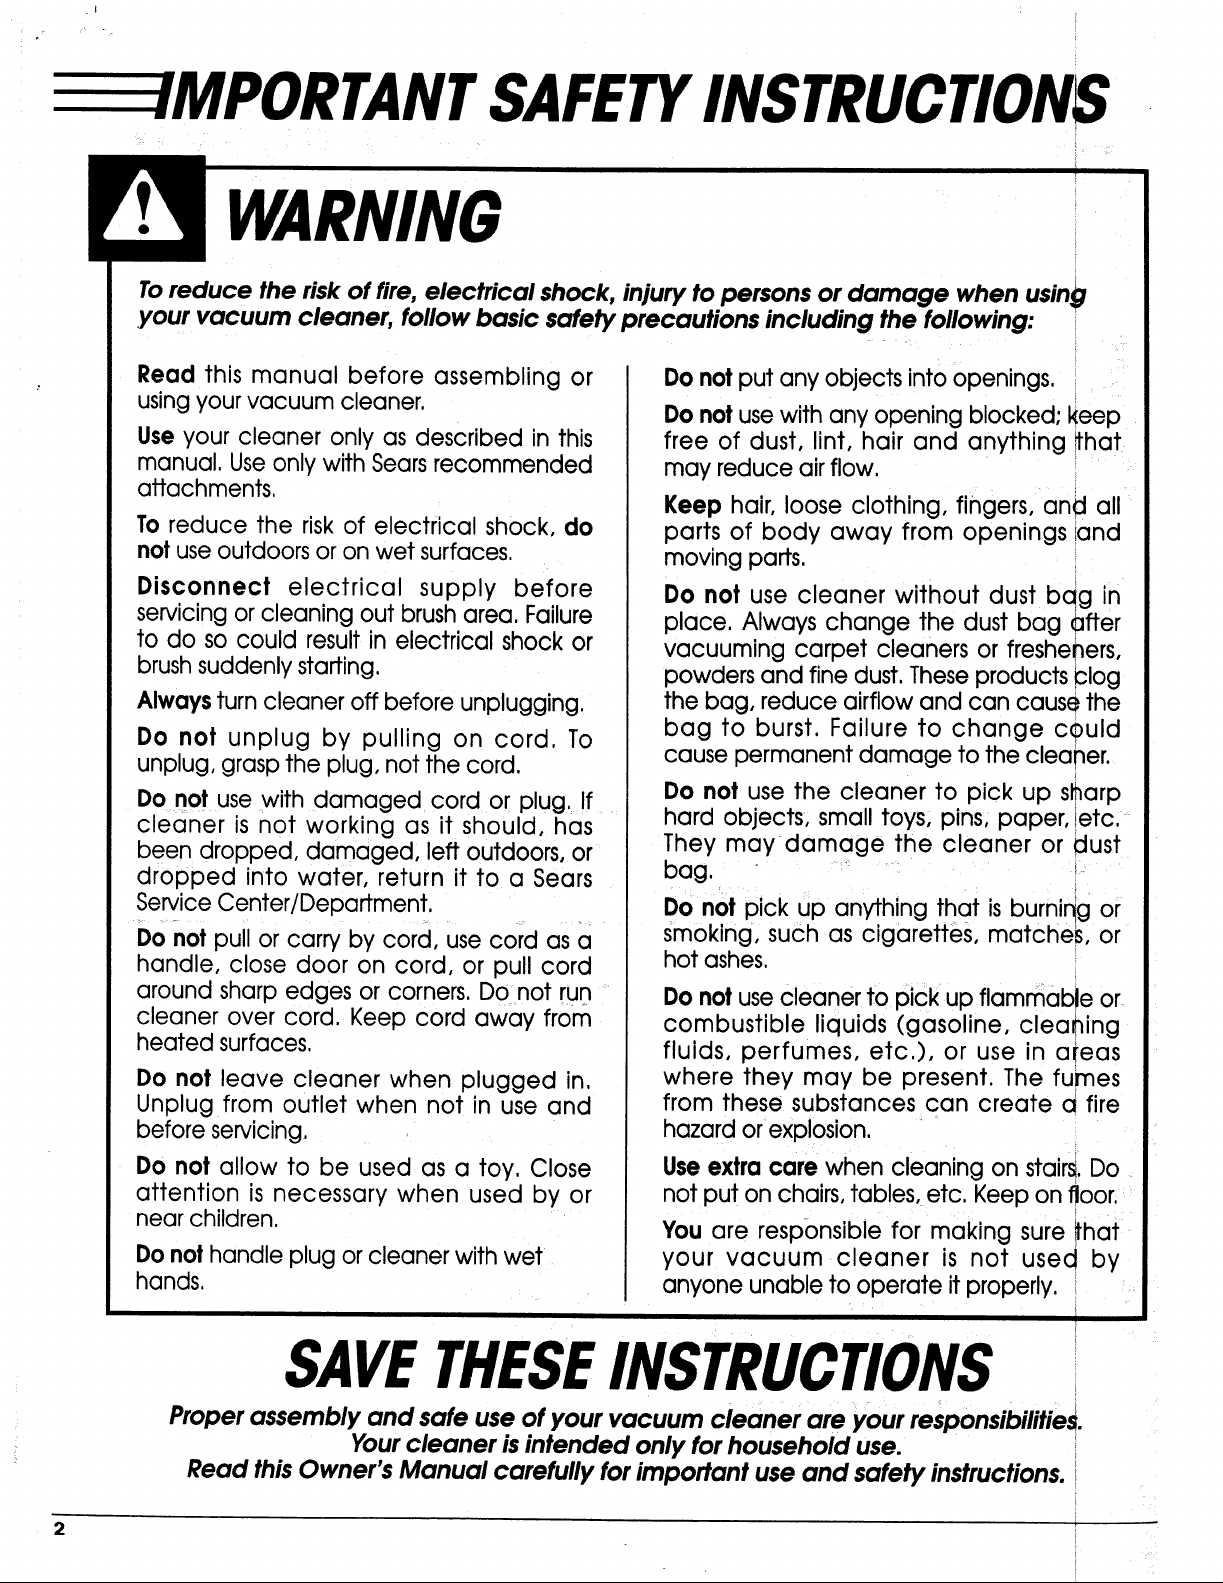
WARNING
To reduce the risk of fire, electrical shock, injury to persons or damage when using
your vacuum cleaner, follow basic safety precautions including the following:
Read this manual before assembling or
using your vacuum cleaner.
Use your cleaner only as described in this
manual. Use only with Sears recommended
attachments.
To reduce the risk of electrical shock, do
not use outdoors or on wet surfaces.
Disconnect electrical supply before
servicing or cleaning out brush area. Failure
to do so could result in electrical shock or
brush suddenly starting.
Always turn cleaner off before unplugging.
Do not unplug by pulling on cord. To
unplug, grasp the plug, not the cord.
Do not use with damaged cord or plug, If
cleaner is not working as it should, has
been dropped, damaged, left outdoors, or
dropped into water, return it to a Sears
Service Center/Department.
Do not pull or carry by cord, use cord as a
handle, close door on cord, or pull cord
around sharp edges or corners. Do not run
cleaner over cord. Keep cord away from
heated surfaces.
Do not leave cleaner when plugged in.
Unplug from outlet when not in use and
before servicing.
Do not put any objects into openings.
Do not use with any opening blocked; keep
free of dust, lint, hair and anything _hat
may reduce air flow.
Keep hair, loose clothing, fingers, and all
parts of body away from openings iand
moving parts.
Do not use cleaner without dust bag in
place. Always change the dust bag Offer
vacuuming carpet cleaners or fresheners,
powders and fine dust. These products Clog
the bag, reduce airflow and can cause the
bag to burst. Failure to change could
cause permanent damage to the cleaner.
Do not use the cleaner to pick up sharp
hard objects, small toys, pins, paper, etc.
They may damage the cleaner or dust
bag.
Do not pick up anything that is burniqg or
smoking, such as cigarettes, matches, or
hot ashes.
Do not use cleaner to pick up flammable or
combustible liquids (gasoline, cleaning
fluids, perfumes, etc.), or use in a!eas
where they may be present. The fumes
from these substances can create a fire
hazard or explosion.
Do not allow to be used as a toy. Close
attention is necessary when used by or
near children.
Do not handle plug or cleaner with wet
hands.
Use extra care when cleaning on stairs. Do
not put on chairs, tables, etc. Keep on floor
You are responsible for making sure ihat
your vacuum cleaner is not used by
anyone unable to operate it properly.
SAVETHESEINSTRUCTIONS
Proper assembly and safe use of your vacuum cleaner are your responsibilitieS.
Your cleaner is intended only for household use.
Read this Owner's Manual carefully for important use and safety instructions.
AND FEATURES
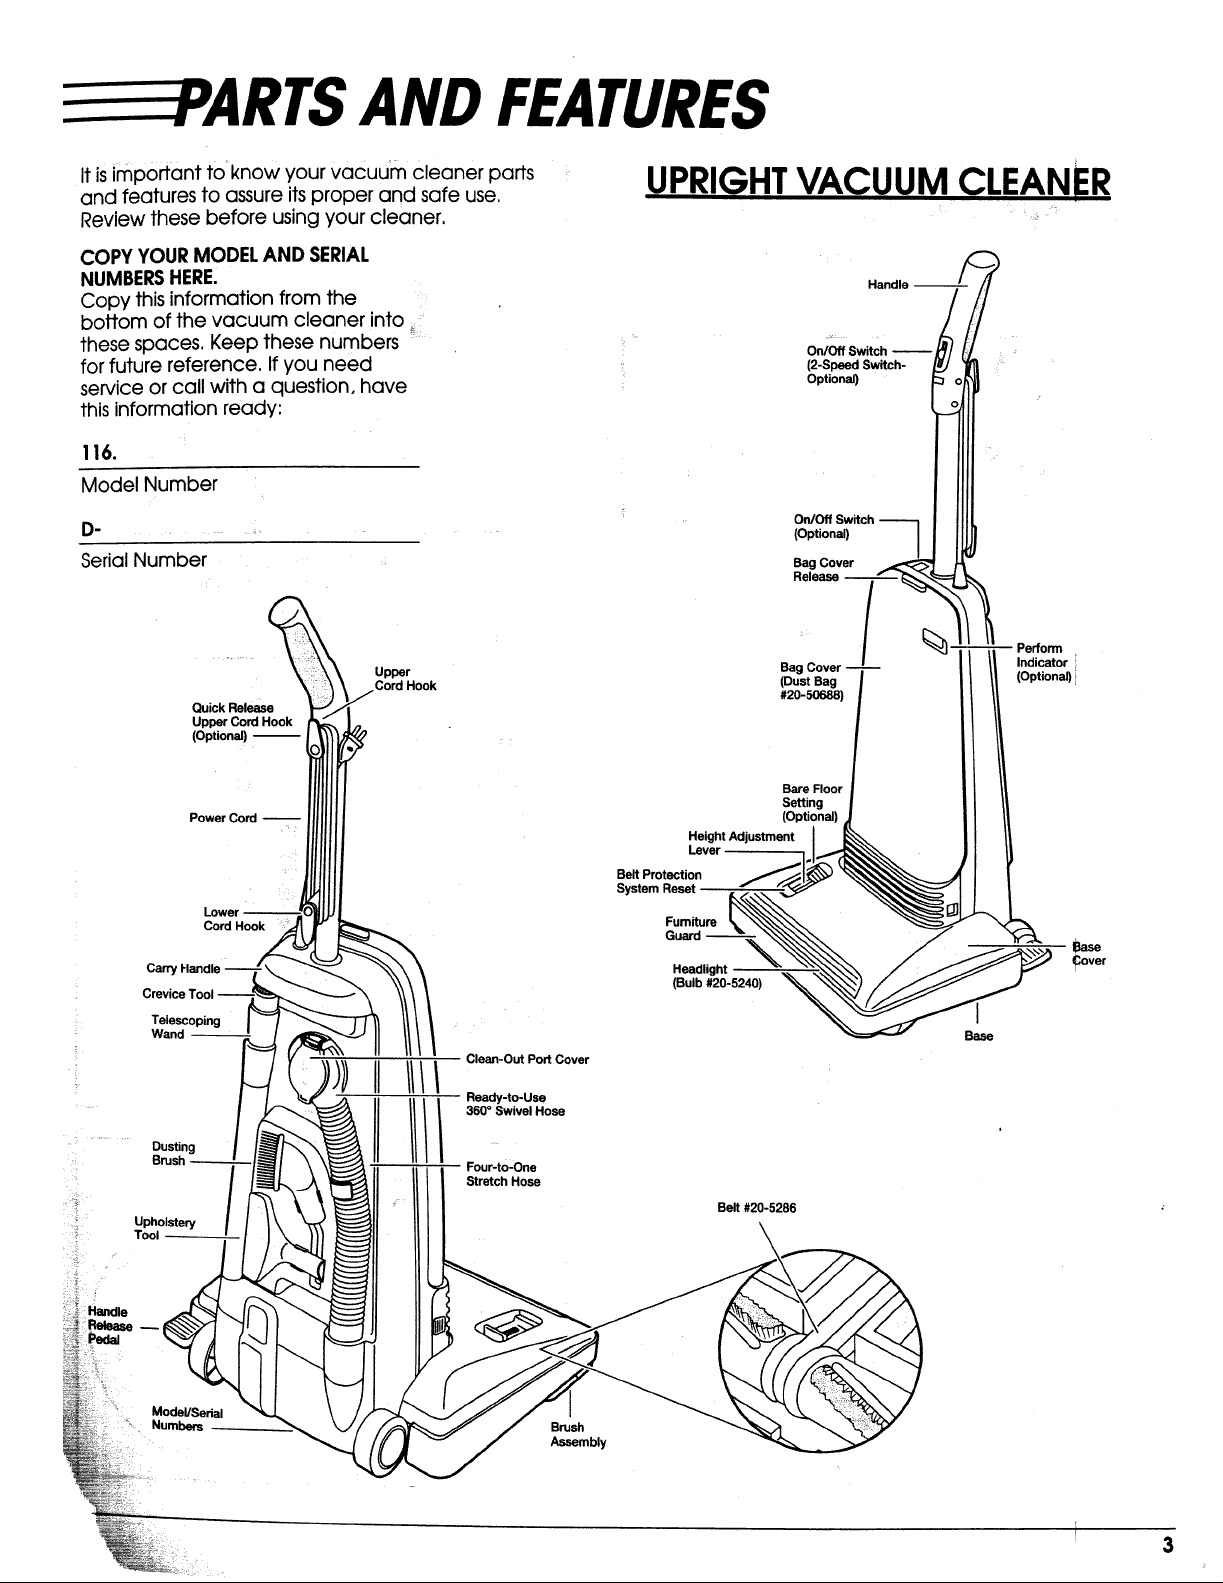
It isimportant to know your vacuum cleaner parts
and features to assure itsproper and safe use,
Review these before using your cleaner.
COPY YOUR MODEL AND SERIAL
NUMBERSHERE.
Copy this information from the
bottom of the vacuum cleaner into
these spaces. Keep these numbers
for future reference, If you need
service or call with a question, have
this information ready:
116.
Model Number
UPRIGHTVACUUM CLEANER
Handle
OrdOff Switch --
(2-Speed Switch-
Optional)
D.
Serial Number
Carry Handle
Crevice Tool
Wand
aru
Ou_kR_
Upper Cord Hook
(Optional)
Power Cord
Lower
Cord Hook
Upper
Cord Hook
II IIII
II!/i
Clean-Out Port Cover
Ready-to-Use
360 ° Swivel Hose
Four-to-One
Stretch Hose
Bait Protection
System Reset
Furniture
(Bulb #20-5240)
Height Adjustment
Level
Bait #20-5286
On/Off Switch
(Optional) /
Bag Cover
Release
Beg Cover
(Dust Bag
#20-50688)
Bare Floor
Setting
(Option=)
Perform
Indicator
(Option=),
ease
Cover
I
Base
:Handle
Brush
Assembly
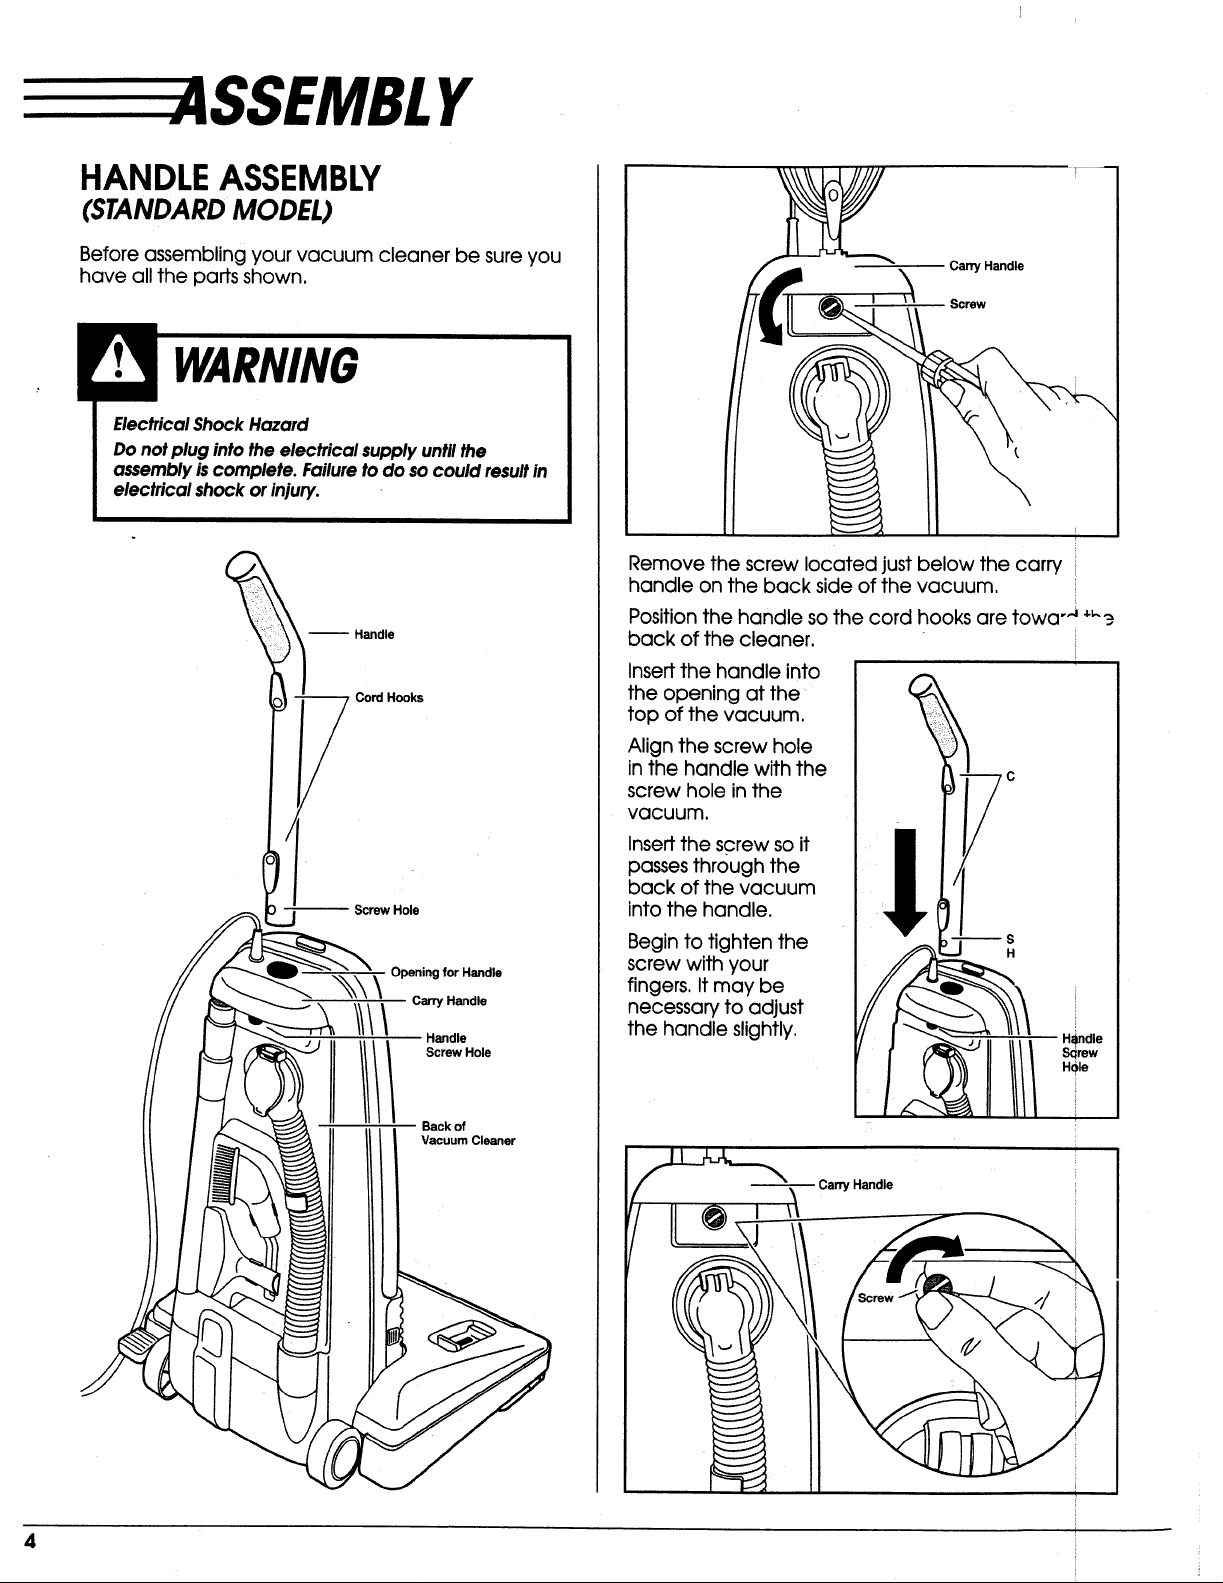
HANDLEASSEMBLY
(STANDARD MODEL)
Y
Before assembling your vacuum cleaner be sure you
have all the parts shown.
Electrical Shock Hazard
Do not plug into the electrical supply untll the
assembly is complete. Failure to do so could result in
electrical shock or injury.
-- Handle
• _ Cord Hooks
_.j Screw Hole
.,_,_ _ Opening for Handle
Handle
IIIIIIorwoe
Back of
Vacuum Cleaner
Carry Handle
Screw
Remove the screw located just below the carry
handle on the back side of the vacuum.
Position the handle so the cord hooks are towa o'__3
back of the cleaner.
Insert the handle into
the opening at the
top of the vacuum.
Align the screw hole
in the handle with the
screw hole in the
vacuum.
Insert the screw so it
passes through the
back of the vacuum
into the handle.
Begin to tighten the
screw with your
fingers, It may be
necessary to adjust
the handle slightly,
Handle
Sc_rew
HO_
Carry Handle
4
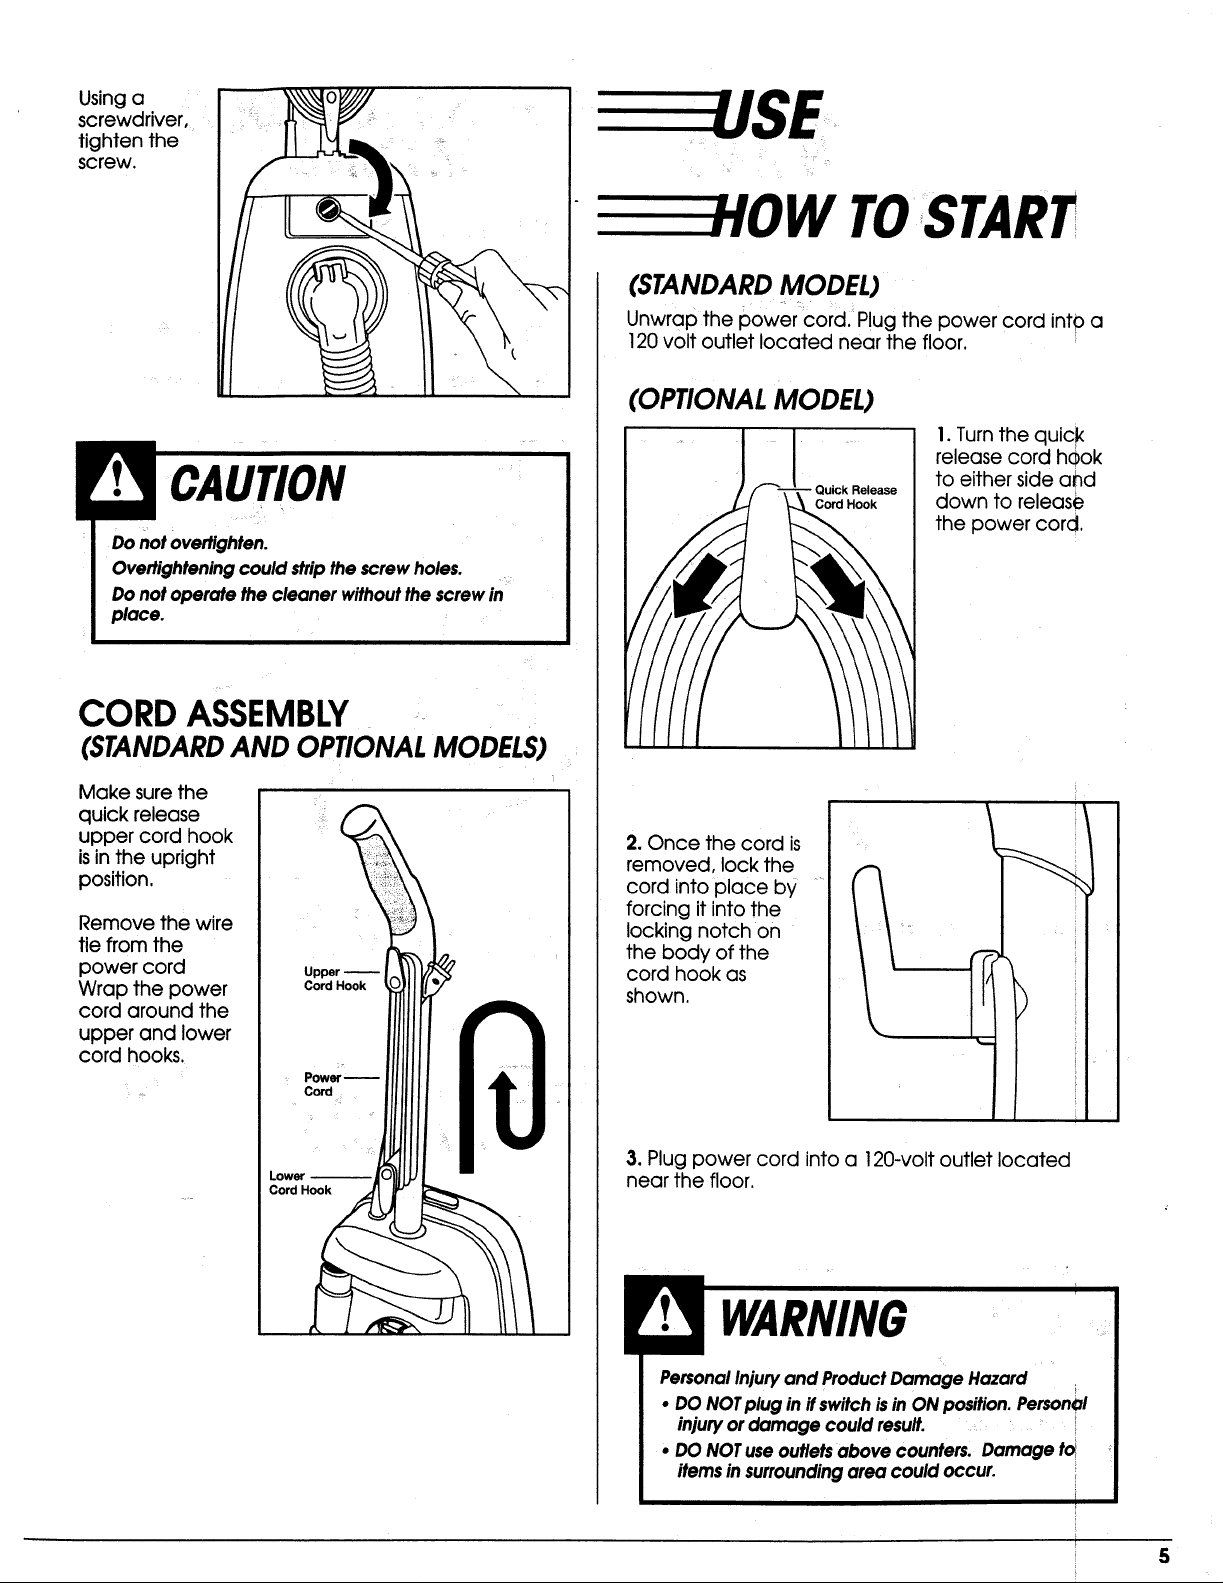
Using a
screwdriver.
tighten the
screw,
CAUTION
Do not overtighten.
Overtighteningcould stripthescrewholes.
Do not operate the cleaner withoutthe screw in
place.
W TOSTART
(STANDARD MODEL)
Unwrap the power cord. Plug the power cord into a
120 volt outlet located near the floor.
(OPTIONAL MODEL)
1.Turn the quick
release cord hook
Release
to either side and
down to release
the power cord.
CORD ASSEMBLY
(STANDARDAND OPTIONALMODELS)
Make sure the
quick release
upper cord hook
isin the upright
position,
Remove the wire
tie from the
power cord
Wrap the power
cord around the
upper and lower
cord hooks,
2. Once the cord is
removed, lock the
cord into place by
forcing it into the
locking notch on
the body of the
cord hook as
shown.
3. Plug power cord into a 120-volt outlet located
near the floor.
• DO NOTplug inifswitchisin ON position.Personal
injuryor damage could result.
• DO NOTuseoutletsabove counters. Damage ta
itemsinsurroundingarea could occur.
5
HEIGHT
FLOOR
SELECTIONAND
SETTING
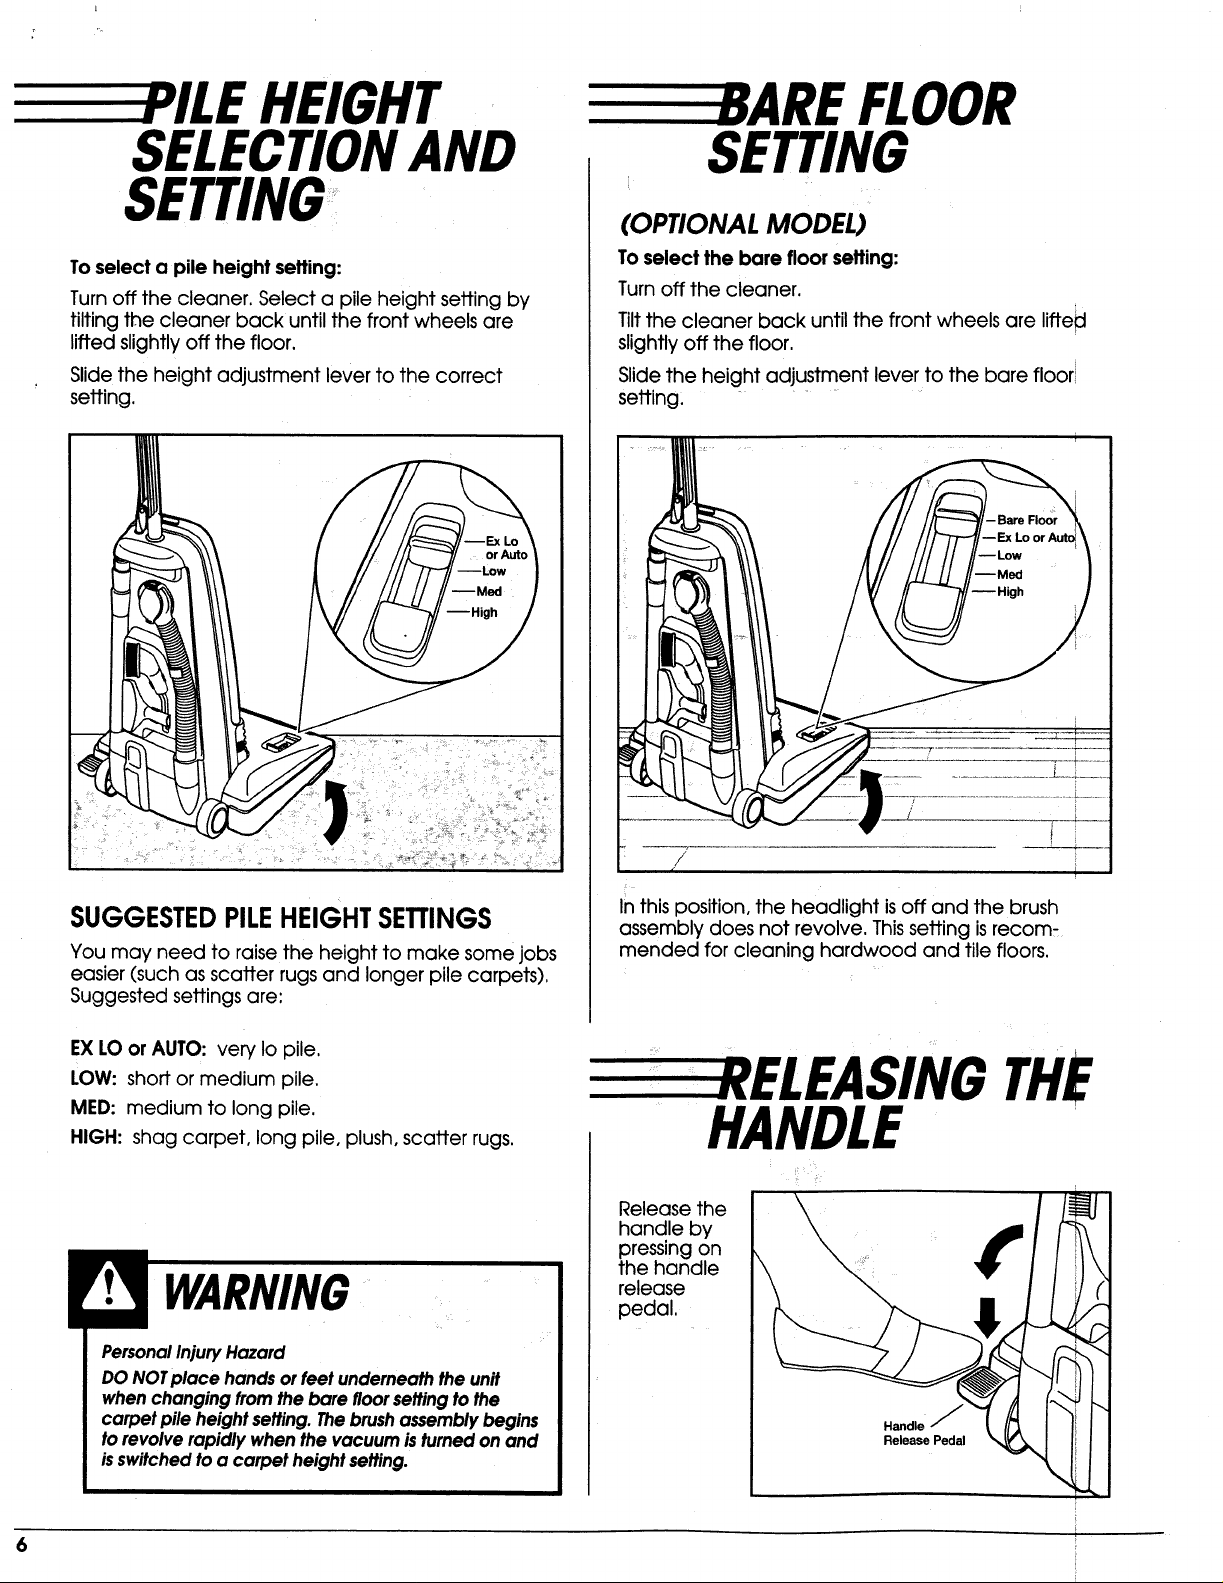
Toselect a pile height setting:
Turn off the cleaner. Select a pile height setting by
tilting the cleaner back until the front wheels are
lifted slightly off the floor.
Slide the height adjustment lever to the correct
setting.
--High
SETTING
(OPTIONAL MODEL)
To select the bare floor seffing:
Turn off the cleaner.
Tilt the cleaner back until the front wheels are lifteid
slightly off the floor.
Slide the height adjustment lever to the bare floor
setting,
SUGGESTEDPILEHEIGHT SETTINGS
You may need to raise the height to make some jobs
easier (such as scatter rugs and longer pile carpets).
Suggested settings are:
EX LO or AUTO: very Io pile.
LOW: short or medium pile.
MED: medium to long pile.
HIGH: shag carpet, long pile, plush, scatter rugs.
WARNING
Personal Injury Hazard
DO NOT place hands or feet underneath the unit
when changing from the bare floor setting to the
carpet pile height setting. The brush assembly begins
to revolve rapidly when the vacuum is turned on and
isswitched to a carpet height setting.
Inthis position, the headlight isoff and the brush
assembly does not revolve. Thissetting isrecom-
mended for cleaning hardwood and tile floors.
LEASINGTHE
HANDLE
Release the
handle by
pressing on
the handle
release
pedal.
 Loading...