

Kenmore 116.24614400 Owner's Manual
Owner'sManual
ManualDelPropietario
VacuumCleaner
Aspiradora
Model, Modelo
116,24614
CAUTION:
Read and follow all
safety and operating
instructions before first
use of this product.
CUIDADO:
Lea y siga todas las
instrucciones de operaci6n
y seguridad antes del uso de
este producto.
Sears, Roebuck and Co., Hoffman Estates, IL 60179 U.S.A.
www.sears.com
Printed in U.S.A.
Part No. CI211ZCN R_(_UQI3-KC_IZCNRZI3U_I lmpreso en EUA
Before Using Your New Vacuum ....... 2
Kenmora Vacuum Cleaner Warranty ... 2
Important Safety Instructions ......... 3
Parts and Features ................. 4-5
Assembly Instructions ............. 6-7
Power-Mata Jr." Storage .............. 7
Use ................................ 8
Howto Start ........................ 8
VacuumingTips ..................... 9
SuggestedPile HeightSettings ........ 10
Attachments....................... 10
AttachmentUse Chart ............... 11
PerformanceFeatures ............. 11-12
HowYour Vacuum Works ............ 13
Please read this guide. It will help you assemble and operate your new Kenmore vacuum in
the safest and most effective way.
For more information about vacuum cleaner care and operation, call your nearest Sears store.
You will need the complete model and serial numbers when requesting information. Your vacu-
um's model and serial numbers are located on the Model and Serial Number Plate.
Canister Care ...................... 13
Bag Changing ..................... 13
Cleaning ExteriorandAttachments ..... 14
MotorSafety FilterChanging .......... 14
ExhaustFilterChanging .............. 15
Power-Mata • Care .................. 15
Belt Changingand AgitatorCleaning.. 16-17
LightBulbChanging ................. 18
AgitatorServicing ................... 18
Troubleshooting .................... 19
Requesting Assistance
Or Service .................. BackCover
Use the space below to record the model number and serial number of your new Kenmore
vacuum.
Model No.
Serial No.
Date of Purchase
Keep this book and your sales check (receipt) in a safe place for future reference.
LIMITED ONE YEAR WARRANTY ON KENMORE VACUUM CLEANER
This warranty is for one year from the date of purchase, and includes only private household
vacuum cleaner use. During the warranty year, when this vacuum cleaner is operated and
maintained according to the owner's manual instructions, Sears will repair any defects in
material or workmanship free of charge.
This warranty excludes vacuum bags, belts, light bulbs, and filters, which are expendable parts
and become worn during normal use.
For warranty service, return this vacuum cleaner to the nearest Sears Service Center in
the United States.
This warranty applies only while this product is in use inthe United States. This warranty gives
you specific legal rights, and you may also have other rights which vary from state to state.
Sears, Roebuck and Co., D/817 WA, Hoffman Estates, IL 60179
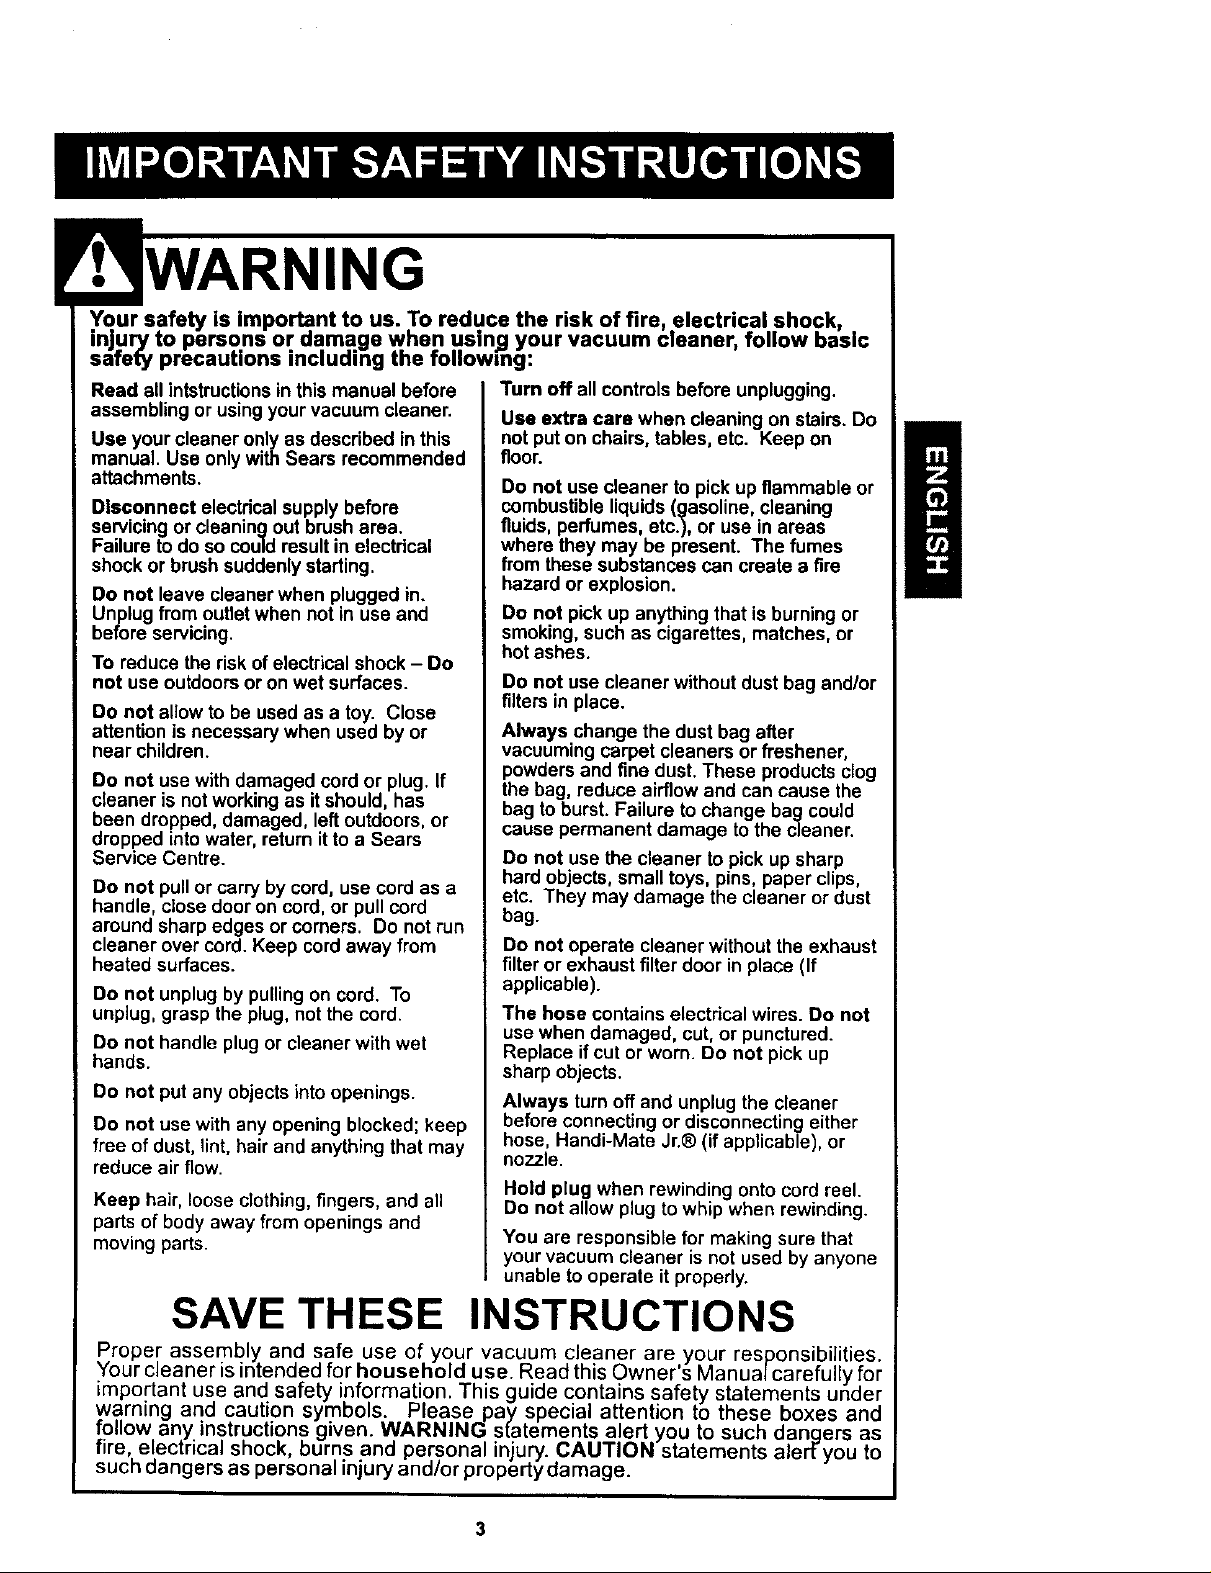
Yn_Ursafety is important to us. To reduce the risk of fire, electrical shock,
uryto persons or damage when using your vacuum cleaner, follow basic
safely precautions including the following:
Read all intstructionsinthis manual before
assembling or usingyour vacuum cleaner.
Use your cleaner only as described inthis
manual. Use only with Sears recommended
attachments.
Disconnect electdcal supply before
servicingor cleaning out brush area.
Failure todo so couldresult in electrical
shock or brushsuddenly starting,
Do not leave cleanerwhen pluggedin.
Unplug from outletwhen not in use and
before servicing,
To reduce the riskof electricalshock - Do
not use outdoorsor on wet surfaces.
Do not allow to be used as a toy. Close
attention is necessary when usedby or
near children.
Do not use with damaged cord or plug. If
cleaner is not working as it should, has
been dropped, damaged, left outdoors, or
dropped into water, returnit to a Sears
Service Centre.
Do not pull or carry by cord, use cord as a
handle, close door on cord,or pull cord
around sharpedges or comers. Do not run
cleaner over cord.Keep cordaway from
heated surfaces.
Do not unplug by pulling on cord. To
unplug,grasp the plug, not the cord.
Do not handle plug or cleaner withwet
hands.
Do not put any objects into openings.
Do not use with any opening blocked; keep
free of dust, lint, hairand anythingthat may
reduce air flow.
Keep hair, loose clothing,fingers, and all
parts of body away from openings and
moving parts.
Turn off all controls before unplugging.
Use extra care when cleaning on stairs. Do
not put on chairs, tables, etc. Keep on
floor.
Do not use cleaner to pick up flammable or
combustible liquids (gasoline, cleaning
fluids,perfumes, etc.), or use in areas
where they may be present. The fumes
from these substances can create a fire
hazard or explosion.
Do not pickup anything that is burningor
smoking,such as cigarettes, matches, or
hot ashes.
Do not use cleaner withoutdust bag and/or
filters inplace.
Always change the dust bag after
vacuuming carpet cleaners or freshener,
powdersand fine dust.These products clog
the bag, reduce airflow and can cause the
bag to burst. Failure to change bag could
cause permanent damage tothe cleaner.
Do not use the cleaner to pick up sharp
hardobjects, small toys,pins, paper clips,
etc. They may damage the cleaner or dust
bag.
Do not operate cleaner without the exhaust
filteror exhaust filter door in place (If
applicable).
The hose containselectrical wires. Do not
use when damaged, cut,or punctured.
Replace ifcut or worn. Do not pickup
sharpobjects.
Always turn off and unplug the cleaner
before connecting or disconnecting either
hose, Handi-Mate Jr.® (if applicable), or
nozzle.
Hold plug when rewinding ontocord reel.
Do not allow plug to whip when rewinding.
You are responsible for making sure that
yourvacuum cleaner is not used byanyone
unable to operate it properly.
SAVE THESE
Proper assembly and safe use of your vacuum cleaner are,your responsibilit es
Your cleaner is intended for household use. Read this Owner s Manual carefully for
important use and safety information. This guide contains safety statements under
warning and caution symbols. Please pay special attention to these boxes and
follow any instructions given. WARNINGs[atements alert you to such dangers as
fire, electrical shock burns and personal injury. CAUTION statements a erfyou to
such dangers as persona njury and/or propertydamage.
INSTRUCTIONS
3
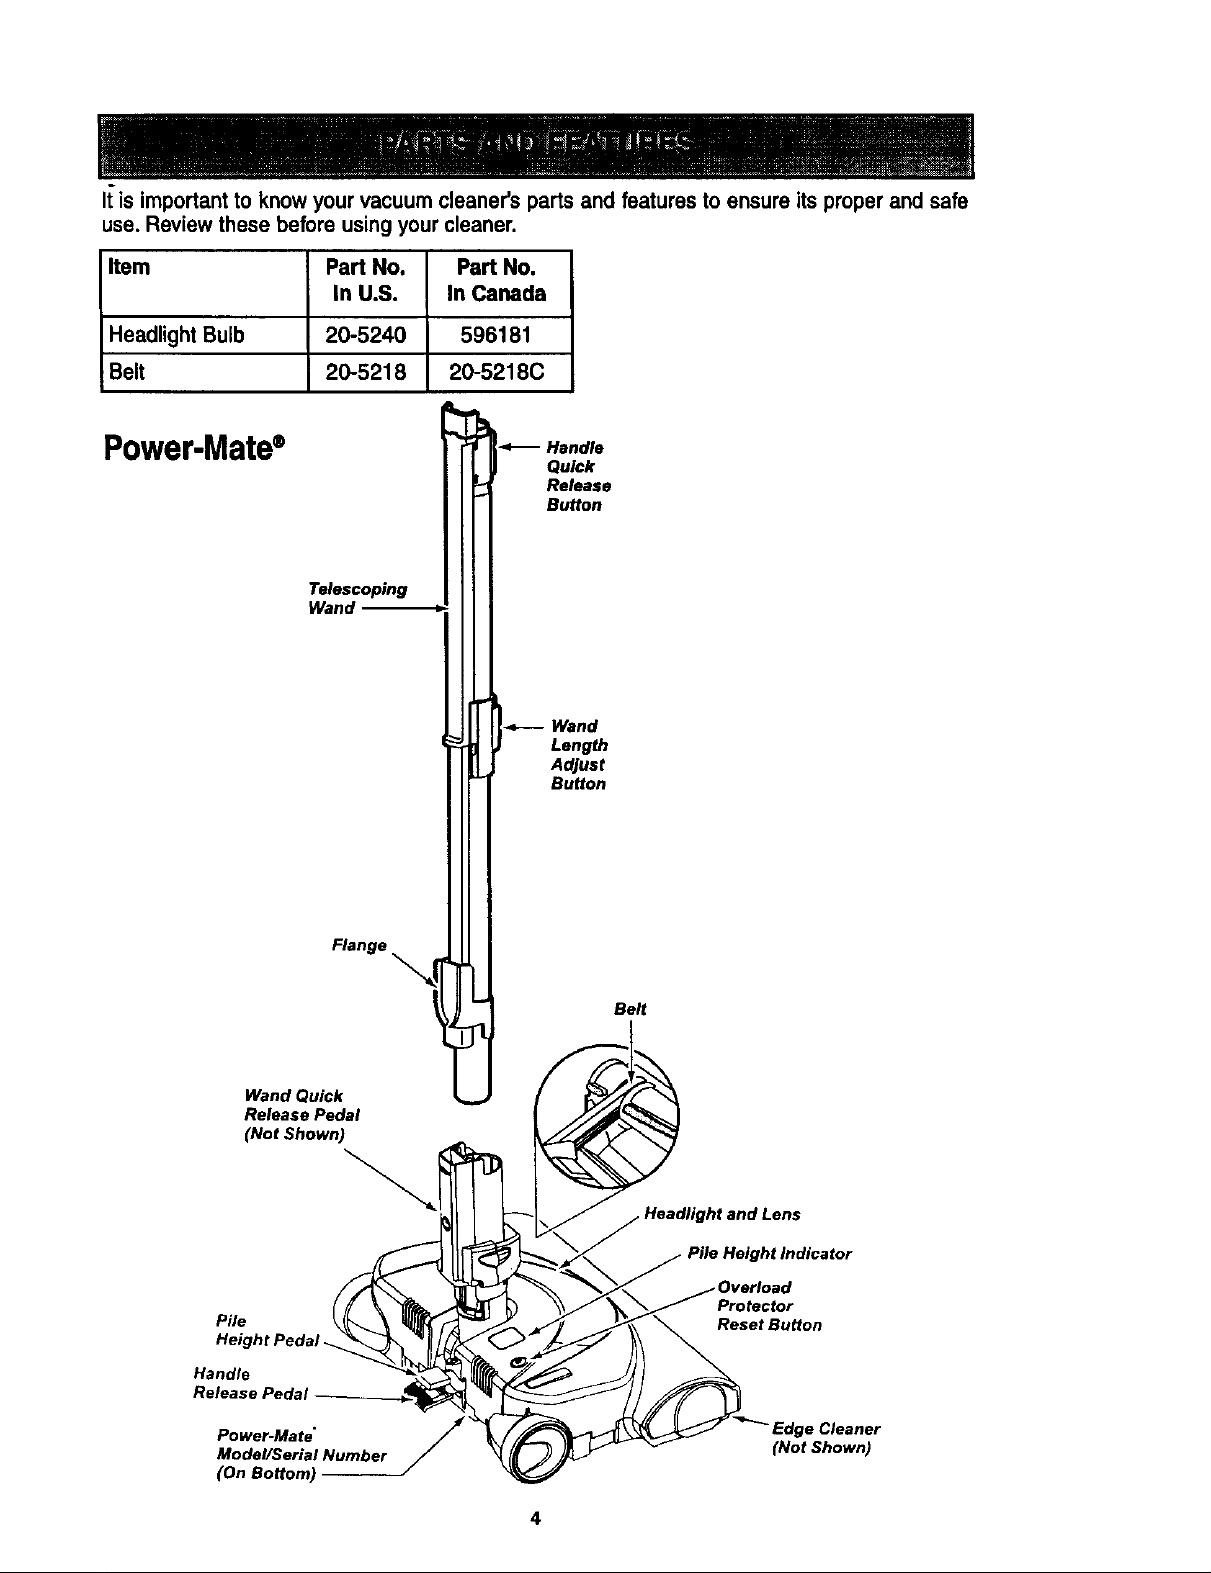
Itis importantto knowyourvacuum cleaner'sparts and features to ensure itsproperand safe
use. Reviewthese before usingyour cleaner.
Item Part No. Part No.
In U.S. In Canada
HeadlightBulb 20-5240 596181
Belt 20-5218 20-5218C
Power-Mate®
Handle
Quick
Release
Button
Telescoping
Wand
_---Wand
Length
Adjust
Button
Range
Belt
Wand Quick
Release Pedal
(Not Shown)
Pile
Height Pedal
Handle
Power-Mate"
Model/Serial Number
(On Bottom)
Protector
ResetBu_on
s Cleaner
(Not Shown)
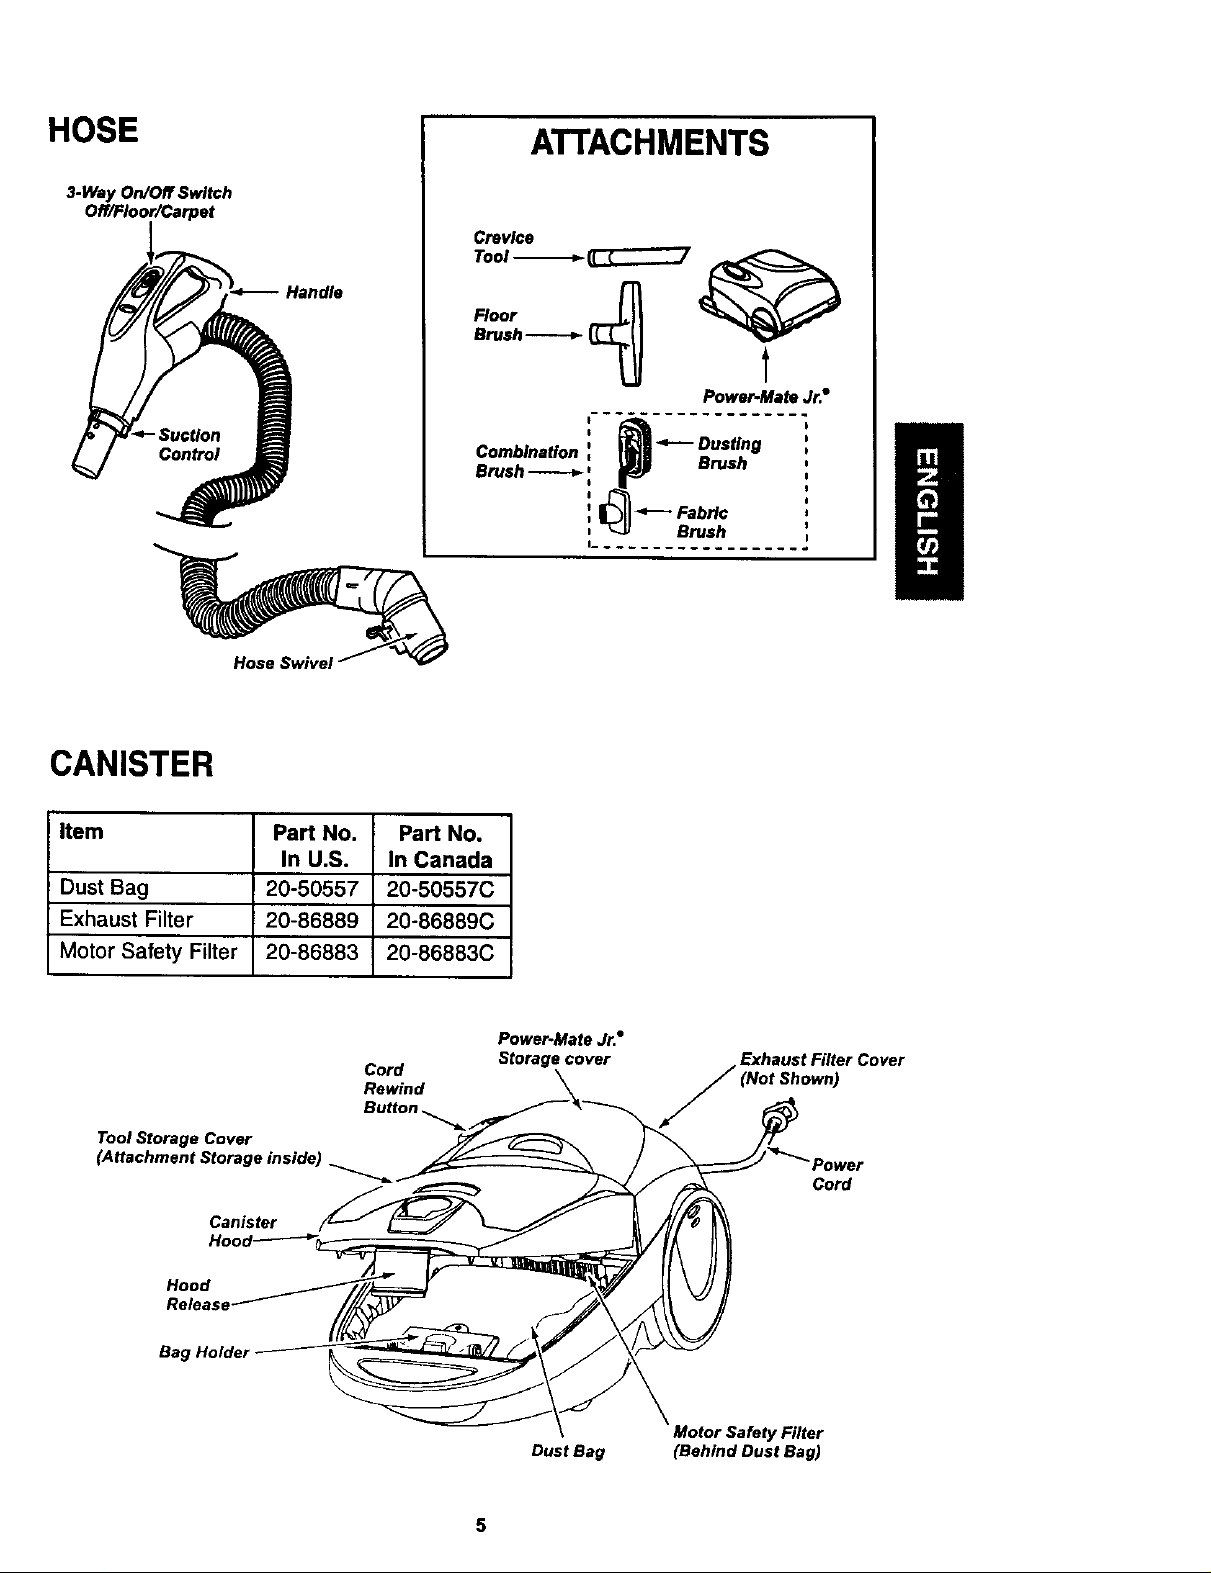
HOSE
3-Way On/Off Switch
Off/Floor/Carpet
_-q_-- H_,andle
L
J
ATTACHMENTS
Crevice
TOOI "_" _]_7
Floor
Brush _ _
Power-Mate Jr.°
It.................
Combination _E _ <-'- Dusting
Brush_ : __) Brush
CANISTER
Item Part No. Part No.
In U.S. In Canada
Dust Bag 20-50557 20-50557C
Exhaust Filter 20-86889 20-86889C
Motor Safety Filter 20-86883 20-86883C
Cord
Rewind
Button _.
Tool Storage Cover
(Attachment Storage inside)
I ................. d
Power.Mate Jr."
Storage cover
H
Exhaust Filter Cover
Cord
Canister
Hood
Bag Holder
Dust Bag
5
Motor Safety Filter
(Behind Dust Bag)
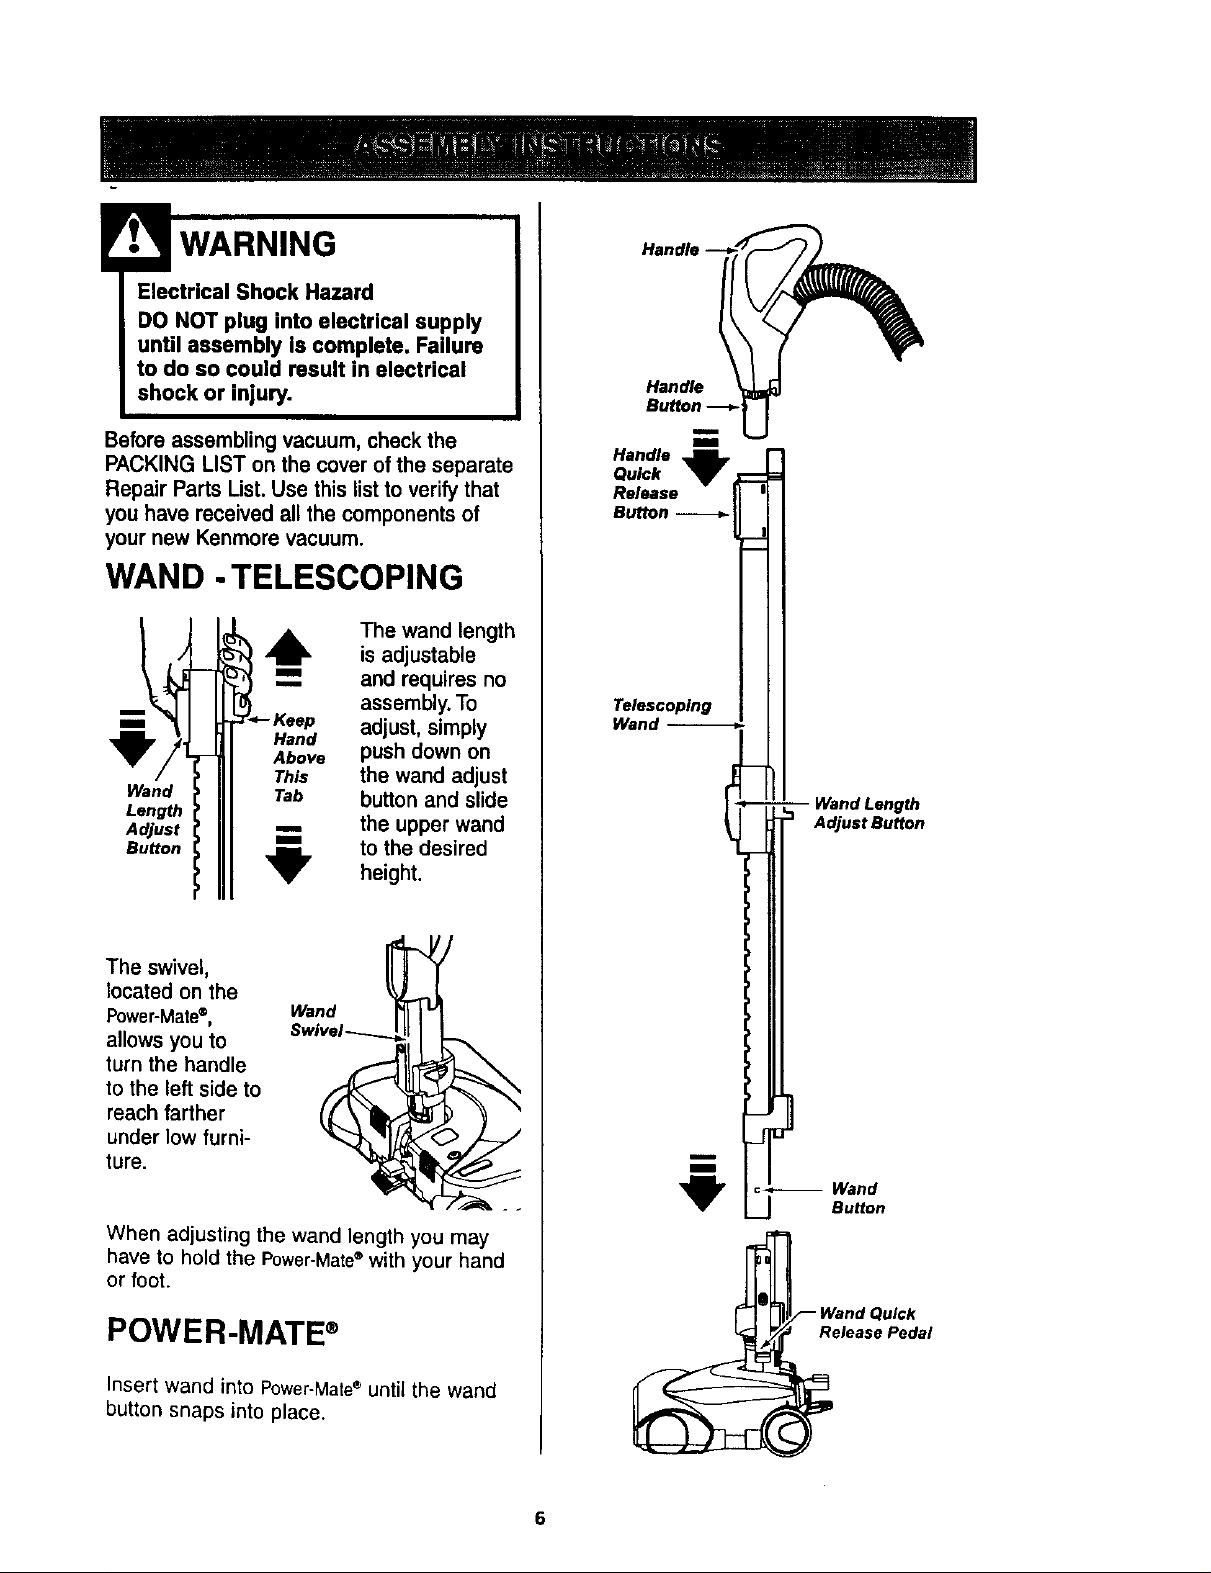
Electrical Shock Hazard
DO NOT plug into electrical supply
until assembly Is complete. Failure
to do so could result in electrical
shock or injury.
Beforeassemblingvacuum,checkthe
PACKING LIST onthe coverof the separate
Repair Parts List.Use thislistto verifythat
you have received all the componentsof
yournew Kenmorevacuum.
WAND -TELESCOPING
The wand length
6, is adjustable
="=.- and requires no
assembly. To
Hand adjust, simply
Above push down on
Wand
Length
Adjust
Button
This the wand adjust
Tab button and slide
the upper wand
_lr to the desired
height.
Handle
Handle
Quick
Release
Button
Telescoping
Wand
-- Wand Length
Adjust Button
The swivel,
located on the
Power-Mate®,
allows you to
turn the handle
to the left side to
reach farther
under low furni-
ture.
When adjusting the wand length you may
have to hold the Power-Mate® with your hand
or foot.
!
POWER-MATE ®
Insert wand into Power-Mate®until the wand
button snaps into place.
:_--_ Wand
Button
Wand Quick
lease Pedal
6
 Loading...