

Page 1
UsG & Cqtg GuidB
EIMJ
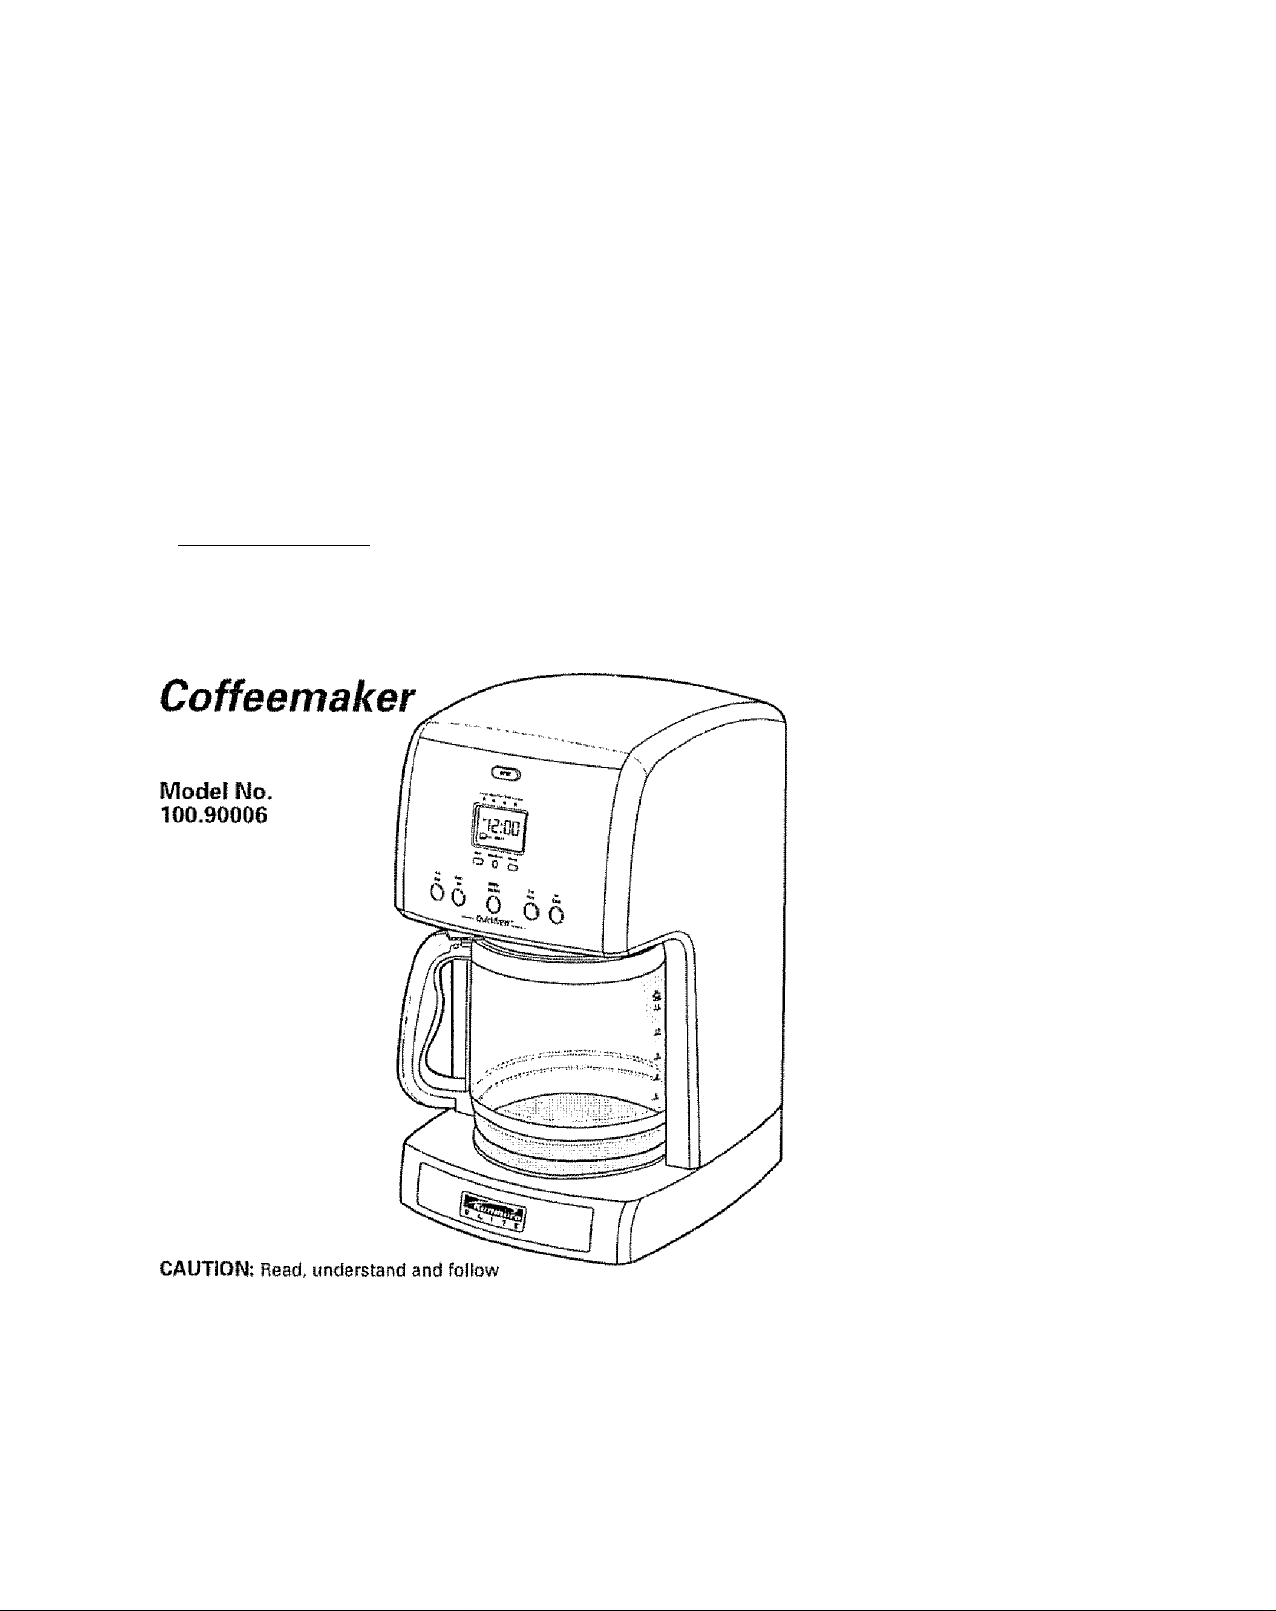
14-Cup Glass Carafe
all Important Safeguards and Operating
instructions in this iVlanual before using
this product
Sears, Roebuck snd Co., Hoffman Estates, !L 6017S U-S-A.
www.kenmore com
Page 2

lA/A DD A M“fv'
WAM H AIM 1 Y
KENMOae ELITE FULL WARRANTY
If this product fails due to a defect in material or worNmartship within five years form the
date of purchase, return It to any Sears store or other Kenmore outlet in the Untied States
for tree replacement.
This warranty does no! include eKpsmJabte parts, such as filters or blades, which can
wear out from rrormal use within the warranty period
This warranly applies tor only 90 days If this product is ever used for other than private
household purposes
This warranty applies only while Ihls product is used in the Urriled States
This warranty gives you specific legal righls, and you may also have other rights which
vary from state to state.
Sears, Roebuck and Co, Hoffman Estates, IL B0170
IMPORTANT SAFEGUARDS
When Using efectrlcsl appliances, basic safety precautions should always be
followed, Including fhe following:
1 READ all instructions.
2 DO NOT touch hot surfaces Use handles or knobs,
3. To protect against fire, eleclric shock and injury lo persons, DO NOT immerse cord,
plug, or the oofteemakec in water or other liquids
4 Close supsrvisiort is rrecessary when any appliance Is used by or near children.
5. ALWAYS UNPLUG caffeemaker from power outlet before cleaning, and whert storing
Allow to cooi before pulling orr or taking off parts, cleaning or storing
B DO NOT operate any appliartce with a damaged cord or plug, or after the appliancs
malfunctions or has been dropped or damaged in any manner Returrr appliance to
the nearest authorized service facifity for examination, repair or adjustment
7 The use of accessory attachmenta not recommended by the appliance manulacturer
may result in tire, electric shock or injury to persons.
6 DO NOT use ouidoDfs
9- NEVER 1st the cord hang over the edge of labia or counter or touch hot surfaces
10 DO NOT place coffssmaker on or near a hot gas or eiectrio burner or in a hEated oven
11 DO NOT use this coffsamakBr for anything other than its intanded use
Page 3
I wi PC) rt^Ht s aiIeg^u
12- The carafe Is cfeslgned for use only with this cofiesmeker.
13 Scalding may occur i( the Sid is removed during the brewing cycles
ALWAYS keep the lid on the carafe when in use
14 , To protect against etecirlcBl shock, tills appliance is equipped with a cotd having
a 3-prong grounding-type piug for Insertion into a proper groimdtng-type receptacle
DO NOT alter the plug ter use in a 2-prong receptacle if the plug will not fit Info
a recepiaolB, have the proper receptacle mstallsd by a qualified Biectfidan
15 SAVE THESE INSTRUCTIONS!
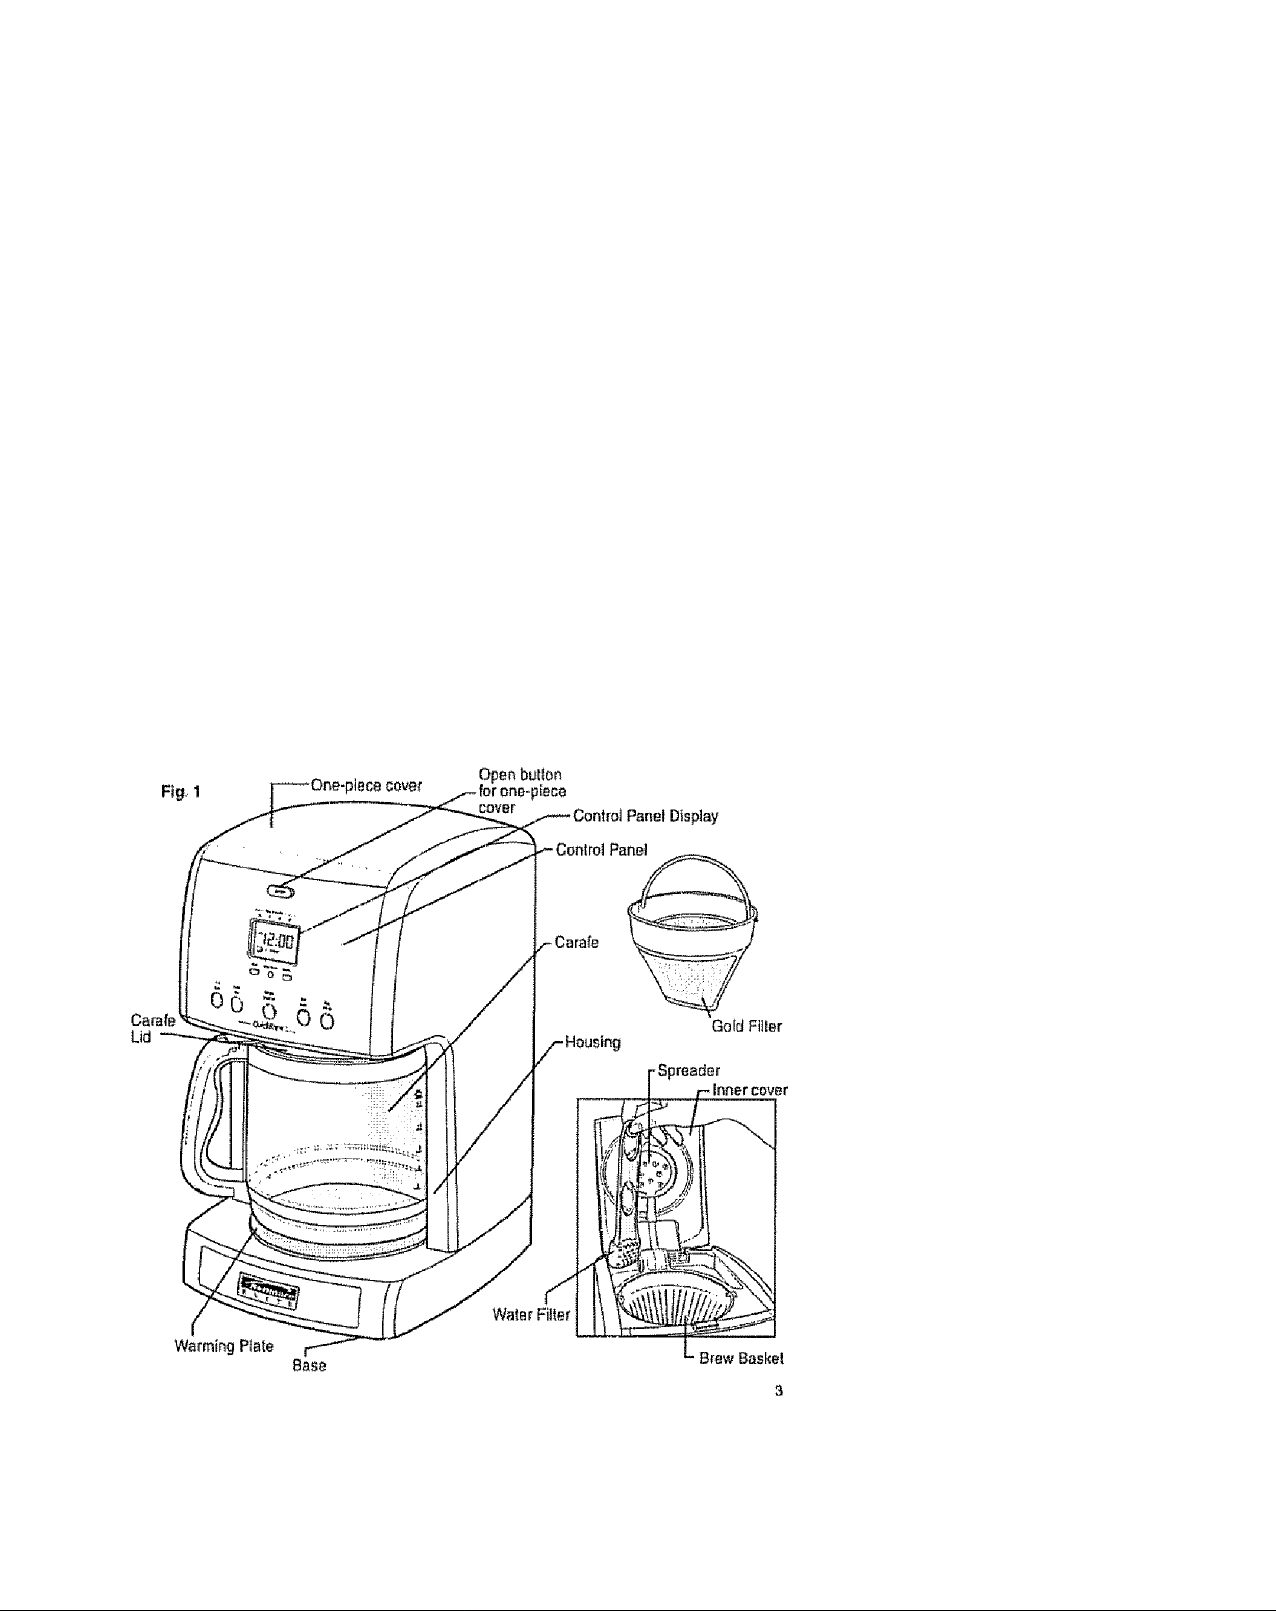
PARTS AND FEATURES
Page 4

PREmRING TO USE^
SefoFe She first use of the coffeemaker wash She brew basket, the permanset gotfrtone
ffller. the carafa and carafe fid in either the fop rack of your dishwasher, or by hand
In warm, sudsy water.
The exterior ot the coffBemaker, the conSroi panel area and the warming piale shouid
only be dearsed with a soft damp cloth
NOTE: NEVER clean the warming plate unless If Is completely cool.
To clean the inside of the
reservoir cover, open the
one-piece cover, allowing
it to rest in the open position.
Pull the water spreader hose
out from under the guide on
Ihs inside ol the iid (See Fig. 2).
wipe surfaces with a damp
cloth, replace water spreader
hose under guide, arrd close
cover
NOTE: DO NOT use abrasive cleansers or scouring pads when cleaning
your coflesmaker. NEVER immerse the cofleemaker in water or any liquid.
Alter a!i parts are washed for the first lime, pour cold water up to the 14 cup level mark
in the water reservoir. Brew it through the coffeemaker as instructed in BREWING, but do
not add colfee grounds to the paper filier When done, turn off the oofteemBkar and
discard the water from the caraia
Page 5

ОШйШЫйШОй СОРШЕМ
The easy-lo-use programmable dlgliat cortlrols let you know when the colfee is ready,
and evan keeps track of the freshness of each brewed carafe It's rtSMSf been easier to
brew the perfect cup of coffee
BREWfNQ COFFEE
1 Press fhe Open butfon on Ihe control panel
and 1Ш the one-piece cover (See Fig,3),
2, Use the carafe to fill (he water reservoir
of the coffeemaker to the desired level
with cold water. There Is a gauge
marked from 2 lo 14 cups on bolh the
coffeamaker’s water tesarvoir and
on the sides of fhe carafe (se e Fig. 4)
These marks show the amounl of cold
water naeded for each cup of coffee.
The amount of brewed coffee will differ
slightly due lo the coffee grinds
absorbing some water
3 Place either Ihe permanent gold-lone
filter or a size 1 X 4 p^er iter into
the braw basket (see Fig 5).
4 Add ground coffee The amount of
coffee you use is a matter of personal
taste (we recommend one heaping
tablespoon for every two cups}
ExperSmanl... try different amounts of
ground coffee par cup until you brew
your perfect cup of coffee, You can also
try using the paper filter along with the
gold-tone filter.
5 Close the cover Place carafe on
the warming plate and plug In Ihe
appiianca.Tha display window
illumirtBles blue and the coffeemaker
beeps for about 3 seconds to let
you know the clock is not set. The
clock does not have lo be set lo
brew coffee,To set the clock lime,
see SETTING THE CLOCK, TIMER
AND AUTO-BREWING.
Page 6

OPERATING YOUR COFFEEMAKER
6. Turn on the coffeemaker by pushing in the BREW ON/OFF button. The ON/OFF
button will illuminate blue and the word Brew will show up in the control panel display
showing that the coffeemaker is brewing. In a few seconds, hot water flows into the
filter. When the water has stopped flowing, the coffeemaker automatically switches
to the warming mode. For delayed brewing, see SETTING THE CLOCK, TIMER AND
AUTO-BREWING.
7. When you have poured out all the coffee in the carafe, press the BREW ON/OFF
button to turn off the appliance, and remove the carafe from the warming plate.
NOTE: If the coffeemaker is not turned off, it will automatically shut itself off
after two hours.
PAUSE AND POUR FEATURE
The pause and pour feature enables you to remove the carafe from the Coffeemaker
and pour a cup of coffee before brewing is finished. When the carafe is removed,
a special valve stops the flow of coffee from the brew basket to the carafe. Brewing does
not stop. If the carafe Is not replaced under the brew basket after 20 seconds, water and
coffee will overflow from the brew basket.
OPERATING THE CONTROL PANEL
SETTINGTHE CLOCK,TIMER AND AUTO-BREWING
USE THE Set Clock Button TO SET THE CLOCK:
1. Press Set Clock button and the button’s indicator light will flash.
2. Set the time of day by pressing the Hour and Minute buttons. Be sure to set the time
with the correct AM and PM designation.
3. You can make the hours and minutes move more quickly in the clock display by
holding the buttons down.
4. if you press the Set Clock button and don’t do anything for 5 seconds, the button’s
light flashes 5 times then turns off. To resume, press the Set Clock button again.
The clock starts a few seconds after you finish setting it.
SET THE Set Auto Button TO PROGRAM IN A BREW TIME:
1. First set the clock. See directions above.
2. Press the Set Auto button and the button’s indicator light will flash.
3. Set the time you wish the coffeemaker to begin brewing by pressing the Hour and
Minute buttons. Be sure to set the correct designation of AM or PM.
4. You can make the hours and minutes move more quickly in the clock display
by holding the buttons down.
Page 7

OPERATING THE CONTROL PANEL
USETHE Auio On BullonTO SETTHE AUTOMATIC BREW TIME:
Once you have set the corraci time to begin lha automatic brewing and tiie dock has
returned to the time ol day, push in the Auto On button. On the display parte! under the
time of day the word Auto will some on, along with iha icon ol a clock face These
(iidicata that the automatic timer is now activated
The Auto Brew can be cancelled at any time by pressing the Auto On button a second
time. The Auto On light goes out To check what time the Auto Brew is set for, push irr the
Set Auto button and the time wif! bs displayed,
1-4 GUP BUTTON
This speda! cycle optimizes the
flavor when brewing 1 to 4 cups oi
coffee, but it can also be used to
increase the brew strength of any
number of cups you зге brewring.
Press 1 -4 Cup button ones and the
blue iight illuminates and the stronger
brewing option is activated An icon of
a cofise carafe and 1-4 Cup will show
on the panel display under the time
(See Fig, 6). Now press the ON/OFF
button to start the brswlnp process
NOTE: Tfis 1-4 Cup cycle button must
be pushed before the ON/OFF button
is pressed. If not. the 1-4 Cup cycle wiil
not be activated
Rg,6
10:00
о 0 о
-QufctUr««-
TIME SINCE BREW iN PANEL DISPLAY
Time Since Brew is an indicator of the freshness
of your carafe of coffee designed into your coffeernaker.
After you Have brewed a pot ol cofise, the coffesmaker
keeps track of its freshness
For the first 15 mlnufes after you brew, there Is
no indicator. After 15 minutes and up to 30 minutes,
one blue LED light appears under the indication Time
Since Brew under the number 15 At this time a long
beep will Eoorrd to notify you of the change of freshness
Once the carafe has been sitting for 30 to 45 minutes, a blue LED light also appears under
the number 30 Another iong beep sounds.
After 45 to 60 minutes an LED also appears under the number 45 along with a beep, and
aiter 00 minutes end loirger, an LED iight appears under the number 60 with another long
beep The coffeernaker will shut itself after 2 hours. At this time another long beep will
sound A long beep also sounds when the coffeernaker Is turned OFF
Page 8

CARE AND CLEANING
ALWAYS UNPLUG Ihe coBeemaker from the electric ouitel before cleanm§ The exterior
of the coifeemaiter, the control panel area artcf the warming plate should only be cleaned
with a soft damp cloth
WARNING: never ¡mmerse the coffeemaker in water or any liquid .
cool. DO NOT use abrasive cleansers or scouring pads.
To dean the inside of the reservoir cover, open the orsa-ptece cover, allowing It to rest in
the open position Pul! the wafer spreader hosa out from under the guide on the insIdB of
ihe iid {See Fig Z], wipe surfaces with a tiamp cloth, rsptaca water spreader hose under
guide, and close cover Do not use abrasive daansars ar scouring pads.
CARAFE CARE
A damaged carafe may result in possible bums from a hot llquid-
To avoid breaking:
1, DO NOT allow all liquid to evaporate from the carafe while on the warming plate
and never heat Ihe glass carafe when amply
2 DISCARD Ihe carafe if chipped, cracked, or damaged in any manner,
3 NEVER usa abrasiua scouring pads or cleansers; they wiil scratch and waakan
the glass
4, DO NOT place the carafe on or near a gas or electric burner, in a heated oven,
or in a microwave oven
5- Avoid rough handling and sharp blows
6. DO NOT set a hot carafe down on a wel or cold surface
CLEANING THE COFFEEMAKER AND CHANGING THE CHARCOAL FILTER
After every 70 cycles, or carafes of coffee, a rsmindar will appear in the control panel
display, change filter and clean along with three beeps, to tell ihe user it is tima to dean
the inside of the cofiaamaker of aif mineral buildup, and to change the water filler.
Mineral deposits left by hard water can clog your coffeemsker. Cleaning Is rscammaridad
about every 70 uses, when the oofteemaker’s rsminder lets you know you have reached
this point
plate unless It ia compfeteSF
Page 9

CARE AND CLEANING
To Clean:
1. Press the Filler Reset buttoe on lha control
panel to slop the Winking vvords icon and the beeps
(Fig 8)
2 Open the lid of reservofr, atrtJ puH out the water (ilter
(Fig 9)-
3- Pour white vinegar into water resarvolr up to the
7-oiip levai shown Inside reservoir,
4 Add cold water up to the 14-cup line
5 Put a paper trlier in the brew basket, doss cover,
and piace empty carafe on the warming plate,
6 Turn ON the cotfsamaker and 1st half of the
vinegar water solufiofs brew through and
Itrlo carafe-
7 Turn the coffee maker OFF at this point and
tel it soak lor at least 15 minutes to soften
any deposits,
a Turn the Eofteemaker back ON and draw the
remaining solution Into the carafe When brew
cycle has slopped, turn OFFcoffeemakar, empty
carafe, and discard soiled paper filtsr-
RsHIt reservoir with cold water and turn ON to
run another brew cycle. You may want to
repeat again to Bllmtoate arsy vinegar
Sfnell/laste
10- Wash the brew basket and carafe
11 Open the Wafer Filter, puli out the
old charcoal, discard and
replace with a new one (Fig 10}
12. Place the Water Filter with new charcoal
into the reservoir, Coffeemaker is cleaned
and ready for use.
To reset the cycle count and rsmcwe Ihs reminder in the control panel display, push the
“Filter Hesef button
Page 10

Get it fixed, at your home or ours!
Your Home
For repair “ fn yo«r home - of al! major brand appliances,
lawn and garden equipment, or heating and cooling systems,
no matter who made it, no matter who sold it!
For the replacement parts, accessories and
owner’s manuals that you need to do-iFyourself
For Sears professional Installation of home appliances
and items like garage door openers and water heaters
1-800-4-MY-HOME® Can anytime, day or night
(1-60D-465-4663) (USA. a« Canada)
WWW seers com www.saars ca
Forsxperi ftame solulions advice' www.managsmyhotne.cpm
Our Home
For repair of carry-ln products like vacuums, lawn equipment,
and eiectronics, call or go ofi-line for the nearest
Sears Parts & Repair Service Center
1-^800-468-1222 (U S A ) 1-800-469-4663 (Canada)
Csll anytime, day or night
www.aaar&.com
To purchase a protection agreemefil on a product serviced by Sears;
1-BOO-827-6655 (USA) 1-800-3B1-B6B5 (Canadfe)
Para pedir servido de reparación
a domicib, y para otdenar piezas:
1-BB8-SU-HOGAR®
(1-aB8-?S4-&t27)
& Sears Biatids,LLC
W RogtetBîiïii Trademark i Trederasrk ! Serytes Mark et Seats Brands. LLC
® Mares Regisliada i Marta de Fabrice / Marra tSe Servlclo de Sa»ts Sraads LLC
Marque de ramtaetee / Marque déposée de Sears Srands. LLC
Au Canada pour service en français;
1-aOO-LÊ-FOYERWc
(1-600-533-6937)
www seers ce
 Loading...