

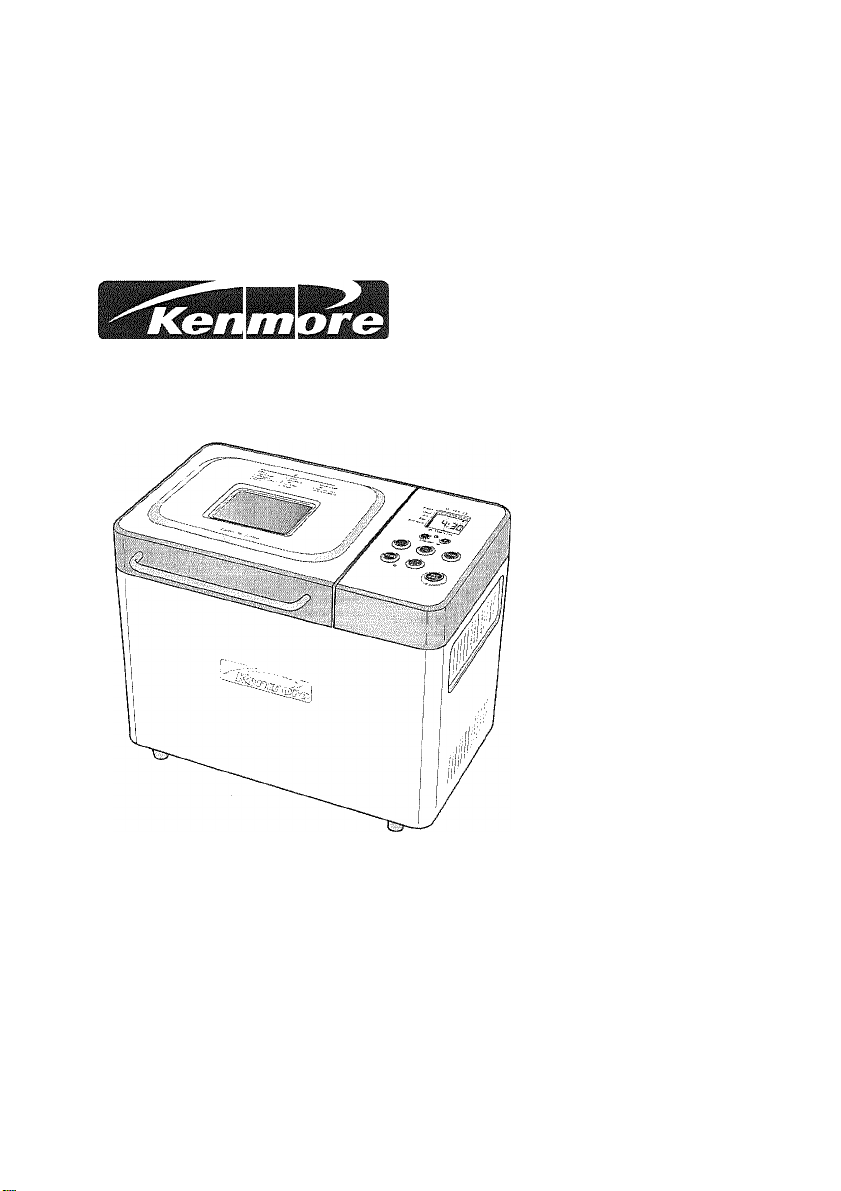
Use & Care Guide
Bread Maker
Model No. 100.12934
CAUTION: Read, understand and foliow all important Safeguards
and Operating Instructions in this Manual before using this product.
Sears, Roebuck and Co., Hoffman Estates, !L 60179 U.S.A,
k^wv^en m o re. CO m
IB-12934

WARRANTY
IMPORTANT SAFEGUARDS
KENMORE FULL WARRANTY
If this product fails due to a defect in material or workmanship within two years from date
of purchase, return it to any Sears store or other Kenmore outlet in the United States for
free replacement.
This warranty applies for only 90 days if (his product is ever used for other than private
household purposes.
This warranty only applies while this product is used in the United States,
This warranty gives you specific legal rights, and you may also have other rights which
very from state to state.
Sears, Roebuck and Co., Hoffman Estates. IL 60179
IMPORTANT SAFEGUARDS
When using electricai appliances, basic safety precautions should always be
followed, including the following:
1. Read all Instructions.
2. DO NOT touch hot surfaces. Use oven mitts to remove the hot bread pan.
Do not place your hand inside the oven chamber after the bread pan has been
removed- as it will be very hot.
3. Remove all packaging plastics and other materials from unit before operating.
4. To protect against electric shock, DO NOT immerse cord, plug, or main Bread Maker
unit in water or other liquids.
5. When using this appliance, provide adequate air space above and on ail sides for air
circulation. Use in a weli-ventiiated area. Make sure steam vents on sides are
uncovered during use. On surfaces where heal may cause a problem, an insulated
heat pad is recommended.
6. To prevent spillage inside the oven chamber, always remove the bread pan from the
machine before adding the ingredients. Ingredients that splash onto the heating
element can burn and cause smoke.
7. UNPLUG from outlet when not in use. before fitting or removing parts and before
cleaning. Allow unit to cool before cleaning, installing, or romoving parts.
8. DO NOT operate any appliance with a damaged cord or plug, or after the appliance
malfunctions or has been dropped or damaged in any manner. Return appliance to
the nearest authorized service facility for examination, repair or adjustment.
9. Placing the Bread Maker in direct sunlight, near hoi appliances or in a draft can all
affect the internal temperature of the ovon, v,ihich could cause poor results,
10. DO NOT use outdoors.
11. Keep hands, etc. away from moving parts inside the Bread Maker.
12. NEVER let the cord hang over the edge of table or counter, or touch hot surfaces.
13. Do not operate the Bread Maker when empty, as this could cause serious damage.
14. Do not overload Bread Maker by exceeding the maximum capacity.
15. DO NOT use this appliance for anything other than its intended use.
16. DO NOT store any materials in this Bread Maker when not in use. NEVER place
paper, cardboard, plastic, or other flammable items in the unit.
17. Close supervision is necessaiy' when any appliance is used by or near children.
]
Supervise children to ensure that they do not play with Bread Maker.
18. To protect against electrical shock, this appliance is equipped with a cord having
a 3-prong grounding-type plug for insertion into a proper grounding-type receptacle.
DO NOT alter the plug for use in a 2-prong receptacle. If the plug will not fit into a
receptacle, have the proper receptacle installed by a qualified electrician.
19. Your Bread Maker has a 6 to 12 minute power interruption protection feature in case
the unit is accidentally unplugged during operation, or the power goes out for a
shod time. The unit will continue with the program if it is plugged back in right away or
if power interruption is less than 6 minutes,
20. This appliance is for household use only.
21. SAVE THESE INSTRUCTIONS!
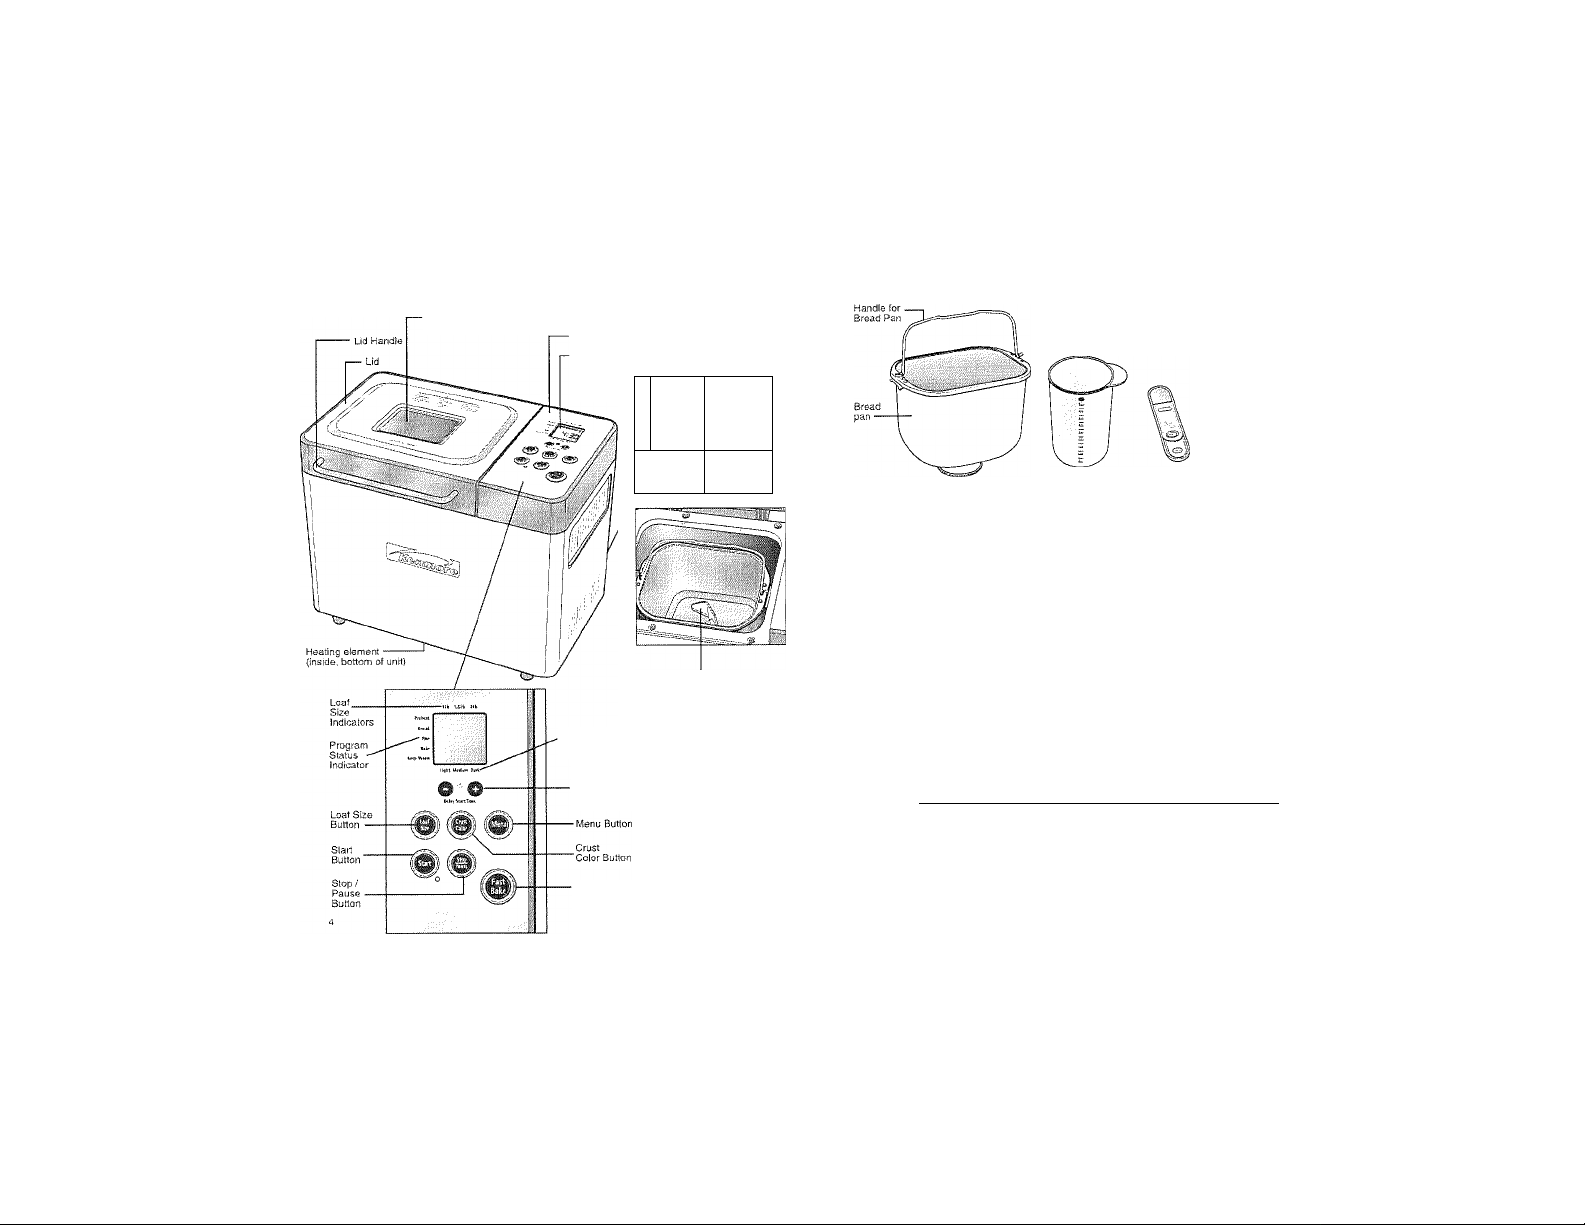
Fig-1
PARTS AND FEATURES
"Viewing window
Control Panel
- LCD Display Window
Crust Color Indicators
(Light. Medium. Darkl
Deiay Start Timer
Buttons (Plus and Minus)
Fast Bake Button
miliJill
On / Off Po
(at rear of i
Kneading Blade
ver Switch
nitl
PARTS AND FEATURES
Measuring Cup
CONTROL PANEL INSTRUCTION (see Fig. 1 and 2)
1. LCD Digital Display (see Fig. 1)
Shows the following:
• Number for each program setting (1 -13). then shows preprogrammed total
bread making lime with minute by minute countdown of time remaining on
selected program.
• Crust color (Light, fMedium or Dark)
• Loaf Size (1.0 Lb, 1.5 Lb, or 2.0 Lb)
• Program status indication
• Red light comes on when unit is operating
2. Loaf Size Button (see Fig. 1)
Press to select the loaf size for the recipe you are making (1.0 Lb. 1.5 Lb or 2.0 Lb).
Default setting is 1.0 Lb.
3. Crust Color Button (see Fig. 1)
Lets you choose the preferred crust color:
Light. Medium or Dark.
Default setting is Medium crust.
4. Menu Button
Press the menu button to select the programmed baking cycle you want. Menu
numbers are on the lid of Bread Maker (see Fig. 2). If you go past the program
number you want, keep going until you reach it again. Default setting is program 1.
Fig. 2
1 Basic
2 Rapid White 7 Quick Bread
3 Wholewheat
4 Rapid Wholewheat 9 Gluten Free
5 French
MENU
6 Sweet 11 Artisan Dough
8 Cake
10 Dough
Dual Measuring
Spoon {Itsp. and 1 tbsp.)
12 Jam
13 Extra Bake Time
(lOmin to 90min)
PARTS AND FEATURES
PARTS AND FEATURES
5. Start Button
Press to begin the programmed baking cycle.
6. Stop / Pause Button (see Fig. 3)
Use this button to pause the program for adding ingredients, or to cancel the entire
program. Press button, add extra ingredients, then push the Start button to resume.
To cancel a program, press and hold Stop / Pause button for about 3 seconds
untii unit stops.
7. Fast Bake Button (see Fig. 3)
This cycle comes in handy when you cannot plan ahead for bread making.
The Fast Bake feature allows you bake bread in about an hour.
8. Delay Start Timer Buttons -
Plus and Minus (see Fig. 3}
Use these buttons to program bread to be baked at a delayed time, {up to 12 hours).
The delay timer will not w'ork on the ‘'Fast Bake" program. It is also not
recommended for the dough, lam or gluten free settings. Set the timer for how
much time you want to pass before the bread is completed. For example, if it is
8:00 pm and you want bread to be ready at 7:00 am. you set the delay timer for
11 hours. The Bread Makerthen calculates when it has to come on.
NOTE: Do not use perishable ingredients in the Delay Start mode, such as milk,
eggs, cheese and yogurt. You can also use these buttons to adjust the lime on any
program. They adjust up and down in 10 minute increments. This must be done
before the unit begins operation.
PROGRAM SETTINGS
The following program settings will make is easy for you to make a great variety of breads
and fruit jams. For each selected setting, the baking time has been preprogrammed. The
recipes provided on pages 13-21 will help you determine which program setting you should
use. NOTE: These timings are for a Medium Crust. Timing will vary somewhat depending
on the crust color you select.
Description
2.0Lb
Program
Setting
BiiSic
Rapid Whila
Whole Wheat
Rapid
Whole Wheat
French
Sweet
Quick Bread
Cake
Gluten Free
Douqli
r.v liours
rLsc time
ArtisQn Dough
5 hi hours ’
пае lime
Jam
1 hr. 25 min.
cook time
Extra Bake
Fast Bake
Program
Menu #
1 3:05
г
3
4 2:34
5
6 3:19
7
s 1:22
10
n
12
13
Button
1.0 Lb
2:40 ?.:4,n
4:20 4:25
3:32 3:36
-
1.5 Lb
3:10 3-15
2:39 2:44
3:22 3:25
-
2:54
- -
:5e
You can use this setting ior most tedpes that
use while Hour
Ouickiv bakes kiaves of breaiJ made- with
2:50
v4jilc IlDur. Recipes must use rapid-rise yeast
Uss lor bread that conlalris a large amount of whole
4:30
ivheat flour. Th:s selling has a longer nse cycle
Quickly bakes loaves of bread made with «'hole
kvheat flour, Recipes must use rapid-rise -yeast
Bakes bread with thin crust anrJ light texture
3:40
Bakes bread that contains higher amounts ot
sugar and eggs, which tend to increase oro-wning
Bakes bread thal contains baking oowtjer
2:0B
instead ol -yeast
Bake? yeast bread with ingredients other than
-
those contain ng wheal or other gluten
Prepares dough that can then be shaped to
make coffee cakes, rolls, pizza and other breads
2:59
and baked in a conventional oven
Several Icing, slo-w. cooler rises lo enhance the
laxturo. taste and crusi in ttio final product.
Punch down for 10 sec. alter 3rd nsc.
This setting Is for making ;ams from fresh fruit.
The blade automatolly stirs the contents
throughout the cook time
Adds extra lime in 10 miriule increments.
Add time before cycle begins
Suitable for white bread recipes made with rapid
-
rise veast. These oreads are best consumed vdlhiri
2 hours after preparing.

PARTS AND FEATURES
OPERATING THE BREAD MAKER
EXTRA BAKE- You can manualiy adjust the amount of time for any baking by using the
plus and minus buttons to change the time in 10 minute increments. This must be done
at the beginning, before the programmed baking begins,
FAST BAKE - The Fast Bake cycle goes through kneading, rising and baking in
approximately an hour. Mix-ins must be added at the very beginning of the cycle
with other basic ingredients. This cycle comes in handy when you cannot plan ahead
for bread making. The kneading and rising of this cycle is suitable for white bread
recipes. Bring all ingredients to room temp and liquids to 100 ‘^F, The texture and rise
of the bread is greatly improved by adding vital wheat gluten to the mixture - in a pinch
it can be left out, but keep it on hand for Fast Bake Loaves.
KEEP WARM FUNCTION - After the bread has baked, the Bread Maker will go into a
Keep Warm mode to keep the bread warm and to ensure that the crust does not
become too soft. Also, items baked using the Fast Bake setting benefit from this step.
This function lasts for up to 60 minutes.
PREPARING YOUR BREAD MAKER i
BEFORE FIRST USE;
Before using your Bread Maker, remove any packing material, plastic, labels, stickers or
tags that may be attached to the appliance. Clean the appliance thoroughly:
1. Wash the bread pan, kneading blade, measuring cup and measuring spoon in hot.
soapy water.
2. Rinse and dry thoroughly.
3. Do not use a dishwasher to clean bread pan. Dishwashing can damage the non-stick
properlies of the bread pan, allowing bread to stick during baking.
3. DO NOT IMMERSE BREAD MAKER IN WATER.
4. The exterior of the Bread Maker can be cleaned with a soft damp cloth and warm
soapy water. Dry thoroughly. Do not use abrasive materials or cleaners.
5. The Oven Chamber can be cleaned with a damp cloth and dried thoroughly. Only clean
oven chamber when it is cool.
Place Bread Maker on a dry, flat, level surface such as a countertop or table. Leave plenty
of room around unit for air circulation. Make sure you have enough room above unit to
open the lid.
1. Lift out the bread pan by pulling
up on its handle.
2. Fit the kneading blade (see Fig. 4)
onto the drive shaft in the bottom
of the bread pan.
3. Pour the water, or other liquid called for
as the first item in the recipe, into the
bread pan.
4. Unless otherwise instructed, add the other
ingredients at room temperature to the pan
in the order listed in the recipe. Yeast should
always go in last. Make a small indentation
with your finger in the top of the dry ingredients
and add the yeast to the indentation. Do not let
the yeast touch the liquid below.
5. Make sure all ingredients are measured and weighed accurately. Use the see-through
measuring cup included for liquids, and measure at eye level. For dry ingredients, use
a measuring cup that can be leveled off with the straight edge of a knife or metal spatula.
A measuring spoon is also included, for tablespoon or teaspoon measures. Level off dry
ingredients. Inaccurate measurements will produce poor results.
6. Insert the bread pan into the oven chamber and push down firmly until it fits into the
drive coupling in the bottom of oven chamber, and dicks into the two clips on each
side of bread pan handle. If pan is not inserted correctly, the kneading blade cannot
work properly.
7. Lower the bread pan handle and close the Lid. Plug in and switch On. The unit will beep
and the program default setting of 1 v/ill display, then the cook time for Program 1,
3:15(3 hr,s. 15 min.).
8. Press the Menu Button until you see the program number you want in the LCD Display
Window. Refer to the chart on top of the Lid for program numbers. If you miss the
program number you wanted, just keep going through all of them again until you come
back to it. DO NOT use the plus and minus buttons. They are only for lime delay settings
and extra bake times. NOTE: If using the Fast Bake setting, just press the button and the
program will start automatically.
9. Select the loaf size you are going to make by pressing the Loaf Size Button until the
indicator in the LCD Display Window- points to your choice. The default setting is 1 Lb.
Keep pressing the button until indicator is pointing to your desired setting.

OPERATING THE BREAD MAKER
BREAD MAKER TIPS AND TECHNIQUES
10. Select the crust color you desire by pressing the Crust Color Button until the indicator
in the LCD Window points to your choice. The default setting is Medium. Keep
pressing the button until indicator is pointing to your desired setting.
11. Press the Start Button. Timer in display window will start to count down the time
remaining on your selected program. To stop or cancel the program, press and hold
the Stop / Pause Button for about 2 to 3 seconds. The red light will go out and the
display will read the last program number.
12. For recipes that require the addition of extra ingredients after the Bread Maker has
begun its programmed cycle, five beeps will sound, repeating three times. This is the
signal to add additional items.
13. For removal of kneading blade, listen for six beeps, repeated three times. At this point
you may push the stop/pause button, remove pan and take out dough, then kneading
blade, return dough to pan, and replace in bread maker. Be sure to push the Start
button again at this time.
14. At the end of the cycle the red light will blink, the unit will emit 10 slow beeps, and the
timer will have counted dov^fn to zeroes. The LCD Display indicates the Bread Maker is
in the V'Jarm mode. The bread will be in kept warm for up to 60 minutes, The red light
on the unit continues blinking to show the unit is still On and active.
15. To remove bread, turn off the Switch (in back of unit) and unplug the Bread Maker.
Using hot pads or oven mitts, lift out the bread pan by its handle. The pan is very hot.
16. Turn the loaf out of the pan and onto a wire rack to cool. If necessaiy, use a nonstick
spatula gently inserted along the sides of the pan to loosen bread. NOTE: Metal
utensils might scratch the nonstick coating on the bread pan.
17. If you have left the kneading blade in during the baking, it will most likely remain in the
bread pan. Once pan is cooled, remove kneading blade from bread pan. If the kneading
blade slays in the loaf of bread, simply lake it out.
18. Leave the bread to coo! for about 30 minutes, or it will not slice properly.
19. Clean the bread pan and kneader immediately after use. (See care and cleaning).
NOTE: The Bread Maker will not operate again until it has cooled down.
1. Follow the Directions: The liquid is always the first ingredient. Dry' ingredients follow
and the yeast is added last. Make a small well in the center of the flour and place the
yeast there. This is especially important when using the delay-bake function to avoid
activating the yeast too soon.
2. Measure carefully: Use the appropriate measuring tools and measure carefully. The
measuring cup included can be used for liquids, measured at eye level. Spoon dr/
ingredients into a standard measuring cup and level off with the straight edge of a knife
or metal spatula. Use measuring spoons for liquid and dry ingredients. Level off dry
ingredients.
3. Keep Ingredients Fresh: Use fresh ingredients at room temperature. Use Bread Flour
in the USA, and use All-Purpose Flour or Bread Flour in Canada. Use yeast that has
an expiration date of at least 6 months in the future. Avoid using perishable ingredients
(such as milk, eggs and cheese) when using the delay-bake function.
4. The Perfect Dough: In very humid weather, bread may require a little more flour. Check
bread toward the end of the first rise. If it seems sticky, add 1 or 2 tablespoons of flour
to the second kneading cycle until the dough forms a smooth ball. If the bread seems
very dry or knocks in the kneading cycle, sprinkle room temperature water into the pan,
1 teaspoon at a time, until dough forms a smooth ball.
5. Look But Don't Open: The glass in the cover is there to monitor the process. Do not
open the lid during the baking process. In the initial mixing you may open the cover to
use a rubber spatula to blend in any ingredients that have stuck to the sides of the
bread pan or to add ingredients at the 5 "add ingredient" beeps repeated 3 times.
6. Have Patience: Wait at least 30 minutes before slicing freshly baked bread; it will still
be deliciously warm but easier to slice. If you like a crisp crust, remove the bread as
soon as the baking cycle is complete. To make another loaf of bread let the unit cool
completely.
7. Adding ingredients: All functions except Rapid Bake allow for the addition of ingredients,
such as dried fruits and nuts. Three series of 5 beeps sound just before kneading is
complete. This happens about 30 minutes into the program. This is when to add your
additional ingredients.
8. To save it for another time; To freeze freshly baked bread, cool completely on a wire
rack. Wrap securely in plastic wrap and then m foil. To serve, remove from foil and
defrost in microwave. For a freshly baked flavor, reheat in the oven.
9. Avoid Delay when Possible: The delay-bake function of the Bread Maker cannot be
used for Fast Bake. It is not recommended for Whole Grain, Quick Bread, making Jam
and anytthing else with perishable ingredients.
10. Test the Water Temperature: For most breads, use water that is 80" to 90T
(26.6° to 32.2‘’C). For Rapid Bake breads, use water that is 110” to 120"F
(43.3“ to 48.8“C).

BREAD MAKER TIPS AND TECHNIQUES j
Troubleshooting:
if Bread is:
• Too Brown - select a lighter crust color
• Too Light - select a darker crust and do not open the unit during
the baking cycle
• Too Coarse - make sure you add salt
• Too Heavy - use less flour (1 tsp at a time)
• Too Low - Use less flour or more yeast or water that is not too hot,
or check the date on your yeast.
• Too High - try less yeast (1/4 tsp. at a time)
« Collapses in the Center - dough is too wet or Hour is not strong enough,
or amount is too great for the unit.
CARE AND CLEANING
WARNING: never immerse the Bread Maker in water or any liquid.
Do not put bread pan in dishwasher. Do not immerse outside of bread
pan in water.
CAUTION: Make sure that the On / Off switch is turned Off and the
unit is unplugged from the povirer source.
Allow Bread Pan to coo! slightly, then wash bread pan and kneading blade immediately
in hot sudsy water, rinse well and dr/ completely.
Do Not use abrasive scouring pads or metal implements. These could scratch the non-stick
coating of the bread pan and kneading blade.
If kneading blade will not come off shaft in bread pan, fill pan partially with warm soapy
water and leave to soak for about 5 minutes. If kneader still cannot be removed after
10 minutes, hold the shaft from underneath the pan and twist back and forth gently
until the kneader is released.
Use a soft, damp cloth to dean the outside and inside surfaces of the Bread Maker if
necessary. Make sure the unit is cool to the touch. The lid can be lifted off tor cleaning.
RECIPES
Basic:
Setting 1 or 2:
White/Rapid
Water 1 li cup + 1 Isp.
Oil
Salt
Sugar
Dried Skimmed
Milk Powder
White Bread Flour
Active Dry Yeast 2 tsp. 1 '•’i tsp.
Place ingredients in order listed in bread pan fitted with kneading blade. Place pan In
bread maker. Select #1 or 2 setting. Choose Crust color and loat size, then press Start
button. If desired you may remove the kneading blade when the unit beeps 6 times,
repeated 3 times. When cycle is completed, remove bread and transfer to wire rack to
cool. 'For recipes using the Rapid White setting, always use rapid-rise yeast.
Whole V/heat Bread:
Setting 3 or 4:
Whole Wheat/rapid
Water
Butter/Margarine
Salt
Soft Brown Sugar
Dried Skimmed
Milk Powder
Whole Wheat
Bread Flour
Active Dry Yeast 2 Vc tsp.
Place ingredients in order listed in bread pan fitted with kneading blade. Place pan in bread
maker. Select n3 or 4 setting. Choose Crust color and loaf size, then press Start button. If
desired you may remove the kneading blade when the unit beeps 5 times, repeated 3 times.
When cycle is completed, remove bread and transfer to wire rack to cool. 'For recipes using
the Rapid Whole Wheat setting, always use rapid-rise yeast.
2 lb. Loaf
2 Tbsp-
2 tsp.
3 Tbsp.
2 Tbsp.
4 V2 cups
2 lb. Loaf
1 Vz cup -(- 1 tsp.
3 Tbsp.
2 tsp. 1 }'z tsp.
4 Tbsp.
3 Tbsp. 2 Tbsp. 1 Vz Tbsp.
4 '/licups
1.5 lb. Loaf 1.0 lb. Loaf
1 cup + 3 tsp.
1 + 1/2 Tbsp.
1 + 1/2 tsp. 1 tsp.
2 Tbsp.
1 +1/2 Tbsp.
3 ’4 cups
1.5 lb. Loaf 1,01b. Loaf
1 Ki cup + 3 tsp. 4 cup + '/2 leas.
2 Tbsp. 1 Tbsp.
3 Tbsp. 2 Tbsp.
3 4 cups 2 cups
1 4 tsp. 1 Isp.
13
4 cup + Vz teas.
1 Tbsp.
1 +1/2 Tbsp.
1 Tbsp.
2 '/4 cups
1 h'a tsp
1 tsp.

RECIPES
French Bread:
Setting 5:
French Bread
Water
Olive Oil
Salt
Sugar
White Bread
Flour
Active Dry
Yeast
Place ingredients in order listed in bread pan fitted with kneading blade. Place pan in bread
maker. Select #5 setting. Choose crust color and loaf size, then press Start button. If desired
you may remove the kneading blade when die unit beeps 6 times, repeated 3 times. When
cycle is'completed, remove bread and transfer to wire rack to cooi.
Sweet Bread:
Raisin Loaf
Setting 6:
Sweet Bread
Milk 2/3 cup
Unsalted butter,
Vz-ln pieces at
room temp.
Eggs, large,
room temp.
Salt 1 tsp. % tsp.
Granulated Sugar 3Tbsp. + 2 tsp.
While Bread Flour 3 % cups
Raisins
Active Dry Yeast 2 ’/4 tsp. 2 IÚ tsp. 2 tsp.
Place ingredients in order listed in bread pan fitted with kneading blade. Place pan in
bread maker. Select #6 setting. Choose crust color and loaf size, then press Start button.
When 5 beeps sound repealed 3 times, add raisins. If desired you may remove the
kneadinq blade when the unit beeps 6 limes, repeated 3 times, Vsthon cycle is completed,
roniovG Toaf and transfer to wire rack to cool.
2 lb. Loaf 1.5 lb. Loaf 1.01b. Loaf
1 Vs Cups
2 Tbsp.
1 'á tsp.
2 Tbsp.
4 Cups
2 tsp.
2 lb. Loaf
1 Vj cups
1 Tbsp. 1 Tbsp.
1 tsp.
1 ks Tbsp.
3 ’/4 Cups 2 ’.n Cups
1 K? tsp. 1 W tsp.
1.51b. Loaf 1.01b. Loaf
V?. cup
Vz cup
2 2 1
2/3 cup li cup 1/3 cup
W cup
3 Tbsp, 2 Tbsp. + 1 tsp.
3 cups 2 14 cups
2/3 cup
Ti tsp.
1 Tbsp.
1/3 cup
2 Tbsp.
’••2 tsp.
RECIPES
Quick Bread:
Pumpkin Bread
with Walnuts
Setting 7:
Quick Bread
Oil
Canned Pumpkin
Eggs, Ig.
room temp.
Brown Sugar,
packed
Unbleached All
Purpose Flour
Ground Cinnamon
Ground Allspice Vz tsp.
Ground Nutmeg tsp.
Salt
Baking Powder
Walnuts’ Vz cup
Dried Cranberries' 1-2 cup
* Walnuts and dried Cranberries are optional
Place ingredients in order listed in bread pan fitted with kneading blade, Place pan in bread
maker. SgIgci # 7 setting for Quick Bread. The Bread Maker v;ill automatically select 2.0 Lb.
loaf and Medium crust. Pres.s Start button, if desired you may remove the kneading blade
when the unit beeps 6 times, repeated 3 limes. When cycle is completed, remove bread
and transfer to wire rack to cool.
2 Ib. Loaf 1.5 Ib. Loaf 1.0 Ib. Loaf
W cup
1 cup
2
1 cup
2 cups
1 tsp.
1 tsp.
1 tsp.
—
—
—
—
—
—
—
—
—

RECIPES
Cake: Sour
Cream
Chocolate Tea
Loaf
Setting 8: Cake
Milk, lo'jvfat
Sour Cream
EggSr ig-
room temp.
Granulated Sugar 6 tbsp.
Brown Sugar,
packed
Unbleached Ail
Purpose Flour
Baking Powder là tsp.
Baking Soda
Salt
Vanilla Extract
Chocolate Chips
Chopped Walnuts
Dried Tart Cherries
Place ingredients in order listed in bread pan fitted with kneading blade. Place pan in bread
maker, Select setting # 8 tor Cake. The Bread Maker will auiomàtically select 1.0 Lb. loaf.
Press -Start. It desired you may remove the kneading blade when the unit beeps 6 times,
repeated 3 times. VVhen cycle is completed, remove tea loaf and transfer to wire rack to cool.
2 lb. Loaf
1.5 lb. Loaf
—
—
1.01b. Loaf
6 Tbsp.
1/3 cup
1
14 cup
1-4 cup + 2 Tbsp.
14 tsp.
H tsp.
Vil tsp.
1/3 cup
1-Í cup
3 Tbsp.
RECIPES
Gluten Free:
Cheesy
Gluten-Free Loaf
Setting 9:
Gluten Free
Lowl'at Milk,
S0-90-F
Olive Oil
Eggs, large,
at room temp.
Honey
Cider Vinegar
Salt
Brov/n Rice Flour
Potato Starch
Tapioca Flour
Garfava Flour
Quinoa Flour
Xanthan gum
Gelatin
Shredded
Provolone cheese
Shredded
Mozzarella
cheese
Grated
Parmesan
cheese
Active Dry Yeast
Add the milk, oil, eggs, honey and cider vinegar to the bread pan fitted with the kneading
blade. Stir the remaining ingredients together, except for the yeast, in a separate mixing
bowl to incorporate, and then add to the bread pan. Add yeast to the bread pan last. Place
pan in bread maker. Select setting # 9 (or Gluten Free. Choose Crust color and loaf size,
then press Start button. While the dough is kneading, scrape the sides of the bread pan
with a rubber spatula to fully incorporate ingredients, if desired you may remove the kneading
blade when the unit beeps 6 times, repeated 3 times. When cycle is completed, remove bread
and transfer to wire rack to cool.
2 lb. Loaf 1.51b. Loaf 1.01b. Loaf
1 % cups
3 Tbsp.
2
3Tbsp.
1 tsp.
1 V?. tsp. 1 tsp.
2 cups 1 V? cups
1 cup
Vz cup
VI cup 2 Tbsp.
Vi cup
2 Vs tsp.
tsp.
1 Vs cups
2 Tbsp.
2
2 Tbsp.
'^4 tsp.
% cup
1/3 cup
2 Tbsp.
2 tsp.
K: tsp.
V'¿ cup + 2 Tbsp. Vi cup
1/3 cup + 2 Tbsp.
!4 cup
2 '4 tsp.
'4 cup
2 Tbsp.
2 Vi tsp.
—
—
—
—
—
—
—
—

RECIPES
RECIPES
Dough:
Pizza Dough
Setting 10:
Dough
Water, 80 - 90=F
Honey or sugar
Salt (sea or kosher)
Olive Oil
Bread Flour'
Whole Wheat Flour’
Active Dry Yeast 2 v;. tsp.
■ May use all bread flour rather than using part whole wheat flour.
Place ingredients in order listed in bread pan fitted with kneading blade. Place pan in bread
maker. Select dough size {2.0,1.5, or 1.0). Select #10, Dough setting. Press start. When
Dough Cycle is cornpleted, remove dough from bread pan, deflate dough, and use for your
favorite pizza.
Large 2 lb. Loaf
1 1/3 cups
1 tsp.
2 tsp.
2 Tbsp.
3 1'4 cups 2 2/3 cups
3/4 cup 9 Tbsp.
Medium -
1.5 lb. Loaf
1 cup 2/3 cup
^4 tsp. k’ tsp.
1 Vn tsp.
1 V? Tbsp. 1 Tbsp.
1 Ti tsp. 1 'À tsp.
Small -
1.01b. Loaf
1 tsp.
1 T4 cups
6 Tbsp.
Artisan Dough;
Hazelnut and
Apricot Loaf
Setting 11:
Artisan Dough
Wafer
Sea Salt
Honey
Bread Fleur
Whole Wheat Flour
Barley Flour V: cup
Active Dry Yeast
Hazelnuts Vz cup
Dried Apricots,
chopped
Place ingredients, except for hazelnuts and apricots, in order listed in bread pan fitted with
kneading blade. Place pan in bread maker. Select # 11, Artisan Dough. Press Start. When
Dough Cycle is completed, remove dough from pan and transfer to well-floured surface.
Punch to deflate and let rest 10 minutes. Preheat oven to 425'’F.
Roll dough into a rectangle approximately 16X12 inches. Sprinkle the hazelnuts and
apricots evenly along the surface of the dough. Roil dough into a cylindrical shape that
is about 3 inches wide. Pinch the ends to shape the loaf. Place on baking sheet lined
vAth parchment, cover with plastic and let rest for about 30 minutes.
Slash loaf diagonally 4 to 5 limes along the lop of the loaf and dust lightly with flour. Bake
in preheated oven until golden and even, about 25 to 30 minutes. When finished, remove
from sheet and transfer to wire rack lo cool.
About
2.0 Lbs.
Dough
1 V-. cups
2 tsp.
1 Tbsp.
2''/a cups
Vi cup
2 k tsp.
2/3 cup
--
— —
— —
—
— —
—
— —
— —
—
—
—

RECIPES
RECIPES
Jam: Strawberry
Rhubarb Jam
Setting 12: Jam
1 Lb. fresh
strawberries,
stemmed and
quartered or halved
12 ounces fresh
rhubarb, cut in
iy2-in. slices
2/3 cup granulated
Sugar
Place half the strawberries in a bowl with 1/3 cup of the sugar. Use a potato masher or fork
to mash roughly - mixture should be slightly chunky with some liquid. Add remaining
ingredients and stir lo combine. Transfer to the bread pan fitted with kneading blade. Place
the bread pan in the broad maker, select # 12 setting. Jam. Press Start Sciape the sides
of the pan at 5 and 10 minutes into the cycle.
When cycle is complete, transfer Jam to clean jars. Let cooi, then cover and retrigerate.
Keeps in refrigerator tor 4 to 6 weeks. '
— — —
1/3 cup packed
Brown Sugar
W cup
powdered pectin
'/2 isp. ground
cinnamon
Fast Bake:
Fast Bake
Corn Loaf
Fast Bake
Button
Canned Cream Corn
Lowfal Milk
Unsaited butter,
in smail pieces,
room temp.
Granulated sugar —
Salt
Bread Flour
Yellow Cornmeal
Vital wheat gluten
Active Dry Yeasi
Combine corn, milk and butter and warm to 100 F. Place ingredients in order listed in
bread pan fitted with kneading blade. Placo pan in bread maker. Select ff 13 for Fast Bake.
Press Start. When cycle is completed remove from biead pan and allow to coo! for 1 hour
or keep in bread maker in bread pan on the Keep Warm function tor 60 min. After Keep
Warm function, allow to cool for 20 minutes before cutting.
2 lb. Loaf 1.51b. Loaf
—
— TL tsp. —
7/8 cup
1/3 cup
4 ’/2 tsp. —
1 Vz tsp.
2 w'3 cups
V’ cup + 1 Tbsp.
3 tsp.
3tsp.
1.01b. Loaf
—
—
—
__
—
—

TIMETABLE FOR BREAD MAKER CYCLES
No. Cycle
1 Basic-
White
2
Rapid
Whits
3 Whole
Wheat
Size P.e-
Crust
Light 1.0
Medium TO
Dark 1.0
Light 1,0
Medium 1.0
Dark 1.0
Light
Medium 1.0 30 M 3M 25 M
Heat
Mins.
OM 3M 31 M 2C M
Lb.
1,5
OM
Lb.
2.0
OM 3M 31 M 26 M
Lb.
OM 3M 31 M 26 M
Lb.
1.5
0 M 3 M 31 M 26 M
Lb.
2.0
OM 3M
Lb.
OM 3M
Lb.
1.5
0 M 3M
Lb.
2.0
OM 3M 31 M 26 M
Lb.
OM
Lb.
OM 3 M 31 M 26 M
1.5
Lb.
2.0
OM 3M 31 M 26 M
Lb.
0 M 3M 31 M 26 M 15 S
Lb,
1.5
0 M
Ld.
i 2.0
OM 3 M 31 M 26 M
; Ld.
0 M 3 M 31 M
Lb.
0 M 3M
1.5
Lb.
2.0
0 M 3 M
Lo.
1,0
30 M 3M
Lb.
1.5
30 M 3M
Lb,
2,0
30 M 3M 25 M
Lb.
Knea
Knead
d 1
Mins.
3M 31 M 26 M 15 S 25 M 15S ■ 55 M 40 M 3:00 60 M 12 2:40 1:35
3 M 31 Ы 26 M 15 S 55 M 0 S :0M 37 M 2:32 60 M 12 2:12 1:32
3 M 31 M 26 M 15 S 55 M 0 S OM 50 M 2:45 50 M 12
Rise 1
Mins,
2
Mins.
31 M 26 M 15 3 25 M 15 S r 55 M 55 И 3:15 60 M 12 2:55 1:50
31 M 26 M 15 S 25 M 15 S 55 M 60 M 3:20 60 M 12 3:00 1:55
31 M 26 M 15 S 25 M 15 S 55 M 65 M 3:25 60 M 12 3:05 2:00
26 M 15 S 55 M 0 S OM 60 M
31 M
26 M
31 M 26 M 15 S 55 M 0 S , OM 70 M 3:05 50 M 12 2:-55 2:05
25 M
80 M
25 M 80 M 15 S 31 M 15 S •16 M 44 M 4:19 50 M 12 3:35 1:30
80 M 15 S 31 M 15 S . -16 M 48 M 4:23 60 M 12 3:39
80 M 15 S 31 M 15 S -16 M 45 M 4:20 50 M 12 3:36 1:31
Rise2Kr.c-ad
Kneed
3
15S 25 M 15 S 55 M 37 M 2:57 60 M 12 2:37 1:32
15 S 25 M 15 S ; 55 M 43 M 3:03 60 M 12 2:43 1:38
15 S 25 M 15 S 55 M 45 И 3:05 60 M 12 2:45 1:40
15 S 25 M
15 S 25 M 15 S 55 M
15 S 55 M
15 S 55 M
55 M
15 S 55 M 0 S OM 55 M
15 S 55 M
15 S 31 M 15 S
Secs.
15 S
0 S
0 S
0 S
0 S
RiseO
Bake
Total
Mins.
55 M
OM 40 M
,0M 43 M
OM
, OM
•16 M
Time
Mins.
Hr ,Min.
3:10 60 M 12
50 M
3:30 60 M 12 3:10 2:05
70 M
2:35 OU M
2:38
2:40 60 M 12
46 M
2:50
2:55
65 M 3:00
40 M 4:15 50 M 12 3:31 1:26
Delay
Keep
Wann
Hours
Uns.
Hours
12
60 M 12
60 M 12 2:30 1:50
50 M 12 2:35 1:55
50 M 12 2;-l0 2:00
Mix-ins
a;£T5play
Hr <Un,
2:50 1:45
2:15
2:18
2:20
2:25
Remove
Padoie
tme l<rt
m Лпр'яу
НгЛ4.П.
1:35
1:38
1:40
1:45
AUDIBLE TONES
1:34
Rapid
Whole
WIioHt
Dark 1,0
Light 1.0
Medium 1-0
Dark 1.0
Light 1.0
Medium 1.0
Dark 1-0
1,5
30 M 3M 25 M
Lb.
2.0
30 M 3M 25 M 80 M 15 S
Lb.
30 M 3 M 25 M 80 M
Lb,
1.5
30 M 3M 25 M
Lb,
30 M 3 M 25 M 80 M 15S 31 M 15 S 46 M 64 M 4;39 GO M 12 3:55
2.0
Lb.
5 M 3 M 25 M
Lb.
1.5
Lb,
2-Ü
Lb.
Lb.
1.5
Lb,
2.0
Lb.
Lb.
1-5
Lb.
2.0
Lb.
Lh.
1.5
Lh.
2.0
Lh,
Lb.
1,5
Lb.
2,0
Lb.
Lh.
1.5
lb.
2.0
Lb.
3 M
5 M
5M 3 M 25 M
3 M 25 M
5 M
3 M 25 M 30 M 15 3 46 M 0 S
5M
3 ГЛ 25 M 30 M 153 46 M 0 S OM 55 M 2:44 60 M 12 2:25 1:41
5M
3 M
5M
5 M 3 M 25 M 30 M
5 M 3 M 25 M 30 M
OM 3M
OM 3M 30 M
0 M 3M 30 M
0 M 3M
OM 3M
0 M 3M 30 M 32 M
0 M 3 M 30 M 32 M 15 S
0 M 3 M 30 M 32 M 15S 30 M 15S 55 M 72 M 3:42 60 M 12 3:23
0 M 3M 30 M 32 M
no M 15 S 31 M 15 S 46 M 50 M 4:25 60 M 12 3,41 1:36
80 M 15 S 31 M 15 3 46 M 60 M 4:35 60 M 12 3:5t 1:46
30 M 15S 46 M 0 S OM 40 M 2:29
30 M
25 M
30 M
30 M
30 M 15 S 46 M 0 3 OM 54 M 2:43 60 M 12 2:24 1:40
25 M
30 M 32 M 15S 30 M 15S 55 M 42 M 3:12 60 M 12 2:53 1:37
32 M 15S 30 M
32 M 15S 30 M 153 55 M 64 M 3:34 60 M 12 3:15 1:59
30 M 32 M 15S 30 M 15S 55 M 62 M 3:32 60 M 12 3:13
30 M 32 M 15 S 30 M 15 S 55 M 66 M 3:36 60 M 12 3:17 2:01
31 M 15 S 46 M 55M 4:30
15 S 31 M 15 S 46 M 54 M 4:29 60 M 12 3:45 1:40
46 M 0 S
15S
153 45 M
153 45 M
153 46 M 0 S 0 M 60 M 2:49 00 M 12 2:30 1:40
153 46 M 0 s 0 M 64 M 2:53 60 M 12 2:34 1:50
15 S 30 M
30 M
15 S 30 M 15 S 55 M 74И 3:44 60 13 12 3:25 2:09
0 M
Ü S 0 M 48 M 2:37 60 M 12
0 S 0 M 45M 2:34
15 3
15S 55 M
15S 55 M 65 M 3:35
44 M 2:33 60 M 12
OM
50 M 2:39 60 M 12 2:20 1:36
55 M 53 M
3:23
70 M 3:40 60 M 12 3.21 2:05
AUDÍBLETONES
12 3,46 1:41
60 M
60 M
12 2;10 1:26
2.U
2:18
12
60 M
60 M 12 3:04 1:48
60 M 12
2:15
3:16
1:50
1:30
1:34
1:31
1:57
2:00
2:07

TIMETABLE FOR BREAD MAKER CYCLES
6 Sweet
7 Quick
9 Gluten Lb.
to
11
1!? Jam N'A N/A OM OM 15M
13 Extra
LighI 1.0
-
Medium 1.0
Dark 1.0
Medium
Bread Lb.
Medium
Free
Douoh N^A N/A OM 3M 27 M 60 M 0 ; 0 M OS OM OM 1:30 N-'A 12 1:14 N.'A
Artisan
N'A N.'A OM 5M 45 M 70 M
Douoh
N>A N/A 0 M 0 M 0 M 0 M
Bake
Fast Medium 1,5 OM 3M ЭМ
Bake Lb.
0 M 3 M 31 M 31 M 15S ; 30 M 15 S 50 M 52 M
Lb.
1.5
0 M 3 m' '3 'l M
Lb.
0 M 3 M 31 M 31 M 15 S . 30 M 15 S 50 M 56 M
P.O
Lb.
0 M 3 M 31 M 31 M 15 S . 30 M 15 S 50 M 54 M 3:19 60 M
Lb.
0 M
1,5
Lb.
2.0
Ofvl 3M
Lb.
0 M
Lb.
1.5
0 M 3 M 31 M 31 M
Lb.
2.0
0 M 3M 31 M 31 M 15S : 30 M 15S 50 M 64 M
Lb.
2.0 0 M 3M 20 M 0 M 0 S Q M OS 0 M 105 M
OM 3M 4M OM
Lb.
1.5 a M 4 M 19 M 48 M 0 ^ 0 M
2.0
8M 4M 19 M 48 M 0 S
Lb.
31 M 31 M 15 S . эб M
3 M
31 M 31 M 15 S
31 M
3 M
15 S ’
зТм’"'
31 M 15 S i 30 M 15S
0 M
8 M OS ^ 0 M 0 S
“aolH" '15 S“”" 50 M 54 M 3;19' 60 M
50 M 57 M
16S
30 M 15S 50 M 60 M 3:25 60 M 12 3:05 1:50
15S
: 30 M 15S
0 S 0 M
i 0 M
10 S
i 85 M
0 ; 0 M OS OM 70 M 1:25 20 M 12 N/A N/A
0
; OM 0 S 0 M 10 k 0:10 60 M 1 1/2 N/A N.'A
50 M 58 M
50 M
61 M 3:26 60 M 12 3:05 1:51
OS OM 75 M 1:22 12 1:22 i:15
OS 0 M 95 M 2:54 COM 12 2:37 2:23
OS 0 M 100M 2:69 60 M 12 2:42 2:28
10 S
110 M OM 5:15 N/A 12 4:39 N,'A
38 к
0 M
3:17 60M
3:21 60 M 12
3:22 60 M 12 3:02 1:47
3:23 60 M 12 3:03 1:48
3:29 60 M
2:06 22 M
22 M6 Cako N.'A 1-0
0:58 60 M N.'A N/A N/A
AUDIBLE TONES
12 2:57 1:42
Тг
3:01 1:46
2:59 1:44
12
12 3:09 1:54
12 1:50 1:45
T:44
3
m
Ü)
z

Get it fixed, at your home or ours!
For expert troubleshooting and home solutions advice:
Your Home
manage
www.managemyhome.com
For repair - in your home — of all major brand appliances,
lawn and garden equipment, or heating and cooling systems,
no matter who made it, no matter who sold it!
For the replacement parts, accessories and
owner’s manuals that you need to do-it-yourself.
For Sears professional installation of home appliances
and items like garage door openers and water heaters.
1-800-4-MY-HOME® Call anytime, day or night
(1-800-469-4663) (U.S.A. and Canada)
www.sears.comwww.sears.ca
For repair of carry-in items like vacuums, lawn equipment,
and electronics, call anytime for the location of the nearest
Sears Parts & Repair Service Center
1 -800-488-1222 (U.S.A.) 1 -800-469-4663 (Canada)
www.sears.com www.sears.ca
To purchase a protection agreement on a product serviced by Sears:
1-800-827-6655 (USA)
Para pedir servido de reparación
a domicilio, y para ordenar piezas:
1-888-SU-HOGAR®
(1-888-784-6427)
© Sears Brands, LLC
© Registered Trademark / ™ Trademark / °“ Service Mark of Sears Brands, LLC
® Marca Registrada Marca de Fábrica / Marca de Servicio de Sears Brands, LLC
Marque de commerce / '■’° Marque déposée de Sears Brands, LLC
Our Home
1-800-361-6665 (Canada)
Au Canada pour service en français:
1-800-LE-FOYER^^
(1-80053:36937)
www.sears.ca
 Loading...