

Ken A Vision PupilCAM 1401KRM, PupilCAM 1401KEM, 1401KRN, PupilCAM 1401KEN, PupilCAM 1401KR Instruction Manual
...
PupilCAM
Instruction Manual
1401KRM
1401KEM
1401KRN
1401KEN
1401KR
1401KE

Thank you for your purchase of a Ken-A-Vision PupilCAM! This high-resolution
camera captures microscopic images and displays them directly to your TV/
monitor or computer with full screen viewing. The pre-attached cable provide
direct interface to your equipment. It’s ready to go, no assembly required!
Connecting The USB Cable
Prior to connecting the USB cable, you must first install the supplied software.
Pre-attached cabling makes it easy to connect the USB cable to you computer.
Simply insert the rectangular end of the USB cable to the USB port of your
computer.
Note: The USB port will supply ample power to the the PupilCAM
supply is required.
®
. No power
Connecting The Video/Power Cable
Your Video/Power cables are pre-attached to the PupilCAM. No connection is
required to the camera. Simply connect the video cable into the “video-in” on
your TV/monitor. Then connected the power supply to the power cable. Next
connect the other end of your power supply to a 110 volt (or 220 volt)
electrical outlet.
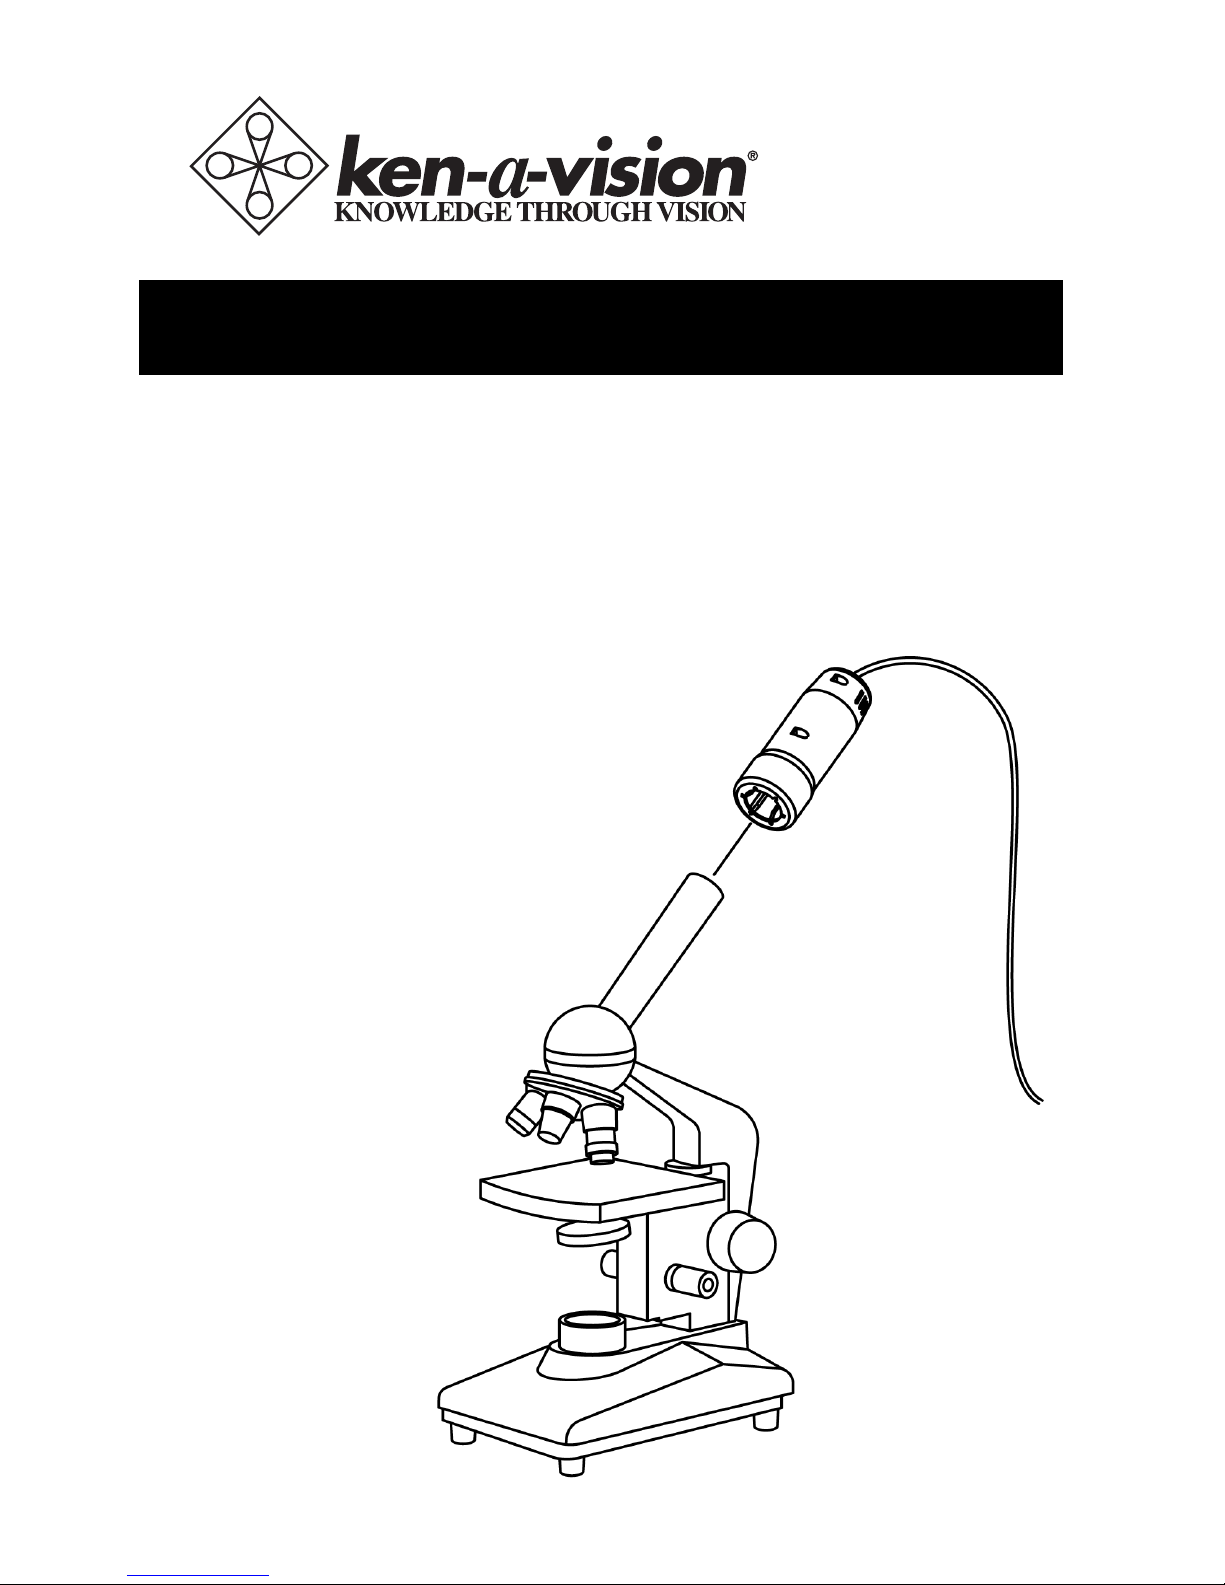
Connecting to a Microscope
The PupilCAM® is designed exclusively to work with a microscope (compound
or stereoscope). A variable eyepiece adapter is built-in to the camera.
• Gently twist the PupilCAM® as you push it down onto the microscope.
• Connect the pre-attached cable to your TV/monitor or computer.
• Put a slide on your microscope and focus.
2
 Loading...