

KEK WALL MURALS WALLPAPER Instruction Manual
NON-WOVEN WALLPAPER
INSTRUCTIONS
WALL MURALS & WALLPAPER
Step 1
Make sure the surface is suitable for this type of
wallpaper. Prepare the surface by making sure it is
dry, clean, smooth, stable, evenly absorbent, and of
uniform colour with no old paint or rust showing
through. Also make sure all old nails and screws are
removed beforehand.
Step 2
We recommend ‘Ready & Roll for non-woven wallpaper’
by Perfax, or similar wallpaper glue from other brands.
Apply the glue directly to the wall, slightly wider than
the wallpaper sheet (48.7 cm).
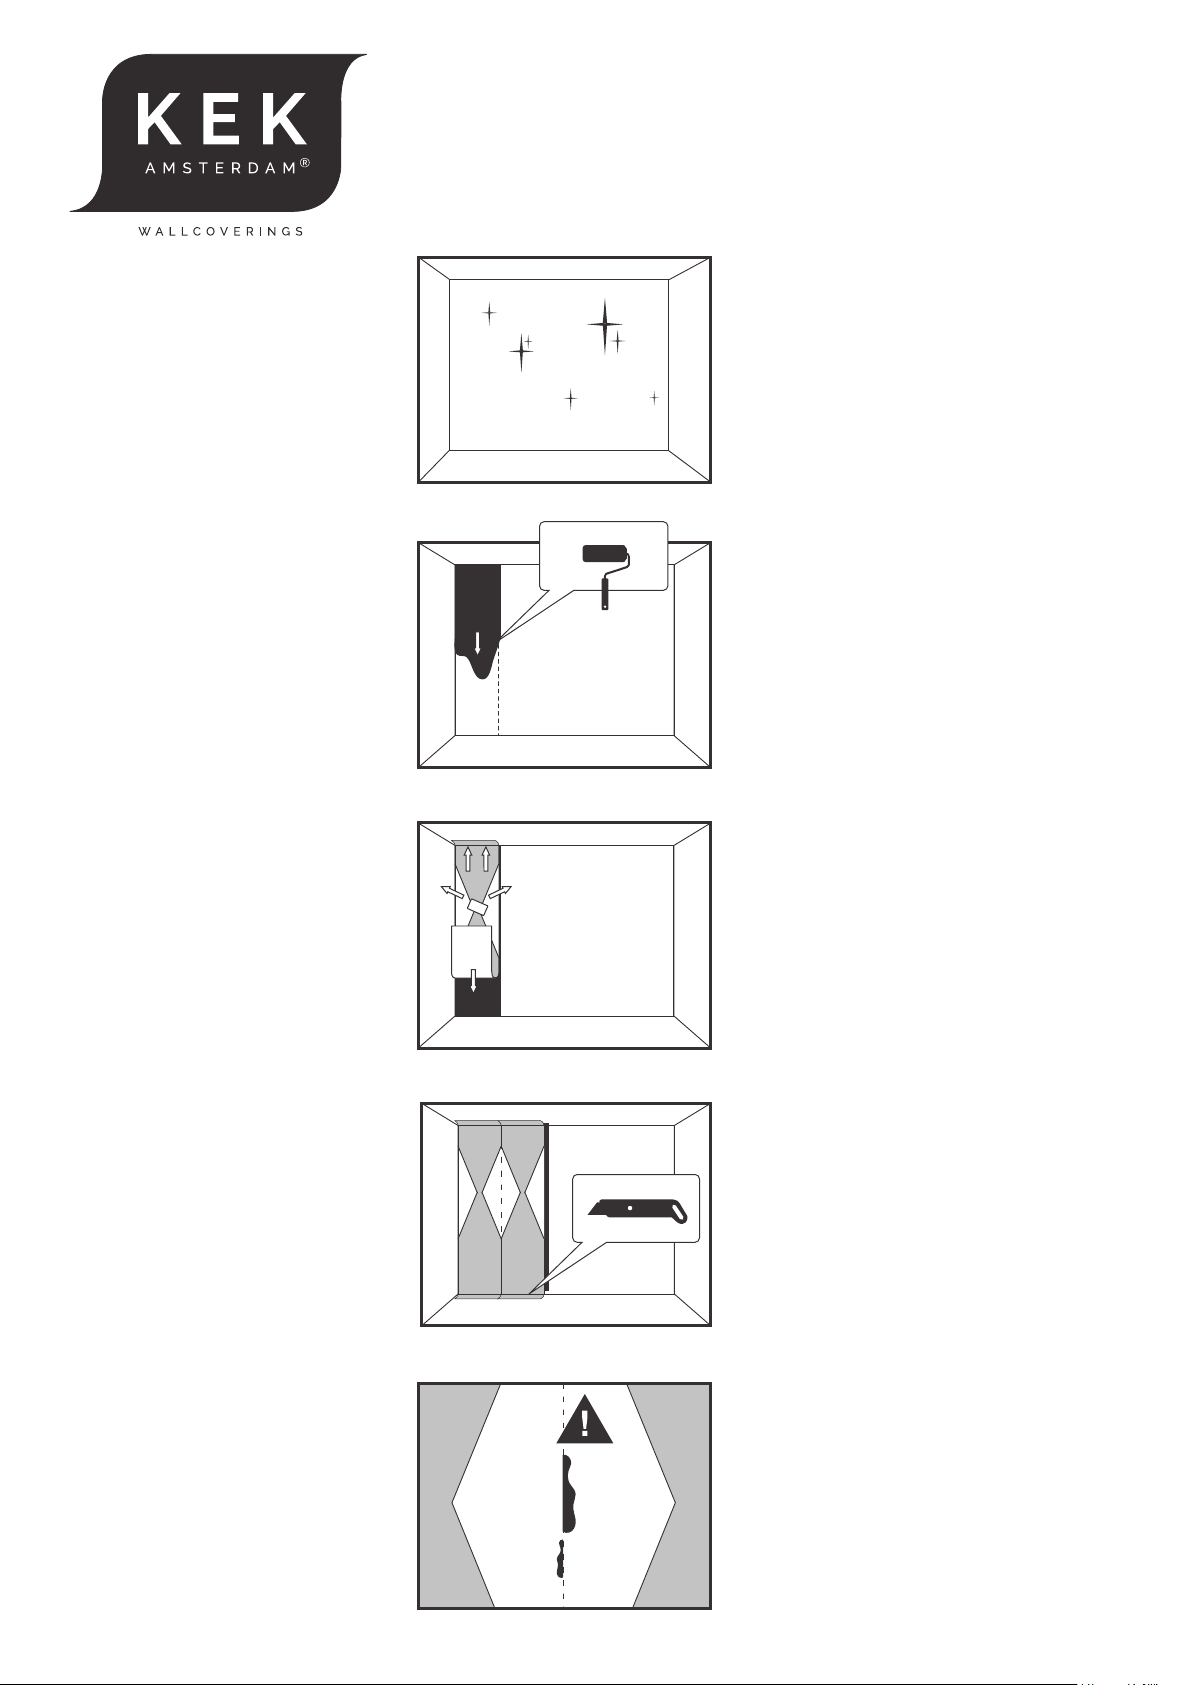
Step 3
Make sure the first sheet is placed vertically plumb by
using a spirit level. Place the sheet directly onto the
pasted wall, using a wallpaper spatula to make sure
there are no air bubbles.
Step 4
The sheet can now be trimmed at the top and bottom.
Place subsequent sheets one by one, using a
wallpaper spatula to ensure that joins are tightly
butted and there is no overlap. Make sure the pattern
or image matches up with the previous sheet.
Step 5
© 2020 KEK Amsterdam | All rights reserved
Carefully pat away excess glue with a piece of kitchen
paper. Be extra careful with dark colours! Because the
wallpaper is ‘uncoated’ (no protective layer) the ink can
come off slightly.
It is important to avoid excessive heat or draughts when
hanging and drying wallpaper, otherwise the wallpaper
dries too quickly and this can lead to gapping at seams.
 Loading...