

Page 1
Re m ot e
C
b
t
n
n
n
n
a
n
i
J
P
g
t
o
.
.
.
O
e
U
N
.
O
r
0
1
t
e
:
o
Y
l
n
d
a
g
t
t
o
f
e
b
h
t
b
t
t
g
n
h
e
n
e
o
b
c
u
o
a
o
n
o
d
g
l
w
u
go
o
t
g
t
tl g
t
w
h
t
e
o
Cont rol
Oper at i n
1 I n
2But t o
ont rol:
ox:JLD
Ma n ua l
er f ace of
descrip t i
LD K.2 6 .
.1 5 .0 0 8 .
of Re m o
he r em ot
n
7 .0 1
0 2
e Cont ro
contr ol
l syst e m
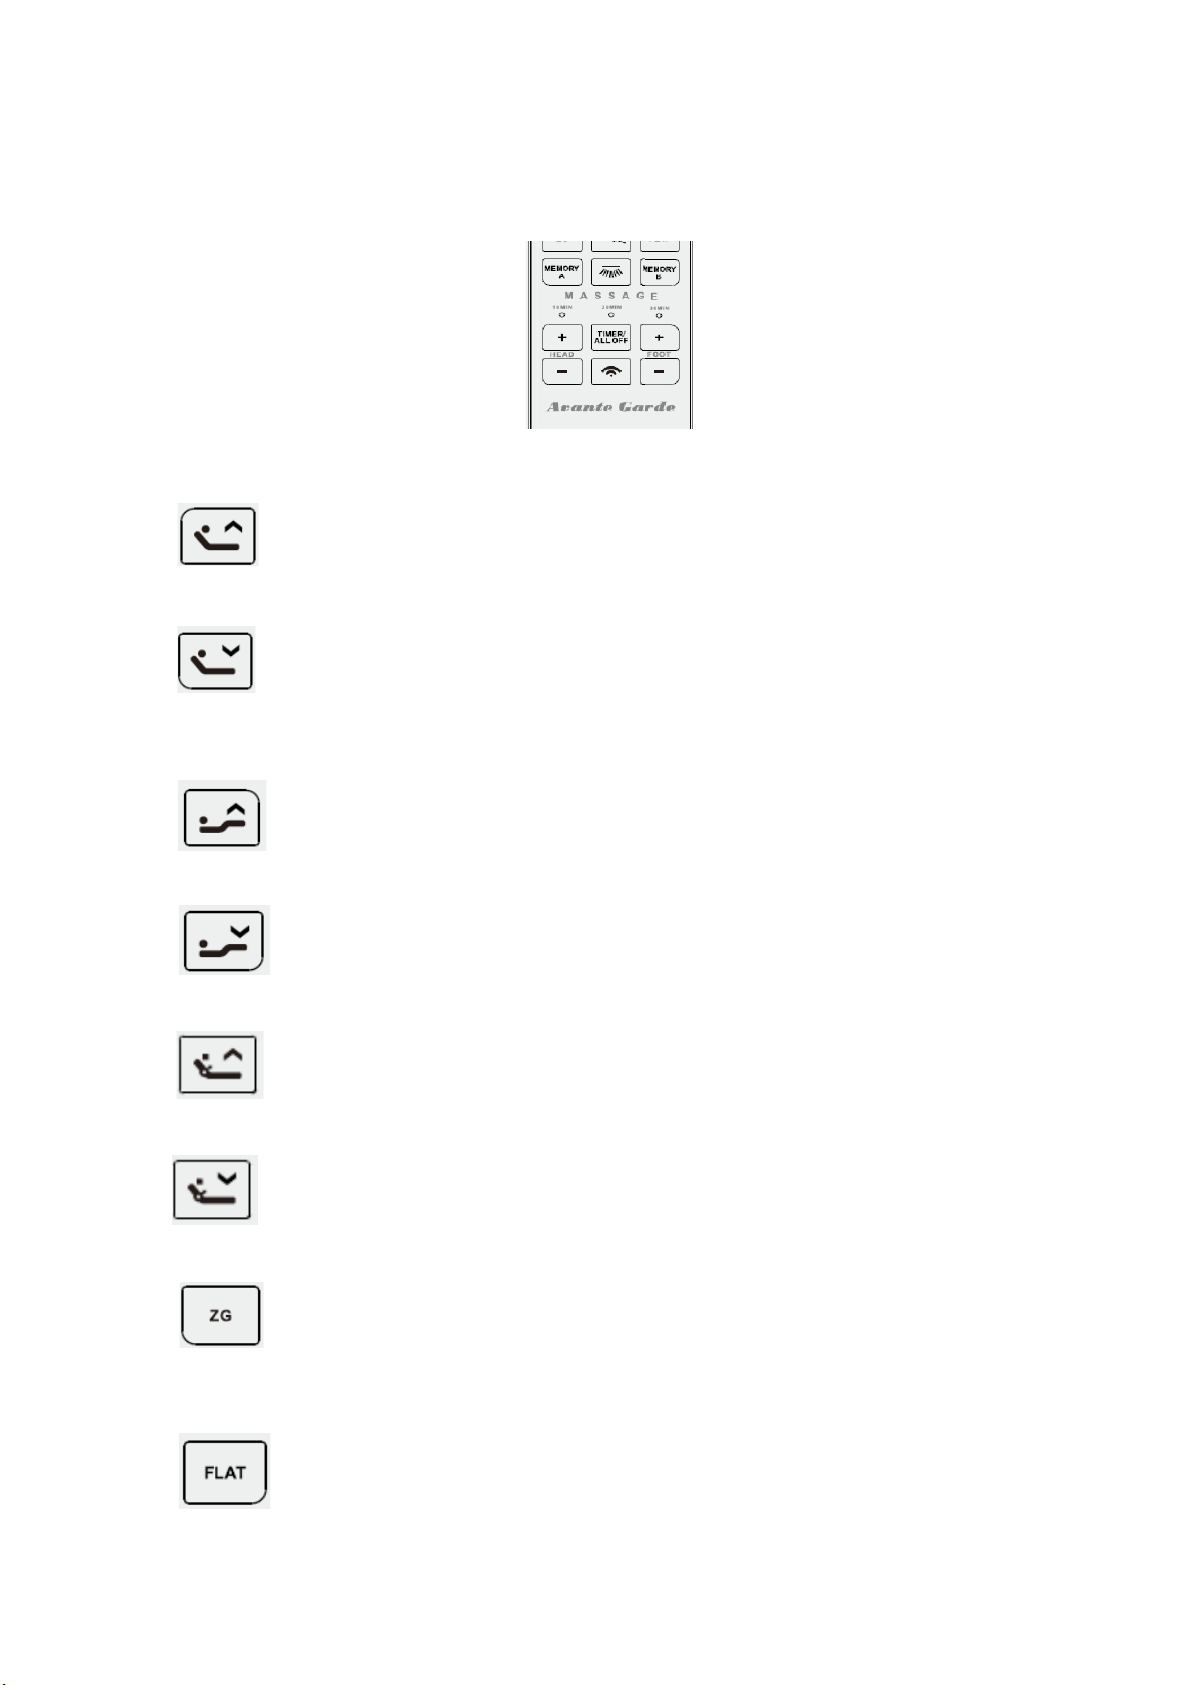
A.
B.
C.
D.
E.
whe
whe
whe
St op
rele
HEAD
released
HEAD
released
FOO
released
FO
when r el
3th
sed .
UP but t on
DN bu tton
T UP but t
T DN butt
ased.
P but ton :
:Press a
Press an
n:Press
on :Press
Press and
d hold t h
hold t he
nd hold t
an d hold
hold t he b
butt on, t
utt on, t h
e but ton,
he but to
ut ton, t he
e Head a
Head act
the Foot a
, t h e Foot
3t h act uat
tuat or w il
at or w ill
ct u at or w i
actuator
r will go
l go u p. S
o dow n. S
o u p. S
ill go do
p. St op w
op
op
op
n.
en
F.
whe
G.
an d
click
H.
runn
3th D
released
ZER
keep runn
ng any bu
FLAT
ing until a
butt on:
GRAVIT
ing until a
tt on.
butt on: C
riving to t
Press and
bu tton: C
rrivin
to
ick t h e bu
he FLAT p
hold t h e
lick t he bu
he zero
ton, t h e H
sition . Ru
Page 1 o
utt on, t h
ton, t he H
ravit y pos
ead and F
ning can
7
3th act u
ead and F
it ion. Run
ot act u at
e st oppe
tor w ill
ot act uat
ing can b
r will st ar
by clickin
dow n . S
r will st art
e st opped
up and k
any but t
op
up
by
ep
n.
Page 2
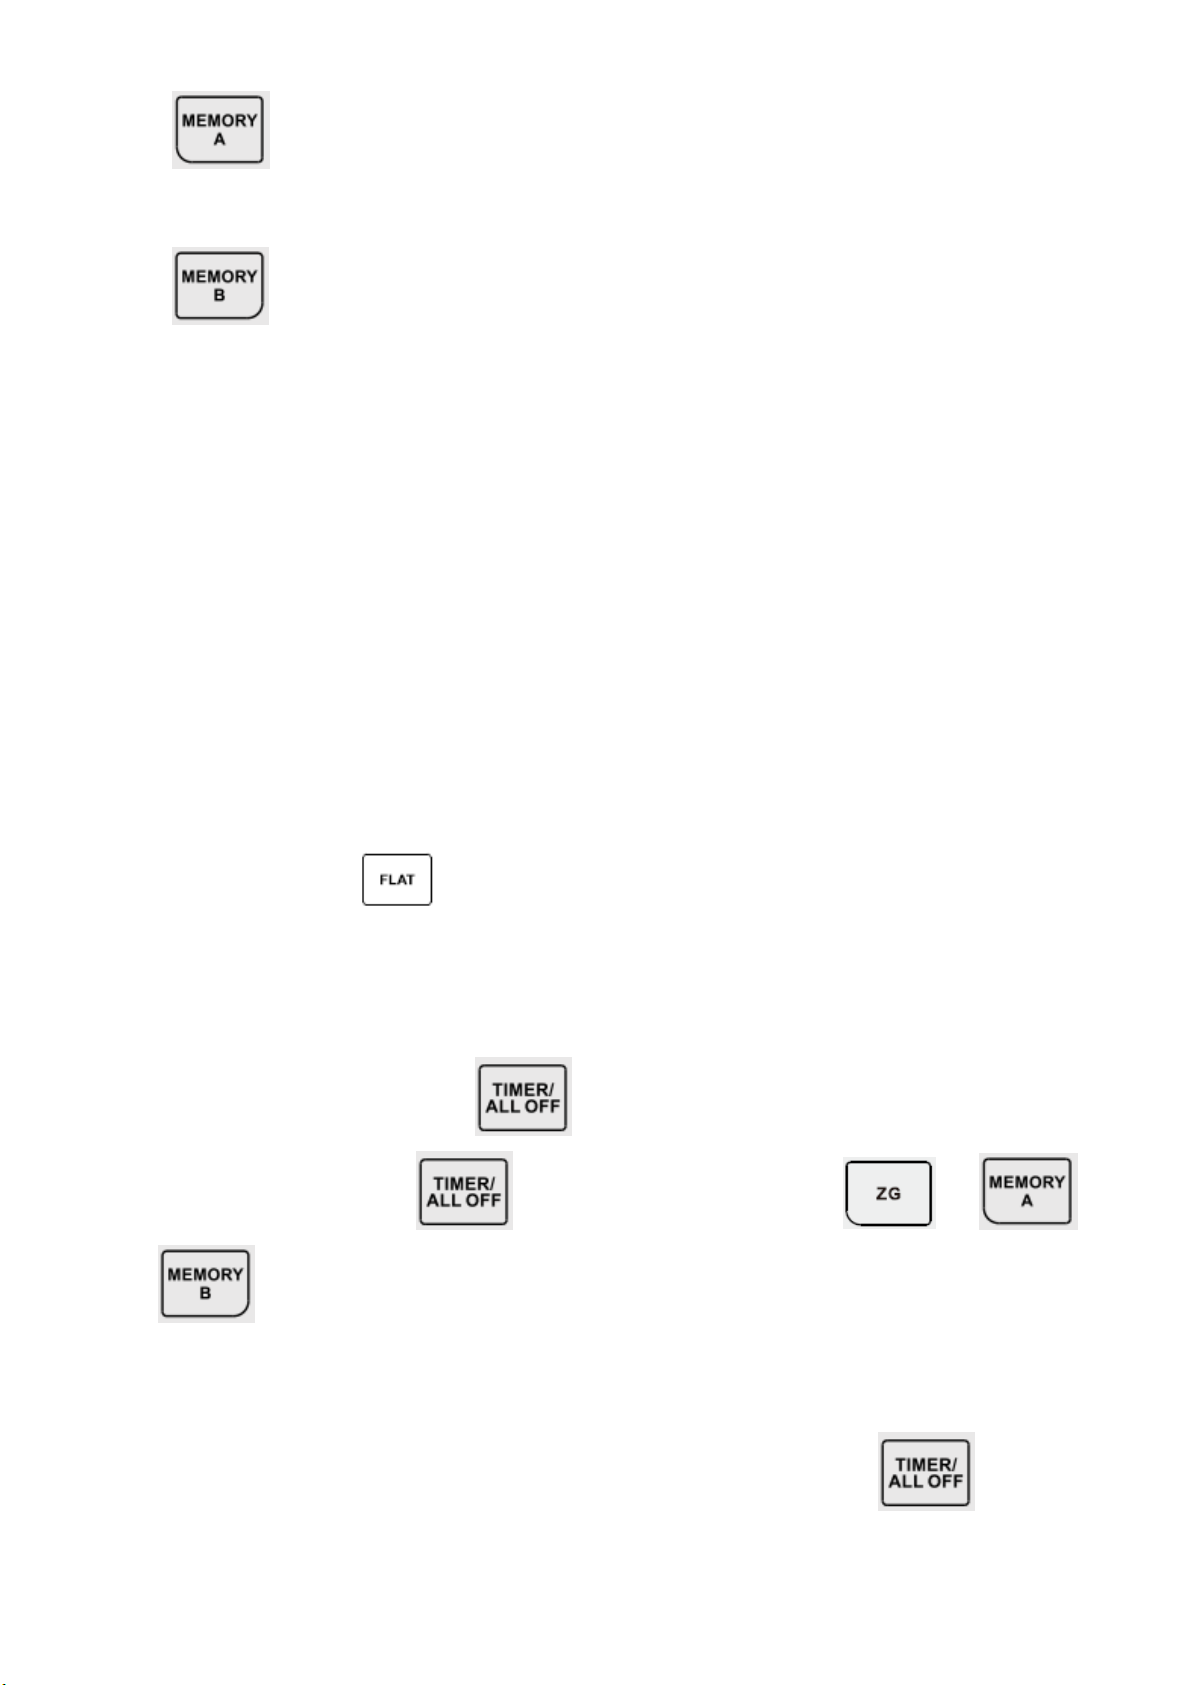
I . MEMORY A bu t ton : Click t h e butt on, t h e Head and Foot actuat or w ill start u p and
keep runnin g u n t il ar riv ing t o t h e Mem or y A posit ion preset b y u ser. Running can be
st opped by click ing any b u t ton.
J. MEMORY B bu t ton : Click t he butt on, the Head an d Foot act uat or w ill start u p and
keep runnin g u n t il ar riv ing t o t h e Mem or y B posit ion preset b y u ser. Running can be
st opped by click ing any b u t ton.
The blue LEDs for backligh t ar e on as long as any butt on is pressed. I F all but tons ar e
released t h e LEDs w ill aut om at ically t u r n off thr ee seconds lat er.
The blue LED for power is alway s on as lon g as t he pow er on.
The b e lo w p o sition s ca n b e ch a nge d o r set b y t he e nd user .
The Ze ro gr a vity p o sit ion
for t he 3 t h a ct uat or
The M em or y A posi t io n ;
The M em or y B posit io n ;
The p r oce d u re t o se t th ese specia l p osit ion s is be low :
only t he H e ad a nd Foot ca n b e r eset , b u t n o t be don e
;
St ep 1 : Cli ck t he but ton t o f la t t h e be d ;
Step 2: Adjust the Head and Foot position t o a d e sir e d p osit ion b y p r essing t he
but ton H EAD _ U P or H EAD _ DOW N o r FOOT_ UP o r FOOT_ DOW N ;
St ep 3 : Pre ss a nd hold t h e but ton f o r 3 sec, backlight LED st a rt f l a sh in g ;
St ep 4 : Re le ase t h e bu tt on t he n click on e of or or
but ton b e fore LED st op fla shing . Th e n t h e Fla sh in g st o p s im m e dia t e ly t o
indica te t he corr e sp o n din g o p er a tin g h as com plet ed su cce ssf u ll y .
ALL of t h e Ze r o g r av it y posit io n a nd t h e SF posit io n a nd t he M e m ory A posit io n
ca n be r e st or ed t o d e fau l t se t s by p r essing a n d holding t h e but ton f o r
ap p r oxim a t e six seconds u nt il t h e ba ckligh t LED s fina l ly stop f la shin g f r om f ir st
flashing.
Page 2 of 7
Page 3

K. FLASHLI GHT butt on:Click t he but t on , t he Flashligh t on t he rem ot e cont r ol will
tur n on if it is bein g off or t urn off if it is being on . I f t h e Flashlight is t urning on as t h e
b u t t o n p re s se d, i t w il l k ee p on a s l o ng a s t he b u t ton pr essed. Wh en the butt on is released,
the Flashlight w ill still keep on for several seconds then tur n off wit h t he backlight t urning
of f t ogether.
L. UNDERLI GHT butt on:Click t he but ton, the Under- light under the bed will t ur n
on if it is being of f or t ur n off if it is bein g on. I f t he Un d er- light is t u r ning on as t he but ton
pressed, it w ill keep on f or 5 m inut es t hen t ur n off au t om at ically if t h e but t on isn’t pressed
again .
M. Head Massage I NTENSI TY I CREASEMENT b u t ton:
Click t he butt on t he Head v ibrat in g int ensit y w ill r aise u p one lev el, t ot al
N. Massage I NTENSI TY DECREASEMENT but t on :
Click t he butt on t he Head v ibrat in g int ensit y w ill lower dow n one level, t ot al
O. Foot Massag e I NTENSI TY I CREASEMENT but ton:
Click t he butt on t he Foot vibrat ing intensity w ill r aise u p one lev el, tot al
P. Foot Massag e I NTENSI TY DECREASEMENT butt on:
Click t he butt on t he Foot vibrat ing intensity w ill lower dow n one level, t ot al
The n u m ber of lev el repr esents t he v ibrat in g int ensit y. Mor e big num ber of t h e level,
m or e st ron gly v ibrat in g it is. Th e st ron gest v ibrating is level 3, and t he w eak est is level 0.
I m plem ent adj u st m en t of t he v ibrat in g int ensit y is t he way k now n as “ PWM”. Differ ent
duty cy cle of PWM m ak es differ ent int ensit y. Th e value of t he duty cy cle correspon d ing t o
the level is below:
Duty cycle Level
0% 0
20% 1
35% 2
50% 3
4 levels.
4 levels.
4 levels.
4 levels.
Page 3 of 7
Page 4

Q. Massage MODE I CREASEMENT and DECREASEMENT bu t ton:
Click t he butt on t he vibrat in g m ode will change by one lev el, tot al
When it h as been lev el 4, it will ret urn t o level 1 if click t h e but t on .
R. Massage t im e but ton :
Press t he bu tton an d released t o st op all m oves including t he act uat or s and vib rator
an d ch ange cir cularly t h e vibrat in g t im e of t he vibrat or b y one level once, t ot al 3 levels
The t im e m eans t hat v ibrating keeps on f or t his per iod then aut om at ically stops if n o any
butt on relat ed t o vibrat ing is pressed again. The t im e and t h e LED indicat ion ar e below:
This LED flash a tim e, t h e vibrat ing t im e is 10m in u t es;
This LED flash a tim e, t he vibrat ing t im e is 20m in u t es;
4 levels.
Th is LED f lash a t im e, t he v ibrat in g t im e is 3 0 m inutes;
10m in,20 m in,30m in LED
3Wireless p airin g oper at ion (Rem ot e cont rol code)
St ep1: Pow er on t h e contr ol box. ( Put elect ricit y on t he cont r ol box . )
St ep2: Double click on t h e light t ou ch swit ch f or pair ing on the con t rol box . At t his t im e, t he
pairing inst ruct ions LED on t h e cont r ol box ligh t , an d t he cont r ol box is in a condit ion of pairing
St ep3: Hold t he silicone butt on in the bat ter cov er on the back of t h e rem ot e cont r ol dev ice,
when t he LED in t he silicone bu t ton flashes, it indicat es that t he rem ot e cont r ol is sear ching for
the rep aired cont rol box. When t he LED of mat ching but t on wit h in t he rem ote contr ol has a lon g
light and the LED on t he pair ed contr ol box is off at the sam e t im e, the pairing oper at ion is
fin ish ed. To t est t he pair ing is successful or not as well as the h ead u p / down, feet up/ down
butt ons and ot her b u t tons relat ed t o t h e actuator, if you can h ear t he t ick ing sound that
released by t he r elay, it indicat es t hat t he r epairin g is successf ul. Otherwise, rep eat all t he st eps
above.
4Lock an d unlock
Press and keep 2 seconds sim u lt aneously bot h but tons an d until t he
Page 4 of 7
Page 5

LEDs flash, the rem ote contr ol will be locked.
Press an d k eep 2 seconds sim ult aneously bot h but tons and u n t il t h e
LEDs flash, the rem ote contr ol will be unlocked.
If not hin g is done for 5 m inut es on it an d t he funct ion being locked aut om at ically is enabled,
the rem ote contr ol will be locked aut om at ically.
The funct ion being lock ed au t om atically can be enabled or disab led .
Press and k eep 2 seconds sim ultaneously both but t ons and unt il the LEDs
flash, t he funct ion being lock ed au t om at ically will be enabled.
Press and k eep 2 seconds sim ultaneously both but t on s and unt il the LEDs
flash, t he funct ion being lock ed au t om at ically will be d isabled.
I n t he locked st at us t h e actuators w ill n ot be operat ed. Bu t the v ibrator is st ill able t o be
operat ed.
Page 5 of 7
Page 6

5Connect t o t he Con t rol Box
The cont rol box is design ed for u sin g t he SMPS of 29VDC/ ar ound 2A as t h e pow er. I t is
necessar y t o u se t he SMPS pr ovided by us w h en nor m al operat ion.
I n t he case of t he AC pow er ut ilit y failure, the bat ter ies for b ack u p of 18VDC can be used as
the pow er. I t is on ly for flat tin g t he bed plate without load if t he bat t eries used as the pow er
an d each one of t he bat t eries m ust be new wit h 9V volt age. You can p r ess and hold t h e
em er gency but ton on t he bod y of t he contr ol box t o flat t he bed. Th e m ovem ent sequence
is that t he Head and Foot act u at or goes dow n u n t il arr ives t o t h e lim it . I f r elease t he butt on,
all m ovem ent w ill st op im m ediat ely.I t isn’t also str ongly recom m ended t o st art t he m assage
m ot or s when t he batt ery box used as power.
Page 6 of 7
Page 7

FCC NOTE
:
Any Changes or modifications not expressly approved by the party responsible for compliance could void the
user’s authority to operate the equipment.
This device complies with part 15 of the FCC Rules. Operation is subject to the following two conditions:
(1) This device may not cause harmful interference, and
This device must accept any interference received, including interference that may cause undesired operation.
(2)
Page 7 of 7
 Loading...