

Kees KS FILTERED SUPPLY FANS User Manual
KEES, INC.
400 S. INDUSTRIAL DRIVE - P.O. BOX L - ELKHART LAKE, WISCONSIN 53020 - (920) 876-3391 - FAX (920) 876-3065
VISIT OUR WEBSITE @
Fan Installation & Maintenance Manual
RECEIPT & INSPECTION
Upon receipt, carefully inspect the fan and accessories for damage or shortage. Turn the wheel by hand to
insure it turns freely and does not rub or bind. If a damper has been supplied, check for free operation of all
moving parts.
INSTALLATION
WARNING: This unit has rotating parts. Use appropriate safety precautions during installation, operating
and maintenance. ALWAYS disconnect power prior to working on the fan. Disconnect switches are
recommended. Locate the disconnect switch near the fan so maintenance personnel have complete
control of the power source.
Install wiring to the fan according to local code requirements and in accordance with the National Electrical Code,
NFPA 70. Ensure the power supply voltage, frequency, phase and wire current capacity is in accordance with the
motor nameplate. Lock out all power sources before wiring the fan to the power source. Wire the fan in
accordance with the wiring diagram on the motor. Leave enough slack in the wiring to allow for motor movement
when adjusting the belt tension.
Before operating the fan, ensure all fasteners and setscrews are tight. Inspect the wheel to inlet clearance and
spin the fan wheel to assure the wheel does not rub or bind on the fan inlet; adjust as necessary. Inspect the belt
tension and pulley alignment and adjust as necessary. Ensure the fan and ductwork are clean and free of debris.
www.kees.com
START-UP
Restore power to the fan. Test the fan rotation to verify it is rotating in the correct direction. Do not run the fan in
the wrong direction. Correct the wiring to obtain correct rotation as necessary. Turn the fan on and inspect for
excessive vibration, unusual noise, bearing or belt noise. Measure fan voltage and amperage to verify they are
correct. If any problems are found, shut off the fan, lock out the power, and rectify any problems before returning
the fan to operation.
OPERATION
After initial start-up, inspect the fan after 30 minutes to assure all fasteners and setscrews are tight. After 8 hours
of operation, inspect and adjust as necessary the belt alignment and tension. After 24 hours of operation, again
inspect and adjust as necessary the belt alignment and tension.
MAINTENANCE
WARNING: This unit has rotating parts. Use appropriate safety precautions during operating and
maintenance. ALWAYS disconnect power prior to working on the fan.
Establish a maintenance and inspection schedule for the fan. Regular inspections should occur at least twice per
year for fans in clean & non-abrasive/non-corrosive environments; more frequently if exposed to adverse
environmental conditions. Inspect the fan for loose fasteners and setscrews, check the belt for wear, tension and
alignment, and service as necessary.
FAN SPEED ADJUSTMENT
WARNING: This unit has rotating parts. Use appropriate safety precautions during operating and
maintenance. ALWAYS disconnect power prior to working on the fan.
To adjust fan speed, loosen the belt tension, then loosen setscrew on motor pulley and remove key if so
equipped. Turn the pulley rim to open or close the groove. If the pulley has multiple grooves, all must be
adjusted to the same width. To reduce the speed, open the groove width. To increase the speed, close the
groove width. Be sure not to adjust the fan speed beyond the fan and motor horsepower limits. After adjustment,
properly set the belt tension (refer to the following section for belt tension procedures).
BELT REPLACEMENT AND TENSION ADJUSTMENT
WARNING: This unit has rotating parts. Use appropriate safety precautions during operating and
maintenance. ALWAYS disconnect power prior to working on the fan.
To remove belt(s), loosen the motor plate adjustment bolts and slide the motor plate so the belt(s) slip easily over
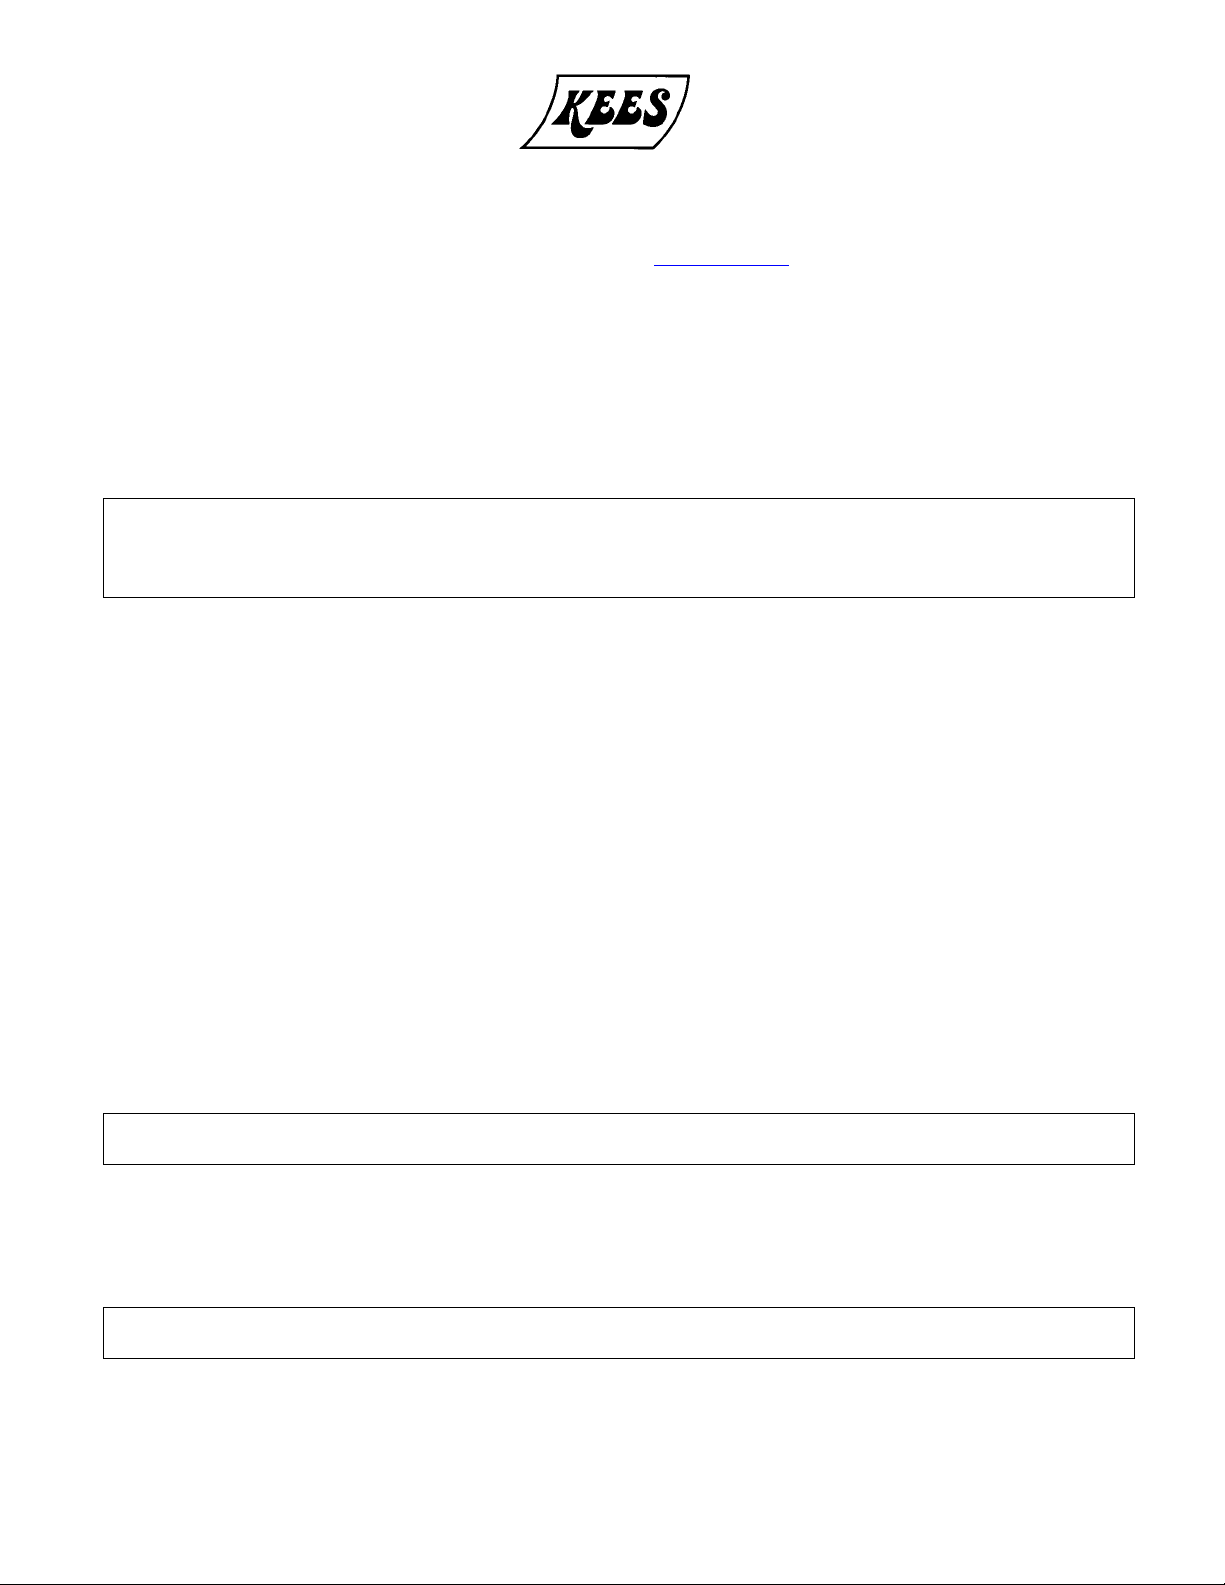
the rim of the pulley. Install new belt(s). To adjust the belt tension, slide the motor plate until proper tension is
achieved. For proper tension, a deflection of approximately 1/4” per foot of shaft center distance should be
obtained by firmly pressing the belt. Refer to figure 1. Tighten the motor plate bolts firmly after adjusting the belt
tension. Check the pulley alignment before returning the fan to operation.
Figure 1
Figure 2
PULLEY ALIGNMENT
WARNING: This unit has rotating parts. Use appropriate safety precautions during operating and
maintenance. ALWAYS disconnect power prior to working on the fan.
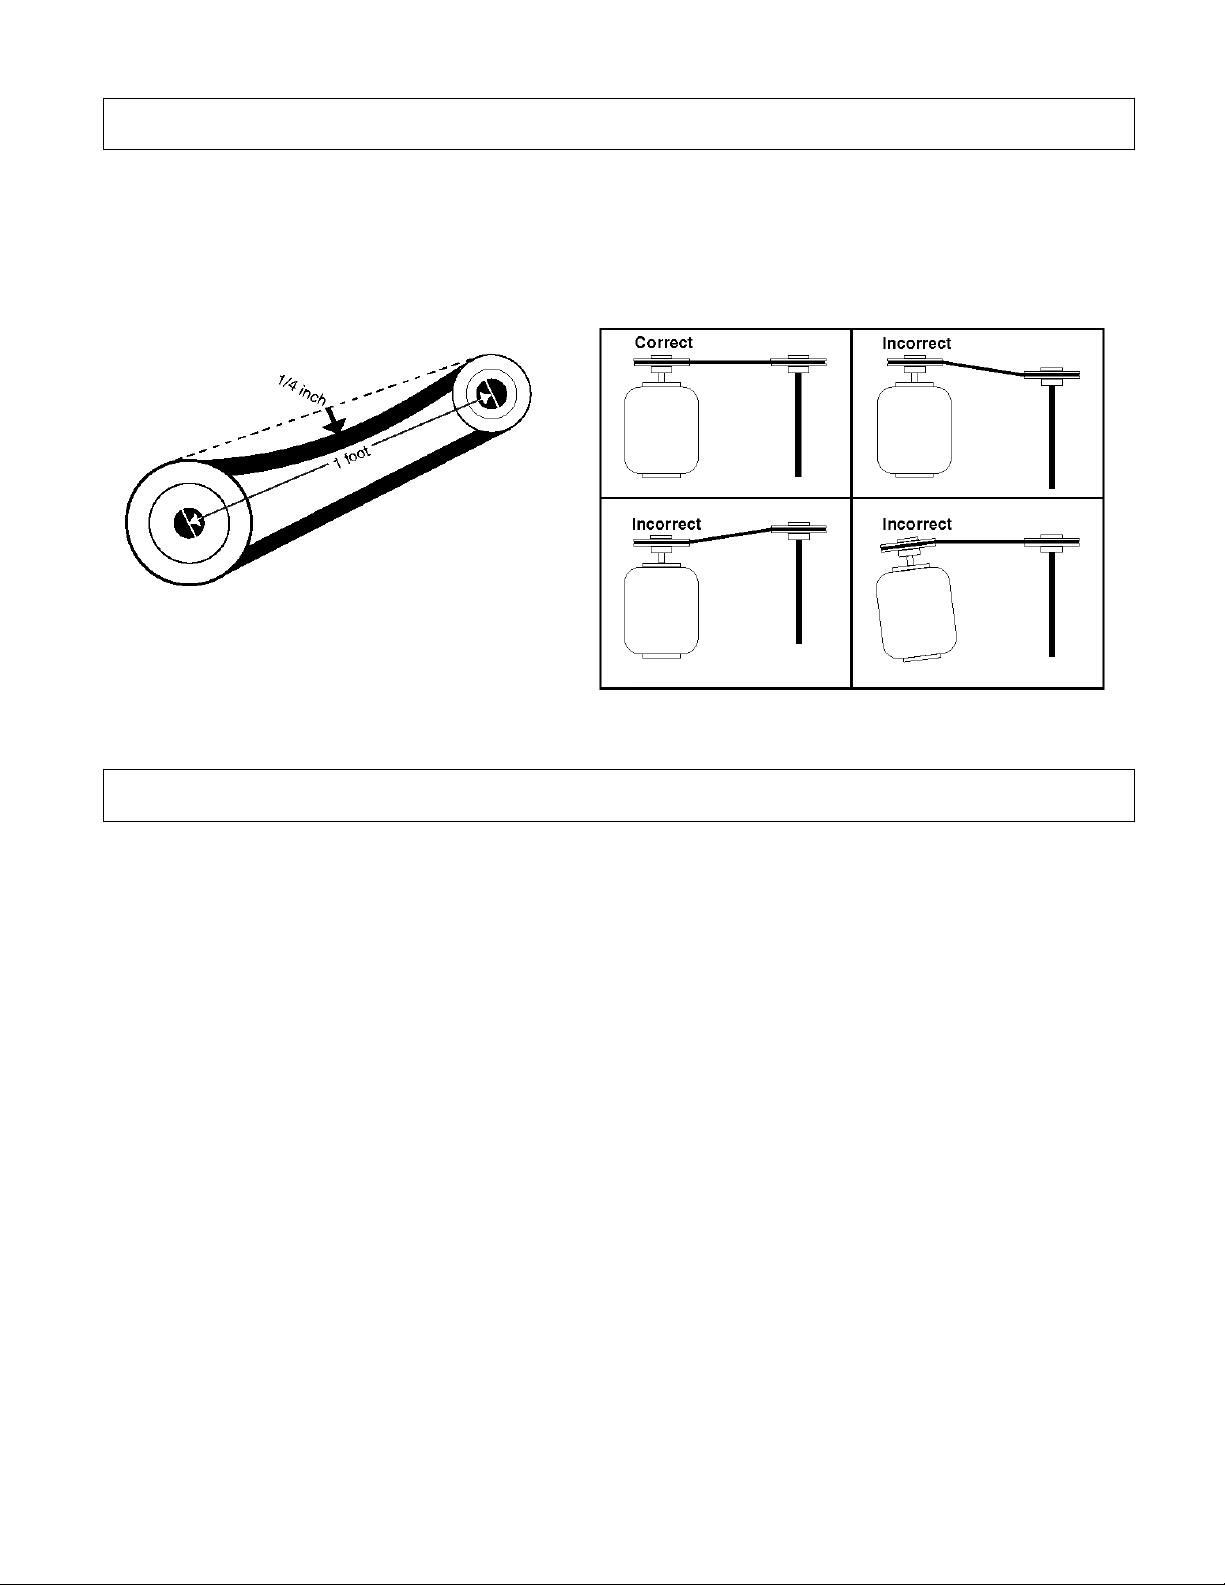
Pulley alignment is adjusted by loosening the motor pulley setscrew and moving the motor pulley on the motor
shaft. Correct pulley alignment is shown in figure 2.
TROUBLESHOOTING
Low Capacity or Pressure Overheated Motor
Incorrect direction of rotation Motor improperly wired
Poor fan discharge conditions or closed damper Incorrect direction of rotation
Improper wheel alignment Incorrect fan RPM
Excessive Vibration or Noise Incorrect voltage
Damaged or unbalanced wheel
Belts loose, worn or oily Overheated Bearings
Speed to high Excessive belt tension
Incorrect direction of rotation
Bearing failure or worn shaft
Fan surge (unstable operating point)
WARRANTY
KEES, INC. warrants it’s products to be free from defects in material and workmanship for a period of one year
from the date of purchase. Any products which prove to be defective during the warranty period will be repaired
or replaced at our option when returned to our factory, shipping prepaid. KEES will not be responsible for any
installation or removal costs, any consequential damages or other costs.
Fan motors are warranted by the motor manufacturer. Contact KEES for the specifics of motor fan warranty if
required.
FanI&M 02/05
 Loading...