


Keencut 75" AZTC Hot
Cut System - 61727
Instruction Manual
Fitting the AZ Hot Knife holder
The AZ Hot Knife attachment has been designed to accept the TC 20 Heated Knife
and will need to be fitted with a Type 'T 013/45' blade.
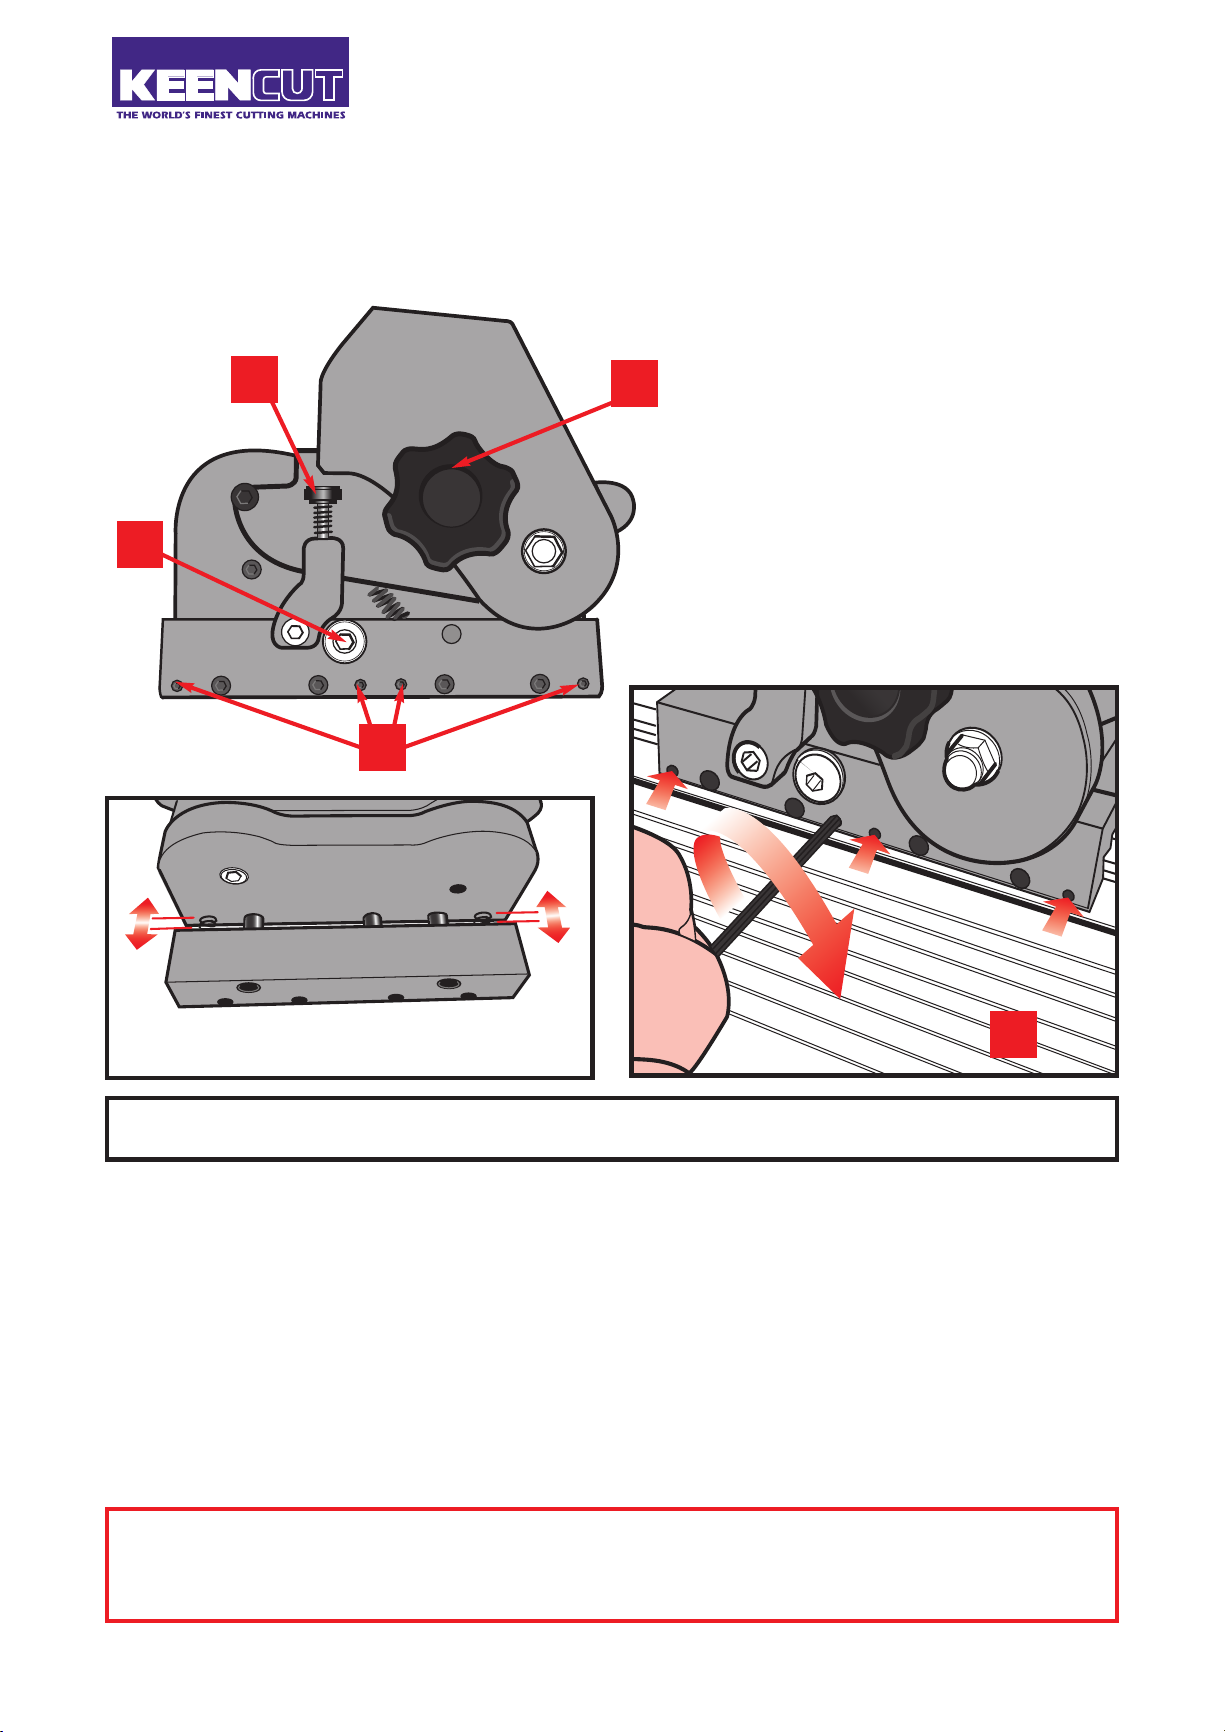
A = Tighten to clamp Hot Knife
into holder
C
A
B = Loosen to open up the base when
fitting on to slideway
C = Rotate knob to adjust point at
which the trigger switches the hot
knife on
B
1
A heatpr
D = Sliding bearing adjustment screws.
D
2
D
oof protective surface must be placed on the base of the machine under the fabric.
1 To fit the attachment to the slideway loosen screw B to create a gap in the base sufficient for it to be
lowered onto the slideway.
Tighten screw B and check that the cutting head runs smoothly.
2 If the head is too loose or too tight when moved it can be adjusted, place the long end of the 2mm Allen
key provided onto one of the four adjustment screws
moving the Cutting Head slowly with the other
screw the smallest amount so the Cutting Head just slides easily.
Repeat this on the other screws in turn, two or three smaller adjustments on each screw may be needed
to achieve an easy sliding movement with zer
NOTE: Once the sliding bearings have been adjusted the attachment should not need readjusting if the
KC-AZ/2 7349-05/13
D and very gradually tighten it with one hand whilst
. Once you feel the sliding motion start to tighten undo the
o side play
cutting head is removed and replaced at a later time. It is however, important that screw B is
fully tightened each time the cutting head is fitted to the machine.
.

Fitting and use of the AZ HOT KNIFE
3
A
5
4
C
F
3 To fit the Hot Knife, simply insert it into the holder ensuring the Hot Knife is seated fully into its recess.
Tighten knob A and check Hot Knife is fully gripped in position, the blade should cut about 2-3mm
(1/16” to 1/8”) away from the edge of the slideway.
4 Depress the Hot Knife and the trigger should switch the heat on prior to it coming into contact with
the fabric.
The trigger can be adjusted to alter the position the heat is switched on by tur
ning knob
C.
5 Once the blade has reached the correct temperature press down to bring the blade in contact with the
fabric and slide the cutting head to the right to seal and cut it.
A heatproof protective surface F must be placed on the base of the machine under the fabric.
Keencut Limited, Baird Road, Willowbrook Industrial Estate, Corby, Northants, ENGLAND NN17 5ZA.
Telephone: 01536 263158 Fax: 01536 204227 E-mail: info@keencut.co.uk www.keencut.co.uk
 Loading...