

Keebox KView IPC1000WI, IPC1000W Quick Installation Manual
1.01
Quick Installation Guide
IPC1000WI
KView Wireless N Day/Night Internet Camera

1. Before You Start
2. Hardware Installation and Configuration 2
3. Wi-Fi Protected Setup (WPS) Push Button Setup 10
1
Version 05.13.2009
Contents
English
1
Troubleshooting
16
Quick Installation Guide - KEEBOX IPC1000WI
Version 01.25.2011
Wireless Tips
17
ŸA computer with a wired network adapter properly installed
ŸCD-ROM Drive
ŸVGA Resolution: 800 x 600 or above
ŸWeb Browser: Internet Explorer (6.0 or higher)
ŸWireless router (e.g. W150NR) or access point
ŸAn available DHCP Server –routers usually have a built-in DHCP server.
ŸIPC1000WI
ŸCD-ROM (Utility and User's Guide)
ŸMulti-Language Quick Installation Guide
ŸNetwork Cable (1.5m/5ft.)
ŸMounting Kit
ŸPower Adapter (5V DC, 1.2A)
1
Installation Requirements
Verify Package Contents
Before You Start
1 English
Supported Operating Systems CPU Memory
Windows 7 (32/64-bit)
Windows Vista (32/64-bit)
Windows XP (32/64-bit)
1.3GHz or above
1.3GHz or above
1.3GHz or above
1GB RAM or above
512MB RAM or above
256MB RAM or above
Windows 2000
1.3GHz or above 256MB RAM or above
Hardware Installation and Configuration
Quick Installation Guide - KEEBOX IPC1000WI
English 2
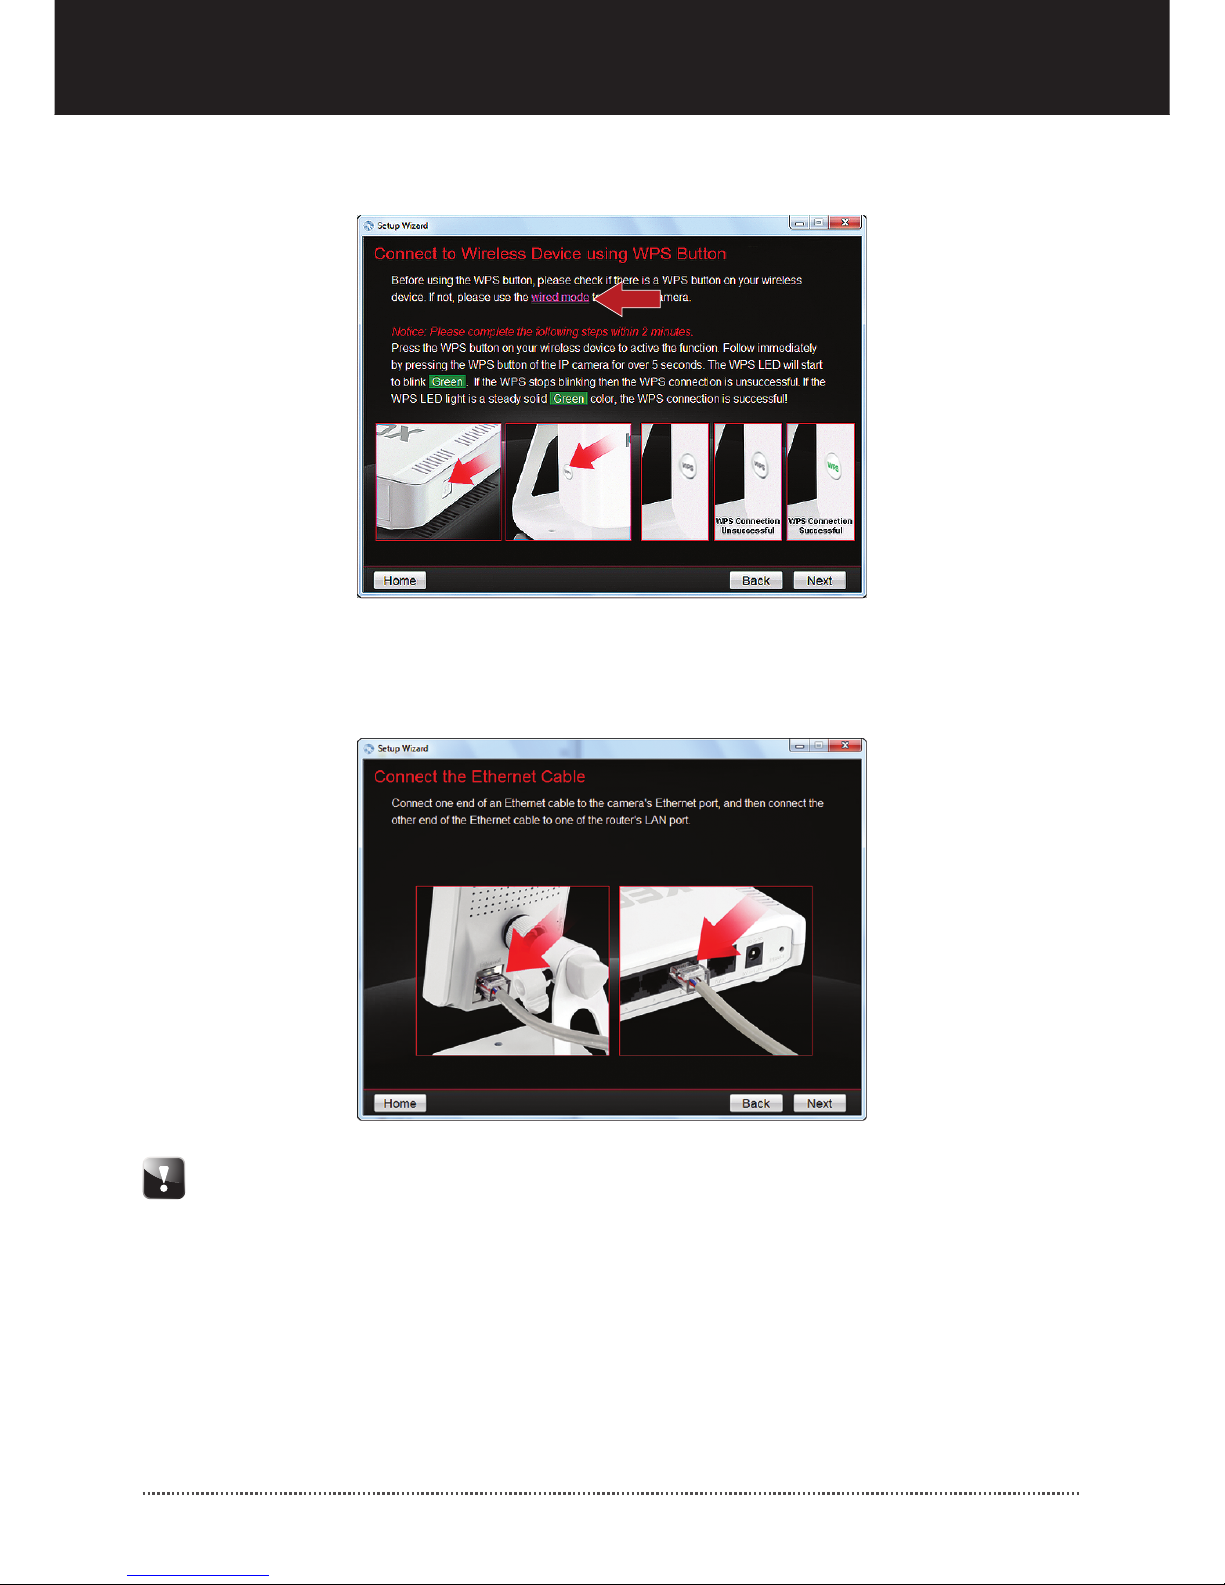
Wi-Fi Protected Setup (WPS) allows you to quickly connect to your wireless
router or access point. If you would like to use WPS push button setup, please
go directly to section 4. Wi-Fi Protected Setup (WPS) Push Button Setup. If your
wireless router or access point does not support WPS, continue on to step 1.
It is recommended that you configure the IP Camera while directly connected
using a Network cable.
If you would like to use KView software, please install the software by clicking
Install KView in the Autorun window and refer to the User's Guide on the CD
for more information.
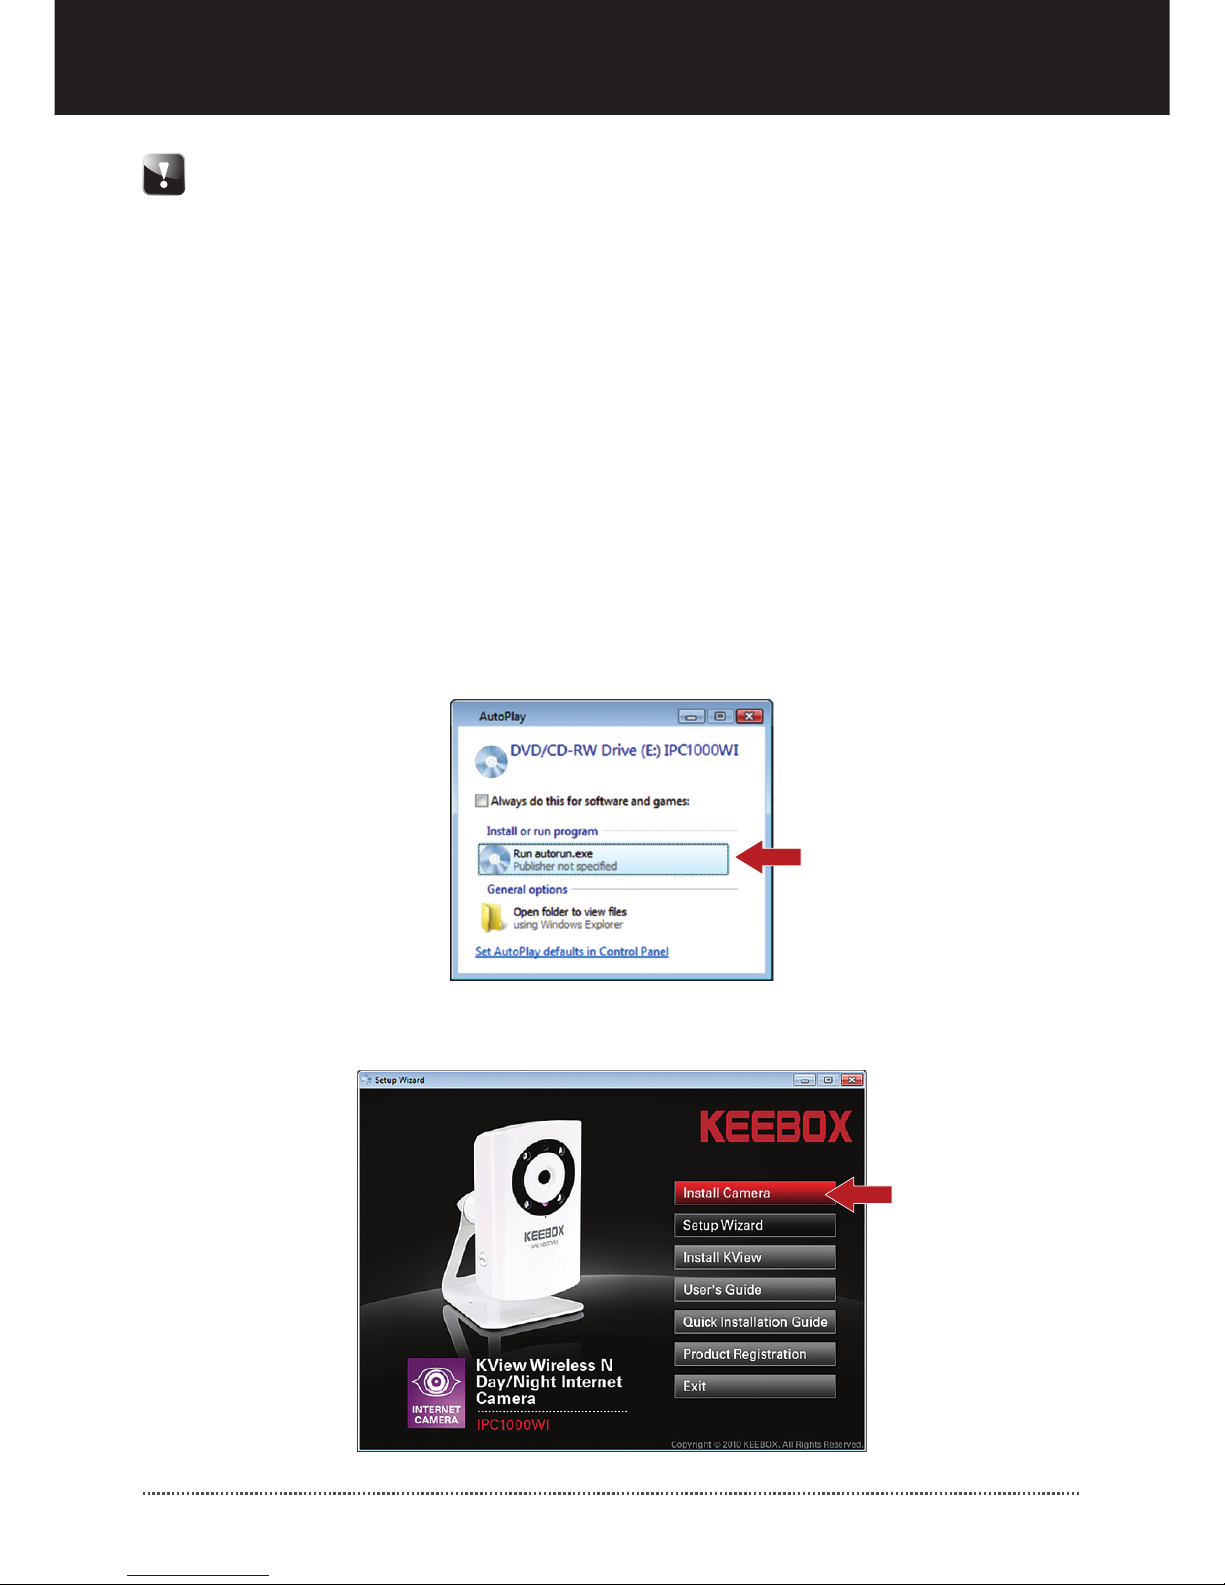
2. Click Run autorun.exe (Windows 7/Vista only)
3. Click Install Camera.
1. Insert the Utility CD-ROM into your CD-ROM drive.
3
Troubleshooting
3 English
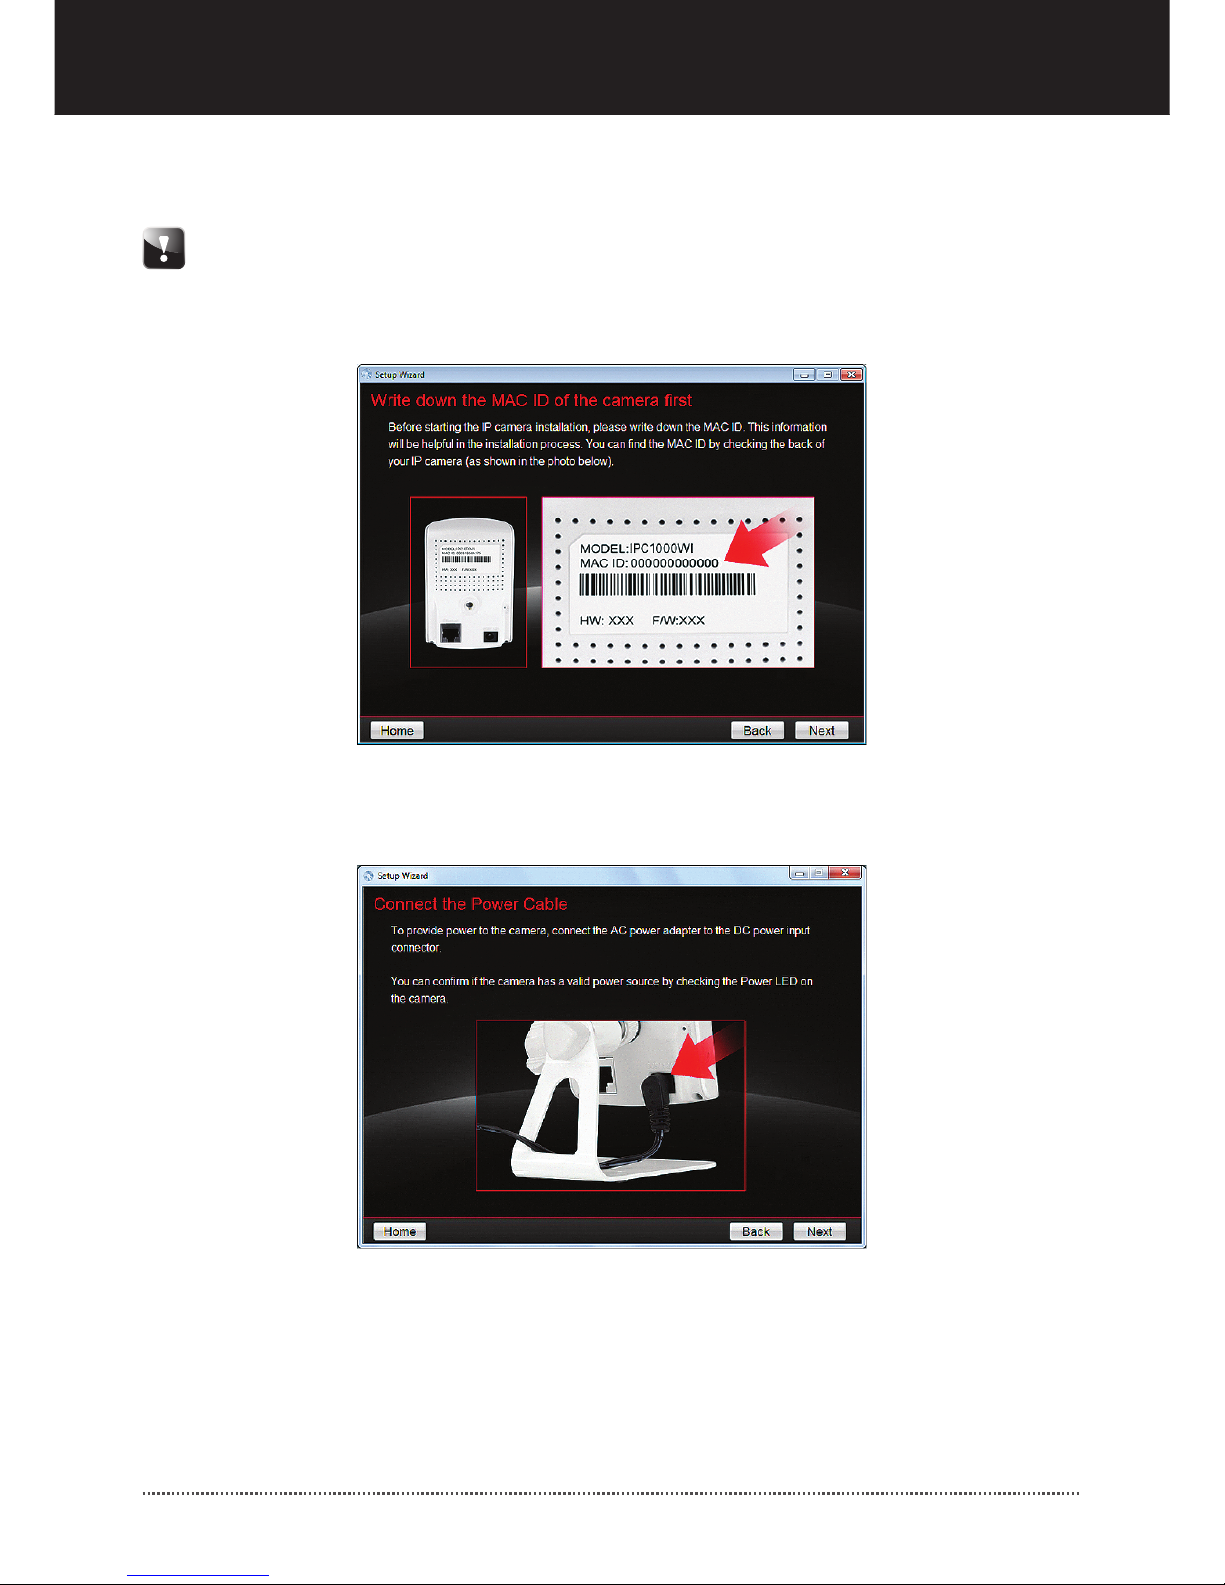
4. Write down the MAC ID of the camera and then click Next.
5. Connect the Power Adapter to the IP Camera and then to a power outlet. Then
click Next.
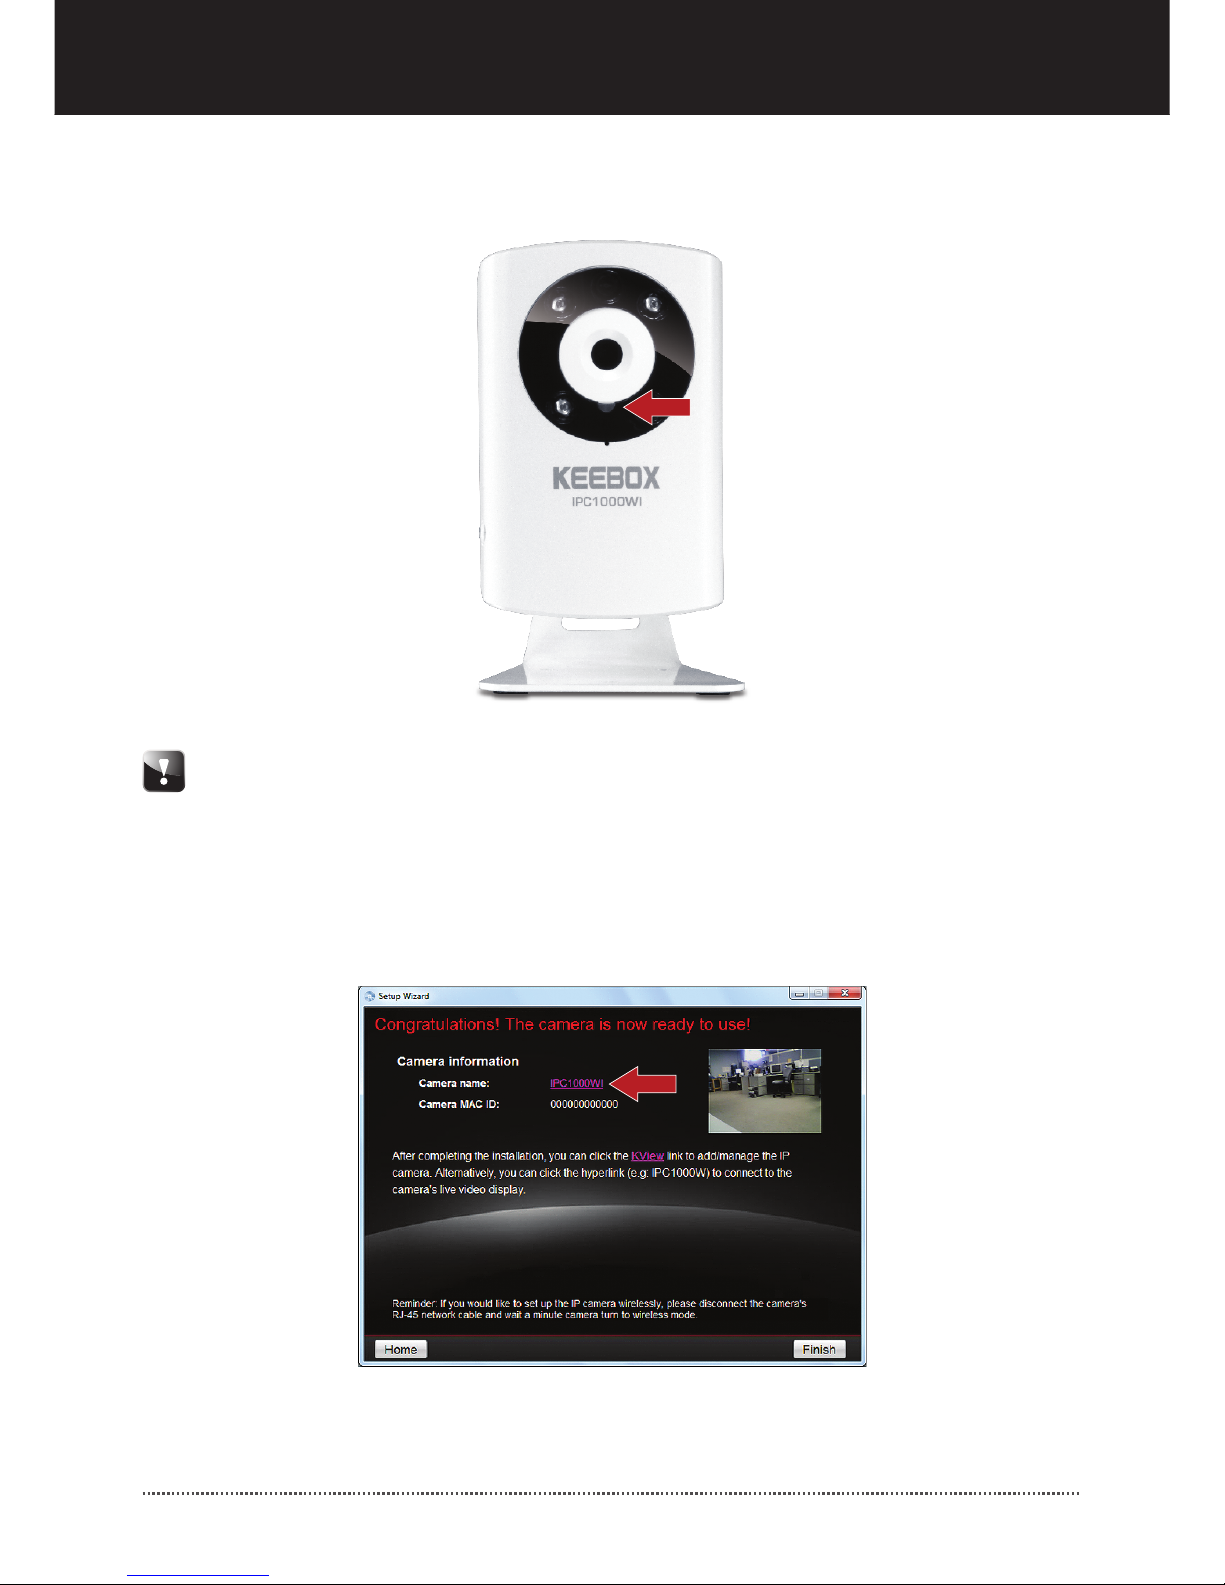
The Mac ID shown in the Setup Wizard is an example. This is not the actual
MAC ID of your IP camera. The Mac ID can be found on the back of the
IPC1000WI.
Quick Installation Guide - KEEBOX IPC1000WI
English 4
6. Click wired mode.
7. Connect a RJ-45 network cable from a router to the network port on the IP
Camera.
At this point the IP camera should be connected to your router and the router
to you computer via network cables.
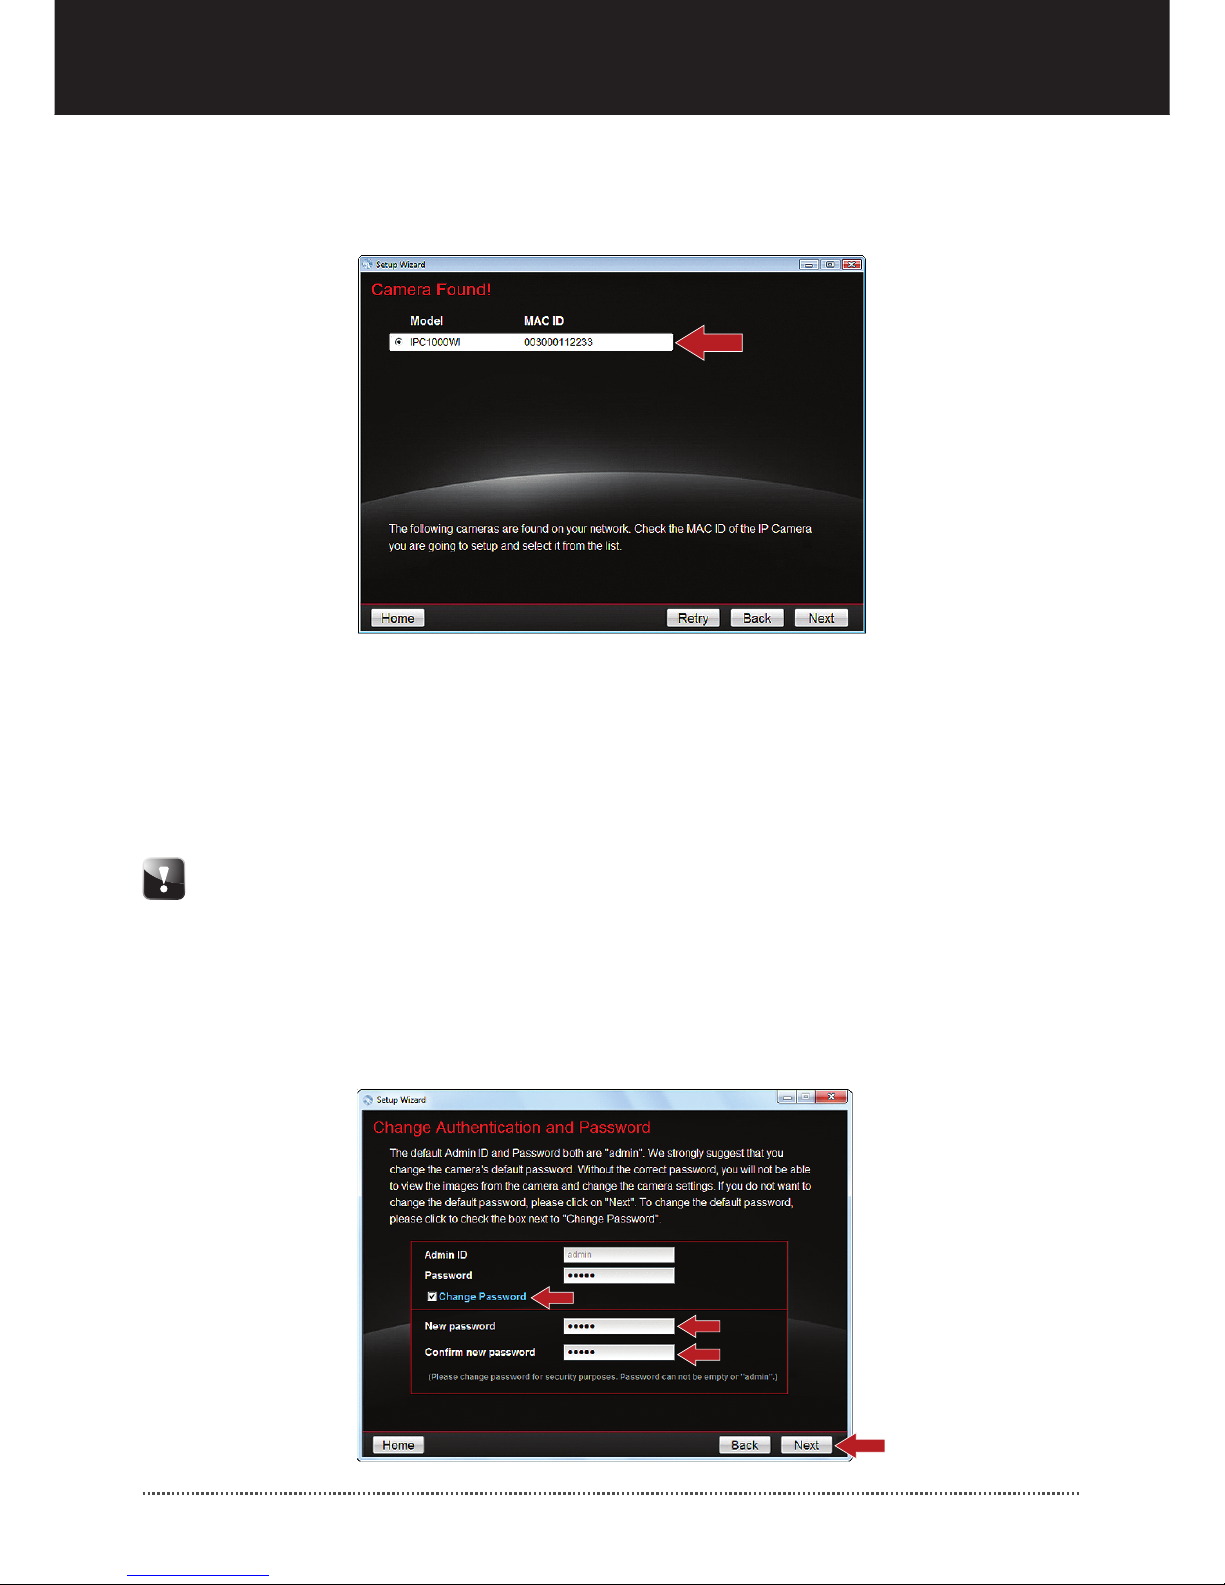
9. If you would like to change the administrator password, click Change Password,
enter a new password, retype the new password and then click Next. Leave
Change Password unchecked if you do not wish to change the password. By
default, the Password is admin.
Setting a password prevents other users from accessing the IPC1000WI's
configuration.
It is recommended that you enter a new password. If you decide to change this
setting, please write down the new password.
Password is limited to up to 8 characters.
5 English
8. Select your IP camera and then click Next. Verify that the MAC ID matches the
MAC ID that you copied down in step 4.
Troubleshooting
Quick Installation Guide - KEEBOX IPC1000WI
English 6
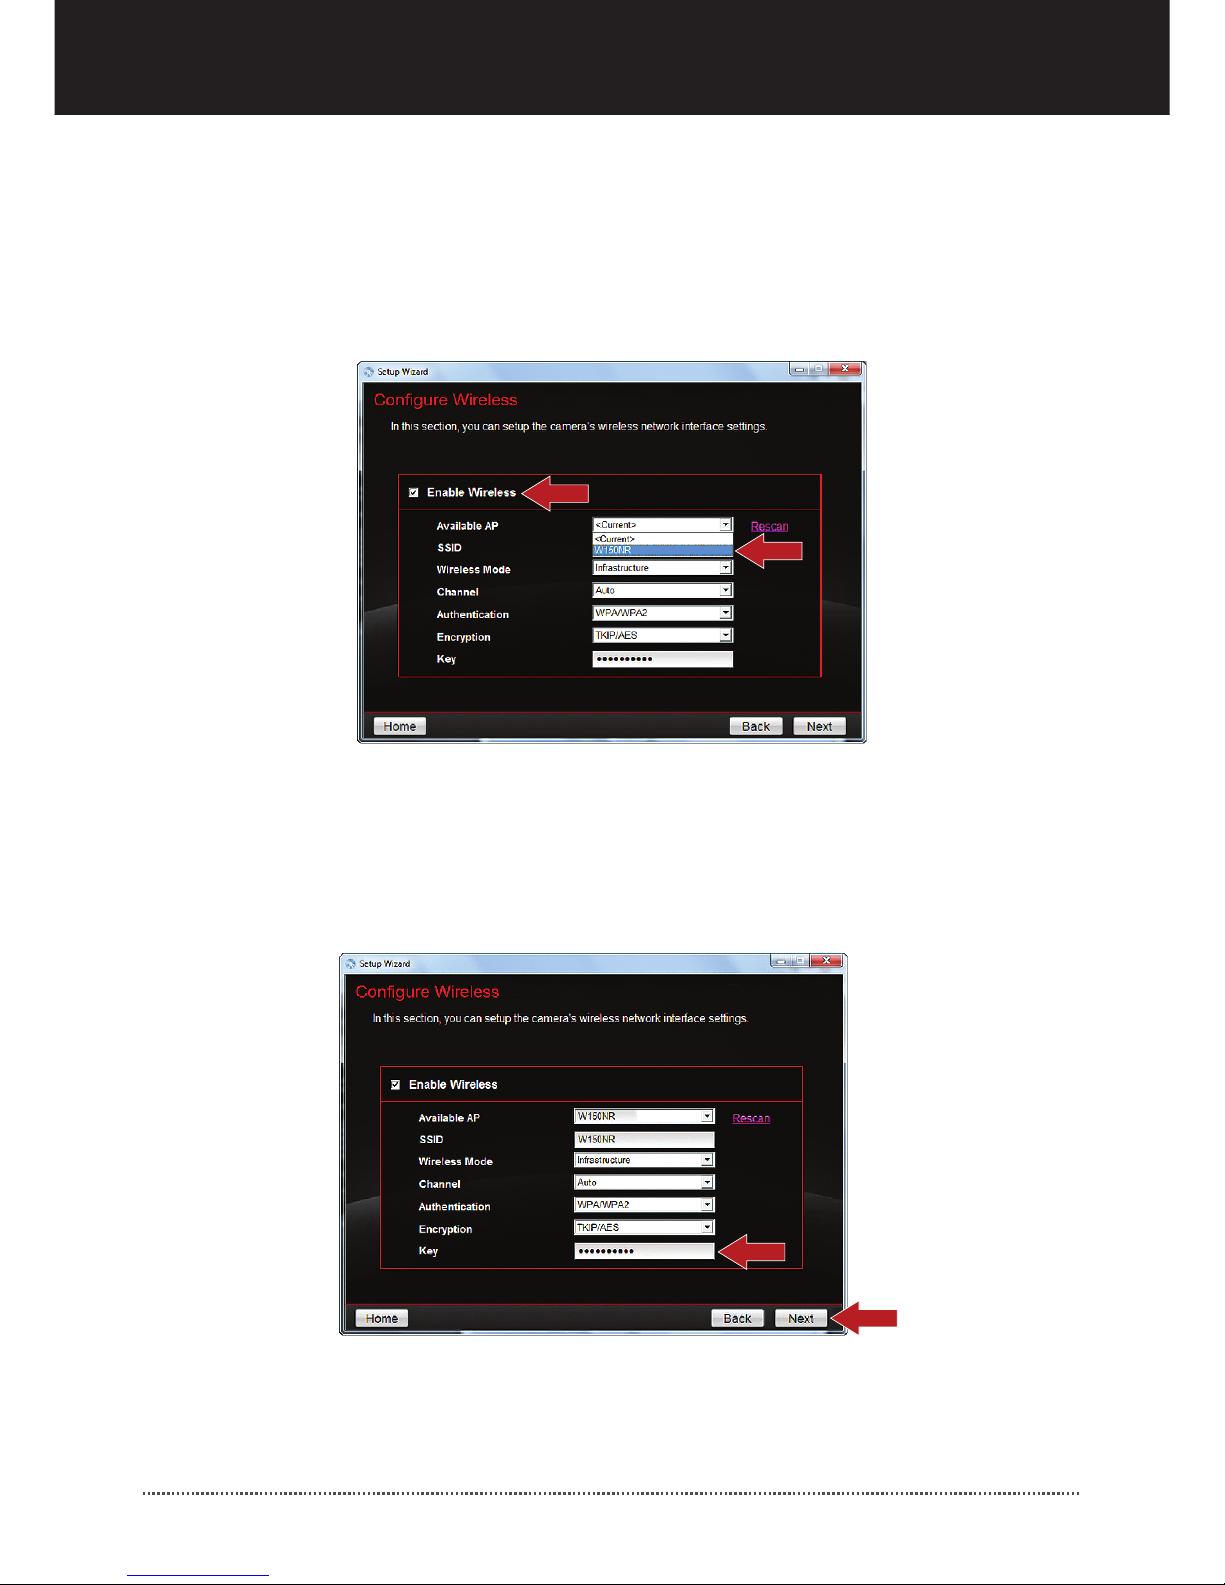
10. Click Enable Wireless.
11. Click on the dropdown list for Available AP.
12. Select your SSID from the Available AP dropdown list. The SSID is the wireless
network name of your wireless network (e.g. wireless router or access point).
13. If Encryption is enabled on your wireless network (e.g. access point or wireless
router) the correct Authentication and Encryption type will be automatically
selected. Enter the Key (wireless network password) and then click Next.
7 English
14. Disconnect the RJ-45 cable. Verify that the LINK (RED) LED is lit.
15. Click IPC1000WI to access the browser configuration.
The IPC1000WI will not work wirelessly until you disconnect the Ethernet
cable from the back of the camera.
Do NOT click Finish until instructed to do so.
 Loading...