

Keba KeContact P30 b Series, KeContact P30 c Series, KeContact P20 c Series, KeContact P20 b Series Functions & Procedures
Page 1
KeContact P20 / P30
b-series / c-series
Authorization functions
RFID & Key
Page 2
Document:V 4.00
Document no.: 96169 (Basic languages)
Pages:112
© KEBA AG 2015-2017
Specifications are subject to change due to ongoing technical development. No guarantee is offered in respect of any of the specifications given here. All rights reserved.
All intellectual property, including trademarks and copyrights, are the property of their respective owners. Any unauthorized use
thereof is strictly prohibited.
KEBA AG, Postfach 111, Gewerbepark Urfahr, A-4041 Linz, www.keba.com/emobility
Page 3

Language
Deutsch....................................................................................................................................................
English.....................................................................................................................................................
Français...................................................................................................................................................
Italiano .....................................................................................................................................................
Español....................................................................................................................................................
Dansk .......................................................................................................................................................
Português................................................................................................................................................
Nederlands..............................................................................................................................................
Norsk ........................................................................................................................................................
Svensk .....................................................................................................................................................
Suomi .......................................................................................................................................................
5
12
19
26
33
40
47
54
61
68
75
Polski........................................................................................................................................................
ελληνικά...................................................................................................................................................
Türkçe ......................................................................................................................................................
中国
...........................................................................................................................................................
82
89
96
103
en - 3/112
Page 4

Page 5

Inhalt
Inhalt
1 Autorisierungsfunktionen ...................................................................................................... 6
1.1 Zu diesem Handbuch.....................................................................................................6
1.2 Begriffserklärungen........................................................................................................6
1.3 RFID Autorisierung ........................................................................................................8
1.4 Zylinderschloss wechseln (optional) ............................................................................ 10
de - 5/112
Page 6

Autorisierungsfunktionen
1 Autorisierungsfunktionen
1.1 Zu diesem Handbuch
VORSICHT!
Dieses Handbuch ist eine Erweiterung des „Benutzerhandbuchs“. Alle Anweisungen und
Sicherheitshinweise im Benutzerhandbuch sind unbedingt zu beachten!
Führen Sie die Installation der Ladestation laut „Installationshandbuch“ durch.
Gültigkeit
Dieses Handbuch ist gültig für spezielle Varianten der Geräteserien:
● KeContact P30 b-series
● KeContact P30 c-series
Zuordnung mittels Produktcode (vom Typenschild):
KC-P30-XXXXXXX-XX
= 1...b-series, 2...c-series, 3...c-series
= R...RFID, K...Keyswitch
Firmware-Version
Hinweis
Führen Sie für den Erhalt des vollen beschriebenen Funktionsumfangs bei Bedarf bitte ein Firmware-Update durch. Zusätzliche Infos, Anleitungen und die Firmware finden Sie unter:
↪
http://www.keba.com/de/emobility/service-support/downloads/downloads
1.2 Begriffserklärungen
Autorisierung
Spezielle Gerätevarianten bieten die Möglichkeit, das Starten einer Ladesitzung
von bestimmten Voraussetzungen abhängig zu machen. Folgende Varianten stehen zur Verfügung:
● Freigabe über Schlüsselschalter.
6/112 - de
● Freigabe über SmartHome Schnittstelle.
● Freigabe über externen Eingang [X1].
● Benutzeridentifizierung mittels RFID Karte.
Page 7

Autorisierungsfunktionen
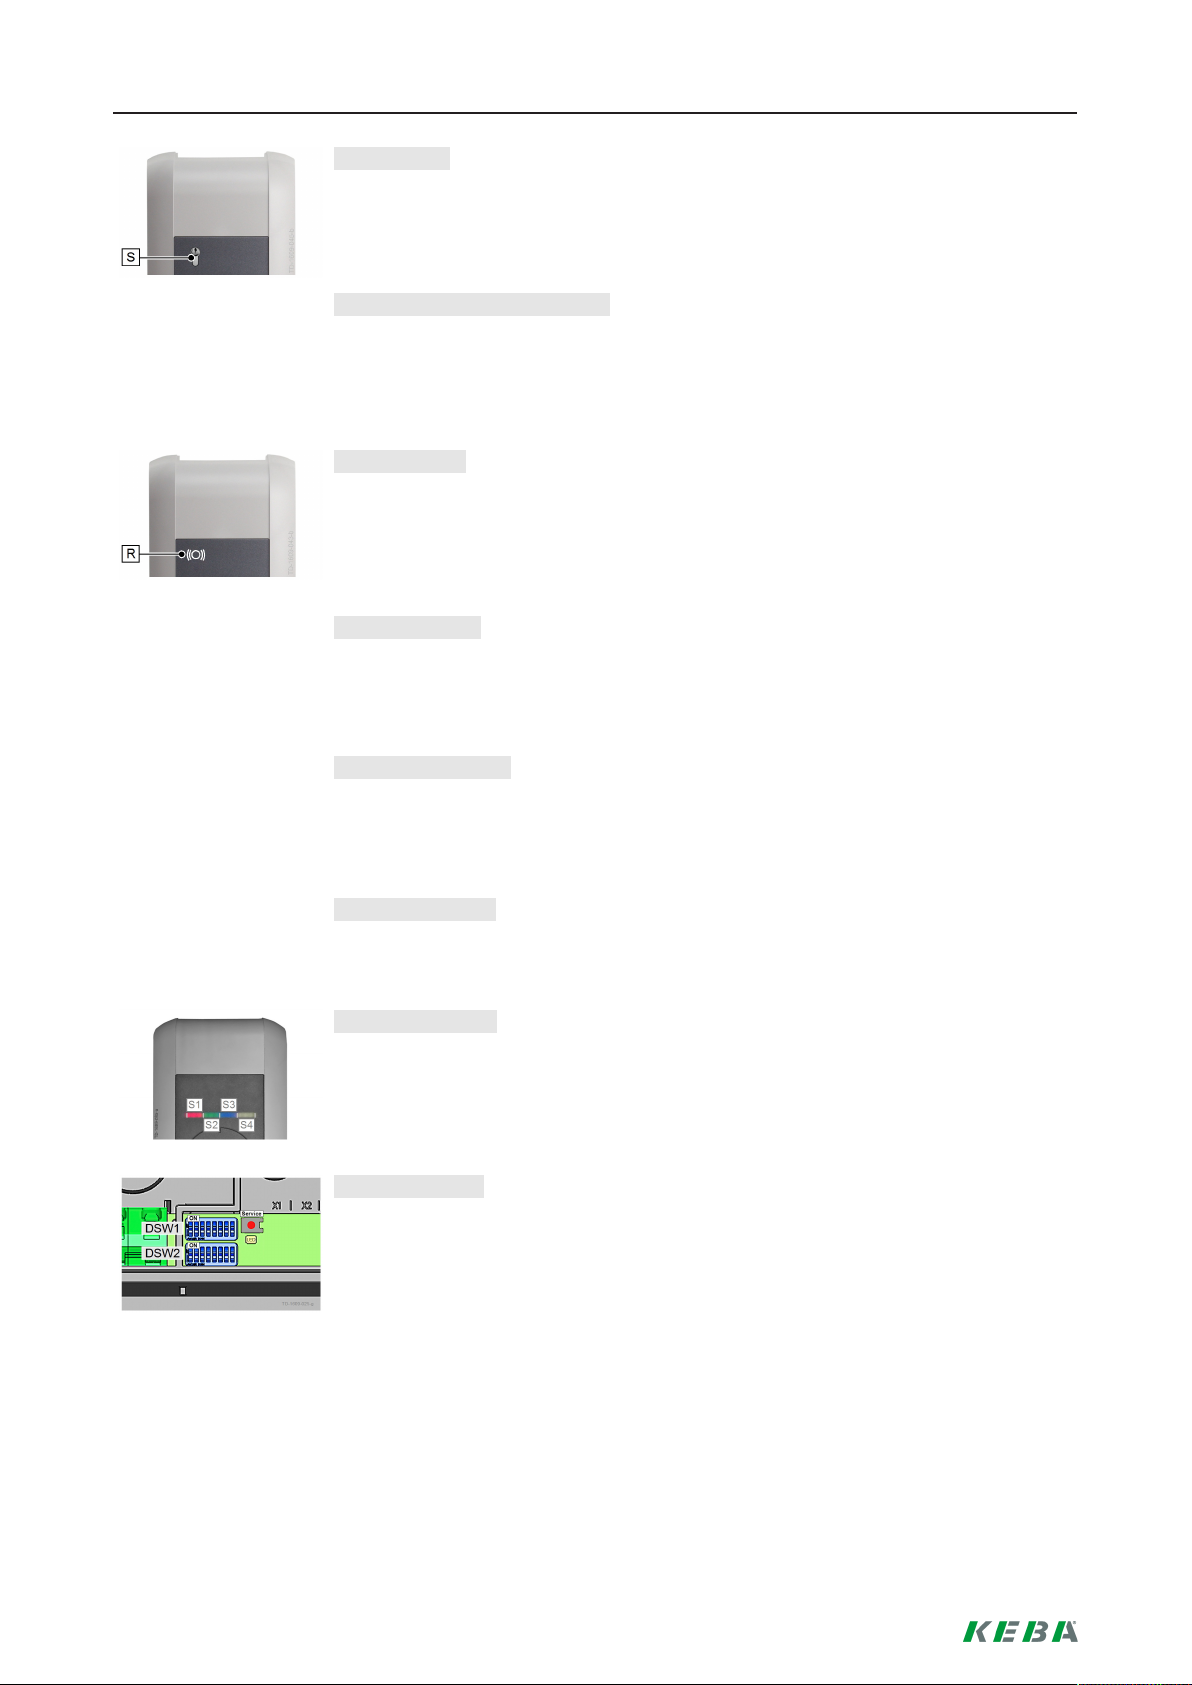
Schlüsselschalter
In speziellen Varianten der KeContact P30 ist ein Zylinderschloss verbaut, das nur
Benutzern mit passendem Schlüssel das Starten eines Ladevorgangs erlaubt.
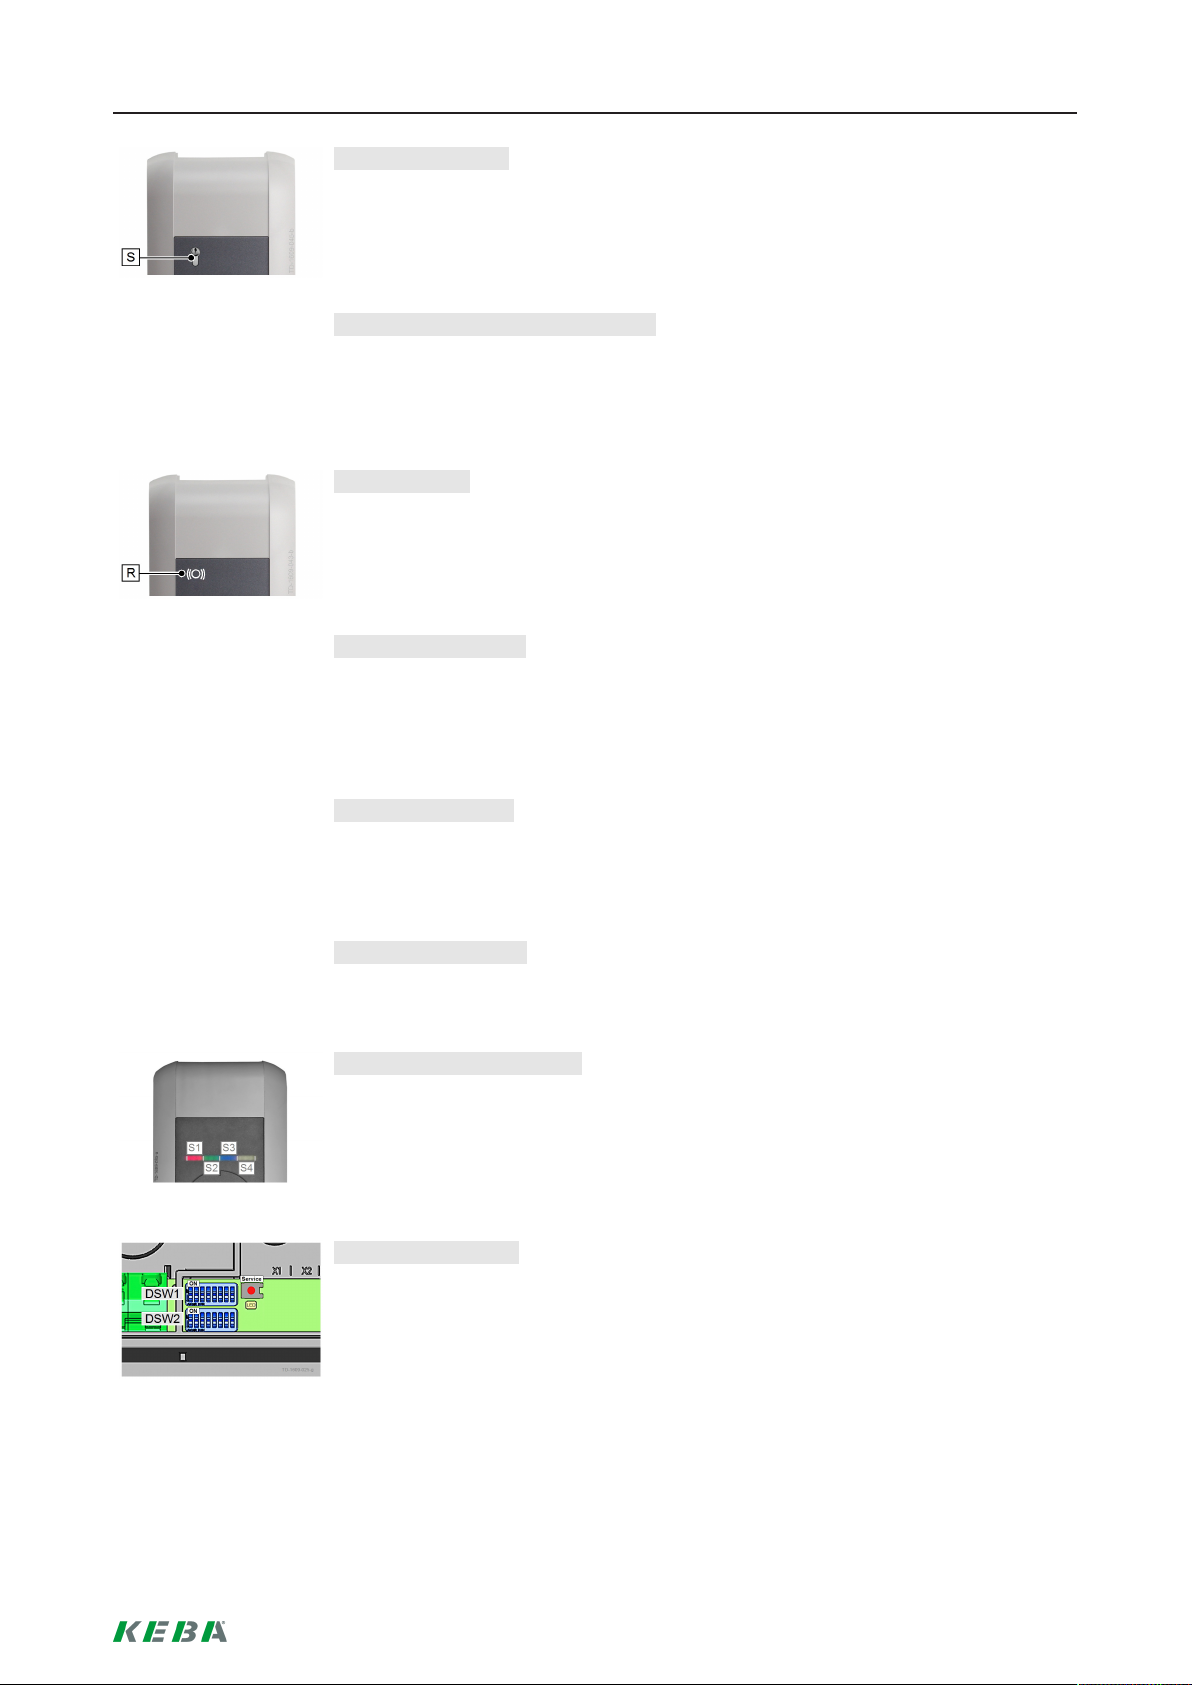
Der Schlüsselschalter [S] dient zur Autorisierung eines Benutzers mit einem
Schlüssel.
Externer Freigabeeingang [X1]
Die beschriebenen Gerätevarianten besitzen die Möglichkeit über einen Eingang
(Schließer) durch einen externen, potentialfreien Schalter autorisiert zu werden.
Beachten Sie in diesem Fall speziell die logische Verknüpfung zwischen den Autorisierungsvarianten. Die korrekte Installation und Konfiguration entnehmen Sie bitte
dem "Installationshandbuch".
RFID Reader
In speziellen Varianten der KeContact P30 ist ein RFID Lesegerät verbaut, das die
Autorisierung mittels RFID Tags erlaubt.
Der RFID Reader [R] dient zur berührungslosen Autorisierung eines Benutzers mit
RFID-Tags nach ISO14443 und ISO15693.
RFID Whitelist
Liste der RFID Tags, mit denen es bei aktivierter RFID Autorisierung erlaubt ist, eine Ladesitzung zu starten.
● P30 b-series und c-series erlauben 20 Einträge in der RFID Whitelist.
RFID Master Karte
Erste eingelernte RFID Karte in der Whitelist der Ladestation.
Sie wird zum Starten und Bestätigen des Anlernvorganges aller weiteren RFID
Karten (Slave Karten) verwendet. Zusätzlich dient sie auch zur Autorisierung einer
Ladesitzung.
RFID Slave Karte
RFID Karte in der Whitelist der Ladestation. Sie dient zur Autorisierung einer Ladesitzung.
LED Balkenanzeige
Die Anzeige informiert über den aktuellen Betriebszustand der Ladestation. Sie besteht aus 4 Segmenten ([S1] bis [S4]), die gemeinsam oder einzeln in unterschiedlichen Farben leuchten oder blinken können.
Die LED Balkenanzeige ist nur bei aktivierter Stromversorgung sichtbar.
Service-Taster
Der Service-Taster [Service] befindet sich im Anschlussfeld der Ladestation. Für
den Zugriff darauf müssen das Designcover und die Anschlussfeldabdeckung entfernt werden.
de - 7/112
Page 8
Autorisierungsfunktionen
1.3 RFID Autorisierung
Master/Slave Betrieb (Ladenetzwerk)
Ist die Ladestation Teil eines Ladenetzwerks (P30 c-series als Slave in einer Master/Slave-Installation), so
müssen alle RFID Karten auf der Master-Ladestation (P30 x-series) eingelernt werden. Die Aktivierung oder
Deaktivierung der Autorisierungsfunktion und die Whitelist für das gesamte Ladenetzwerk werden am Master
verwaltet. Entnehmen Sie die Informationen zu dieser Installationsvariante bitte dem spezifisch beiliegenden
„Konfigurationshandbuch“.
Visualisierung LED Balken
● Ist keine Autorisierung für eine Ladesitzung erforderlich, blinken alle 4 Segmente der LED Balkenanzeige der Ladestation im Idle Zustand (=Leerlauf) grün.
● Ist eine Autorisierung für eine Ladesitzung erforderlich, blinken alle 4 Segmente der LED Balkenanzeige der Ladestation im Idle Zustand (=Leerlauf) blau. (Autorisierung entweder mittels Schlüsselschalter,
RFID Karte oder externem Eingang notwendig).
● Permanentes, oranges Leuchten des LED Segments [S4] bedeutet, dass das Einlernen einer Slave
Karte durch erneutes Vorhalten der Master Karte bestätigt werden muss.
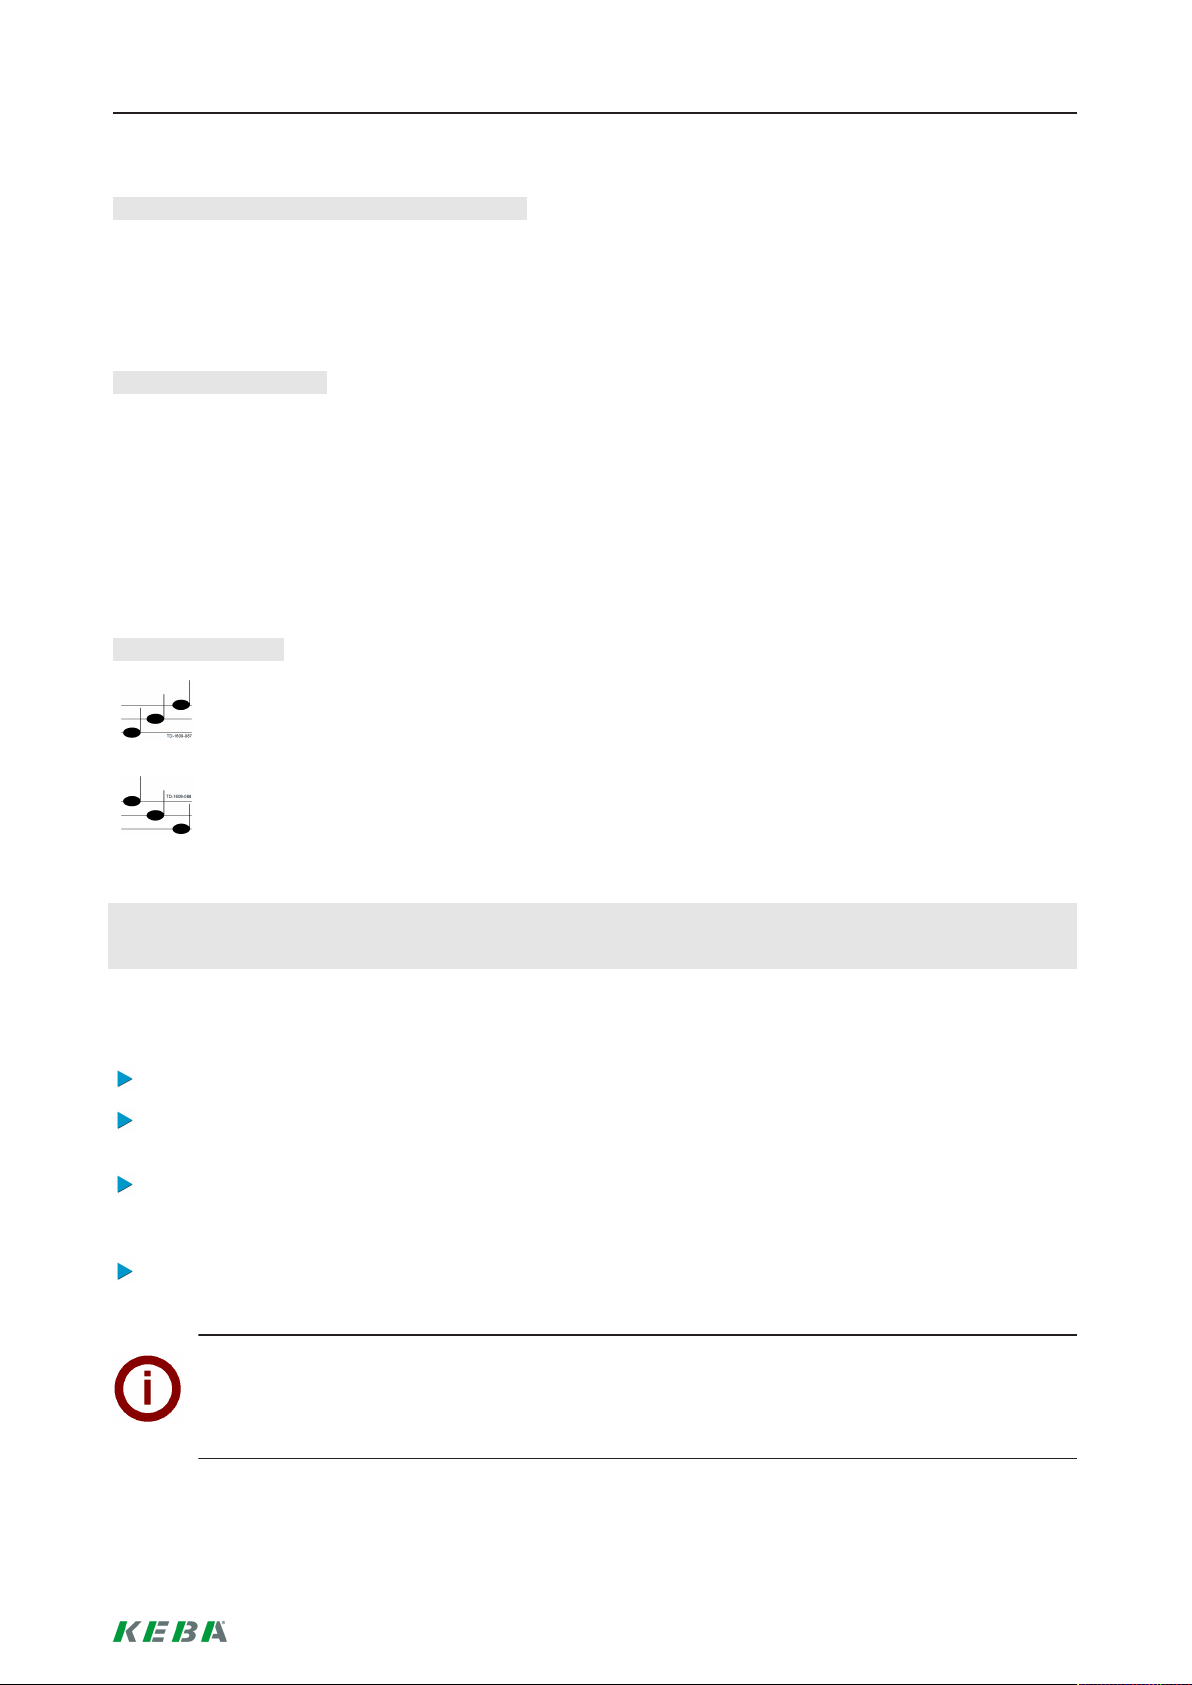
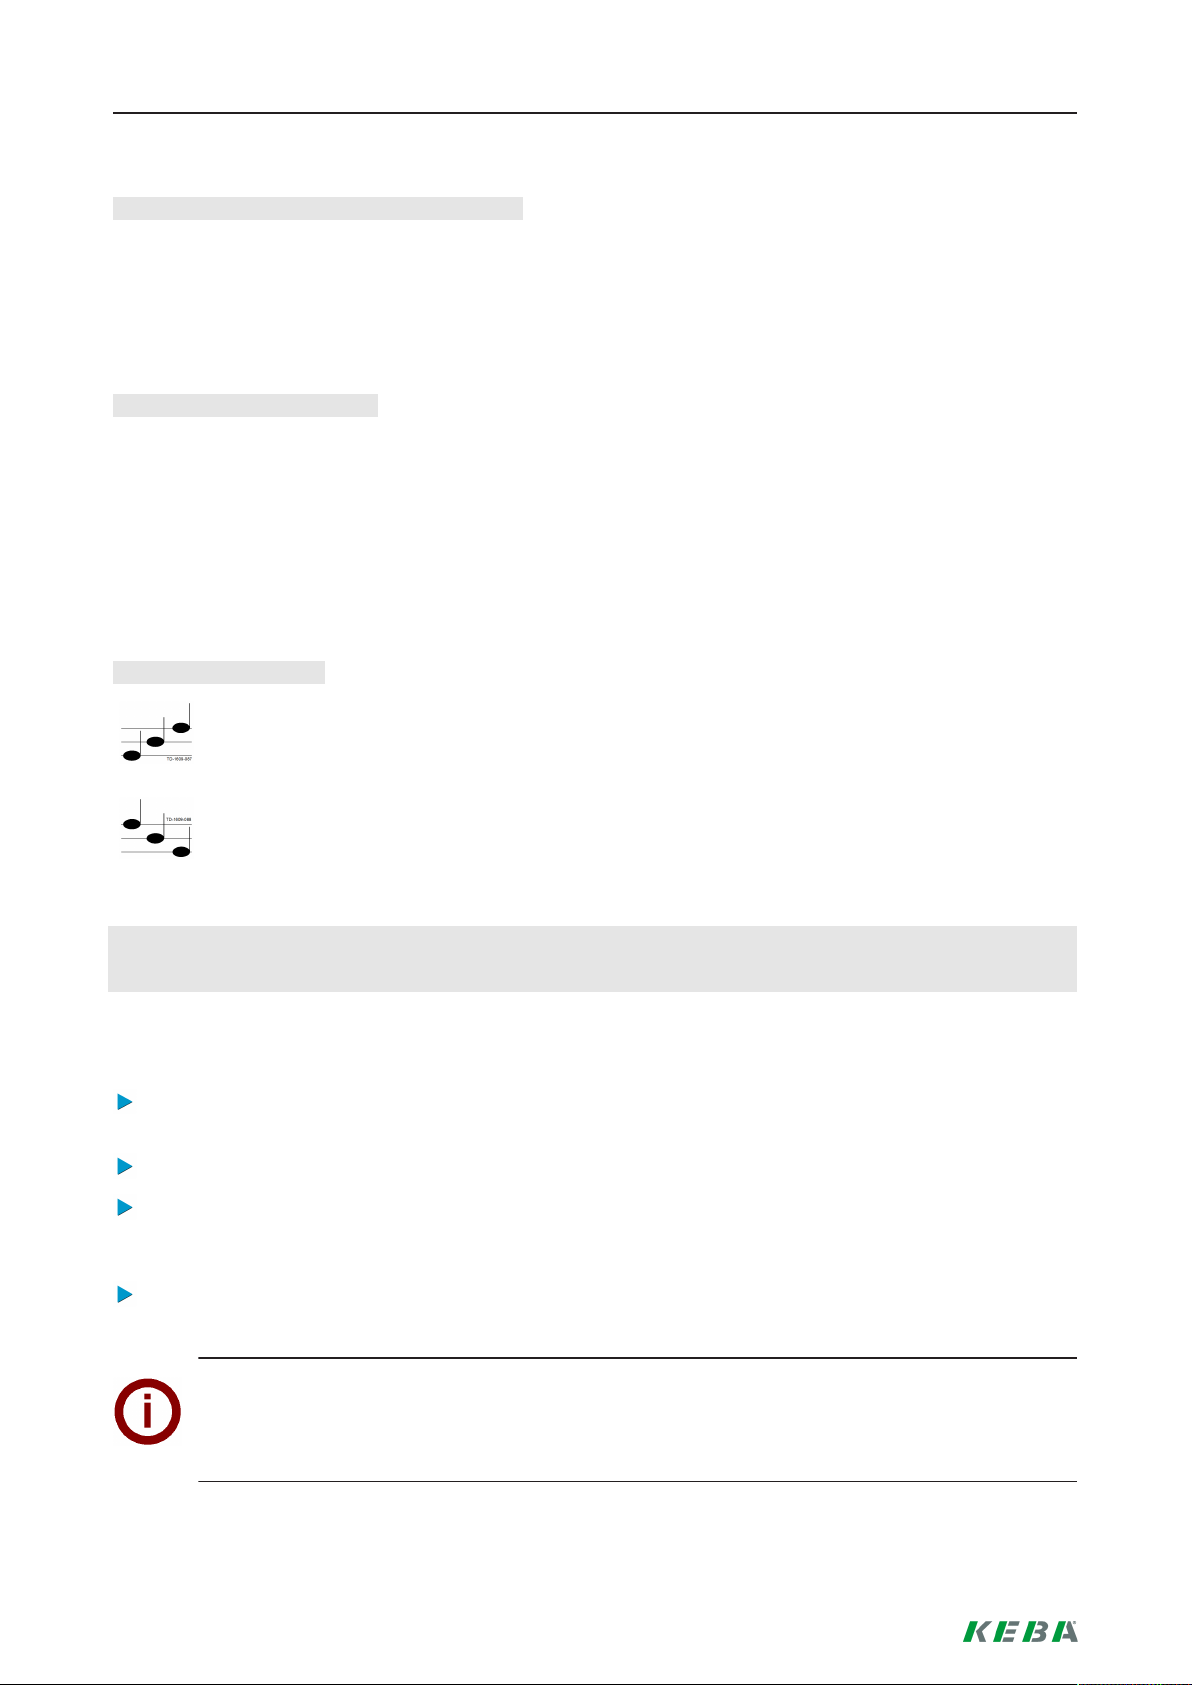
Akustische Signale
Ansteigende Tonfolge:
RFID Karte wurde gelesen und akzeptiert.
Absteigende Tonfolge:
RFID Karte wurde gelesen und abgelehnt (keine Berechtigung).
Autorisierung aktivieren/deaktivieren, Whitelist löschen und Master Karte einlernen
Um die Autorisierung zu aktivieren, zu deaktivieren, die Whitelist zu löschen oder eine Master Karte einzulernen, darf keine Ladesitzung aktiv sein und es darf auch kein Fahrzeug an der Ladestation angesteckt sein.
Für den Zugriff auf den Service Taster müssen das Designcover und die Anschlussfeldabdeckung entfernt
werden.
Drücken Sie den [Service] Taster im Anschlussfeld so lange, bis der zweite Signalton ertönt.
Die Ladestation führt nun automatisch einen Neustart durch und löscht dabei die interne RFID Whitelist.
Direkt nach diesem Neustart der Ladestation kann für 60 Sekunden, durch das Vorhalten einer RFID
Karte, die Master Karte angelernt werden. Eine gültige Karte wird mit einem Signalton bestätigt und damit wird die Autorisierungsfunktion aktiviert.
Verstreicht dieses Zeitintervall ohne das Einlernen einer Master Karte, dann wird die RFID Autorisierungsfunktion der Ladestation deaktiviert.
8/112 - de
Hinweis
Nach dem Anlernen der Master Karte blinkt die Ladestation noch für 60 Sekunden grün und es
kann eine, durch den Master autorisierte, Ladesitzung gestartet werden. Danach wechselt die Ladestation in den nicht autorisierten Idle Zustand und blinkt blau.
Page 9

Autorisierungsfunktionen
Slave Karte einlernen (Benutzerkarte zur Whitelist hinzufügen)
Für das Einlernen einer Slave Karte darf keine Ladesitzung aktiv sein und es darf auch kein Fahrzeug an der
Ladestation angesteckt sein. Die Autorisierungsfunktion der Ladestation muss aktiviert sein. Die LED Balkenanzeige der Ladestation blinkt im Idle Zustand blau.
Halten Sie die RFID Master Karte vor den RFID Reader und warten Sie den Signalton ab.
Halten Sie nun innerhalb von 3 Sekunden die neu einzulernende Slave Karte vor den RFID Reader. Ein
unterstütztes Kartenmodell wird durch eine ansteigende Tonfolge angezeigt.
Bestätigen Sie den Einlernvorgang innerhalb von 3 Sekunden durch erneutes Vorhalten der Master Karte. Der Vorgang wird durch eine weitere ansteigende Tonfolge abgeschlossen. Die Ladestation befindet
sich anschließend im nicht autorisierten Idle Zustand und blinkt blau.
Start eines Ladevorgangs mit aktivierter RFID Autorisierung
Bei aktivierter Autorisierung der Ladestation blinkt die Balkenanzeige im Idle Zustand blau.
Stecken Sie das Fahrzeug an der Ladestation an.
Halten Sie eine RFID Karte aus der Whitelist vor den RFID Reader.
Eine gültige Karte aus der Whitelist wird mit einem Signalton bestätigt und eine Ladesitzung kann vom
Fahrzeug gestartet werden.
Hinweise
● Vor-Autorisierung:
Wird die Ladestation ohne angestecktes Fahrzeug autorisiert, kann für 60 Sekunden ein Fahrzeug angesteckt und damit eine Ladesitzung gestartet werden. Verstreicht dieses Zeitintervall
ohne dass ein Fahrzeug angesteckt wird, wechselt die Ladestation wieder in den nicht autorisierten Idle Zustand zurück.
● Freigabeeingang [X1]:
Spezielle Gerätevarianten bieten die Möglichkeit, die Freigabe einer Ladesitzung zusätzlich
von der Beschaltung des Freigabeeingangs abhängig zu machen. Sollten Sie diese Funktion
in den DIP Switch Einstellungen aktiviert haben, benötigt die Freigabe einer Ladesitzung zusätzlich ein korrektes Signal am Freigabeeingang. Weitere Informationen dazu finden Sie im
"Installationshandbuch".
de - 9/112
Page 10
Autorisierungsfunktionen
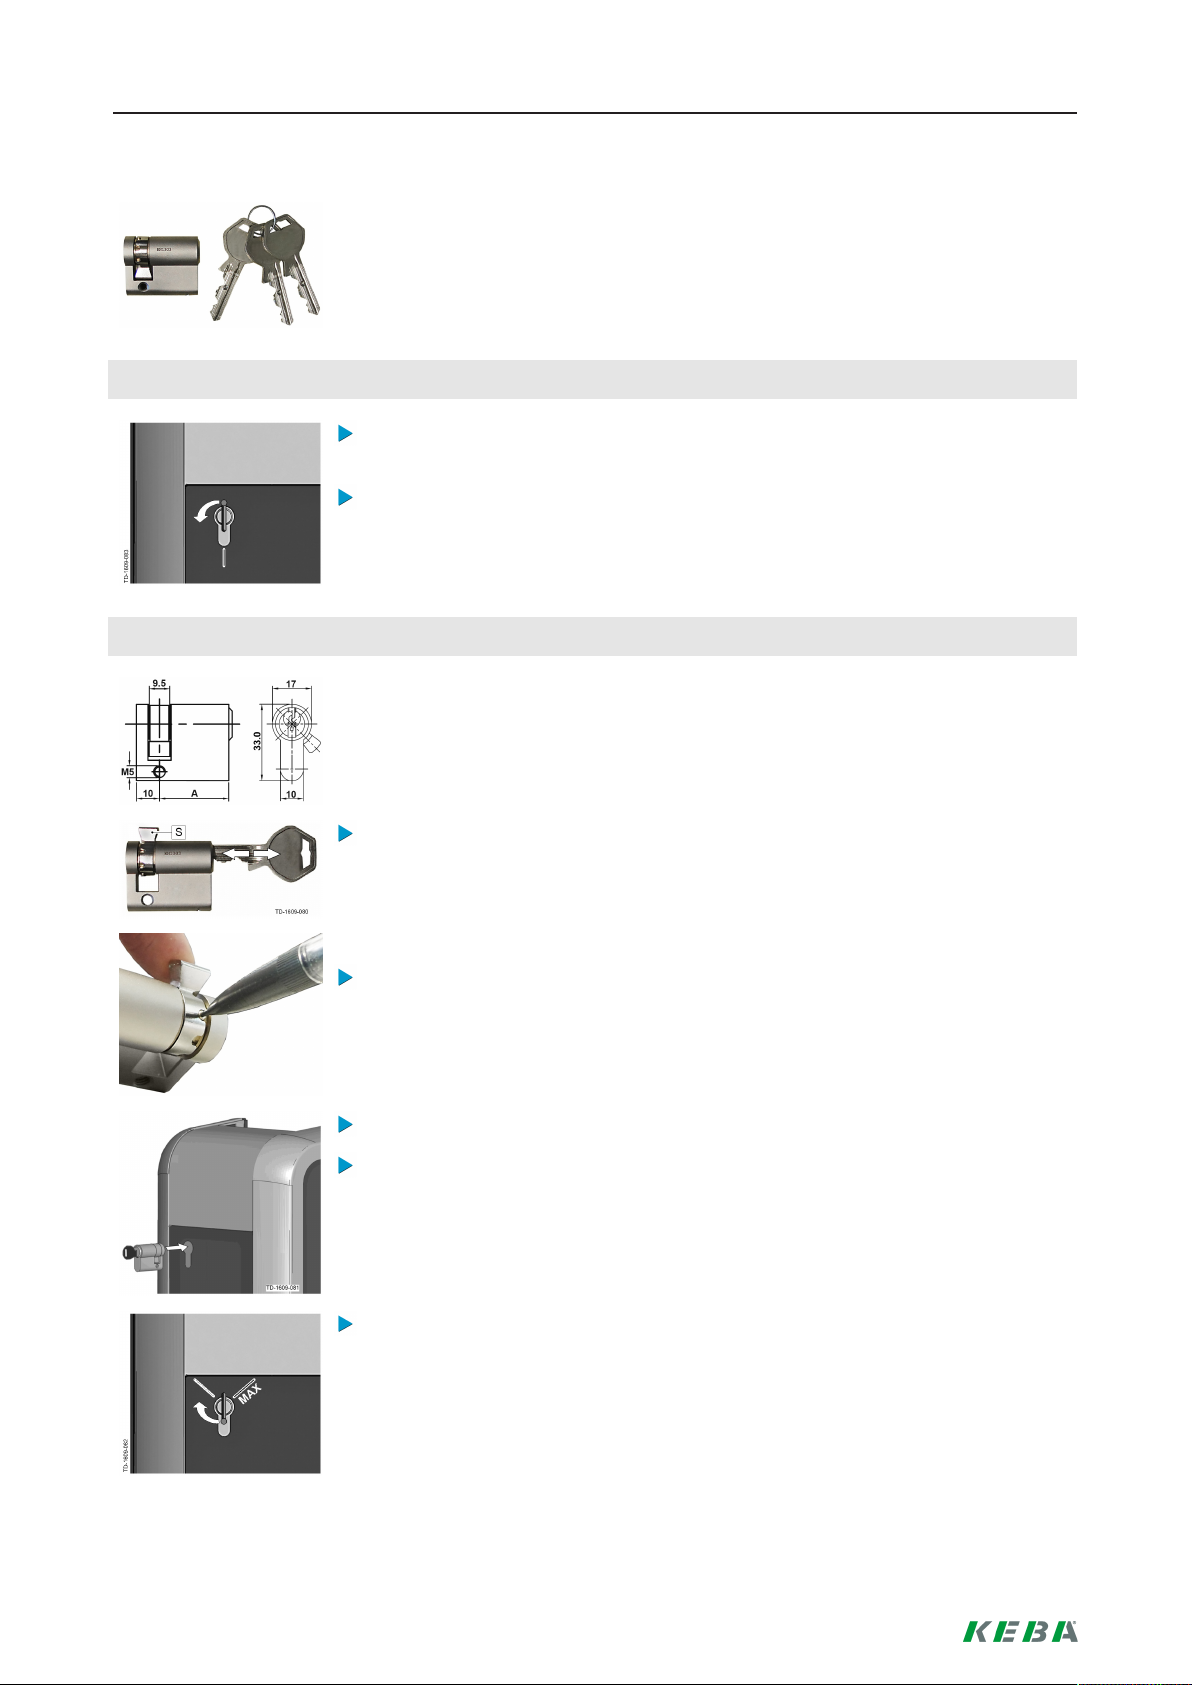
1.4 Zylinderschloss wechseln (optional)
Bei Gerätevarianten mit Schlüsselschalter ist serienmäßig ein Zylinderschloss eingebaut. Das Zylinderschloss kann bei Bedarf laut nachfolgender Anleitung ersetzt
werden.
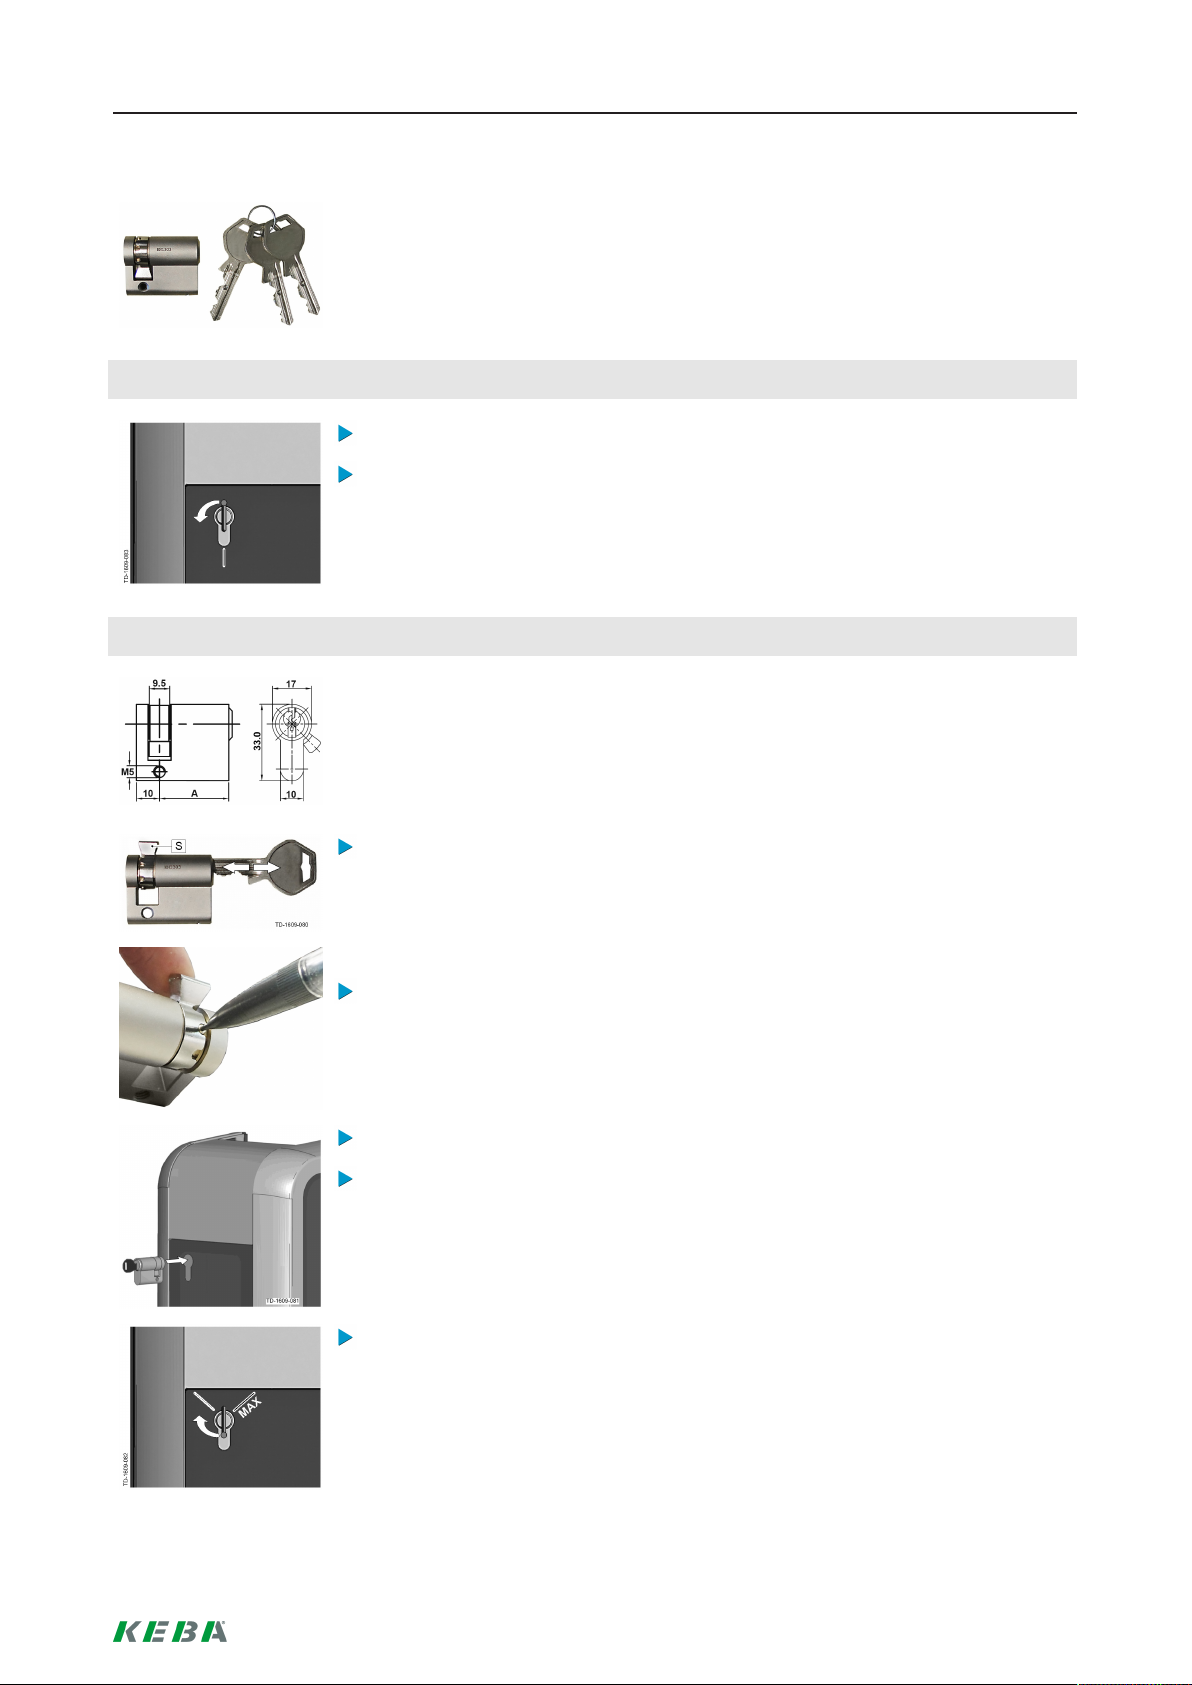
Zylinderschloss ausbauen
Drehen Sie den Schlüssel nach links, bis die Widerstände spürbar überwunden
sind.
Drehen Sie den Schlüssel weiter, bis er sich in vertikaler Stellung befindet. Nun
kann das Zylinderschloss mit leicht erhöhtem Kraftaufwand aus der Halterung
entriegelt und herausgezogen werden.
Zylinderschloss einbauen
Das Zylinderschloss muss folgende Anforderungen erfüllen:
● Profil-Halbzylinder nach EN 1303 bzw. DIN 18252
● Maß A = 30mm (bei A=31mm tritt ein minimaler Überstand am Gehäuse auf).
● Verstellbare Schlossnase
Stellen Sie den Winkel der Schlossnase [S] so ein, dass sie in der Abziehposition des Schlüssels senkrecht nach oben zeigt.
Die Verstellung des Winkels der Schlossnase erfolgt in der Regel wiefolgt:
Drücken Sie mit einem dünnen Gegenstand den Codierstift hinein und schieben Sie die Schlossnase in die gewünschte Position.
Drehen Sie den Schlüssel um 180°, so dass die Schlossnase nach unten zeigt.
Schieben Sie das Zylinderschloss mit etwas Druck vollständig in das Gehäuse
hinein, bis es hörbar einrastet. Das Zylinderschloss sollte bündig mit der Gehäuseoberfläche abschließen.
10/112 - de
Drehen Sie den Schlüssel nach rechts, bis die Widerstände spürbar überwunden sind und der Schlüssel abgezogen werden kann.
Drehen Sie den Schlüssel nicht über die Position [MAX] hinaus. Der Schlüsselschalter ist nun einsatzbereit.
Page 11

Page 12

Contents
Contents
1 Authorization functions ........................................................................................................ 13
1.1 About this manual ........................................................................................................ 13
1.2 Explanation of terms .................................................................................................... 13
1.3 RFID authorization ....................................................................................................... 15
1.4 Changing the cylinder lock (optional)...........................................................................17
12/112 - en
Page 13
Authorization functions
1 Authorization functions
1.1 About this manual
CAUTION!
This manual is a supplement to the "User manual". You must comply with all instructions
and safety notes in the user manual!
Install the charging station according to the "Installation manual".
Validity
This manual is valid for special versions of the following device series:
● KeContact P30 b-series
● KeContact P30 c-series
Allocation via product code (on nameplate):
KC-P30-XXXXXXX-XX
= 1...b-series, 2...c-series, 3...c-series
= R...RFID, K...Keyswitch
Firmware version
Note
Please run a firmware update as necessary to obtain the full scope of functions described. Additional information, instructions and the firmware can be found at:
↪
http://www.keba.com/de/emobility/service-support/downloads/downloads
1.2 Explanation of terms
Authorization
Special versions provide the option to make starting a charging session dependent
on certain preconditions. The following versions are available:
● Enabling via keyswitch.
● Enabling via SmartHome interface.
● Enabling via external input [X1].
● User identification via RFID card.
en - 13/112
Page 14
Authorization functions
Key switch
The special version of the KeContact P30 has a cylinder lock fitted that allows only
users with the corresponding key to start a charging process.
The key switch [S] is used for authorizing a user with a key.
External enabling input [X1]
The described device version has the facility for authorization via an input (N.O.
contact) using an external, potential-free switch. In this case, observe the logical
link between the authorization versions in particular. The correct installation and
configuration process can be found in the "Installation manual".
RFID Reader
The special version of the KeContact P30 has an RFID reader fitted that allows authorization via RFID tags.
The RFID reader [R] is used for contactless authorization of a user via RFID tags
conforming to ISO14443 and ISO15693.
RFID Whitelist
List of RFID tags where it is permitted to start a charging session with activated
RFID authorization.
● P30 b-series and c-series permit 20 entries in the RFID whitelist.
RFID master card
First programmed RFID card in the charging station whitelist.
It is used to start and confirm the programming process for all further RFID cards
(slave cards). It is also used to authorize a charging session.
RFID slave card
RFID card on the charging station whitelist. It is used to authorize a charging session.
LED bar display
The display provides information on the current operating status of the charging
station. It consists of 4 segments ([S1] to [S4]) which can light up or flash, together
or individually, in different colors.
The LED bar display is only visible with activated power supply.
Service button
The service button [Service] is located in the connection panel on the charging
station. To access this button, the design cover and the connection panel cover
must be removed.
14/112 - en
Page 15
Authorization functions
1.3 RFID authorization
Master/slave operation (charging network)
If the charging station is part of a charging network (P30 c-series as slave in a master/slave installation), all
RFID cards must be programmed on the master charging station (P30 x-series). The activation and deactivation of the authorization function and the whitelist for the entire charging network are managed on the master. For information on this installation version, please see the specific "Configuration manual" provided.
LED bar visualization
● If authorization is not required for a charging session, all 4 segments of the LED bar display on the
charging station in idle condition (=no-load) will be green.
● If authorization is required for a charging session, all 4 segments of the LED bar display on the charging station in idle condition (=no-load) will be blue. (Authorization required either via key switch, RFID
card or external input).
● A continuous, orange light on the LED segment [S4] means that the programming of a slave card must
be confirmed by holding up the master card again.
Acoustic signals
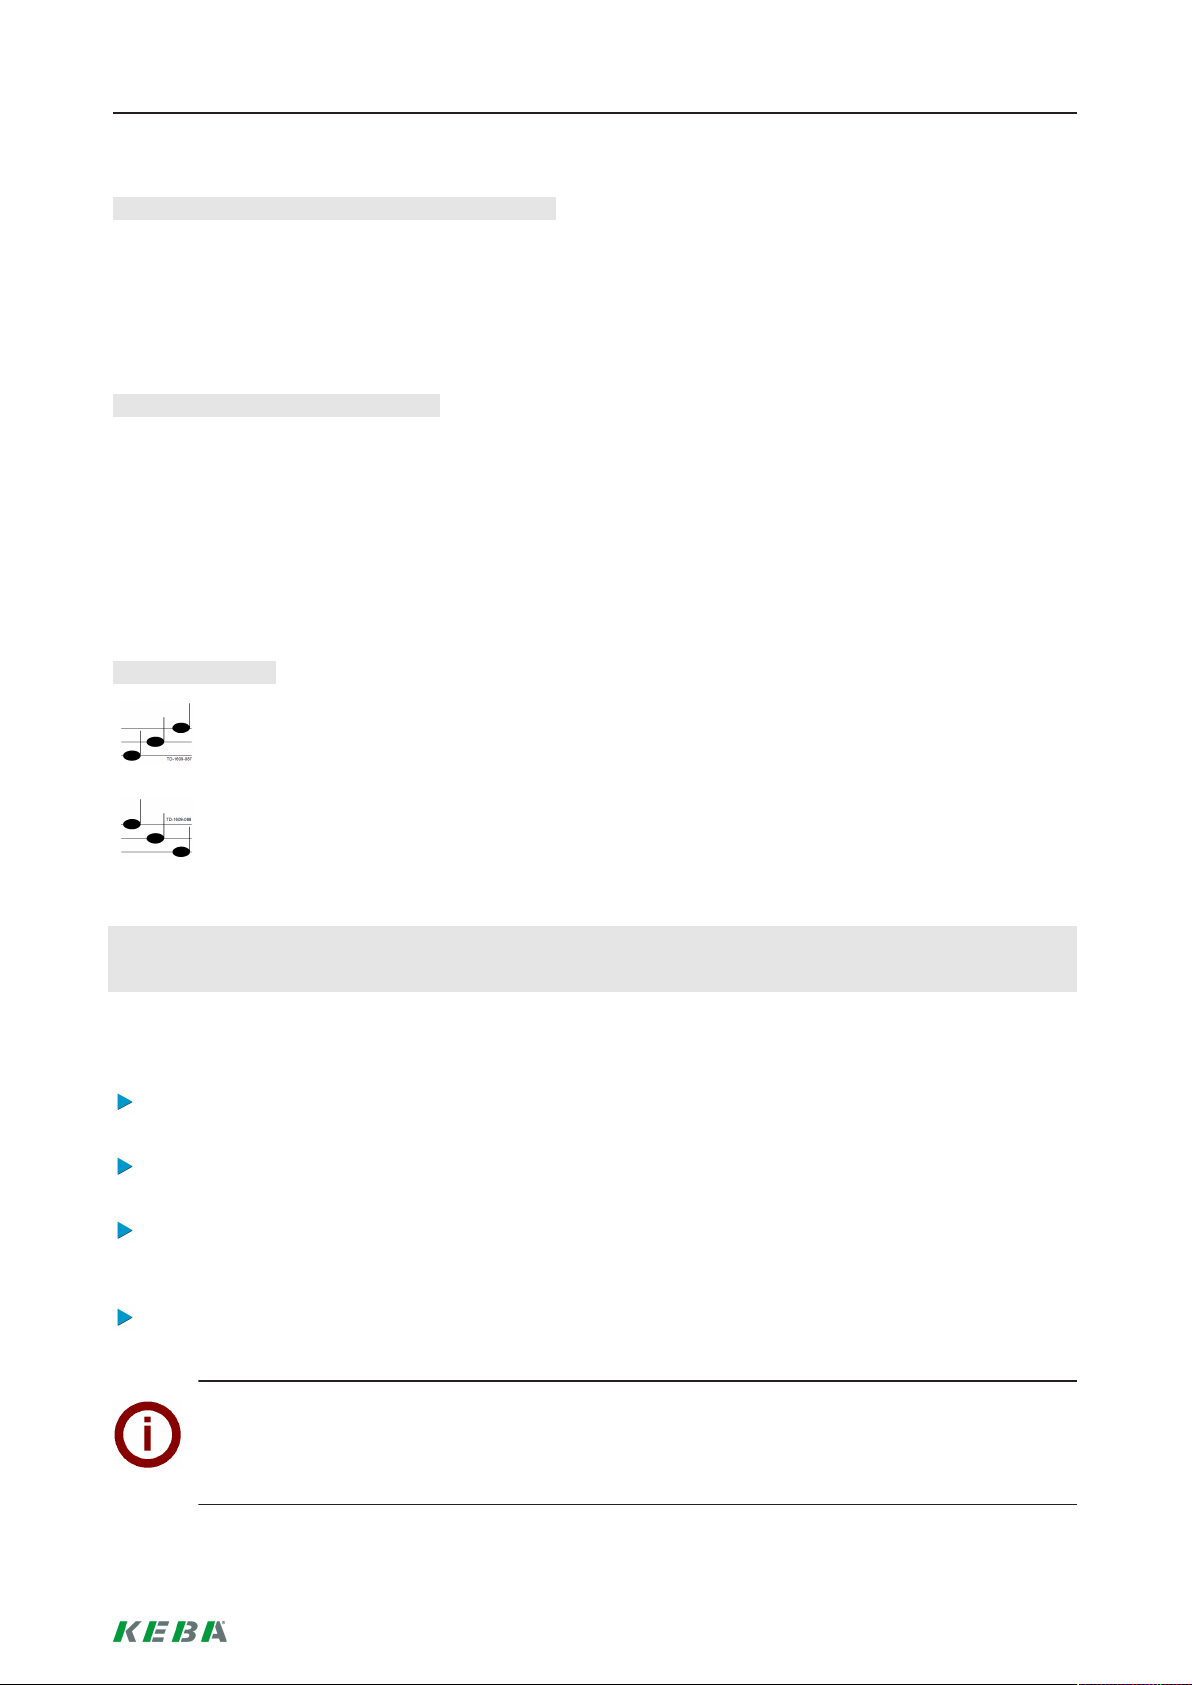
Rising tone sequence:
RFID card has been read and accepted.
Falling tone sequence:
RFID card has been read and rejected (no authorization).
Activating/deactivating authorization, deleting the whitelist and programming the
master card
To activate or deactivate authorization, delete the whitelist or to program a master card, it is not permitted for
any charging session to be active and no vehicle is permitted to be plugged into the charging station. To access the service button, the design cover and the connection panel cover must be removed.
Press the [Service] button on the connection panel until the second signal tone is sounded.
The charging station will then automatically perform a restart, deleting the internal RFID whitelist in the
process.
Directly after restarting the charging station, the master card can be programmed in by holding up an
RFID card for 60 seconds. A valid card is confirmed with a signal tone, and this activates the authorization function.
If this time interval elapses without a master card being programmed in, the RFID authorization function
on the charging station is deactivated.
Note
After programming in the master card, the charging station flashes green for a further 60 seconds
and a charging session authorized by the master can be started. The charging station then
changes to the non-authorized idle condition and flashes blue.
en - 15/112
Page 16
Authorization functions
Programming in a slave card (adding a user card to the whitelist)
To program in a slave card, it is not permitted for any charging session to be active and in addition it is not
permitted for any vehicle to be plugged in to the charging station. The authorization function of the charging
station must be activated. The LED bar display on the charging station flashes blue in idle condition.
Hold the RFID master card in front of the RFID reader and wait for the signal tone.
Then hold the new slave card for the programming process in front of the RFID reader within 3 seconds.
A supported card model is indicated by a rising tone sequence.
Confirm the programming process by holding up the master card again within 3 seconds. The procedure
is concluded by a further rising tone sequence. The charging station will then be in non-authorized idle
condition and flashes blue.
Starting a charging process with activated RFID authorization
With activated authorization of the charging station, the bar display flashes blue in idle condition.
Plug the vehicle into the charging station.
Hold an RFID card from the whitelist in front of the RFID reader.
A valid card from the whitelist is confirmed with a signal tone and a charging session can be started from
the vehicle.
Note
● Pre-authorization:
If the charging station is authorized without a vehicle plugged in, a vehicle can be plugged in
for 60 seconds and this will start a charging session. If this time interval elapses without a vehicle being plugged in, the charging station changes back to non-authorized idle condition.
● Enable input [X1]:
Special device versions provide the additional option of making the authorization of a charging
session dependent on the activation of an enabling input. If you have activated this function on
the DIP switch, enabling a charging session will require a correct signal on the enabling input
in addition. Further information on this can be found in the "Installation manual".
16/112 - en
Page 17
Authorization functions
1.4 Changing the cylinder lock (optional)
Device versions with key switch have a cylinder lock installed as standard. If
needed, the cylinder lock can be replaced according to the following instructions.
Removing the cylinder lock
Turn the key to the left until you feel the key turn in the lock.
Turn the key further until it is in the vertical position. The cylinder lock can then
be unlocked from the holder using slightly increased force and removed.
Fitting a cylinder lock
The cylinder lock must fulfill the following requirements:
● Profile half cylinder conforming to EN 1303 or DIN 18252
● Dimension A = 30mm (for A=31mm a minimum overhang occurs on the hous-
ing).
● Adjustable lock nose
Adjust the angle of the lock nose [S] so that it faces up vertically when the key
is in the removal position.
The adjustment of the lock nose angle normally occurs as follows:
Use a thin object to press in the code pin and push the lock nose into the desired position.
Turn the key 180° so that the lock nose faces downward.
Use light pressure to press the cylinder lock into the housing completely until it
audibly engages. The cylinder lock should be flush with the surface of the
housing.
Turn the key to the right so that you feel the turn key and the key can be removed.
Do not turn the key past the [MAX] position. The key switch is now ready for
use.
en - 17/112
Page 18

Page 19

Table des matières
Table des matières
1 Fonctions d’autorisation ...................................................................................................... 20
1.1 À propos de ce manuel ................................................................................................ 20
1.2 Terminologie ................................................................................................................ 20
1.3 Autorisation RFID......................................................................................................... 22
1.4 Remplacement d'une serrure cylindrique (en option) ..................................................24
fr - 19/112
Page 20

Fonctions d’autorisation
1 Fonctions d’autorisation
1.1 À propos de ce manuel
PRUDENCE!
Cette notice complète le Manuel d'utilisation. Respectez impérativement les instructions et
les consignes de sécurité du manuel d'utilisation.
Installez la station de recharge selon les instructions du Manuel d'installation.
Validité
Ce manuel s’applique aux modèles spéciaux des séries d'appareils :
● KeContact P30 b-series
● KeContact P30 c-series
Classification avec le code produit (de la plaque signalétique) :
KC-P30-XXXXXXX-XX
= 1...b-series, 2...c-series, 3...c-series
= R...RFID, K...Keyswitch
Version de firmware
Remarque
Si nécessaire, mettez à jour le firmware pour bénéficier de toutes les fonctions décrites. Pour en
savoir plus, consulter les instructions et obtenir le firmware, accédez à :
↪
http://www.keba.com/de/emobility/service-support/downloads/downloads
1.2 Terminologie
Autorisation
Les modèles d'appareil spéciaux permettent d'associer le démarrage d'une recharge à certaines conditions. Les options suivantes sont disponibles :
● Validation par interrupteur à clé.
20/112 - fr
● Validation par interface SmartHome.
● Validation par entrée externe [X1].
● Identification d'utilisateur par carte RFID.
Page 21
Fonctions d’autorisation
Interrupteur à clé
Les modèles spéciaux de KeContact P30 intègrent une serrure cylindrique qui permet uniquement aux utilisateurs possédant la clé correspondante de démarrer la
recharge.
L’interrupteur à clé [S] permet l’autorisation d’un utilisateur avec une clé.
Entrée de validation externe [X1]
Les modèles d'appareil décrits peuvent être autorisés par un contacteur externe
sans potentiel via une entrée (contact à fermeture). Dans ce cas, tenez compte du
lien logique entre les variantes d'autorisation. Pour connaître la procédure d'installation et de configuration, consultez le "Manuel d'installation".
Lecteur RFID
Certains modèles spéciaux de KeContact P30 intègrent un lecteur RFID qui permet
l'autorisation à l'aide d'un badge RFID.
Le lecteur RFID [R] permet l’autorisation sans contact d’un utilisateur muni d'un
badge RFID selon ISO14443 et ISO15693.
Liste blanche RFID
Liste des badges RFID qui permettent de démarrer une recharge lorsque l'autorisation RFID est activée.
● Pour les P30 b-series et c-series, la liste blanche RFID peut contenir jusqu'à
20 entrées.
Carte maître RFID
Première carte RFID programmée dans la liste blanche de la station de recharge.
Elle est utilisée pour démarrer et confirmer la programmation de toutes les autres
cartes RFID (cartes esclaves). Elle permet également d'autoriser une recharge.
Carte esclave RFID
Carte RFID dans la liste blanche de la station de recharge. Elle permet d'autoriser
une recharge.
Affichage à barres à LED
L'affichage fournit des informations sur l'état de fonctionnement de la station de recharge. Il comprend 4 segments ([S1] à [S4]) qui s'allument ou clignotent en
même temps ou individuellement dans des couleurs variées.
L'affichage à barres à LED est visible uniquement lorsque l'alimentation électrique
est activée.
Bouton de service
Le bouton [Service] se trouve dans le panneau de raccordement de la station de
recharge. Pour y accéder, il faut retirer le capot décoratif et le couvercle du panneau de raccordement.
fr - 21/112
Page 22
Fonctions d’autorisation
1.3 Autorisation RFID
Mode maître/esclave (réseau de recharge)
Si la station de recharge fait partie d'un réseau de recharge (P30 c-series en tant qu'esclave dans une installation maître/esclave), toutes les cartes RFID doivent être programmées sur la station de recharge maître
(P30 x-series). L'activation ou la désactivation de la fonction d'autorisation et la liste blanche pour le réseau
de recharge complet sont gérées sur le maître. Consultez le Manuel de configuration fourni pour en savoir
plus sur cette variante d'installation.
Réaction des barres à LED
● Si aucune autorisation n'est nécessaire pour la recharge, les 4 segments de l'affichage à barres à LED
de la station de recharge clignotent en vert à l'état de veille (=point mort).
● Si une autorisation est nécessaire pour la recharge, les 4 segments de l'affichage à barres à LED de la
station de recharge clignotent en bleu à l'état de veille (=point mort). (Autorisation nécessaire avec l'interrupteur à clé, la carte RFID ou l'entrée externe).
● L'illumination orange permanente du segment à LED [S4] signifie que la programmation d'une carte esclave doit être confirmée en présentant à nouveau la carte maître.
Signaux acoustiques
Séquence acoustique montante :
la carte RFID a été lue et acceptée.
Séquence acoustique descendante :
la carte RFID a été lue et refusée (pas d'autorisation).
Activation/désactivation de l'autorisation, effacement de la liste blanche et
programmation de la carte maître
Pour activer, désactiver l'autorisation, effacer la liste blanche ou programmer une carte maître, aucune recharge ne doit être en cours et aucun véhicule ne doit être raccordé à la station de recharge. Pour accéder
au bouton de service, il faut retirer le capot décoratif et le couvercle du panneau de raccordement.
Appuyez sur la touche [Service] sur le panneau de raccordement jusqu'à ce que le second signal retentisse.
La station de recharge redémarre automatiquement et efface la liste blanche RFID interne.
Tout de suite après le redémarrage de la station de recharge, la carte maître peut être programmée pendant 60 secondes en présentant une carte RFID. Une carte valide est confirmée par un signal acoustique, ce qui active la fonction d'autorisation.
Si ce délai s'écoule sans qu'aucune carte maître ne soit programmée, la fonction d'autorisation RFID de
la station de recharge se désactive.
Remarque
Après la programmation de la carte maître, la station de recharge clignote en vert pendant encore
60 secondes et une recharge autorisée par le maître peut être démarrée. Puis, la station de recharge bascule à l'état de veille non autorisé et clignote en bleu.
22/112 - fr
Page 23
Fonctions d’autorisation
Programmation de la carte esclave (ajout de la carte utilisateur à la liste blanche)
Pour programmer une carte esclave, aucune recharge ne doit être en cours et aucun véhicule ne peut être
raccordé à la station de recharge. La fonction d'autorisation de la station de recharge doit être activée. L'affichage à barres à LED de la station de recharge clignote en bleu à l'état de veille.
Présentez la carte maître RFID devant le lecteur RFID et attendez le signal sonore.
Dans un délai de 3 secondes présentez à nouveau la carte esclave à programmer devant le lecteur
RFID. Un modèle de carte pris en charge est signalé par une suite de tonalités montantes.
Confirmez la programmation dans un délai de 3 secondes en présentant à nouveau la carte maître. La
procédure se termine par une nouvelle série de tonalités montantes. La station de recharge est alors
dans l'état de veille non autorisé et clignote en bleu.
Démarrage d'une recharge avec autorisation RFID activée
En cas d'autorisation activée de la station de recharge, l'affichage à barres clignote en bleu à l'état de veille.
Branchez le véhicule à la station de recharge.
Présentez une carte RFID de la liste blanche devant le lecteur RFID.
Une carte valide de la liste blanche est confirmée par un signal acoustique et le véhicule peut démarrer
une recharge.
Remarques
● Pré-autorisation
Si la station de recharge est autorisée sans véhicule branché, il est possible de brancher un
véhicule dans un délai de 60 secondes pour démarrer la recharge. Si ce délai s'écoule alors
qu'aucun véhicule n'a été branché, la station de recharge bascule à nouveau à l'état de veille
non autorisé.
● Entrée de validation [X1]
Des modèles d'appareil spéciaux permettent d'associer la validation d'une recharge à l'activation de l'entrée de validation. Si vous avez activé cette fonction dans les réglages de l'interrupteur DIP, la validation d'une recharge exige également un signal correct à l'entrée de validation. Pour en savoir plus, consultez le "Manuel d'installation".
fr - 23/112
Page 24

Fonctions d’autorisation
1.4 Remplacement d'une serrure cylindrique (en option)
Les modèles d'appareil dotés d'un interrupteur à clé intègrent de série une serrure
cylindrique. Le remplacement de la serrure cylindrique est possible en suivant les
instructions ci-dessous.
Démontage de la serrure cylindrique
Tournez la clé vers la gauche jusqu’à ce que vous sentiez céder les résistances.
Continuez de tourner la clé jusqu’à ce qu’elle se trouve en position verticale. La
serrure cylindrique peut maintenant être déverrouillée puis retirée du support
en forçant un peu plus.
Montage de la serrure cylindrique
La serrure cylindrique doit satisfaire aux exigences suivantes:
● Demi-cylindre profilé selon EN1303 ou DIN18252
● Cote A = 30mm (une saillie minimale apparaît sur le boîtier si A = 31mm)
● Panneton réglable
Réglez l’angle du panneton [S] de sorte qu’il soit dirigé vers le haut à la verticale en position de retrait de la clé.
Réglez l’angle du panneton comme suit:
Enfoncez la broche de codage à l’aide d’un objet fin et poussez le panneton
dans la position souhaitée.
Tournez la clé à 180° afin que le panneton soit orienté vers le bas.
Enfoncez entièrement la serrure cylindrique dans le boîtier, en exerçant une légère pression jusqu’à ce vous l’entendiez s’encliqueter. La serrure cylindrique
ne doit pas dépasser de la surface du boîtier.
24/112 - fr
Tournez la clé vers la droite jusqu’à ce que vous sentiez céder les résistances
et que la clé puisse être retirée.
Ne tournez pas la clé au-delà de la position [MAX]. L’interrupteur à clé est
maintenant opérationnel.
Page 25

Page 26

Indice
Indice
1 Funzioni di autorizzazione.................................................................................................... 27
1.1 Informazioni sul manuale ............................................................................................. 27
1.2 Illustrazione della terminologia:.................................................................................... 27
1.3 Autorizzazione RFID .................................................................................................... 29
1.4 Sostituzione della serratura a cilindro (opzionale) ....................................................... 31
26/112 - it
Page 27
Funzioni di autorizzazione
1 Funzioni di autorizzazione
1.1 Informazioni sul manuale
ATTENZIONE!
Il presente manuale è un'integrazione del "Manuale d'uso". Osservare assolutamente tutte
le istruzioni e le avvertenze di sicurezza contenute nel Manuale d'uso!
Eseguire l'installazione della stazione di rifornimento seguendo le istruzioni del "Manuale
d'installazione".
Validità
Il presente manuale è valido per particolari varianti delle serie di apparecchi:
● KeContact P30 b-series
● KeContact P30 c-series
Assegnazione tramite codice del prodotto (dalla targhetta identificativa):
KC-P30-XXXXXXX-XX
= 1...b-series, 2...c-series, 3...c-series
= R...RFID, K...Keyswitch
Versione del firmware
Nota
Aggiornare eventualmente il firmware per poter ricevere tutte le funzionalità descritte. Per informazioni supplementari, istruzioni e il firmware:
↪
http://www.keba.com/de/emobility/service-support/downloads/downloads
1.2 Illustrazione della terminologia:
Autorizzazione
Speciali varianti di apparecchi offrono la possibilità di avviare un ciclo di carica in
funzione di determinate condizioni. Sono disponibili le seguenti varianti:
● abilitazione tramite interruttore a chiave
● abilitazione tramite interfaccia SmartHome
● abilitazione tramite ingresso esterno [X1]
● identificazione utente tramite carta RFID.
it - 27/112
Page 28

Funzioni di autorizzazione
Interruttore a chiave
In speciali varianti della serie KeContact P30 è montata una serratura a cilindro
che consente l'avvio di un processo di carica solo agli utenti muniti dell’apposita
chiave.
L'interruttore a chiave [S] serve ad autorizzare un utente dotato di chiave.
Ingresso di abilitazione eterno [X1]
Le varianti degli apparecchi descritte possono essere autorizzate tramite un ingresso (contatto NA) utilizzando un interruttore esterno a contatto pulito. In questo caso
osservare specialmente il collegamento logico tra le varianti di autorizzazione. Per
la corretta installazione e configurazione consultare il “"Manuale d'installazione".
Lettore RFID
In speciali varianti della serie KeContact P30 è montato un lettore che consente
l'autorizzazione tramite i tag RFID.
Il lettore RFID [R] serve all'autorizzazione senza contatto di un utente munito di tag
RFID in conformità alle norme ISO 14443 e ISO15693.
Whitelist RFID
Elenco dei tag RFID con i quali ad autorizzazione RFID attivata è consentito l'avvio
di un ciclo di carica.
● Con le P30 b-series e c-series sono possibili whitelist RFID contenenti 20 voci.
Master Card RFID
Prima carta RFID inizializzata nella whitelist della stazione di rifornimento.
Viene utilizzata per avviare e confermare la procedura di inizializzazione di tutte le
altre carte RFID (carte slave). Inoltre serve ad autorizzare un ciclo di carica.
Slave Card RFID
Carta RFID nella whitelist della stazione di rifornimento. Serve ad autorizzare un ciclo di carica.
Visualizzazione a barre LED
La visualizzazione informa sull'attuale stato di esercizio della stazione di rifornimento. È costituita da 4 segmenti (da [S1] a [S4]), che possono accendersi o lampeggiare in quattro colori diversi.
La visualizzazione a barre LED è visibile solo ad alimentazione elettrica attivata.
Tasto Service
Il tasto Service [Service] si trova nell'area dei collegamenti della stazione di rifornimento. Per accedervi è necessario rimuovere la custodia e il coperchio dell'area
dei collegamenti.
28/112 - it
Page 29
Funzioni di autorizzazione
1.3 Autorizzazione RFID
Funzionamento Master/Slave (rete di ricarica)
Se la stazione di rifornimento è parte di una rete di ricarica (P30 c-series come slave in un’installazione Master/Slave), tutte le carte RFID dovranno essere inizializzate sulla stazione di rifornimento master (P30 x-series). L'attivazione o disattivazione della funzione di autorizzazione e la whitelist per l’intera rete di ricarica
sono gestite sul master. Per informazioni su questa variante di installazione consultare il “Manuale di confi-
gurazione”.
Visualizzazione delle barre a LED
● Se un ciclo di carica non richiede l'autorizzazione, i 4 segmenti della visualizzazione a barre LED della
stazione di rifornimento nello stato Idle (=funzionamento a vuoto) si accendono di colore verde.
● Se un ciclo di carica richiede un’autorizzazione, i 4 segmenti della visualizzazione a barre LED nello
stato Idle (=funzionamento a vuoto) si accendono di colore blu. (Autorizzazione tramite interruttore a
chiave, carta RFID o ingresso esterno).
● Il segmento [S4] acceso di colore arancione permanente indica che è necessario confermare l’inizializzazione di una carta slave applicando nuovamente la scheda master.
Segnali acustici
Sequenza acustica ascendente:
la carta RFID è stata letta e accettata.
Sequenza acustica discendente:
la carta RFID è stata lette e respinta (nessuna autorizzazione).
Attivazione/disattivazione dell'autorizzazione, cancellazione della whitelist e
inizializzazione della carta master
Per attivare o disattivare l’autorizzazione, cancellare la whitelist o inizializzare una carta master non deve essere attivo nessun ciclo di carica e nessun veicolo deve essere collegato alla stazione di rifornimento. Per
accedere al tasto Service è necessario rimuovere la custodia e il coperchio dell'area dei collegamenti.
Premere il tasto [Service] nell'area dei collegamenti senza rilasciarlo finché non risuona il secondo segnale acustico.
La stazione di rifornimento effettuerà automaticamente un riavvio cancellando anche la whitelist RFID interna.
Subito dopo il riavvio della stazione di rifornimento è possibile inizializzare la carta master applicando la
carta RFID per 60 secondi. Una carta valida viene confermata da un segnale acustico e la funzione di
autorizzazione viene attivata.
Se in questo intervallo di tempo non viene inizializzata una scheda master, la funzione di autorizzazione
RFID della stazione di rifornimento viene disattivata
Nota
Dopo l’inizializzazione della carta master la stazione di rifornimento lampeggia ancora per 60 secondi ed è possibile avviare un ciclo di carica utilizzando la carta. Successivamente la stazione di
rifornimento passa allo stato Idle non autorizzato e lampeggia di colore blu.
it - 29/112
Page 30
Funzioni di autorizzazione
Inizializzazione dalla carta slave (aggiunta della carta utente alla whitelist)
Per inizializzare la carta slave non deve essere attivo un ciclo di carica e nessun veicolo deve essere collegato alla stazione di rifornimento. La funzione di autorizzazione della stazione di rifornimento deve essere attivata. Nello stato Idle la visualizzazione a barre LED della stazione di rifornimento lampeggia di colore blu.
Tenere la Master Card RFID davanti al lettore RFID e attendere il segnale acustico.
Entro 3 secondi tenere la nuova carta slave da inizializzare davanti al lettore RFID. Un modello di carta
supportato viene segnalato da una sequenza acustica ascendente.
Confermare la procedura di inizializzazione entro 3 secondi applicando ancora la carta master. A completamento della procedura viene emessa una seconda sequenza acustica ascendente. La stazione di rifornimento successivamente si trova nello stato Idle non autorizzato e lampeggia di colore blu.
Avvio di un processo di carica con autorizzazione RFID attivata
Ad autorizzazione della stazione di rifornimento attivata nello stato Idle la visualizzazione a barre lampeggia
di colore blu.
Collegare il veicolo alla stazione di rifornimento.
Tenere una carta RFID della whitelist davanti al lettore RFID.
Una carta valida viene confermata da un segnale acustico ed è possibile avviare un ciclo di carica dal
veicolo.
Note
● Autorizzazione preliminare
Se una stazione di rifornimento viene autorizzata senza un veicolo collegato, per 60 secondi è
possibile collegare un veicolo e avviare un ciclo di carica. Se in questo intervallo di tempo non
viene collegato un veicolo, la stazione di rifornimento passa di nuovo nello stato Idle non autorizzato.
● Ingresso di abilitazione [X1]
Speciali varianti di apparecchi offrono la possibilità di far dipendere l’abilitazione di un ciclo di
carica anche dalla configurazione circuitale dell'ingresso di abilitazione. Se tale funzione è stata attivata nelle impostazioni del DIP switch, per abilitare un ciclo di carica sarà necessaria anche la presenza di un segnale corretto sull’ingresso di abilitazione. Per ulteriori informazioni
consultare il "Manuale d’installazione".
30/112 - it
Page 31

Funzioni di autorizzazione
1.4 Sostituzione della serratura a cilindro (opzionale)
Nelle varianti dell'apparecchio dotate di interruttore a chiave è montata di serie una
serratura a cilindro. La serratura a cilindro può essere sostituita all'occorrenza in
base alle seguenti istruzioni.
Smontaggio della serratura a cilindro
Girare la chiave verso sinistra oltre il punto di resistenza.
Continuare a girare la chiave finché questa si trova in posizione verticale. Ora è
possibile sbloccare ed estrarre la serratura a cilindro dal supporto forzando leggermente.
Montaggio della serratura a cilindro
La serratura a cilindro deve soddisfare i seguenti requisiti:
● Semicilindro profilato secondo EN1303 o DIN18252
● Misura A = 30 mm (con A=31 mm si crea una sporgenza minima sull’alloggia-
mento)
● Nasello della serratura regolabile
Regolare l'angolo del nasello della serratura [S] in modo che questo nella posizione di estrazione della chiave sia rivolto verso l'alto in verticale.
La regolazione dell'angolo del nasello della serratura viene generalmente effettuata
come segue:
Con un oggetto sottile inserire il perno di codifica e spingere il nasello della serratura nella posizione desiderata.
Girare la chiave di 180° in modo tale che il nasello della serratura sia rivolto
verso il basso.
Spingere completamente la serratura a cilindro nell'alloggiamento esercitando
una leggera pressione fino allo scatto in sede. La serratura a cilindro deve essere a filo con la superficie dell'alloggiamento.
Girare la chiave verso destra oltre il punto di resistenza, finché è possibile
estrarre la chiave.
Non girare la chiave oltre la posizione [MAX]. L'interruttore a chiave è pronto
per l'uso.
it - 31/112
Page 32

Page 33

Contenido
Contenido
1 Funciones de autorización ................................................................................................... 34
1.1 Sobre este manual.......................................................................................................34
1.2 Explicación de conceptos ............................................................................................34
1.3 Autorización RFID........................................................................................................36
1.4 Cambiar la cerradura de cilindro (opcional) ................................................................. 38
es - 33/112
Page 34

Funciones de autorización
1 Funciones de autorización
1.1 Sobre este manual
¡PRECAUCIÓN!
Este manual es una ampliación del "Manual de usuario". ¡Se han de tener en cuenta obligatoriamente todas las instrucciones e indicaciones de seguridad del manual!
Realice la instalación de la estación de carga según el "Manual de instalación".
Validez
Este manual es válido para variantes especiales de los equipos del modelo:
● KeContact P30 Tipos b
● KeContact P30 Tipos c
Asignación mediante código de producto (de la placa de características):
KC-P30-XXXXXXX-XX
= 1...tipos b, 2...tipos c, 3...tipos c
= R...RFID, K...Keyswitch
Versión del firmware
Nota
Para mantener el pleno volumen de funcionamiento descrito, realice cuando sea necesario una
actualización del firmware. La información adicional, las instrucciones y el firmware se pueden encontrar en:
↪
http://www.keba.com/de/emobility/service-support/downloads/downloads
1.2 Explicación de conceptos
Autorización
Las variantes de equipos especiales ofrecen la posibilidad de iniciar sesiones de
carga en función de determinados requisitos. Están disponibles las variantes siguientes:
● Habilitación mediante interruptor de llave.
34/112 - es
● Habilitación mediante interfaz SmartHome.
● Habilitación mediante entrada externa [X1].
● Identificación de usuario mediante tarjeta RFID.
Page 35

Funciones de autorización
Interruptor de llave
En las variantes especiales de KeContact P30 hay montada una cerradura de cilindro que permite iniciar el proceso de carga solo a los usuarios con la llave adecuada.
El interruptor de llave [S] sirve para autorizar un usuario con una llave.
Entrada de habilitación externa [X1]
Las variantes de equipos descritas pueden ser autorizadas a través de una entrada (contacto de cierre), por medio de un interruptor libre de potencial externo. Observe en este caso especialmente la combinación lógica entre las variantes de autorización. La correcta instalación y configuración se pueden consultar en el "Manual de instalación".
Lector RFID
En las variantes especiales de KeContact P30 hay montado un lector RFID que
permite la autorización mediante etiquetas RFID.
El lector RFID [R] sirve para la autorización sin contacto de un usuario con etiquetas RFID según ISO14443 e ISO15693.
Lista blanca RFID
Lista de las etiquetas RFID con las cuales se puede iniciar una sesión de carga si
está activada la autorización RFID.
● La P30 tipo b y tipo c permiten 20 registros en la lista blanca RFID.
Tarjeta maestra RFID
Primera tarjeta RFID aprendida en la lista blanca de la estación de carga.
Se utiliza para iniciar y confirmar el proceso de aprendizaje del resto de las tarjetas
RFID (tarjetas esclavas). También sirve para autorizar una sesión de carga.
Tarjeta esclava RFID
Tarjeta RFID en la lista blanca de la estación de carga. Sirve para autorizar una
sesión de carga.
Indicación de barras LED
La indicación informa sobre el estado operativo actual de la estación de carga. Está compuesta por 4 segmentos ([S1] a [S4]), los cuales pueden encenderse o parpadear de manera conjunta o individual en colores diferentes.
La indicación de barras LED solo se muestra cuando la alimentación eléctrica está
activa.
Pulsador de servicio
El pulsador de servicio [Servicio] se encuentra en la zona de conexión de la estación de carga. Para acceder se han de retirar la cubierta de diseño y la cubierta de
la zona de conexión.
es - 35/112
Page 36

Funciones de autorización
1.3 Autorización RFID
Funcionamiento Maestro/esclavo (red de carga)
Si la estación de carga forma parte de una red de carga (P30 tipo c como esclavo en una instalación maestro/esclavo, todas las tarjetas RFID deben pasar por el aprendizaje en la estación de carga maestro (P30 tipo x). La activación y la desactivación de la función de autorización y la lista blanca para toda la red de carga se gestionan desde el maestro. Consulte todas las informaciones acerca de esta variante de instalación
en el "Manual de configuración“ adjunto específico.
Visualización de las barras de LED
● Si no es necesaria ninguna autorización para una sesión de carga, parpadean los 4 segmentos de la
indicación de barras LED de la estación de carga en estado Idle (=marcha en vacío) verde.
● Si es necesaria una autorización para una sesión de carga, parpadean los 4 segmentos de la indicación de barras LED de la estación de carga en estado Idle (=marcha en vacío) azul. (Es necesaria una
autorización mediante interruptor de llave, tarjeta RFID o entrada externa).
● Si el segmento LED [S4] se ilumina en color naranja significa que se ha de confirmar el aprendizaje de
una tarjeta esclava presentándola de nuevo.
Señales acústicas
Secuencia de tono ascendente:
La tarjeta RFID ha sido leída y aceptada.
Secuencia de tono descendente:
La tarjeta RFID ha sido leída y denegada (sin permiso).
Activar/desactivar la autorización, borrar la lista blanca y realizar el aprendizaje de
la tarjeta maestra
Para activar y desactivar la autorización, borrar la lista blanca o bien realizar el aprendizaje de la tarjeta maestra, no debe estar activa ninguna sesión de carga y no debe haber conectado ningún vehículo a la estación de carga. Para acceder al pulsador de servicio se han de retirar la cubierta de diseño y la cubierta de la
zona de conexión.
Mantenga accionado el pulsador de [Servicio] de la zona de conexión hasta que suene una segunda
señal acústica.
La estación de carga ejecuta ahora un nuevo arranque automáticamente, borrando en el proceso la lista
blanca RFID interna.
Justo después de este nuevo arranque de la estación de carga, dispone de 60 segundos para realizar
el aprendizaje de la tarjeta maestra, colocando delante una tarjeta RFID. Si la tarjeta es válida, se confirma con una señal acústica y se activa la función de autorización.
Si finaliza este intervalo de tiempo sin que se haya realizado el aprendizaje de una tarjeta maestra, se
desactivará la función de autorización RFID de la estación de carga.
Nota
Después del aprendizaje de la tarjeta maestra, la estación de carga parpadea durante unos 60 segundos, durante los cuales se puede iniciar una sesión de carga autorizada por la maestra. A continuación, la estación de carga cambia al estado Idle no autorizado y parpadea en azul.
36/112 - es
Page 37

Funciones de autorización
Aprendizaje de una tarjeta esclava (agregar una tarjeta de usuario a la lista blanca)
Para el aprendizaje de una tarjeta esclava no debe estar activa ninguna sesión de carga y no debe haber
conectado ningún vehículo a la estación de carga. La función de autorización de la estación de carga debe
estar activada. La indicación de barras LED de la estación de carga parpadea en estado Idle azul.
Sostenga la tarjeta maestra RFID delante del lector RFID y espere a la señal acústica.
Antes de que transcurran 3 segundos, coloque la tarjeta esclava que se debe aprender delante del lector RFID. Si el modelo de tarjeta es compatible, se indica mediante una secuencia de señal acústica ascendente.
Confirme el proceso de aprendizaje colocando de nuevo la tarjeta maestra delante antes de que transcurran los 3 segundos siguientes. El proceso finaliza con otra secuencia de señales acústicas ascendentes. La estación de carga pasa a continuación a un estado Idle no autorizado y parpadea en azul.
Inicio de un proceso de carga con autorización RFID activada
Cuando la autorización de la estación de carga está activada, la indicación de barras parpadea en estado
Idle azul.
Enchufe el vehículo a la estación de carga.
Coloque una tarjeta RFID de la lista blanca delante del lector RFID.
Si la tarjeta de la lista blanca es válida, se confirma con una señal acústica y se puede iniciar una sesión
de carga desde el vehículo.
Notas
● Autorización previa:
Si se autoriza la estación de carga sin ningún vehículo enchufado, se puede enchufar un vehículo durante los 60 segundos siguientes e iniciar una sesión de carga. Si transcurre este intervalo de tiempo sin que se enchufe ningún vehículo, la estación de carga cambia de nuevo al
estado Idle no autorizado.
● Entrada de habilitación [X1]:
Las variantes de equipos especiales ofrecen la posibilidad de habilitar una sesión de carga,
dependiendo de la conmutación de la entrada de habilitación. Si se ha activado esta función
con los conmutadores DIP, para habilitar una sesión de carga también se necesita una señal
correcta en la entrada de habilitación. Encontrará información detallada en el "Manual de ins-
talación".
es - 37/112
Page 38

Funciones de autorización
1.4 Cambiar la cerradura de cilindro (opcional)
En las variantes de aparatos con interruptor de llave va montada de serie una cerradura de cilindro. La cerradura de cilindro se puede sustituir si se necesita según
las instrucciones siguientes.
Desmontaje de la cerradura de cilindro
Gire la llave hacia la izquierda hasta que supere las resistencias.
Siga girando la llave hasta que quede en posición vertical. Ahora podrá desbloquear la cerradura de cilindro del soporte ejerciendo una fuerza ligeramente
elevada y sacarla.
Montaje de la cerradura de cilindro
La cerradura de cilindro debe cumplir los siguientes requisitos:
● Semicilindro de perfil según EN1303 o DIN18252
● Dimensión A = 30mm (si A=31mm, sobresaldrá ligeramente de la carcasa)
● Leva de la cerradura regulable
Coloque la leva [S] en un ángulo tal que apunte hacia arriba en vertical cuando
la llave esté en posición de sacarla.
Por lo general, el ángulo de la leva se regula del siguiente modo:
Empuje al interior la espiga codificadora con un objeto delgado y deslice la leva a la posición deseada.
Gire la llave 180°, de modo que la leva quede apuntando hacia abajo.
Ejerciendo algo de presión, deslice la cerradura de cilindro completamente al
interior de la carcasa hasta que encaje de forma audible. La cerradura de cilindro debe quedar a ras con la superficie de la carcasa.
38/112 - es
Gire la llave hacia la derecha hasta que supere las resistencias y se pueda sacar la llave.
No gire la llave más allá de la posición [MAX]. El interruptor de llave está listo
para funcionar.
Page 39

Page 40

Indhold
Indhold
1 Autorisationsfunktioner........................................................................................................ 41
1.1 Om denne håndbog ..................................................................................................... 41
1.2 Begrebsforklaringer...................................................................................................... 41
1.3 RFID-autorisation.........................................................................................................43
1.4 Udskiftning af cylinderlås (ekstraudstyr) ...................................................................... 45
40/112 - da
Page 41

Autorisationsfunktioner
1 Autorisationsfunktioner
1.1 Om denne håndbog
FORSIGTIG!
Denne håndbog er en udvidelse af "Brugerhåndbogen". Alle anvisninger og sikkerhedshenvisninger i brugerhåndbogen skal altid overholdes!
Installer ladeboksen iht. "Installationshåndbogen".
Gyldighed
Denne håndbog gælder for specielle varianter af serierne:
● KeContact P30 b-serien
● KeContact P30 c-serien
Tilordning ved hjælp af produktkode (fra typeskiltet):
KC-P30-XXXXXXX-XX
= 1...b-serie, 2...c-serie, 3...c-serie
= R...RFID, K...Keyswitch
Firmwareversion
Bemærk
Gennemfør ved behov en firmwareopdatering for at bevare den fulde beskrevne funktionalitet.
Yderligere informationer, vejledninger og firmware findes på:
↪
http://www.keba.com/de/emobility/service-support/downloads/downloads
1.2 Begrebsforklaringer
Autorisation
Specielle varianter giver mulighed for at gøre starten af opladningssessionen afhængig af bestemte forudsætninger. Der findes følgende varianter:
● Aktivering via nøgleafbryder.
● Aktivering via SmartHome-interface.
● Aktivering via ekstern indgang [X1].
● Brugeridentifikation ved hjælp af RFID-kort.
da - 41/112
Page 42

Autorisationsfunktioner
Nøgleafbryder
I specielle varianter af KeContact P30 er der monteret en cylinderlås, der kun giver
brugere med passende nøgle tilladelse til at oplade.
Nøgleafbryderen [S] bruges til autorisation af en bruger med en nøgle.
Ekstern aktiveringsindgang [X1]
De beskrevne varianter giver mulighed for at blive autoriseret via en indgang (lukker) ved hjælp af en ekstern potentialfri kontakt. Vær i så fald opmærksom på den
logiske forbindelse mellem autorisationsvarianterne. Den korrekte installation og
konfiguration fremgår af "Installationshåndbogen".
RFID reader
I specielle varianter af KeContact P30 er der monteret en RFID-læseenhed, der giver autorisation ved hjælp af RFID-tags.
RFID reader [R] bruges til berøringsfri autorisation af en bruger med RFID-tags iht.
ISO14443 og ISO15693.
RFID whitelist
Listen over RFID-tags, hvormed en opladningssession kan startes med aktiveret
RFID-autorisation.
● P30 b-serien og c-serien giver mulighed for 20 registreringer i RFID whitelist.
RFID-master-kort
Første indlærte RFID-kort i ladeboksens whitelist.
Det bruges til at starte og bekræfte indlæringen af alle yderligere RFID-kort (slave-
kort). Det bruges også til autorisation af en opladningssession.
RFID-slave-kort
RFID-kort i ladeboksens whitelist. Det bruges til autorisation af en opladningssession.
LED-bjælkevisning
Visningen informerer om ladeboksens aktuelle driftstilstand. Den består af 4 segmenter ([S1] til [S4]), der sammen eller enkeltvist kan lyse eller blinke i forskellige
farver.
LED-bjælkevisningen er kun synlig, når strømforsyningen er aktiv.
Service-tast
Service-tasten [Service] befinder sig i ladeboksens tilslutningsfelt. For at få adgang til den skal design-coveret og afdækningen på tilslutningsfeltet fjernes.
42/112 - da
Page 43

Autorisationsfunktioner
1.3 RFID-autorisation
Master/slave-drift(ladenetværk)
Hvis ladeboksen er en del af et ladenetværk (P30 c-serie som slave i en master/slave-installation), skal alle
RFID-kort indlæres på master-ladeboksen (P30 x-serie). Aktivering og deaktivering af autorisationsfunktionen og af whitelist for hele ladenetværket administreres på masteren. Informationer om denne installationsvariant fremgår af den specifikt medfølgende "Konfigurationshåndbog".
Visualisering LED-bjælker
● Hvis ingen autorisation kræves til en opladningssession, blinker alle 4 segmenter på ladeboksens
LED-bjælkevisning grønt i tilstanden idle (=tomgang).
● Hvis der kræves en autorisation til en opladningssession, blinker alle 4 segmenter på ladeboksens
LED-bjælkevisning blåt i tilstanden idle (=tomgang). (autorisation enten ved hjælp af nøglekontakt,
RFID-kort eller ekstern indgang nødvendig).
● Permanent, orange lys i LED-segment [S4] betyder, at indlæringen af et slave-kort skal bekræftes ved
at holde master-kortet op foran igen.
Akustiske signaler
Stigende tonerække:
RFID-kortet er læst og accepteret.
Faldende tonerække:
RFID-kortet er læst og afvist (ingen autorisation).
Aktivering/deaktivering af autorisation, sletning af whitelist og indlæring af masterkort
For at aktivere, deaktivere autorisationen, slette whitelisten eller indlære et master-kort må der ikke være
nogen aktiv opladningssession, og der må ikke være sluttet en bil til ladeboksen. For at få adgang til servicetasten skal design-coveret og afdækningen på tilslutningsfeltet fjernes.
Tryk på [Service]-tasten i tilslutningsfeltet, til den anden signaltone lyder.
Ladeboksen udfører nu automatisk en genstart og sletter dermed den interne RFID-whitelist.
Lige efter genstarten af ladeboksen kan master-kortet indlæres i 60 sekunder ved at holde et RFID-kort
op foran. Et gyldigt kort bekræftes med en signaltone, og dermed aktiveres autorisationsfunktionen.
Hvis dette tidsinterval udløber uden indlæsning af et master-kort, deaktiveres ladeboksens RFID-autorisationsfunktion.
Bemærk
Efter indlæring af master-kortet blinker ladeboksen grønt 60 sekunder længere, og der kan startes
en opladningssession, der er autoriseret af masteren. Derefter skifter ladeboksen til den ikke-autoriserede idle-tilstand og blinker blåt.
da - 43/112
Page 44

Autorisationsfunktioner
Indlæring af slave-kort (tilføjelse af brugerkort til whitelisten)
Til indlæring af et slave-kort må der ikke være nogen aktiv opladningssession, og der må ikke være sluttet
en bil til ladeboksen. Ladeboksens autorisationsfunktion skal være aktiveret. Ladeboksens LED-bjælkevisning blinker blåt i tilstanden idle.
Hold dit RFID-master-kort hen foran RFID readeren, og afvent signaltonen.
Hold nu inden for 3 sekunder det slave-kort, der skal indlæres igen, hen foran RFID readeren. En understøttet kortmodel vises af en stigende tonerække.
Bekræft indlæringen inden for 3 sekunder ved at holde master-kortet hen foran igen. Processen afsluttes med endnu en stigende tonerække. Derefter befinder ladeboksen sig i den ikke-autoriserede idle-tilstand og blinker blåt.
Start af en opladning med aktiveret RFID-autorisation
Når ladeboksen er aktiveret, blinker LED-bjælkevisning blåt i tilstanden idle.
Slut bilen til ladeboksen.
Hold RFID-kortet fra whitelisten hen foran RFID readeren.
Et gyldigt kort fra whitelisten bekræftes med en signaltone, og der kan startes en opladningssession af
bilen.
Bemærkninger
● Forautorisation:
Hvis ladeboksen autoriseres uden tilsluttet bil, kan der sluttes en bil til i 60 sekunder, og dermed kan der startes en opladningssession. Hvis dette tidsinterval udløber, uden at der er sluttet en bil til, skifter ladeboksen atter til den ikke-autoriserede idle-tilstand.
● Aktiveringsindgang [X1]:
Specielle varianter giver mulighed for desuden at gøre aktiveringen af en opladningssession
afhængig af aktiveringsindgangens ledningsføring. Hvis du ikke har aktiveret denne funktion i
DIP switch-indstillingerne, kræver aktiveringen af en opladningssession desuden et korrekt
signal ved aktiveringsindgangen. Yderligere informationer om dette findes i "Installations-
håndbogen".
44/112 - da
Page 45

Autorisationsfunktioner
1.4 Udskiftning af cylinderlås (ekstraudstyr)
I ladebokse med nøgleafbryder er der seriemæssigt indbygget en cylinderlås. Cylinderlåsen kan udskiftes efter behov i henhold til følgende vejledning.
Afmontering af cylinderlås
Drej nøglen mod venstre, indtil der ikke længere mærkes nogen modstand.
Drej nøglen videre, indtil den befinder sig i lodret position. Nu kan cylinderlåsen
åbnes og tages ud af holderen med lidt ekstra kraft.
Montering af cylinderlås
Cylinderlåsen skal opfylde følgende krav:
● Profil-halvcylinder i henhold til EN1303 eller DIN18252
● Mål A = 30 mm (ved A=31 mm kommer der et minimalt udhæng på kabinet-
tet).
● Justerbart fremspring på låsen
Indstil vinklen på låsens fremspring [S] således, at låsens udtrækningsposition
peger lodret opad.
Justering af vinklen på låsens fremspring foregår som regel som følger:
Tryk kodestiften ind med en tynd genstand, og skyd fremspringet på låsen i
den ønskede position.
Drej nøglen 180°, således at låsens fremspring peger nedad.
Skyd med en vis kraft låsecylinderen helt ind i kabinettet, indtil det kan høres,
at den griber fat. Cylinderlåsen bør flugte med kabinettets overflade.
Drej nøglen mod højre, indtil der ikke længere mærkes nogen modstand, og
nøglen kan tages ud.
Drej ikke nøglen ud over positionen [MAX]. Nøgleafbryderen er nu klar til brug.
da - 45/112
Page 46

Page 47

Conteúdo
Conteúdo
1 Funções de autorização ....................................................................................................... 48
1.1 Sobre este manual.......................................................................................................48
1.2 Explicações de termos.................................................................................................48
1.3 Autorização RFID......................................................................................................... 50
1.4 Substituir a fechadura cilíndrica (opcional) .................................................................. 52
pt - 47/112
Page 48

Funções de autorização
1 Funções de autorização
1.1 Sobre este manual
CUIDADO!
Este manual é um suplemento do "Manual do utilizador". Todas as instruções e indicações
de segurança do manual do utilizador devem ser rigorosamente respeitadas!
Efetue a instalação da estação de carregamento conforme o "Manual de instalação".
Validade
Este manual é válido para as variantes especiais das séries do equipamento:
● KeContact P30 b-series
● KeContact P30 c-series
Atribuição através do código do produto (a partir da placa de características):
KC-P30-XXXXXXX-XX
= 1...b-series, 2...c-series, 3...c-series
= R...RFID, K...Keyswitch
Versão de firmware
Nota
Para a obtenção de toda a extensão de funções descrita, se necessário efetuar uma atualização
de firmware. Encontra informações adicionais, instruções e firmware em:
↪
http://www.keba.com/de/emobility/service-support/downloads/downloads
1.2 Explicações de termos
Autorização
As variantes especiais do equipamento oferecem a possibilidade de tornar
dependente o início de uma sessão de carregamento de determinados requisitos.
Encontram-se à disposição as seguintes variantes:
● Aprovação através do interruptor de chave.
48/112 - pt
● Aprovação através da interface SmartHome.
● Aprovação através da entrada externa [X1].
● Identificação de utilizador através de cartão RFID.
Page 49

Funções de autorização
Interruptor de chave
Em variantes especiais do KeContact P30 está montada uma fechadura cilíndrica
que apenas permite o início de um processo de carregamento a utilizadores com a
chave adequada.
O interruptor de chave [S] permite a autorização de um utilizador com uma chave.
Entrada de aprovação externa [X1]
As variantes descritas do equipamento possuem a possibilidade de autorizar por
uma entrada (contacto de fecho) através de um interruptor externo e livre de
potencial. Neste caso, observe especialmente a ligação lógica entre as variantes
de autorização. Encontra a configuração e a instalação corretas no "Manual de
instalação".
Leitor RFID
Em variantes especiais do KeContact P30 está montado um leitor RFID que
permite a autorização através de etiquetas RFID.
O leitor RFID [R] permite a autorização sem contato de um utilizador com
etiquetas RFID conforme ISO14443 e ISO15693.
RFID Whitelist
Lista das etiquetas RFID, com a qual é permitido iniciar uma sessão de
carregamento no caso de autorização RFID ativada.
● Os P30 de b-series e c-series permitem 20 entradas na Whitelist de RFID.
Cartão Master RFID
O primeiro cartão RFID programado na Whitelist da estação de carregamento.
Esta é utilizada para o início e a confirmação dos processos de programação de
todos os outros cartões RFID (cartões Slave). Adicionalmente, esta também serve
para a autorização de uma sessão de carregamento.
Cartão Slave RFID
Cartão RFID na Whitelist da estação de carregamento. Esta serve para a
autorização de uma sessão de carregamento.
Indicador de barras LED
A indicação informa sobre o estado operacional atual da estação de carregamento.
É composto por 4 segmentos ([S1] bis [S4]), que podem acender ou piscar, em
simultâneo ou individualmente a cores diferentes.
O indicador de barras LED é apenas visível com a alimentação elétrica ativada.
Botão para assistência
O botão para assistência [Assistência] encontra-se no painel de conetores da
estação de carregamento. Para tal acesso devem ser removidas a cobertura de
design e a cobertura do painel de conetores.
pt - 49/112
Page 50

Funções de autorização
1.3 Autorização RFID
Operação Master/Slave (rede de carregamento)
Se a estação de carregamento for parte de uma rede de carregamento (P30 c-series como Slave numa
instalação Master/Slave), todos os cartões RFID devem ser assim programados na estação de
carregamento Master (P30 x-series). A ativação ou desativação da função de autorização e a Whitelist para
toda a rede de carregamento são geridas em Master. As informações relativamente a esta variante de
instalação podem ser consultadas no específico "Manual de configuração" incluído.
Barras LED Visualização
● Se não for necessária qualquer autorização para uma sessão de carregamento, todos os 4 segmentos
do indicador de barras LED da estação de carregamento ficam intermitentes a verde no estado inativo
(=operação em vazio).
● Se for necessária uma autorização para uma sessão de carregamento, todos os 4 segmentos do
indicador de barras LED da estação de carregamento ficam intermitentes a azul no estado inativo
(=operação em vazio). (Autorização necessária através de um interruptor de chave, cartão RFID ou de
uma entrada externa).
● A luz permanente cor de laranja do segmento LED [S4] significa que a programação de um cartão
Slave deve ser confirmada através de uma nova apresentação do cartão Master.
Sinais acústicos
Sequência de sinais sonoros ascendente:
O cartão RFID foi lido e aceite.
Sequência de sinais sonoros descendente:
O cartão RFID foi lido e rejeitado (sem autorização).
Ativar/desativar a autorização, eliminar Whitelist e programar cartão Master
Para ativar ou desativar a autorização, para eliminar a Whitelist ou programar um cartão Master, nenhuma
sessão de carregamento pode estar ativa e nenhum veículo pode estar ligado à estação de carregamento.
Para o acesso ao botão para assistência devem ser removidas a cobertura de design e a cobertura do
painel de conetores.
Pressione o botão para [assistência] no painel de conetores até soar o segundo sinal sonoro.
A estação de carregamento executa agora automaticamente um reinício e elimina assim a Whitelist
RFID interna.
Diretamente após este reinício da estação de carregamento, o cartão Master pode ser programado por
60 segundos através da apresentação de um cartão RFID. Um cartão válido é confirmado com um sinal
sonoro e assim é ativada a função de autorização.
Se este intervalo de tempo tiver decorrido sem a programação de um cartão Master, é desativada então
a função de autorização RFID da estação de carregamento.
Nota
Após a programação do cartão Master, a estação de carregamento ainda fica intermitente a verde
durante 60 segundos e pode ser iniciada uma sessão de carregamento autorizada através do
Master. Posteriormente, a estação de carregamento muda para o estado inativo não autorizado e
fica intermitente a azul.
50/112 - pt
Page 51

Funções de autorização
Programar o cartão Slave (adicionar o cartão de utilizador à Whitelist)
Para a programação de um cartão Slave, nenhuma sessão de carregamento pode estar ativa e nenhum
veículo pode estar ligado à estação de carregamento. A função de autorização da estação de carregamento
deve estar ativa. O indicador de barras LED da estação de carregamento fica intermitente a azul no estado
inativo.
Mantenha o cartão Master RFID em frente do leitor RFID e aguarde o sinal sonoro.
Segure agora dentro de 3 segundos o novo cartão Slave a programar diante do leitor RFID. Um modelo
de cartões suportado é indicado por uma sequência de sinais sonoros ascendente.
Confirme o processo de programação dentro de 3 segundos através da nova apresentação do cartão
Master. O processo é concluído através de uma outra sequência de sinais sonoros ascendentes. Por
fim, a estação de carregamento encontra-se no estado inativo não autorizado e fica intermitente a azul.
Inicia um processo de carregamento com autorização RFID ativada
No caso de autorização ativada da estação de carregamento, o indicador de barras fica intermitente a azul
no estado inativo.
Ligue o veículo na estação de carregamento.
Segure um cartão RFID da Whitelist diante do leitor RFID.
Um cartão válido da Whitelist é confirmado com um sinal sonoro e uma sessão de carregamento pode
ser iniciada a partir do veículo.
Notas
● Autorização prévia:
Se a estação de carregamento for autorizada sem veículo ligado, um veículo pode ser ligado
durante 60 segundos e assim é iniciada uma sessão de carregamento. Se este intervalo de
tempo tiver decorrido sem um veículo ter sido ligado, a estação de carregamento muda
novamente para o estado inativo não autorizado.
● Entrada de aprovação [X1]:
As variantes especiais do equipamento oferecem a possibilidade de tornar dependente a
aprovação de uma sessão de carregamento a partir da conexão da entrada de aprovação. Se
tiver de ativar esta função nos ajustes do interruptor DIP, a aprovação de uma sessão de
carregamento necessita adicionalmente de um sinal correto na entrada de aprovação.
Encontra mais informações acerca deste tema no "Manual de instalação".
pt - 51/112
Page 52

Funções de autorização
1.4 Substituir a fechadura cilíndrica (opcional)
Nas variantes do equipamento com interruptor de chave está equipada de série
uma fechadura cilíndrica. Se necessário, a fechadura cilíndrica pode ser
substituída de acordo com as seguintes instruções.
Desmontar a fechadura cilíndrica
Rode a chave para o lado esquerdo, até as resistências serem ultrapassadas
de forma percetível.
Continue a rodar a chave, até a mesma se encontrar na posição vertical.
Agora a fechadura cilíndrica pode ser desbloqueada e retirada, aplicando
alguma força, para fora do suporte.
Montar a fechadura cilíndrica
A fechadura cilíndrica deve cumprir os seguintes requisitos:
● Semi-perfil do cilindro conforme as normas EN 1303 ou DIN 18252
● Medida A = 30 mm (em A = 31 mm existe uma distância mínima na caixa).
● Secção dianteira da fechadura regulável
Ajuste o ângulo da secção dianteira da fechadura [S], de forma a que na
posição de remoção da chave a mesma fique virada para cima na vertical.
A regulação do ângulo da secção dianteira da fechadura ocorre geralmente
conforme a seguir:
Com um objeto fino pressione o pino de codificação para dentro e desloque a
secção dianteira da fechadura para a posição pretendida.
Rode a chave a 180º, para que a secção dianteira da fechadura aponte para
baixo.
Empurre com alguma pressão a fechadura cilíndrica completamente para
dentro da caixa, até encaixar audivelmente. A fechadura cilíndrica deve estar
nivelada com a superfície da caixa.
52/112 - pt
Rode a chave para a direita, até as resistências serem ultrapassadas de forma
percetível e ser possível retirar a chave.
Não rode a chave além da posição [MÁX]. O interruptor de chave está agora
pronto a funcionar.
Page 53

Page 54

Inhoud
Inhoud
1 Verificatiefuncties ................................................................................................................. 55
1.1 Over dit handboek........................................................................................................ 55
1.2 Uitleg begrippen...........................................................................................................55
1.3 RFID-verificatie ............................................................................................................ 57
1.4 Cilinderslot vervangen (optioneel) ...............................................................................59
54/112 - nl
Page 55

Verificatiefuncties
1 Verificatiefuncties
1.1 Over dit handboek
VOORZICHTIG!
Dit handboek is een aanvulling op het “Gebruikershandboek”. Alle instructies en veiligheidsinstructies in het gebruikershandboek moeten in ieder geval worden opgevolgd!
Installeer het laadstation zoals beschreven in het “Installatiehandboek”.
Toepasselijkheid
Dit handboek is van toepassing op speciale varianten van de apparaatseries:
● KeContact P30 b-series
● KeContact P30 c-series
Toewijzing middels productcode (zal typeplaatje):
KC-P30-XXXXXXX-XX
= 1...b-series, 2...c-series, 3...c-series
= R...RFID, K...Keyswitch
Firmwareversie
Opmerking
Voer voor het behoud van de volledige beschreven functieomvang indien nodig a.u.b. een firmware-update uit. Extra informatie, handleidingen en firmware vindt u op:
↪
http://www.keba.com/de/emobility/service-support/downloads/downloads
1.2 Uitleg begrippen
Verificatie
Speciale apparaatvarianten bieden de mogelijkheid om het starten van een laadsessie afhankelijk te maken van bepaalde voorwaarden. De volgende varianten
zijn beschikbaar:
● Vrijgave via sleutelschakelaar.
● Vrijgave via SmartHome-interface.
● Vrijgave via externe ingang [X1].
● Gebruikersidentificatie met RFID-kaart.
nl - 55/112
Page 56

Verificatiefuncties
Sleutelschakelaar
In speciale varianten van de KeContact P30 is een cilinderslot ingebouwd waarmee alleen gebruikers met passende sleutel een laadcyclus kunnen starten.
De sleutelschakelaar [S] wordt gebruikt voor de verificatie van een gebruiker met
een sleutel.
Externe vrijgave-ingang [X1]
De beschreven apparaatvarianten bieden de mogelijkheid om via een ingang
(maakcontact) door een externe, potentiaalvrije schakelaar geverifieerd te worden.
In dit geval dient u speciaal te letten op de logische verknoping tussen de verificatievarianten. De correcte installatie en configuratie vindt u in het “Installatiehandboek”.
RFID-reader
In speciale varianten van de KeContact P30 is een RFID-lezer ingebouwd waarmee verificatie met behulp van RFID-tags mogelijk is.
De RFID-reader [R] wordt gebruikt voor de contactloze verificatie van een gebruiker met RFID-tags conform ISO14443 en ISO15693.
RFID-whitelist
Lijst met RFID-tags waarbij het met geactiveerde RFID-verificatie toegestaan is
een laadsessie starten.
● Bij de P30 b-series en c-series zijn 20 items in de RFID-whitelist toegestaan.
RFID-masterkaart
Eerste geprogrammeerde RFID-kaart in de whitelist van het laadstation.
Deze wordt gebruikt voor het starten en bevestigen van de programmering van alle
overige RFID-kaarten (slavekaarten). Bovendien kan deze kaart ook worden gebruikt voor de verificatie van een laadsessie.
RFID-slavekaart
RFID-kaart in de whitelist van het laadstation. Deze kaart wordt gebruikt voor de
verificatie van een laadsessie.
Led-balkindicatie
De indicatie informeert u over de actuele bedrijfstoestand van het laadstation. Deze
heeft 4 segmenten ([S1] tot [S4]) die samen of individueel in verschillende kleuren
kunnen branden of knipperen.
De led-balkindicatie is alleen zichtbaar bij actieve voedingsspanning.
Serviceknop
De serviceknop [Service] bevindt zich in het aansluitveld van het laadstation. Om
toegang tot dit veld te krijgen, moet het designdeksel en de afdekking van het aansluitveld worden verwijderd.
56/112 - nl
Page 57

Verificatiefuncties
1.3 RFID-verificatie
Master-/slavemodus (laadnetwerk)
Als het laadstation deel uitmaakt van een laadnetwerk (P30 c-series als slave in een master-slave-installatie), moeten alle RFID-kaarten op het master-laadstation (P30 x-series) worden geprogrammeerd. De activering of deactivering van de verificatiefunctie en de whitelist voor het volledige laadnetwerk worden in de master beheerd. U vindt de informatie over deze installatievariant in het specifieke bijgevoegde “Configuratie-
handboek”.
Visualisatie led-balk
● Als geen verificatie nodig is voor een laadsessie, knipperen alle 4 segmenten van de led-balkindicatie
van het laadstation in idle-toestand (=niet in gebruik) groen.
● Als een verificatie nodig is voor een laadsessie, knipperen alle 4 segmenten van de led-balkindicatie
van het laadstation in idle-toestand (=niet in gebruik) blauw. (Verificatie ofwel met sleutelschakelaar,
RFID-kaart of externe ingang nodig).
● Als het led-segment [S4] permanent oranje brandt, betekent dat dat het programmeren van een slavekaart moet worden bevestigd door de masterkaart nog een keer voor de reader te houden.
Akoestische signalen
Oplopende reeks tonen:
RFID-kaart is gelezen en geaccepteerd.
Aflopende reeks tonen:
RFID-kaart is gelezen en afgewezen (geen verificatie).
Verificatie activeren/deactiveren, whitelist wissen en masterkaart programmeren
Om de verificatie te activeren, te deactiveren, de whitelist te wissen of een masterkaart te programmeren,
mag geen laadsessie actief zijn en mag er geen voertuig op het laadstation aangesloten zijn. Om toegang tot
de serviceknop te krijgen, moet het designdeksel en de afdekking van het aansluitveld worden verwijderd.
Druk zolang op de knop [Service] op het aansluitveld totdat een tweede akoestisch signaal te horen is.
Het laadstation start nu automatisch opnieuw op en wist daarbij de interne RFID-whitelist.
Direct na deze herstart van het laadstation kan gedurende 60 seconden een masterkaart worden geprogrammeerd door de RFID-kaart voor de reader te houden. Een geldige kaart wordt bevestigd met een
akoestisch signaal waardoor ook de verificatiefunctie wordt geactiveerd.
Als deze tijd verstrijkt zonder programmering van een masterkaart, wordt de RFID-verificatiefunctie van
het laadstation gedeactiveerd.
Opmerking
Na het programmeren van de masterkaart knippert het laadstation nog 60 seconden groen. Gedurende deze tijd kan een door de master geverifieerde laadsessie worden gestart. Daarna schakelt
het laadstation naar de niet geverifieerde idle-toestand en knippert blauw.
nl - 57/112
Page 58

Verificatiefuncties
Slavekaart programmeren (gebruikerskaart toevoegen aan whitelist)
Om een slavekaart te programmeren, mag geen laadsessie actief zijn en mag er geen voertuig op het laadstation aangesloten zijn. De verificatiefunctie van het laadstation moet geactiveerd zijn. De led-balkindicatie
van het laadstation knippert in de idle-toestand blauw.
Houd de RFID-masterkaart voor de RFID-readers en wacht op het akoestische signaal.
Houd nu binnen 3 seconden de nieuwe slavekaart die u wilt programmeren voor de RFID-reader. Als u
een oplopende reeks tonen hoort, wordt het model ondersteund.
Bevestig de programmering binnen 3 seconden door de masterkaart nog een keer voor de reader te
houden. Deze procedure wordt met nog een reeks oplopende tonen afgesloten. Daarna bevindt zich het
laadstation in de niet geverifieerde idle-toestand en knippert blauw.
Een laadcyclus starten met geactiveerde RFID-verificatie
Bij geactiveerde verificatie van het laadstation knippert de balkindicatie in de idle-toestand blauw.
Sluit het voertuig op het laadstation aan.
Houd een RFID-kaart uit de whitelist voor de RFID-reader.
Een geldige kaart uit de whitelist wordt bevestigd met een akoestisch signaal. Er kan nu een laadsessie
worden gestart door het voertuig.
Opmerkingen
● Pre-verificatie:
Als een laadstation wordt geverifieerd zonder aangesloten voertuig, kan gedurende 60 seconden een voertuig worden aangesloten en daarmee een laatste sessie worden gestart. Als deze
tijd verstrijkt zonder dat een voertuig wordt aangesloten, schakelt het laadstation weer terug
naar de niet geverifieerde idle-toestand.
● Vrijgave-ingang [X1]:
Speciale apparaatvarianten bieden de mogelijkheid om de vrijgave van een laadsessie daarnaast nog afhankelijk te maken van het schakelen van een vrijgave-ingang. Als u deze functie
in de DIP-switchinstellingen heeft geactiveerd, is voor de vrijgave van een laadsessie bovendien een correct signaal aan de vrijgave-ingang nodig. Meer informatie hierover vindt u in het
“Installatiehandboek”.
58/112 - nl
Page 59

Verificatiefuncties
1.4 Cilinderslot vervangen (optioneel)
Bij apparaatvarianten met sleutelschakelaar is standaard een cilinderslot ingebouwd. Het cilinderslot kan indien nodig aan de hand van de onderstaande handleiding worden vervangen.
Cilinderslot demonteren
Draai de sleutel naar links totdat de weerstanden voelbaar overwonnen zijn.
Draai de sleutel verder totdat hij verticaal staat. Nu kan het cilinderslot met enige kracht uit de houder ontgrendeld en eruit getrokken worden.
Cilinderslot monteren
Het cilinderslot moet voldoen aan de volgende vereisten:
● halve profielcilinder volgens EN 1303 ofwel DIN18252
● maat A = 30mm (bij A=31mm steekt hij minimaal uit de behuizing).
● verstelbare sluitpal
Stel de hoek van de sluitpal [S] zo in, dat deze in de uittrekpositie van de sleutel verticaal naar boven wijst.
In de regel wordt de sluitpal op de volgende wijze versteld:
Druk met een dun voorwerp de codeerpen in en schuif de sluitpal in de gewenste positie.
Draai de sleutel 180° zodat de sluitpal omlaag wijst.
Schuif het cilinderslot met enige druk helemaal in de behuizing totdat deze
hoorbaar vastklikt. Het cilinderslot moet het oppervlak van de behuizing vlak afsluiten.
Draai de sleutel naar rechts totdat de weerstanden voelbaar overwonnen zijn
en de sleutel eruit kan worden getrokken.
Draai de sleutel niet voorbij de positie [MAX]. De sleutelschakelaar is nu klaar
voor gebruik.
nl - 59/112
Page 60

Page 61

Innhold
Innhold
1 Autoriseringsfunksjoner....................................................................................................... 62
1.1 Innføring i håndboken .................................................................................................. 62
1.2 Begrepsforklaringer...................................................................................................... 62
1.3 RFID autorisering.........................................................................................................64
1.4 Skifte sylinderlås (tilbehør)........................................................................................... 66
no - 61/112
Page 62

Autoriseringsfunksjoner
1 Autoriseringsfunksjoner
1.1 Innføring i håndboken
FORSIKTIG!
Denne håndboken er en utvidelse av "Brukerhåndboken". Alle anvisningene og
sikkerhetsreglene i brukerhåndboken skal følges!
Installer ladestasjonen som beskrevet i "Installasjonshåndboken".
Gyldighet
Denne håndboken er gyldig for spesielle varianter av apparatserier:
● KeContact P30 b-serie
● KeContact P30 c-serie
Tilordning med produktkode (fra typeskilt):
KC-P30-XXXXXXX-XX
= 1...b-serie, 2...c-serie, 3...c-serie
= R...RFID, K...nøkkelbryter
Fastvareversjon
Merk!
Gjennomfør om nødvendig en fastvareoppdatering for å motta hele det beskrevne
funksjonsomfanget. Ekstra info, anvisninger og fastvare finner du på:
↪
http://www.keba.com/de/emobility/service-support/downloads/downloads
1.2 Begrepsforklaringer
Autorisering
Spesielle apparatvarianter gir mulighet til å gjør start av en lading avhengig av
bestemte forutsetninger. Følgende varianter er tilgjengelige:
● Frigivelse med nøkkelbryter.
62/112 - no
● Frigivelse via SmartHome grensesnitt.
● Frigivelse via ekstern inngang [X1].
● Brukeridentifisering med RFID-kort.
Page 63

Autoriseringsfunksjoner
Nøkkelbryter
I spesielle varianter av KeContact P30 er det montert et sylinderlås, som gjør det
mulig for brukeren å starte ladingen med en passende nøkkel.
Nøkkelbryteren [S] brukes til autorisering av en bruker med en nøkkel.
Ekstern frigivelsesinngang [X1]
De beskrevne apparatvariantene har mulighet til å autoriseres via en inngang
(lukker) med en ekstern, potensialfri bryter. Følg i dette tilfellet spesielt den logiske
sammenkoblingen mellom autoriseringsvariantene. Den korrekte installasjonen og
konfigurering finner du i "Installasjonshåndboken".
RFID Reader
I spesielle varianter av KeContact P30 er det montert et RFID leseapparat, som
tillater autorisering med RFID-tagger.
RFID Reader [R] brukes til berøringsfri autorisering av en bruker med RFID-tagger
iht. ISO14443 og ISO15693.
RFID Whitelist
Liste over RFID-tagger, som ved aktivert RFID autorisering har tillatelse til å starte
en lading.
● P30 b-serie og c-serie tillater 20 poster i RFID Whitelist.
RFID-masterkort
Første innlærte RFID-kort i Whitelist til ladestasjonen.
Det brukes til å starte og bekrefte innlæringsprosessen til alle videre RFID-kort
(slavekort). I tillegg brukes det også for autorisering av en lading.
RFID-slavekort
RFID-kort i Whitelist til ladestasjonen. Det brukes for autorisering av en lading.
LED søyleindikator
Indikatoren informerer om gjeldende driftstilstand til ladestasjonen. Det består av 4
segmenter ([S1] til [S4]) som sammen eller enkeltvis lyser eller blinker med
forskjellige farger.
LED søyleindikatoren er kun synlig når strømforsyningen er aktivert.
Serviceknapp
Serviceknappen [Service] befinner seg i tilkoblingsfeltet til ladestasjonen. For
tilgang til denne må designdekslet og dekslet over tilkoblingsfeltet fjernes.
no - 63/112
Page 64

Autoriseringsfunksjoner
1.3 RFID autorisering
Master/slave-drift (ladenettverk)
Hvis ladestasjonen er en del av et ladenettverk (P30 c-serie som slave i en master/slave-installasjon), så må
alle RFID-kort læres inn på master-ladestasjonen (P30 x-serie). Aktivering eller deaktivering av
autoriseringsfunksjonen og Whitelist for hele ladenettverket håndteres på master. Finn informasjon om
denne installasjonsvarianten i den spesielt vedlagte "Konfigurasjonshåndboken".
Visualisering LED-søyle
● Hvis det ikke er nødvendig med noen autorisering for en lading, blinker alle 4 segmentene til LED
søyleindikatoren til ladestasjonen i tilstanden Idle (= tomgang) grønt.
● Hvis det er nødvendig med en autorisering for en lading, blinker alle 4 segmentene til LED
søyleindikatoren til ladestasjonen i tilstanden Idle (= tomgang) blått. (Autorisering enten med
nøkkelbryter, RFID-kort eller ekstern inngang nødvendig).
● Permanent, oransje lys til LED-segmentene [S4] betyr at innlæring av et slavekort ved å på nytt holde
foran materkortet må bekreftes.
Akustiske signaler
Stigende tonerekkefølge:
RFID-kort ble lest og akseptert.
Synkende tonerekkefølge:
RFID-kort ble lest og avvist (ingen rettighet).
Aktivere/deaktivere autorisering, slett Whitelist og lær inn masterkort
For å aktivere eller deaktivere autoriseringen, slette Whitelist eller lære inn et masterkort, skal ikke noen
lading være aktiv og det skal ikke være noe kjøretøy koblet til ladestasjonen. For tilgang til serviceknappen
må designdekslet og dekslet over tilkoblingsfeltet fjernes.
Trykk knappen [Service] i tilkoblingsfeltet helt til den andre signaltonen høres.
Ladestasjonen gjennomfører nå automatisk en nystart og sletter dermed den interne RFID Whitelist.
Direkte etter denne nystarten av ladestasjonen kan man i 60 sekunder lære inn masterkortet, ved å hold
foran et RFID-kort. Et gyldig kort bekreftes med en signaltone og dermed blir autoriseringsfunksjonen
aktivert.
Utløper dette tidsintervallet uten innlæring av et masterkort, deaktiveres RFID-autoriseringsfunksjonen til
ladestasjonen.
64/112 - no
Merk!
Etter innlæringen av masterkortet blinker ladestasjonen fortsatt grønt i 60 sekunder og man kan
starte en lading autorisert av master. Deretter skifter ladestasjonen til den ikke autoriserte
tilstanden Idle og blinker blått.
Page 65

Autoriseringsfunksjoner
Lære inn slavekort (legge til brukerkort til Whitelist)
For å lære inn et slavekort, skal ikke noen lading være aktiv og det skal ikke være noe kjøretøy koblet til
ladestasjonen. Autoriseringsfunksjonen til ladestasjonen må være aktivert. LED søyleindikatoren til
ladestasjonen blinker blått i tilstanden Idle.
Hold RFID-masterkortet foran RFID Reader, og vent til signaltonen lyder.
Hold nå i løpet av 3 sekunder slavekortet som skal læres inn foran RFID Reader. En støttet korttype
angis med en stigende tonerekke.
Bekreft innlæringsprosessen i løpet av 3 sekunder ved å holde masterkortet foran igjen på nytt.
Prosessen avsluttes med en ytterligere stigende tonerekkefølge. Deretter er ladestasjonen i ikke
autorisert tilstand Idle og blinker blått.
Start en ladeprosess med aktivert RFID autorisering
Ved aktivert autorisering av ladestasjonen blinker søyleindikatoren blått i tilstanden Idle.
Koble kjøretøyet til ladestasjonen.
Hold et RFID-kort fra Whitelist foran RFID Reader.
Et gyldig kort fra Whitelist bekreftes med en signaltone og en lading kan startes fra kjøretøyet.
Merk
● For-autorisering:
Blir en ladestasjon autorisert uten tilkoblet kjøretøy, kan man i 60 sekunder koble til et
kjøretøy, og dermed starte en lading. Utløper dette tidsintervallet uten at et kjøretøy blir koblet
til, skifter ladestasjonen tilbake til ikke autorisert tilstand Idle.
● Signalinngang [X1]:
Spesielle apparatvarianter gir mulighet til i tillegg å gjøre frigivelse av en lading avhengig av
kobling av frigivelsesinngangen. Hvis denne funksjonen er aktivert i DIP-bryterinnstillingen,
trenger frigivelse av en lading i tillegg et korrekt signal på frigivelsesinngangen. Ytterligere
informasjon om dette finner du i "Installasjonshåndbok".
no - 65/112
Page 66

Autoriseringsfunksjoner
1.4 Skifte sylinderlås (tilbehør)
På apparatmodeller med nøkkelbryter er det montert en sylinderlås som standard.
Sylinderlåsen kan skiftes ut i henhold til anvisningene nedenfor.
Demontere sylinderlåsen
Drei nøkkelen til venstre helt til motstanden blir sporbart overvunnet.
Drei nøkkelen videre til den står i verktikal stilling. Nå kan sylinderlåsen låses
opp og trekkes ut av holderen ved bruk av litt mer kraft.
Montere sylinderlås
Sylinderlåsen må oppfylle følgende krav:
● Profil-halvsylinder ifølge EN1303 eller DIN18252
● Mål A = 30 mm (ved A = 31 mm oppstår det et minimalt utstikk på huset).
● Justerbar medbringer
Still vinkelen på medbringeren [S] inn slik at den peker rett oppover i nøkkelens
uttrekksposisjon.
Justeringen av medbringerens vinkel foretas som regel på følgende måte:
Trykk den kodede stiften inn med en tynn gjenstand, og skyv medbringeren i
ønsket posisjon.
Drei nøkkelen rundt 180° slik at medbringeren peker nedover.
Skyv sylinderlåsen helt inn i huset med litt trykk og til den går hørbart i lås.
Sylinderlåsen skal stå helt plant med husoverflaten.
66/112 - no
Drei nøkkelen til høyre til motstanden blir sporbart overvunnet og nøkkelen kan
trekkes ut.
Drei ikke nøkkelen videre over posisjonen [MAX]. Nøkkelbryteren er nå klar til
bruk.
Page 67

Page 68

Innehåll
Innehåll
1 Funktioner för behörighetstilldelning ................................................................................. 69
1.1 Om den här handboken ............................................................................................... 69
1.2 Definitioner...................................................................................................................69
1.3 RFID-behörighetstilldelning.......................................................................................... 71
1.4 Byta cylinderlås (valbart).............................................................................................. 73
68/112 - sv
Page 69

Funktioner för behörighetstilldelning
1 Funktioner för behörighetstilldelning
1.1 Om den här handboken
VAR FÖRSIKTIG!
Den här handboken är ett tillägg till användarhandboken. Alla anvisningar och
säkerhetsanvisningar i användarhandboken måste följas!
Installera laddningsstationen enligt instruktionerna i installationshandboken.
Giltighet
Den här handboken gäller för särskilda varianter i enhetsserierna:
● KeContact P30 b-serie
● KeContact P30 c-serie
Tilldelning med produktkod (från typskylten):
KC-P30-XXXXXXX-XX
= 1...b-serie, 2...c-serie, 3...c-serie
= R...RFID, K...Keyswitch
Firmwareversion
Hänvisning
För att få full funktionalitet ska du vid behov uppdatera firmwaren. Ytterligare information,
anvisningar och firmware hittar du på:
↪
http://www.keba.com/de/emobility/service-support/downloads/downloads
1.2 Definitioner
Behörighetstilldelning
Särskilda enhetsvarianter gör det möjligt att starta en laddningssession utifrån
specifika förutsättningar. Följande varianter står till förfogande:
● Frigivning via nyckelbrytare.
● Frigivning via SmartHome-gränssnitt.
● Frigivning via extern ingång [X1].
● Användaridentifiering med RFID-kort.
sv - 69/112
Page 70

Funktioner för behörighetstilldelning
Nyckelbrytare
I särskilda varianter av KeContact P30 finns ett cylinderlås monterat vilket gör att
endast användare med rätt nyckel kan starta en laddningssession.
Nyckelbrytaren [S] används för att ges användare behörighet med nyckel.
Extern frigivningsingång [X1]
De beskrivna enhetsvarianterna kan ges behörighet via en ingång (slutkontakt)
genom en extern, potentialfri brytare. I det här fallet är det nödvändigt att beakta
den logiska kopplingen mellan behörighetsvarianterna. Rätt installation och
konfiguration hittar du i installationshandboken.
RFID-läsare
Vissa varianter av KeContact P30 har en RFID-läsare som möjliggör
behörighetstilldelning med hjälp av RFID-taggar.
RFID-läsaren [R] används för beröringsfri behörighetstilldelning till en användare
med RFID-taggar i enlighet med ISO14443 och ISO15693.
RFID whitelist
Lista med RFID-taggar med vilka det är tillåtet att starta en laddningssession när
RFID-behörighetstilldelningen är aktiverad.
● I P30 b-serien och c-serien går det att skriva in 20 poster i RFID-whitelistan.
RFID-masterkort
Det första programmerade RFID-kortet i laddningsstationens whitelist.
Det används för att starta och bekräfta programmeringen av alla ytterligare RFID-
kort (slavkort). Dessutom används det för att auktorisera en laddningssession.
RFID-slavkort
RFID-kort i laddningsstationens whitelist. Det används för att godkänna en
laddning.
LED-stapelindikering
Indikeringen informerar om laddningsstationens aktuella driftsstatus. Den består av
4 segment ([S1] till [S4]) som kan lysa eller blinka tillsammans eller i olika färger.
LED-stapelindikeringen visas endast när strömförsörjningen är påslagen.
Serviceknapp
Serviceknappen [Service] sitter på laddningsstationens anslutningspanel. För att
få åtkomst till den är det nödvändigt att ta av det designade locket och
anslutningspanelens täckdel.
70/112 - sv
Page 71

Funktioner för behörighetstilldelning
1.3 RFID-behörighetstilldelning
Master-/slavdrift (laddningsnätverk)
Om laddningsstationen är en del av ett laddningsnätverk (P30 c-serie som slav i en master-/slavinstallation)
måste alla RFID-kort programmeras på masterladdningsstationen (P30 x-serien). Att aktivera eller avaktivera
behörighetstilldelningsfunktionen och whitelistan för hela laddningsnätverket görs på mastern. Du hittar
specifik information om den här installationsvarianten i den bifogade konfigurationshandboken.
Visualisering med LED-staplar
● Om det inte krävs någon behörighetstilldelning för en laddningssession blinkar alla 4 segment i
laddningsstationens LED-staplar grönt i idle-läge (=tomgång).
● Om det krävs behörighetstilldelning för en laddningssession blinkar alla 4 segment i
laddningsstationens LED-staplar blått i idle-läge (=tomgång). (Det krävs behörighetstilldelning antingen
med nyckelbrytare, RFID-kort eller extern ingång.)
● Om LED-segmentet [S4] permanent lyser orange betyder det att programmeringen av ett slavkort
måste bekräftas genom att masterkortet hålls fram igen.
Akustiska signaler
Stigande tonföljd:
RFID-kort har lästs in och accepterats.
Fallande tonföljd:
RFID-kort har lästs in, men accepteras inte (ingen behörighet).
Aktivera/avaktivera behörighet, radera whitelist och programmera masterkort
För att aktivera eller avaktivera behörighet, radera whitelist eller programmera ett masterkort får ingen
laddningssession vara aktiv och det får inte heller vara något fordon anslutet till laddningsstationen. För att få
åtkomst till serviceknappen är det nödvändigt att ta av det designade locket och anslutningspanelens
täckdel.
Tryck på [Service]-knappen på anslutningspanelen tills den andra signaltonen ljuder.
Det gör att laddningsstationen automatiskt startar om och raderar då den interna RFID-whitelistan.
Direkt efter den här omstarten av laddningsstationen går det att i 60sekunder programmera
masterkortet genom att hålla fram ett RFID-kort. Ett giltigt kort bekräftas med en signalton och det gör att
behörighetstilldelningsfunktionen aktiveras.
Om det här tidsfönstret löper ut utan att ett masterkort har programmerats avaktiveras RFIDbehörighetstilldelningen i laddningsstationen.
Hänvisning
När masterkortet har programmerats blinkar laddningsstationen grönt i ytterligare 60sekunder och
det går att starta en laddningssession som har godkänts med mastern. Sedan växlar
laddningsstationen över till det icke behörighetstilldelade idle-läget och blinkar blått.
sv - 71/112
Page 72

Funktioner för behörighetstilldelning
Programmera slavkort (lägga till användarkort i whitelistan)
För att programmera ett slavkort är det inte tillåtet att en laddningssession är aktiv och det får inte heller vara
något fordon anslutet till laddningsstationen. Funktionen behörighetstilldelning måste vara aktiverad i
laddningsstationen. Laddningsstationens LED-stapelindikering blinkar blått i idle-läget.
Håll RFID-masterkortet framför RFID-läsaren och vänta på signaltonen.
Håll nu inom 3sekunder slavkortet som ska programmeras framför RFID-läsaren. En kortmodell som
stöds anges med en stigande tonföljd.
Bekräfta programmeringen inom 3sekunder genom att hålla fram masterkortet igen. Processen
avslutas med ytterligare en stigande tonföljd. Efter detta är laddningsstationen i det icke
behörighetstilldelade idle-läget och blinkar blått.
Starta en laddningssession med aktiverad RFID-behörighetstilldelning
När laddningsstationens behörighetstilldelning är aktiverad blinkar balkindikeringen blått i idle-läge.
Anslut fordonet till laddningsstationen.
Håll ett RFID-kort från whitelistan framför RFID-läsaren.
Ett giltigt kort från whitelistan bekräftas med en signalton och det går att starta en laddningssession från
fordonet.
Anvisningar
● Behörighetstilldelning i förväg:
Om laddningsstationen ges behörighet utan att det finns ett anslutet fordon går det i
60sekunder att ansluta ett fordon och därigenom starta en laddningssession. Om det här
tidsfönstret löper ut utan att ett fordon ansluts växlar laddningsstationen tillbaka i det icke
behörighetstilldelade idle-läget.
● Frigivningsingång [X1]:
Särskilda enhetsvarianter gör det möjligt att frige en laddningssession även utifrån
frigivningsingångens ledningar. Om du har aktiverat den här funktionen i DIP-switchinställningarna krävs det även en korrekt signal i frigivningsingången för att frige en
laddningssession. Mer information om det hittar du i installationshandboken.
72/112 - sv
Page 73

Funktioner för behörighetstilldelning
1.4 Byta cylinderlås (valbart)
På enhetsvarianter med nyckelbrytare finns som standard ett cylinderlås monterat.
Cylinderlåset kan vid behov bytas ut enligt följande anvisningar.
Demontera cylinderlåset
Vrid nyckeln åt vänster tills du inte längre känner något motstånd.
Fortsätt att vrida nyckeln tills den är i vertikalt läge. Nu kan du med lätt
ansträngning lossa cylinderlåset från hållaren och dra ut det.
Montera cylinderlås
Cylinderlåset måste uppfylla följande krav:
● Profilhalvcylinder enligt EN 1303 resp. DIN 18252
● Mått A=30mm (vid A=31mm skjuter det ut en minimal bit vid huset).
● Justerbart lås
Ställ in vinkeln på låset [S] på sådant sätt att det pekar lodrätt uppåt i nyckelns
utdragningsläge.
Låsets vinkel justeras vanligen enligt följande:
Tryck in kodningsstiftet med ett tunt föremål och skjut låset till den önskade
positionen.
Vrid nyckeln 180°, så att låset pekar nedåt.
Skjut in cylinderlåset helt i huset med visst tryck tills du hör att det hakar fast.
Cylinderlåset ska ligga i linje med husets ovansida.
Vrid nyckeln åt höger tills du inte längre känner något motstånd och nyckeln
kan dras ut.
Vrid inte nyckeln längre än [MAX]-läget. Nu går det att använda
nyckelbrytaren.
sv - 73/112
Page 74

Page 75

Sisältö
Sisältö
1 Valtuutustoiminnot................................................................................................................ 76
1.1 Koskien tätä käsikirjaa ................................................................................................. 76
1.2 Käsitteiden selitykset ...................................................................................................76
1.3 RFID-valtuutus ............................................................................................................. 78
1.4 Sylinterilukon vaihtaminen (lisävaruste)....................................................................... 80
fi - 75/112
Page 76

Valtuutustoiminnot
1 Valtuutustoiminnot
1.1 Koskien tätä käsikirjaa
HUOMIO!
Tämä käsikirja on "KeContact P20 -käyttäjäkäsikirjan" laajennus. Kaikkia ohjeita ja
turvallisuusohjeita käyttäjäkäsikirjassa on ehdottomasti noudatettava!
Suorita latausaseman asennus "Asennuskäsikirjan" mukaan.
Voimassaolo
Tämä käsikirja on tarkoitettu seuraavien laitesarjojen laitteille:
● KeContact P30 b-sarja
● KeContact P30 c-sarja
Määritys tuotekoodin mukaan (tyyppikilvessä):
KC-P30-XXXXXXX-XX
= 1...b-sarja, 2...c-sarja, 3...c-sarja
= R...RFID, K...avainkytkin
Laiteohjelmistoversio
Ohje
Suorita tarvittaessa laiteohjelmiston päivitys, jotta saat käyttöösi kaikki kuvatut toiminnot niiden
täydessä laajuudessa. Lisätietoja, ohjeita ja laiteohjelmisto löytyvät tästä:
↪
http://www.keba.com/de/emobility/service-support/downloads/downloads
1.2 Käsitteiden selitykset
Valtuutus
Erityiset laitemallit tarjoavat mahdollisuuden tehdä lataustapahtuman alkamisen
riippuvaiseksi tietyistä edellytyksistä. Valittavissa ovat seuraavat vaihtoehdot:
● Vapautus avainkytkimellä.
76/112 - fi
● Vapautus SmartHome-liitännän kautta.
● Vapautus ulkoisen tulon [X1] kautta.
● Käyttäjän tunnistus RFID-kortin avulla.
Page 77

Valtuutustoiminnot
Avainkytkin
Erityisiin KeContact P30 -laitemalleihin on asennettu sylinterilukko, joka sallii
lataustapahtuman käynnistämisen ainoastaan käyttäjille, joilla on sopiva avain.
Avainkytkimellä [S] suoritetaan käyttäjän valtuutus avaimen avulla.
Ulkoinen vapautustulo [X1]
Kuvatuissa laitemalleissa on mahdollisuus käyttää tulon (sulkukoskettimen) kautta
ulkoista, potentiaalivapaata kytkintä valtuutuksen antamiseen. Tässä tapauksessa
on huomioitava erityisesti valtuutusvaihtoehtojen väliset loogiset kytkennät. Oikea
asennustapa ja konfigurointiohjeet tulee katsoa "Asennuskäsikirjasta".
RFID-lukulaite
Erityisiin KeContact P30 -laitemalleihin on asennettu RFID-lukulaite, joka sallii
valtuuttamisen RFID-tunnisteen avulla.
RFID-lukulaitteen [R] tehtävänä on valtuuttaa käyttäjä ilman kosketusta RFIDtunnisteen avulla standardien ISO14443 ja ISO15693 mukaisesti.
RFID-tunnisteluettelo
Luettelo RFID-tunnisteista, joiden avulla on sallittua käynnistää lataustapahtuma
RFID-valtuutuksen ollessa aktivoituna.
● P30 b-sarja ja c-sarja mahdollistavat 20 syötettä RFID-tunnisteluetteloon.
RFID-isäntäkortti
Ensimmäinen opetettu RFID-kortti latausaseman tunnisteluettelossa.
Sitä käytetään kaikkien muiden RFID-korttien (orjakorttien) opetustoiminnon
käynnistämiseen ja vahvistamiseen. Sitä käytetään myös lataustapahtuman
valtuuttamiseen.
RFID-orjakortti
RFID-kortti latausaseman tunnisteluettelossa. Sitä käytetään lataustapahtuman
valtuuttamiseen.
LED-palkkinäyttö
Merkkivalonäyttö ilmaisee latausaseman senhetkisen käyttötilan. Siihen kuuluu 4
osiota ([S1] - [S4]), jotka voivat palaa tai vilkkua eri värisinä yhdessä tai erikseen.
LED-palkkinäyttö on näkyvissä vain virransyötön ollessa kytkettynä päälle.
Huoltopainike
Huoltopainike [Service] sijaitsee latausaseman liitäntäkentässä. Sen käyttämiseksi
on poistettava kotelo ja liitäntäkenttäsuojus.
fi - 77/112
Page 78

Valtuutustoiminnot
1.3 RFID-valtuutus
Isäntä- ja orjakäyttö (latausverkko)
Jos latausasema on osa latausverkkoa (P30 c-sarja orjalaitteena isäntä-orja-asennuksessa), niin kaikki
RFID-kortit on opetettava isäntä-latausasemassa (P30 x-sarja). Valtuutustoiminnon aktivointia ja
deaktivointia sekä koko latausverkon tunnisteluetteloa hallitaan isäntälaitteesta. Katso tätä
asennusvaihtoehtoa koskevat tiedot erityisestä mukana toimitetusta "Konfigurointikäsikirjasta".
LED-palkkien tuominen näyttöön
● Jos lataustapahtuma ei edellytä valtuutusta, kaikki latausaseman LED-palkkinäytön 4 osiota vilkkuvat
joutokäyntitilassa (= Idle) vihreinä.
● Jos lataustapahtuma edellyttää valtuutusta, kaikki latausaseman LED-palkkinäytön 4 osiota vilkkuvat
joutokäyntitilassa (= Idle) sinisinä. (Valtuutus on välttämätöntä avainkytkimellä, RFID-kortilla tai
ulkoisen tulon kautta.)
● Pysyvä, oranssina palava LED-segmentti [S4] merkitsee sitä, että orjakortti on opetettava uudelleen
pitämällä isäntäkorttia esillä.
Akustiset signaalit
Nouseva sävelkulku:
RFID-kortti on luettu ja hyväksytty.
Laskeva sävelkulku:
RFID-kortti on luettu ja torjuttu (ei valtuutusta).
Valtuutuksen aktivointi ja deaktivointi, tunnisteluettelon poistaminen ja isäntäkortin
opettaminen
Kun valtuutus halutaan aktivoida tai deaktivoida, tunnisteluettelo poistaa tai isäntäkortti opettaa,
lataustapahtuma ei saa olla käynnissä, eikä latausasemaan saa olla kytkettynä ajoneuvoa. Huoltopainikkeen
käyttämiseksi on poistettava kotelo ja liitäntäkenttäsuojus.
Paina liitäntäkentässä olevaa [Service]-painiketta niin kauan, että järjestelmästä kuuluu toinen
äänimerkki.
Latausasema ohjaa tämän jälkeen automaattisesti uudelleenkäynnistyksen läpi ja poistaa tällöin sisäisen
RFID-tunnisteluettelon.
Isäntäkortti voidaan opettaa heti latausaseman uudelleenkäynnistyksen jälkeen 60 sekunnin ajan
pitämällä RFID-korttia esillä. Jos kortti on voimassa, järjestelmä antaa vahvistuksen äänimerkillä ja
aktivoi siten valtuutustoiminnon.
Jos aikaraja kuluu umpeen ilman, että isäntäkorttia opetetaan, niin latausaseman RFID-valtuutustoiminto
kytkeytyy pois päältä.
Ohje
Isäntäkortin opettamisen jälkeen latausasema vilkkuu vielä 60 sekunnin ajan vihreänä, ja
isäntäkortilla valtuutettu lataustapahtuma voidaan käynnistää. Sen jälkeen latausasema siirtyy
valtuuttamattomaan joutokäyntitilaan ja vilkkuu sinisenä.
78/112 - fi
Page 79

Valtuutustoiminnot
Orjakortin opettaminen (käyttäjäkortin lisääminen tunnisteluetteloon)
Kun orjakortti halutaan opettaa, lataustapahtuma ei saa olla käynnissä, eikä latausasemaan saa olla
kytkettynä ajoneuvoa. Latausaseman valtuutustoiminnon täytyy olla aktivoituna. Latausaseman LEDpalkkinäyttö vilkkuu joutokäyntitilassa sinisenä.
Pidä RFID-isäntäkorttia RFID-lukulaitteen edessä ja odota äänimerkin kuulumista.
Aseta nyt 3 sekunnin kuluessa uusi, opetettava orjakortti RFID-lukulaitteen eteen. Jos korttimalli on
tuettu, sävelkulku on nouseva.
Vahvista opetustoiminto 3 sekunnin kuluessa pitämällä uudelleen isäntäkorttia esillä. Toiminto päättyy
uuteen nousevaan sävelkulkuun. Sen jälkeen latausasema on valtuuttamattomassa joutokäyntitilassa ja
vilkkuu sinisenä.
Lataustapahtuman käynnistäminen aktiivisella RFID-valtuutuksella
Kun valtuutus on aktiivinen, latausaseman palkkinäyttö vilkkuu joutokäyntitilassa sinisenä.
Kytke ajoneuvo latausasemaan.
Aseta tunnisteluettelossa mainittu RFID-kortti RFID-lukulaitteen eteen.
Jos kortti on voimassa tunnisteluettelossa, järjestelmä antaa vahvistuksen äänimerkillä, ja
lataustapahtuma voidaan aktivoida ajoneuvosta.
Ohjeita
● Ennen valtuutusta:
Jos latausasema valtuutetaan ilman, että ajoneuvoa on kytketty, ajoneuvo voidaan kytkeä 60
sekunnin kuluessa ja siten lataustapahtuma voidaan käynnistää. Jos tämä ajanjakso kuluu
umpeen ilman, että ajoneuvoa kytketään, latausasema siirtyy jälleen valtuuttamattomaan
joutokäyntitilaan.
● Vapautustuloliitäntä [X1]:
Erityiset laitemallit tarjoavat lisäksi mahdollisuuden tehdä lataustapahtuman vapautuksen
riippuvaiseksi vapautustulon kytkennästä. Jos tämä toiminto on aktivoitu DIP-kytkimen
asetuksista, lataustapahtuman vapautus edellyttää lisäksi oikeata vapautustuloon saapuvaa
signaalia. Lisätietoja asiasta on nähtävissä "Asennuskäsikirjassa".
fi - 79/112
Page 80

Valtuutustoiminnot
1.4 Sylinterilukon vaihtaminen (lisävaruste)
Laitevaihtoehtoihin avainkytkimen kanssa on vakiovarusteena asennettu
sylinterilukko. Sylinterilukko voidaan tarvittaessa vaihtaa seuraavien ohjeiden
mukaisesti.
Sylinterilukon irrotus
Käännä avainta vasemmalle, kunnes vastukset on tuntuvasti ylitetty.
Käännä avainta edelleen, kunnes se on pystysuorassa asennossa. Nyt
sylinterilukko voidaan hieman voimaa käyttäen vapauttaa pidikkeen
lukituksesta ja vetää ulos.
Sylinterilukon asennus
Sylinterilukon täytyy täyttää seuraavat vaatimukset:
● Profiili-puolisylinteri normin EN 1303 tai DIN 18252 mukaan
● Mitta A = 30 mm (mitalla A = 31 mm ilmenee kotelolla minimaalinen ylitys).
● Säädettävä lukon nokka
Säädä lukon nokan [S] kulma siten, että avaimen ulosvetoasennossa se
osoittaa pystysuorassa ylöspäin.
Lukon nokan säätö tapahtuu yleensä seuraavalla tavalla:
Paina koodaustappi jollakin ohuella esineellä sisään ja siirrä lukon nokka
haluttuun asentoon.
Käännä avainta 180° siten, että lukon nokka osoittaa alaspäin.
Työnnä sylinterilukko kevyesti painaen täysin kotelon sisään, kunnes se
lukittuu kuuluvasti. Sylinterilukon tulee olla kotelon pinnan kanssa samalla
tasolla.
80/112 - fi
Käännä avainta oikealle, kunnes vastukset on tuntuvasti ylitetty ja avain
voidaan vetää irti.
Älä käännä avainta asennon [MAX] yli. Avainkytkin on nyt käyttövalmis.
Page 81

Page 82

Spis treści
Spis treści
1 Funkcje autoryzacji ............................................................................................................... 83
1.1 Wskazówki dotyczące niniejszego podręcznika ..........................................................83
1.2 Objaśnienia pojęć ........................................................................................................83
1.3 Autoryzacja RFID.........................................................................................................85
1.4 Wymiana zamka bębenkowego (opcjonalnie) .............................................................87
82/112 - pl
Page 83

Funkcje autoryzacji
1 Funkcje autoryzacji
1.1 Wskazówki dotyczące niniejszego podręcznika
OSTROŻNIE!
Niniejszy podręcznik stanowi rozszerzenie „Podręcznika dla użytkownika”. Należy koniecznie przestrzegać wszystkich instrukcji oraz wskazówek dotyczących bezpieczeństwa!
Należy przeprowadzić instalację stacji ładowania w sposób zgodny z„Podręcznikiem instalacji”.
Ważność
Niniejszy podręcznik obowiązuje dla wersji specjalnych urządzeń z serii:
● KeContact P30 seria b
● KeContact P30 seria c
Przyporządkowanie odbywa się w oparciu o kod produktu (podany na tabliczce znamionowej):
KC-P30-XXXXXXX-XX
= 1...seria b, 2...seria c, 3...seria c
= R...RFID, K... przełącznik kluczykowy
Wersja oprogramowania wbudowanego
Wskazówka
Aby zapewnić sobie całkowity opisany zakres funkcji należy, w razie potrzeby, przeprowadzić aktualizację oprogramowania wbudowanego. Dodatkowe informacje, instrukcje oraz oprogramowanie wbudowane są dostępne na stronie:
↪
http://www.keba.com/de/emobility/service-support/downloads/downloads
1.2 Objaśnienia pojęć
Autoryzacja
Specjalne wersje urządzenia oferują możliwość uzależnienia uruchomienia sesji ładowania od określonych warunków. Dostępne są następujące warianty:
● Zatwierdzenie za pośrednictwem wyłącznika kluczykowego.
● Zatwierdzenie za pośrednictwem interfejsu SmartHome.
● Zatwierdzenie za pośrednictwem wejścia zewnętrznego [X1].
● Identyfikacja użytkownika za pomocą karty RFID.
pl - 83/112
Page 84

Funkcje autoryzacji
Wyłącznik kluczykowy
W wersjach specjalnych KeContact P30 znajduje się zamek bębenkowy, który
umożliwia rozpoczęcie procesu ładowania wyłącznie użytkownikom posiadającym
pasujący klucz.
Wyłącznik kluczykowy [S] służy do autoryzacji użytkownika za pomocą kluczyka.
Zewnętrzne wejście zwalniające[X1]
Opisywane wersje urządzenia posiadają możliwość autoryzacji za pośrednictwem
wejścia (zestyk zwierny) zewnętrznym wyłącznikiem bezpotencjałowym. W tym
przypadku należy szczególnie pamiętać o powiązaniu logicznym wariantów autoryzacji. Opis prawidłowej instalacji i konfiguracji znajduje się w „Podręczniku instalacji”.
Czytnik RFID
W wersjach specjalnych KeContact P30 znajduje się czytnik RFID, który umożliwia
autoryzację za pomocą etykiety RFID.
Czujnik RFID [R] służy do bezdotykowej autoryzacji użytkownika za pomocą etykiety RFID zgodnie z ISO14443 i ISO15693.
Lista wyjątków RFID
Listwa etykiet RFID umożliwiających rozpoczęcie sesji ładowania przy aktywnej autoryzacji RFID.
● P30 seria b i c dopuszczają 20 wpisów na liście wyjątków.
Karta główna RFID
Pierwsza wczytana karta RFID na liście wyjątków stacji ładowania.
Służy ona do uruchamiania i potwierdzania procesu programowania wszystkich ko-
lejnych kart RFID (kart slave). Dodatkowo wykorzystuje się ją do autoryzacji sesji
ładowania.
Karta slave RFID
Karta RFID na liście wyjątków stacji ładowania. Służy ona do autoryzacji sesji ładowania.
Wskazania na pasku LED
Wskazanie informuje o aktualnym stanie roboczym stacji ładowania. Pasek składa
się z4 segmentów ([S1] do [S4]), które pojedynczo lub razem mogą świecić lub
migać wróżnych kolorach.
Wskazania paska LED są widoczne wyłącznie przy aktywnym zasilaniu.
Przycisk serwisowy
Przycisk serwisowy [Service] znajduje się na panelu przyłączeniowym stacji ładowania. Dostęp do przycisku wymaga zdjęcia pokrywy i osłony panelu przyłączeniowego.
84/112 - pl
Page 85

Funkcje autoryzacji
1.3 Autoryzacja RFID
Tryb master/slave (sieć ładowania)
Jeżeli stacja jest elementem sieci ładowania (P30 seria c jako slave w instalacji master/slave), wówczas konieczne jest wczytanie wszystkich kart do głównej stacji ładowania (P30 seria x). Zarządzanie procesem aktywacji lub dezaktywacji funkcji autoryzacji oraz listy wyjątków dla całej sieci ładowania odbywa się w urządzeniu głównym. Informacje na temat tego wariantu instalacji znajdują się w specjalnie dołączonym „Pod-
ręczniku konfiguracji”.
Wizualizacja paska LED
● Jeżeli sesja ładowania nie wymaga autoryzacji, wszystkie 4 segmenty paska LED stacji ładowania w
stanie uśpienia (= bieg jałowy) migają na zielono.
● Jeżeli sesja ładowania wymaga autoryzacji, wszystkie 4 segmenty paska LED stacji ładowania w stanie uśpienia (= bieg jałowy) migają na niebiesko. (Autoryzacja za pośrednictwem wyłącznika kluczykowego, karty RFID lub wejścia zewnętrznego).
● Nieprzerwane świecenie segmentu LED [S4] na pomarańczowo oznacza, że wczytanie karty slave wymaga potwierdzenia poprzez ponowne przyłożenie karty głównej.
Sygnały dźwiękowe
Dźwięk rosnący:
karta RFID została wczytana i zaakceptowana.
Dźwięk malejący:
karta RFID została wczytana i odrzucona (brak uprawnień).
Aktywacja/dezaktywacja autoryzacji, kasowanie listy wyjątków i wczytywanie karty
głównej
W celu przeprowadzenia autoryzacji, dezaktywacji, skasowania listy wyjątków lub wczytania karty głównej
żadna sesja ładowania nie może być aktywna, a do stacji nie może być podłączony żaden pojazd. Dostęp do
przycisków serwisowych wymaga zdjęcia pokrywy i osłony panelu przyłączeniowego.
Naciskać przycisk [Service] na panelu przyłączeniowym do momentu, aż słyszalny będzie drugi sygnał
dźwiękowy.
Stacja ładowania przeprowadzi teraz automatycznie ponowne uruchomienie, usuwając wewnętrzną listę
wyjątków RFID.
Bezpośrednio po tym ponownym uruchomieniu stacji można przez 60 sekund zaprogramować kartę
główną poprzez przyłożenie karty RFID. Ważność karty jest sygnalizowana sygnałem dźwiękowym, który
aktywuje funkcję autoryzacji.
Jeżeli w tym czasie nie nastąpi wczytanie karty głównej, następuje dezaktywacja funkcji autoryzacji RFID
stacji ładowania.
Wskazówka
Po zaprogramowaniu karty głównej stacja ładowania miga jeszcze przez 60 sekund na zielono;
możliwe jest rozpoczęcie sesji ładowania autoryzowanej przez kartę główną. Następnie stacja
przełącza się w nieautoryzowany stan uśpienia i miga na niebiesko.
pl - 85/112
Page 86

Funkcje autoryzacji
Wczytywanie karty slave (dodawanie karty użytkownika do listy wyjątków)
W celu wczytania karty slave żadna sesja ładowania nie może być aktywna, a do stacji nie może być podłączony żaden pojazd. Funkcja autoryzacji stacji ładowania musi być aktywna. Pasek LED stacji ładowania miga na niebiesko w stanie uśpienia.
Należy przytrzymać kartę główną RFID przed czytnikiem RFID izaczekać na sygnał dźwiękowy.
Przytrzymać nowo wczytywaną kartę slave przed czytnikiem RFID przez 3 sekundy. Obsługiwany model
karty jest sygnalizowany dźwiękiem rosnącym.
Potwierdzić proces wczytywania przez 3 sekundy poprzez ponowne przyłożenie karty głównej. Zakończenie procesu jest sygnalizowane dźwiękiem rosnącym. Następnie stacja znajduje się w nieautoryzowanym stanie uśpienia i miga na niebiesko.
Rozpoczęcie procesu ładowania z aktywowaną autoryzacją RFID
Przy aktywnej autoryzacji stacji ładowania pasek LED miga na niebiesko w stanie uśpienia.
Należy podłączyć pojazd do stacji ładowania.
Przytrzymać kartę RFID przed czytnikiem RFID.
Ważność karty z listy wyjątków jest sygnalizowana sygnałem dźwiękowym, a pojazd może rozpocząć sesję ładowania.
Wskazówki
● Przed autoryzacją:
W razie autoryzacji stacji ładowania bez podłączonego pojazdu, można go podłączyć na 60
sekund w celu rozpoczęcia sesji ładowania. Jeżeli czas ten minie bez podłączenia pojazdu,
stacja ładowania powraca do nieautoryzowanego stanu uśpienia.
● Wejście zwalniające [X1]:
Specjalne wersje urządzenia oferują możliwość uzależnienia uruchomienia sesji ładowania od
załączenia wejścia zwalniającego. W razie aktywacji tej funkcji w ustawieniach przełącznika
DIP switch, zatwierdzenie sesji ładowania wymaga dodatkowo prawidłowego sygnału na wejściu zwalniającym. Bliższe informacje na ten temat są dostępne w „Podręczniku instalacji”.
86/112 - pl
Page 87

Funkcje autoryzacji
1.4 Wymiana zamka bębenkowego (opcjonalnie)
Wprzypadku wariantu urządzenia zwyłącznikiem kluczykowym zamontowany jest
seryjnie zamek bębenkowy. Wrazie potrzeby można wymienić zamek bębenkowy
zgodnie zponiższą instrukcją.
Demontaż zamka bębenkowego
Należy przekręcić klucz w lewo, aż opór zostanie odczuwalnie pokonany.
Dalej przekręcać klucz, aż znajdzie się w pozycji pionowej. Teraz, przy użyciu
trochę większej siły, można odblokować zamek bębenkowy z mocowania i wyjąć.
Montaż zamka bębenkowego
Zamek bębenkowy musi spełniać następujące wymagania:
● Półcylinder profilowany zgodnie zEN1303 lub DIN18252
● Wymiar A= 30mm (przy A = 31 mm zamek minimalnie wystaje zobudowy).
● Regulowany nosek zamka
Należy ustawić kąt noska zamka [S] wtaki sposób, aby przy wyjmowaniu klucza był skierowany pionowo do góry.
Ustawianie kąta noska zamka przebiega zwykle wnastępujący sposób:
Należy wcisnąć element kodujący do środka za pomocą cienkiego przedmiotu
iprzesunąć nosek zamka do żądanej pozycji.
Należy przekręcić klucz o180°, tak aby nosek zamka skierowany był do dołu.
Wsunąć zamek bębenkowy całkowicie do obudowy zlekkim naciskiem, aż do
usłyszenia zatrzaśnięcia. Zamek bębenkowy nie powinien wystawać ponad powierzchnię obudowy.
Należy przekręcić klucz wprawo, aż opór zostanie odczuwalnie pokonany
imożliwe będzie wyjęcie klucza.
Nie przekręcać klucza poza pozycję [MAX]. Wyłącznik kluczykowy jest teraz
gotowy do eksploatacji.
pl - 87/112
Page 88

Page 89

Περιεχόμενα
Περιεχόμενα
1 Λειτουργίες εξουσιοδότησης................................................................................................ 90
1.1 Σχετικά με το παρόν εγχειρίδιο ....................................................................................90
1.2 Επεξηγήσεις όρων ....................................................................................................... 90
1.3 Εξουσιοδότηση RFID................................................................................................... 92
1.4 Αλλαγή κυλίνδρου κλειδαριάς (προαιρετικά)................................................................ 94
el - 89/112
Page 90

Λειτουργίες εξουσιοδότησης
1 Λειτουργίες εξουσιοδότησης
1.1 Σχετικά με το παρόν εγχειρίδιο
ΠΡΟΣΟΧΗ!
Το παρόν εγχειρίδιο αποτελεί επέκταση του «Εγχειριδίου χρήστη». Πρέπει να τηρούνται
αυστηρά όλες οι εντολές και οι οδηγίες ασφαλείας του εγχειριδίου χρήστη!
Διενεργήστε εγκατάσταση του σταθμού φόρτισης σύμφωνα με το «Εγχειρίδιο
εγκατάστασης».
Ισχύς
Το παρόν εγχειρίδιο ισχύει για ειδικές εκδόσεις των σειρών συσκευής:
● KeContact P30 σειρά b
● KeContact P30 σειρά c
Αντιστοίχιση βάσει του κωδικού προϊόντος (από την πινακίδα τύπου):
KC-P30-XXXXXXX-XX
= 1...σειρά b, 2...σειρά c, 3...σειρά c
= R...RFID, K...Keyswitch
Έκδοση υλικολογισμικού
Οδηγία
Για την αξιοποίηση όλων των περιγραφόμενων λειτουργιών ενημερώστε κατά περίπτωση το
υλικολογισμικό. Πρόσθετες πληροφορίες, οδηγίες και το υλικολογισμικό διατίθενται στη διεύθυνση:
↪
http://www.keba.com/de/emobility/service-support/downloads/downloads
1.2 Επεξηγήσεις όρων
Εξουσιοδότηση
Ειδικές εκδόσεις της συσκευής σας δίνουν τη δυνατότητα να ορίζετε την έναρξη
μιας διαδικασίας φόρτισης εφόσον ισχύουν συγκεκριμένες προϋποθέσεις.
Διατίθενται οι παρακάτω εκδόσεις:
● Έγκριση μέσω διακόπτη με κλειδί.
90/112 - el
● Έγκριση μέσω διεπαφής SmartHome.
● Έγκριση μέσω εξωτερικής εισόδου [X1].
● Ταυτοποίηση χρήστη μέσω κάρτας RFID.
Page 91

Λειτουργίες εξουσιοδότησης
Διακόπτης με κλειδί
Σε ειδικές εκδόσεις του KeContact P30 ενσωματώνεται ένας κύλινδρος κλειδαριάς,
ο οποίος επιτρέπει την έναρξη μιας διαδικασίας φόρτισης μόνο από χρήστες που
διαθέτουν το κατάλληλο κλειδί.
Ο διακόπτης με κλειδί [S] χρησιμοποιείται για εξουσιοδότηση ενός χρήστη με ένα
κλειδί.
Εξωτερική είσοδος έγκρισης [X1]
Στις περιγραφόμενες εκδόσεις συσκευής υποστηρίζεται η δυνατότητα
εξουσιοδότησης μέσω μιας εισόδου (επαφή σύνδεσης) από έναν εξωτερικό
διακόπτη χωρίς τάση. Σε αυτήν την περίπτωση δώστε ειδικά προσοχή στη λογική
σύνδεση μεταξύ των εκδόσεων εξουσιοδότησης. Για τη σωστή εγκατάσταση και
διαμόρφωση ανατρέξτε στο «Εγχειρίδιο εγκατάστασης».
RFID Reader
Σε ειδικές εκδόσεις του KeContact P30 ενσωματώνεται μια συσκευή ανάγνωσης
RFID, η οποία επιτρέπει την εξουσιοδότηση μέσω μιας ετικέτας RFID.
Η συσκευή ανάγνωσης RFID [R] χρησιμοποιείται για την εξουσιοδότηση ενός
χρήστη με ετικέτες RFID κατά τα πρότυπα ISO14443 και ISO15693, χωρίς να
απαιτείται επαφή.
Λευκή λίστα RFID
Λίστα των ετικετών RFID, μέσω των οποίων επιτρέπεται η έναρξη μιας διαδικασίας
φόρτισης όταν είναι ενεργοποιημένη η εξουσιοδότηση RFID.
● Στις συσκευές P30 σειράς b και σειράς c επιτρέπεται η εισαγωγή έως 20
καταχωρήσεων στη λευκή λίστα RFID.
Κύρια κάρτα RFID
Η πρώτη ρυθμισμένη κάρτα RFID στη λευκή λίστα του σταθμού φόρτισης.
Χρησιμοποιείται για την έναρξη και την επιβεβαίωση της διαδικασίας ρύθμισης για
όλες τις υπόλοιπες κάρτες RFID (εξαρτώμενες κάρτες). Επίσης, εξυπηρετεί στην
εξουσιοδότηση μιας διαδικασίας φόρτισης.
Εξαρτώμενη κάρτα RFID
Κάρτα RFID στη λευκή λίστα του σταθμού φόρτισης. Εξυπηρετεί στην
εξουσιοδότηση μιας διαδικασίας φόρτισης.
Ένδειξη γραμμών LED
Η ένδειξη ενημερώνει για την τρέχουσα κατάσταση λειτουργίας του σταθμού
φόρτισης. Αποτελείται από 4 τμήματα ([S1] έως [S4]), τα οποία μπορεί να ανάβουν
ή να αναβοσβήνουν με διάφορα χρώματα, είτε όλα μαζί είτε το καθένα ξεχωριστά.
Η ένδειξη γραμμών LED είναι ορατή μόνο όταν υπάρχει τροφοδοσία ρεύματος.
Πλήκτρο Service
Το πλήκτρο σέρβις [Service] βρίσκεται στο πεδίο σύνδεσης του σταθμού
φόρτισης. Για την πρόσβαση σε αυτό απαιτείται αφαίρεση του Designcover και του
καλύμματος του πεδίου σύνδεσης.
el - 91/112
Page 92

Λειτουργίες εξουσιοδότησης
1.3 Εξουσιοδότηση RFID
Λειτουργία κύριου/εξαρτώμενου (δίκτυο φόρτισης)
Εάν ο σταθμός φόρτισης αποτελεί μέρος ενός δικτύου φόρτισης (P30 σειρά c ως εξαρτώμενη μονάδα σε μια
εγκατάσταση κύριας/εξαρτώμενης λειτουργίας), πρέπει να ρυθμιστούν όλες οι κάρτες RFID στον κύριο
σταθμό φόρτισης (P30 σειρά x). Η ενεργοποίηση και απενεργοποίηση της λειτουργίας εξουσιοδότησης,
όπως και η διαχείριση της λευκής λίστας για ολόκληρο το δίκτυο φόρτισης εκτελείται από την κύρια μονάδα.
Για πληροφορίες σχετικά με αυτόν τον τρόπο εγκατάστασης ανατρέξτε στο παρεχόμενο «Εγχειρίδιο
διαμόρφωσης».
Οπτικοποίηση γραμμών LED
● Εάν δεν απαιτείται εξουσιοδότηση για κάποια διαδικασία φόρτισης, τα 4 τμήματα της ένδειξης
γραμμών LED του σταθμού φόρτισης αναβοσβήνουν ταυτόχρονα με πράσινο χρώμα στην κατάσταση
αδράνειας (= χωρίς φορτίο).
● Εάν απαιτείται εξουσιοδότηση για κάποια διαδικασία φόρτισης, τα 4 τμήματα της ένδειξης γραμμών
LED του σταθμού φόρτισης αναβοσβήνουν ταυτόχρονα με μπλε χρώμα στην κατάσταση αδράνειας (=
χωρίς φορτίο). (Απαιτείται εξουσιοδότηση μέσω διακόπτη με κλειδί, κάρτας RFID ή εξωτερικής εισόδου).
● Όταν το τμήμα LED [S4] ανάβει σταθερά με πορτοκαλί χρώμα, σημαίνει ότι απαιτείται επιβεβαίωση της
ρύθμισης μιας εξαρτώμενης κάρτας κρατώντας ξανά μπροστά στη συσκευή ανάγνωσης την κύρια
κάρτα.
Ακουστικά σήματα
Αλληλουχία ήχων αυξανόμενης έντασης:
Η κάρτα RFID αναγνώστηκε και έγινε δεκτή.
Αλληλουχία ήχων ελαττούμενης έντασης:
Η κάρτα RFID αναγνώστηκε και απορρίφθηκε (χωρίς δικαιώματα).
Ενεργοποίηση/απενεργοποίηση εξουσιοδότησης, διαγραφή λευκής λίστας και
ρύθμισης κύριας κάρτας
Για την ενεργοποίηση ή την απενεργοποίηση της εξουσιοδότησης, τη διαγραφή της λευκής λίστας ή τη
ρύθμιση μιας κύριας κάρτας δεν πρέπει να είναι ενεργή καμία διαδικασία φόρτισης και δεν πρέπει να έχει
συνδεθεί κανένα όχημα στον σταθμό φόρτισης. Για την πρόσβαση στο πλήκτρο σέρβις απαιτείται αφαίρεση
του Designcover και του καλύμματος του πεδίου σύνδεσης.
Πατήστε το πλήκτρο [Service] στο πεδίο σύνδεσης μέχρι να ακουστεί ο δεύτερος ήχος σήματος.
Ο σταθμός φόρτισης επανεκκινείται αυτόματα και διαγράφει την εσωτερική λευκή λίστα RFID.
Αμέσως μετά την επανεκκίνηση του σταθμού φόρτισης είναι δυνατή για 60 δευτερόλεπτα η ρύθμιση της
κύριας κάρτας κρατώντας μπροστά στη συσκευή ανάγνωσης μια κάρτα RFID. Μια έγκυρη κάρτα
επιβεβαιώνεται μέσω ενός ήχου σήματος και ενεργοποιείται η λειτουργία εξουσιοδότησης.
Εάν αυτό το χρονικό διάστημα παρέλθει χωρίς να ρυθμιστεί κύρια κάρτα, η λειτουργία εξουσιοδότησης
RFID του σταθμού φόρτισης απενεργοποιείται.
Οδηγία
Μετά τη ρύθμιση της κύριας κάρτας ο σταθμός φόρτισης αναβοσβήνει για άλλα 60 δευτερόλεπτα με
πράσινο χρώμα και είναι δυνατή η έναρξη μιας διαδικασίας φόρτισης με εξουσιοδότηση από την
κύρια κάρτα. Στη συνέχεια ο σταθμός φόρτισης αλλάζει στη μη εξουσιοδοτημένη κατάσταση
αδράνειας και αναβοσβήνει με μπλε χρώμα.
92/112 - el
Page 93

Λειτουργίες εξουσιοδότησης
Ρύθμιση εξαρτώμενης κάρτας (προσθήκη κάρτας χρήστη στη λευκή λίστα)
Για τη ρύθμιση μιας εξαρτώμενης κάρτας δεν πρέπει να είναι ενεργή καμία διαδικασία φόρτισης και δεν
πρέπει να έχει συνδεθεί κανένα όχημα στον σταθμό φόρτισης. Η λειτουργία εξουσιοδότησης του σταθμού
φόρτισης πρέπει να είναι ενεργοποιημένη. Η ένδειξη γραμμών LED του σταθμού φόρτισης αναβοσβήνει
στην κατάσταση αδράνειας με μπλε χρώμα.
Κρατήστε την κύρια κάρτα RFID μπροστά από τη συσκευή ανάγνωσης RFID και περιμένετε μέχρι να
ακουστεί ο ήχος σήματος.
Κρατήστε εντός 3 δευτερολέπτων την εξαρτώμενη κάρτα που θέλετε να ρυθμίσετε μπροστά στη
συσκευή ανάγνωσης RFID. Τα υποστηριζόμενα μοντέλα κάρτας υποδεικνύονται μέσω μιας αλληλουχίας
ήχων αυξανόμενης έντασης.
Επιβεβαιώστε τη διαδικασία ρύθμισης εντός 3 δευτερολέπτων κρατώντας ξανά την κύρια κάρτα. Η
διαδικασία ολοκληρώνεται με άλλη μια αλληλουχία ήχων αυξανόμενης έντασης. Ο σταθμός φόρτισης
εισέρχεται στη μη εξουσιοδοτημένη κατάσταση αδράνειας και αναβοσβήνει με μπλε χρώμα.
Έναρξη μιας διαδικασίας φόρτισης με ενεργοποιημένη εξουσιοδότηση RFID
Όταν είναι ενεργοποιημένη η εξουσιοδότηση του σταθμού φόρτισης, η ένδειξη γραμμών αναβοσβήνει στην
κατάσταση αδράνειας με μπλε χρώμα.
Συνδέστε το όχημα στον σταθμό φόρτισης.
Κρατήστε μια κάρτα RFID από τη λευκή λίστα μπροστά στη συσκευή ανάγνωσης RFID.
Μια έγκυρη κάρτα από τη λευκή λίστα επιβεβαιώνεται μέσω ενός ήχου σήματος και είναι δυνατή η
έναρξη μιας διαδικασίας φόρτισης από το όχημα.
Οδηγίες
● Προ-εξουσιοδότηση:
Εάν ο σταθμός φόρτισης εξουσιοδοτηθεί χωρίς να έχει συνδεθεί όχημα, μπορεί να συνδεθεί ένα
όχημα για 60 δευτερόλεπτα και να ξεκινήσει η διαδικασία φόρτισης. Εάν αυτό το χρονικό
διάστημα παρέλθει χωρίς να συνδεθεί κάποιο όχημα, ο σταθμός φόρτισης μεταβαίνει ξανά στη
μη εξουσιοδοτημένη κατάσταση αδράνειας.
● Είσοδος έγκρισης [X1]:
Ειδικές εκδόσεις της συσκευής σας δίνουν τη δυνατότητα να ορίζετε, επίσης, την έγκριση μιας
διαδικασίας φόρτισης ανάλογα με την καλωδίωση της εισόδου έγκρισης. Εάν ενεργοποιήσετε
αυτήν τη λειτουργία από τις ρυθμίσεις διακόπτη DIP, για την έγκριση μιας διαδικασίας φόρτισης
απαιτείται επιπλέον η λήψη σωστού σήματος στην είσοδο έγκρισης. Περισσότερες σχετικές
πληροφορίες περιλαμβάνονται στο «Εγχειρίδιο εγκατάστασης».
el - 93/112
Page 94

Λειτουργίες εξουσιοδότησης
1.4 Αλλαγή κυλίνδρου κλειδαριάς (προαιρετικά)
Στις εκδόσεις συσκευών με διακόπτη με κλειδί, στο βασικό εξοπλισμό
περιλαμβάνεται ένας κύλινδρος κλειδαριάς. Εφόσον απαιτείται, ο κύλινδρος
κλειδαριάς μπορεί να αντικατασταθεί σύμφωνα με τις ακόλουθες οδηγίες.
Αφαίρεση κυλίνδρου κλειδαριάς
Περιστρέψτε το κλειδί αριστερόστροφα, μέχρι να ξεπεραστούν οι αντιστάσεις.
Συνεχίστε να περιστρέφετε το κλειδί, μέχρι να βρίσκεται σε κάθετη θέση. Στη
συνέχεια, ο κύλινδρος κλειδαριάς μπορεί να απασφαλιστεί και να αφαιρεθεί
από την υποδοχή ασκώντας ελαφρώς αυξημένη δύναμη.
Τοποθέτηση κυλίνδρου κλειδαριάς
Ο κύλινδρος κλειδαριάς θα πρέπει να πληροί τις ακόλουθες απαιτήσεις:
● Προφίλ ημικυλίνδρου κατά το πρότυπο EN 1303 ή DIN 18252
● Διάσταση A = 30mm (σε περίπτωση που A=31mm, προεξέχει ελάχιστα από
το περίβλημα).
● Ρυθμιζόμενη γλώσσα κλειδαριάς
Ρυθμίστε τη γωνία της γλώσσας κλειδαριάς [S] κατά τέτοιον τρόπο, ώστε στη
θέση αφαίρεσης του κλειδιού να δείχνει κατακόρυφα προς τα επάνω.
Κατά κανόνα, η ρύθμιση της γωνίας της γλώσσας κλειδαριάς πραγματοποιείται ως
εξής:
Πιέστε τον πείρο κωδικοποίησης προς τα μέσα με ένα λεπτό αντικείμενο και
μετακινήστε τη γλώσσα κλειδαριάς στην επιθυμητή θέση.
Περιστρέψτε το κλειδί κατά 180°, ώστε η γλώσσα κλειδαριάς να δείχνει προς τα
κάτω.
Εισάγετε τον κύλινδρο κλειδαριάς στο περίβλημα ασκώντας ελαφρώς πίεση,
μέχρι να ασφαλίσει με το χαρακτηριστικό ήχο. Ο κύλινδρος κλειδαριάς θα
πρέπει να εφαρμόζει πλήρως στην επιφάνεια του περιβλήματος.
94/112 - el
Περιστρέψτε το κλειδί δεξιόστροφα, μέχρι να ξεπεραστούν οι αντιστάσεις και να
είναι δυνατή η αφαίρεση του κλειδιού.
Μην περιστρέφετε το κλειδί πέρα από τη θέση [MAX]. Ο διακόπτης με κλειδί
βρίσκεται σε ετοιμότητα.
Page 95

Page 96

İçindekiler
İçindekiler
1 Yetkilendirme fonksiyonları ................................................................................................. 97
1.1 Bu el kitabı hakkında.................................................................................................... 97
1.2 Terim açıklamaları .......................................................................................................97
1.3 RFID yetkilendirme ......................................................................................................99
1.4 Silindir kilidin değiştirilmesi (opsiyonel)......................................................................101
96/112 - tr
Page 97

Yetkilendirme fonksiyonları
1 Yetkilendirme fonksiyonları
1.1 Bu el kitabı hakkında
DİKKAT!
Bu el kitabı "kullanıcı el kitabının" geliştirilmiş halidir. Kullanıcı el kitabındaki tüm talimatlar
ve güvenlik bilgileri kesinlikle dikkate alınmalıdır!
"Kurulum el kitabı" uyarınca şarj istasyonunun kurulumunu yapınız.
Geçerlilik
Bu el kitabı aşağıdaki cihaz serilerinin özel seçenekleri için geçerlidir:
● KeContact P30 b serisi
● KeContact P30 c serisi
Ürün kodu (tip plakasından) vasıtasıyla atama:
KC-P30-XXXXXXX-XX
= 1...b serisi, 2...c serisi, 3...c serisi
= R...RFID, K...Keyswitch
Donanım yazılımı versiyonu
Bilgi
Açıklanan komple fonksiyon boyutunu elde etmek için gerekirse bir donanım yazılımı güncellemesi
yürütülmelidir. İlave bilgiler, talimatlar ve donanım yazılımı için bkz.:
↪
http://www.keba.com/de/emobility/service-support/downloads/downloads
1.2 Terim açıklamaları
Yetkilendirme
Özel cihaz seçenekleri şarj işleminin başlatılmasını belirli koşullara bağlama
olasılığı sunar. Aşağıdaki seçenekler mevcuttur:
● Anahtarlı şalter üzerinden onay.
● SmartHome arabirim üzerinden onay.
● Harici giriş [X1] üzerinden onay.
● RFID kartı vasıtasıyla kullanıcı kimliği.
tr - 97/112
Page 98

Yetkilendirme fonksiyonları
Anahtarlı şalter
KeContact P30 kapsamındaki özel seçeneklerde şarj işleminin başlatılması için
kullanıcıya sadece uygun anahtarla izin veren bir silindir kilidi monte edilmiştir.
Anahtarlı şalter [S] bir kullanıcının bir anahtar ile yetkilendirilmesine yarar.
Harici onay girişi [X1]
Açıklanan cihaz seçeneklerinin bir giriş (kilit) üzerinden harici, potansiyelsiz şalter
vasıtasıyla yetkilendirilebilme ihtimali vardır. Bu durumda özellikle yetkilendirme
seçenekleri arasındaki mantıksal bağlantıyı dikkate alınız. Doğru kurulum ve
konfigürasyon için lütfen "kurulum el kitabına" bakınız.
RFID okuyucu
KeContact P30 kapsamındaki özel seçeneklerde RFID imler vasıtasıyla
yetkilendirmeye izin veren RFID okuma cihazı monte edilmiştir.
RFID okuyucu [R] ISO14443 ve ISO15693 uyarınca RFID imleri ile bir kullanıcının
temassız şekilde yetkilendirilmesine yarar.
RFID beyaz liste
Etkin bir RFID yetkilendirmede bir şarj işlemini başlatmak için izin verilen RFID
imleri listesi.
● P30 b serisi ve c serisi RFID beyaz listesine 20 girişe izin verir.
RFID master kartı
Şarj istasyonu beyaz listesinin ilk öğretilmiş RFID kartı.
Diğer tüm RFID kartlarının (slave kartları) öğretme işleminin başlatılması ve onayı
için kullanılır. Ayrıca bir şarj işleminin yetkilendirilmesi için de kullanılır.
RFID slave kartı
Şarj istasyonu beyaz listesinde RFID kartı. Bir şarj işleminin yetkilendirilmesine
yarar.
LED şerit göstergesi
Gösterge şarj istasyonunun güncel işletim durumu hakkında bilgi verir. Birlikte ya
da ayrı ayrı yanabilen veya yanıp sönebilen 4 segmentten oluşur ([S1] ile [S4]
arasında).
LED şerit göstergesi sadece devreye alınmış akım beslemesinde görünür.
Servis butonu
Servis butonu [Service] şarj istasyonunun bağlantı alanında bulunur. Erişim için
tasarım kaplaması ve bağlantı alanı muhafazası çıkarılmalıdır.
98/112 - tr
Page 99

Yetkilendirme fonksiyonları
1.3 RFID yetkilendirme
Master/Slave işletimi (şarj ağı)
Şarj istasyonu bir şarj ağı parçasıysa (bir master/slave kurulumunda slave olarak P30 c serisi), tüm RFID
kartları Master şarj istasyonu (P30 x serisi) üzerine öğretilmiş olmalıdır. Yetkilendirme fonksiyonunun
etkinleştirilmesi ve devre dışı bırakılması ve komple şarj ağı için beyaz liste Master kapsamında yönetilir. Bu
kurulum seçeneği ile ilgili bilgiler için lütfen özel olarak beraberinde teslim edilen "Konfigürasyon el
kitabına" bakınız.
LED şeritlerin görselleştirilmesi
● Bir şarj işlemi için yetkilendirme gerekli değilse, şarj istasyonunun LED şerit göstergesinin tüm 4
segmenti Idle durumda (=boşta çalışma) yeşil yanıp söner.
● Bir şarj işlemi için yetkilendirme gerekliyse, şarj istasyonunun LED şerit göstergesinin tüm 4 segmenti
Idle durumda (=boşta çalışma) mavi yanıp söner. (Yetkilendirme ya anahtarlı şalter, RFID kartı ya da
harici giriş üzerinden gereklidir).
● LED segmentin [S4] sürekli turuncu yanması Slave kartının öğretilmesi Master kartın tekrar gösterilerek
onaylanmasını gerektirdiği anlamına gelir.
Akustik sinyaller
Artan ses dizisi:
RFID kartı okundu ve kabul edildi.
Azalan ses dizisi:
RFID kartı okundu ve reddedildi (yetkisi yok).
Yetkilendirmenin etkinleştirilmesi/devre dışı bırakılması, beyaz listenin silinmesi ve
master kartın öğretilmesi
Yetkilendirmenin etkinleştirilmesi/devre dışı bırakılması, beyaz listenin silinmesi ve master kartın öğretilmesi
için herhangi bir şarj işlemi etkin olmamalıdır ve şarj istasyonunda herhangi bir araç takılı bulunmamalıdır.
Servis butonuna erişim için tasarım kaplaması ve bağlantı alanı muhafazası çıkarılmalıdır.
Bağlantı alanında ikinci sinyal ses duyulana kadar [Service] butonuna basınız.
Şarj istasyonu artık yeniden bir başlatma yürütür ve bu esnada dahili RFID beyaz listeyi siler.
Şarj istasyonunun yeniden başlatılmasından hemen sonra bir RFID kartını göstererek 60 saniye
içerisinde master kart öğretilebilir. Geçerli bir kart bir sinyal sesi ile onaylanır ve böylece yetkilendirme
fonksiyonu etkinleştirilir.
Bir master kartı öğretmeden bu zaman diliminin süresi dolarsa şarj istasyonunun RFID yetkilendirme
fonksiyonu devre dışı bırakılır.
Bilgi
Master kartı öğrettikten sonra şarj istasyonu 60 saniyeliğine yeşil yanıp söner ve master tarafından
yetkilendirilmiş bir şarj işlemi başlatılabilir. Ardından şarj istasyonu yetkilendirilmemiş Idle duruma
geçiş yapar ve mavi yanıp söner.
tr - 99/112
Page 100

Yetkilendirme fonksiyonları
Slave kartının öğretilmesi (beyaz listeye kullanıcı kartının eklenmesi)
Bir slave kartın öğretilmesi için herhangi bir şarj işlemi etkin olmamalıdır ve şarj istasyonunda herhangi bir
araç takılı bulunmamalıdır. Şarj istasyonunun yetkilendirme fonksiyonu etkinleştirilmiş olmalıdır. Şarj
istasyonunun LED şerit göstergesi Idle durumda mavi yanıp söner.
RFID master kart RFID okuyucusunun önünde tutulmalı ve sinyal sesi beklenmelidir.
Ardından 3 saniye içerisinde yeni öğretilecek slave kartı RFID okuyucusunun önüne tutulmalıdır.
Desteklenen bir kart modeli artan bir ses dizisi vasıtasıyla gösterilir.
3 saniye içerisinde tekrar master kart gösterilerek öğretme işlemi onaylanmalıdır. İşlem, diğer bir artan
ses dizisi ile sonlandırılır. Ardından şarj istasyonu yetkilendirilmemiş Idle durumda bulunur ve mavi yanıp
söner.
Etkinleştirilmiş RFID yetkilendirme ile bir şarj işleminin başlatılması
Şarj istasyonunun etkinleştirilmiş yetkilendirmesinde şerit göstergesi Idle durumda mavi yanıp söner.
Aracı şarj istasyonuna takınız.
Beyaz listeden bir RFID kartı RFID okuyucunun önüne tutulmalıdır.
Beyaz listeden geçerli bir kart bir sinyal sesi ile onaylanır ve bir şarj işlemi araç tarafından başlatılabilir.
Bilgiler
● Ön yetkilendirme:
Şarj istasyonu araç takılı olmadan yetkilendirirse, 60 saniye için bir araç takılıp böylece şarj
işlemi başlatılabilir. Bir araç takılmadan bu zaman diliminin süresi dolarsa, şarj istasyonu tekrar
yetkilendirilmemiş Idle durumuna geçiş yapar.
● Onay girişi [X1]:
Özel cihaz seçenekleri şarj işleminin onayını ilave olarak onay girişi bağlantısına bağlama
olasılığı sunar. Bu fonksiyonu DIP Switch ayarlarında etkinleştirdiyseniz, bir şarj işleminin
onayı ilave olarak onay girişinde doğru bir sinyale ihtiyaç duyar. Bununla ilgili daha fazla bilgi
için "kurulum el kitabına" bakınız.
100/112 - tr
 Loading...