

Keating Of Chicago Silver Edition 8, Silver Edition 16 User Manual

SILVER EDITION™
8 & 16 PRODUCT FASTRON
COOKING CONTROLLER
MANUAL
IMPORTANT:
®
THE USER'S MANUAL PROVIDES SPECIFIC OPERATING INSTRUCTIONS
FOR YOUR MODEL. USE THE FASTRON
INSTRUCTED IN THIS MANUAL.
KEEP A COPY OF YOUR BILL OF SALE.
The date on the bill establishes the warranty period should service be required.
If service is performed, it is in your interest to obtain and keep all receipts.
KEEP THIS MANUAL FOR TRAINING NEW PERSONNEL.
The unauthorized use or duplication of the software described herein, or
this material, is strictly prohibited.
®
CONTROLLER ONLY AS
As continuous product improvement occurs, specifi cations may be
changed without notice.
1-800-KEATING | keatingofchicago.com
SilverEditionFASTcomputer_2014
01/14
NOTE: The unauthorized use or duplication of the software described herein, or this
material, is strictly prohibited.
WARNING
ShockBurnsGas
Improper installation, adjustment, alteration, service or maintenance can
cause property damage, injury or death. Read the installation, operating
and maintenance instructions thoroughly before installing or servicing this
Improper installation
can cause damage,
injury or death.
equipment.
WARNING
FOR YOUR SAFETY:
Do not store or use gasoline or other fl ammable vapors or liquids in the
vicinity of this or any other appliance.
Do not store
flammable liquids
near this or
any other appliance.
IF NOT INSTALLED, OPERATED AND MAINTAINED IN ACCORDANCE WITH THE MANUFACTURER’S INSTRUCTIONS, THIS PRODUCT COULD EXPOSE YOU TO SUBSTANCES
IN FUEL OR IN FUEL COMBUSTION WHICH CAN CAUSE DEATH OR SERIOUS ILLNESS
AND WHICH ARE KNOWN TO THE STATE OF CALIFORNIA TO CAUSE CANCER, BIRTH
DEFECTS OR OTHER REPRODUCTIVE HARM.
The products are protected under one or more
of the following U.S. Patents:
4,610,238 4,644,931 4,688,475
4,742,455 4,782,445 4,812,625
4,812,963 4,864,498 4,911,068
4,920,948 5,043,860 5,171,974
5,331,575 5,485,780 5,539,671
5,542,344 5,711,606 5,723,846
5,726,424 5,730,308 5,875,430
Plus foreign patents and patents pending.
Plus licensed patents
4,437,159 4,549,527 4,663,710
4,672,540 4,858,119
i

SILVER EDITION FASTRON® CONTROLLER
TABLE OF CONTENTS
Important Safety Instructions ............................................ i
INTRODUCTION .............................................................. 1
INSTALLATION
Damage During Shipment ................................................ 1
Installation ..................................................................... 2
CONTROLLER KEY DESCRIPTIONS
Standard Features ........................................................... 3
OPERATING THE CONTROLLER ........................................ 4
CONTROLLER FEATURES................................................. 5
DISPLAY DESCRIPTIONS ................................................. 6
PROGRAMMING THE CONTROLLER .......................... 7 - 12
WARRANTY INFORMATION ........................................... 13
INTRODUCTION
Instructions in this manual should be read thoroughly before attempting to operate the Silver Edition FASTRON®
Controller. All installation and service on Keating equipment must be performed by qualifi ed, certifi ed, licensed and/
or authorized installation or service personnel.
Operating information for Keating equipment has been prepared for use by qualifi ed and/or
authorized personnel.
Keating equipment is made in the USA and has American sizes of hardware. All metric conversions
are approximate.
INSTALLATION INSTRUCTIONS
Proper installation will assure top performance.
Alterations of any kind to your equipment will void the
warranty. Before uncrating, check equipment carefully
for damage.
IF EQUIPMENT ARRIVES DAMAGED
Keating does not assume responsibility for loss or
damage incurred in transit.
IMPORTANT
This merchandise has been thoroughly inspected
and carefully packed before leaving our plant.
Responsibility for its safe delivery was assumed by
the carrier at the time of shipment. Claims for loss or
damage to the contents should, therefore, be made
upon the carrier, as follows:
CONCEALED LOSS OR DAMAGE
Concealed loss or damage means loss or damage
which does not become apparent until the merchandise has been unpacked. The contents may be
damaged in transit due to rough handling even though
the carton may not show external damage. When the
damage is discovered upon unpacking, make a written request for inspection by the carrier’s agent within
fi fteen days of the delivery date. Then fi le a claim with
the carrier since such damage is the carrier’s responsibility. By following these instructions carefully, we
guarantee our full support of your claims to protect
you against loss from concealed damage.
VISIBLE LOSS OR DAMAGE
Any external evidence of loss or damage must be
noted on the freight bill or express receipt, and
signed by the carrier’s agent. Failure to adequately describe such external evidence of loss or damage may
result in the carrier refusing to honor a damage claim.
The form required to fi le such a claim will be supplied
by the carrier.
DO NOT RETURN DAMAGED MERCHANDISE TO
KEATING. FILE YOUR CLAIM AS STATED ABOVE.
1-800-KEATING |
1
FIRST STEPS
NOTE: Not all features are available on all models.
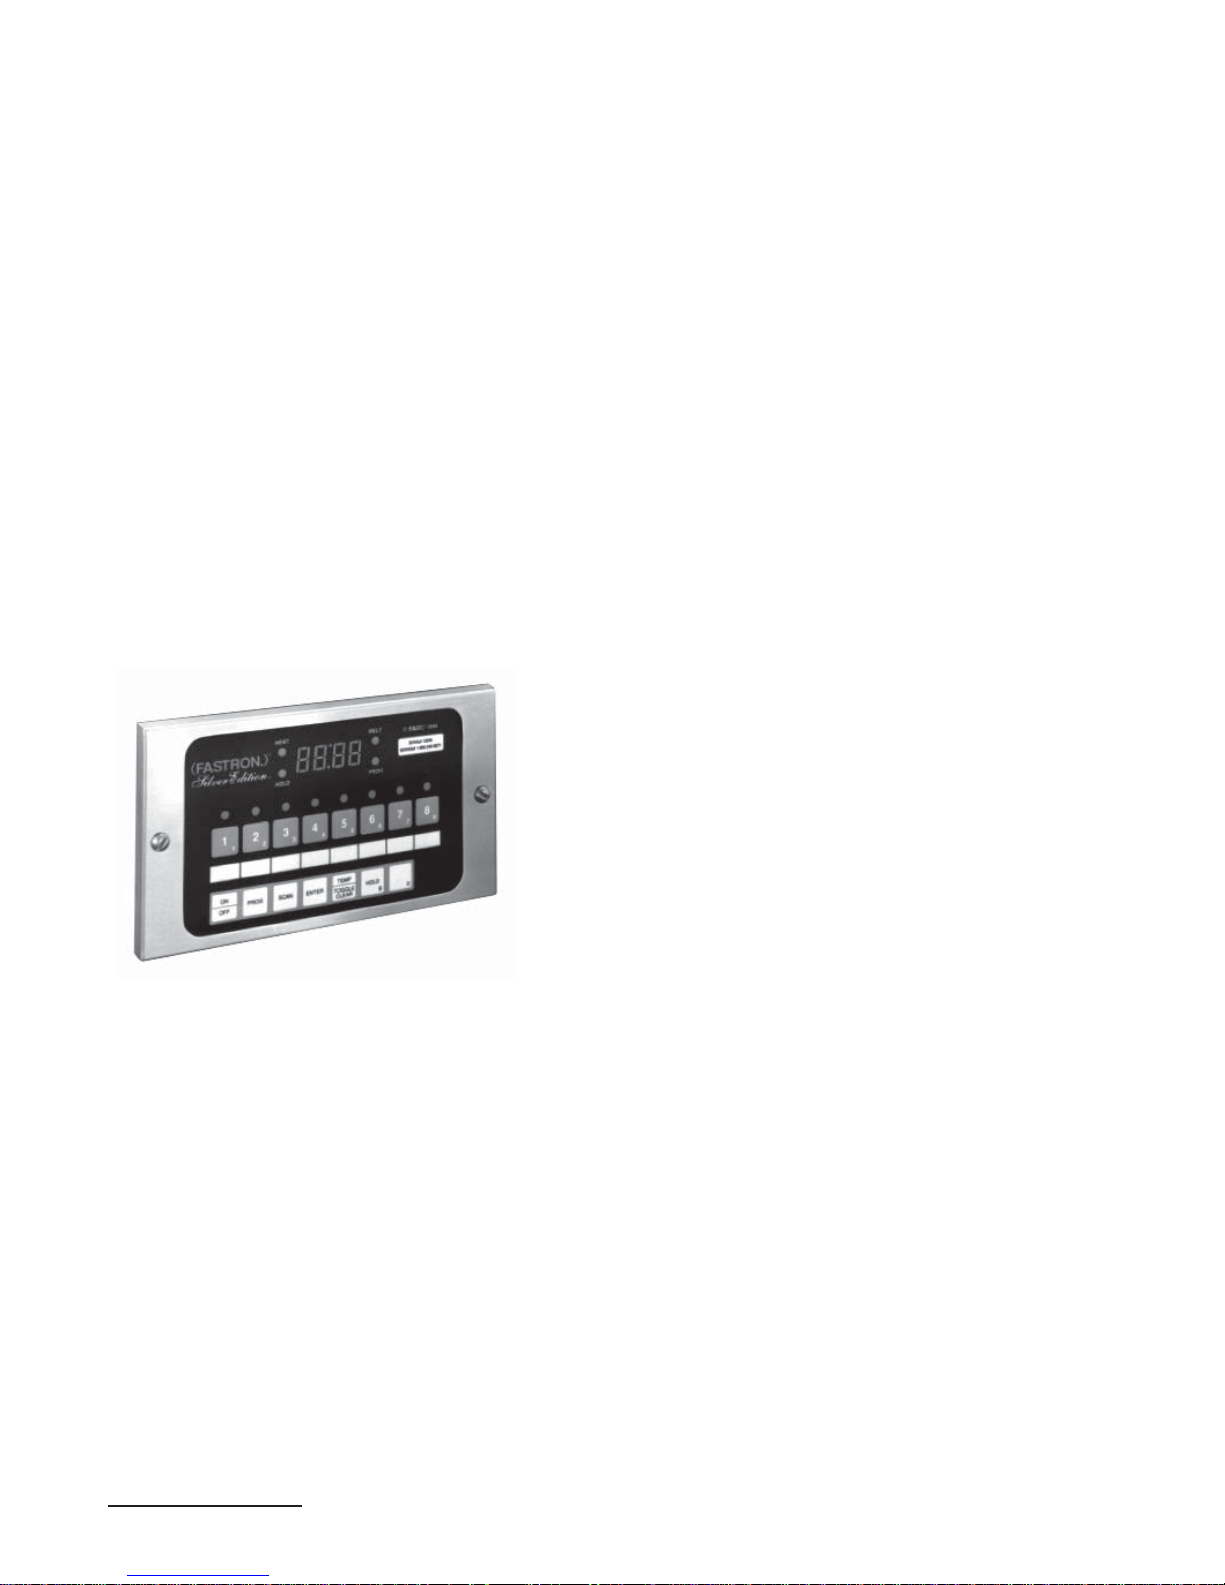
Thank you for your purchase. In choosing FAST you
have chosen a product with over 25 years of innovation and quality manufacturing behind it. The
(FASTRON.)® Silver Edition Cooking Controller is
designed to simplify your cooking process and allow
your foodservice operators to spend more time with
the customers and other important responsibilities.
Quality control of your food product is assured through
the various features, notifi cation displays and alarms
designed into the Controller.
There are three modes of operation on the Silver
Edition Cooking Controller -
Operating Mode: used to cook the various menu items
Product Programming Mode: used to add or modify
menu items
System Programming Mode: used to confi gure the
controller to various applications
CONTROLLER OPERATING ENVIRONMENT
NOTE: The solid state components in this control-
ler are designed to operate reliably in a temperature
range up to 158°F/70°C. Before installing this controller, it should be verifi ed that the ambient temperature at the mounting location does not exceed
158°F/70°C.
Tools Required:
– Straight screwdriver
– Power drill
– #29 high-speed drill bit
– 10/32 tap
– Center punch
– Hammer
Installation (Freestanding units only):
1. Choose your mounting location.
2. Attach 2 mounting brackets to the controller using
the 2 wing nuts provided. Be sure to put 1 star
washer on each side of the mounting bracket.
3. Hold the controller against your mounting surface.
4. Mark 4 mounting holes.
5. Drill and tap the mounting holes.
6. Secure the controller to the mounting surface
using the 4 screws provided.
This instruction booklet covers the following
(FASTRON.)® Silver Edition Cooking Controller
models:
Model IR081CMA7110
Model IR082CMA7113
Model IR081AMAxxxx
Model IR082AMAxxxx
Model IR161DNAxxxx
Model IR162DNAxxxx
Model IR161BNAxxxx
Model IR162BNAxxxx
| keatingofchicago.com
2
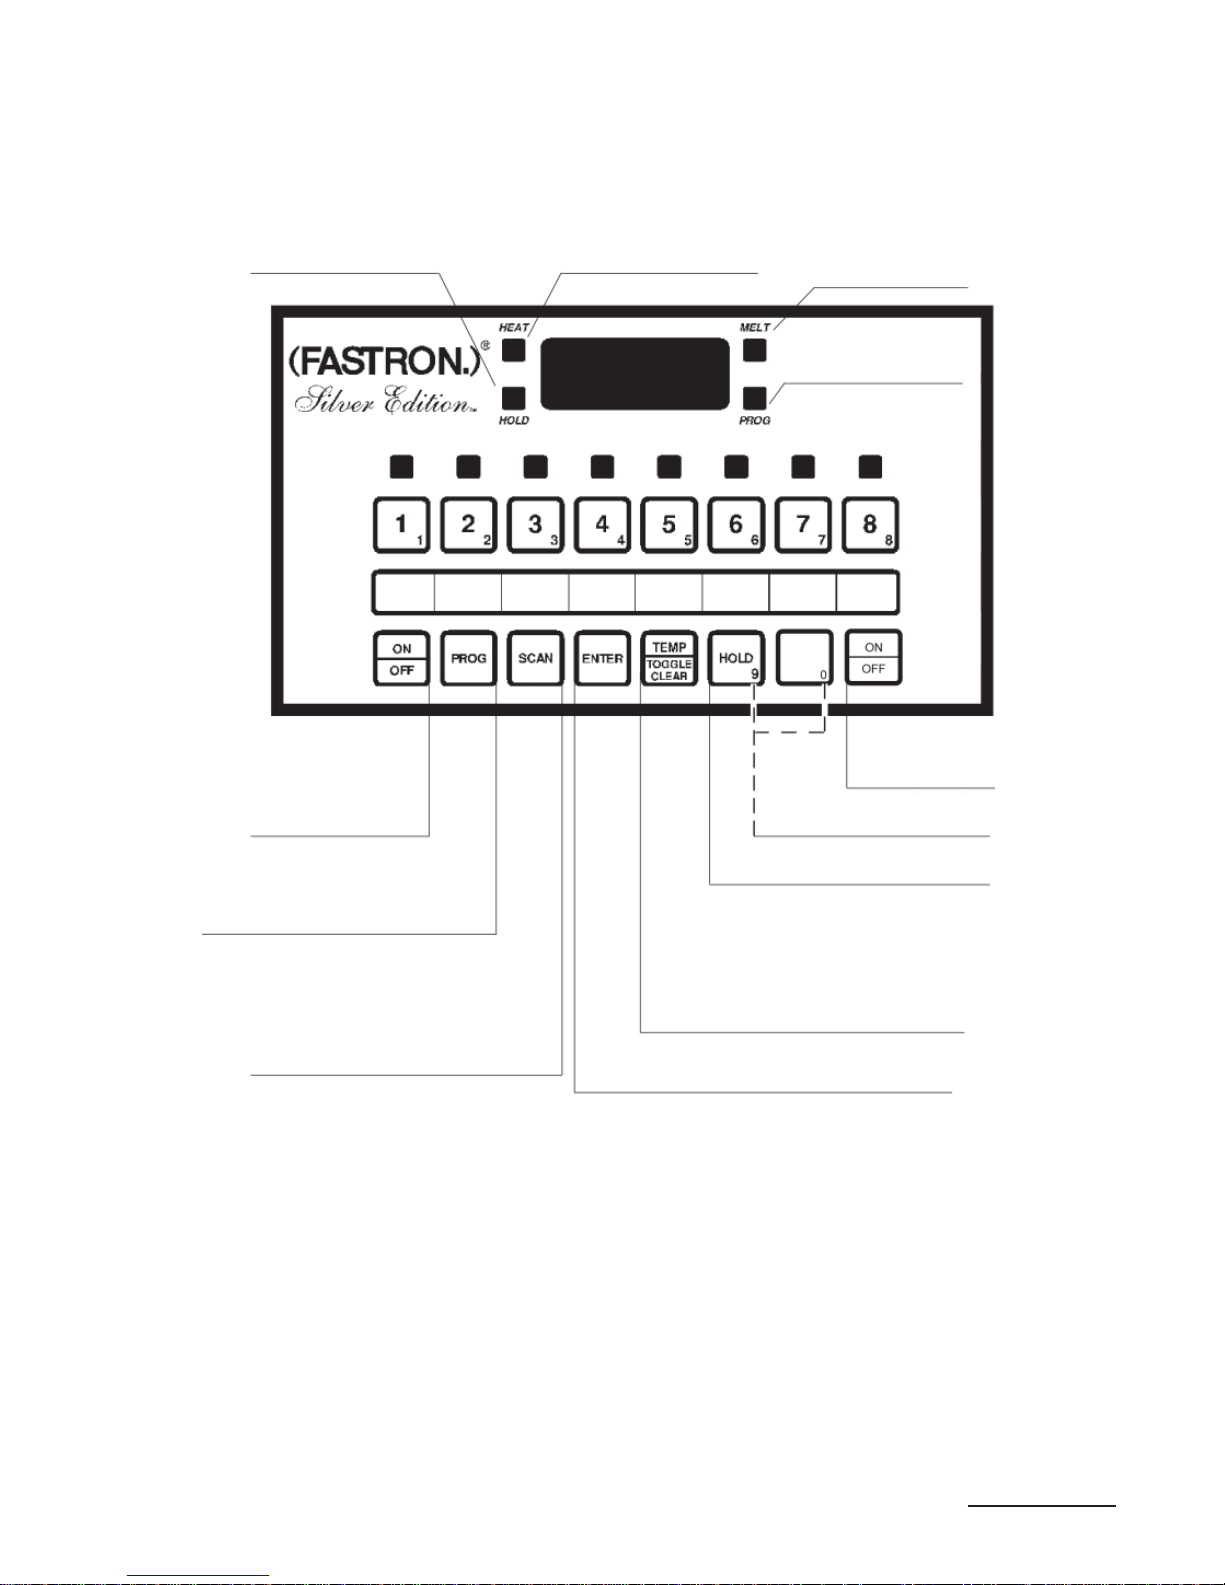
CONTROLLER KEY DESCRIPTIONS
SILVER EDITION FASTRON® CONTROLLER
When lit (bright) indicates
a product hold time is
being tracked.
Optional “soft” ON/OFF
key switches controller
functions off while leaving
power to the appliance on.
In “operating” mode, allows access
to the programming mode. In “programming” mode allows access to
the operating mode.
In “operating” mode, displays the remaining
cook time on every product key currently
in a cook cycle and lights the respective
product’s LED for 2 seconds each.
In “programming” mode, steps to the next
function to be programmed.
When lit (bright) indicates
the controller is calling for
heat.
In “operating” mode, used to view
remaining hold times.
In “operating” mode, displays the actual
temperature followed by the programmed
or set temperature.
In “programming” mode, allows the user
to toggle between choices in an entry fi eld
and clear values from a data fi eld.
In “programming” mode, used to accept the information
and “enter” it into the controller’s memory.
When lit (bright) indicates
the controller is in melt
cycle.
When lit (bright)
indicates the controller
is in program mode.
Optional “soft” ON/
OFF key–available
for dual vat fryers.
In “programming” mode, used to
enter numerical values (0-9).
1-800-KEATING |
3
OPERATING THE CONTROLLER
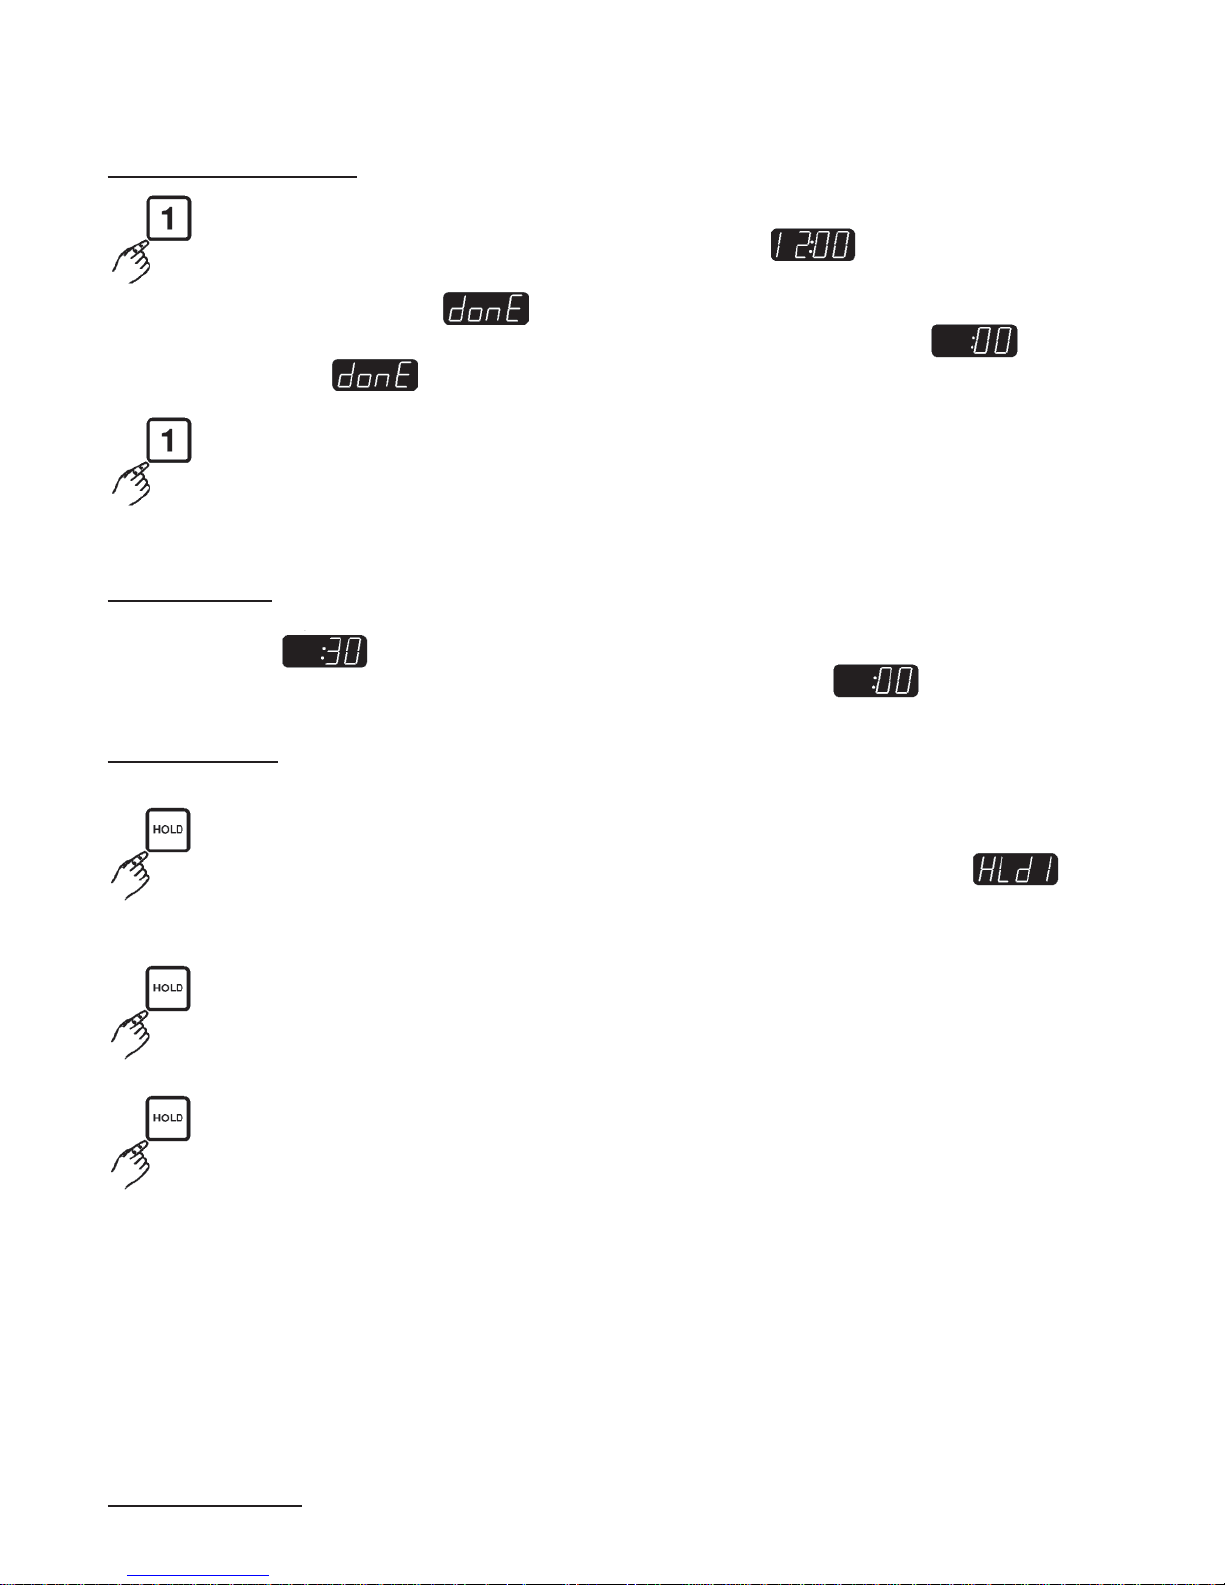
STARTING A COOK CYCLE
To start a cook cycle, simply press the product key for the product you wish to cook. If the product
key is programmed, the correct cooking time will be displayed (example) and this time
will immediately start to count down in minutes and seconds. The pressure solenoid will also close if
programmed to do so. If is displayed immediately and the unit starts to signal, the key
being operated is not programmed. If correctly programmed, it will count down to
followed by and start to signal.
Cancel this signal by pressing the same cycle product key used to start the cook cycle.
ACTION ALARMS
If the unit is programmed with action alarms, the action alarms will signal at a preset time during the cooking
cycle; for example, . This signal, a dual rhythm beeping, will last 5 seconds and then self-cancel. The
display will fl ash the action alarm time and the unit will then start counting toward .
HOLDING TIMERS
If the unit is programmed with holding times, they will automatically start counting upon expiration
of the cooking cycle. When there are active hold times, the HOLD indicator will be lit. To view all
active hold times, press and hold the HOLD key. Upon expiration, the timer will display
and pulse with an audible tone.
To cancel, press the HOLD key.
To view the hold time with the least amount of time remaining, press the HOLD key.
| keatingofchicago.com
4
 Loading...