

Page 1
1
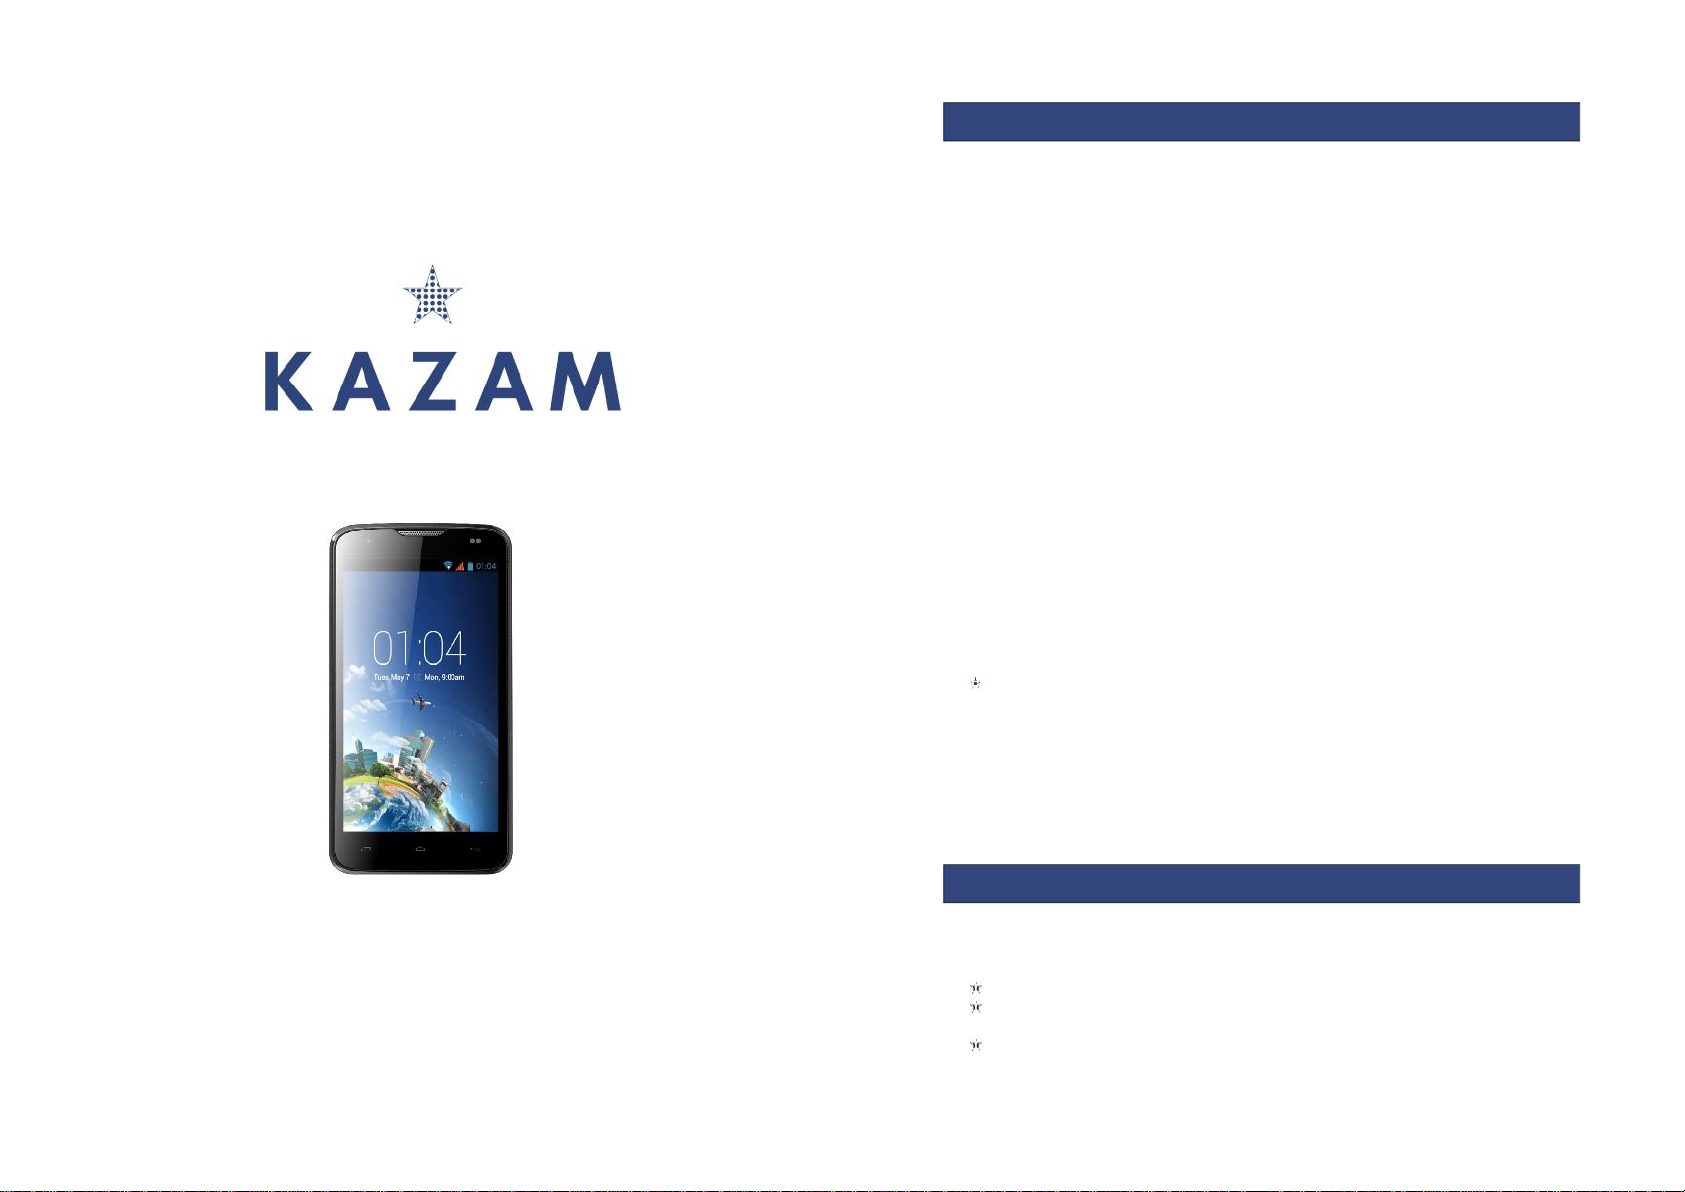
KAZAM Thunder 350L
User Manual
2
©2013 Kazam Mobile Ltd. All rights are reserved. Kazam, the Kazam logo and the
Kazam icon are trademarks of Kazam Mobile Ltd. No part of this document can be
reproduced without permission. All trademarks and brand names mentioned in this
publication are property of their respective owners.
While all the efforts have been made to ensure the accuracy of contents in this
manual, we presume no responsibility for errors or omissions or statements of any
kind, whether such errors are omissions or statements resulting from negligence,
accidents, or any other cause. We operate a policy of continuous development
and reserve the right to make changes, modifications and improvements to the
device, device features/specifications or any of its parts without prior notice.
Your device may have preinstalled bookmarks and links for third party internet sites
and may allow you to access third party sites. These are not affiliated with us, and
we do not endorse or assume liability for them. If you access such sites take
precautions for security or content.
The limited warranty does not cover user manuals or any third party software,
settings, content, data or links, whether included in, or downloaded to the product,
whether included during installation, assembly, shipping or any other time in the
delivery chain, or otherwise and in any way acquired by you. To the extent
permitted by applicable law(s), we do not warrant that any of our software will meet
your requirements, will work in combination with any hardware or software
applications provided by a third party, that the operations of the software will be
uninterrupted or error free or that any defects in the software are correctable or will
be corrected.
User Manual is provided to guide the user about the functionality of the device. It
does not constitute any certificate of technology. Some functions may vary due to
modifications and upgrades of software, or due to printing mistake.
Please read the following safety guidelines before using the device.
Do not use the mobile phone while you are driving.
Do not place magnetic storage media near your mobile phone, as the
magnetic force from the device may erase the information stored on it.
Keep your mobile phone and its accessories away from children.
ALL RIGHTS RESERVED
SAFETY PRECAUTIONS
Page 2

3
Mobile phones can interfere with the functioning of medical devices such as
hearing aids or pacemakers. People with active medical implants should
keep their mobile phone at least 15 cm away from the implant.
Permanent hearing loss may occur if you use earphones or headphones at
high volume.
Use a wireless hands-free system (headphone/ headset) with a low power
Bluetooth emitter.
Make sure the mobile phone has a low SAR.
Keep your calls short or send a text message (SMS) instead. This advice
applies specially to children adolescents and pregnant women.
Use mobile phone when the signal quality is good.
Notice:
Warranty is invalidated if the mobile phone or accessories are dismantled, the
manufacturer will not be liable to pay for damages.
Only use original batteries and charging devices.
Back up important data regularly and store it properly. The manufacturer is
not liable for any loss of data due to mis-operation, poor signal or power cut,
etc.
All screen images in this manual are for reference only, content displayed
may depend on the pre-setting of the service provider, the network operator
or the SIM card. If any functions referred to in this manual are different from
those of your device, please follow your device.
Do not put use it in a place with flammable gas such as a petrol pumps. The
temperature recommended for using the device is 10-55℃. Do not touch the
charger, power cable or socket with wet hands. This may cause an electric
shock.
Our cellular phones are in accordance with the communication industry standards
of PRC, and also according in accordance with standards of European, and are
approved for GSM networks.
Your phone may be used internationally with various networks depending on your
roaming arrangements with your service provider.
Only use the chargers listed in the manufacturer’s catalogue should be used. Using
any other charger may be dangerous and would also invalidate your warranty.
Line voltage must be exactly the one indicated on the charger’s serial plate.
Your phone is a radio transmitter which may interfere with electronic medical
equipment or implants, such as hearing aids, pacemakers, insulin pumps, etc. It is
recommended that a minimum separation of 15cm be maintained between the
phone and an implant.
If your mobile phone or any of its accessories do not function normally,
please contact Kazam customer support. The qualified personnel will assist
you, and if necessary will arrange for a repair.
4
ALL RIGHTS RESERVED 2
SAFETY PRECAUTIONS 2
TABLE OF CONTENTS 4
1. UNDERSTANDING YOUR DEVICE 5
1.1. GENERAL INFO 5
1.2. DEVICE OVERVIEW 5
2. GETTING STARTED 6
2.1. INSTALLING SIM CARDS& BATTERY 6
2.2. POWERING ON/OFF THE DEVICE 7
3. BASIC OPERATIONS 7
3.1. Switch Main Menu style 7
3.2. Home screen 8
4. CAMERA 9
5. GPRS/WLAN NETWORK 9
6. U-DISK STORAGE 9
7. MU S I C 1 0
8. BLUETOOT H 10
9. CALL MEN U 11
10. FUNCTION MENU 11
10.1. File m anagement 12
10.2. Sending an Email 12
10.3. Dialing 12
10.4. Call 13
10.5. Calculator 13
10.6. Chrome 13
10.7. Voice Record 13
10.8. Calendar 14
10.9. Settings 14
10.10. Clock 15
10.11. FM Radio 15
10.12. Voice Search 16
10.13. Contacts 16
10.14. Gallery 17
10.15. Messaging 17
10.16. Notification menu 18
10.17. Download content 18
10.18. Call records 18
10.19. Widget 18
10.20. Selecting wallpaper source 19
11. SPECIFICATION 20
12. ACCESSORIES 21
13. ENVIRONMENTAL CONCERN 21
TABLE OF CONTENTS
Page 3
5
1.1 GENERAL INFO
KAZAM Thunder 350L has a 5.0” FWVGA screen with 540*960 resolution. It has an
auto focus camera, an 2020mAh expandable memory. It supports MMS, SMS and
Bluetooth.
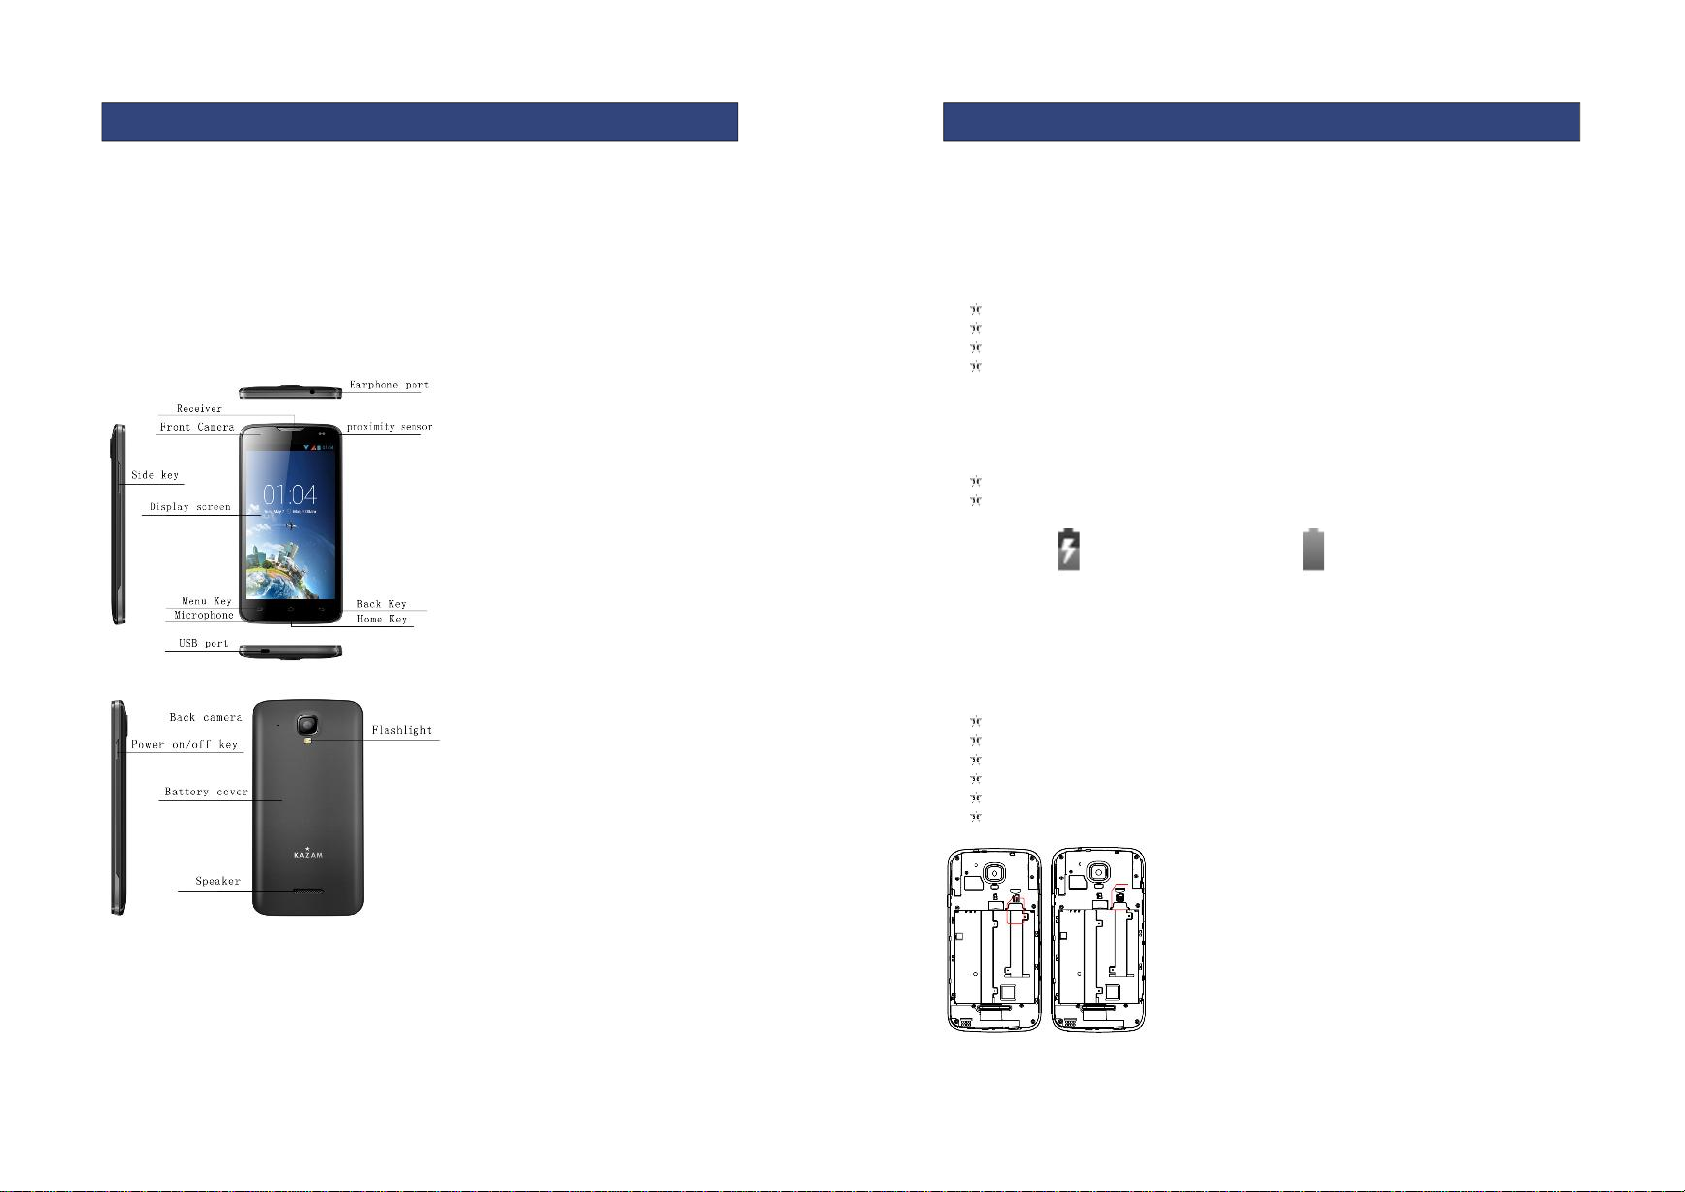
1.2 DEVICE OVERVIEW
1.UNDERSTANDING YOUR DEVICE
6
2.1 INSTALLING CARDS & BATTERY
Please switch off your device before removing the battery, inserting a SIM or
memory card.
Installing Battery
To install the battery please follow the steps below:-
Remove the back cover of the device.
Hold the device with the front facing downwards.
Insert the battery ensuring it is the correct way round.
Replace the battery cover until it clicks into place.
Charging the Battery
The device prompts a warning tone and message indicating insufficient battery
when the battery power is low. Please follow the instructions below to charge your
device:-
Plug the connector of the charger into the micro USB port on the device.
Plug the charger into a standard AC wall outlet.
Charging……. Fully Charged…….
It is recommended to fully charge the battery before using the device for the first
time.
Installing SIM Card
In order to install you SIM card, follow the steps below:
Remove the back cover of the device.
Hold the device with the front facing downwards.
Remove the battery.
Insert the SIM card into the device as shown below.
Replace the battery.
Replace the battery cover until it clicks into place.
Installing Memory Card
2. GETTING STARTED
Page 4

7
Your device supports micro SD card, which is a multimedia memory card used to
increase the memory of the device. The micro SD card is small and should be
installed carefully to avoid any kind of damage. Please follow the steps below to
install the memory card in the device:
Remove the back cover of the device.
Hold the device with the front facing downwards.
Remove the battery
Slot the micro SD card into the device as shown below.
Replace the battery.
Replace the battery cover until it clicks into place.
2.2 POWERING ON/OFF THE DEVICE
To power off your phone, press & hold POWER key. On release, the Phone options
menu opens. Select ‘Power off’ and confirm.
To power on again, press & hold POWER key.
3.1 Switch Main Menu style
(1) In default Home screen, slide your fingertip left and right along the screen to
reveal more home screen.
(2) On Home screen, click icon on the bottom of the screen (Main menu
icon) to enter the main menu screen, slide your fingertip left and right
3. BASIC OPERATIONS
8
along the screen to reveal the more applications.
3.2. Home screen
(1) Read your notifications
When you see a notification in the status bar, touch the bar and slide your finger
down the screen to open the list of notifications displayed in the sliding window.
Ongoing notifications report activities such as call forwarding ON, current call status,
song playing.
Notifications report the arrival of new messages, calendar events, and alarms. You
can clear notifications list by selecting ‘Clear’ notifications at the top of the
notifications window.
To open the message, reminder or other notification, you can touch the items. To
close the notifications window, slide your finger up the screen.
(2) Create Home screen shortcuts and widgets:
From the Home screen, touch the menu button, and then click the WIDGETS. Touch
& hold to pick up a widget to select a shortcut to some of your saved information
(such as a play list), a widget (a clock) for your Home screen.
(3) Move objects on the Home screen
·To move an icon or other item on the Home screen, you must first touch & hold it
to enter move mode. The object will magnify when it’s ready to be moved.
·Without lifting your finger (or you’ll drop out of move mode), drag the object to
the new position. To move an item to a section of the Home screen not in view,
move it to the edge of the screen and hold it there for a moment. The screen view
will shift; position the object and release.
Page 5

9
All the pictures you can capture or view on your phone are stored on a memory
card, which must be installed in your phone. Before you can use the Camera or view
pictures in Gallery, make sure you have a card installed.
Your device’s networking capabilities allow you to access the Internet or your
corporate network through WLAN, GPRS, EDGE (if available)
You can also add and set up a VPN or proxy connection.
To use WLAN on your device, you need access to a wireless access point.
Note: The availability and range of your device’s WLAN signal depends on the
number, infrastructure, and other objects through which the signal passes.
To open the Browser you need to be connected to a network.
This phone supports movable storage, i.e., the U-disk function.
When the phone is switched on, you see the icon in the status bar on the top of the
screen when its connected to a PC by a data line. Touch the bar and slide your
finger down the screen to open the list of notifications displayed in the sliding
window. Select [USB connected] and touch [Turn on USB storage] to confirm, you
can use the phone as a U-disk.
4. CAMERA
5. GPRS/WLAN NETWORK
6. U-DISK STORAGE
10
Your music is organized into four categories: Genres, Artists, Albums, and Songs.
Select a category to view the lists within each. Once in a category, keep selecting
until you reach the music you want to play.
The phone supports Bluetooth(BT) functions, you can establish a wireless connection
between the phone with other compatible devices, and data transmission, you can
establish a wireless connection between devices in the phone with a distance of up
to 10 meters. Bluetooth connection may be interference by obstacles, such as walls
or other electronic device.
1. Enter the setting menu, Touch the Bluetooth to open the function, idle screen will
display BT icon in the status bar.
2. Open the BT discoverable, and other devices can search the phone.
3. Before using the phone as a Bluetooth device, you need to pair the phone with
the target device as follows:
-Sure your phone has Bluetooth-enabled.
-Touch "Scan for devices." Bluetooth devices within the range of the phone will start
scanning.
-Touch the device you want to pair, to confirm password to complete the pairing.
7. MUSIC
8. Bluetooth
Page 6

11
You can use Bluetooth to share the pictures, videos or music files with family and
friends.
The Call menu is only visible during an active call, and features such as Call Waiting,
Call Diverting, and Multiple-party Call are network dependent. Contact your network
service provider.
The call options include:
▪End a call.
End the current call.
▪Pop up dial keyboard
Pop up the dial keyboard during a calling.
▪Hands free
Switch on the loudspeaker to amplify the voice.
▪Mute
Do not send local voice.
▪Hold
Put the current call on hold or retrieve the call on hold.
▪New call
Make another new call
10.1 File Management
9. Call menu
10. Functional Menu
12
The file management is composed of SD card ,SD card is the external Memory. In
the file management, files can be searched rapidly, Deleted or edited in each card
and new files can be created.
10.2 Sending an Email
You can send an Email to anyone who has an Email address.
Entering the procedure and set an account, you can click the account so that you
come into the account already created, you can also activate, compile and create
an account and then delete the operating. The email can be sent and received just
like in a computer. This procedure requires the network support.
10.3 Dialing
When dialing, you can have a quick access to the call records, contacts and digit
dial keyboard(used for manual dialing) by the menu key on the screen.
Page 7

13
10.4 Call
Click a number portrait in the phonebook, and you can do these things instantly: dial,
send a message and make a call. During call, you can select applications such as
adjusting it to mute mode, switching to robot portrait, turning off the voice and
intercepting photos to SD card.
10.5 Calculator
Your phone provides a calculator with 4 basic functions for the convenience of your
calculating.
Press this button , and you delete the input and output in bitwise.
10.6 Chrome
The browser allows you to surf on the net and browse the page just like on the
computer. You can create on the phone a bookmark and synchronize it with
computer. You can have a quick access to your favorite sites on the main screen.
You could view web pages in longitudinal or transverse mode. The page rotates
according to the rotation of the phone and automatically adjusts to fit the page.
10.7 Voice Recorder
The recorder could be used to record audio files.
To start voice recording: Tap
To end voice recording: Tap
To play back voice recording: Tap
14
The audio files are automatically stored on your phone. Click the Menu key, and you
can operate and set the recorded voice. The file can be in document management
and various players can be selected to play the voices.
10.8 Calendar
Calendar allows you to view your schedules and events at any time. You may view
schedules one by one or several ones at the same time.
Select to show calendar by day, week or month. If “by week (or month)”, the calendar
will be shown by week (or month). This application is convenient for you to view
schedule or add events.
10.9 Settings
● Wi-Fi: Wi-Fi can be turned on or off and made some settings.
● Bluetooth: Bluetooth can be turned on or off and settings are made.
● Data usage: It makes you in full awareness of the usage of the information.
● More: Click more and you will set up flight mode and VPN and more.
● Audio profiles: General, silent, meeting and outdoor optional. In the meanwhile,
customized setting-up of some scene modes are allowed.
Select a mode and enter the customized setting-up, operational are vibration,
volume, ring tones, notifications and key beep, etc.
● Display: Customized setting-up of the phone luminance, wallpaper, the Auto-rotate
screen and screen time-out and font size is allowed.
● Storage: The internal memory of the phone and the external SD card is shown.
● Battery: The usage detail of the battery is shown.
● Applications: View, manage or delete the applications on your phone.
● Location access: Set the service during the locating.
Page 8

15
● Security: Set unlocking pattern; lock the SIM card; set the SD card.
● Language and input: Select a language and input method.
● Backup and reset: Reset DRM and restore factory settings to clear all personal data
on your phone.
● Account and synchronization: Set the synchronization of your phone account with
your phone.
● Date and time: Set current time and date.
● Schedule power on/off : set the time to turn on or off your phone.
● Accessibility : Some accessibility functions can be set.
● Printing: Need to add a google account to use cloud print.
● Developer options: Set some options used by developers.
● About phone: View the model, service status, mobile software and hardware
information, etc.
10.10 Clock
● Clock
Enter the Clock to display the current time.
● Alarms
Your phone provides many groups of alarm clocks. Select one of them to edit and
customize alarm clock.
10.11FM Radio
Wear your earpieces of radio before searching for channels.
16
Glossary:
● Channel list : Display the list of FM radio channels. You can select to play one of
them. (the list can contain 20 channels maximum)
● Search : Select this option to automatically search for channels and generate the
list of channels.
● Loudspeaker : Press the button to use the radio loudspeaker.
● and : Tap to move to another available channel.
● : Tap to broadcast and pause.
10.12 Voice Search
You can locally search for the information you need.
10.13 Contacts
The “contacts ” lets you easily call your colleagues or friends, or send emails or short
messages to them. You may add contacts directly from your phone, or synchronize
“contacts” with any application on your phone. You may open “contacts ” directly
from the Main screen, or open it via the “Dialing” application.
● Add a contact:
To add a contact, directly enter the name and phone number, or import the name
and phone number from the SIM card. (The number of contacts you can add is limited
by the memory of your phone.)
● Search for contacts:
To search for a contact, press the Search key in search screen, and a search box will
pop up. In the search box, enter the key words, such as first name, second name and
Page 9

17
company name. While you are entering the key word, the matching contacts
immediately appear.
● Edit a contact:
To edit details of a contact, select “Edit a contact”.
● Delete a contact:
To delete the current contact, select “Delete a contact”.
From the menu, you can also synchronize with/share an account or import/export a
contact.
10.14 Gallery
Gallery is a picture manager that typically exhibits miniatures, supports the features of
“edit picture”, “set pictures as wallpaper” and “share picture”.
10.15 Messaging
Messaging lets you send text and multimedia messages to any contact that has an
SMS device. The multimedia messages include photos, video clips (for iPhone 3GS or
other new style phones), contacts information, and voice memos. What’s more, you
can send messages to several contacts at the same time.
Note: Perhaps Messaging is not available in all countries and regions. Probably you
need pay for using Messaging. For more information, consult your network operator.
As long as you are within the network, you can use “Messaging”. As long as you can
make a call, you can send messages. You probably have to pay for sending or
receiving messages, depending on your network operator.
18
Send a message: Tap , enter the number and name of the contact or select the
contact from Contacts. Tap the text box above keypad, enter the information and
then tap .
After selecting the number, you can select such options as Call, Add subject, Attach,
Insert facial expression, and more.
Tap Settings to set ringtone, Delivery reports, and maximum quantity of messages.
10.16 Notification Menu
Slide and pull down menu on the main interface, you can see the message notice
and choose whether to turn on or off WIFI, Bluetooth, airplane mode. In the data
connection, the current SIM card is available to make data connection of GPRS. Slide
it around you can see the options of profile for your convenience.
10.17 Download Content
You can download through the browser things and pictures you want and list them in
the Download Content menu.
10.18 Call Records
Come into the call records, you can view missed calls, received calls and outgoing
calls. The calling time is viewed in each record and features such as calling, sending
messages and adding to new contacts can be set. Deleting call records and setting
up speed dial can be done in the menu.
10.19 Widget
Page 10

19
Hold down the main screen, you can select the widget:
holding down this widget, you can drag it anywhere you want in the main screen. It is
convenient for you to enter that procedure.
10.20 Selecting Wallpaper Source
Hold down the main screen, the options of selecting wallpaper source will appear,
then you can set up wallpapers you like.
20
Main Specification
Display
GSM Bands(MHz)
850/900/1800/1900
Size
5.0'
3G Bands(MHz)
900/2100
Type
IPS
4G Bands(MHz
)
800/1800/2600
Resolution
540*960
Internal User Memory
8GB ROM / 1GB RAM
Camera
SD Expandable to
32GB
Resolution
2.0M/8.0M
SIM Card Slots
Single
Type
Fixed Focus/Auto Focus
Size(mm)
144.1*9.2*73
Flash
YES
Weight with Battery
174g
Video
1080p/30fps
Connectivity
Bluetooth
YES
WIFI
YES
USB
YES
AUDIO
3.5MM jack
Applications and Features
MMS
YES
WAP
YES
Alarm
YES
World Clock
YES
Calendar
YES
Games
NO
Calculator
YES
FM Radio
YES
Torch
YES
Charging/Battery/Certifications
Charger
Type
USB
Battery
Removable
YES
Type
Li-ion
Size
2020mAh
Standby time
320 hours
Talk Time
7 hours
11. SPECIFICATION
Page 11

21
* The standby time and maximum talk time depend upon the network signals and
settings.
Use only batteries, chargers, and accessories approved by the manufacturer with this
device. Use of any other types will invalidate the warranty and may be dangerous.
Check with your dealer for available accessories. You may opt to buy:
Extra Battery
Extra batteries of various capacities are available from our company or through your
dealer.
Charger Plug, charger cable
Charger plug used to connect with the charger cable for charging on wall outlets.
Also you can use the charger cable to connect with the other devices such as the
personal computers to charge the phone.
Charging time from empty is about 2 to 3 hours. The charging condition is displayed
on screen. You may use your phone while charging.
Earphone
A mini, practical, hands-free device; you can use its button to answer and end calls.
Do not plug or unplug the earphone when connecting dialed or incoming calls.
Help us save the environment…GO GREEN!
All our endeavours are directed towards providing environmentally aware products
to you. The materials used in our devices are recyclable and can be reused to make
new products. We strive to make products that are safe for our consumers as well as
the environment.
Preserve natural resources for future generations by recycling your mobile phone. Your
mobile phone contains some metals which, when recycled properly, can be put back
into circulation, decreasing the need for new metal mining.
Recycling reduces the need for raw materials, saves energy, helps mitigate global
warming and reduces pollution, therefore preserving natural resources for the future.
Follow some simple steps and contribute towards saving the planet:
DO
Recycle your handset and its accessories.
To protect natural resources and to promote re-use of the material, kindly
separate batteries from other type of waste.
DONT
Do not dispose of your mobile and its battery in fire.
13. ENVIRONMENTAL CONCERN
12. ACCESSORIES
22
Do not dispose your mobile with the regular waste.
Do not over charge your handset. Remove the charger when battery is full.
This logo signifies that this product and/or its accessories should not be
disposed of with other household waste.
Hazards of improper handling, accidental breakage, damage and /or
improper recycling of hazardous elements, can result in the following:
When burned, cancer-producing dioxins can be released into the air we
breathe; If thrown in landfills, leaching into groundwater affecting your local
community
In warm climates, the oxidation of mercury in the environment can be
accelerated, leading to the creation of oxidized Hg atoms that are known to
be associated with ozone depletion.
Improper recycling additionally results in data security issues, as private
electronic information remains on hard drive, if not properly removed before
disposal.
How to Recycle
Please get your electronics products recycled only through authorised recyclers,
approved by Pollution Control Board. We provide facility of recycling of our products,
for details please visit our website or call our customer care. Help us to GO GREEN.
Constitution of Hazardous Elements in your Device:
Your device does not contain the following hazardous elements in a proportion higher
than the limits provided hereunder: maximum concentration value of 0.1% by weight
in homogenous materials for lead, mercury, hexavalent chromium, polybrominated
biphenyls and polybrominateddiphenyl ethers; and maximum concentration value of
0.01% by weight in homogenous materials for cadmium.
Page 12

23
EU Declaration of Conformity for
R&TTE Directive 1999/5/EC
We Kazam Mobile Limited of Suite 4B, 43 Berkeley Square, London, W1J 5FJ, United Kingdom
Declare under our sole responsibility that the product
Product name: Smart phone
Trade name: KAZAM
Model name: Thunder 350L
(Detailed description of product including name, type, model and supplementary
Information such as lot, batch or serial number, sources and number of items)
To which this declaration relates, is inconformity with the following standards
And/or other normative documents.
We hereby declare that (all essential radio test suites have been carried out and that)
the abone named product is in conformity to all the essential requirements
Of Directive 1999/5/EC.
The Conformity assessment procedure referred to in Article 10 and detailed in Annex
[Ⅲ]or [Ⅳ]of Directive 1999/5/EC has been followed with the involvement of the
following Notified Body(ies):
Bay Area Compliance Laboratories Corp.1274 Anvilwood Ave, Sunnyvale, CA 94089,USA
Identification mark: 1313the equipment will also carry the
(Notified Body number) class 2 equipment identifier
Signature:
Printed name/title: Daniel Readman/Manager
Date: 22/09/2014
Tel:+44 (0) 20 7491 6930
Address:Suite 4B, 43 Berkeley Square, London, W1J 5FJ, United Kingdom
24
SAR Information
Head: 0.154 W/kg@10g (CE)
Body: 0.395 W/kg@10g (CE)
Body-worn Operation
This device was tested for typical body-worn operations. To comply with RF exposure
requirements, a minimum separation distance of 1.5 cm must be maintained between
the user’s body and the handset, including the antenna. Third-party belt-clips, holsters,
and similar accessories used by this device should not contain any metallic
components. Body-worn accessories that do not meet these requirements may not
comply with RF exposure requirements and should be avoided.
Use only the supplied or an approved antenna. Unauthorized antennas,
modifications, or attachments could impair call quality, damage the phone, or result
in violation of regulations. Do not use the phone with a damaged antenna. If a
damaged antenna comes into contact with the skin, a minor burn may result. Please
contact your local dealer for replacement antenna.
 Loading...